When you click on links to various merchants on this site and make a purchase, this can result in this site earning a commission. Affiliate programs and affiliations include, but are not limited to, the eBay Partner Network.
Also... I noticed an open port on the air filter box on the passenger side. Not the large one that come off the air pump but above and on the side. If that is a large vacuum port to ??? then that would explain the poor running condition. No noticeable hoses are loose however.
Another success tonight. I got another shipment of parts from 928R Us including a rebuilt AFM. I replaced that, all the intake hoses, the 4-way vacuum splitter under the manifold and the thermo switch. Got everything back together and fired it up. Great start, perfect idle and the throttle responds just like it should. Took the car out on the streets and it's runner really well. Jump the throttle to the kick-down and this thing pulls like a horse! I'm very pleased tonight. Now I can go to work on some of the more cosmetic details like instrument panel lights, air conditioning and the interior rear view mirror that came loose recently.
I took delivery on some new tires. Went with Riken 225x50x16 on the BBS wheels that came with this car. Tire Rack had a special on those and I couldn't beat the price. It does look much better with the correct OD wheel & tire. With the OE tire inflation, the car rides really well. Much stiffer than I thought it would. Next I'm digging into the instrument panel for bulb and odometer gear replacement.
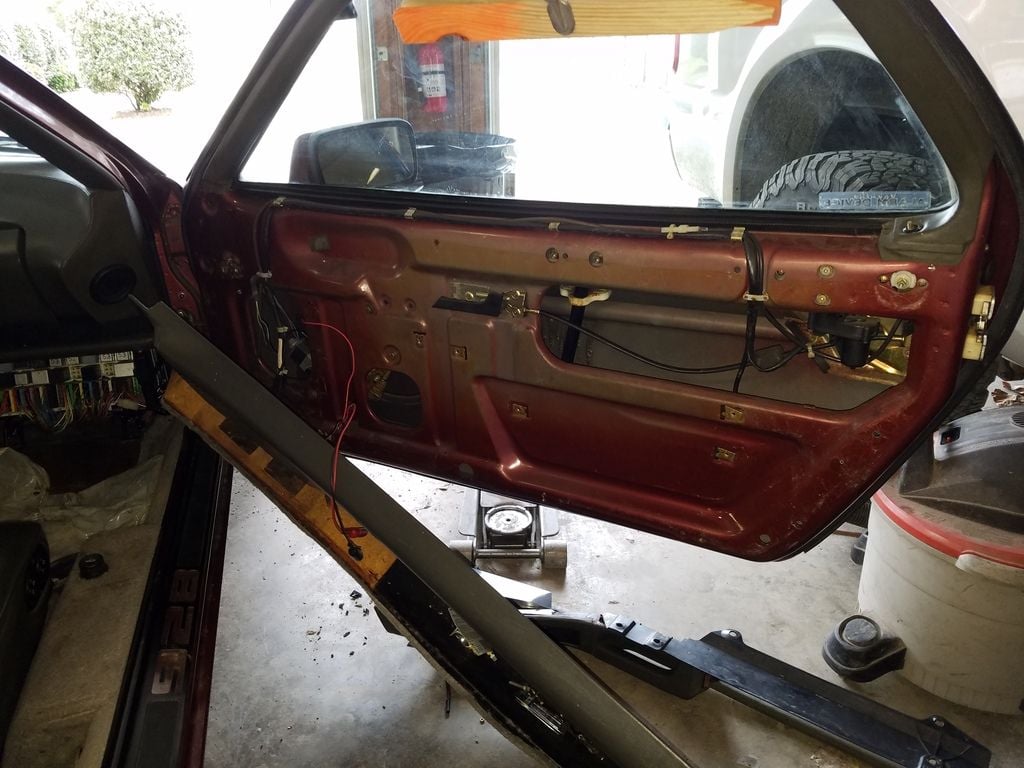
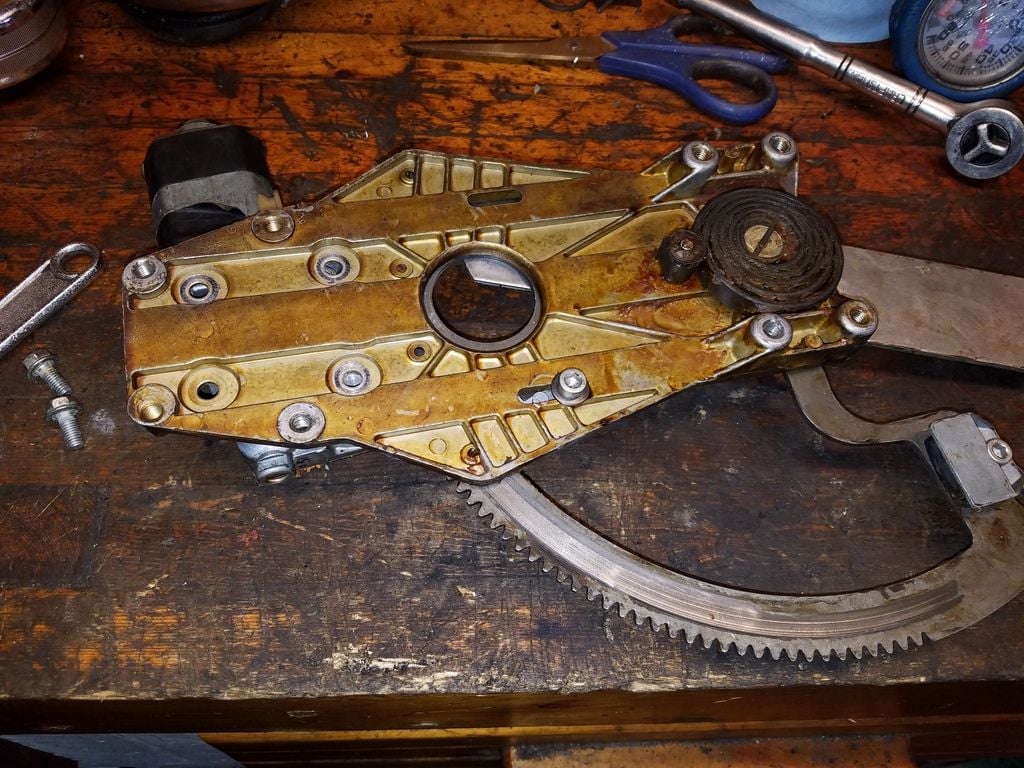
Yesterday I went into the passenger door to see if I could get the window regulator motor functional. Pulling the door card wasn't too bad and I only broke one piece of plastic - a small piece of the air duct. Clamped the window in the raised position and pulled out the regulator assembly. I figured out the motor was definitely seized up by testing with a 12V battery. Out in my parts storage I had both window regulator assemblies from a 924S and I was hopeful the motor would be compatible. When I bolted the 924S motor to the 928S window regulator I found that the little gear box had a slightly different dimension. Where the gear protrudes it has a longer shaft. So I separated the 928S electric motor from the gear box and tried putting the good electric motor from the 924S on that. That didn't work so well. Firstly, it's very difficult to get the worm gear shaft on the motor to spline up with the nylon drive gear in the gear box. When I did finally get it to seat well, the more I tightened the screws holding the motor to the gear box, the less able the motor was to function. Something was causing it to bind up. I used some washers for shims and kept bench testing but when I put the assembly back in the door and used the switch circuit, no dice. However, if I just jump the motor terminals to a battery, it will raise and lower the window. I suspect the switch is bad and noted that those switches have been swopped from one position to another. The switch in the passenger window position is labeled as a sun roof switch. I went ahead and buttoned everything back up as this issue is low priority but I'll need to get that switch out and see if I can clean it up or replace.
So I got another package from Roger with the odometer gear and replacement instrument bulbs. Tuesday was a day off after a medical procedure and I proceeded to pull the instrument cluster following this thread...
Very helpful and detailed. When I got he instrument panel out, I took it inside to my office desk for brain surgery. Everything came apart as planned and the old gear had basically distintegrated into dust. Cleaned that up, installed the new gear and tested. I did have some binding as noted in the thread but was able to solve that by pushing the axle the small gears for the trip tumblers back a tiny bit to one side. I changed out all the bulbs even though the originals all metered out as good. What I did find however, was the dimmer was corroded and not passing any current. I tried to clean that up but it was too far gone. Frankly, I couldn't even find the dimmer until I was taking the pod apart (I don't think that's anywhere in the owners manual). Anyway, I got the instrument panel back in, the turn signal switch assembly, covers, steering wheel all back on after a couple of attempts. I basically did a bypass on the dimmer. It was hard to tell if the instrument lights were working when I went for the daytime test drive but the odometer was. Then later that night I came back out and confirmed the instrument lights were working. Now it won't be so disconcerting driving at night.
You may find that just "pushing the axle back a tiny bit" won't work forever.
When I did mine the first time, I noticed a bit of slop, but my "Hand cranking" of the odo to test it out worked fine, so I didn't worry about it and put everything back together.
A bit over a year and about 3k miles later, the odo stopped working.
Doing it the second time was a lot easier & faster. Shimming the gears made sure it wouldn't bind up again and it hasn't.
Dimmer for the panel lights is shown in the Owner's Manual. Page 20 shows all the switch layouts & page 22 has a sentence or two on it (in the 86 ROW one anyway).
It's a pretty cheap rheostat, and bypassing it is a common thing. If you want to replace it, 928 International usually has a 1/2 price sale on used parts just after Thanksgiving.
Yeah, it's the small gear that turns over the 1 digit after 10ths goes around on the trip meter. The tiny extra tooth that goes deeper doesn't always mesh properly. The shaft all those are on has a tapered end on the left and when I pushed that to the right maybe 1/2 mm, it apparently altered the spacing just enough.
Yesterday I went back into the passenger door to replace the window regulator motor with a used part from 928Int (1/2 price sale). That went well, the switch is fine and the window works great. I must say that I like working on 928 doors much more than 944/924. Better quality parts and easier access IMHO. While the door card was off I repaired the door pocket lid hinges where the small nuts and bolts had come loose. Then it was over to the drivers side door to tighten up the drivers exterior mirror. A common problem there where the hollow bolt that secures the mirror to the mount was stripped. I had attempted a back yard fix by shortening the spring but that wasn't working very well. So in the same parts order, I received a replacement hollow bolt and spring. That design is common to 944/924 and it's troublesome. Anyway, I fished the mirror wires out after cutting them (no connector in the door, dumb), then took the assembly to my bench. It was actually the threaded portion of the mirror "stem" that was buggered up. Some penetrating oil and careful threading with the replacement hollow bolt helped that out a lot. However, with the first 1/4" of threads gone, I couldn't get the bolt to thread up with the replacement spring and two nylon bushings in place. I noted that there must be a special tool for that large torx fitting inside the hollow bolt. Something that allows the wires to pass through while tightening. So I used a Dremel to make a couple notches in the hollow bolt flange to use a punch to tighten. Ultimately I ended up with the hollow bolt, spring and only the small bushing on the top off the spring. That's not optimum as the flange on the hollow bolt will catch on the surrounding casting when you fold the mirror (witch you must do to re-install on the door) and subsequently self-loosen. That larger nylon bushing would prevent that from happening. I spliced the wires back together and re-installed but I'll probably have to revisit that issue later. It's better than it was but not as good as it could be.
I did get the NLA external air temp sensor and that fixed heater temp control. However...
Now I'm getting some strange noises from what I believe to be the compressor clutch. It's getting hot here and I do need the AC. I spayed some PB Blaster into the clutch and that seems to have helped but I suspect that joker is on it's way out. I've got a spare compressor so swapping the clutch out is an option. Is that possible with the compressor mounted?
The shifter is now selecting 3rd but still won't go down to 2nd. Every time I'm under the car, I'll spray more lubricant and exercise the shifter. Fingers crossed on that.
A new quirk has emerged... the volt meter in the instrument panel is jumping about. Seems to be more pronounced at speed than idle. I metered voltage at the battery and it's charging nicely at 13.5V at idle. No other electric symptoms that suggest the voltage is actually fluctuating. Very odd...
And the used window regulator motor on the passenger side has crapped out. Looks like I'll need to pony up for a new motor. Crap!
Another item that needs done is a valve cover re-seal. The engine oil leaks are marginal but stinky when hitting the exhaust. And yes, it's a fire hazard as well.
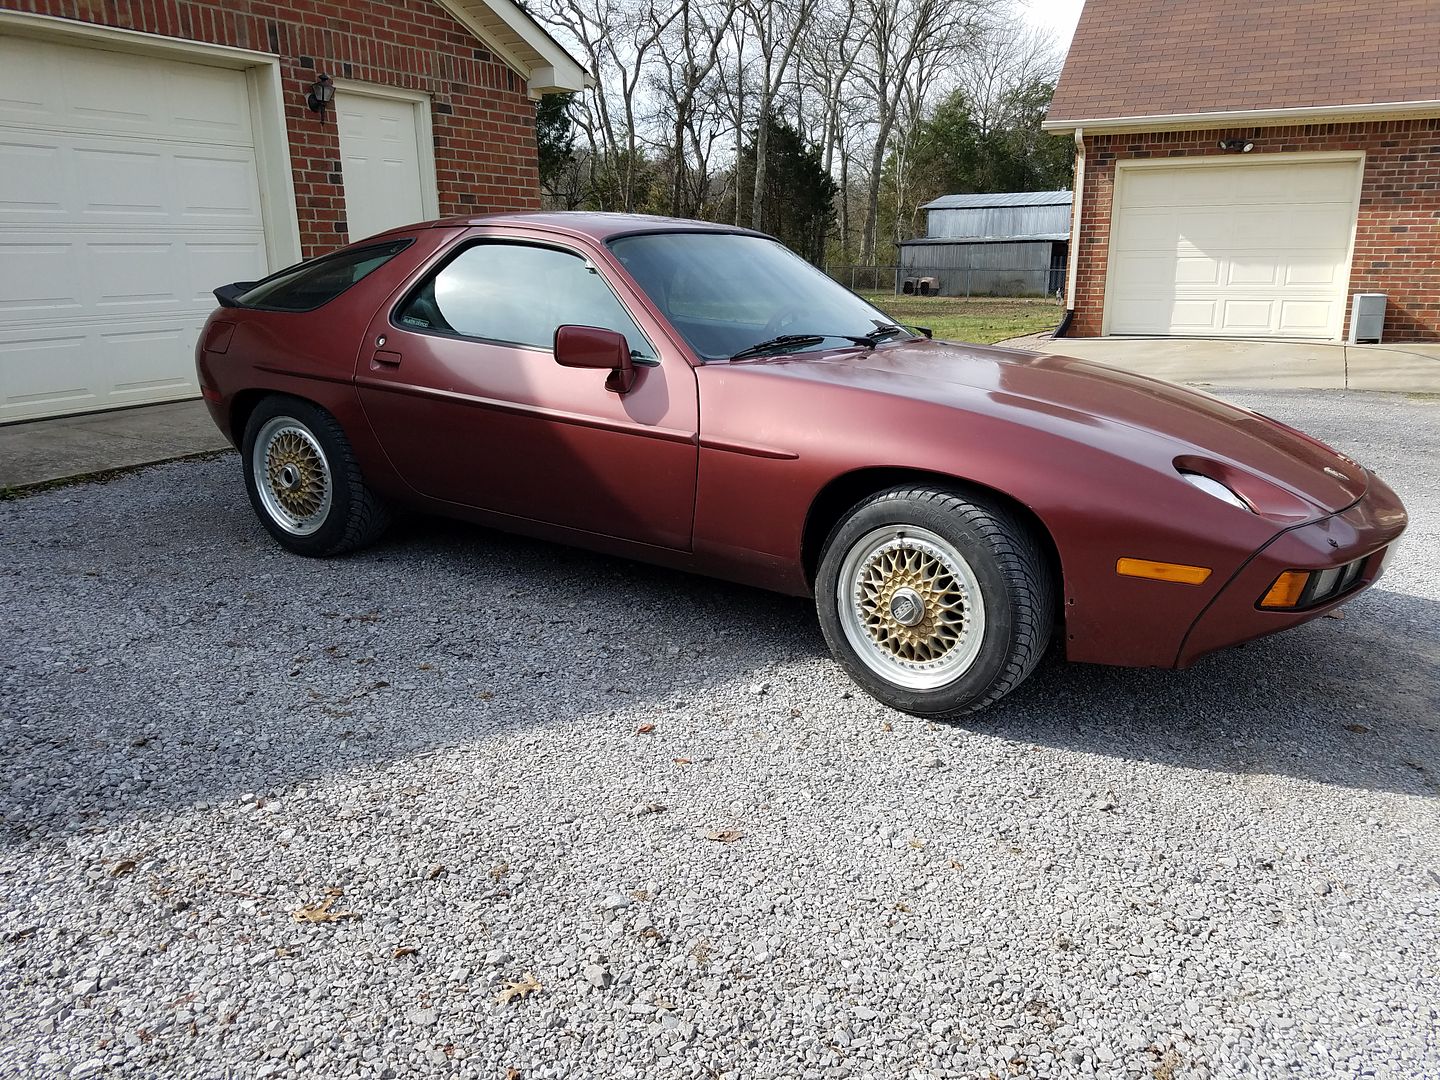
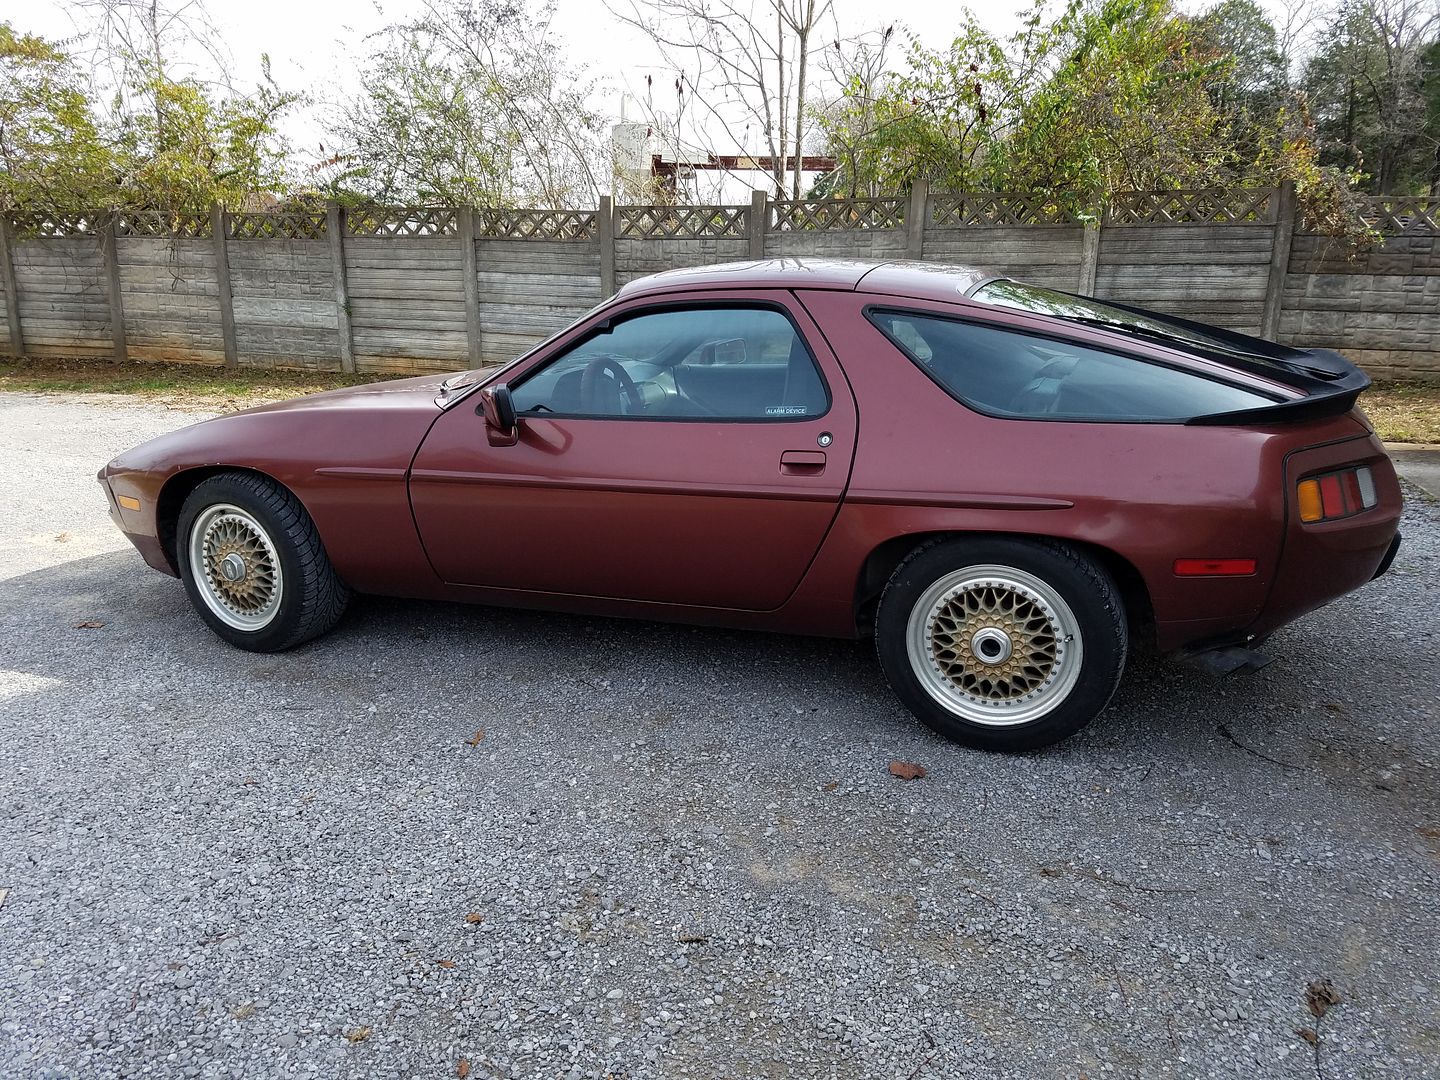
We try and drive this car every weekend. It's registered as an antique so that limits weekday usage. Everyone that sees it for the first time marvels at the engineering and build quality. This one will get proper paint and body work at some point in the future.
Try opening up the window motor and cleaning it then regreasing it. Most of the time that is what they need to get working again unless it is so internally corroded that all hope is lost.
Try opening up the window motor and cleaning it then regreasing it. Most of the time that is what they need to get working again unless it is so internally corroded that all hope is lost.


 10-22-2017, 08:24 AM