When you click on links to various merchants on this site and make a purchase, this can result in this site earning a commission. Affiliate programs and affiliations include, but are not limited to, the eBay Partner Network.
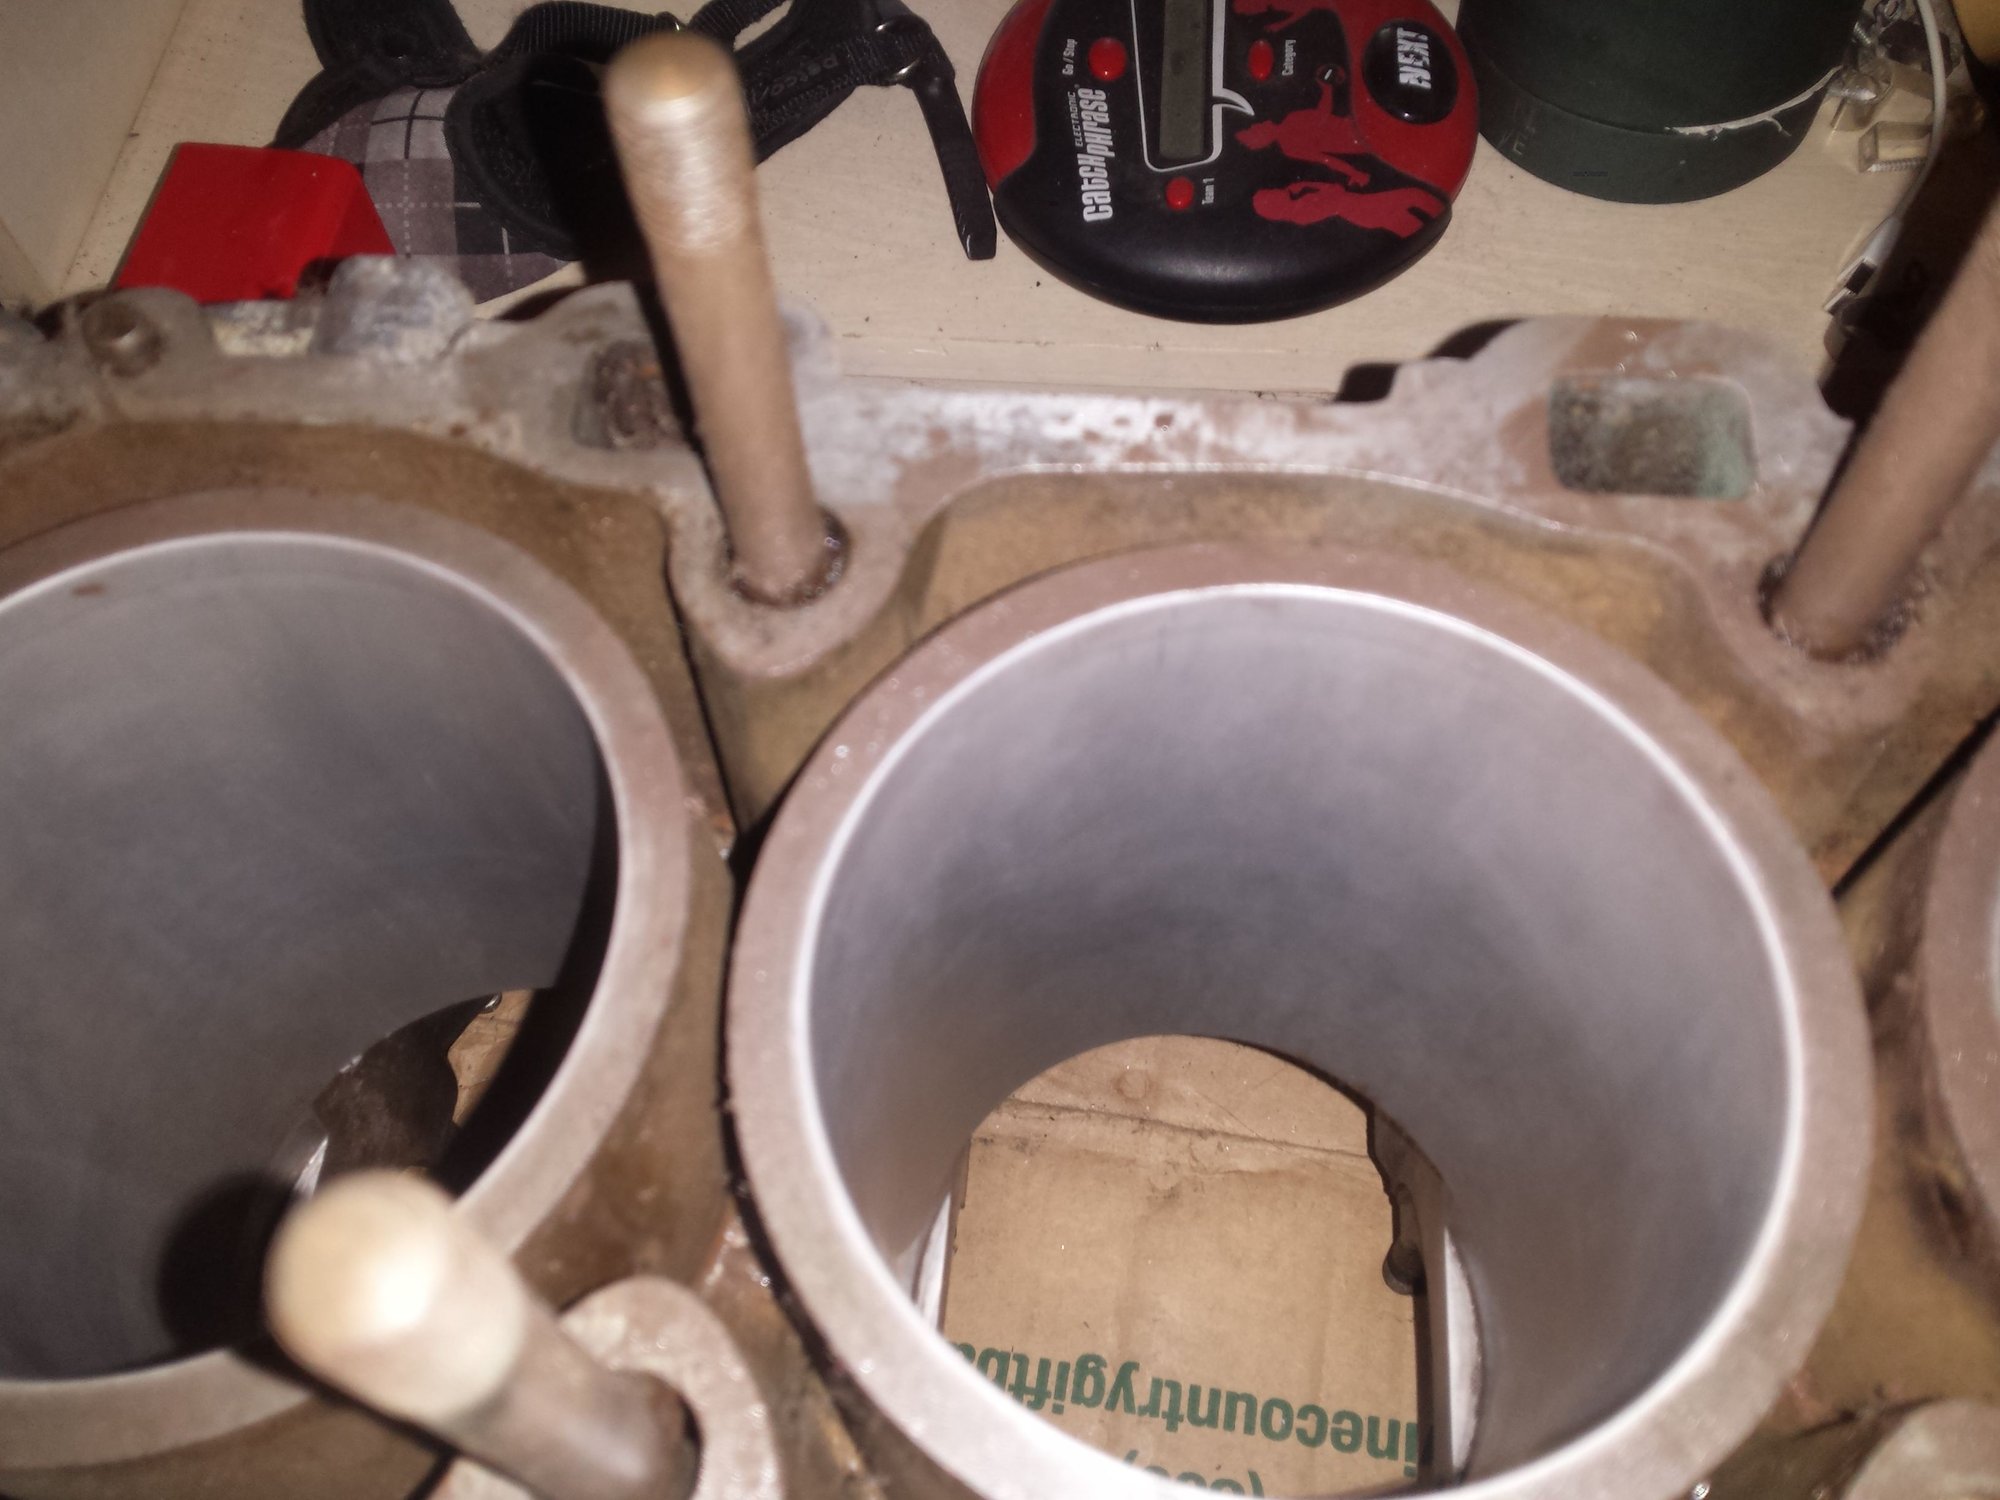
DIY Alusil cylinder lapping: A quick how to (with pics)
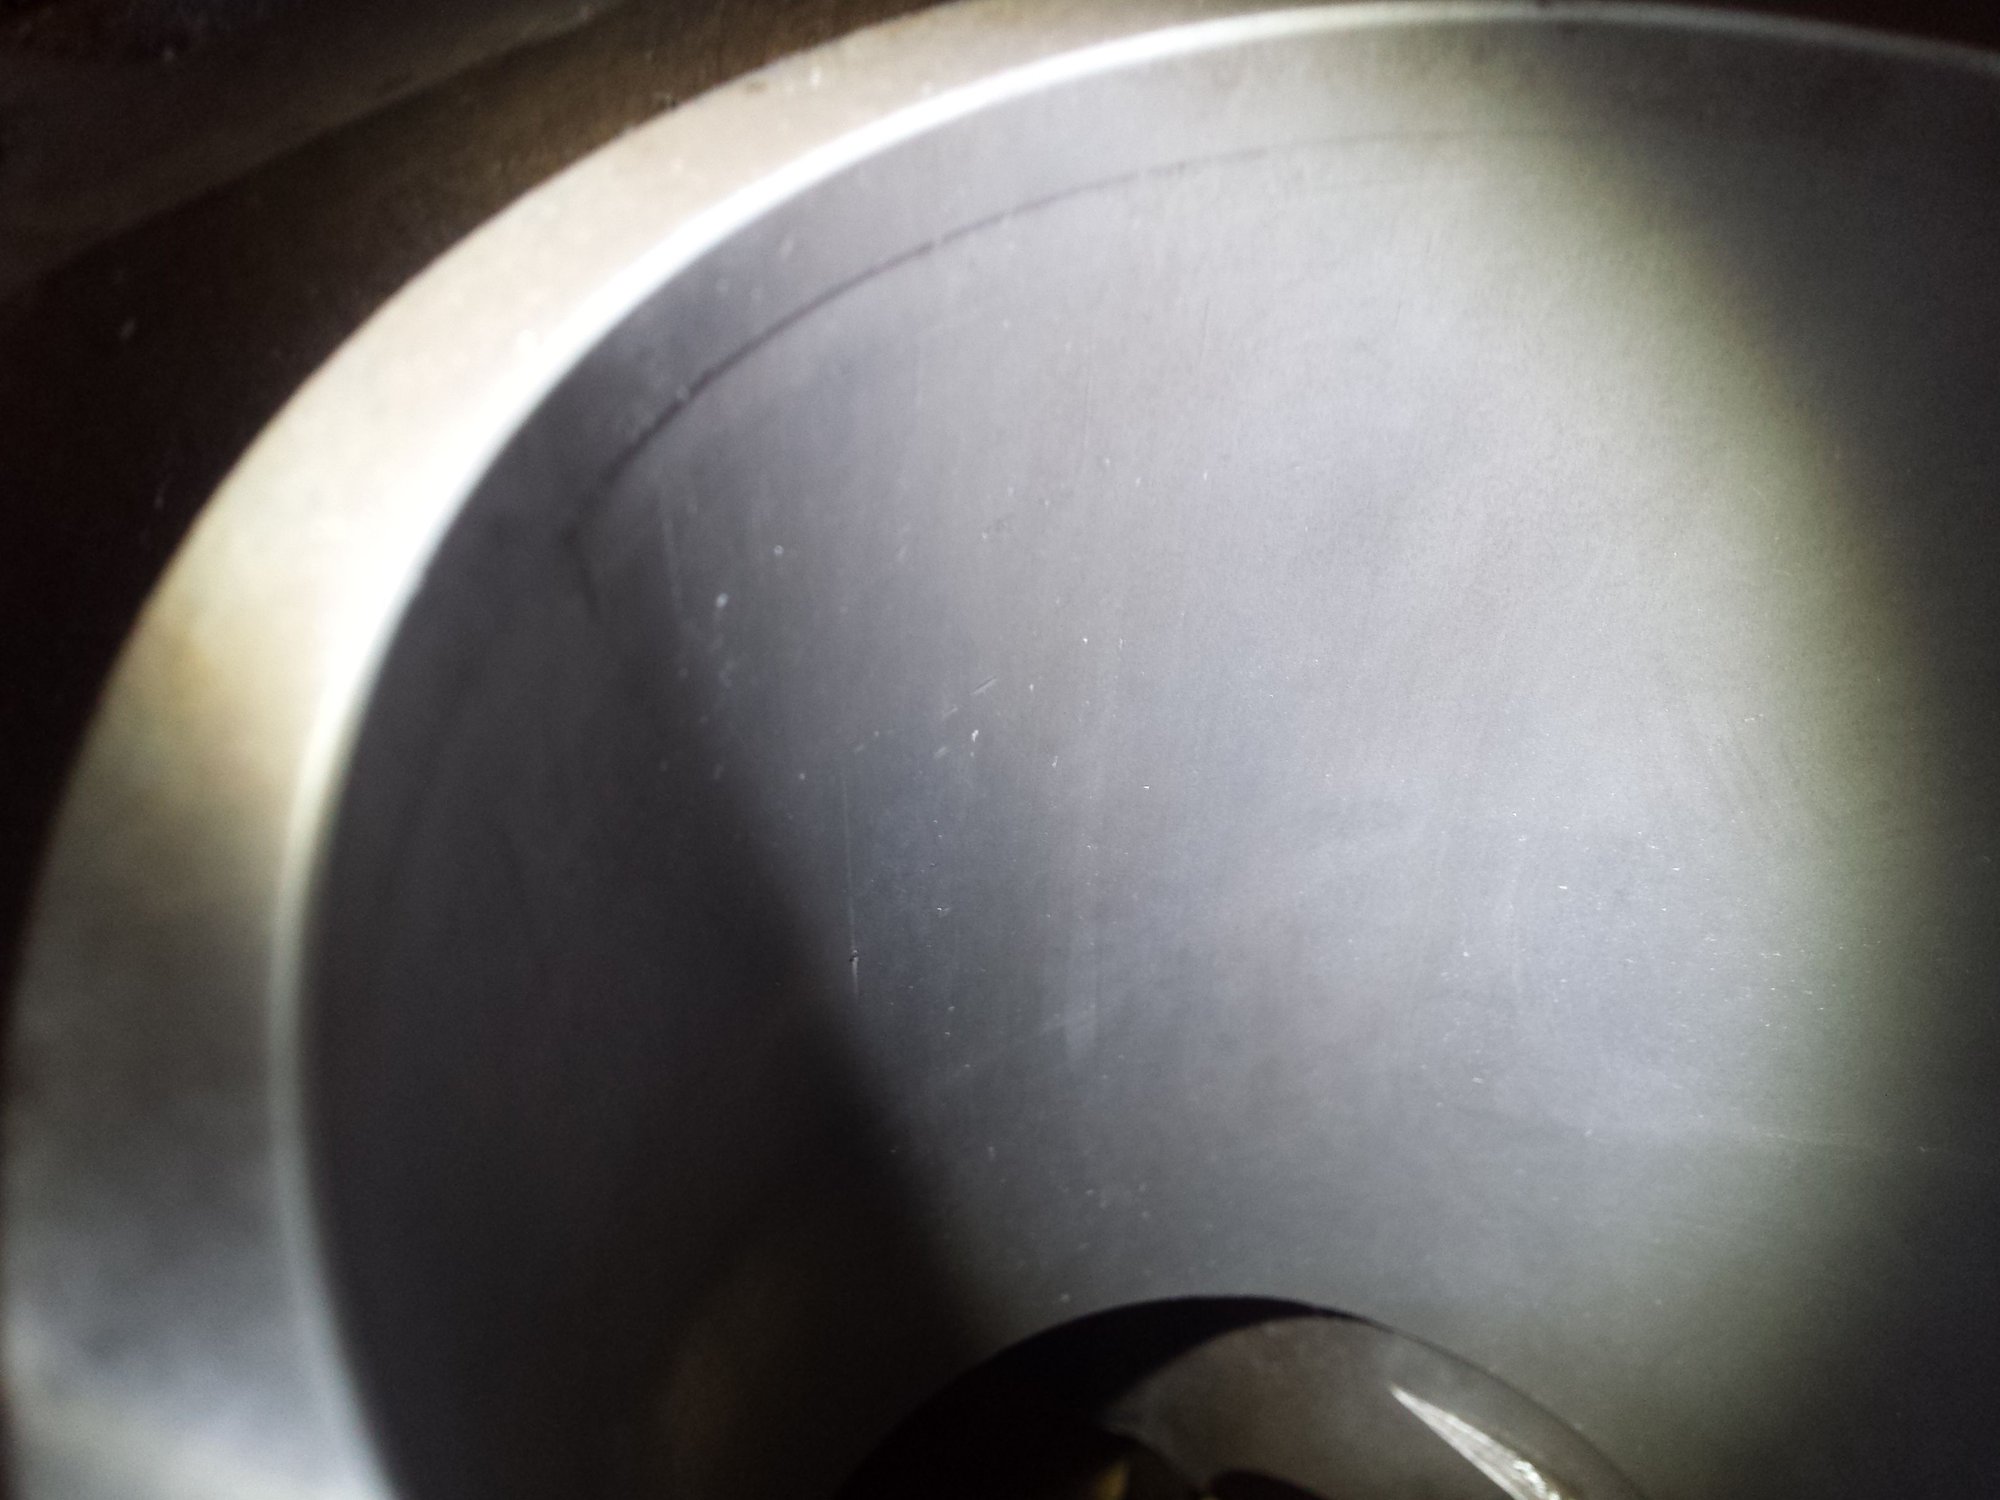
Many have told me it couldn't successfully be done, but today I lapped my cylinders myself. As some of you may know, they actually got an inadvertent "two stage process" where they were treated with caustic soda first.
This write up won't be too terribly long, since there really isn't too much too it.
Things needed:
standard 3 head flexible deglazing hone: 15 dollars
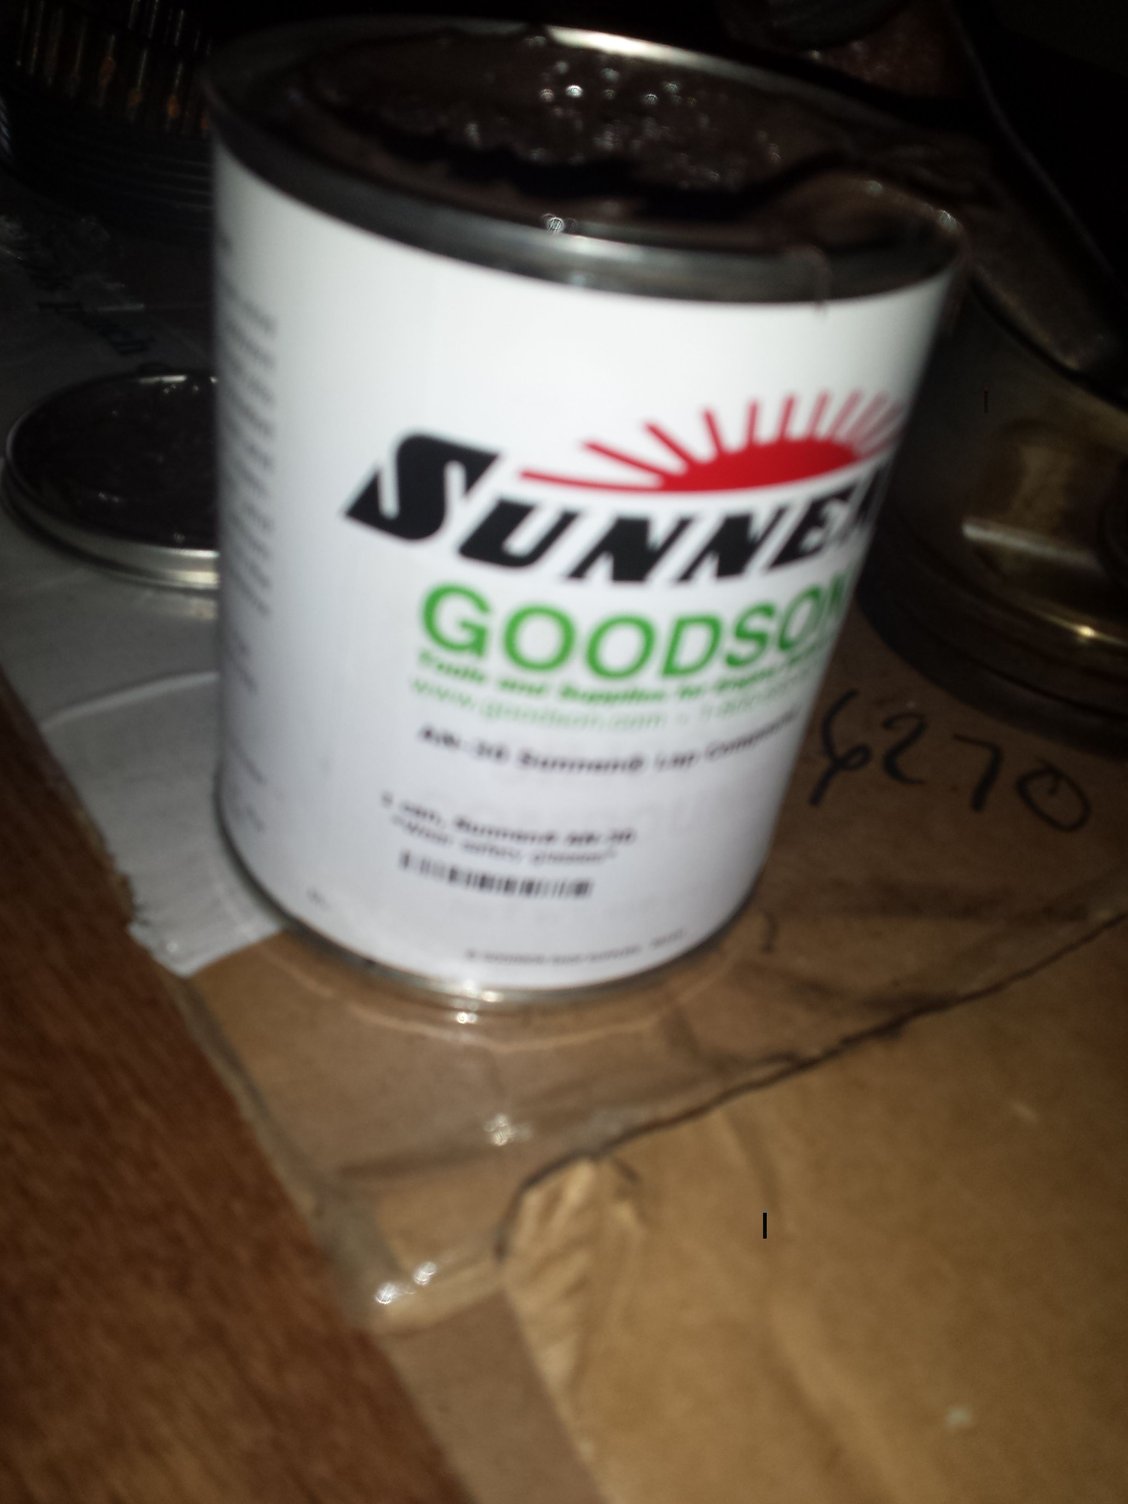
1 lb of AN-30 lapping compound: 80 dollars
two 12" x 12" sheets of thick needle felting felt: 3 dollars
a roll of duct tape
1 quart of 15w40 Rotella T6 synthetic (because it was on hand): 6 dollars
A torquey 3/8" electric drill
a hot glue gun and half a dozen glue sticks
1 quart of acetone
lots of shop towels
a new kitchen sponge
nitrile gloves
Basically you start off by covering the stones on the hone with 2 layers of duck tape; this is a failsafe so if the felt gets pulled off by the friction, you won't eat the bores.
After that, you securely hot glue two layers of felt to each head, use way more glue than you think is required because there is some serious friction at work.
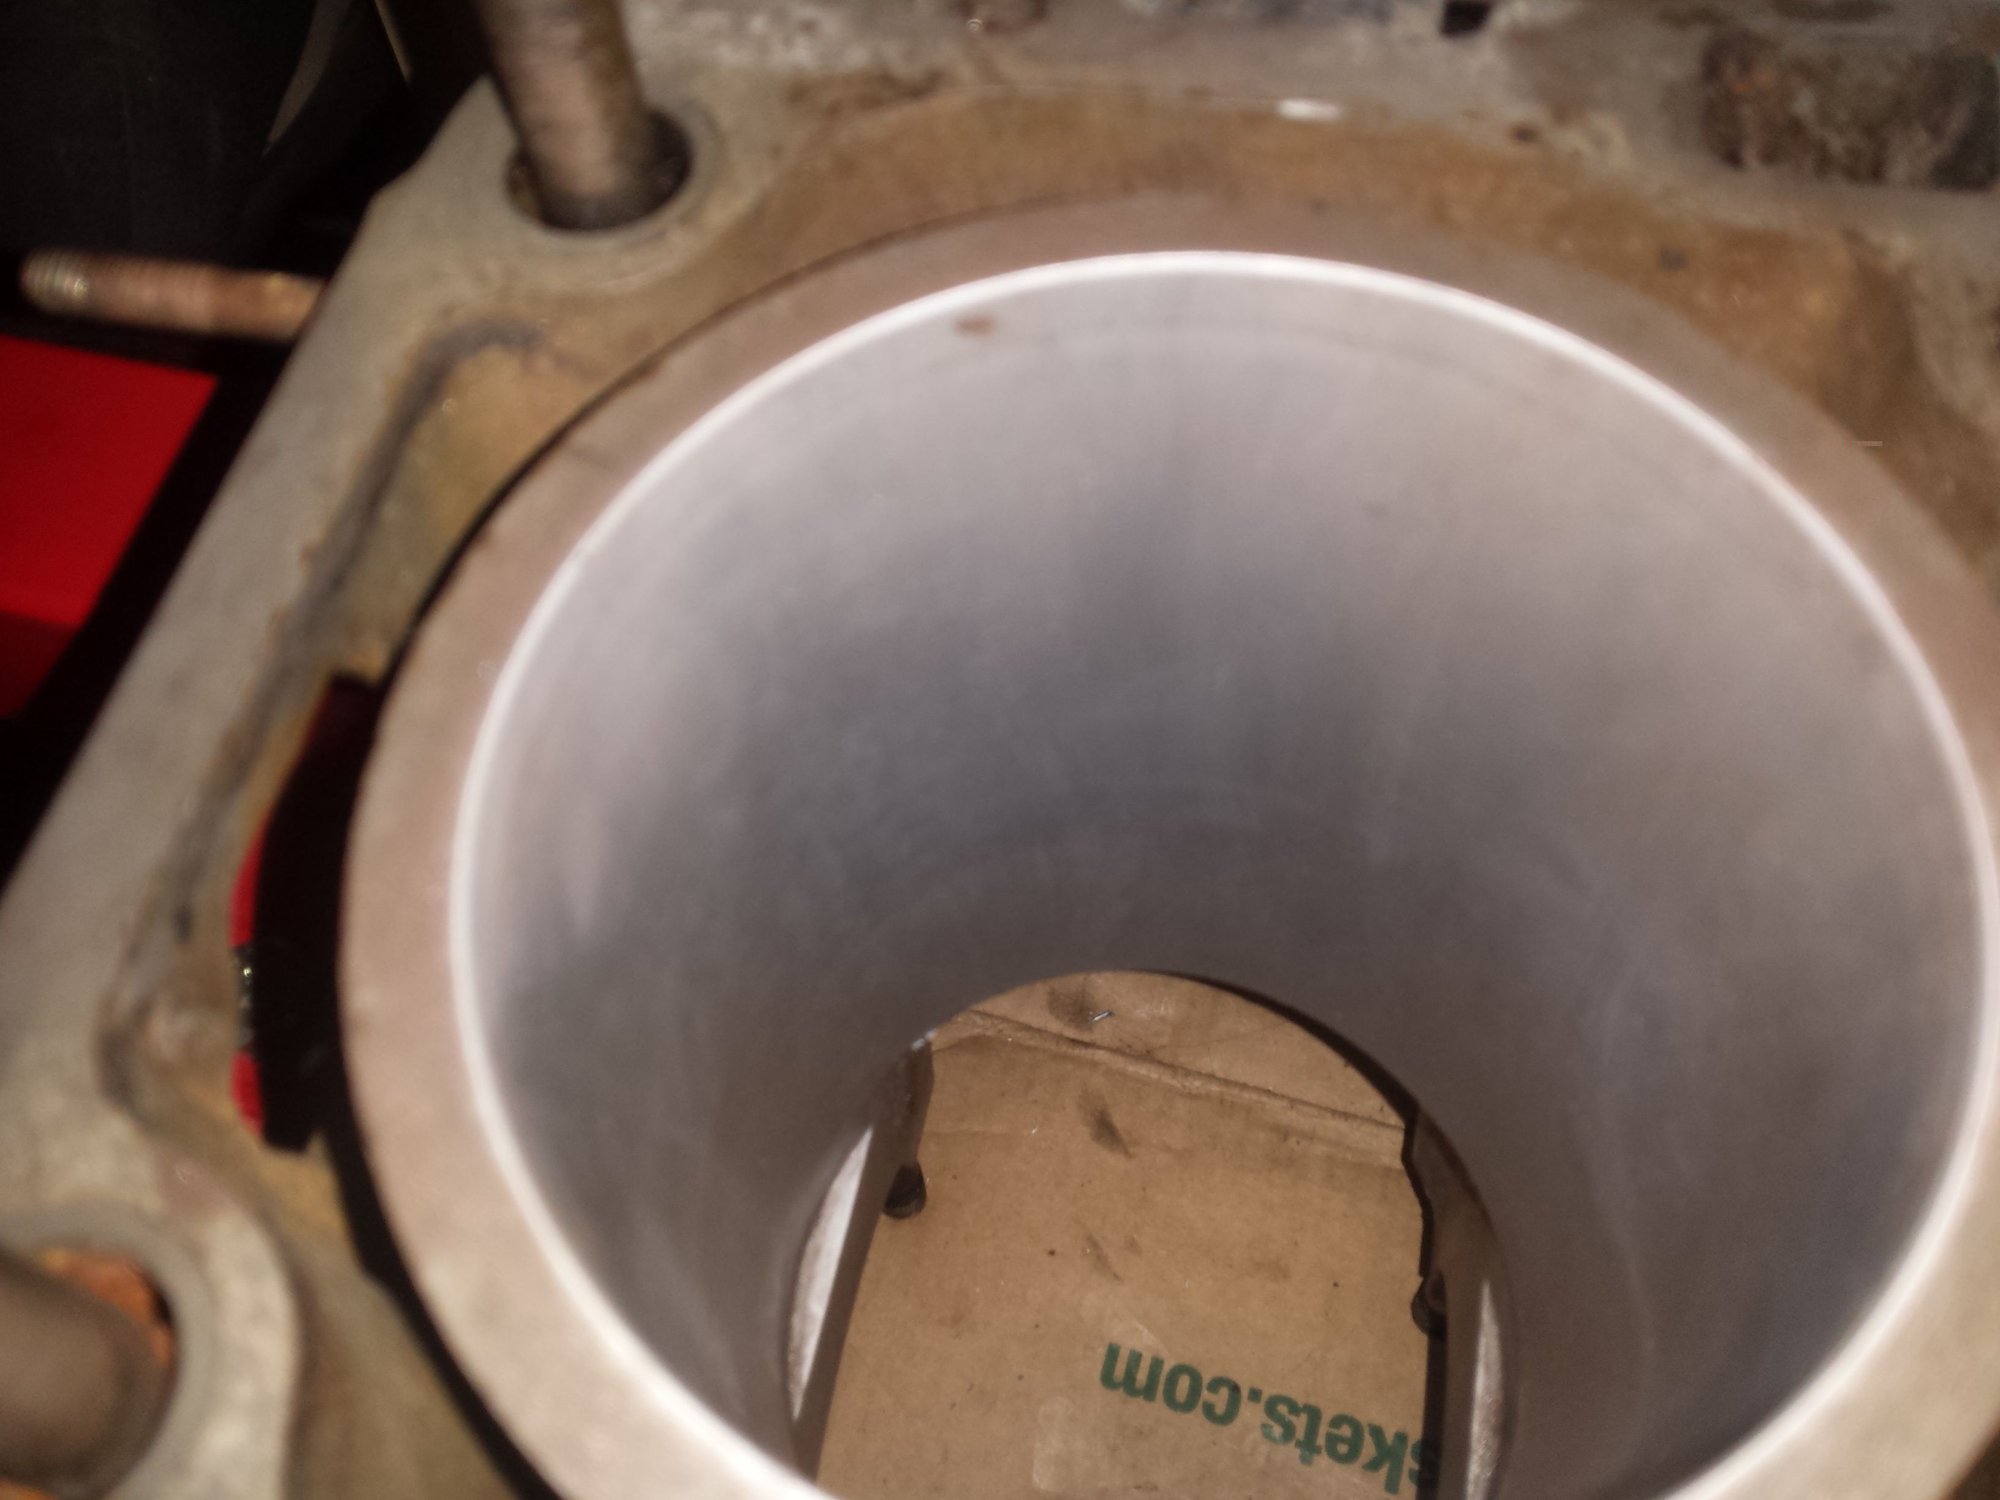
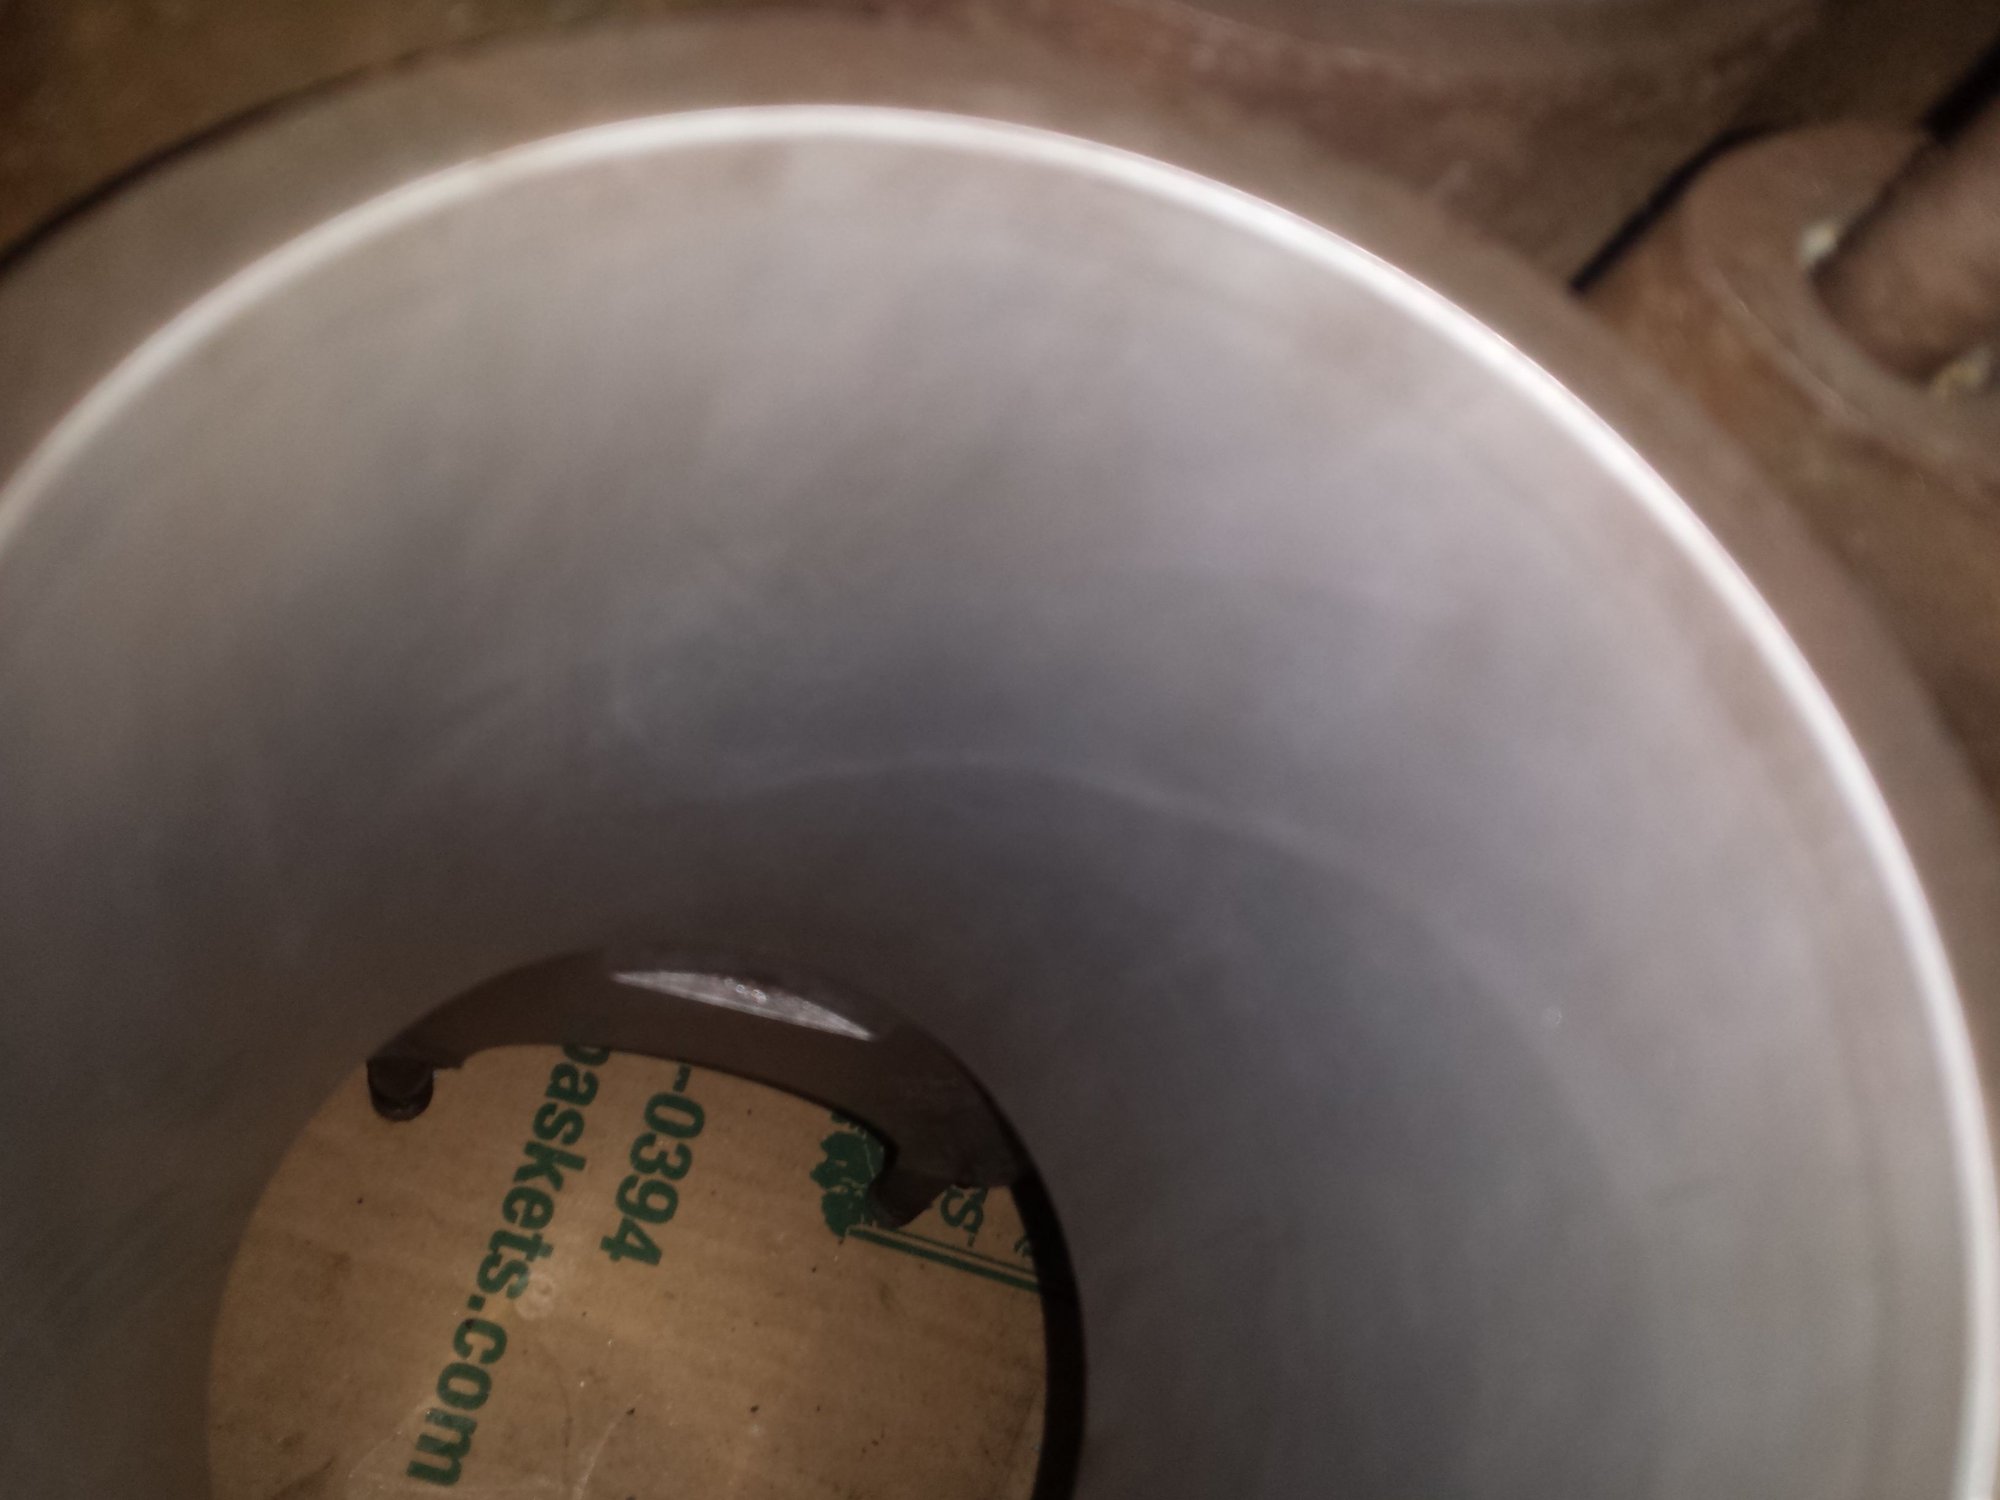
The AN-30 paste is really thick, you'll need to cut it with a light oil to make it smearable onto the cylinder walls. I mixed a good sized glop of it into an old bowl, and added a few caps worth of oil to it and mixed it up till it was smooth. I applied it in a thin layer to all the cylinders using a sponge.
I spun the drill ~250 rpm and stroked it up and down ~1-2 times a second. The length of the stones is almost the length of the cylinder walls, so be sure and not to stroke too far or the bottom ridge of the bore will rip up the felt.
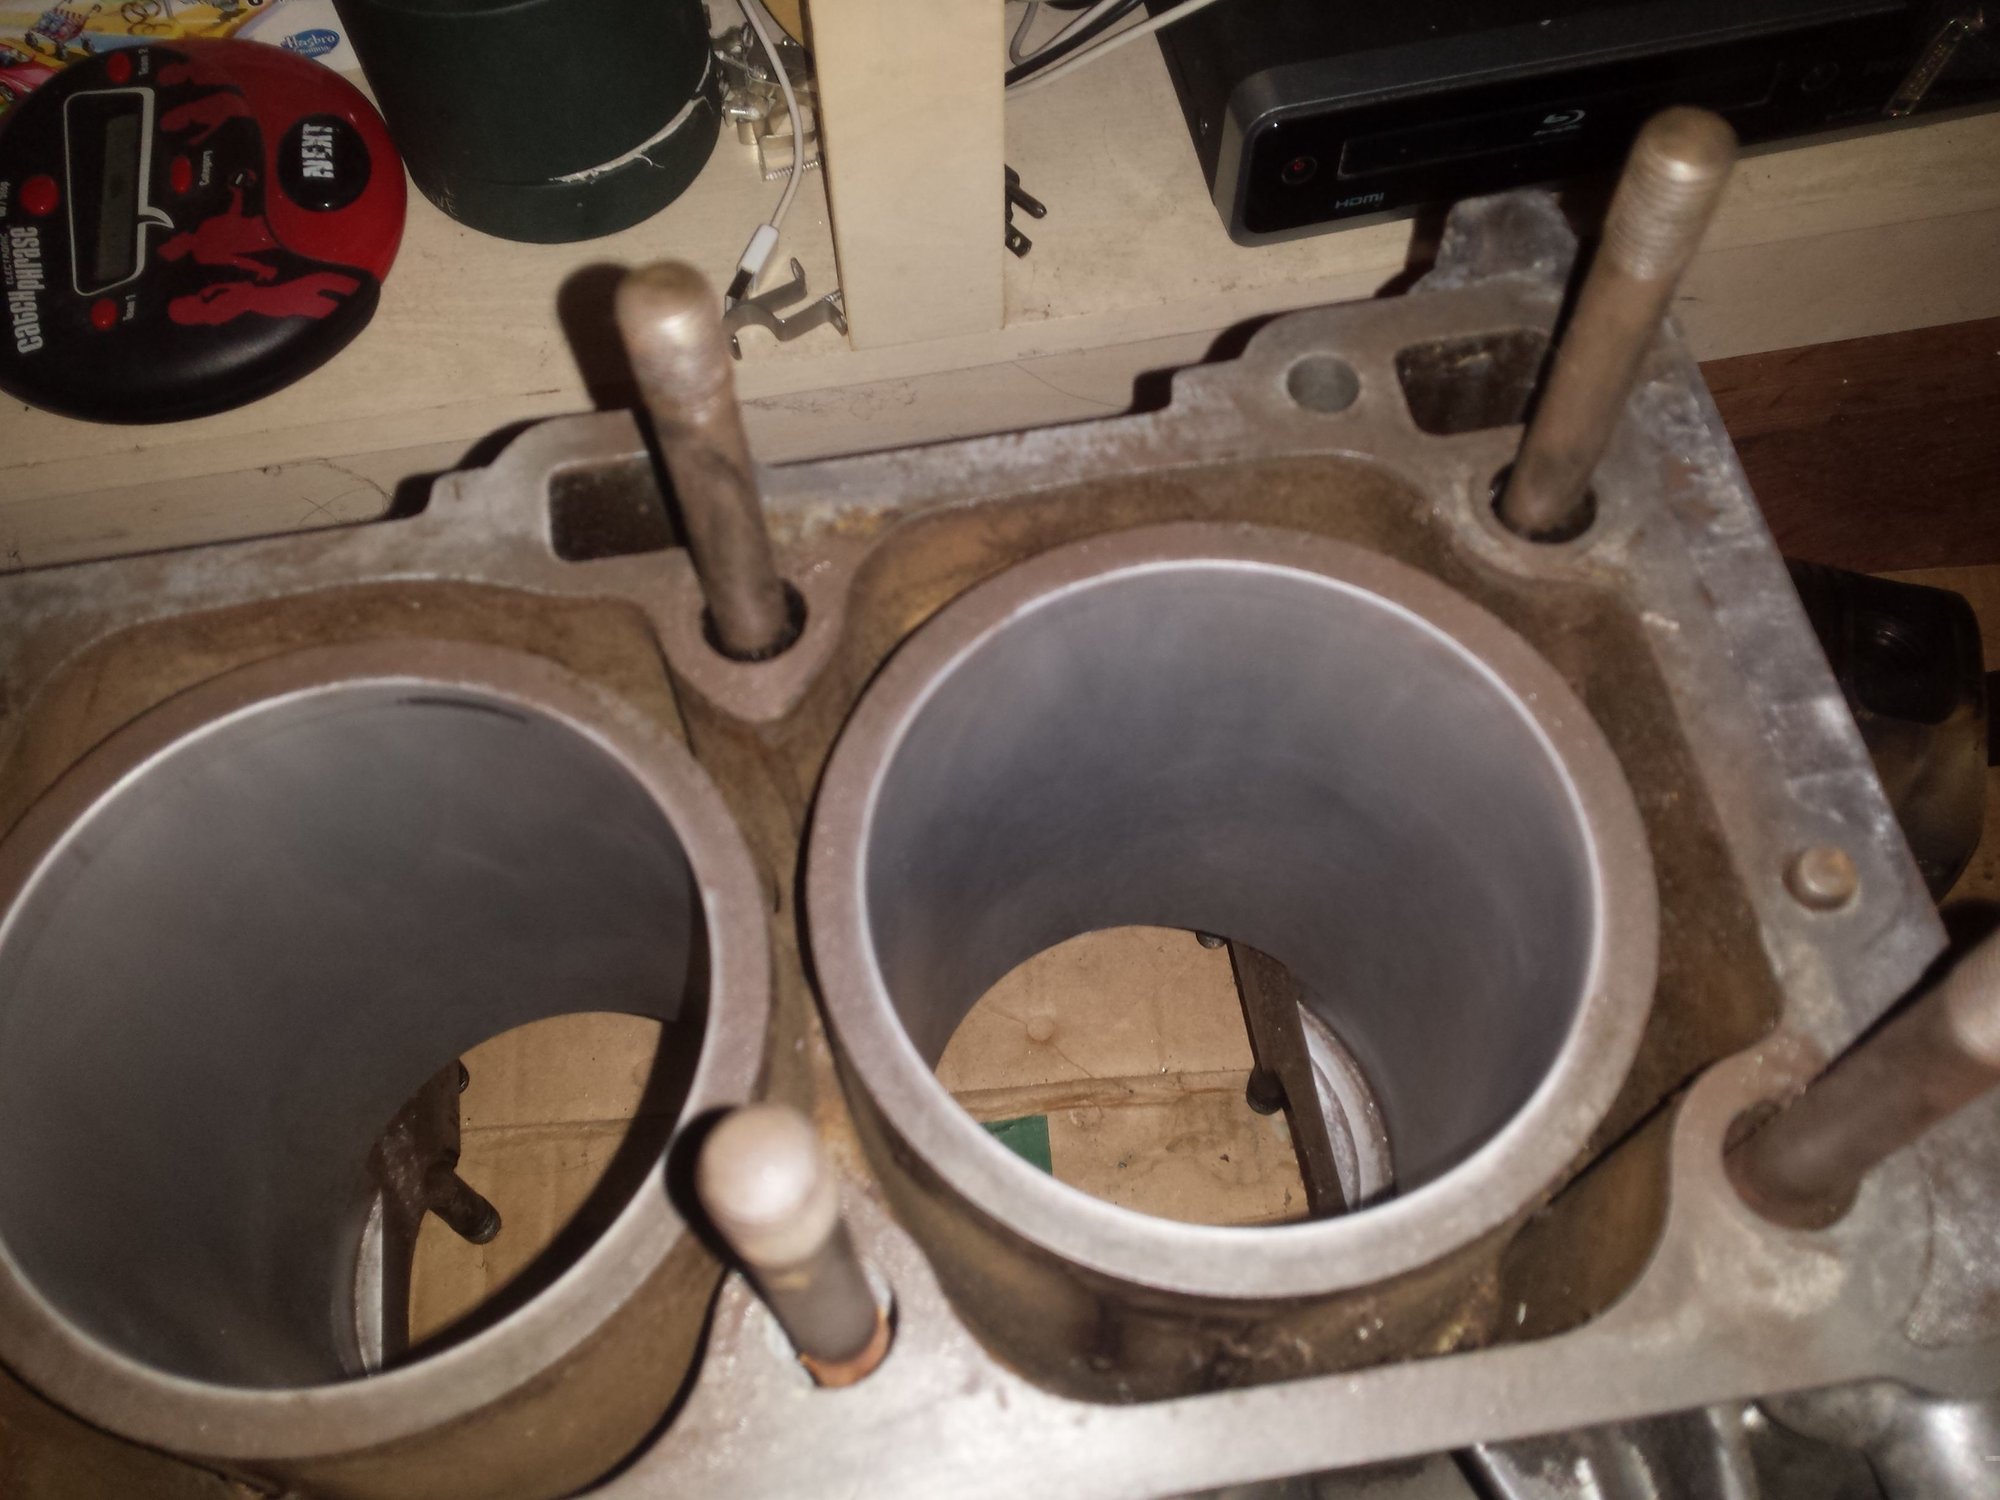
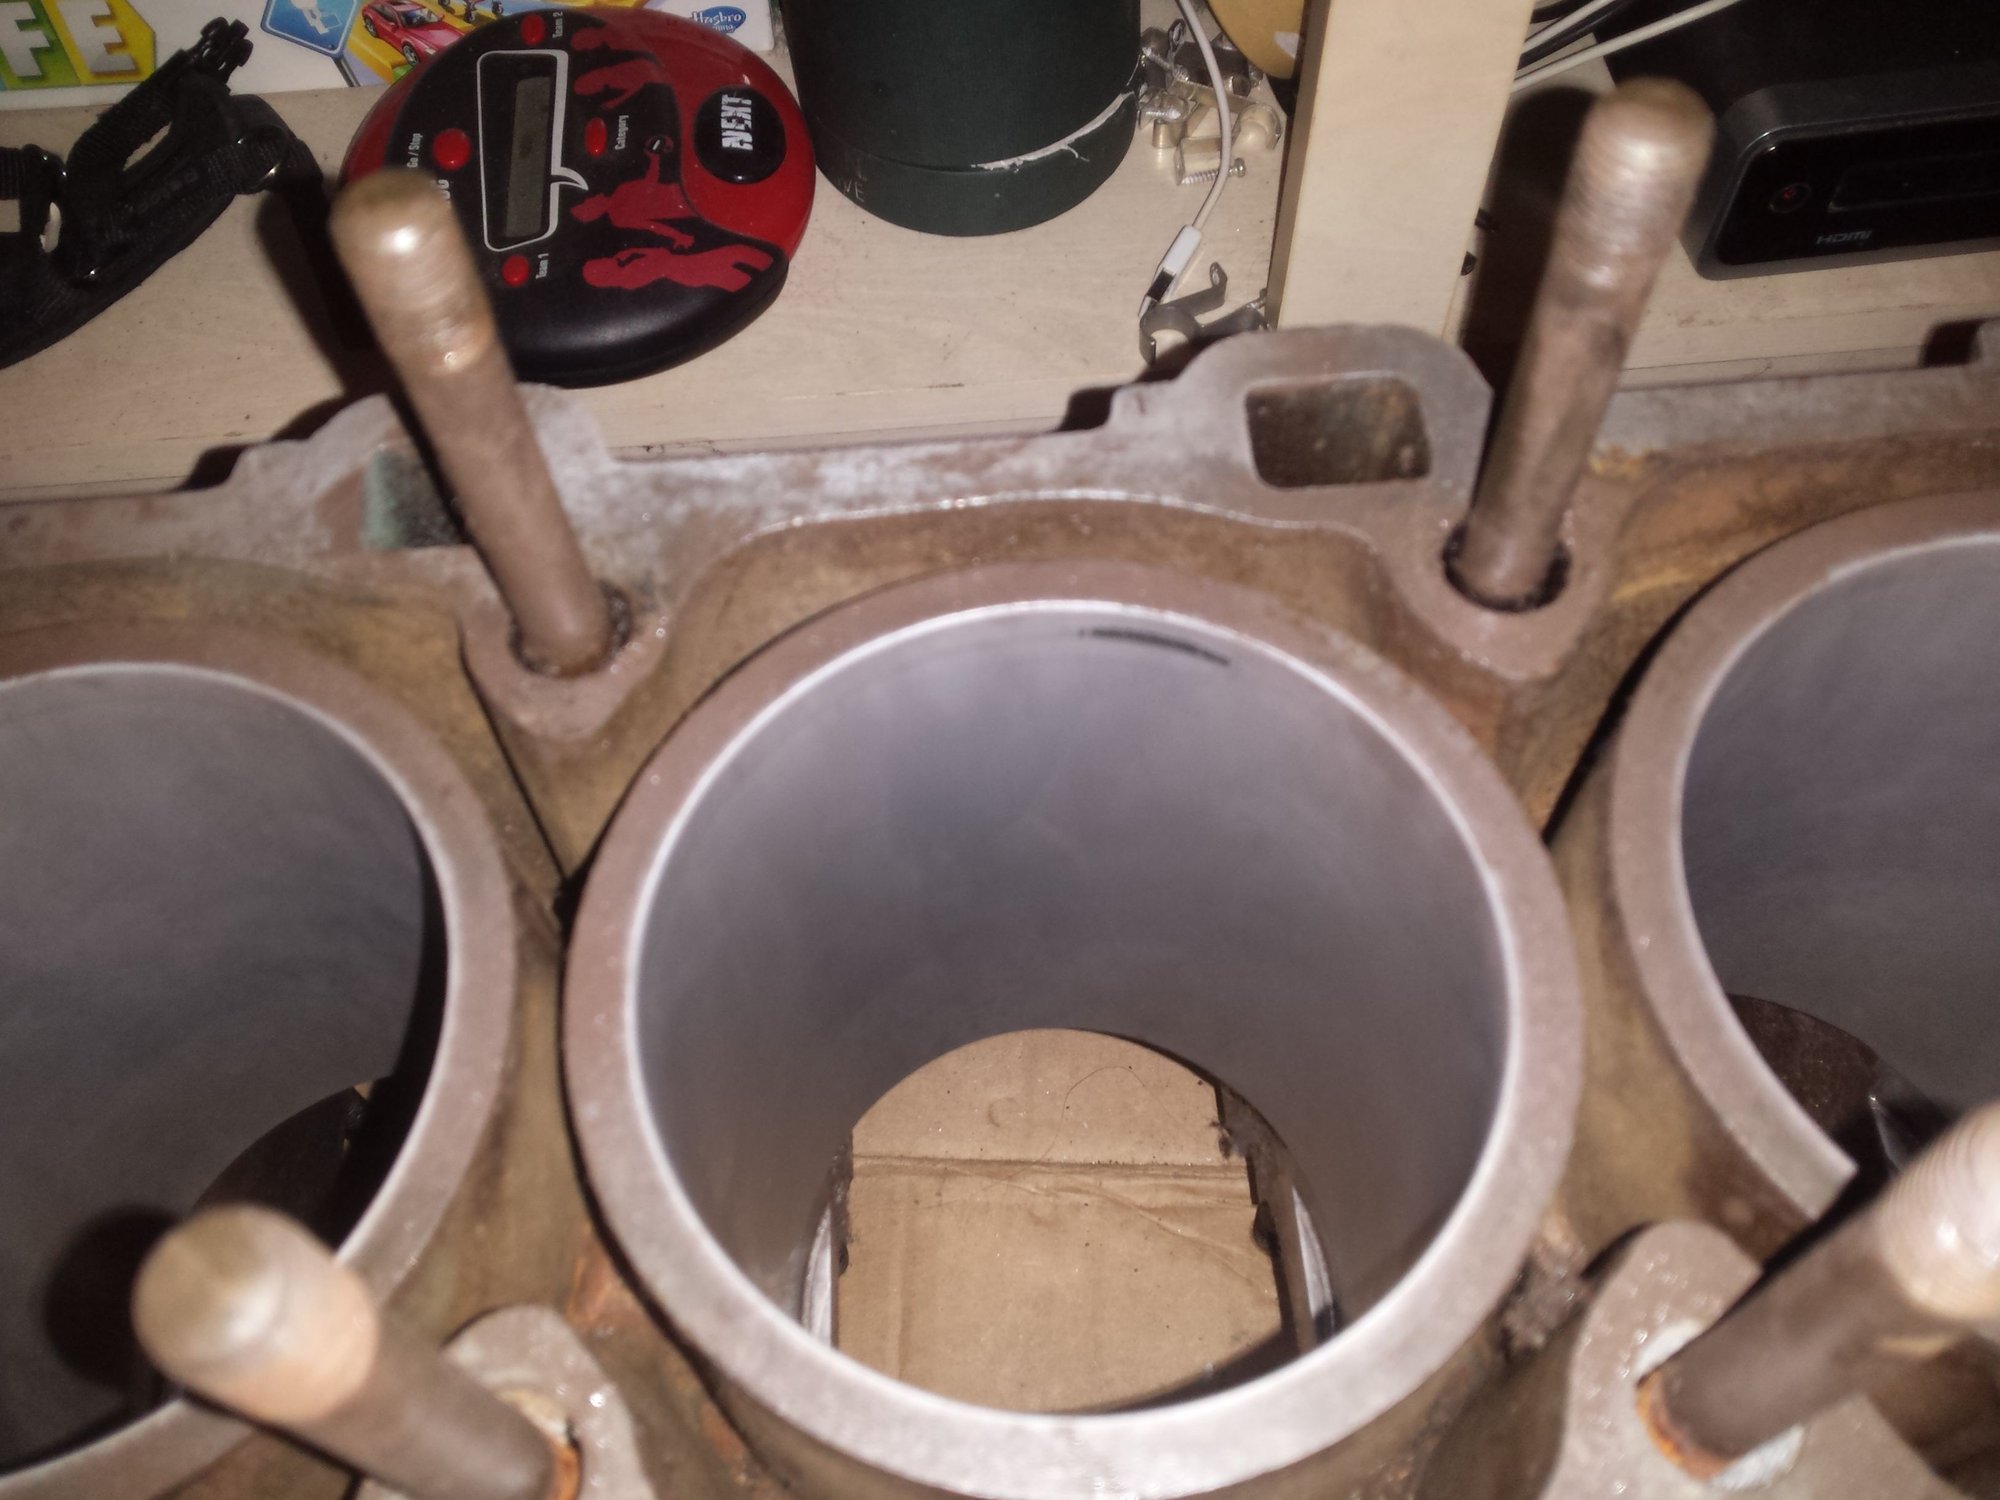
I noticed the cleanliness of the felt played a big role in the quality of the finish I got. The first pass I made, I did all 4 cylinders using the same felt and only cylinder #1 really looked good. After that, I made a second pass using new felt on the heads for each cylinder. Be sure to oil the felts before starting on each cylinder too, or the friction will be way too high.
The first pass, I lapped each cylinder for ~90 seconds. The second pass, I lapped for ~60 seconds for a total of about 2 1/2 minutes on each bore. Between each pass, I reapplied fresh AN-30.
All in all, I used about 1/4 to 1/3 of the jar of AN-30, I estimate now that I'm familiar with the technique I could probably lap 3 complete engines with one 80 dollar jar of the compound.
After lapping, I washed the bores down using acetone and a bunch of rags. AN-30 is VERY sticky so there is still some residue; I plan on having the block professionally cleaned before assembly.
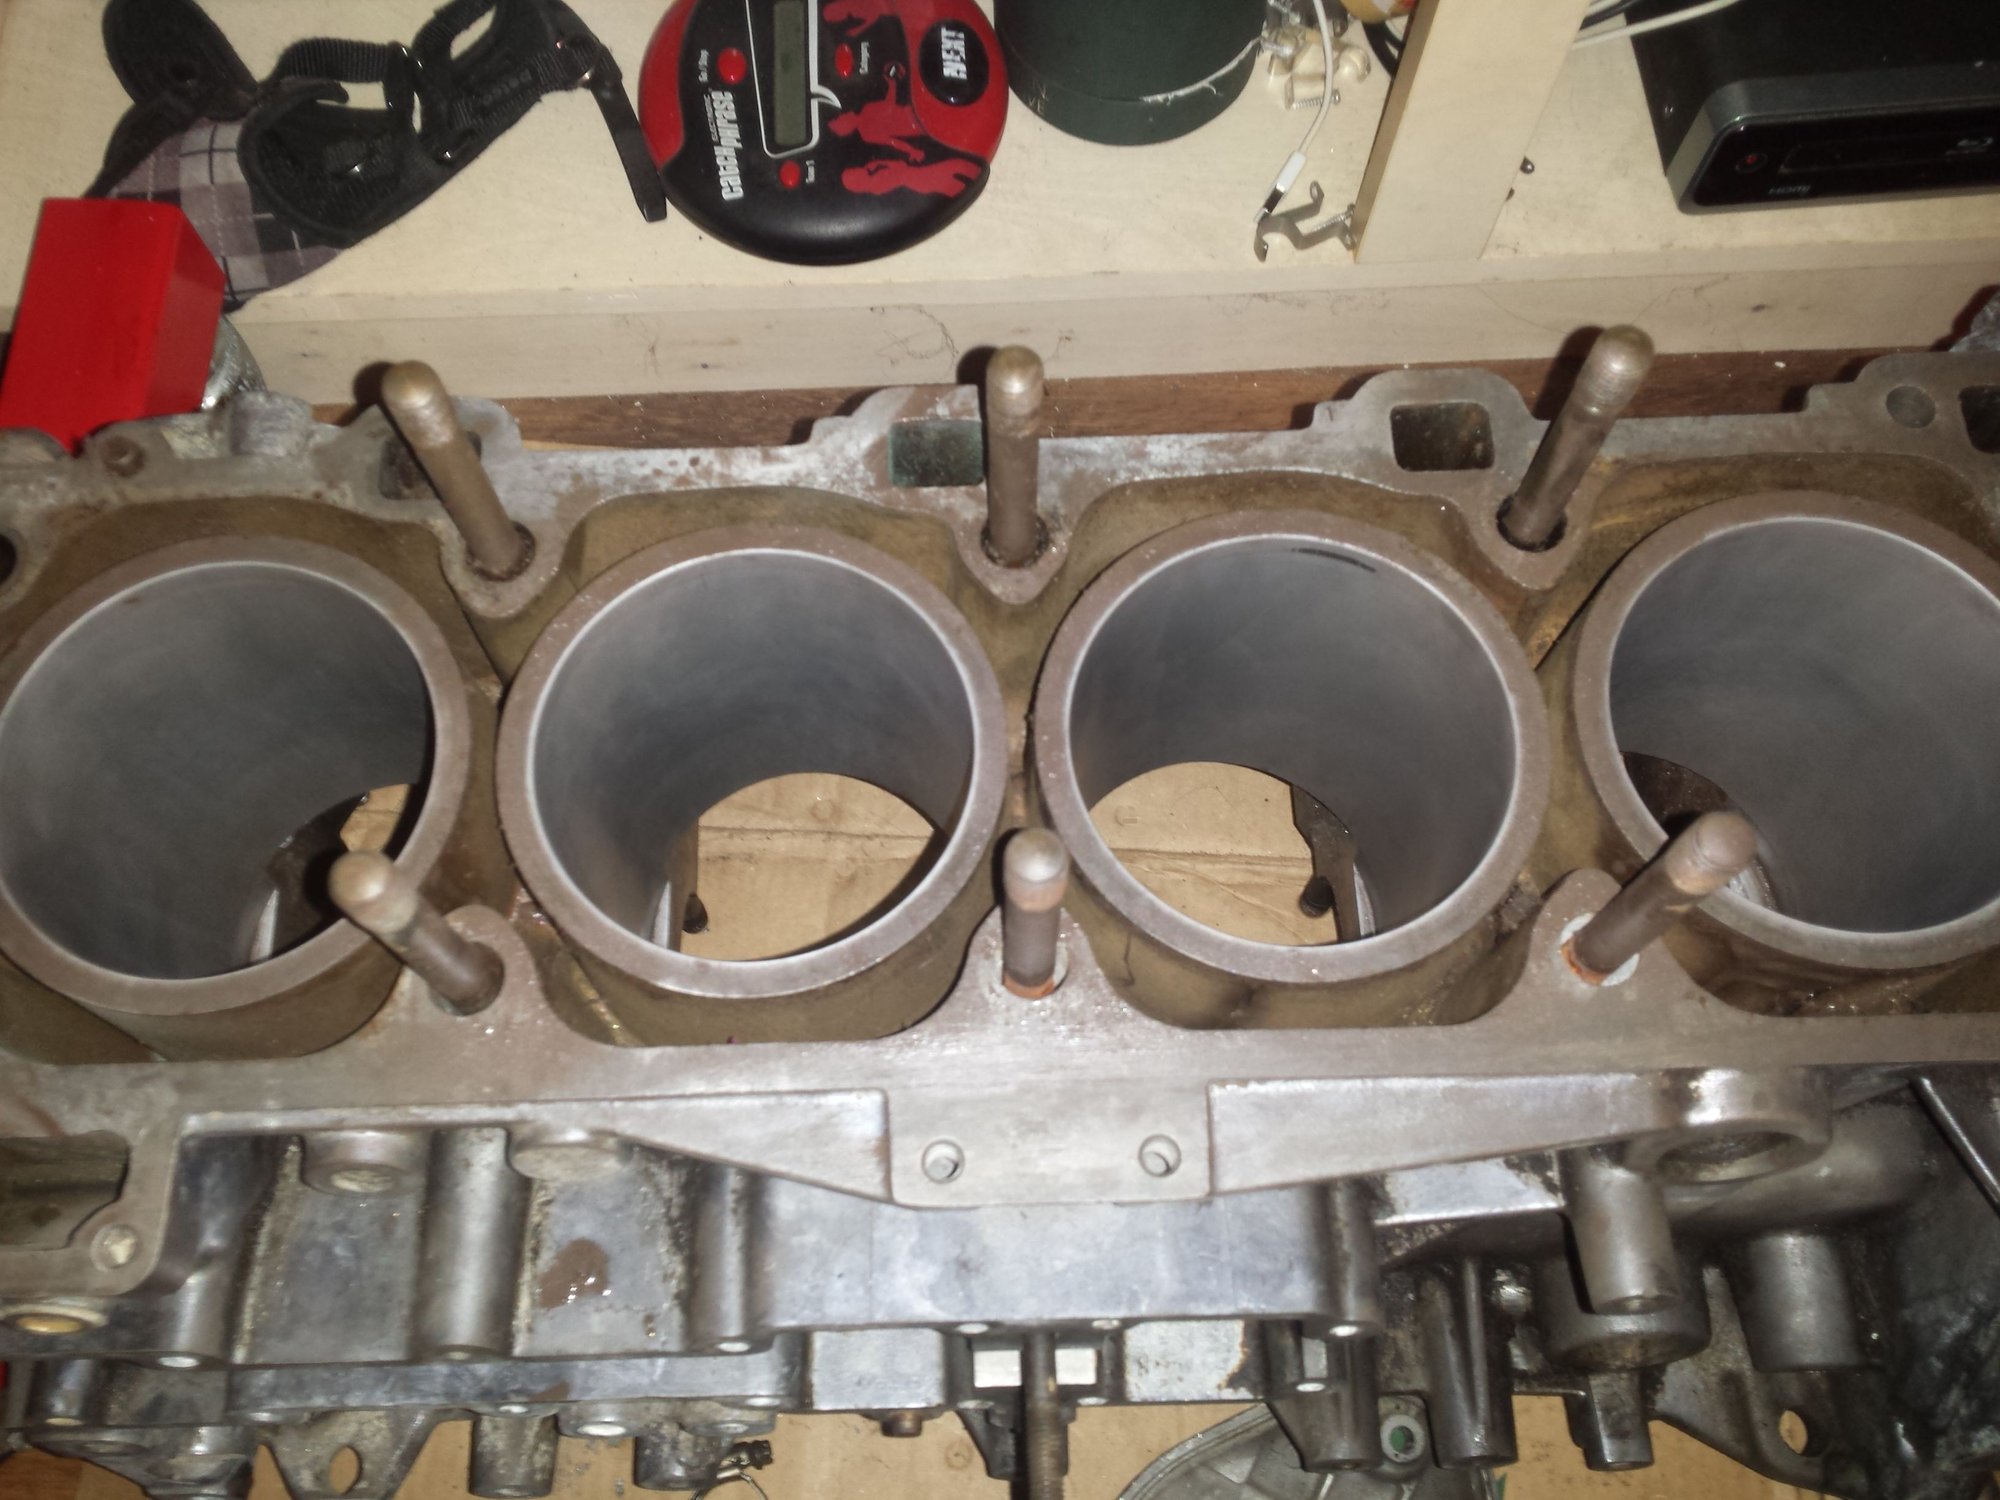
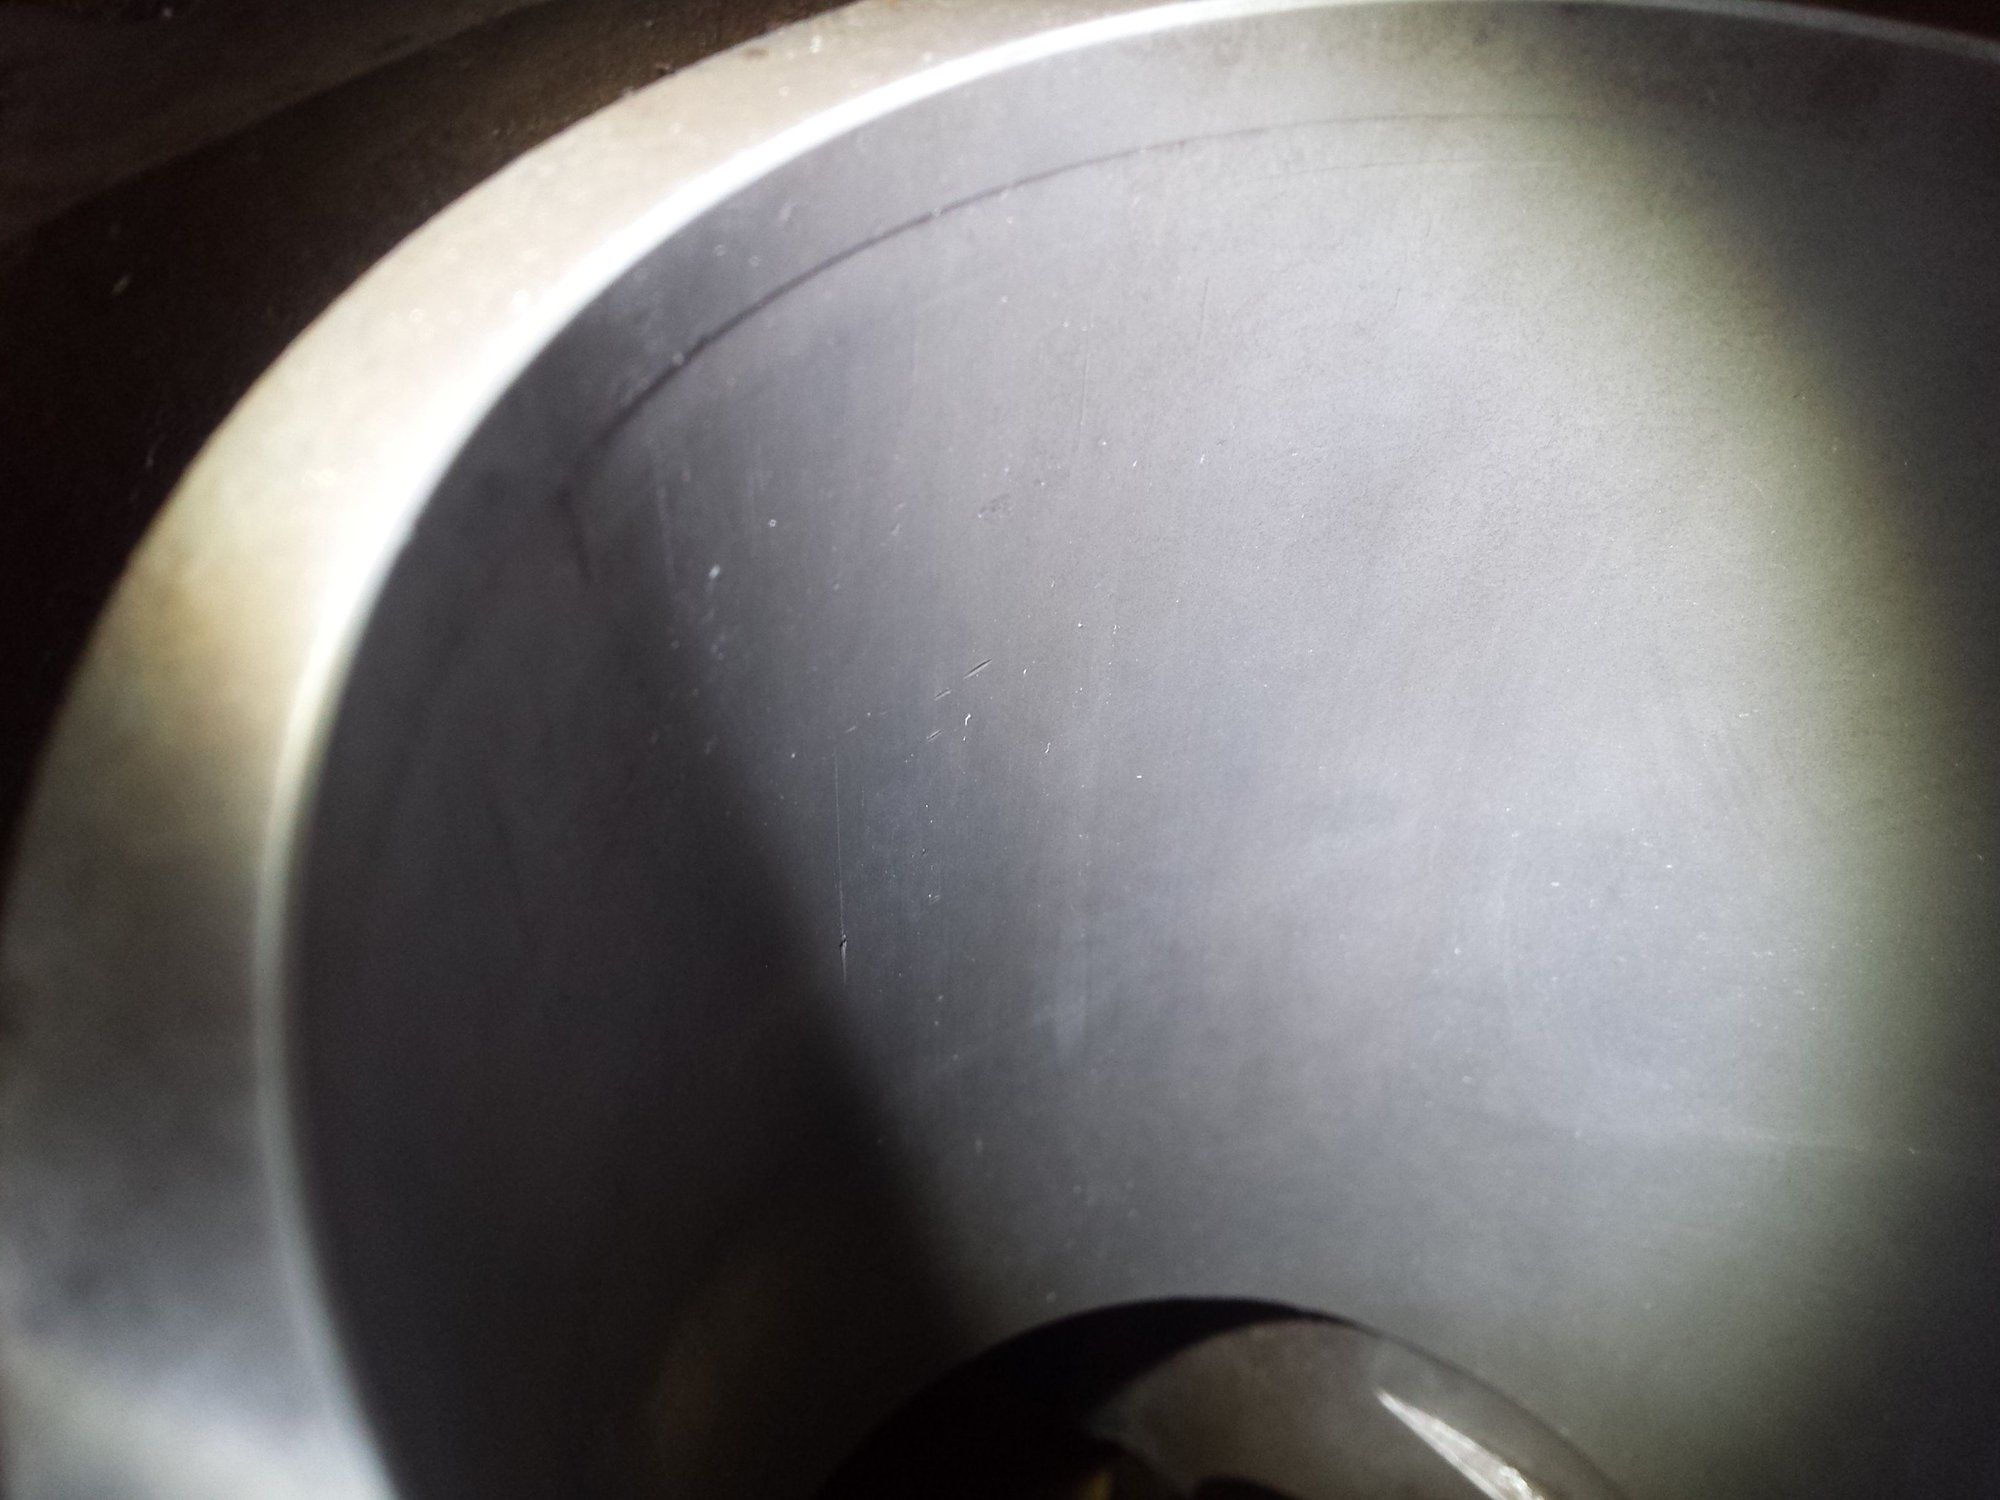
Also, I thought everyone would like to know I mic'd the bores before and after to measure how much material was removed from the bores. I measured using a nice set of telescoping gauges and my nice mituyoto vernier micrometers.
Before lapping, after treating with caustic soda: 3.9374" = 100.010mm
After lapping: 3.9373" = 100.007mm
So it looks like the AN-30 treatment increased the bore size by only .002mm, and my bores are still within Porsche spec for a group 1 block, which is 100.010mm +- .005mm
What I want to know is if this really works. I mean are the bores good to go after this? Is there anyone that has done it and has an engine that has put a lot of Miles on it after this diy?
So if one needs to go oversize you could get your block honed to oversize at a shop and then do this lapping by yourself and be good to go with new pistons and rings?
Voith your bores look much nicer, I didnt have the luxary of polishing to mirror finish before lappi g because I was doing "damage control". IMHO thry still look better than when i first took the head off and I'm pretty sure they will work fine. You pioneeered this, what do you think?

 02-02-2016 | 11:30 PM