De-powering the steering rack
 04-23-2015, 01:24 PM
#61
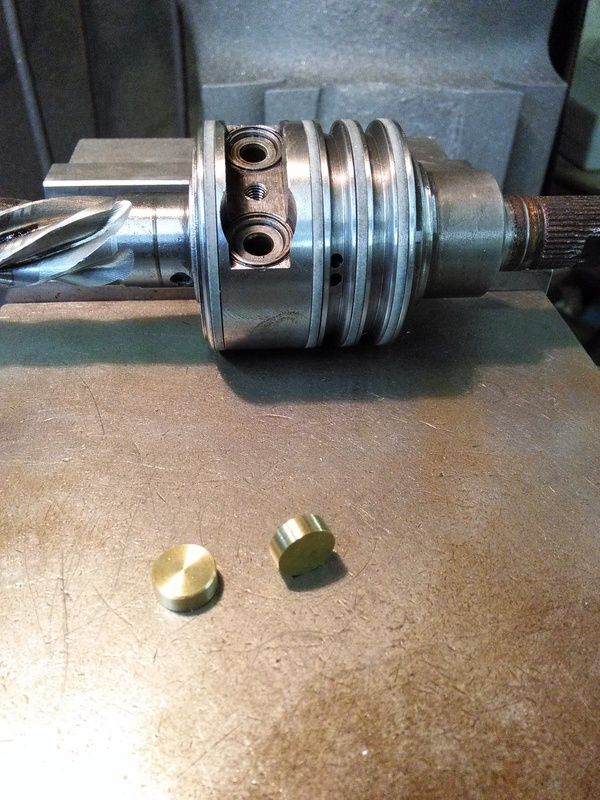
XS method part deux.... High impact brass.....

 04-23-2015, 01:25 PM
#62
Rennlist Member

Before I begin experimental cutting, you wouldn't recall if it was an 8.5 or a 9mm would you? Willing to share? Sadly, my micrometer is of the cheap digital variety, however my lathe is working so I suppose I could just try what I've got. I don't got an 8.5 socket though so I'd have to buy one to hack up.
It seems to be a 9. My open end 9's fit it, but they aren't snug enough to really get onto it from the top. I'm thinking this is a 1980's version of a "tamper proof" fastener.
I suppose I could just drill a hole in the top of it and use an ez-out...
04-23-2015, 01:52 PM
#63
Its 8mm on mine. My socket O.D. didn't fit originally. You need to take it down to .485" OD
My first rack mod is done....
I got rid of the very thin washers under the T shaped bar in my calculations because they contribute to the original pivoting action of the bar...
My first rack mod is done....

I got rid of the very thin washers under the T shaped bar in my calculations because they contribute to the original pivoting action of the bar...
 04-23-2015, 01:53 PM
#64
Rennlist Member
On closer examination (much closer and with better glasses) I see the bolt holding down the "t-bar" has a safety washer crimped over it to hold it in place. I don't think ZF ever intended for that bolt to be removed.
That's why my mic won't give me a reading on the head. I think I'll drive the crimped washer off with a brass punch and try again.
That's why my mic won't give me a reading on the head. I think I'll drive the crimped washer off with a brass punch and try again.
 04-23-2015, 03:14 PM
#66
Rennlist Member
Got the bolt lock off with a drift + very small thin blade screwdriver. When I was 40 I had 20/15 vision, now I can't see small parts with glasses under floodlights. Sigh.
Once that lock was off an 8mm socket fit fine and I didn't need to lathe mine down, so I got lucky on that since my 9mm wouldn't have fit. I measured the clearance at about 12.3mm.
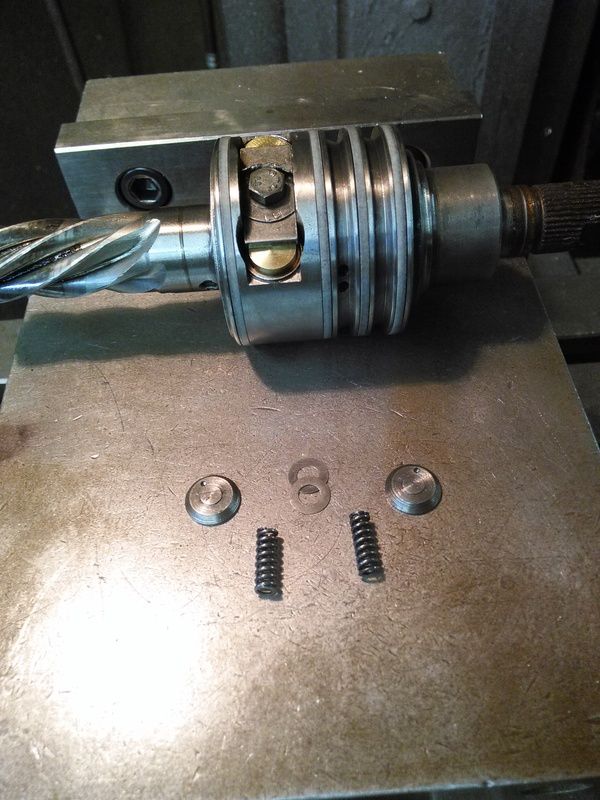
Nice work on the washer replacements and the standoffs. I can't tell if you used the two steel caps over the brass washers or eliminated them? Do you have any idea what those springs really do, or more to the point, what the combination of the spring, very thin washers and caps do?
Once that lock was off an 8mm socket fit fine and I didn't need to lathe mine down, so I got lucky on that since my 9mm wouldn't have fit. I measured the clearance at about 12.3mm.
Nice work on the washer replacements and the standoffs. I can't tell if you used the two steel caps over the brass washers or eliminated them? Do you have any idea what those springs really do, or more to the point, what the combination of the spring, very thin washers and caps do?
04-23-2015, 03:41 PM
#68
The high impact brass inserts I made get rid of all the play but allows the small T-shaped bar to seat completely.
I just set it up in vice with a steering joint......ZERO play
04-23-2015, 04:52 PM
#69
Rennlist Member
I would imagine they are stop points for the long barrel plungers inside the pinion housing. The factory can tune/change the degree of pinion shaft play by increasing or decreasing their thickness.
The high impact brass inserts I made get rid of all the play but allows the small T-shaped bar to seat completely.
I just set it up in vice with a steering joint......ZERO play
The high impact brass inserts I made get rid of all the play but allows the small T-shaped bar to seat completely.
I just set it up in vice with a steering joint......ZERO play
I suppose this is all horsefeathers anyway, I was just trying to figure out how the thing worked under power. What we're doing is setting the play as close to zero as possible by locking those pins in place and not allowing them to turn in response to? Vibration? It seems to me we'd need to understand the orientation we need to lock them in, and seal them against intrusion by grease (don't want anything making them slick).
Good news on Zero Play! So to achieve this you only had to fully seat the t-bar over the brass caps? Good work!
 04-23-2015, 09:06 PM
#72
Rennlist Member
I'm afraid I don't recognize that part? The only plate I've removed was a rhombus with a generally diamond shape.
So I do think it would be a general benefit to the community if you sold these parts as a kit. I've scrounged through a few hardware stores and scoured the web for off the shelf parts and I can get them, but they're hard to find and pretty expensive. M12x1.5 bolts aren't stock items at the local HW store, and brass collars with an M12 bore aren't to be had easily either.
I was able to find off the shelf washers with a 10.5mm diameter and a 1.4mm thickness. Two stacked worked with the caps to secure the pinion, but I think your solution is much more precise and I'd certainly favor it over mine.
So, when do you begin production? I only want to know so I can corner the market on scrap power steering racks...
Hey, I got mine already!
04-23-2015, 09:34 PM
#73
I'm on the hunt down for a couple more. Once I've modded a few I'll know if they all require the exact same brass insert dimensions. I used precision depth mics. Then I'll make kits. Mine will come with a billet cover to replace the one above so you know you have an XS rack....
.110" (2.8mm) wouldn't have cut it on this one...
If you feel confident in .110 thickness for your rack, I'll send you a pair FOC. Gentleman's gesture.
Also there may be a problem with not reusing that inner seal tube like that machine shop excludes....
I would like a new tension spring under the front cap to see how the old one compares. I see a slight off-axis movement when the pinion turns the rack towards passenger side.
Anyone know the part # to the tension spring under the front cap?
Otto, from your pics and Machine Shop's, my spring and plunger is different as well. Do you have a better close-up of yours?
Last edited by xschop; 04-23-2015 at 10:41 PM.
04-23-2015, 10:55 PM
#74
Rennlist Member
I know there's literally a pile of them up in Oakland CA where I picked up mine. Talk to EASY: http://www.easypor.com No doubt at all they can fix you up and they're very used to working with professionals. You could also talk to Lart in LA, he could probably give you access to Southern California's 944 bone yard.Look for Lart's Parts on eBay. If you've on the east side of the US I can't help, I just know the folks who do this in CA.
I can make better closeups but you've already seen the best I have. I have better lights; I took those pictures with a 3G iPhone I use as a remote control for my stereo, not exactly pro-photo tech
What would you like details on? When you say spring and plunger, are you talking about the single spring under the rhomboid plate with the plastic insert?
What would you like details on? When you say spring and plunger, are you talking about the single spring under the rhomboid plate with the plastic insert?
04-23-2015, 11:13 PM
#75
I know there's literally a pile of them up in Oakland CA where I picked up mine. Talk to EASY: http://www.easypor.com No doubt at all they can fix you up and they're very used to working with professionals. You could also talk to Lart in LA, he could probably give you access to Southern California's 944 bone yard.Look for Lart's Parts on eBay. If you've on the east side of the US I can't help, I just know the folks who do this in CA.
I can make better closeups but you've already seen the best I have. I have better lights; I took those pictures with a 3G iPhone I use as a remote control for my stereo, not exactly pro-photo tech
What would you like details on? When you say spring and plunger, are you talking about the single spring under the rhomboid plate with the plastic insert?
Last edited by xschop; 04-24-2015 at 03:17 AM.