When you click on links to various merchants on this site and make a purchase, this can result in this site earning a commission. Affiliate programs and affiliations include, but are not limited to, the eBay Partner Network.
Can't say I know much about that. Washers work fine. Costs about $0.20.
You know you can't see them or anything once the rack is assembled, right?
So I made out ahead since these free? Ha!
My thinking was that washers have a bit of variability and stacking a couple introduced even more. Since the T bar spans both they need to be nearly the same height to reduce the slop as much as possible. I was able to make the spacers to within a thousandth of each other. It�s probably overkill but any practice to become a better machinist is worth it to me.
For the height, they worked out to about 50 thou over the cap height. Seemed like a pretty small amount. I just wanted to make sure I seated the spools all the way down so the spacers had to be slightly thicker than the spring caps.
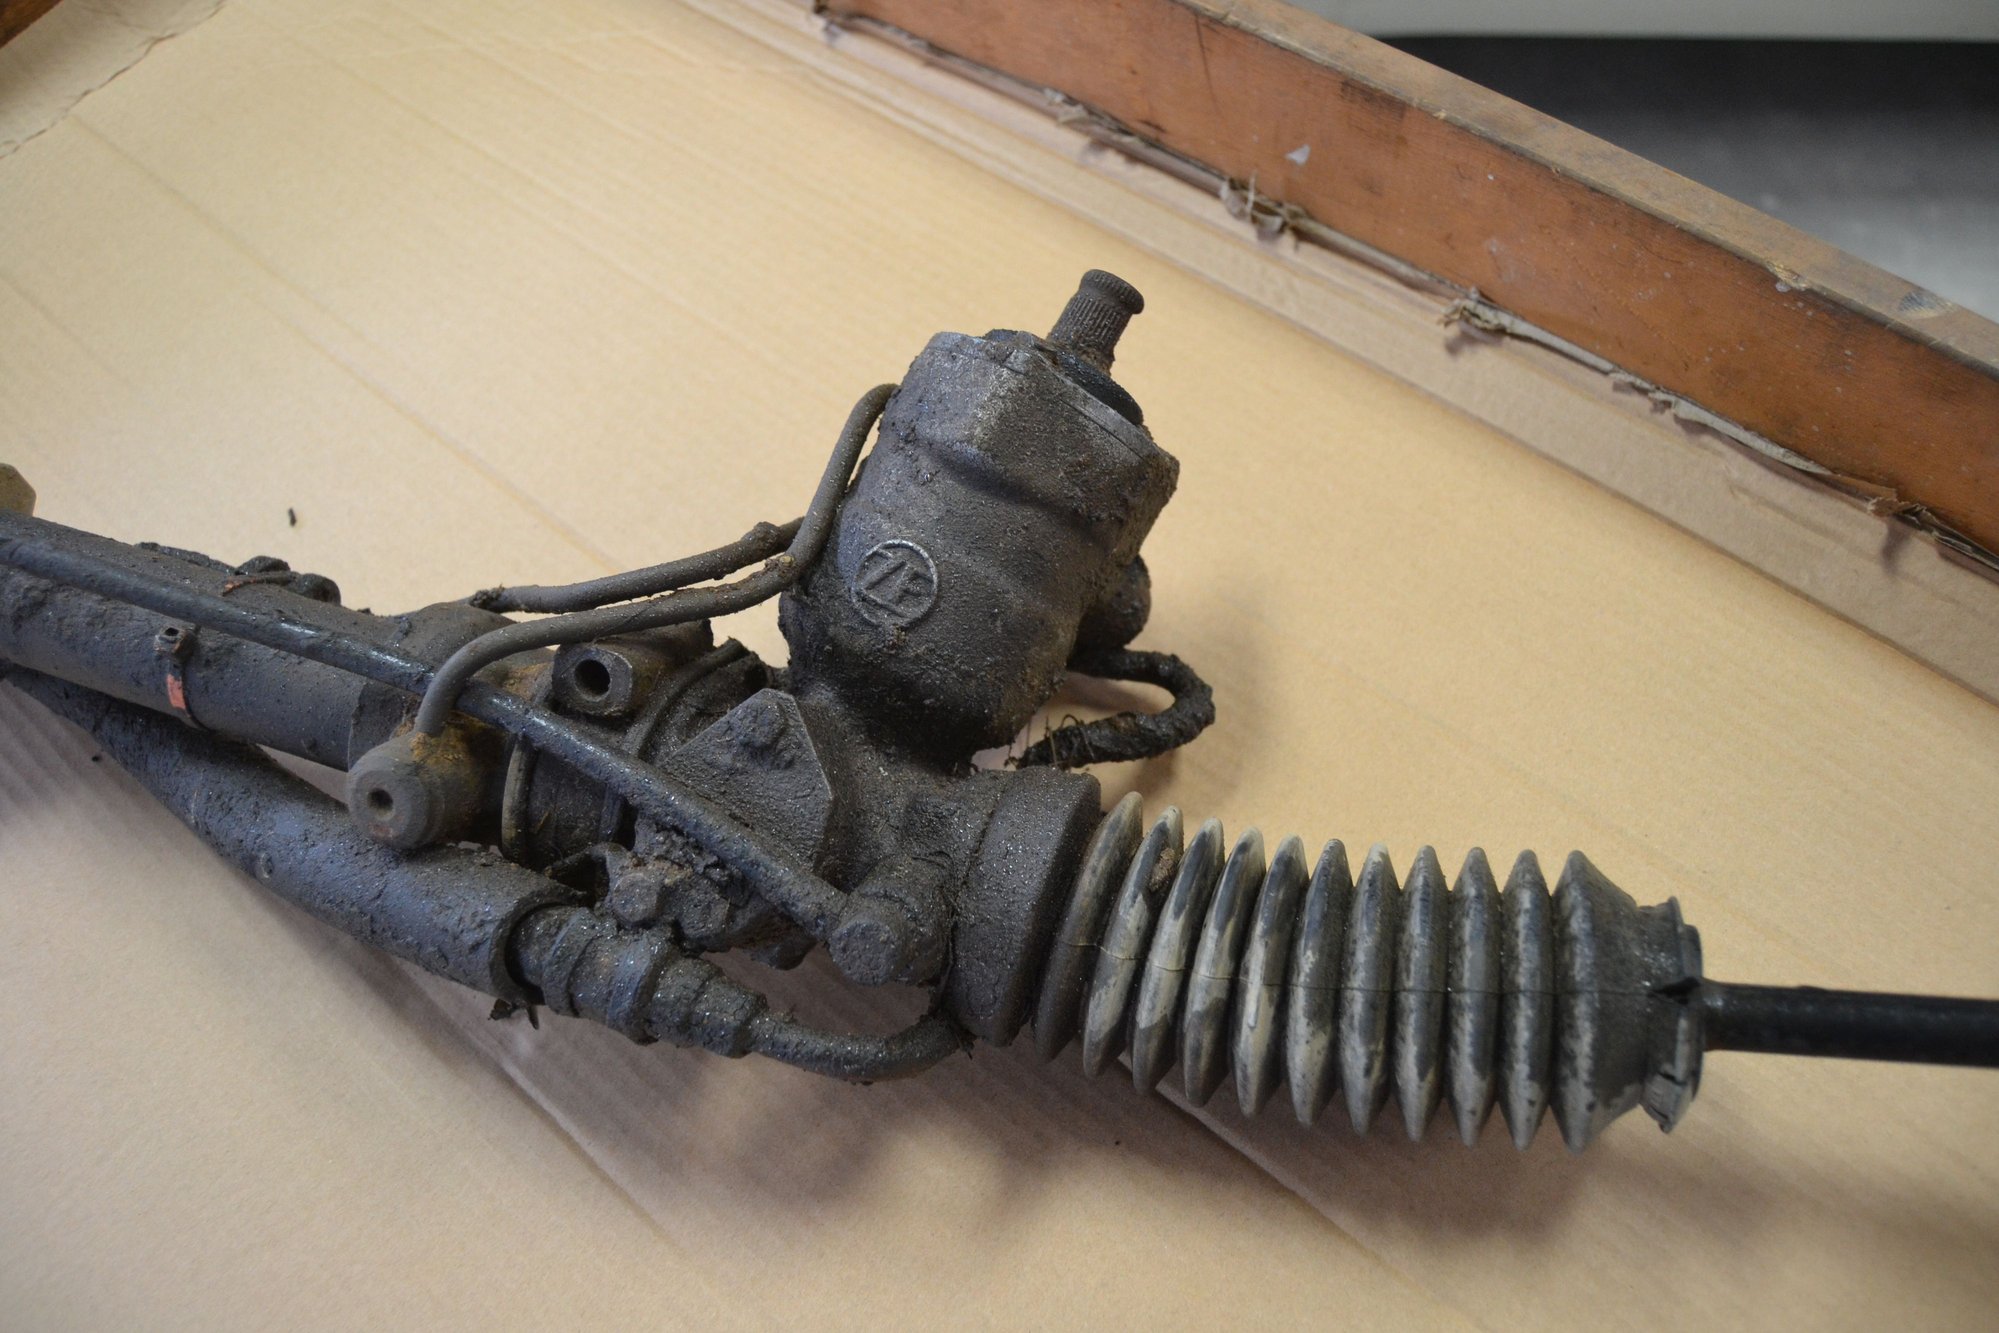
I’ve been thinking about reinstalling power steering. I did a proper depower a couple years ago and it’s fine for the most part but AutoX is a bear with it, but on the track it’s not too bad. I really could use a bigger Momo steering wheel though.
I started to reseal another rack but I ended up scoring some of the mating surfaces so it was an automatic fail and is only good as a candidate for manual conversion. I think at this point if I want to go this route I’ll have to pony up for a well rebuilt rack but from what I read no matter what these thing just leak all the time and I don’t want an issue on track like that.
from what I read no matter what these thing just leak all the time and I don’t want an issue on track like that.
That was my motivation also, then again if you don't mind re-building the rack seals every couple of years it may not be a problem. It seems to me I had some trouble getting mine out the first time but no trouble at all when I went to re-install it so it may be no big deal.
I wanted to try the manual though since I'm trying to get as close to a "Firehawk" spec car as I can, which I understand to be close to the factory club sport and I also understand was manual steering. I thought I might be stuck with a de-powered rack but finally found a factory manual.
I agree, it's more work at low speeds. I'm not setting mine up for auto-x, it's a road racing car.
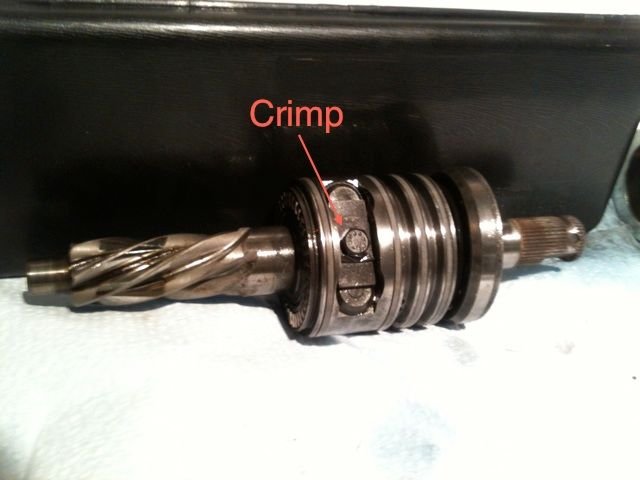
I noticed in this photo there wasn't a sign of the safety washer crimp up on the T-bar bolt? I think that's important. If that bolt backs out you'll be in serious trouble.
I am a little unclear on whether the band seals should be removed. Maybe when I get things apart and review things, it will become clear. Regardless, I will add my findings and "solutions".
I didn't take redundant pictures, I suppose that's a bad habit to get into now we've seen what can happen with bloto-phuket. I'm also not sure how many photos of my own I can post since my paid membership has expired and I'm not renewing it in protest over having to pay to be labeled an "Addict". But I'll try anyway and see how far I can get.
The essential parts of the "proper" mod are to remove the internal piston from the rack tube and lock the spools on the pinion. Beside that, all you're doing is removing the hard hydraulic lines and plugging the holes. I used zerk fittings as plugs pretty universally, I figured it couldn't really hurt and they're sold in convenient packs of 5 but it's purely a mater of taste.
As I mentioned above, there is one very important photo I'll attach here, it shows the crimped safety washer on the "t-bar" retaining bolt:
When you disassemble the pinion you should have to fold down the safety crimp with a brass punch to remove the bolt. Once the bolt is removed, take off the t-bar, remove the caps, take out the springs and replace them with stacked washers thick enough for the caps to completely contact, replace the bar, safety washer and bolt, and tighten the bolt. Check the spline shaft at the top of the pinion for play by spinning it; it should spin easily using only two fingers and there should be no free play. If the pinion passes this test, fold the crimp back up to lock the bolt in position.
If there's still play when you turn the pinion, remove the bolt and add more washers until the spools are locked.
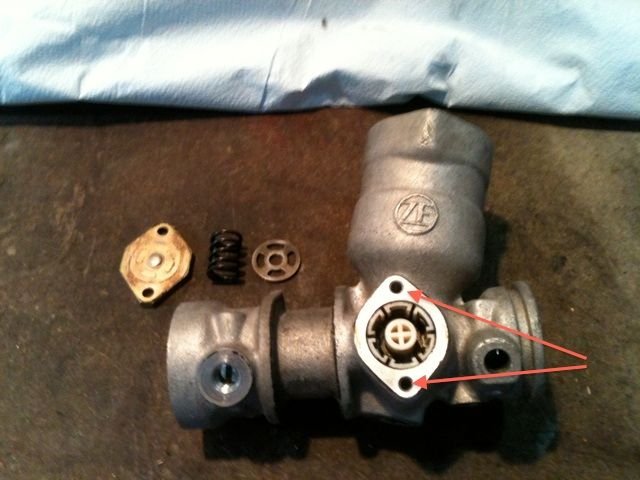
If you can't turn the pinion easily with two fingers, slightly loosen the bolts retaining the tension adjustment spring:
These bolts should be torqued to about 6 ft/lbs to get free motion of the pinion.
Unfortunately I can't find pictures of the internal piston that needs to be removed, it's possible I have them but lost them, maybe never took them. The tube the rack gear moves in needs to be unscrewed from the pinion body, there's a retaining nut with a slot in it that can be spun off using a drift. Once the piston is exposed you need to get it off the rack gear, I recall it being obvious but can't recite the procedure from memory since I did it a few years ago. After the piston is out, re-assemble the rack tube to the pinion body after greasing the rack liberally. Pack the pinion housing with grease also.
The flexible line that runs between two plastic barb inserts is used to equalize pressure in the rack housing and should be retained. I don't know why that's the case, I can't see a purpose to it once the piston is removed, but I tried plugging the two ports and it increased back-pressure and steering resistance so I put it back on.
Hope this helps. Maybe someone out there with a photo-phukedup account can recover the old pictures?
Last edited by Otto Mechanic; 04-27-2018 at 06:22 AM.
Thanks for the details. I will probably have everything apart this weekend and should be able to figure out the shimming of the spools. My sealing plugs/ zerk fittings probably won't arrive until next week. I might look at other ideas as an interim step. Would like to get Nico back on the road soon.
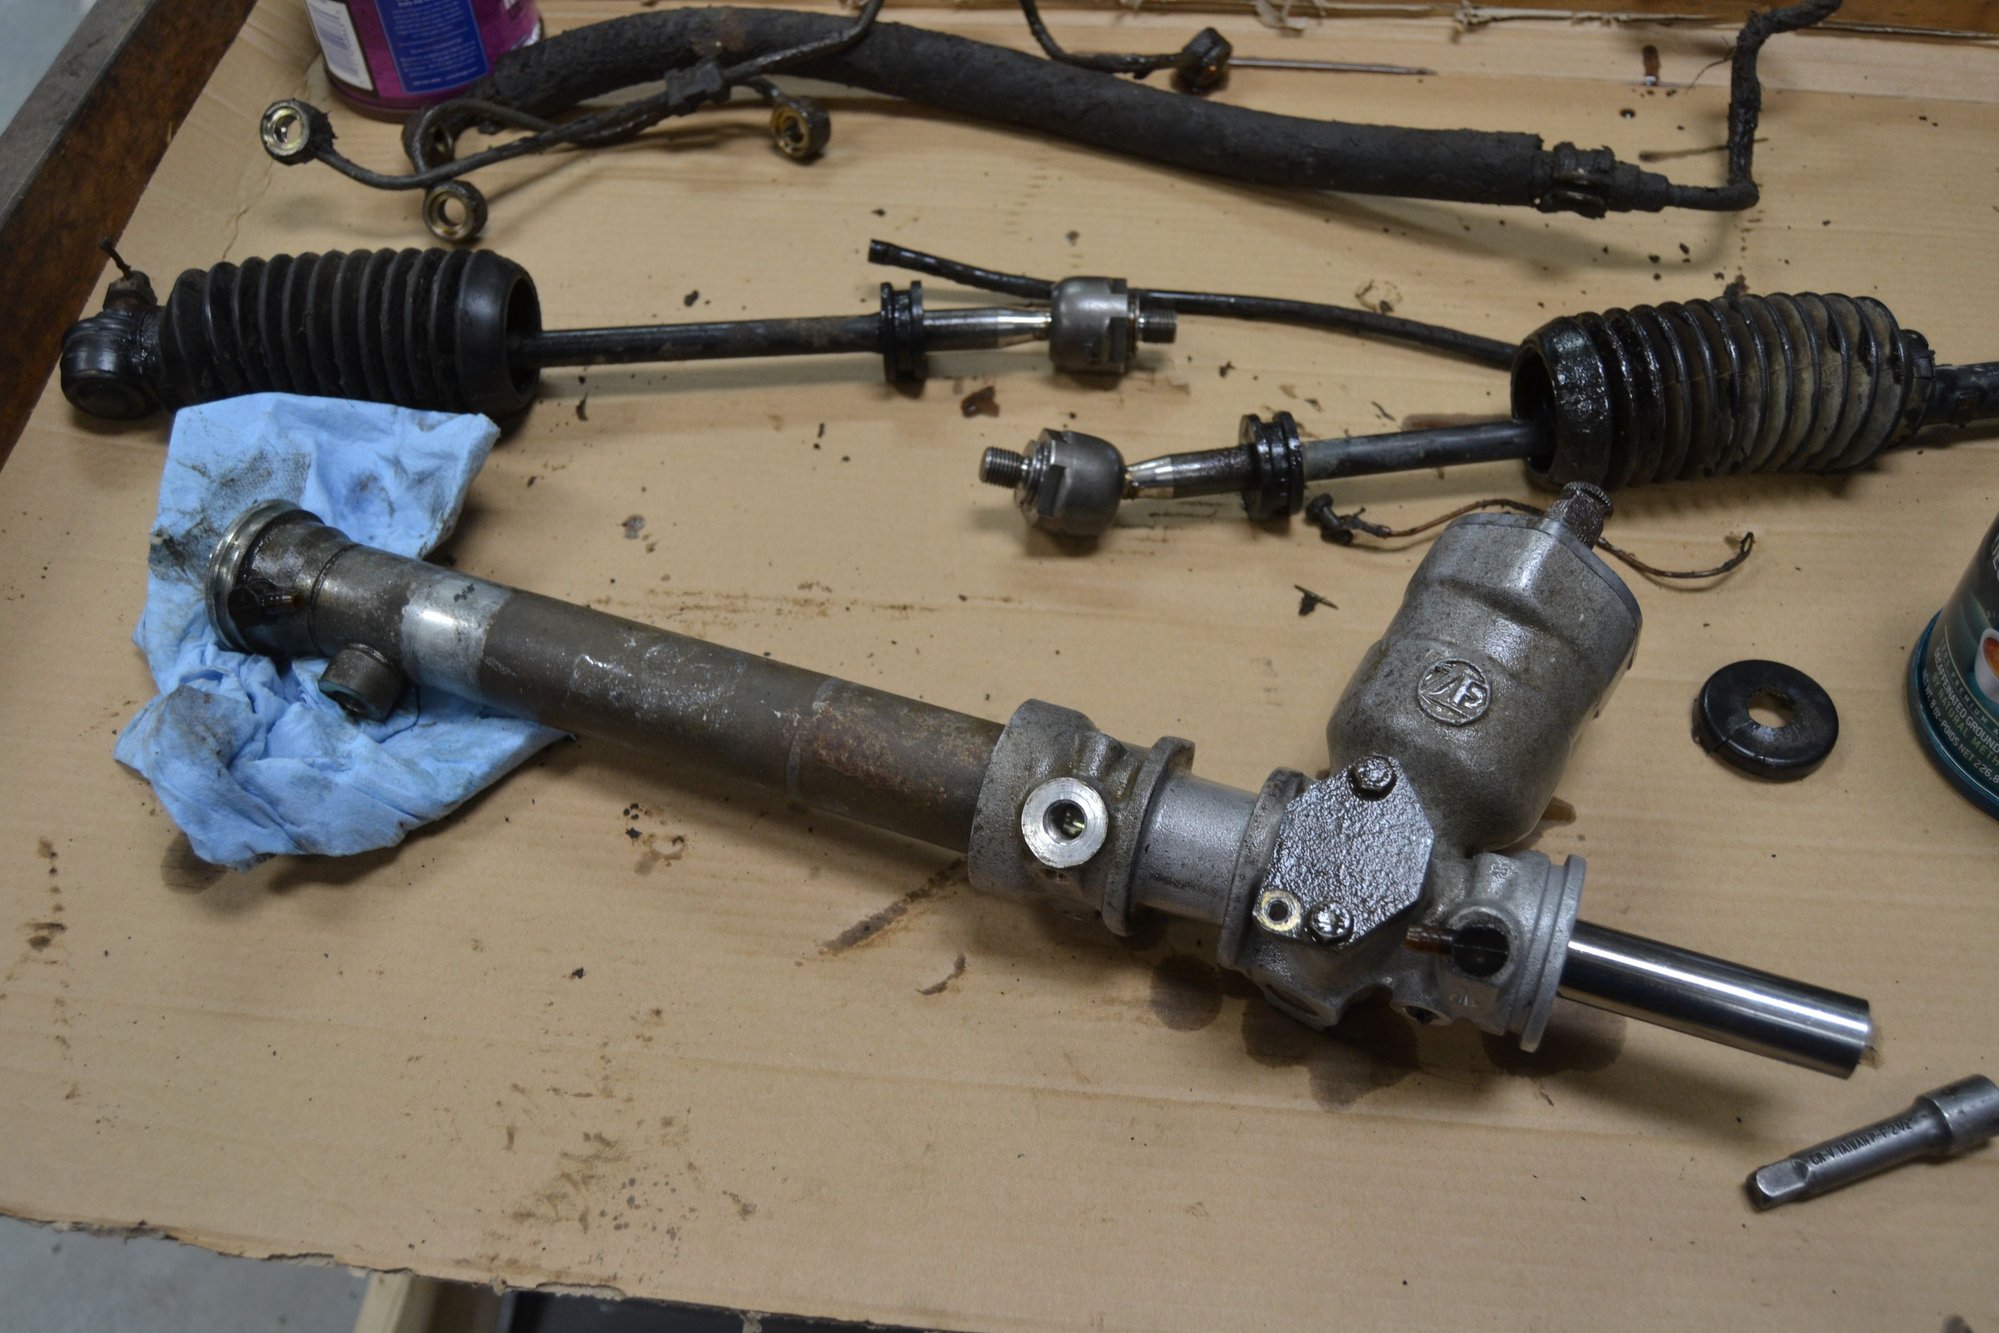
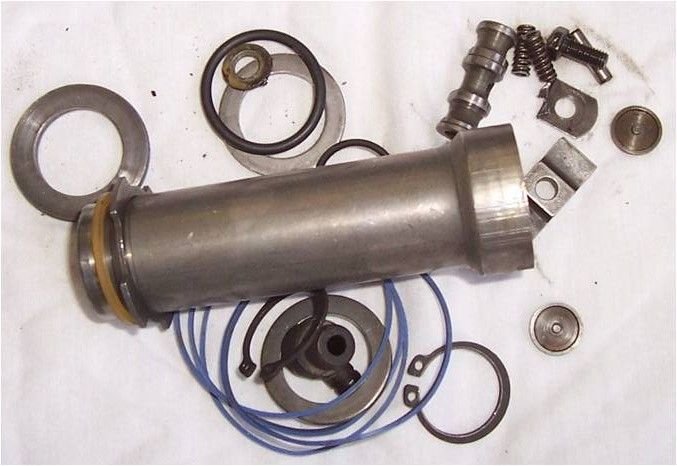
I rebuilt two racks previously using the Rennbay kits. So I know how to get these guys apart (and back together). Just trying to understand what does not need to go back in. If the Machine Shop method is to be believed, everything in this photo does not go back. Note that the T-bar, spools and mounting hardware, will go back since I am not welding things. So that brings in to question; the shuttle (what you call the piston?) and the nylon band seals. I will also keep the equalization tube you mention (photo shows one of the nipples).
Any thoughts on the pros and cons of keeping/ removing the band seals? More space for grease with them gone?
Last edited by Scott at Team Harco; 04-25-2018 at 02:39 PM.
Also, isn't that bolt head too high to fit down the sleeve?
The retainer is there, you can barely see it in the photo. The bolt head is low enough that does not hang up, however the retainer clip is bent too high in that image. Ill have to fold it over.
I probably should have made the spacers slightly shorter. But For a first go around they will work. I did not have a depth mic to get a better measurement so I was guessing somewhat.
If the Machine Shop method is to be believed, everything in this photo does not go back. Note that the T-bar, spools and mounting hardware, will go back since I am not welding things. So that brings in to question; the shuttle (what you call the piston?) and the nylon band seals. I will also keep the equalization tube you mention (photo shows one of the nipples).
Any thoughts on the pros and cons of keeping/ removing the band seals? More space for grease with them gone?
Certainly not the shuttle/piston, that stays out.
I followed The Machine Shop photo too, just as you suggest, that's probably why I couldn't find it. He tells you to leave out the spools, that won't work unless you weld. You need them to make the stacked washers/shims work to lock the spools, but you knew that.
I'm not sure about the band seals, I believe I left them in.
I actually kept all the parts I didn't put back in a separate bag, which is now at my "soon to be" shop in Paso Robles. I'm not there right now or I'd dump the bag out on the bench and take a picture. Sorry.
Regards,
Scott.
Last edited by Otto Mechanic; 04-25-2018 at 09:58 PM.

 04-23-2018 | 01:26 AM