When you click on links to various merchants on this site and make a purchase, this can result in this site earning a commission. Affiliate programs and affiliations include, but are not limited to, the eBay Partner Network.
After losing the #2 rod bearing on my 1985.1 NA track car in September, my winter project was simply to rebuild the engine with some reliability and performance upgrades and to strip some more weight from the car. That engine rebuild is being covered in another thread.
For weight reduction, I planned to remove the rest of the interior carpet (rear was already done) and to do an AC delete. Once I got got all of the AC out, I figured I didn't need heat either. So a heater delete, then while I was in there ... ripping out the dash, alarm system, cruise control, unused wires, etc. Now with the car being that gutted, it seems like a good time to replace the bolt in roll bar with a full cage. The cage will have nascar bars on both sides, which means gutting the doors and fabricating manual window function so it will still be weather tight.
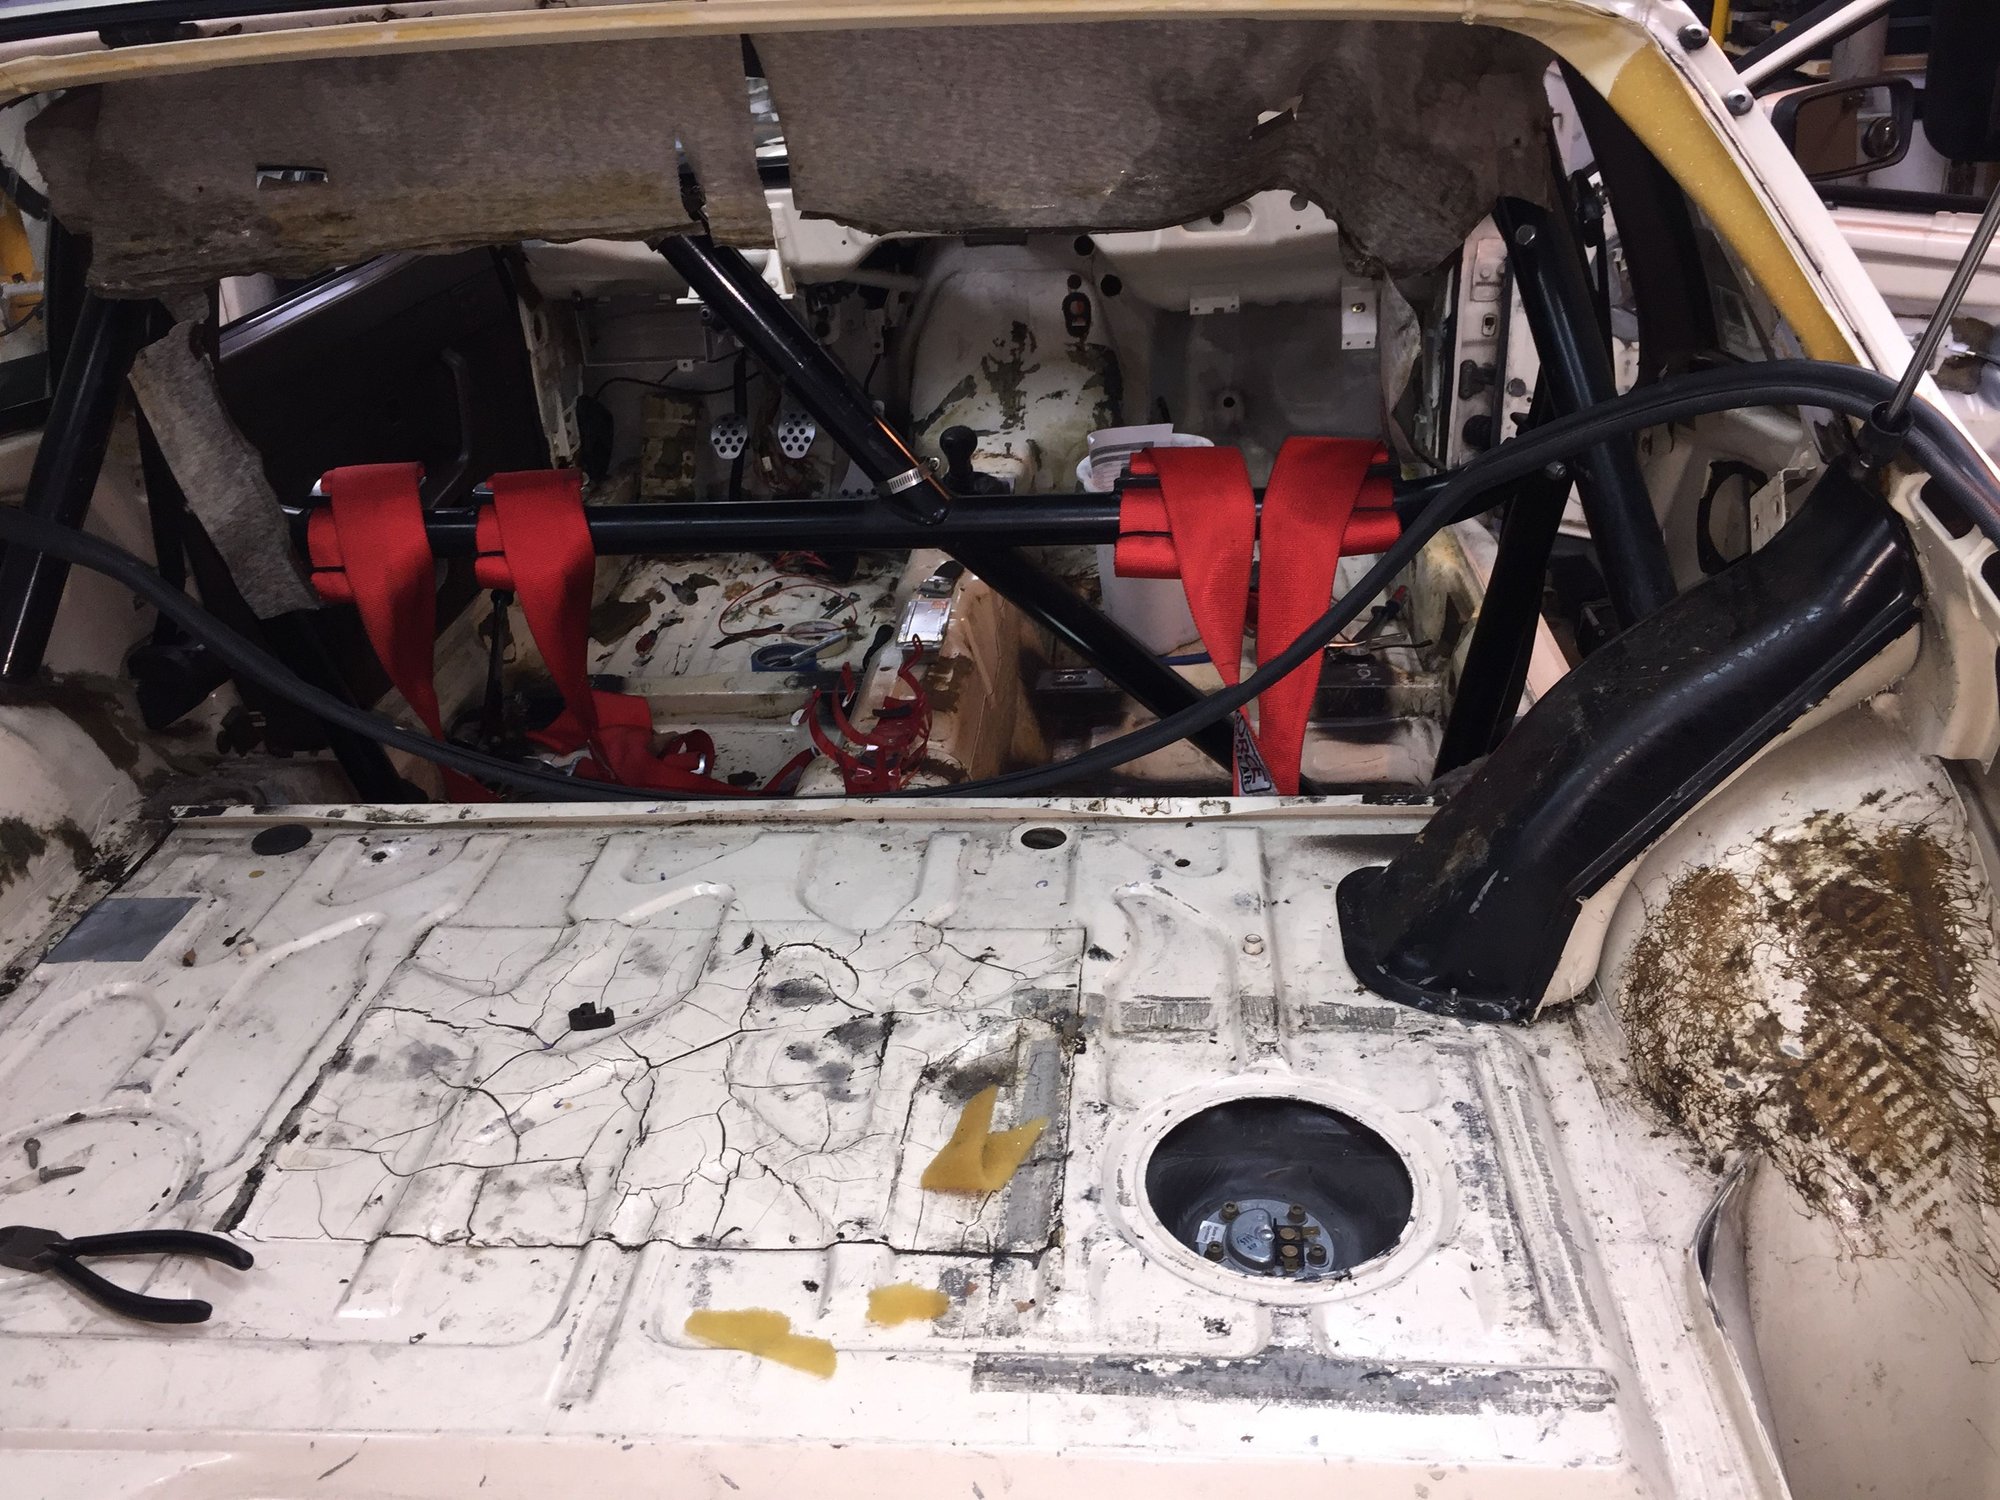
Here is the current status. Engine out, donor engine torn down and most of it is in the hands of Lindsey Racing right now. The seats are out. All the carpet has been removed, as well as the dash and everything behind it. All wiring harnesses except one have been removed and had most of the unnecessary wires removed. The motor that allows you to open the hatch from the driver's seat has been removed.
Next on the list:
Remove roll bar
Remove roof lifting electrical and mechanical bits
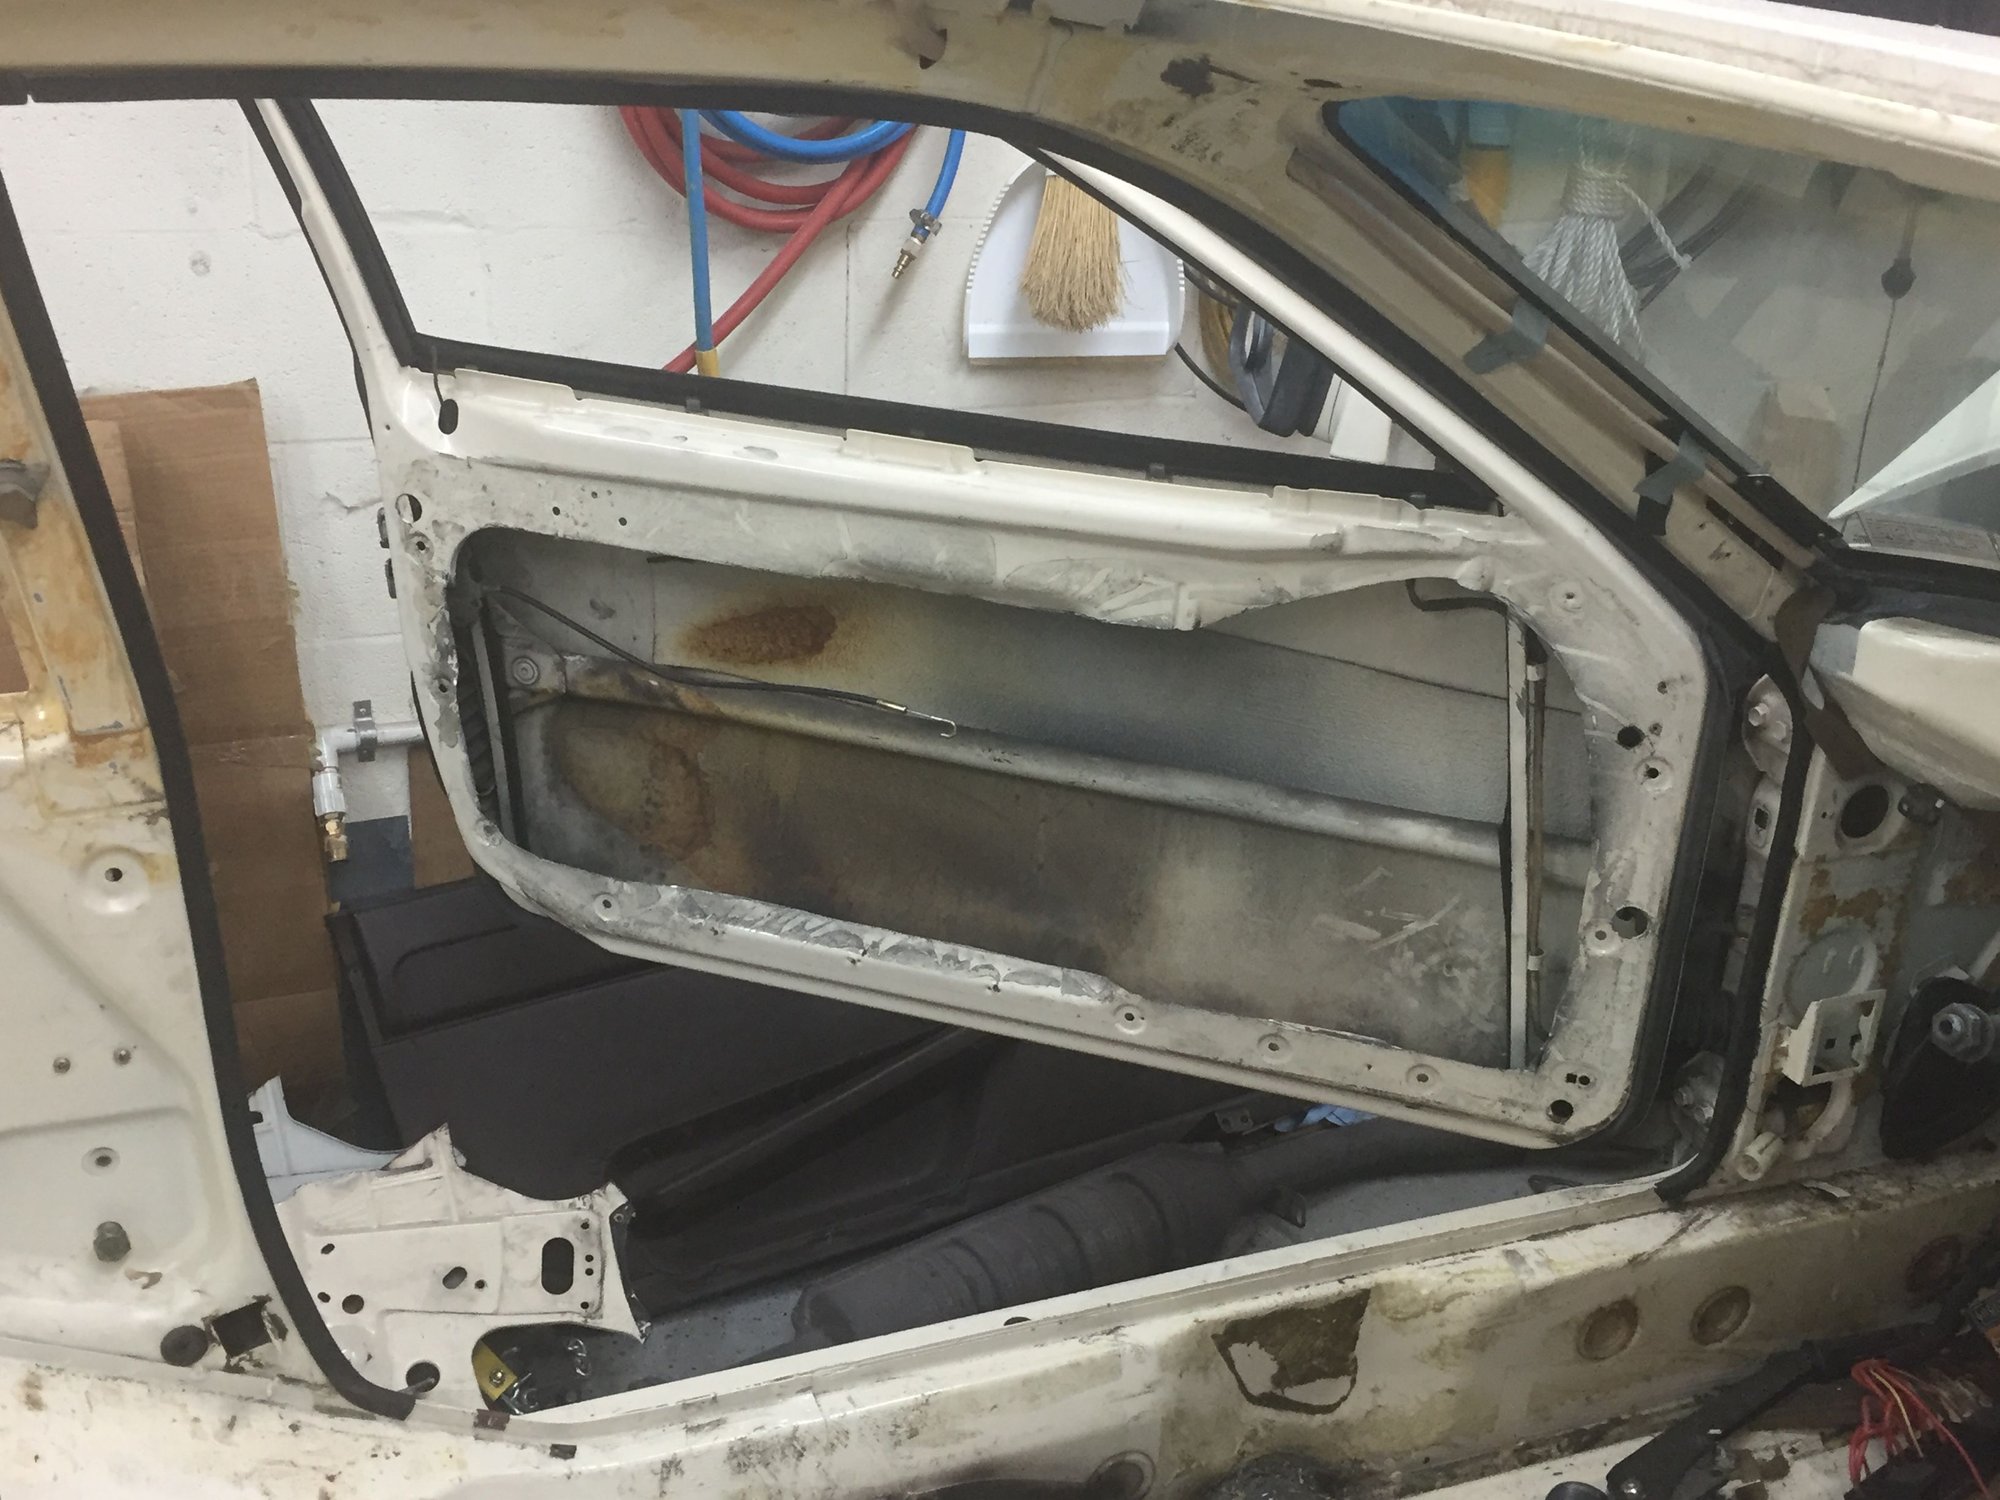
Gut the doors
Cut the inner door panels to clear the cage
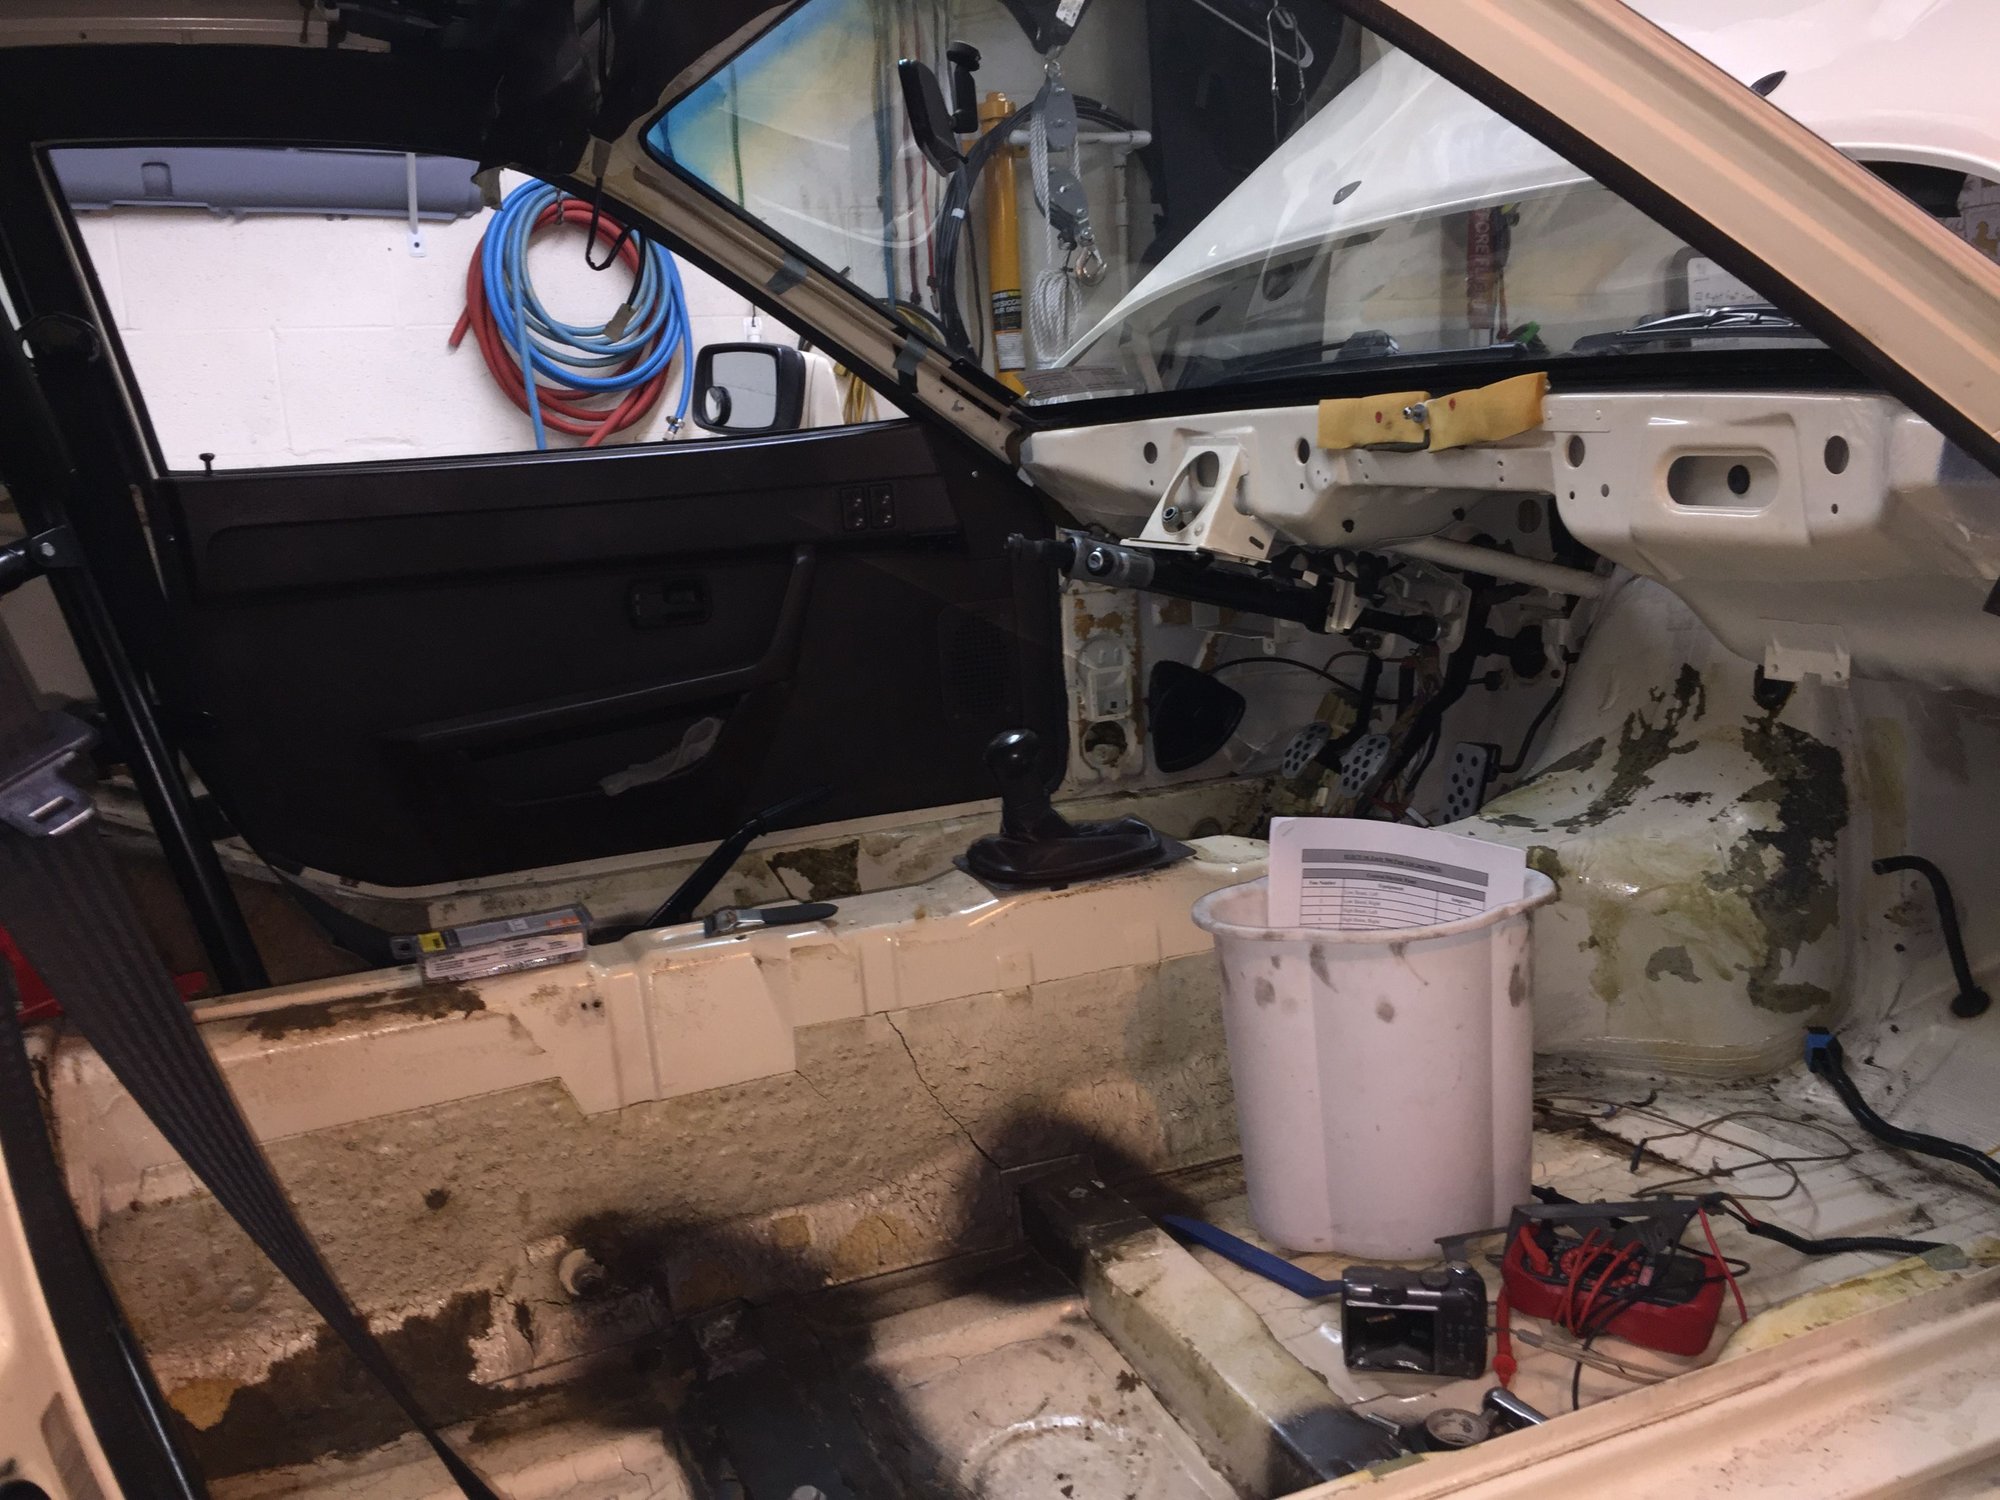
Clean up all the glue and remaining bits of insulation
Remove the windshield (for cage installation)
Have cage welded in
seal up the holes in the firewall left from the AC, heat and vent delete
Install some heat insulation on the firewall
Prime and paint interior
Wire in a battery cut off switch
Modify dash to include the gauges I had in the center console and some new switches
Put it all back together
Build, install and break in the engine
Working a few hours at night and most weekends, I hope to have it all done by March.
Here is how she sits now.
Glenn, no wonder you were too busy to take my phone call One thing I would suggest is coordinate with your cage builder as to whether you want to be able to retract the window glass with the doors closed. My "Nascar door bars" were fabricated with an arch into the door cavity such that I can only close the doors with the windows up. Which means I have to take the windows all the way out to be DE legal. Not a crisis but if I had to do it again, I would get less arch on the door bars so that I could close the door with the windows up or down. Another thing I discovered is that Porsche sound deadening material does not respond to the "dry ice method". There are various threads on this but I think a heat gun and an air operated chisel may be the way to go. Good luck with the project. Don't park next to me next time. Both 944's parked near me at Mid-Ohio died!
What camber plates are you using? And, is this a DE car or built for a specific class?
Although it is a DE car, I have an eye on racing. So, the build is being done with both NASA Spec and PCA Cup rules in mind.
the camber plates are Ground Control and the cage will be a Hanksville Hot Rods kit, which is designed to meet the requirements of several sanctioning bodies.
Originally Posted by harveyf
Glenn, no wonder you were too busy to take my phone call One thing I would suggest is coordinate with your cage builder as to whether you want to be able to retract the window glass with the doors closed. My "Nascar door bars" were fabricated with an arch into the door cavity such that I can only close the doors with the windows up. Which means I have to take the windows all the way out to be DE legal. Not a crisis but if I had to do it again, I would get less arch on the door bars so that I could close the door with the windows up or down. Another thing I discovered is that Porsche sound deadening material does not respond to the "dry ice method". There are various threads on this but I think a heat gun and an air operated chisel may be the way to go. Good luck with the project. Don't park next to me next time. Both 944's parked near me at Mid-Ohio died!
Harvey, I've had a bunch of other stuff on my plate, too. Nothing personal.
The side windows will be an "in or out" proposition. I may use a plexiglass window with a slide opening on the driver's side.
The thin sound deadening that is affixed directly to the floor and tunnel, will be left alone. I figure it is not worth the effort and can always be removed later, if needed.
I am looking forward to parking next to you. I don't think you had anything to do with the massacre at Mid-Ohio. Many cars died that weekend and they were parked all over.
Originally Posted by GPA951s
Nice project... you can check out how i did my cage in my thread when i build my car...A Racecar is born Basically a winter build..
A Multitool is the way I stripped the sound deadening out of my car... Super fast, then wipe clean with lacquer thinner..
I used a multitool and heat gun on my 911. It worked well.
Tonight, I got the bolt-in roll bar unbolted and out of the car. Only one bolt had to be cut off. The rest just took a little muscle. The job was made more difficult by not having the correct tools. The nuts and bolts are SAE and all my tools are metric. Who uses SAE hardware on a German car? Anyway, the roll bar is out and will be going up for sale.
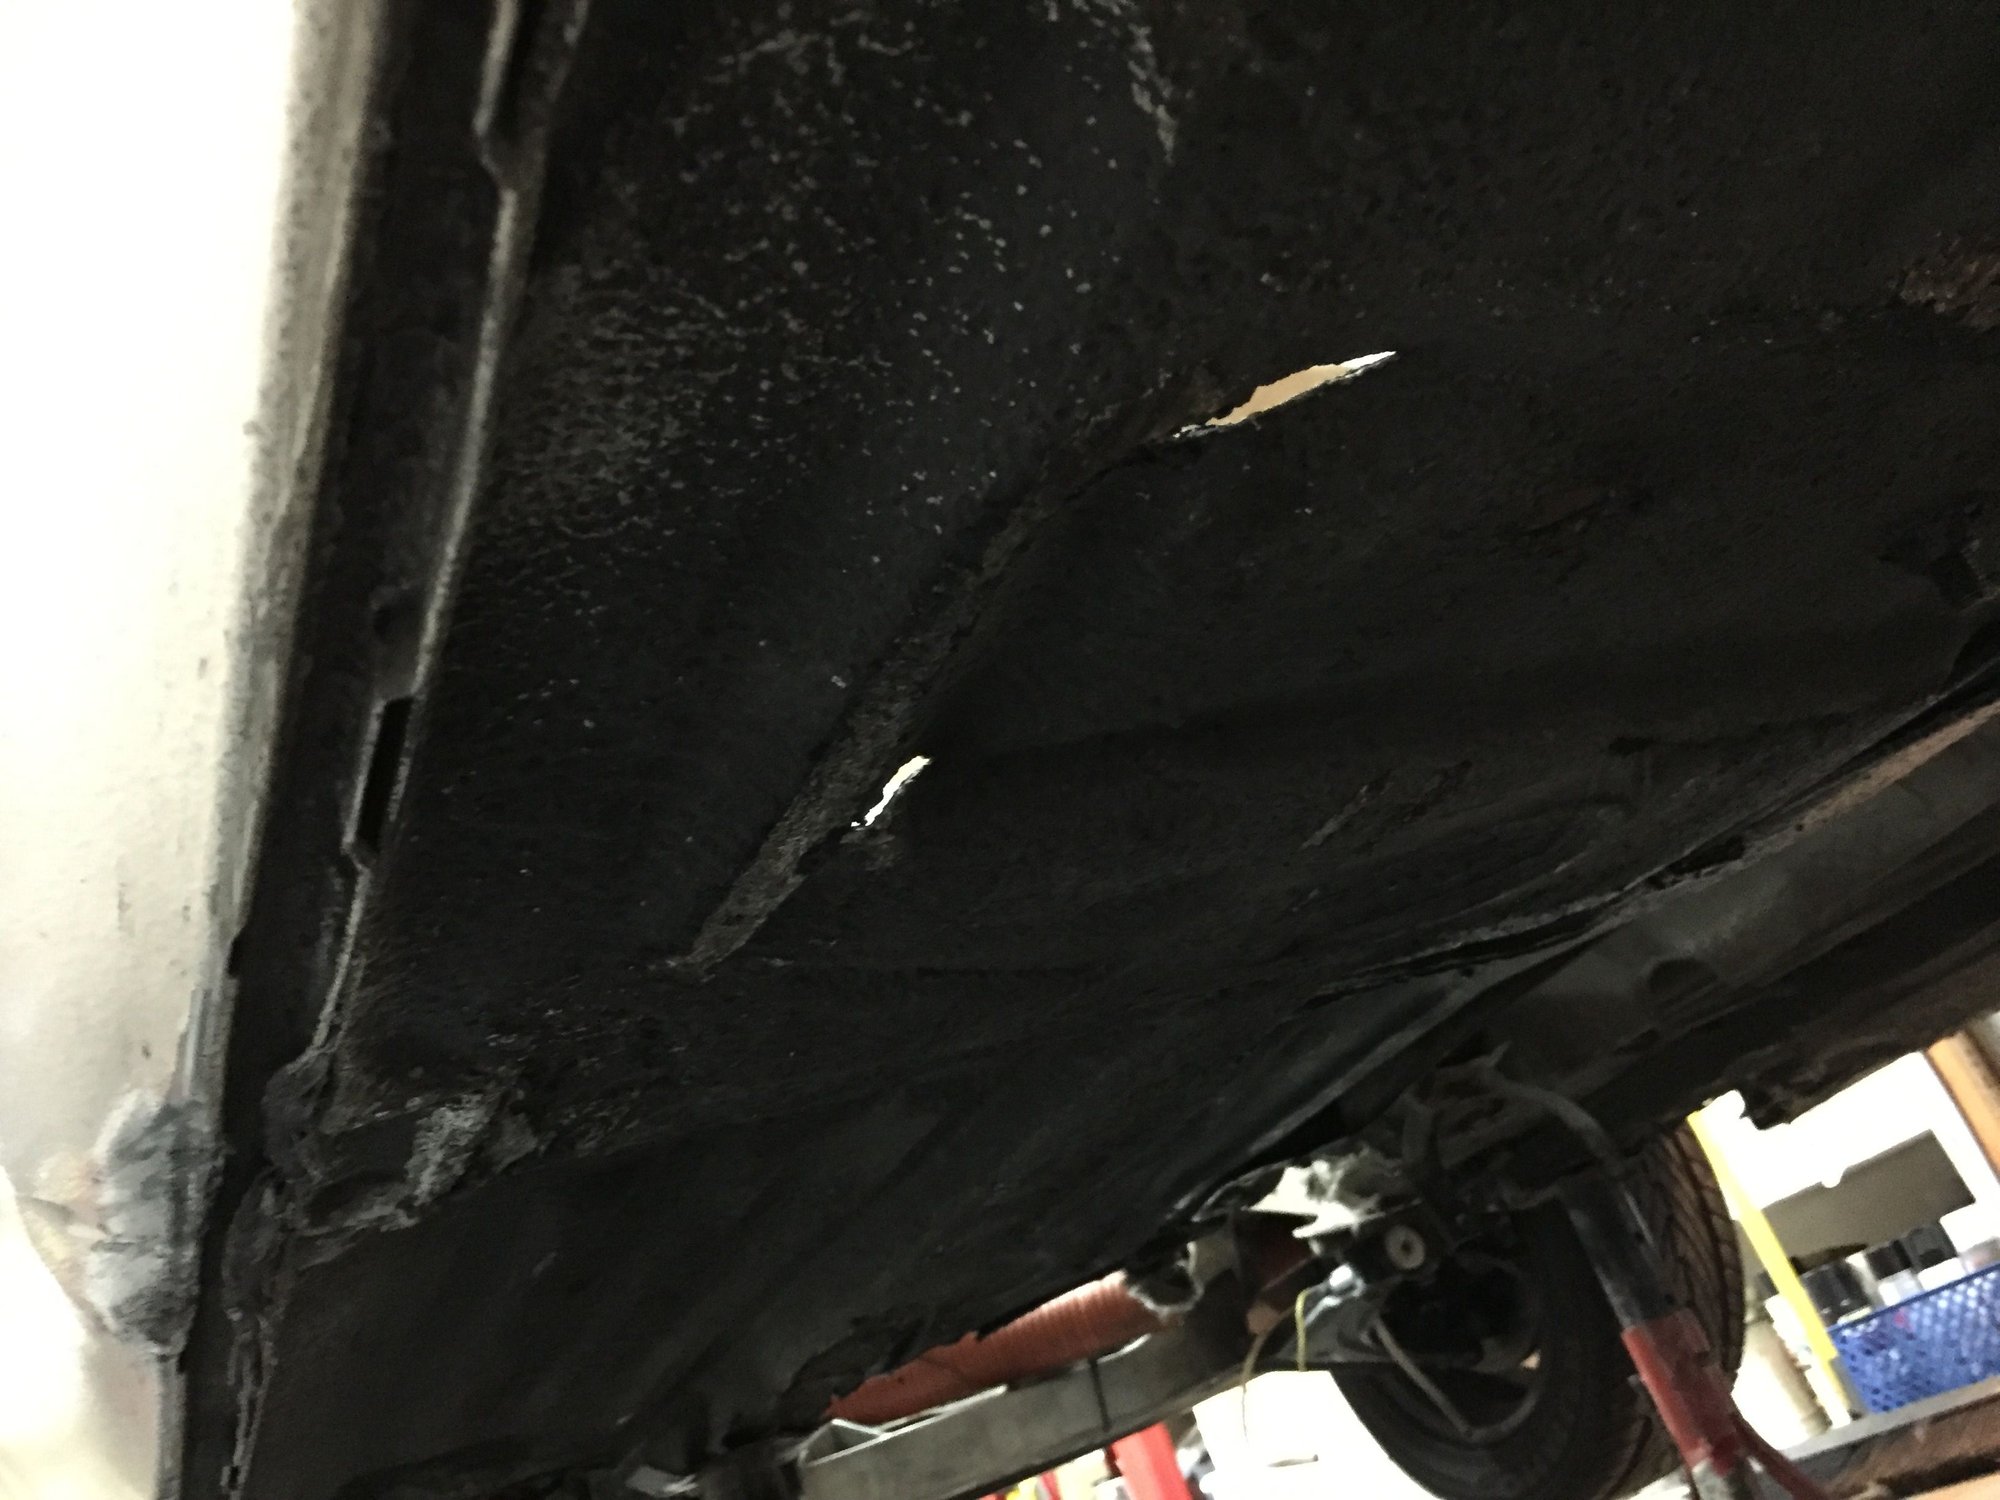
One interesting discovery has added to my to-do list. While I was working on the roll bar bolts under the car on the driver side, I noticed light coming through the floor where it should not be able to.
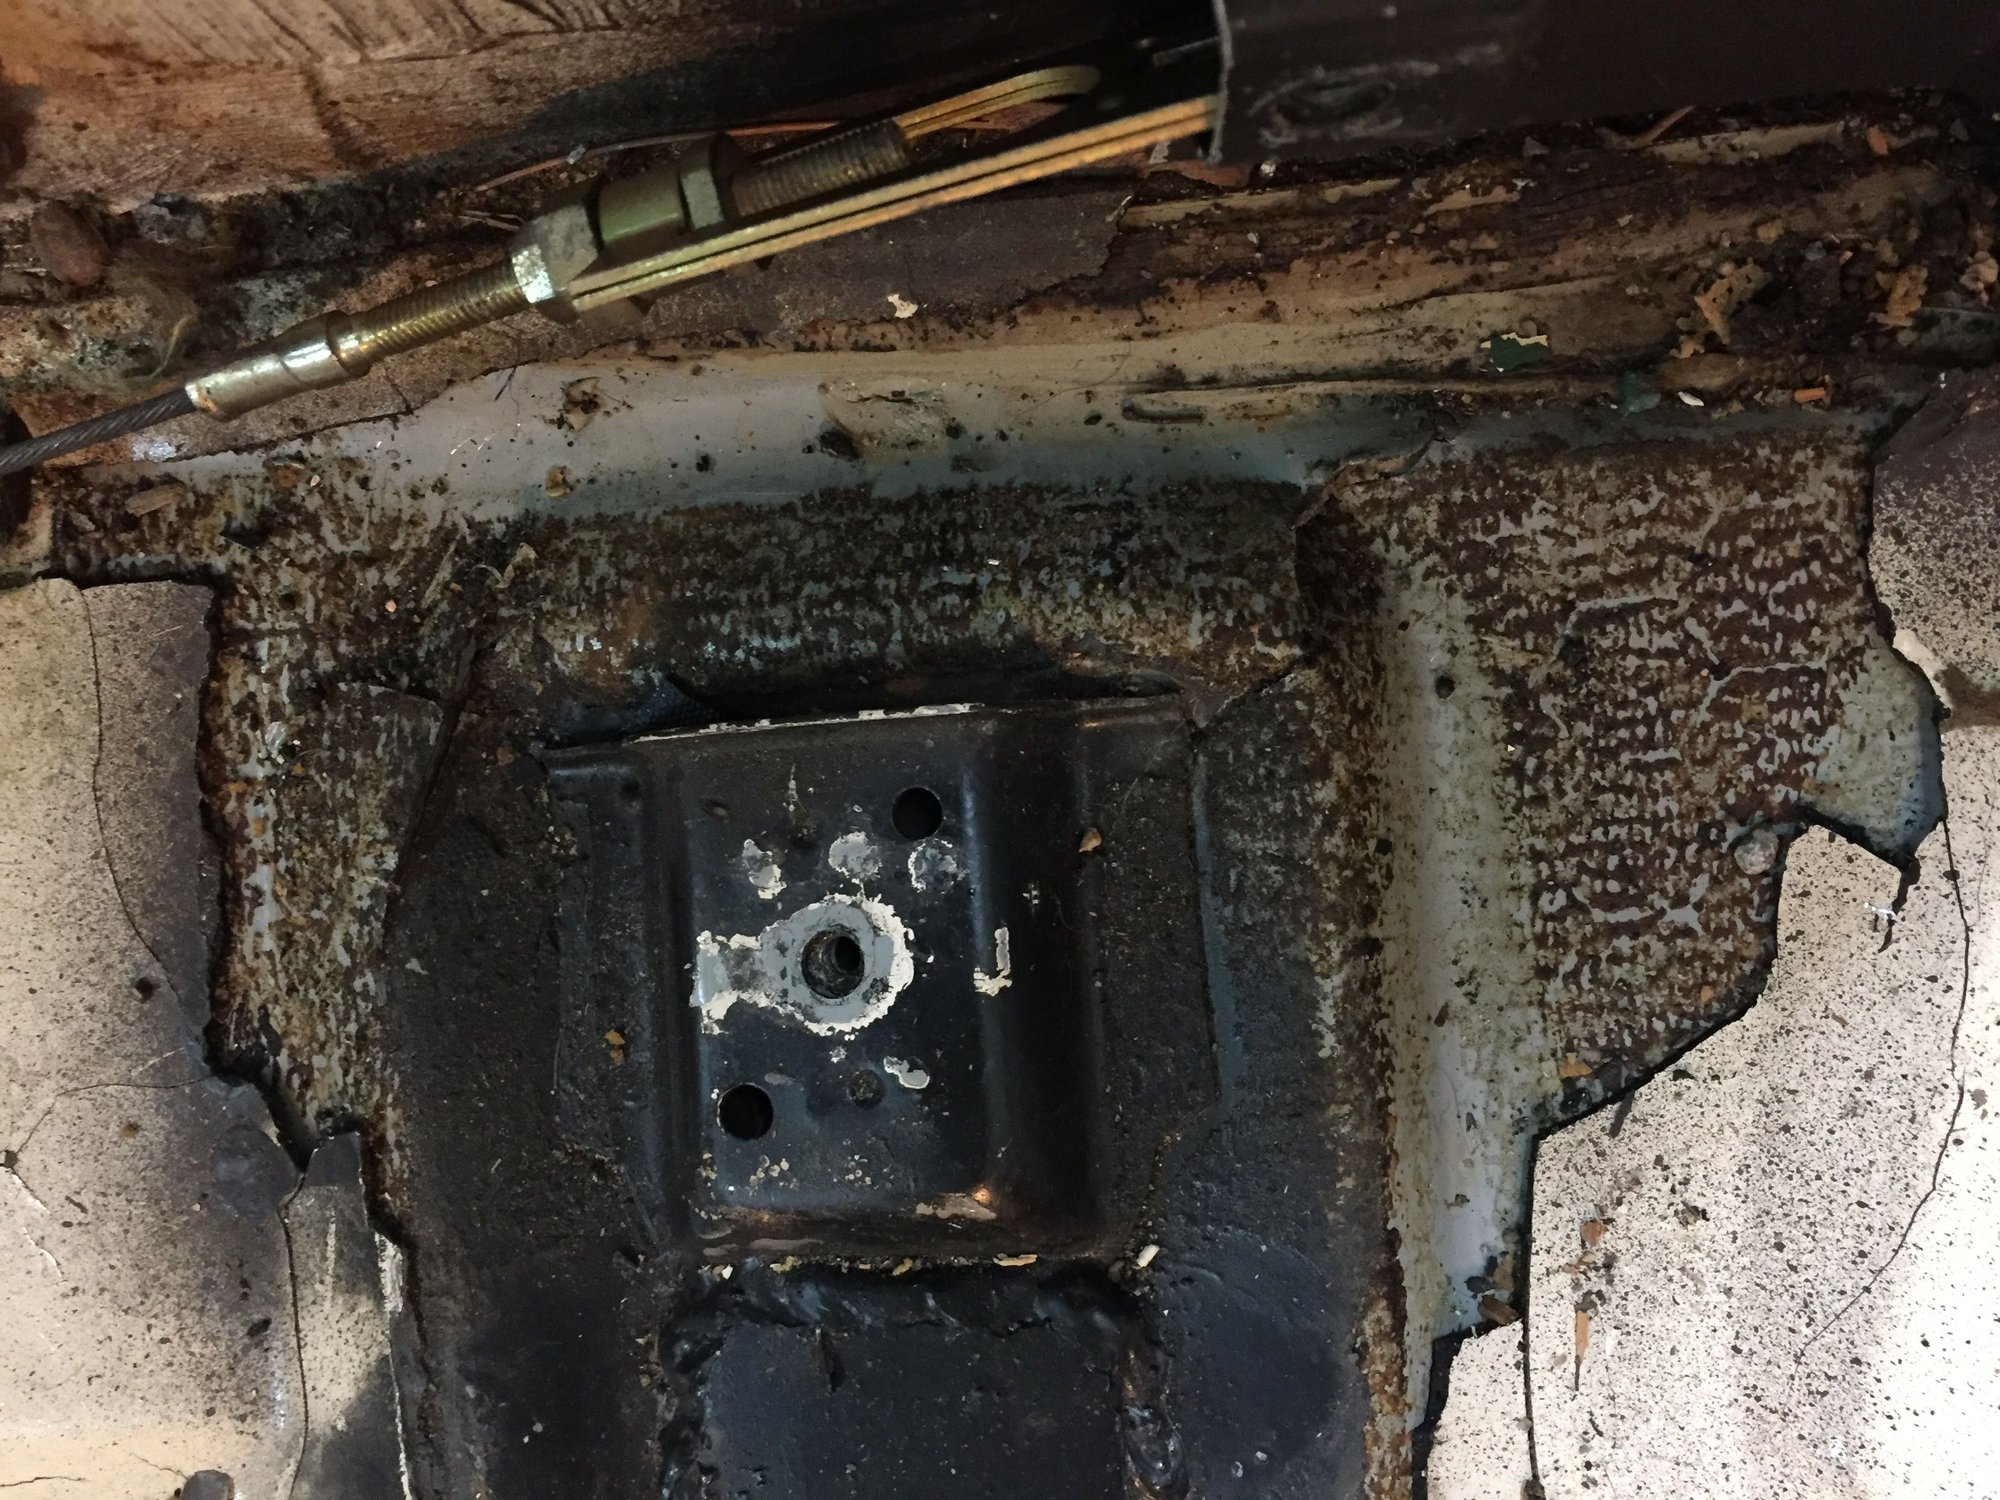
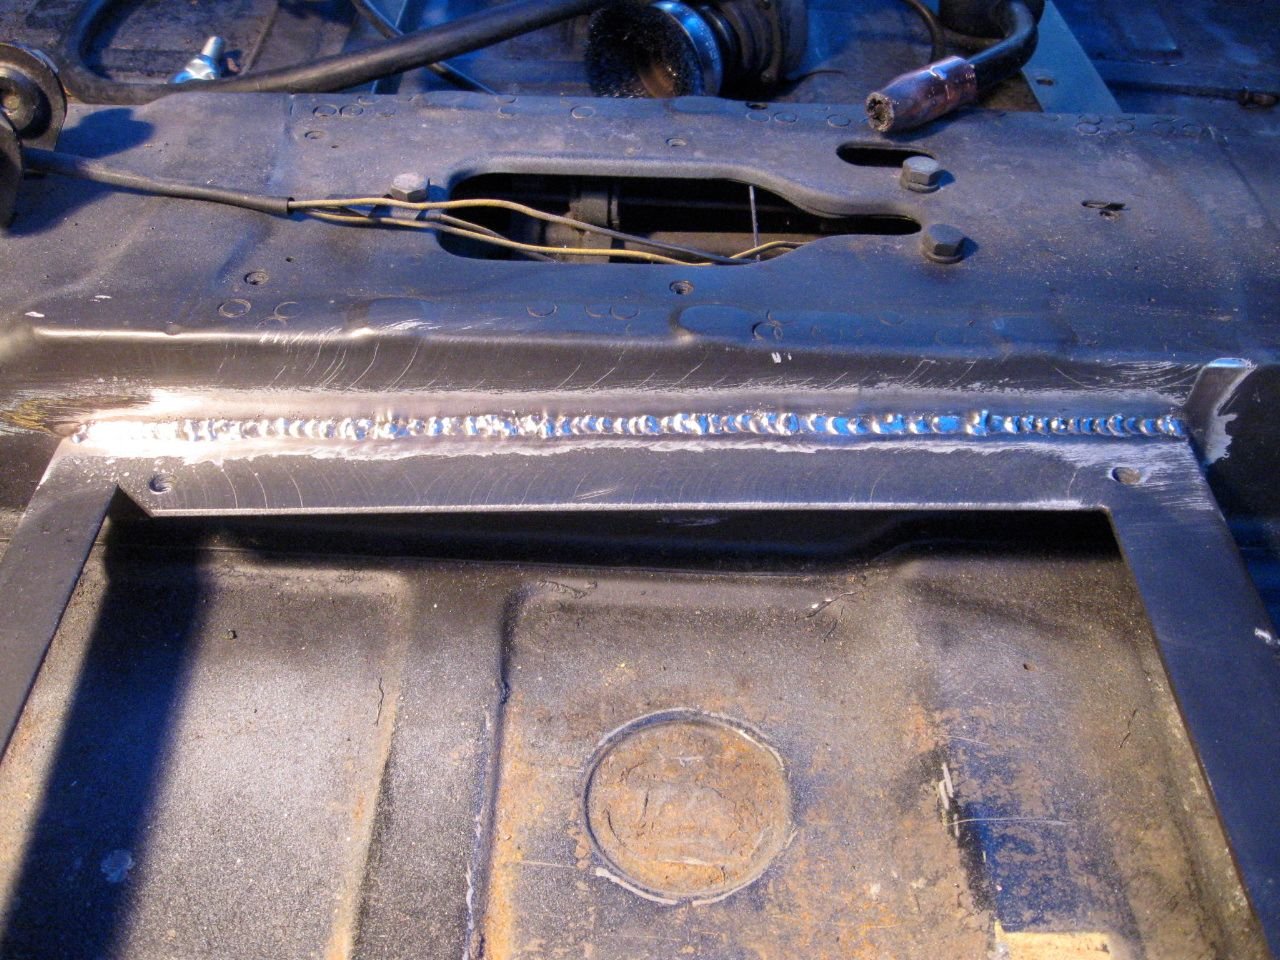
Exploring the source from above, I found cracks near the rear left seat mount.
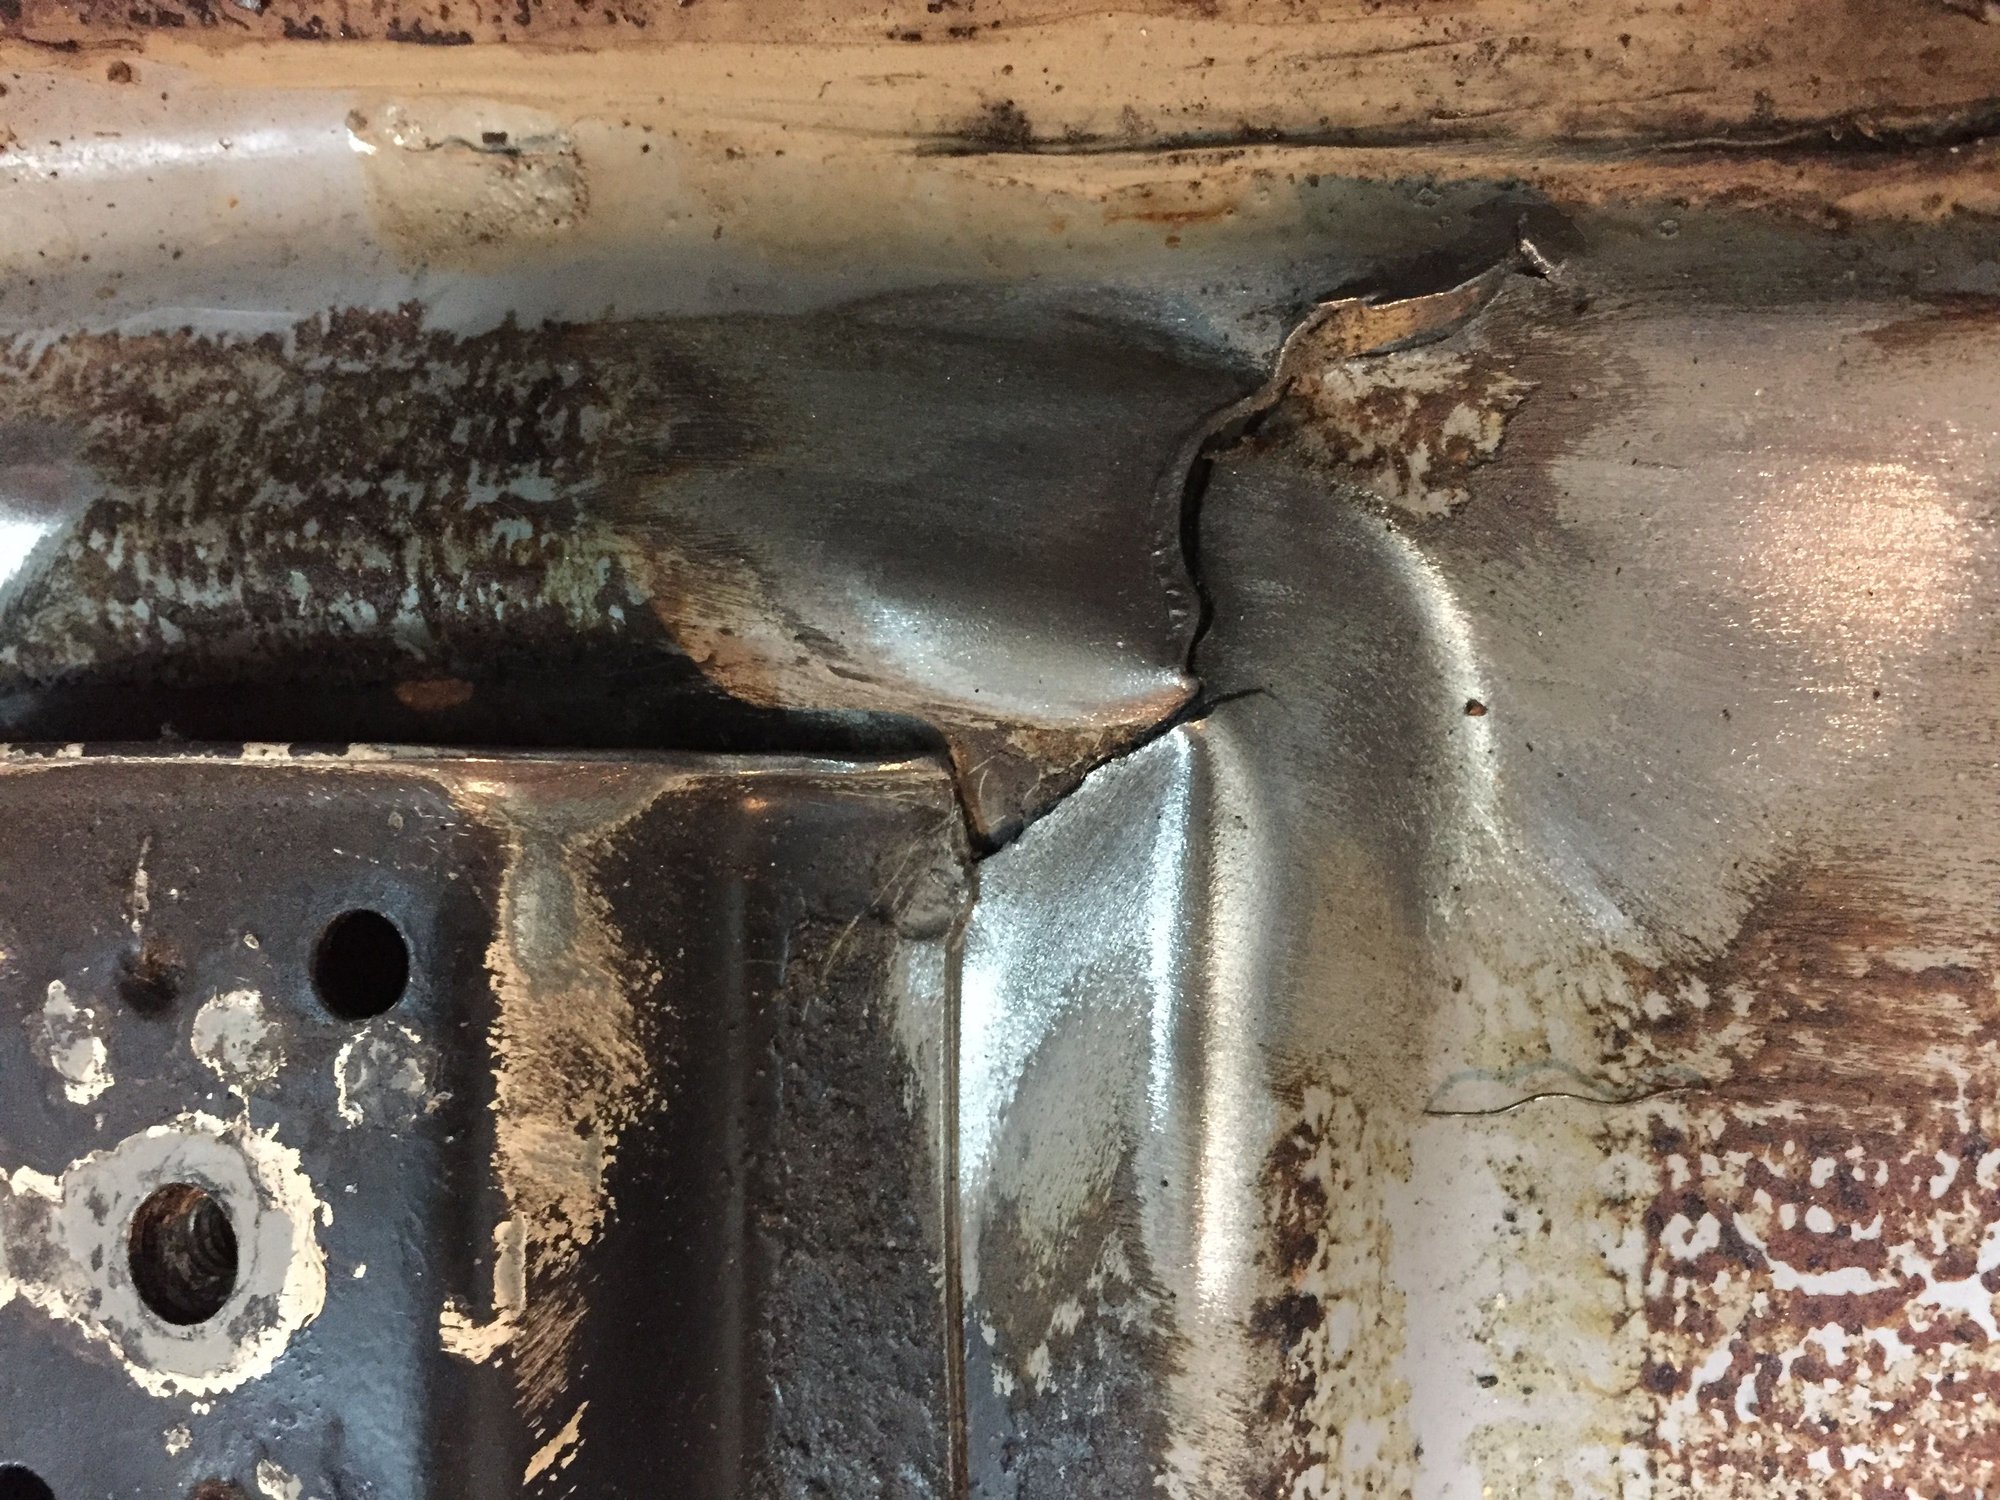
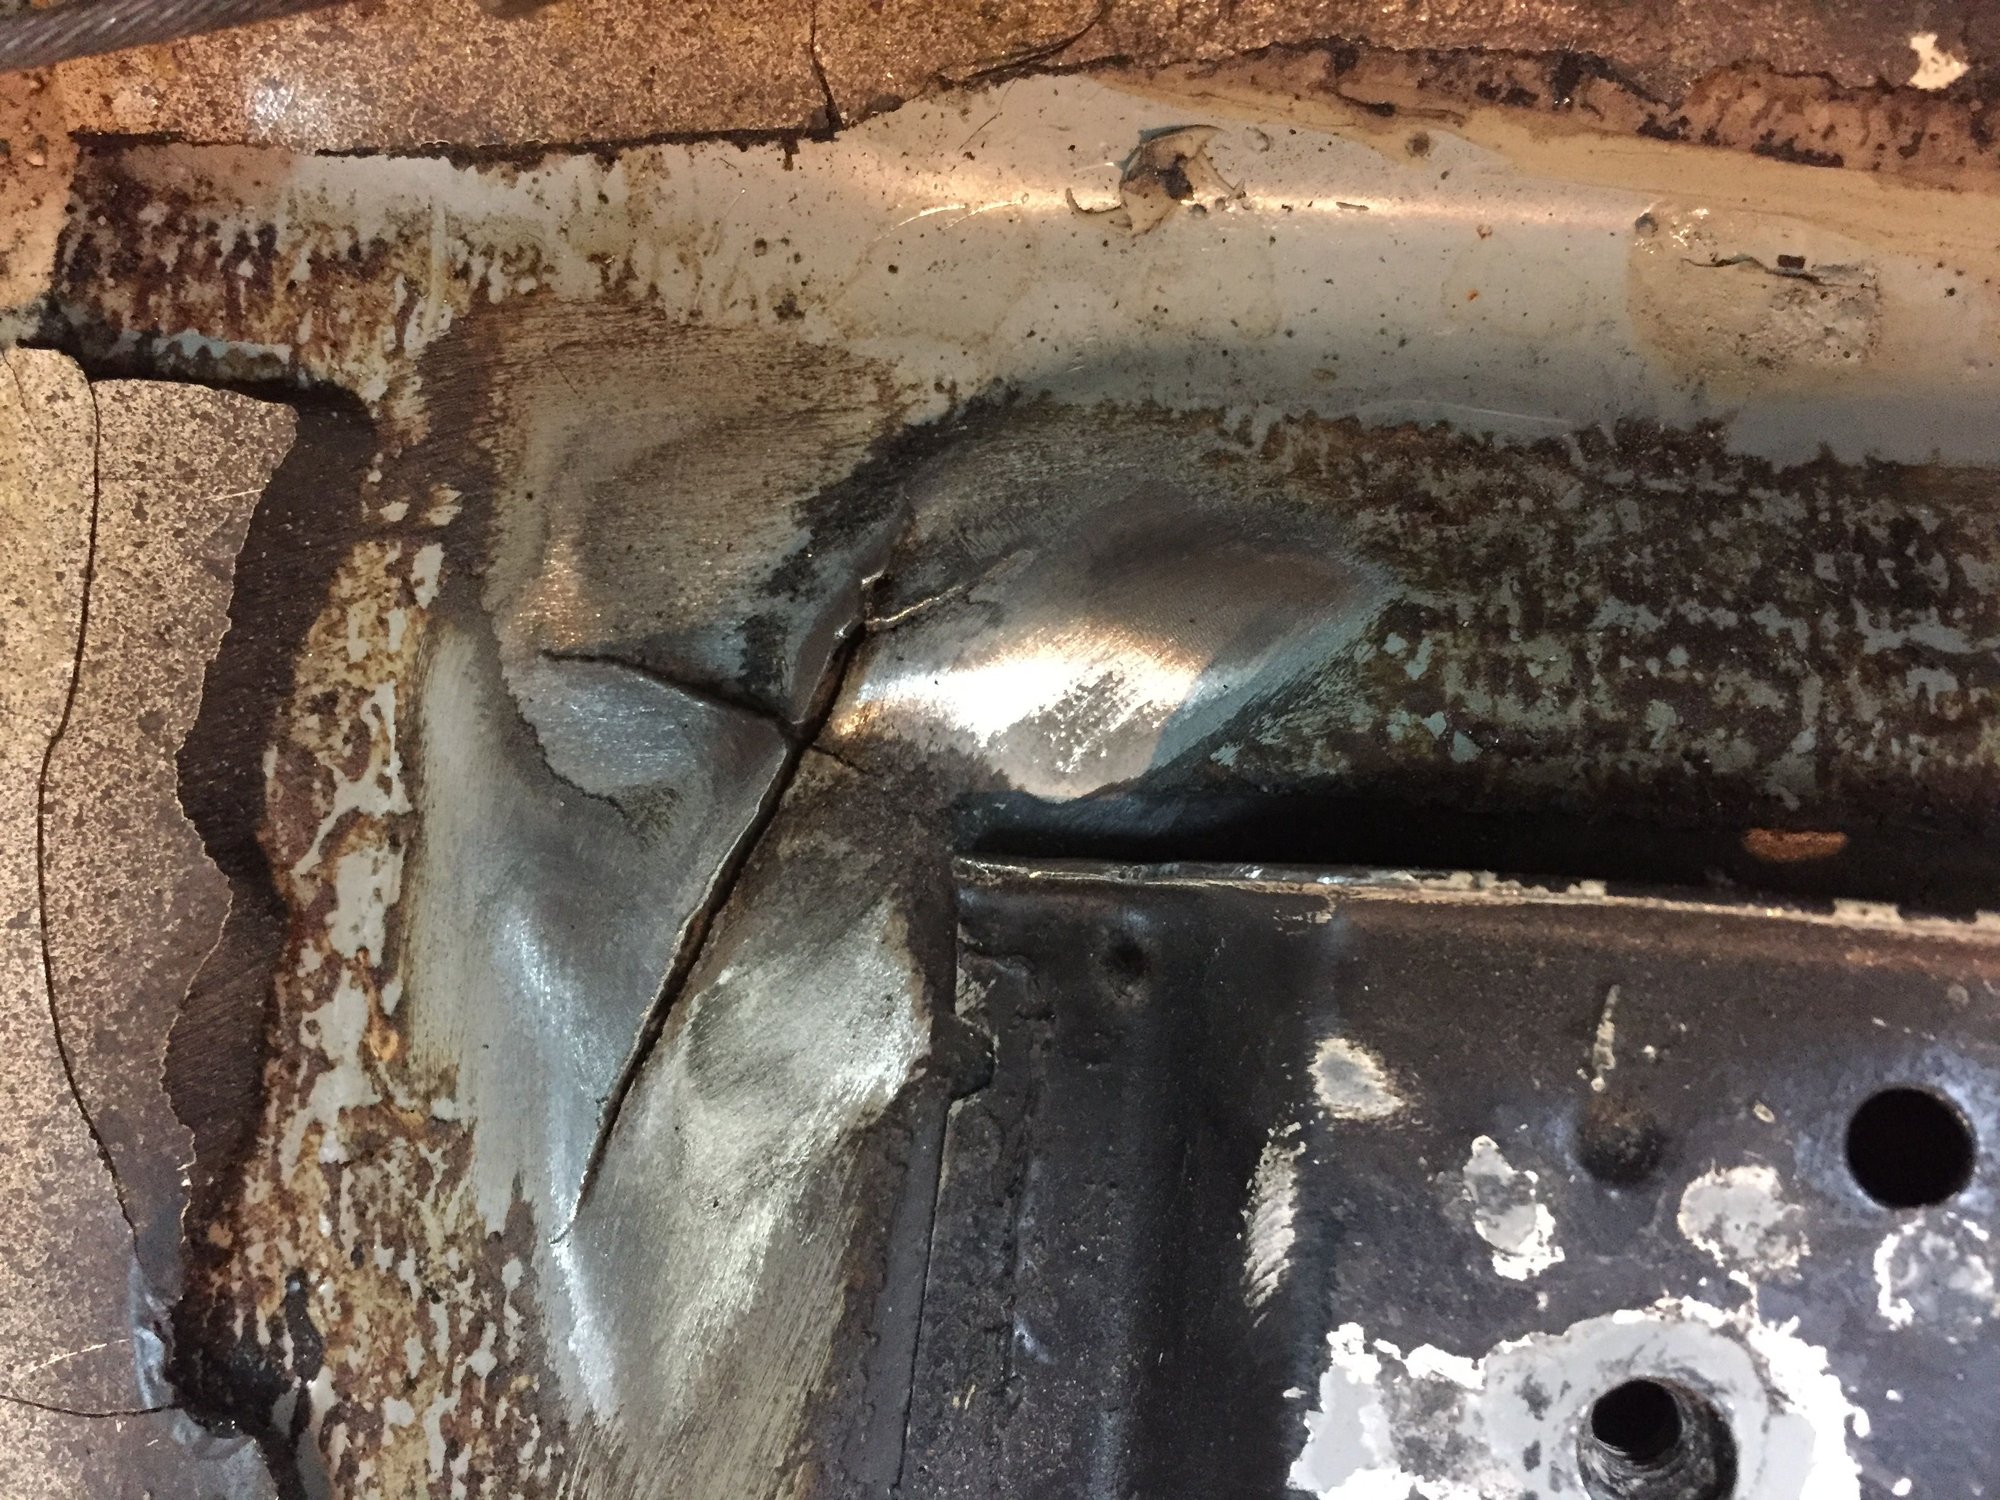
After a little application of wire wheel, you can see them clearly.
The seat mount is also slightly depressed. I checked the passenger side and found the same mount to be depressed but no cracks. This is a failure I had not heard of before. I am assuming it is a weakness that only shows up after many hard track miles.
It will have to be welded up but I'll be adding some sort of reinforcement, too.
With that discovery, I figured it was time to stop for the night.
Hi Glenn,
A suggestion is to drill a hole larger than the floor pan cracks at the end tip to prevent the crack from "spreading" prior to welding the crack. The hole acts as a stress relief.
Good luck with the build and the project documentation is interesting.
Happy Thanksgiving,
Tom
Hi Glenn,
A suggestion is to drill a hole larger than the floor pan cracks at the end tip to prevent the crack from "spreading" prior to welding the crack. The hole acts as a stress relief.
Good luck with the build and the project documentation is interesting.
Happy Thanksgiving,
Tom
Thanks Tom. I thought stop drilling a crack was used when you are not going to weld the crack and just want to stop it from spreading. But it certainly can't hurt. I'll do that.
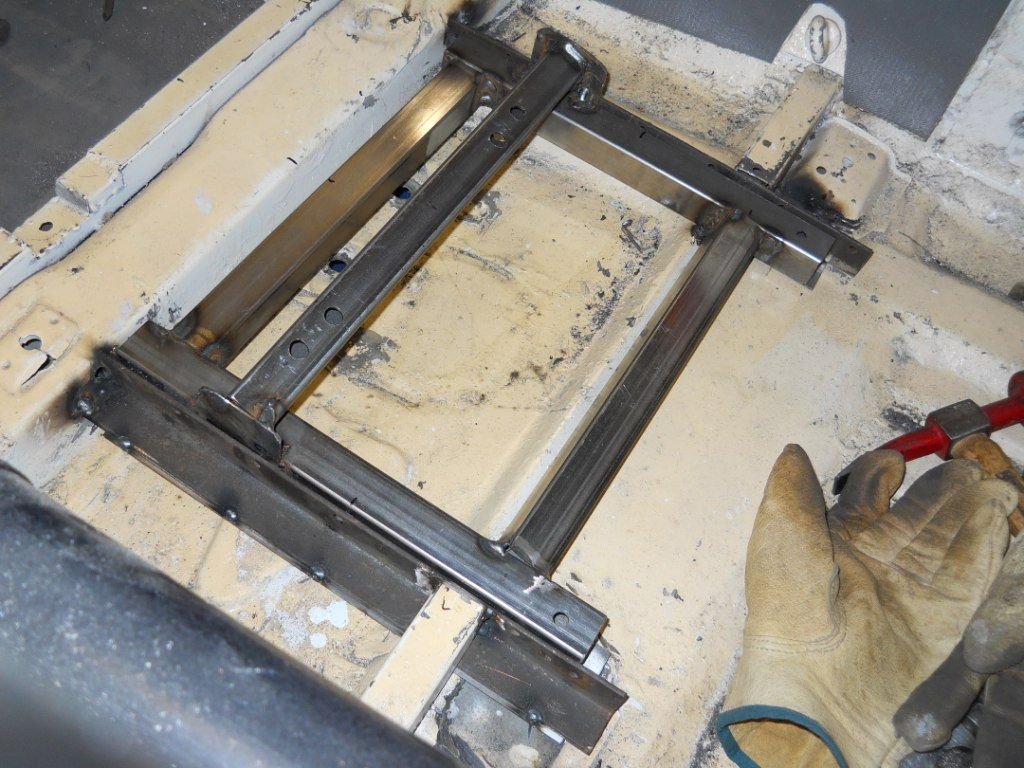
Glenn, that whole attach the seat to the floor thing made me nervous, both from a strength standpoint and due to the fact that I have had the stock captive nuts strip or spin, at which point you are really hosed. I built up a structure as shown in the photo and mounted my aftermarket aluminum seat shell on it. If I were to stick with the floor mount, I would drill through the captive nuts and go with substantial washer plates on the underside of the floor. Also, I suspect you will need a brace from the harness bar to the seat back, as required by the regulations. Of course, I'm about a foot shorter than you are so was willing/able to give up the space under the seat without my helmet hitting on the roof!
Last edited by harveyf; 11-28-2019 at 11:01 AM.
Reason: update
That is pretty beefy, Harvey. I picked up a used Sparco ADV once the side mounts arrive, I'll start planing my seat mount. As you mentioned, I am tall and need all the head room possible.
When I did my 911, I fabricated a simple lower mount and welded it to the center tunnel and the outside tunnel (I guess it is a tunnel).
Not a whole lot of progress on the car. I've been finishing up a bathroom remodel and working on rebuilding a retaining wall (when weather permits). But I do have some updates to share.
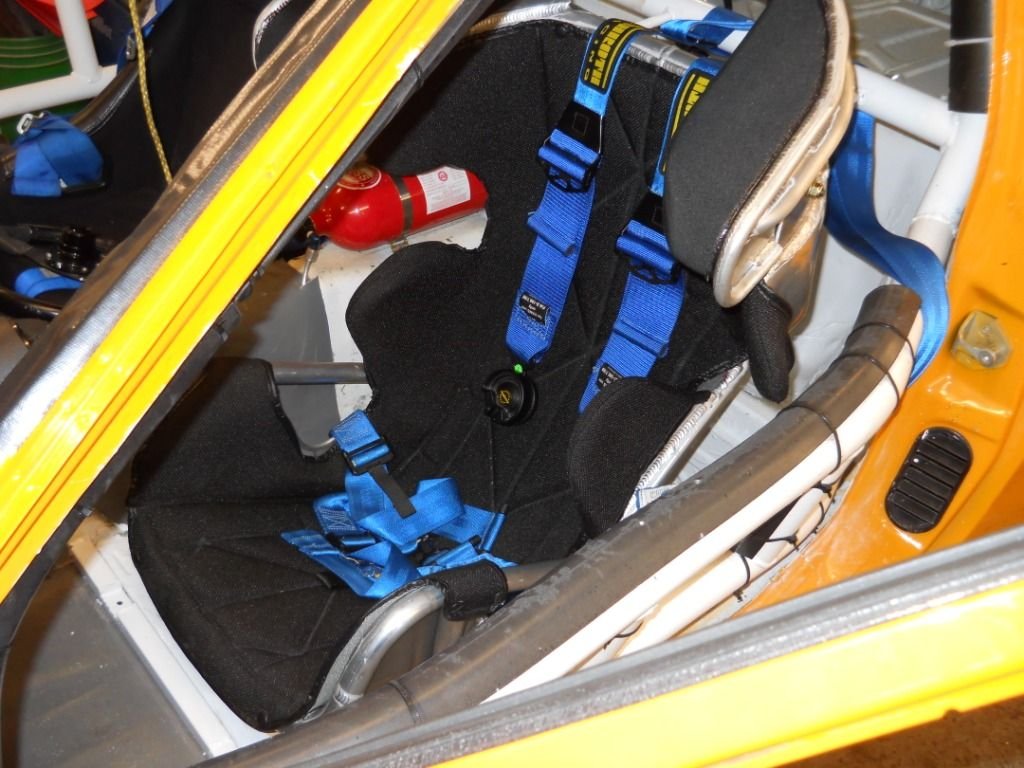
I did a rough test fit of the Sparco seat to get a measurement of where I need the harness bar on the cage. I don't think the seat is going to work for me. I sit too high and the holes for the shoulder harness are too low. It is better with the bottom cushion removed but still not good. I used my old seats to get the harness bar measurement and will plan to upgrade the seats at a later date. I'll need to do more research and go sit in a few. Glad the Sparco seat was a gift. Anyone wanna buy a set of aluminum Sparco side mounts?
With the harness bar measurement, I placed an order for a cage kit from Hanksville Hotrods. Each kit is custom built and test fitted in a 944 before it is shipped. There are a couple orders ahead of mine so it will be a few weeks. I'm having it shipped directly to the local shop that will weld it in for me. I'm penciled in on their calendar for mid-January. I'll have to finish stripping the interior before then. Not that there is much left to remove. But I'd like to have all the old glue removed and most of it primed before the cage goes in. Oh, and I have to remove the windshield.
I had bags and bins of stuff I stripped off the car taking up space in the garage so I started separating the trash from the saleable parts. And I weighed it, too. So far, 145 pounds removed. 45 pounds of that was the roll bar which will be more than replaced with the additional weight of a cage. Still happy with the weight removed that is not being replaced.
I hope to spend more time on the car in the next week or so.
I have been fighting the seat mount problem for a long time on my resto project, where I had to mount new seats in a 83 model car. Finally I woke up with an idea..I drilled out the holes on each side of the existing mounts, and dislodged all of the captive nuts, fabricated a "piggy back" piece to upgrade the rear mount. I tried using epoxy to hold in new nuts until I could get the seat mounted, because with the seat in the way, there just isn't room to install and hold the new nuts, which are nylock. Anyway, that didn't work, so I'm going to weld in Tee nuts into the mounts, and try to grind them off flush. Since nylocks won't stand the heat, I can't use those either. I'll just loctite the bolts into the Tee nuts.Hopefully, I wont have to fabricate a plate to hold the Tee or other captive nuts, to be welded in..just my two cents. Hope this helps.Thanks
My race car had the same cracks as yours when i got it ... the PO never mentioned that to me as i bought the car sight unseen , although he
did forward me dozens of pictures, of the good parts i guess.
Take your time with the cage, i had to bypass the sliders as the PO was 5'6 and weighed well above 200 lbs ... i'm 5'10 and weigh 190 and my helmet was
hitting the front transverse rollbar so i had to mount the seat directly to the floor.You seem like a good welder so those cracks shouldn't be too much of an issue.
I kind of figured the guy before me was jacking the car directly by the floor under the seats and that pretty much destroyed the underneath of the car, but it is what it is
and it held up to a 70 mph frontal impact after i got t- boned on the first lap of a race.
I'm not familiar with the Hanksville cage , but the one good thing about my car is that the PO had a new cage professionally installed in the car before he sold it
which is probably the best thing about the car.
You're going to have a nice Winter project on your hands !
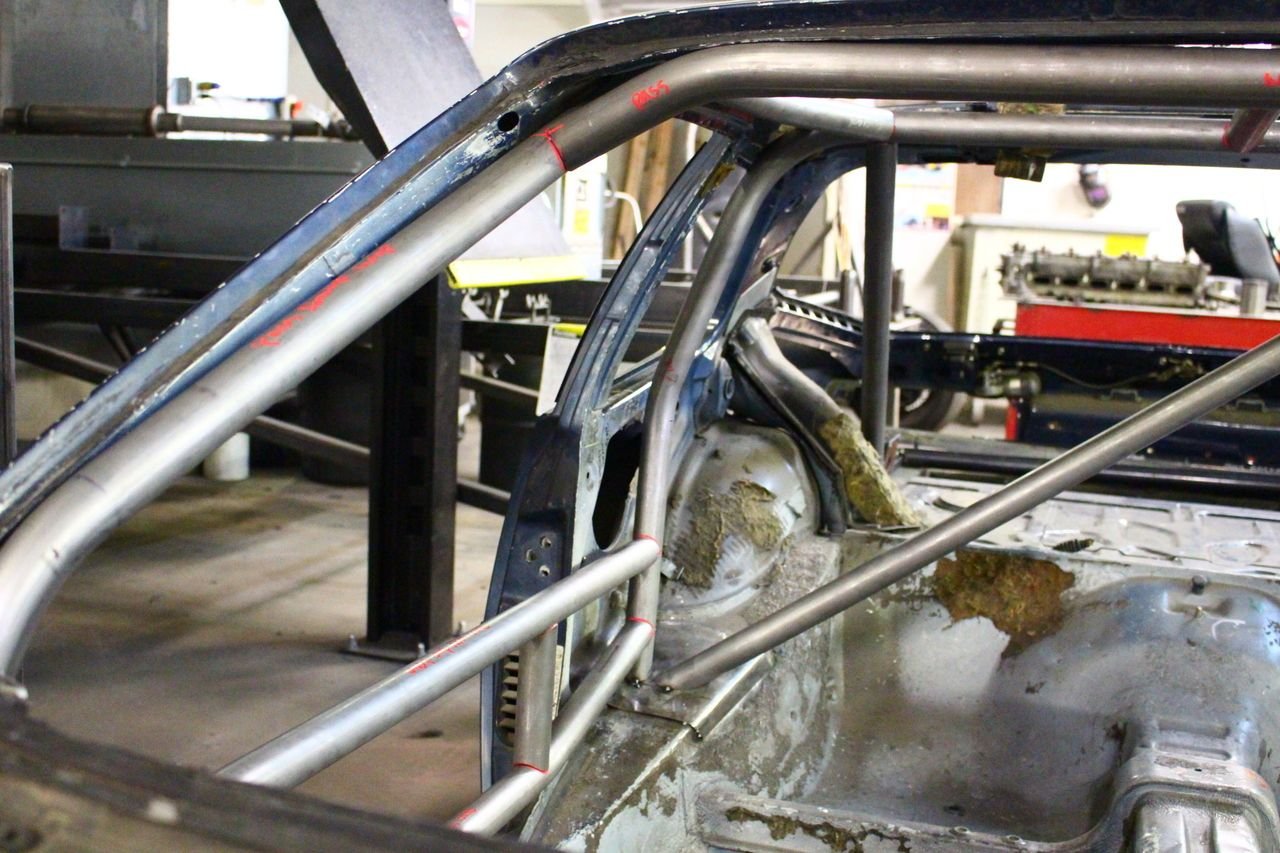
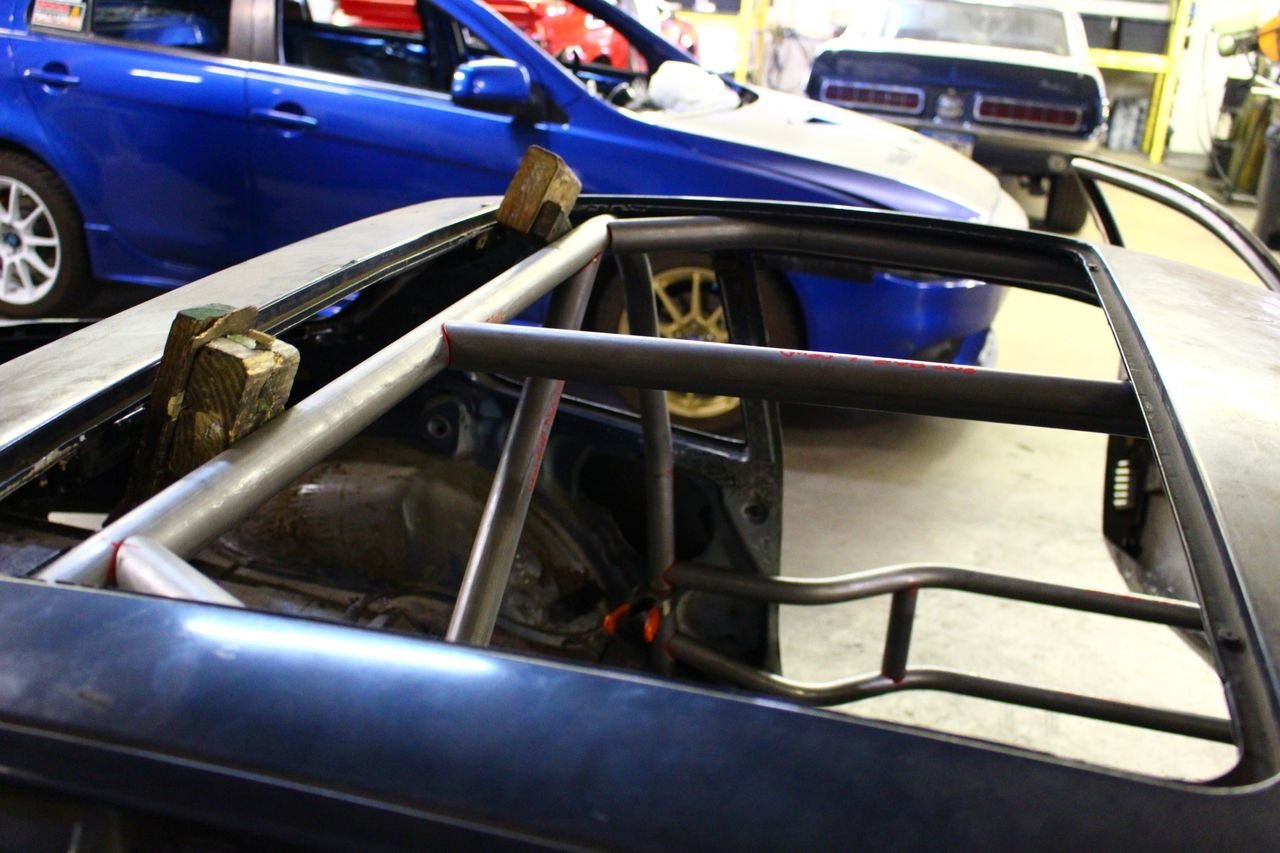
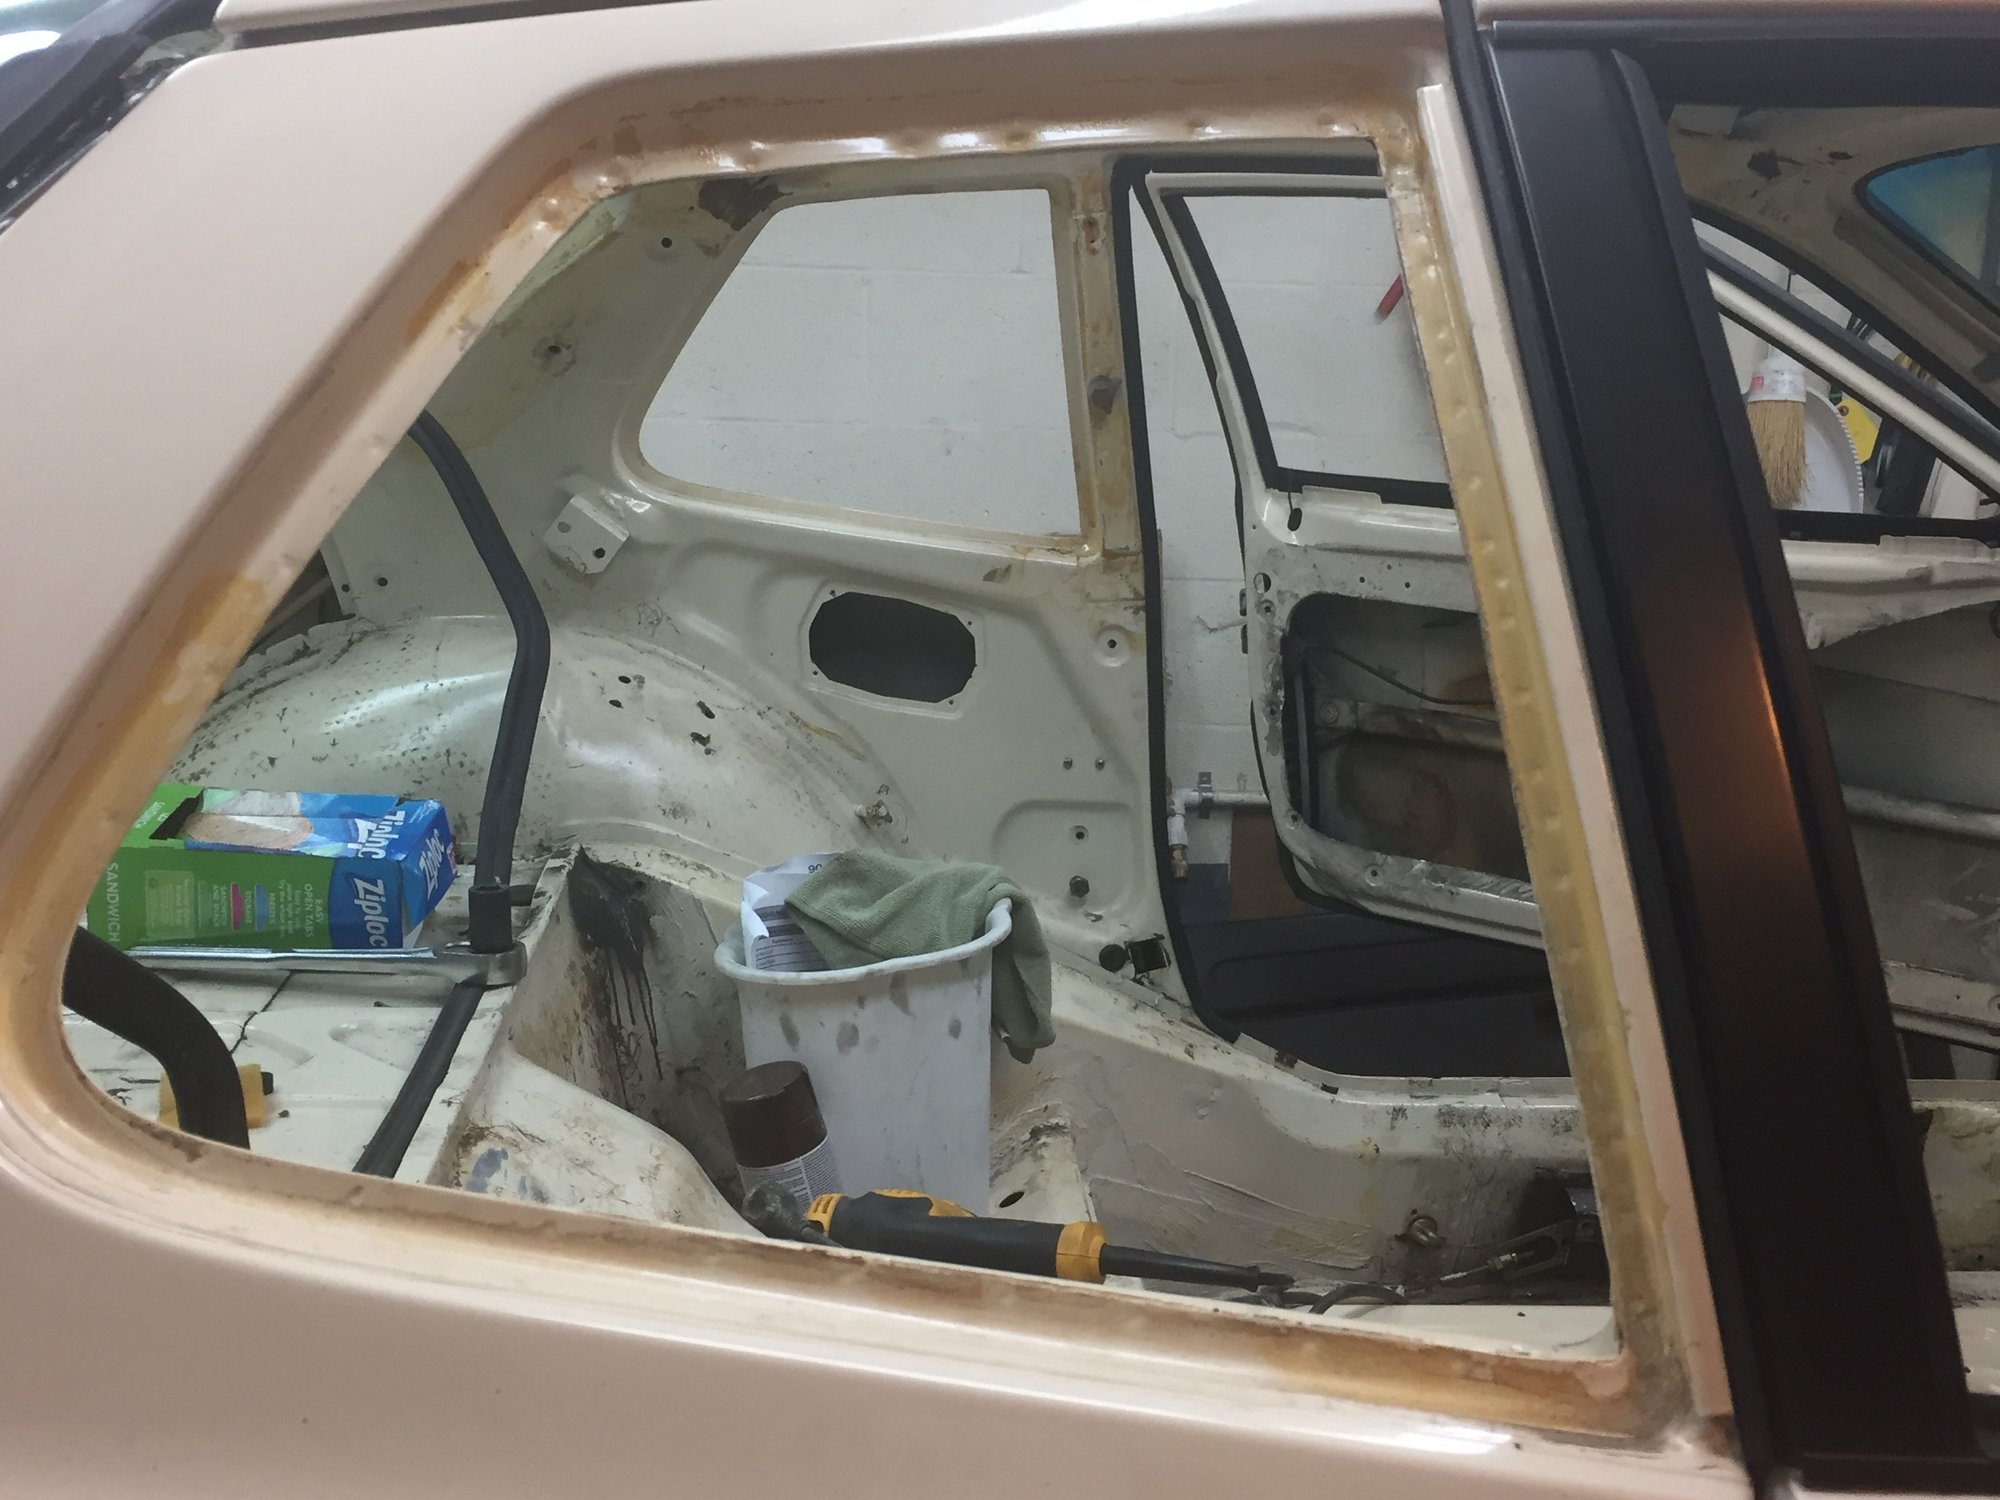
Slow progress, is still progress. Roof lifting mechanism is out. Got the driver's door gutted and cut. I also removed the quarter windows. I hope they go back in as easily as they came out. And I have started removing the glue residual.
Made a decision on interior finish. I am going to fabricate a lightweight carpet set, similar to the 911 RS, carpet kits to use in the rear of the car. The rest will remain bare (but freshened) Pastel Beige paint. Perhaps with the cage painted brown.

 11-26-2019 | 07:32 PM


 One thing I would suggest is coordinate with your cage builder as to whether you want to be able to retract the window glass with the doors closed. My "Nascar door bars" were fabricated with an arch into the door cavity such that I can only close the doors with the windows up. Which means I have to take the windows all the way out to be DE legal. Not a crisis but if I had to do it again, I would get less arch on the door bars so that I could close the door with the windows up or down. Another thing I discovered is that Porsche sound deadening material does not respond to the "dry ice method". There are various threads on this but I think a heat gun and an air operated chisel may be the way to go. Good luck with the project. Don't park next to me next time. Both 944's parked near me at Mid-Ohio died!