When you click on links to various merchants on this site and make a purchase, this can result in this site earning a commission. Affiliate programs and affiliations include, but are not limited to, the eBay Partner Network.
Figured I'd document this build for the fun of it.
In early September, I was at Mid-Ohio for a PCA DE. My group was first out on Saturday and, if you know Mid-Ohio, That first session is like ice skating. So I took it easy. The second session, I was looking forward to pushing it much harder. The car had other ideas. On pit out, as I was approaching the chicane, made some noise and lost power. I was near red line so I thought I had hit the rev limiter. Wrong, it had seized. I had planned on rebuilding that engine this winter anyway. But with the noise and it being seized, I decided to get a used motor and rebuild that one. So here I am. (I'll do a separate thread for the tear down of the seized motor.)
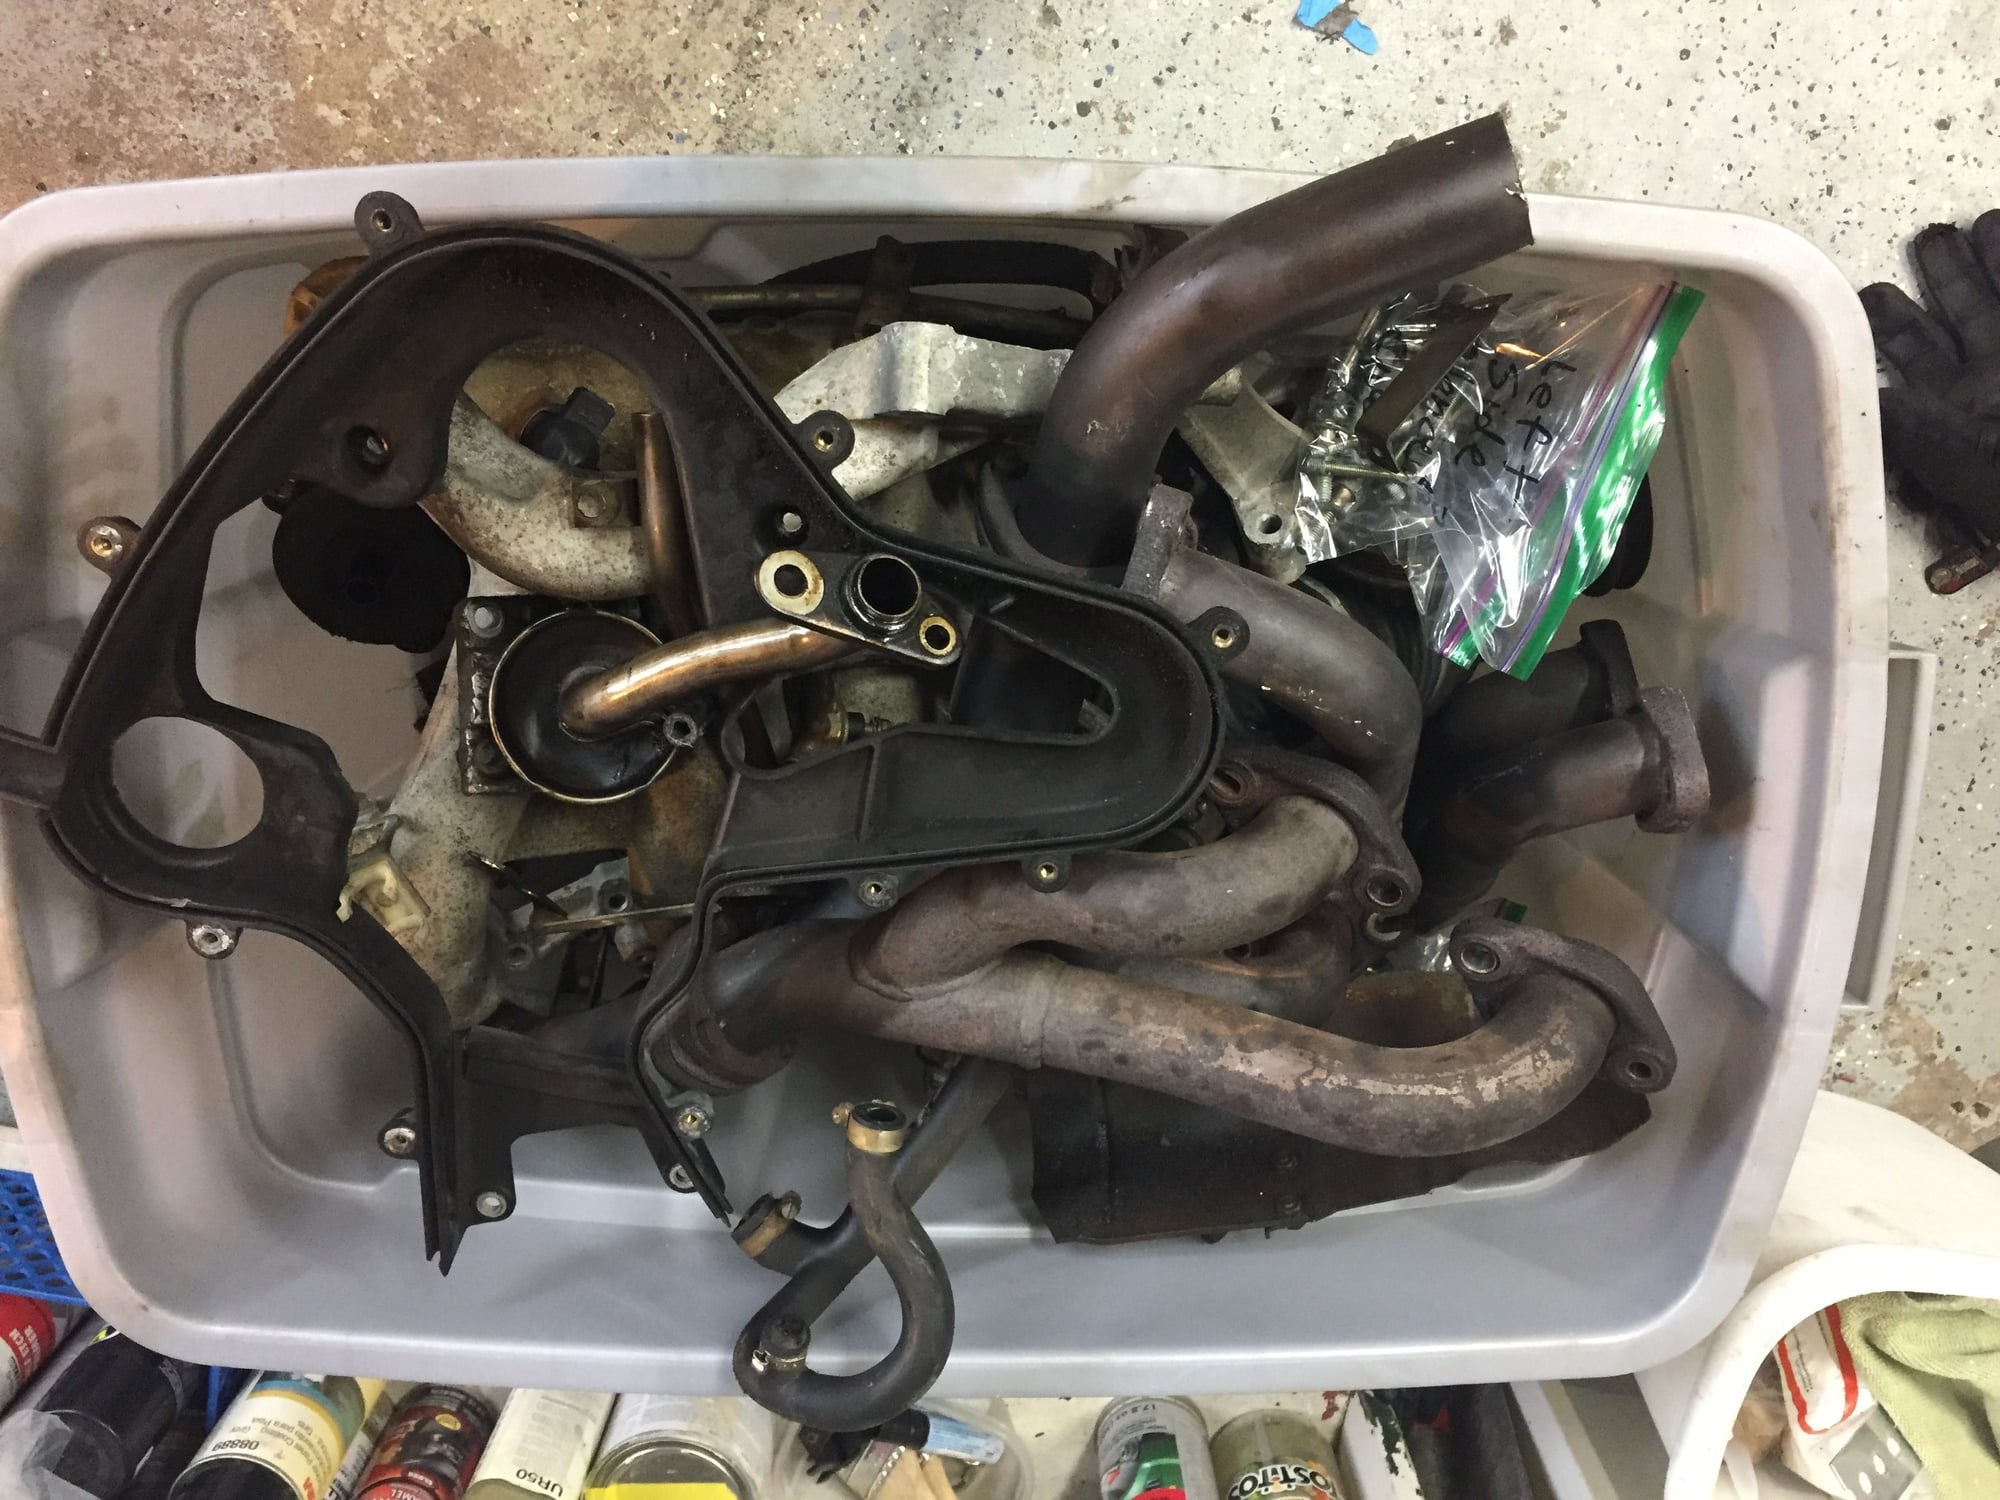
The engine I picked up is from a late car so I will have some decisions to make on which way to go on the electrical side of things. My plan is to spend too much money for the performance improvement I will get. That includes letting Lindsey Racing massage the head and balance and lighten the crankshaft. Because it is bound for track duty I want it to be more durable so, I will have LR drill additional oil ports in the rod journals and I may upgrade the rods. The oil pan will get a trap door baffle and I am in search of a turbo oil cooler console so I can add a large external cooler. Other planned upgrades include an external catch can for the AOS, AC delete, heater block off, oil pan gasket brackets and I'll wrap the exhaust manifolds.
Harvey on these forums has a great step by step blog about engine rebuilding !
Another thing , Mike at Lindsey is also great support, he will take the time to guide you
towards good choices ... some expensive , but it is what it is !
As far as better rods go , check out the Molnar website , they make a nice set for our engines.
I did a race engine rebuild over last Winter , unfortunately the shop that machined my block screwed up
on the #3 cylinder sleeve and i had head gasket issues all season !
Have to take the engine apart again and have them look into their mistake, at least they admitted it was "possibly " a
machining issue with the block and i won't get charged for the extra work.
Don't hesitate to ask if you have any questions and do keep us posted !
Harvey on these forums has a great step by step blog about engine rebuilding !
...{snip}
Thanks Phil. I met Harvey at Mid-Ohio that fateful weekend. I've already checked out his blog and will be referencing it.
Probably be giving Lindsey Racing a call this week to discuss my plans.
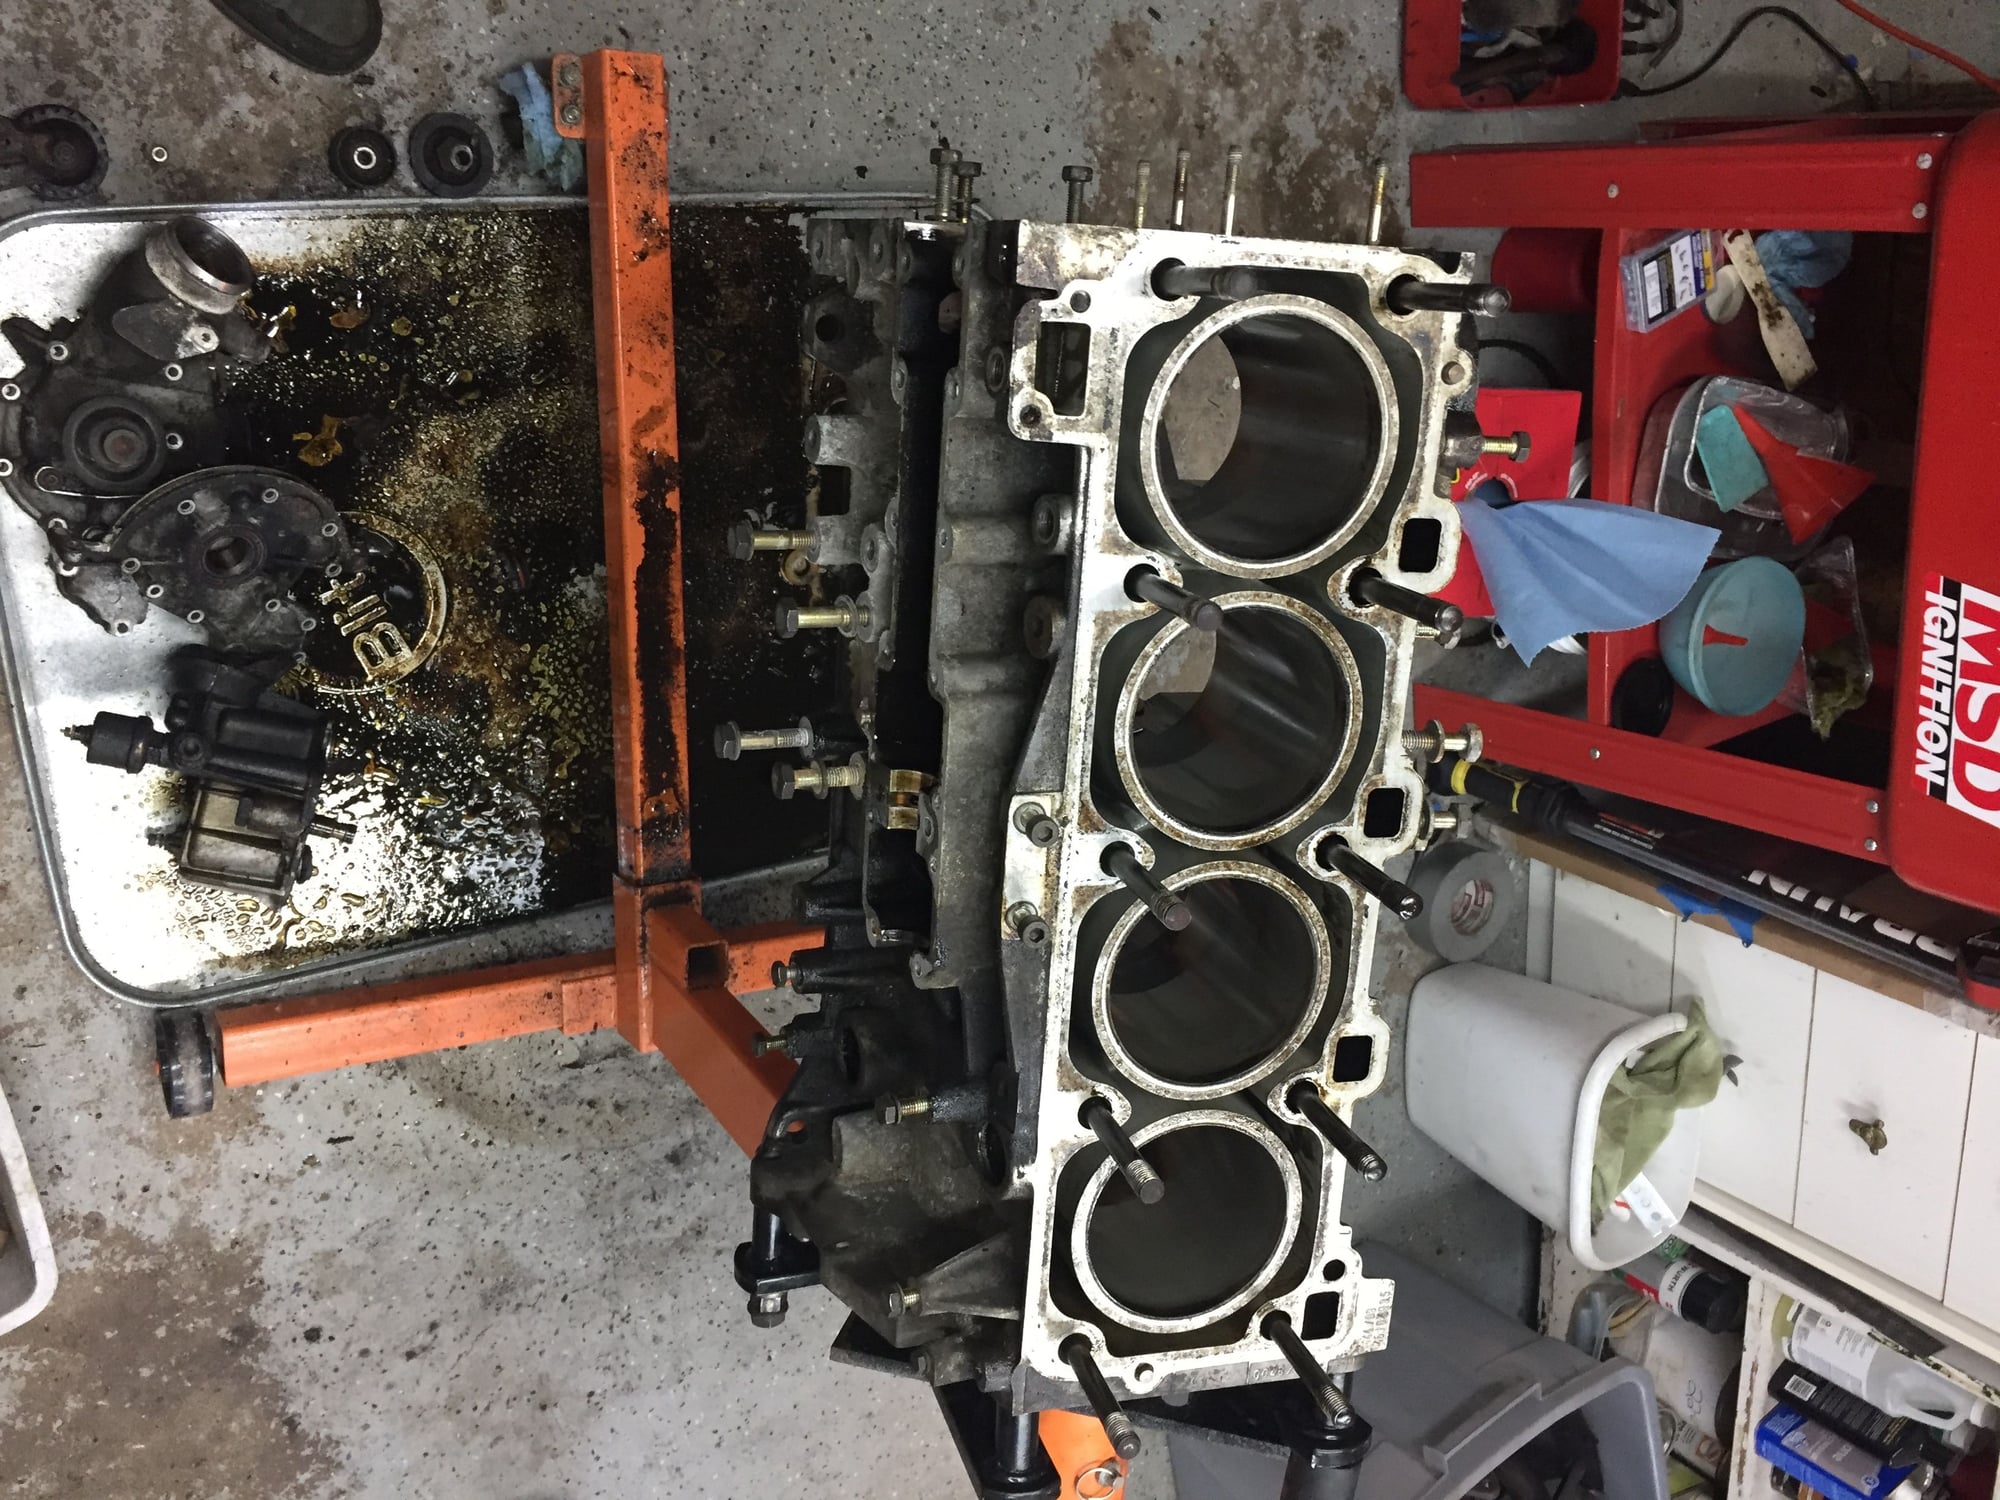
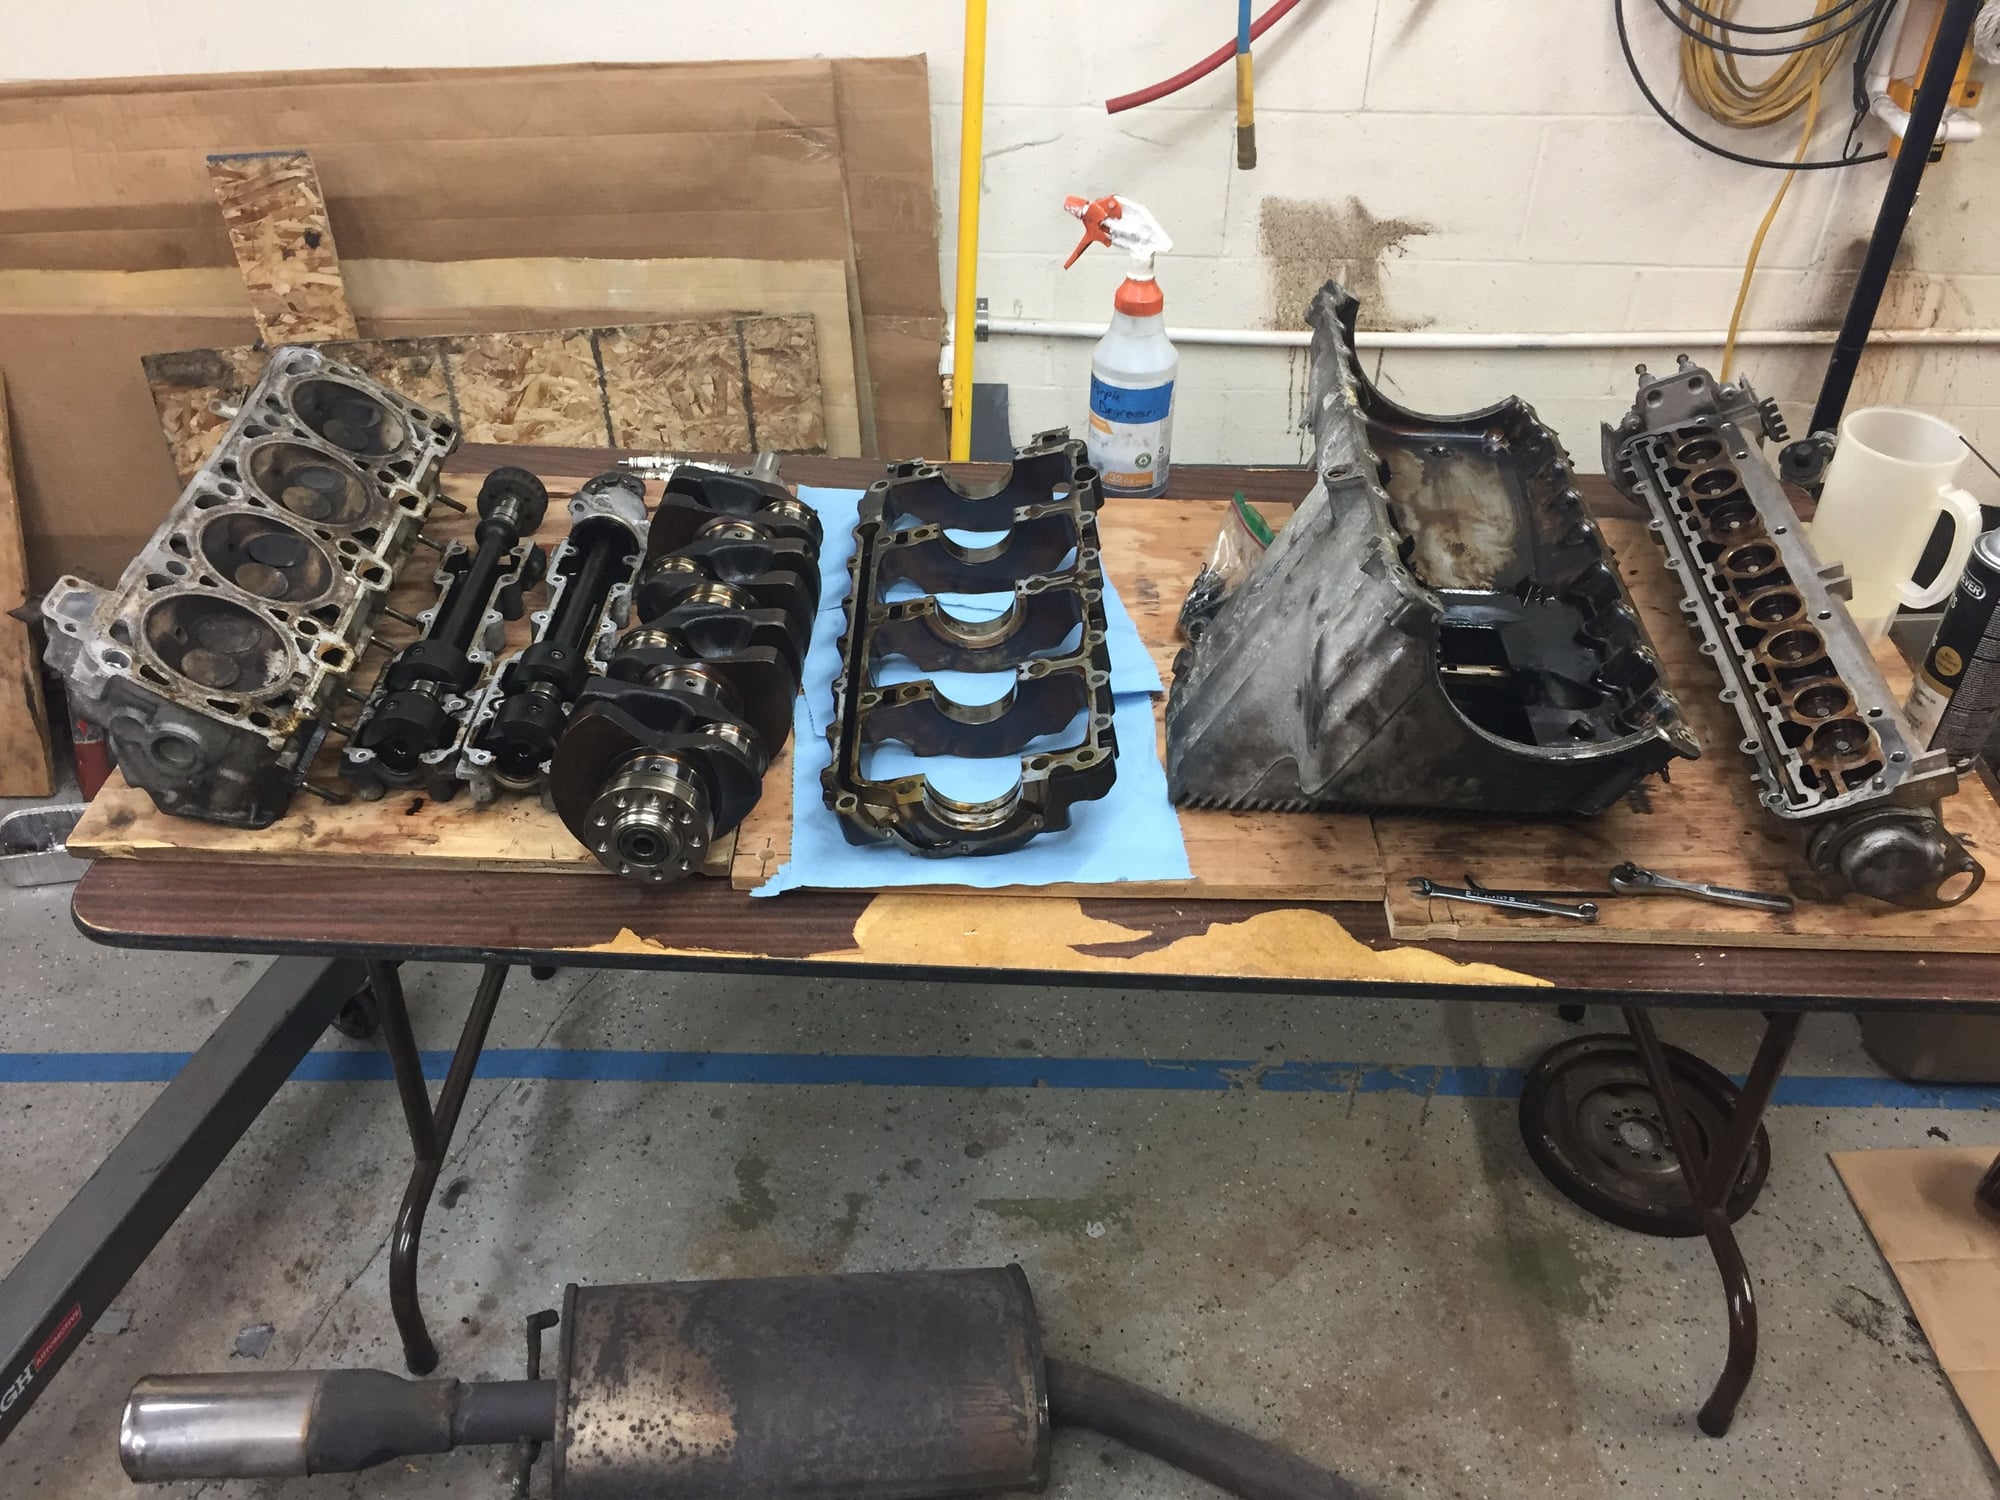
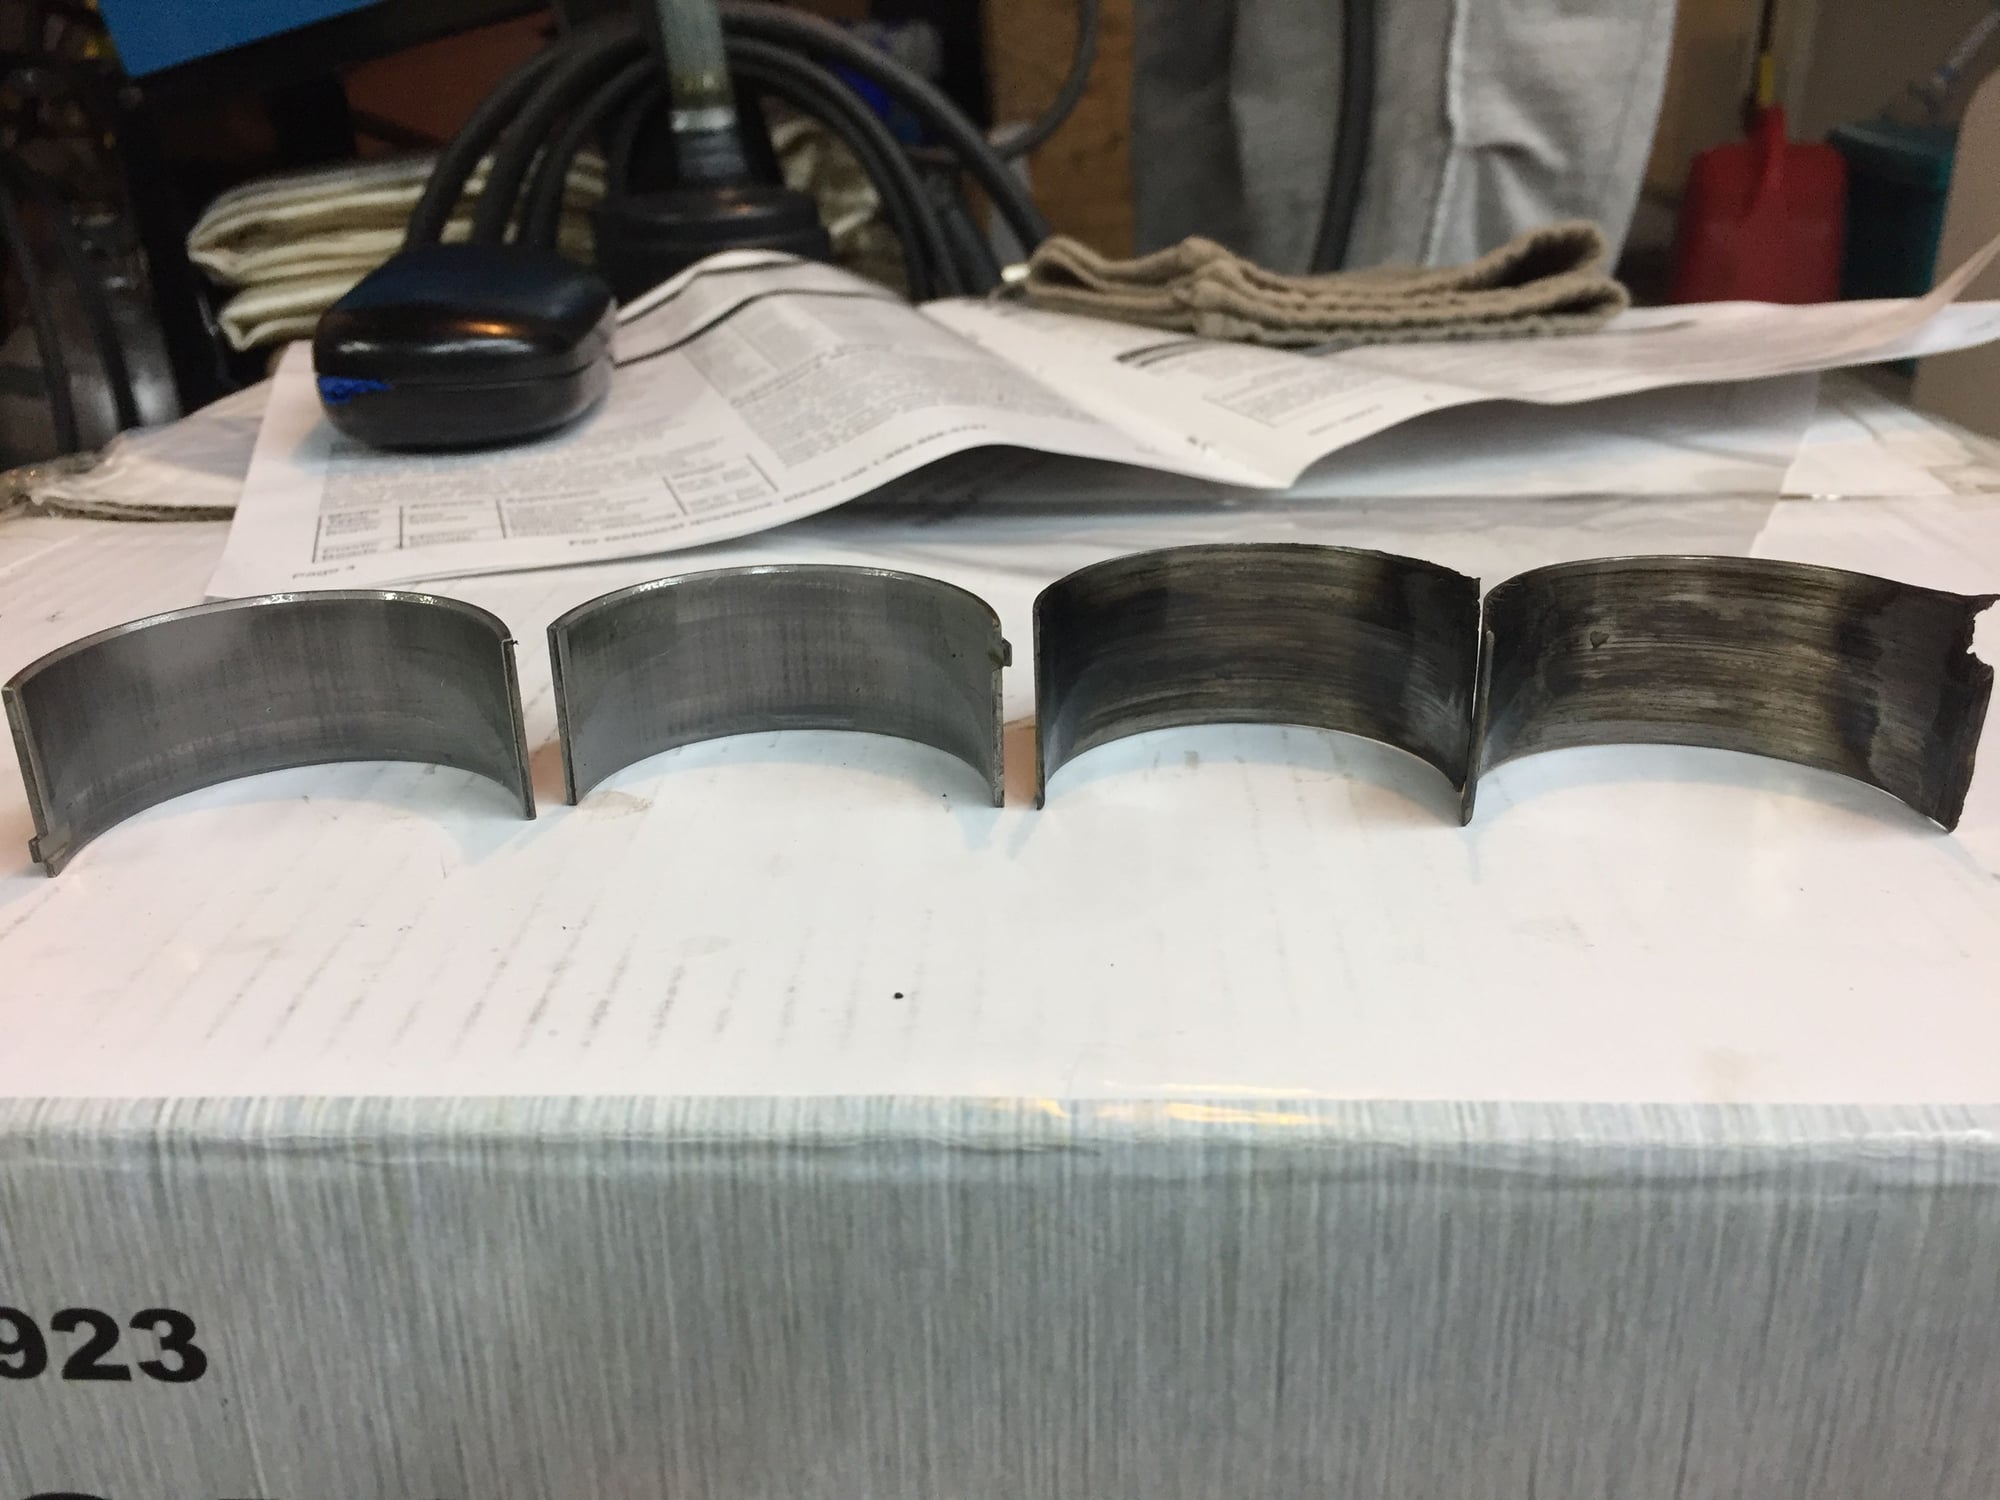
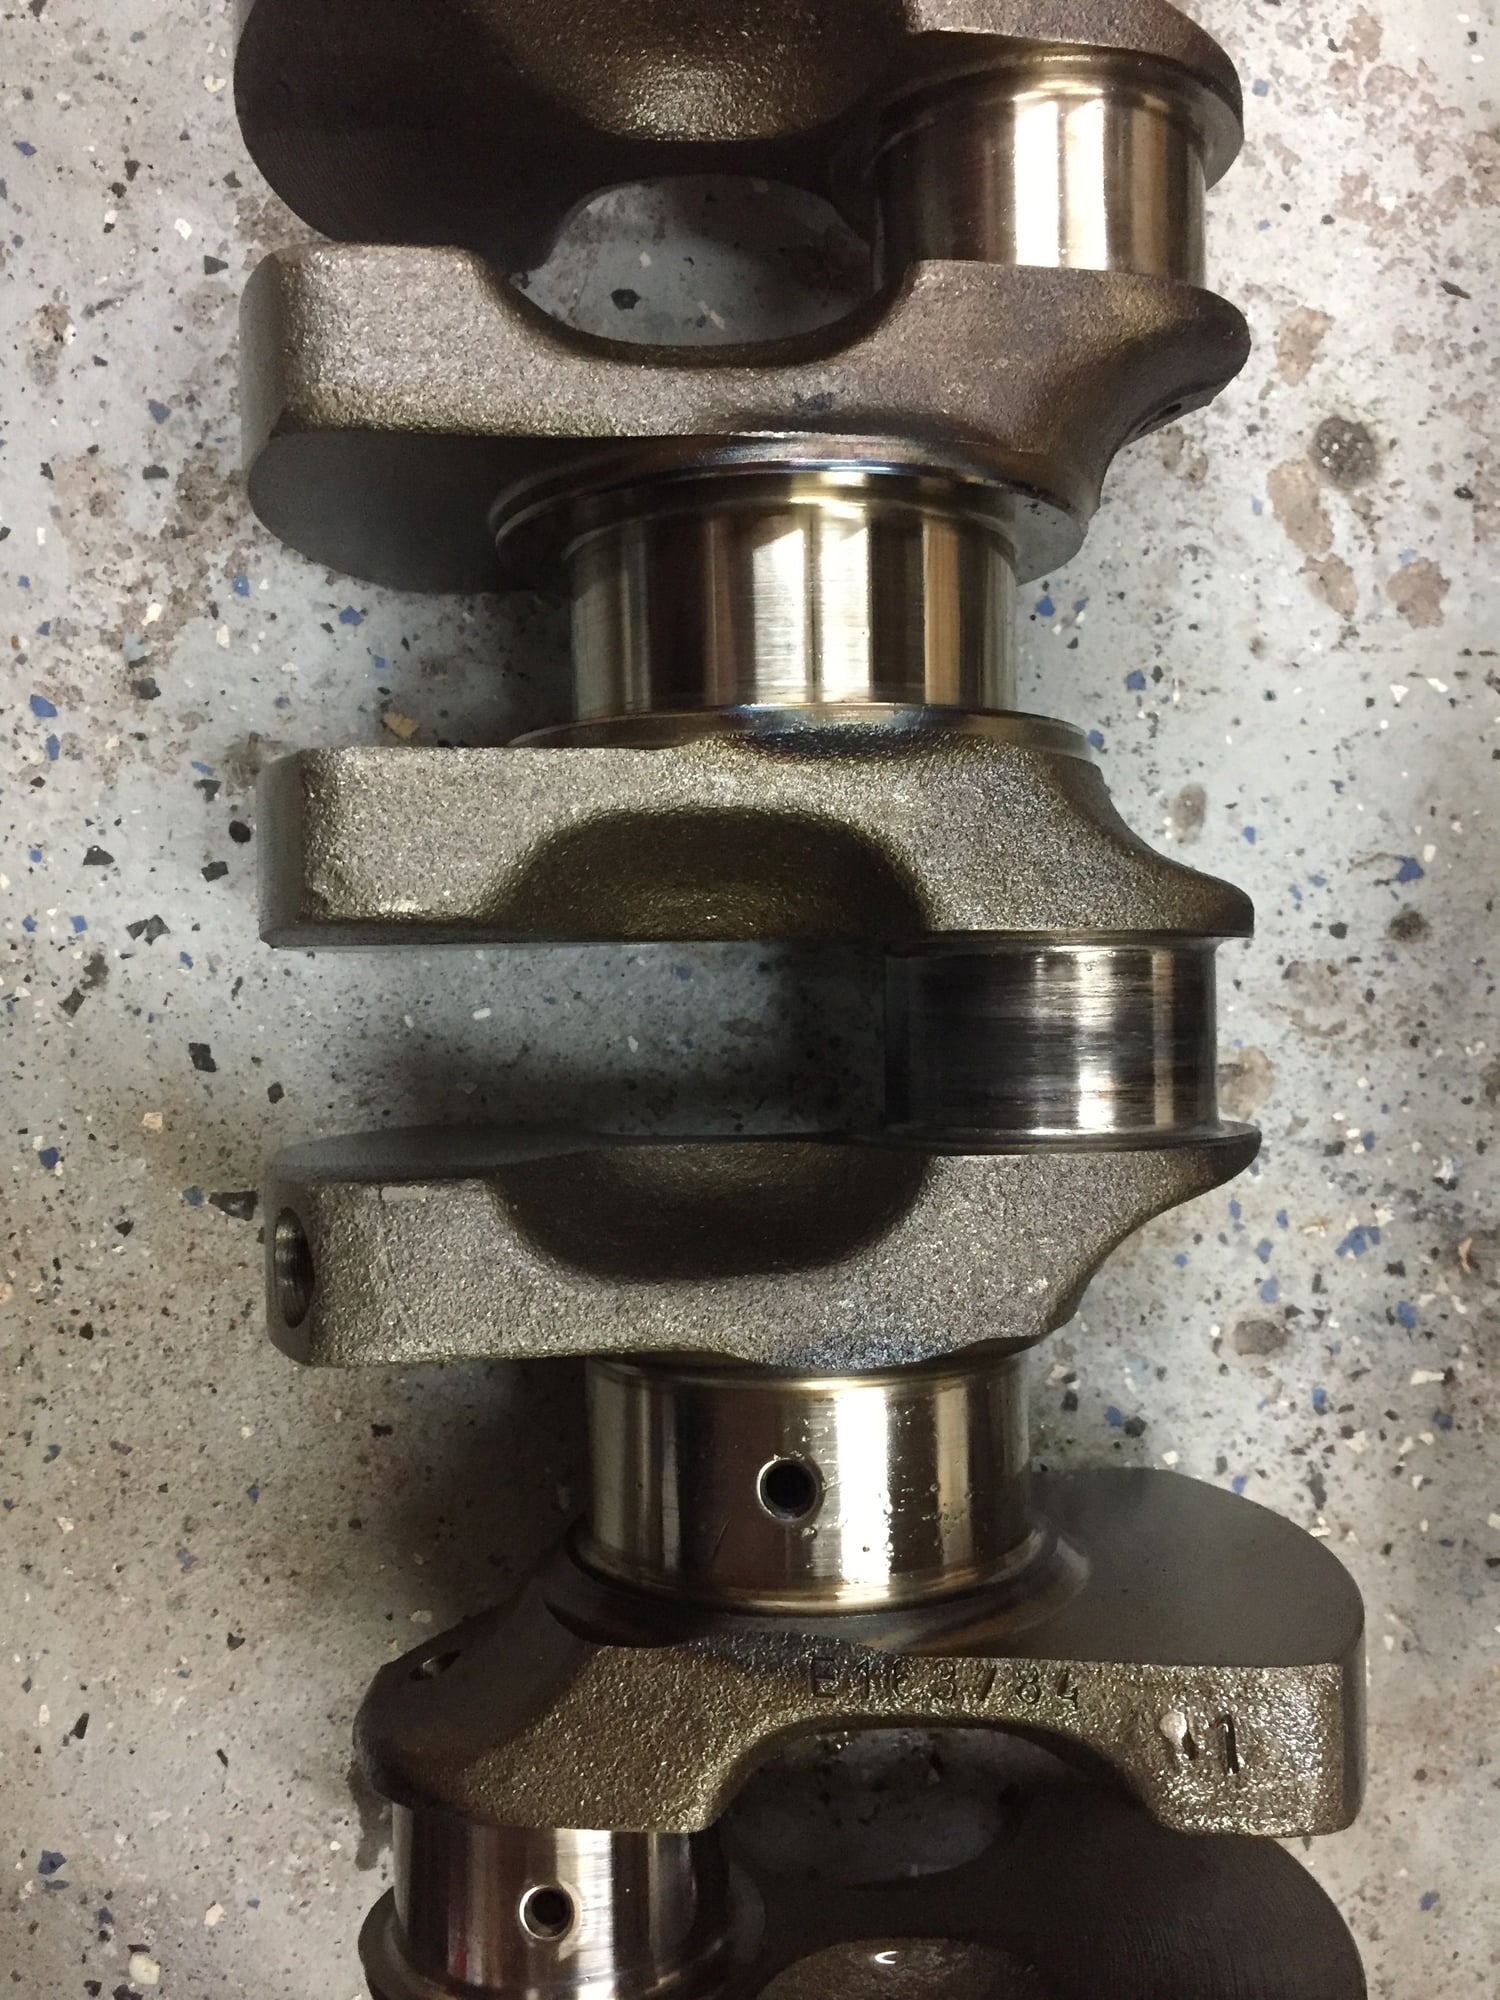
I got around to disassembling the engine that let me down at Mid-Ohio. I did not find the level of carnage I had expected. I had spun the #2 rod bearing and that had locked up the motor. So I lost the crank and one rod, for sure. But the rest of the engine looks pretty darn good, for 92,000 miles, mostly on the track.
I will be doing oil analysis and changing rod bearings more frequently n the future. These rod bearings had about 17 months, 8,000 miles, 24 track days with 6 oil changes (VR-1 20w-50) from new to failure.
If you plan to race this car as SP, make sure you read the rules about what is allowed.
Yep, read the rules. This engine will not be legal for Spec or 944Cup. I will either build another engine or buy someone's full set up when it comes time to race.
Before spending $$$$$$, discuss with Mike at Lindsey Racing what are key fixes to prevent the next #2 bearing failure. Changing oil frequently is not a fix. Using the correct oil and oil analysis is the best. Use Blackstone Lab, Fort Wayne, IN to test oil. Spend $$$$ wisely based on data
Before spending $$$$$$, discuss with Mike at Lindsey Racing what are key fixes to prevent the next #2 bearing failure. Changing oil frequently is not a fix. Using the correct oil and oil analysis is the best. Use Blackstone Lab, Fort Wayne, IN to test oil. Spend $$$$ wisely based on data
So, here’s the funny thing. I had changed the oil just before the event and grabbed a sample to send to Blackstone for what would be my baseline analysis. It is still sitting on my desk.
I’ve done my research and exchanged emails with Mike. In the new build, the crank will be cross drilled to increase oil supply, an oil pan baffle will be added to reduce oil starvation while cornering and I’m replacing the internal oil cooler with an external cooler from a 951 to better manage oil temps.
I’m also getting the LR 3-piece cross member to make it easier to change rod bearings before they fail.
I shipped the crank, head and cross member to LR today.
Last edited by Glenn R; 10-07-2019 at 10:35 PM.
Reason: Additional text
Since your engine won't be legal for Spec or Cup racing , talk to Mike about some custom JE pistons with a little more compression, and along
with the right cam you can bump up the powerband to something like 6500 - 6700 rpm ... it helps to stretch the gears from one corner to the other while staying on the powerband.
It's just a while you're in there option...
For what it's worth , i run Lindsey's big *** oil cooler in front and my oil temp rarely goes above 200 degrees !
I've also installed his oil pan baffle.Another thing , my car's original race engine came with a crank scraper , which i installed in the latest motor i built, although
there are conflicting thoughts regarding the effectiveness, but it came with the car so i reused it.
All things I've discussed with Mike. I'm trying to balance costs with durability and performance. So this build will be "Phase 1" allowing for additional improvements as funds come available.
The 1988 engine I am starting with has the higher compression pistons, 10.2 if I remember correctly. The oil pan baffle will be part of this first phase. The Lindsey 3x+ oil cooler will be an early addition, call it Phase 1.1. Since the crank will be knife edged, a scraper moves way down the list. A WEB 274 grind cam would come before that. Other items that are slated for later phases include an NA-Tune MAF kit and exhaust.
Head, intake, crank and cross member have been shipped to LR. Block has had most of the caked on dirt removed and will be shipped to LR as soon as I have time to pack it up.
I've been cleaning and tumbling the hardware. Some will be replaced with new. The rest will be re-plated. I'm going to powder coat the cam housing, oil pan and the arms that attach to the motor mounts.
I need to finish cleaning parts and clear the garage so I can get the car in as start stripping more weight out of it.
Glenn,
I just shipped my block to LR because the previous owner used scotch pads with abrasive disc dots embedded to clean the block top surface. Metal was removed and the surface is no longer parallel. Also, the cylinder walls are scoured, no hanging nail stuff, but not good for a race engine. The cylinder walls are to be Nikasiled.
I found a heavy duty cardboard packing box, 18x24x18, at Lowe's. Purchased rigid Styrofoam to fill the void and protect the studs and prevent the studs from punchering the cardboard. I prep'd the cardboard box, placed a piece of 1/4 inch plywood, 18x24, in the bottom; place in the rear of my Subaru Outback; and then placed the block inside the box on bubble wrap over the plywood.
Wedged the Styrofoam to fill the void and used packing paper to wedge between the Styrofoam against the block and the sides of the box. Total weight was 85 lbs. Used Shipnerd for shipping.
Best,
Tom
I was going to build a wood crate for my block but I think I will go the same route as you did.
 09-21-2019, 08:48 PM
") That includes letting Lindsey Racing massage the head and balance and lighten the crankshaft. Because it is bound for track duty I want it to be more durable so, I will have LR drill additional oil ports in the rod journals and I may upgrade the rods. The oil pan will get a trap door baffle and I am in search of a turbo oil cooler console so I can add a large external cooler. Other planned upgrades include an external catch can for the AOS, AC delete, heater block off, oil pan gasket brackets and I'll wrap the exhaust manifolds.
That includes letting Lindsey Racing massage the head and balance and lighten the crankshaft. Because it is bound for track duty I want it to be more durable so, I will have LR drill additional oil ports in the rod journals and I may upgrade the rods. The oil pan will get a trap door baffle and I am in search of a turbo oil cooler console so I can add a large external cooler. Other planned upgrades include an external catch can for the AOS, AC delete, heater block off, oil pan gasket brackets and I'll wrap the exhaust manifolds.