When you click on links to various merchants on this site and make a purchase, this can result in this site earning a commission. Affiliate programs and affiliations include, but are not limited to, the eBay Partner Network.
So I am a sucker for a lost cause. This is not a first for me.
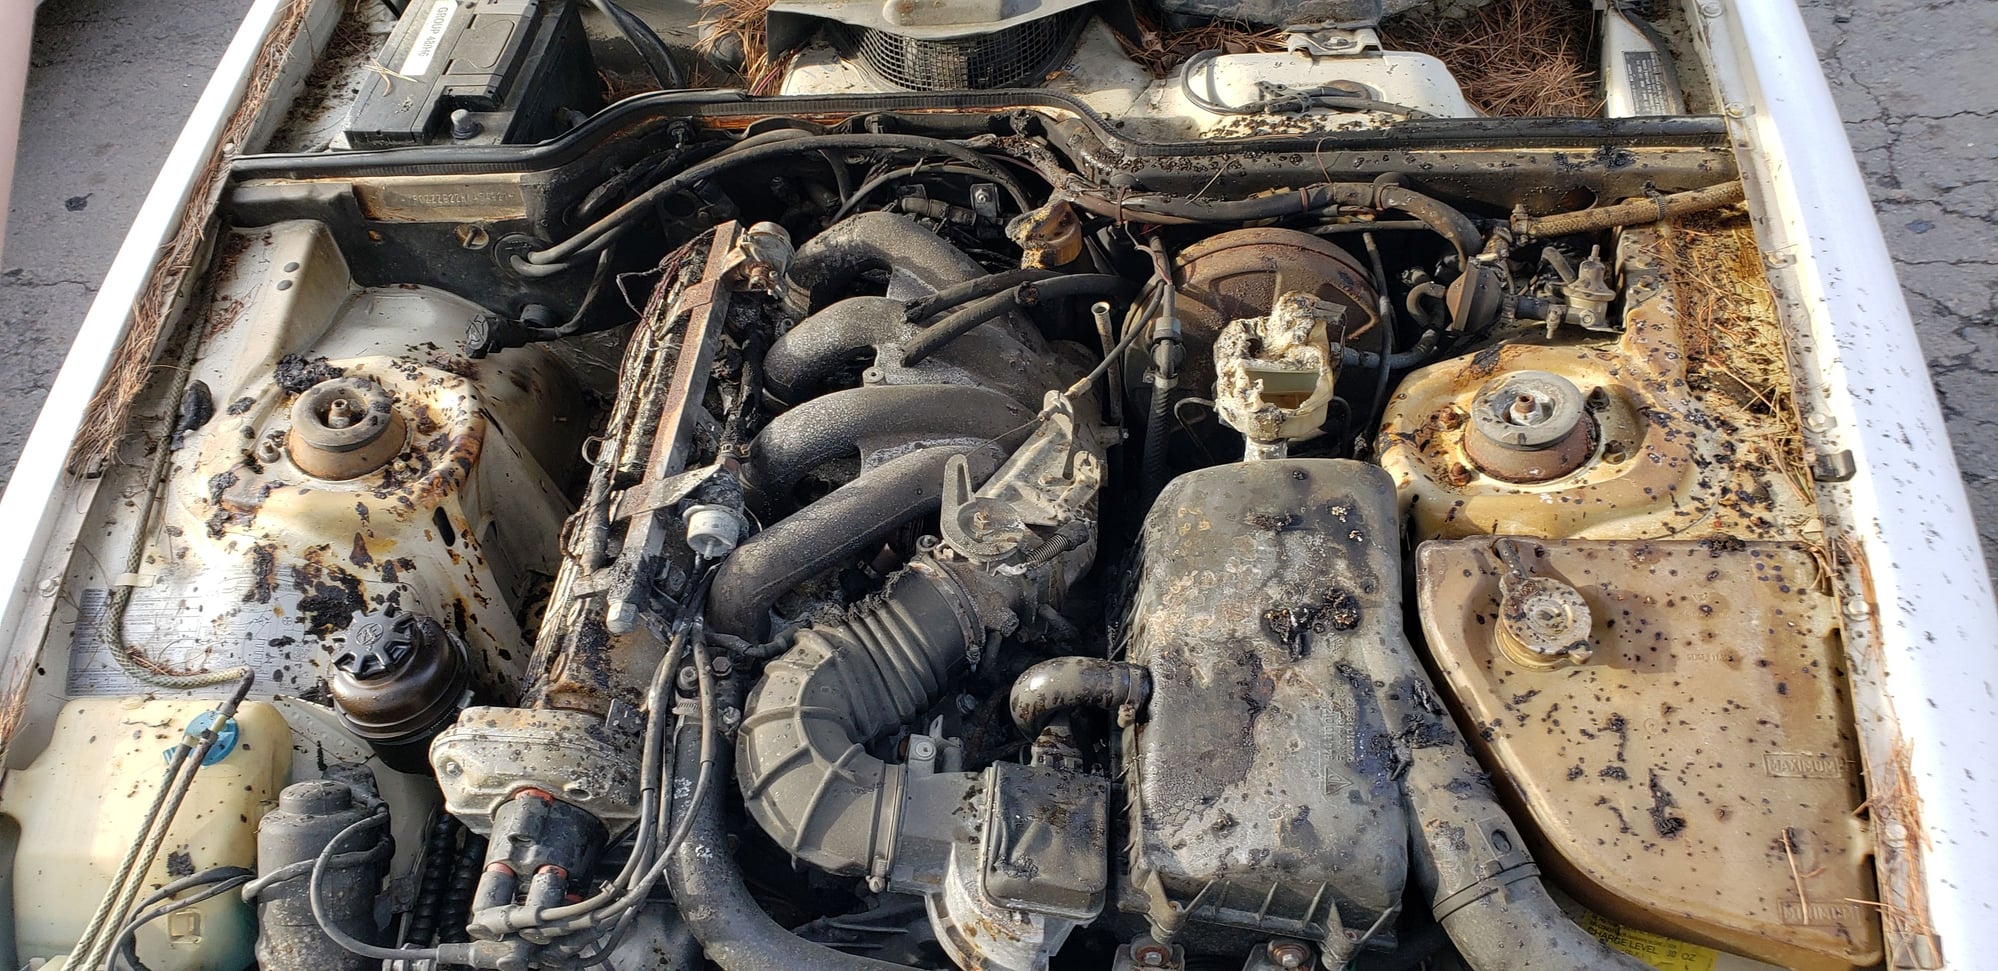
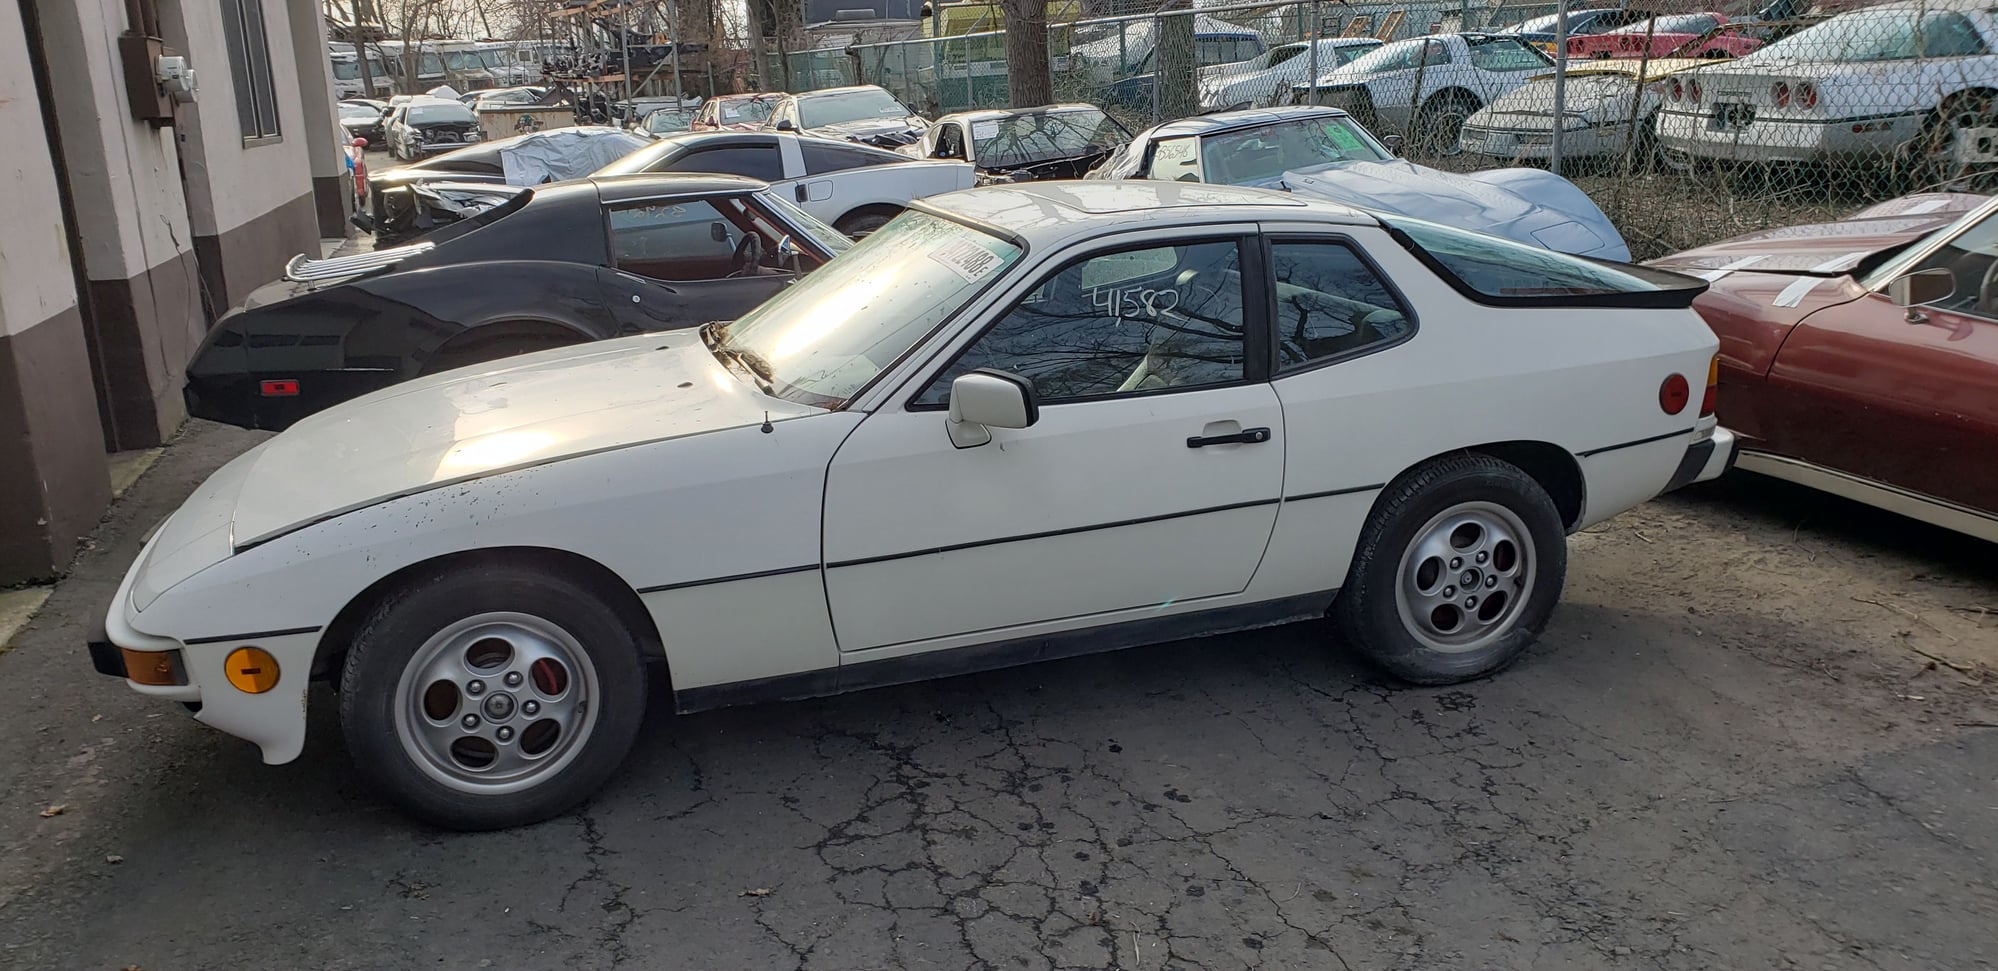
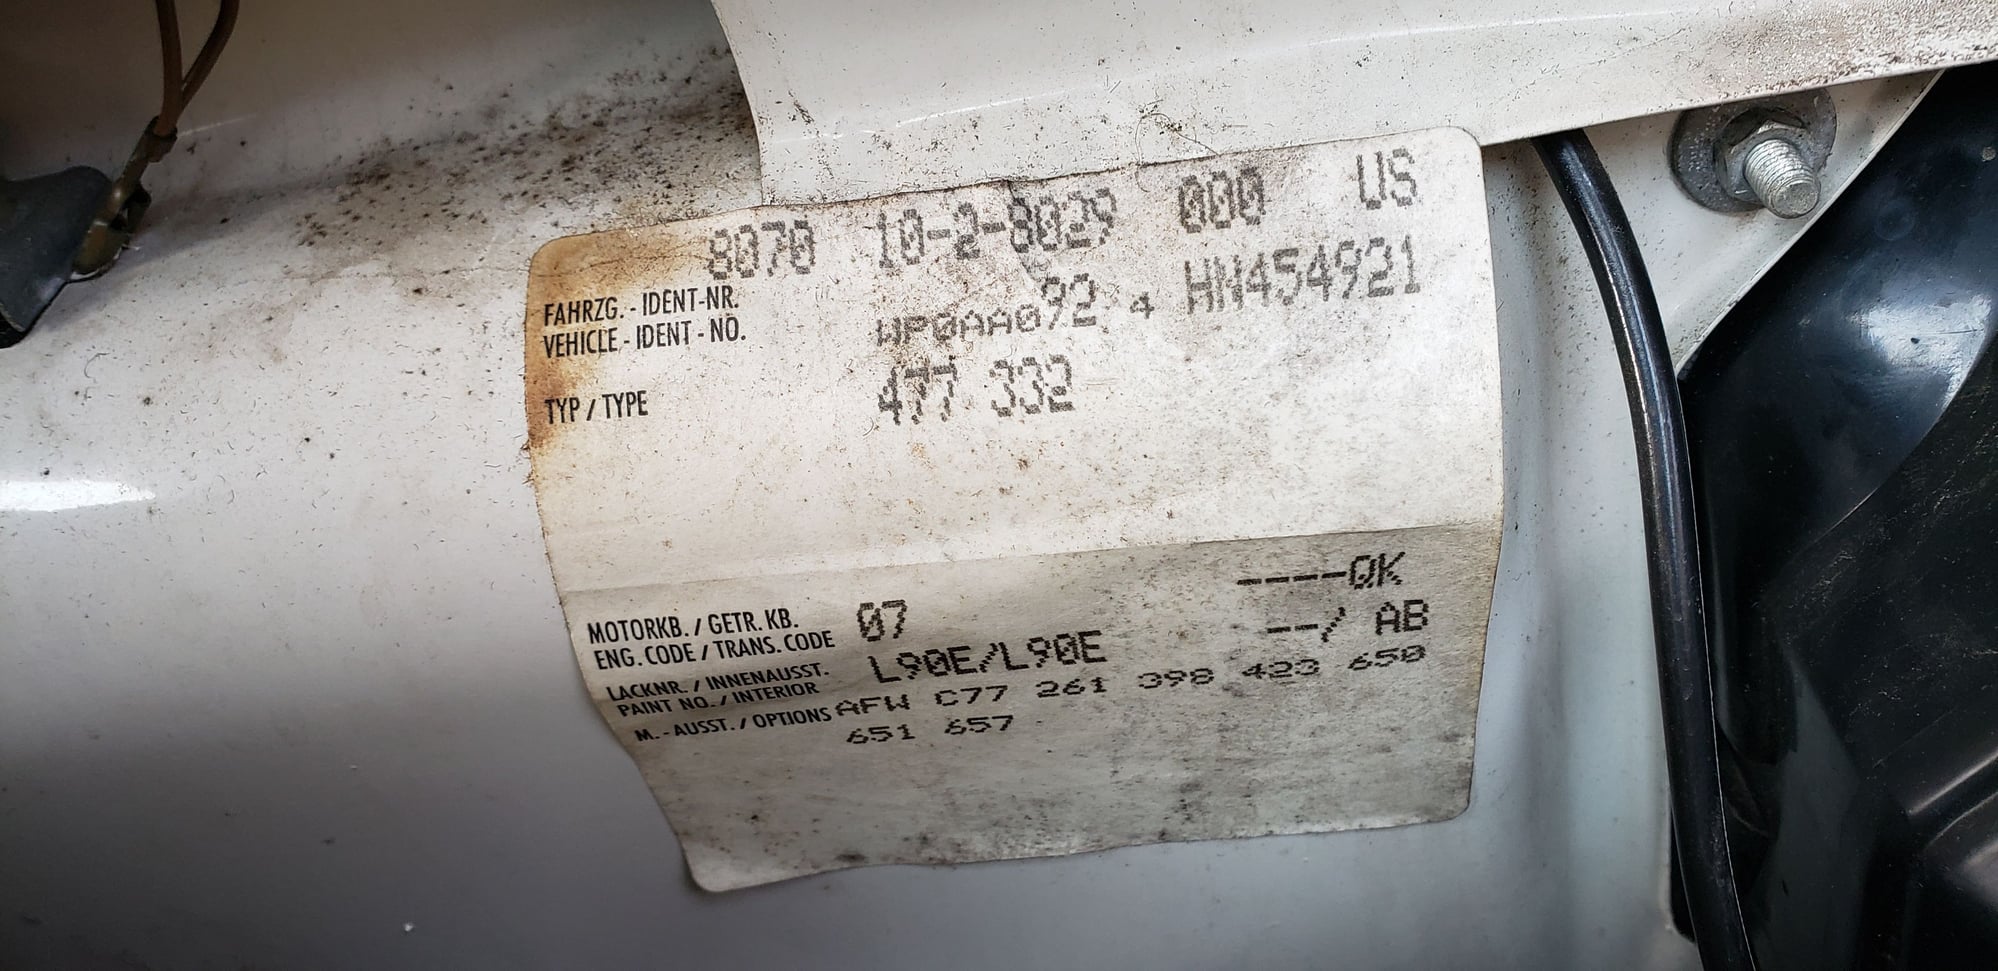
Back in March, I picked up this 87 924s that had an engine fire. Not 100 percent sure why, maybe it was because I had just sold my 83 944 that I had just completed after a years work. Carfax showed some recent service including a timing belt/ water pump within the past year. I purchased it from the salvage auction so I rolled the dice only by examining the pics. Classic fuel line fire, rather ugly.
Hood insulation melted and dripped all over everything!!! Ugly!!!
I have an 85 944 parts car on hand. My hope was that I could install the fuel rail, intake, vac lines and DME harness from the parts car and be on my way. Unfortunately, I would not be quite so lucky.........to be continued.....
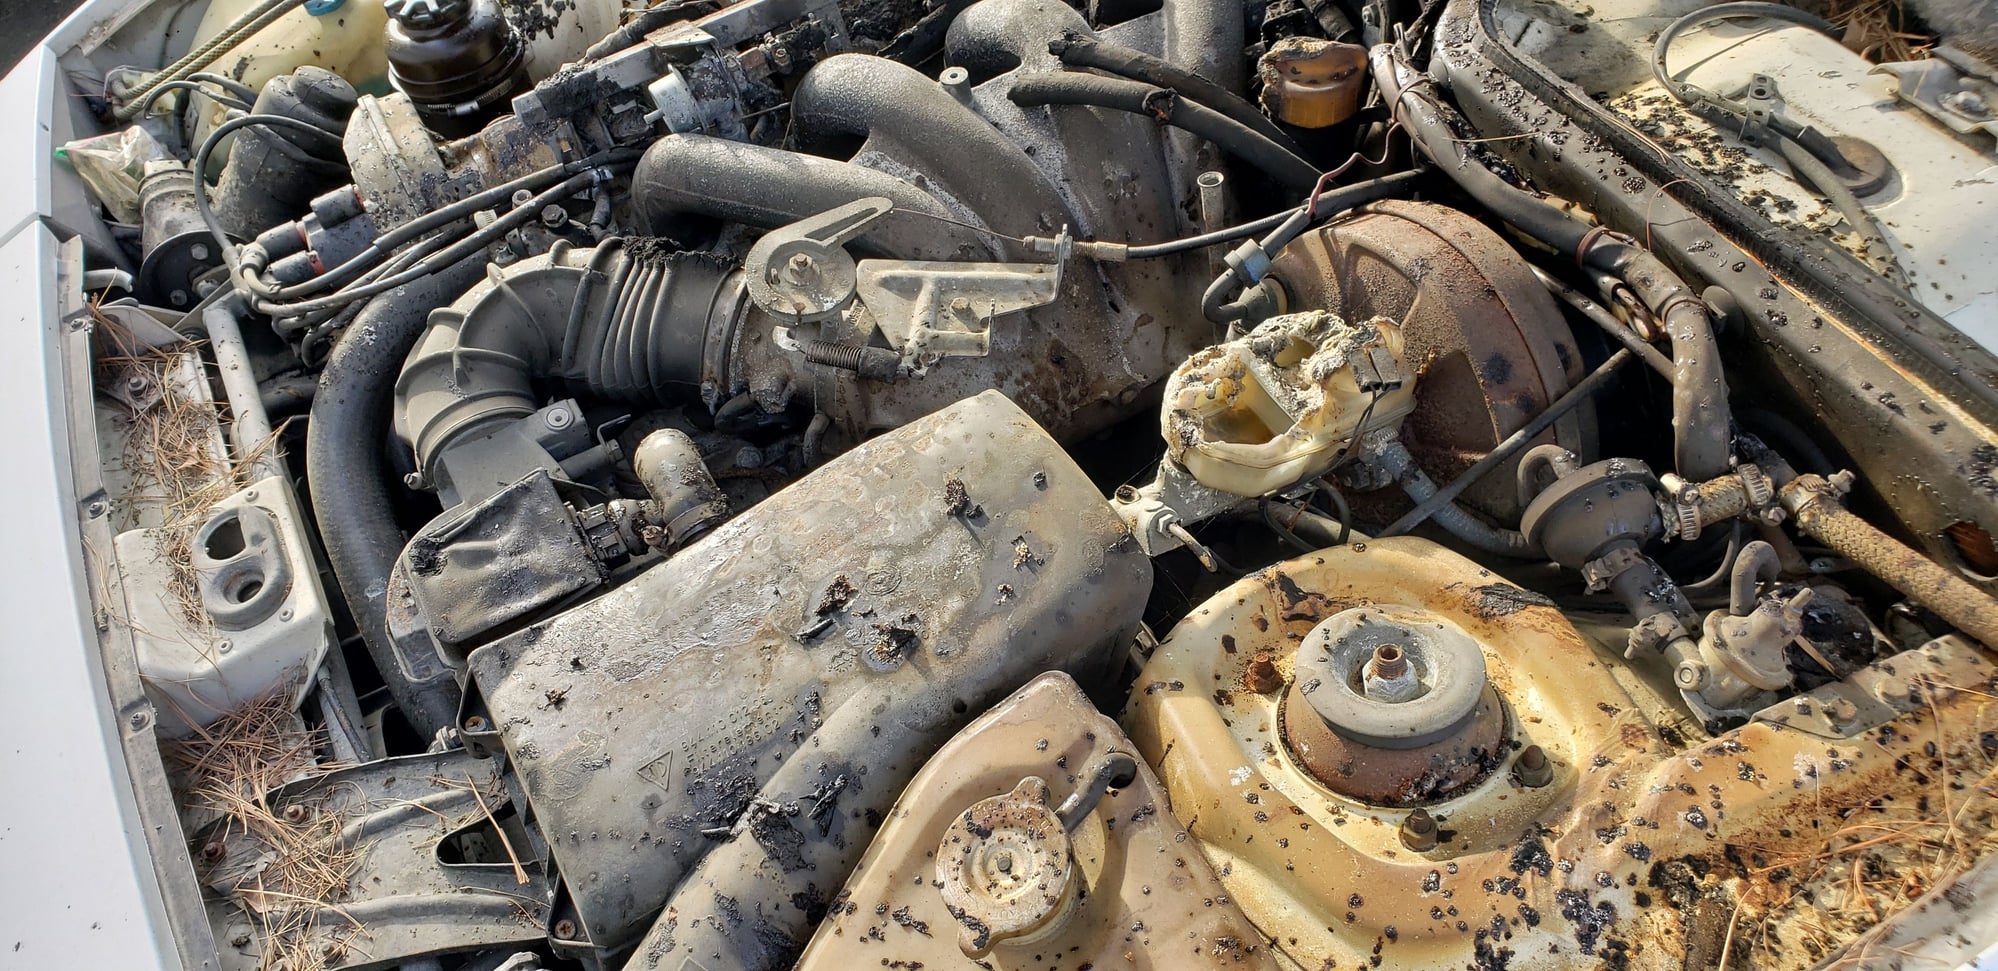
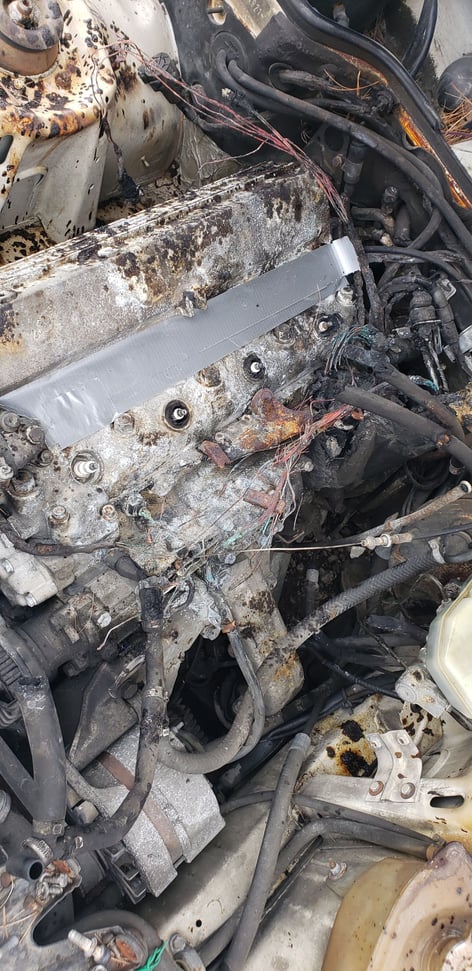
As I started examining things under the hood, it became clear that the melting hood insulation not only made a real sticky mess but it also helped spread the fire. Large burning clumps fell and melted whatever it hit including the J boot and timing cover (uh-oh) .
And of course, here is a big part of the cause of this fire
That is right......a hose clamp on the high pressure fuel hose. While the clamp likely didn't cause the leak, its clear that someone was trying to "repair" the pressure line. Look at all that mess, the hood insulation really is bad stuff. This was a factory hood insulation too! At this point, I am still convinced that this is all much better than it looks. I have worked engine fires before and find them to be daunting in appearance but usually not too bad once you get cleaned up. Its time to start proving my theory.........
as far as I could tell, this was electrical but who cares about grommets!! I got sick of looking at it so I threw in a aftermarket harness and a single port and sent it on its way.
So after about 3 days of ownership back in March, I start poking around even more.
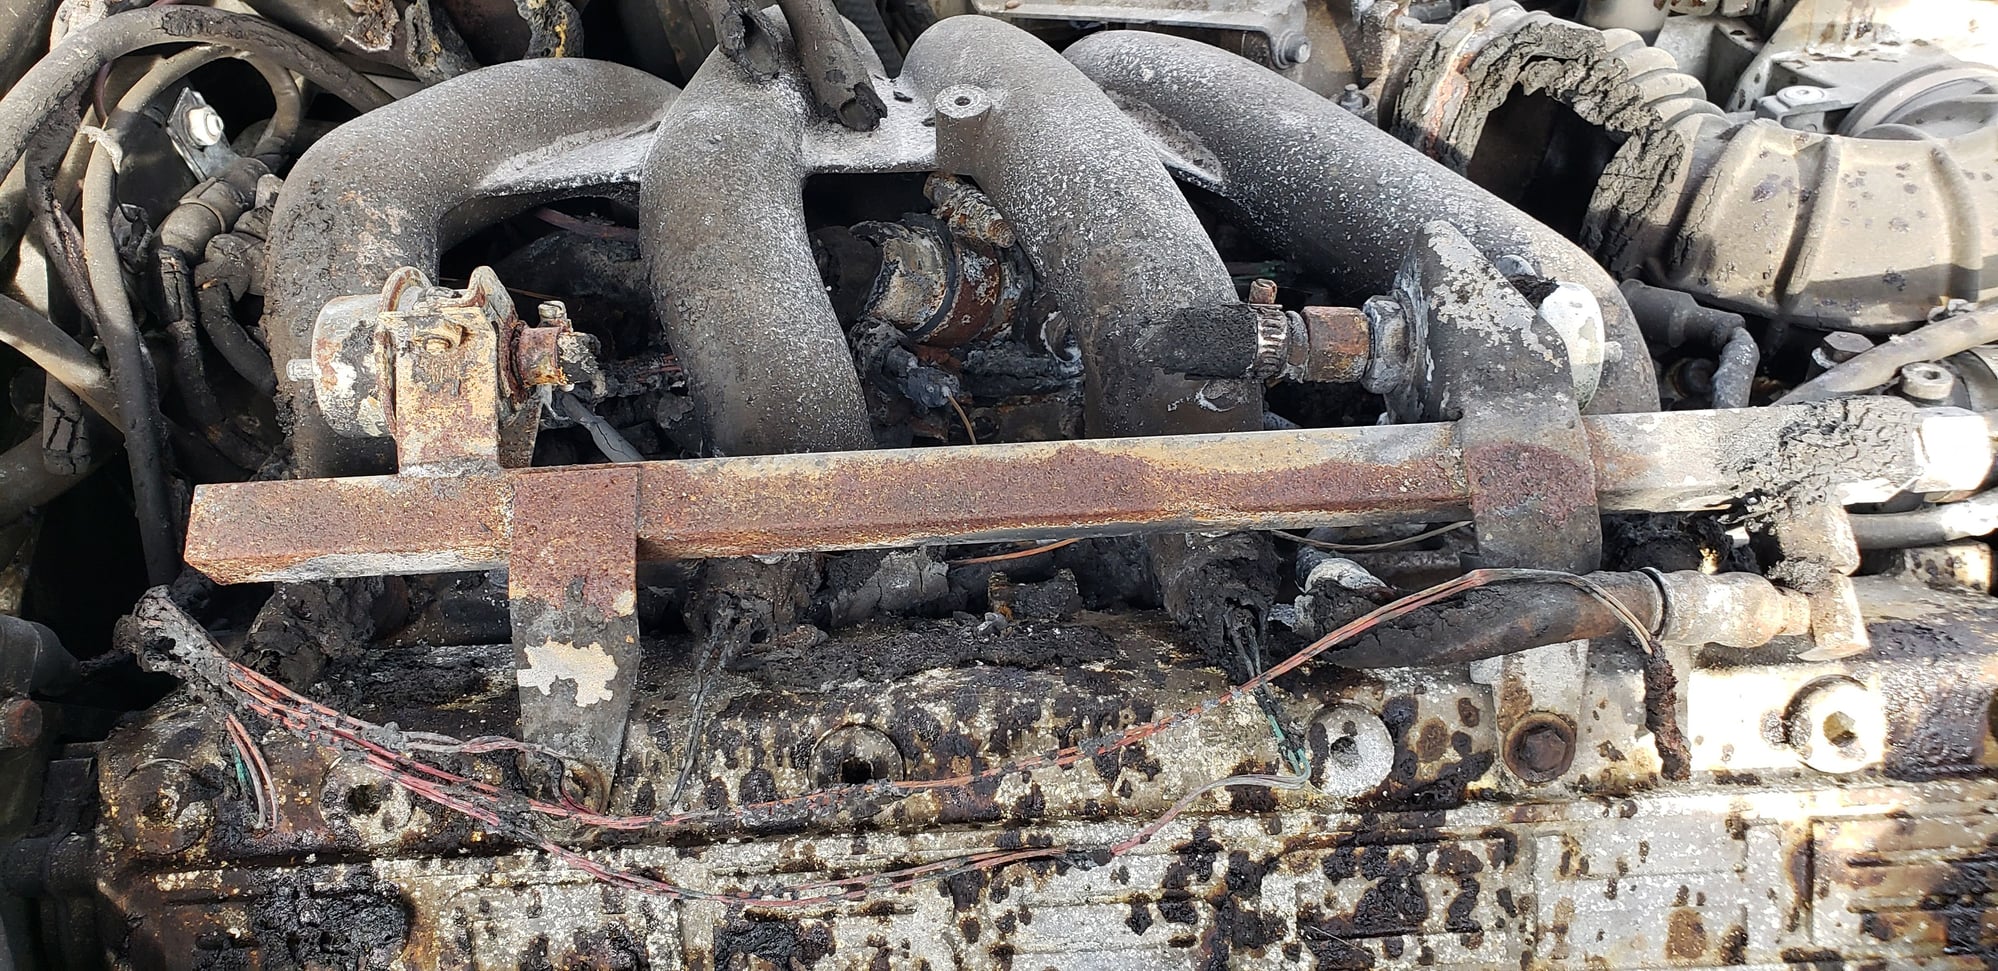
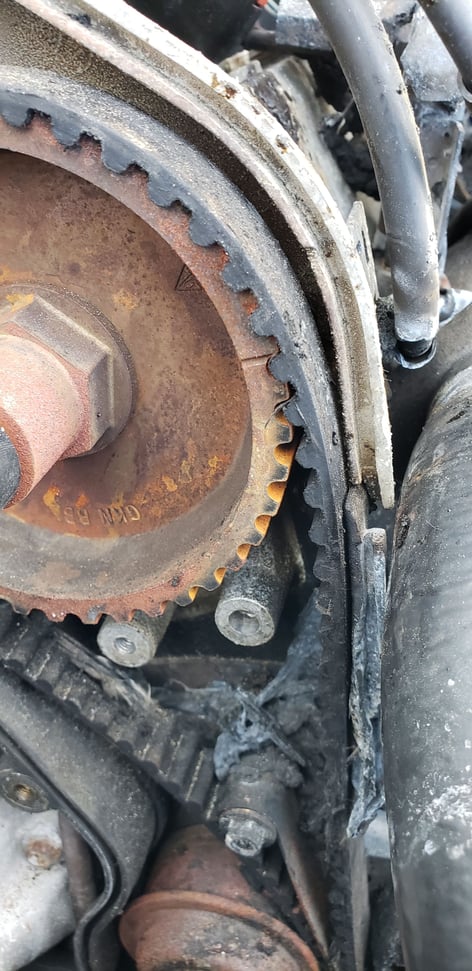
Now this is a problem.........damaged timing belt cover, took it off to take a gander and......
Belt frayed, tensioner pulley melted. Now, did it happen while the car was running or was it an after affect of the fire? I had some hope since the timing marks were still in alignment despite the condition of the belt. Maybe the valves survived. Optimistic perhaps......
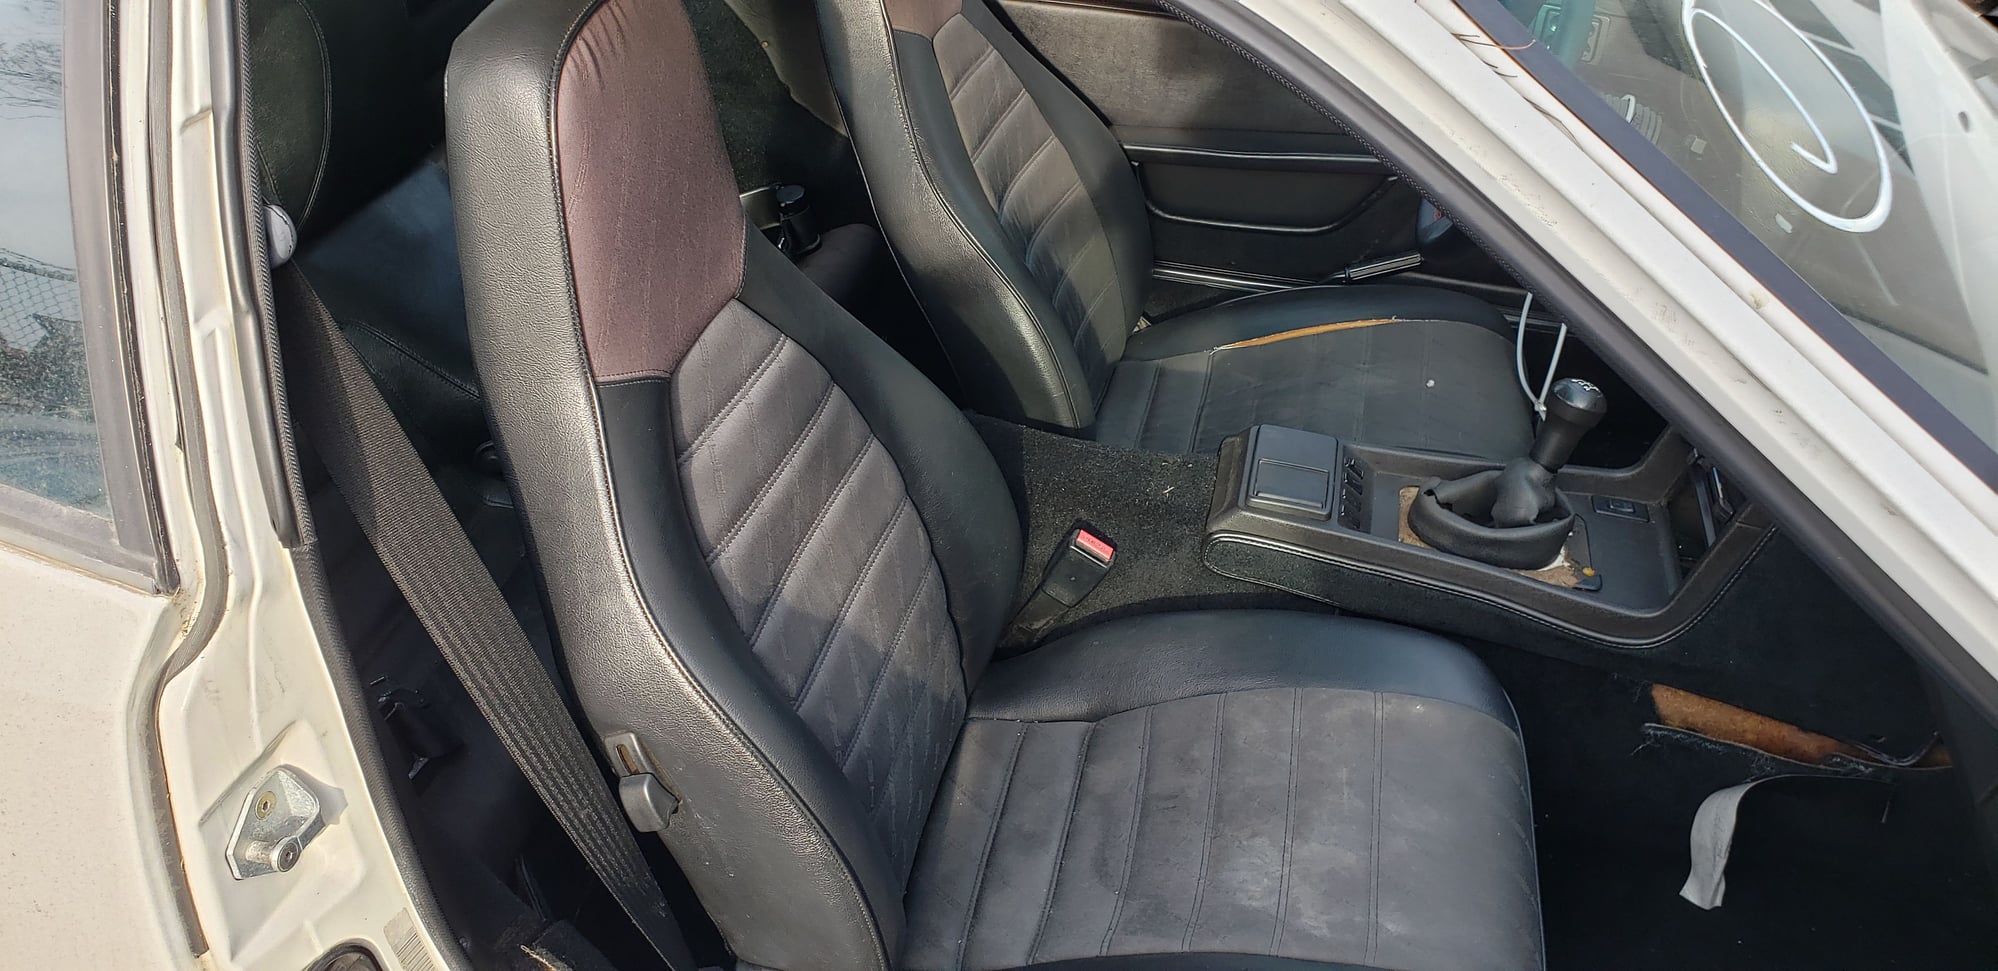
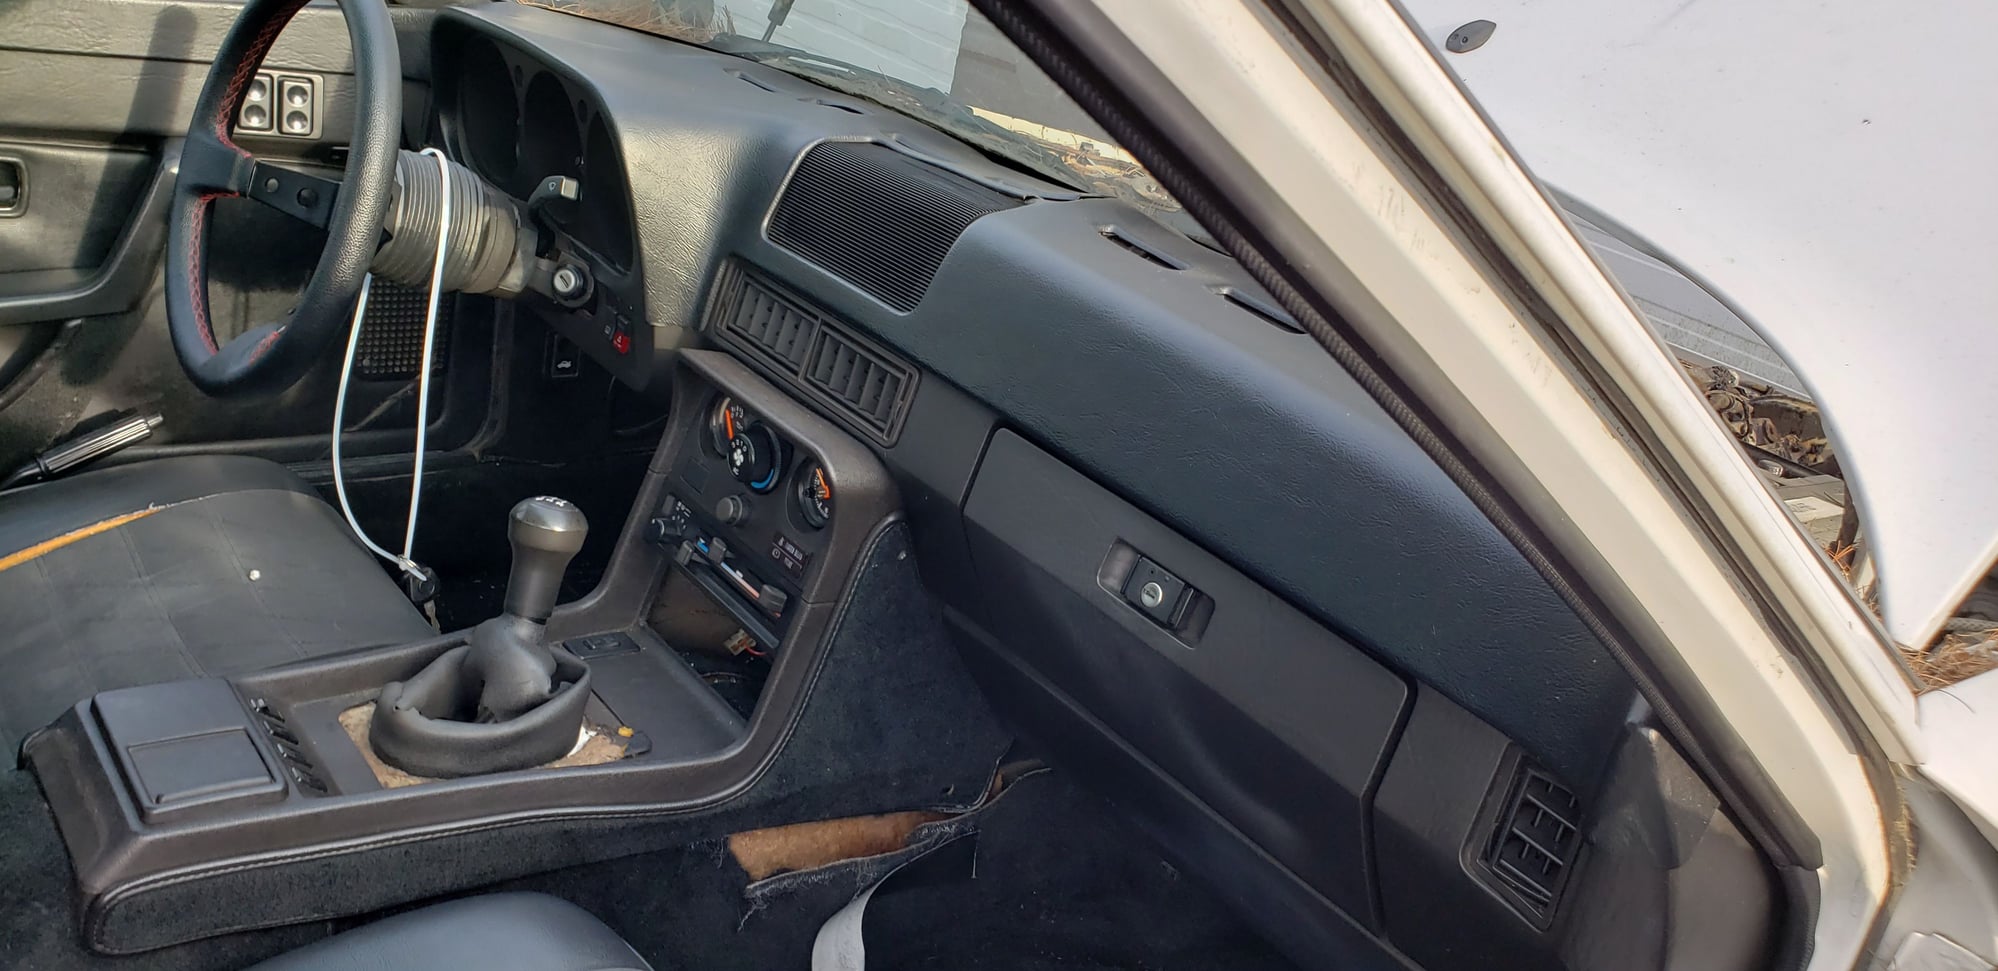
Now at this point, I got to ask myself........its a fairly unexciting (option wise) white on black 924s with 141k. No sentimental value here, I probably should part it out, but again, I like a hard luck case. Plus the remainder of the car isn't bad. Body is fairly clean (original paint) and interior is somewhat respectable (I have a decent steering wheel) and the seats are savable.
Notice anything missing from these pictures? I am always warning people who want to buy from salvage auctions. Expect the worse by the time the car arrives, ZERO extra parts. Heck, even keys don't always show up. In this case, the previous owner or someone along its journey to me helped themselves to the original Blaupunkt radio (at least they unplugged it), shifter boot, shifter trim, console box, MOMO horn cap center caps.......and even the front emblem. The list goes on. Nothing major but a lot of little things add up.
In case you think I am crazy so far, you are right but keep in mind I have a parts car which goes along way
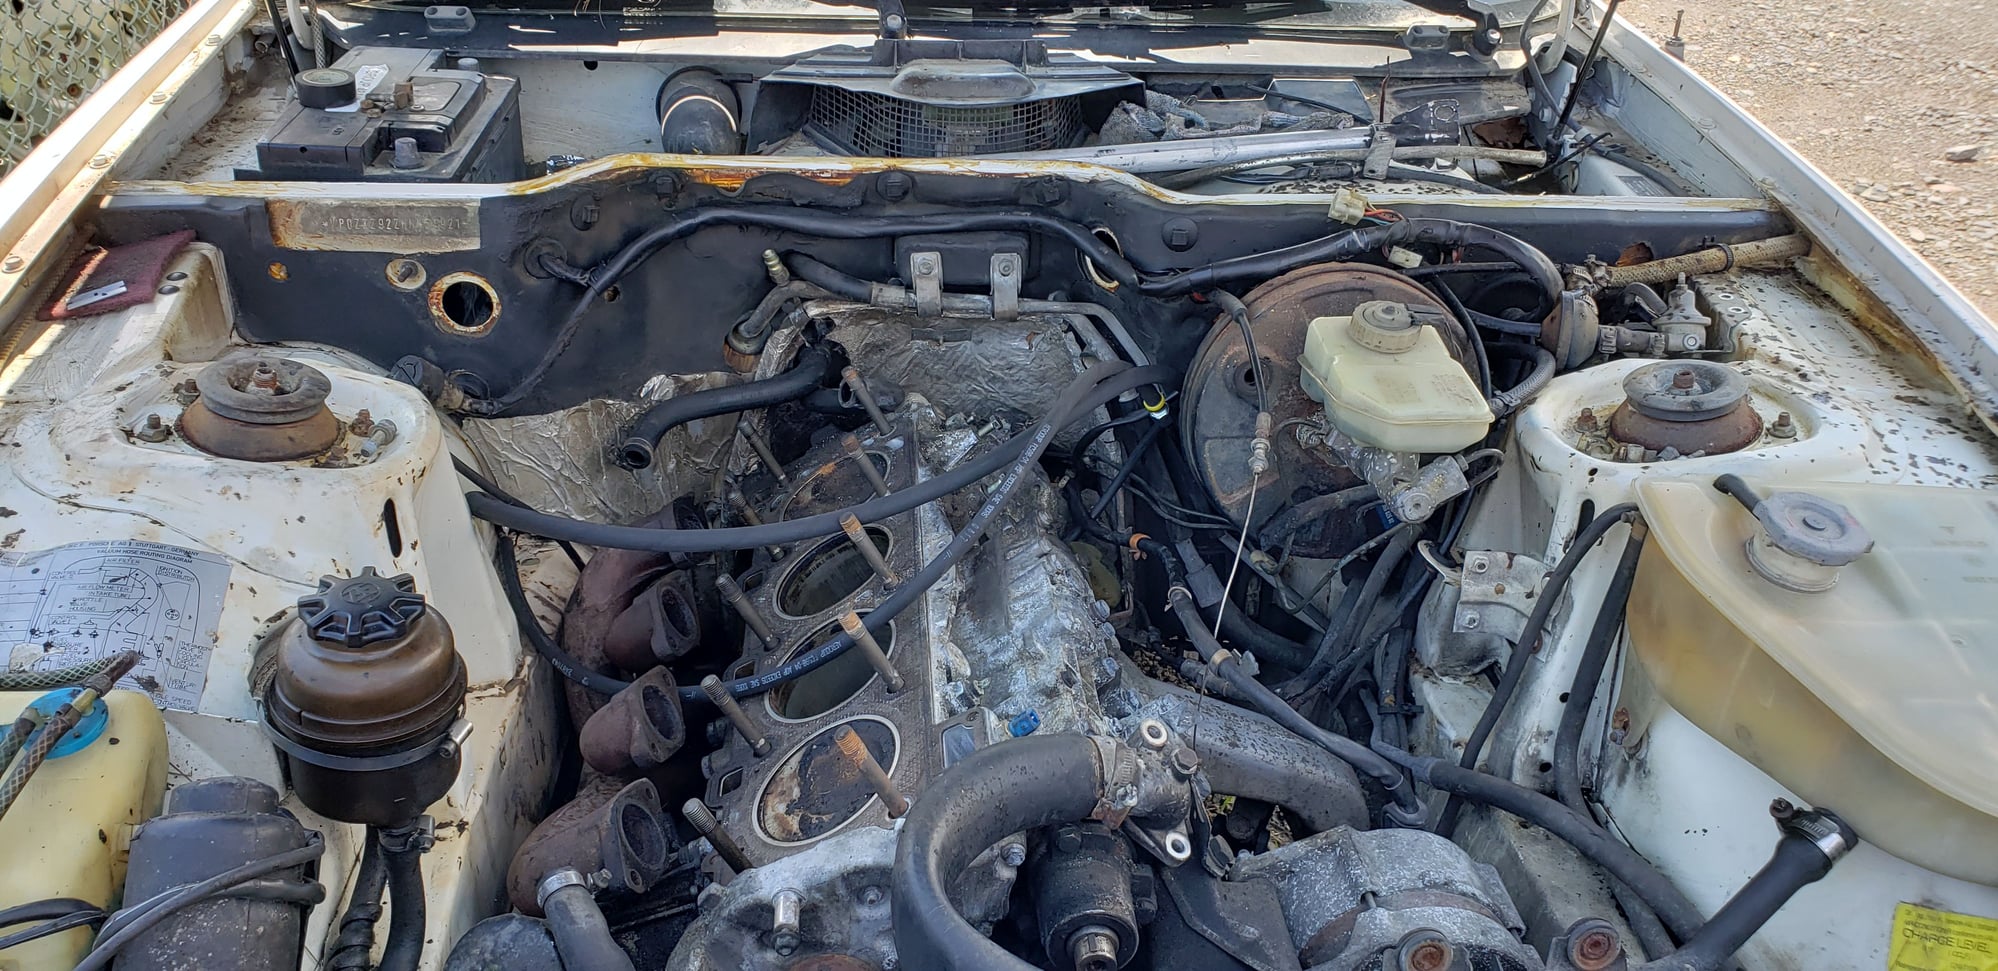
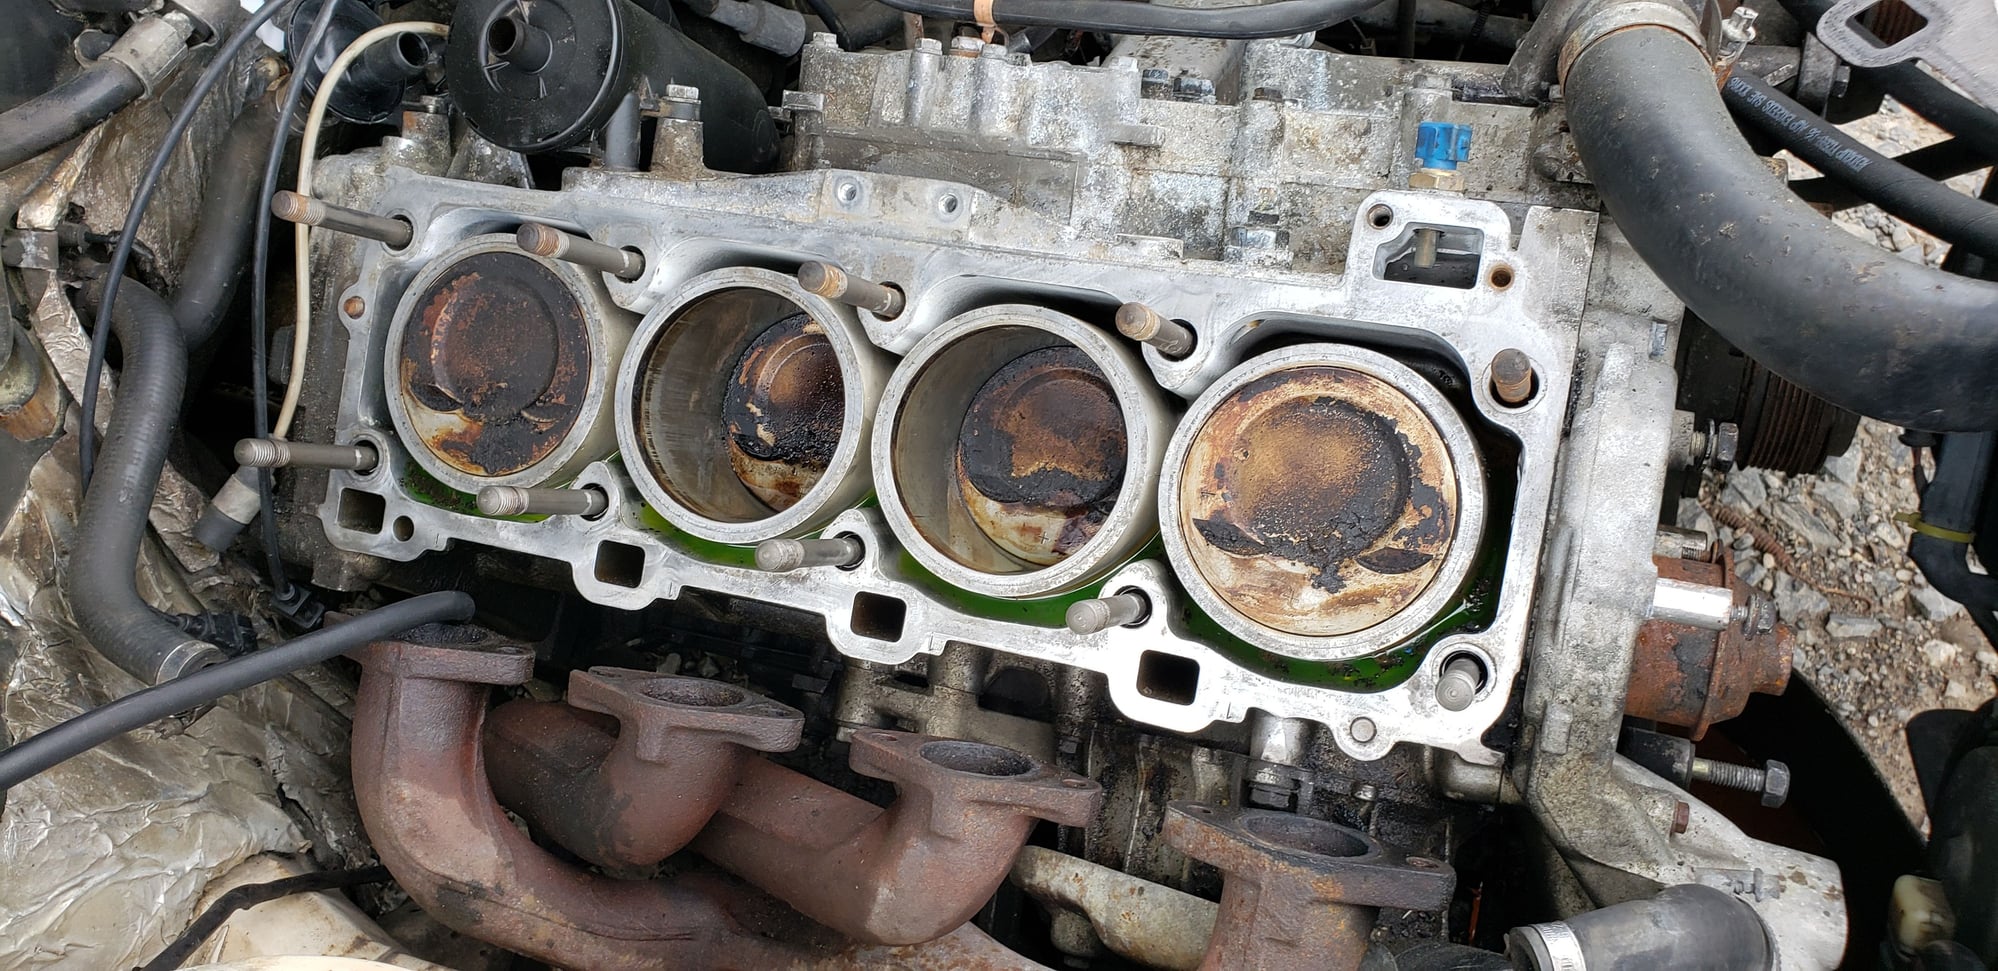
Fearing the worse, I stripped down the timing and balance belts and installed a timing belt temporarily and turned the motor over by hand. An eighth of a turn later I was contacting a valve. I figured I had to remove the intake and cam tower anyway so the head is really not a big deal at that point. After working years on 928's this was going to be easy
Started stripping down and cleaning up. Did I mention this melted hood insulation is a real PITA? It was clear as this came apart that someone had very recently did this same job. I was starting to believe that the last timing belt job in 11/18 also included the head. The carfax entry for it indicated "valve adjustment" along with water pump, timing belt and ignition plugs,cap and wires. My guess is that the head came off the same time. Fresh gaskets and hardware were present and made the job all the easier as nothing was seized of frozen. New fuel hoses are installed using Aeroquip hoses and pushlok fittings. BTW, on 924s and early 944 this job is a real bit$h. Not sure how I would have done it without the AOS and intake out of the way.
At this point, I am into 3 weeks of ownership and 6 hrs of work. Time to strip the parts car.......
Here is the parts car. Obviously, I would have to see out some unique items to the 87 such as DME harness and timing covers. Of course, I sold the AFM off this car long ago so I needed to hunt down a few deals.
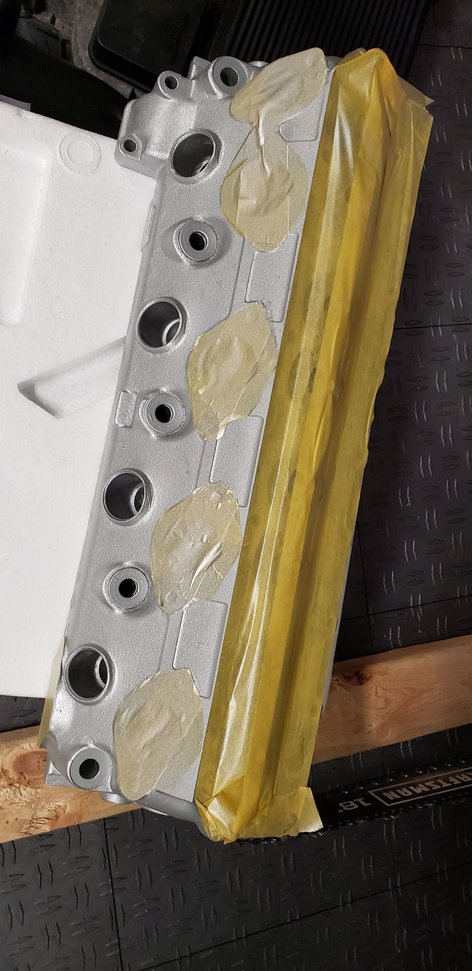
I sent the injectors off to Witchhunter for a $100.00 worth of cleaning/rebuild. I decided to use the intake and TB off the parts car as the path of least resistance even though I am certain the 87 could have been cleaned up. As for the head, ONE bent exhaust valve. That's right ONE. Not sure how only one got bent but once inside the head, its clear to see that this head was recently (less than 1000 miles) machined and rebuilt. I installed the valve and cleaned the head up
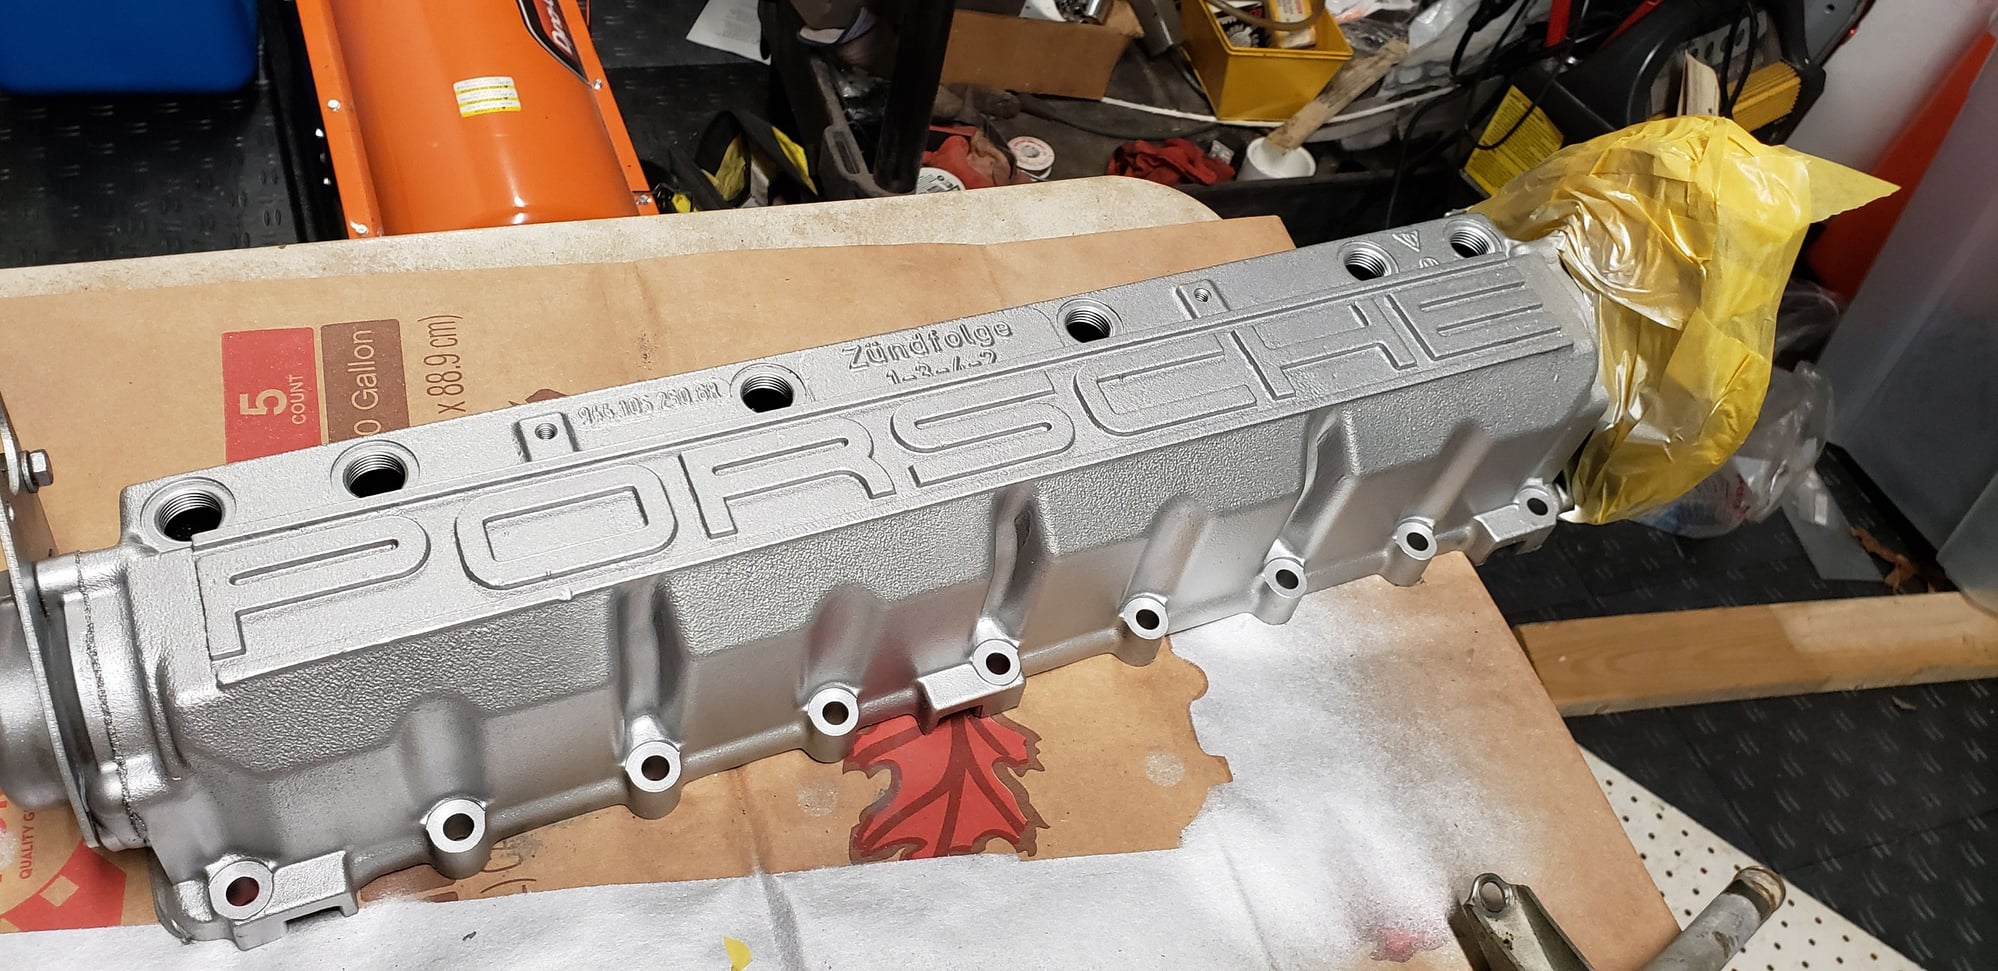
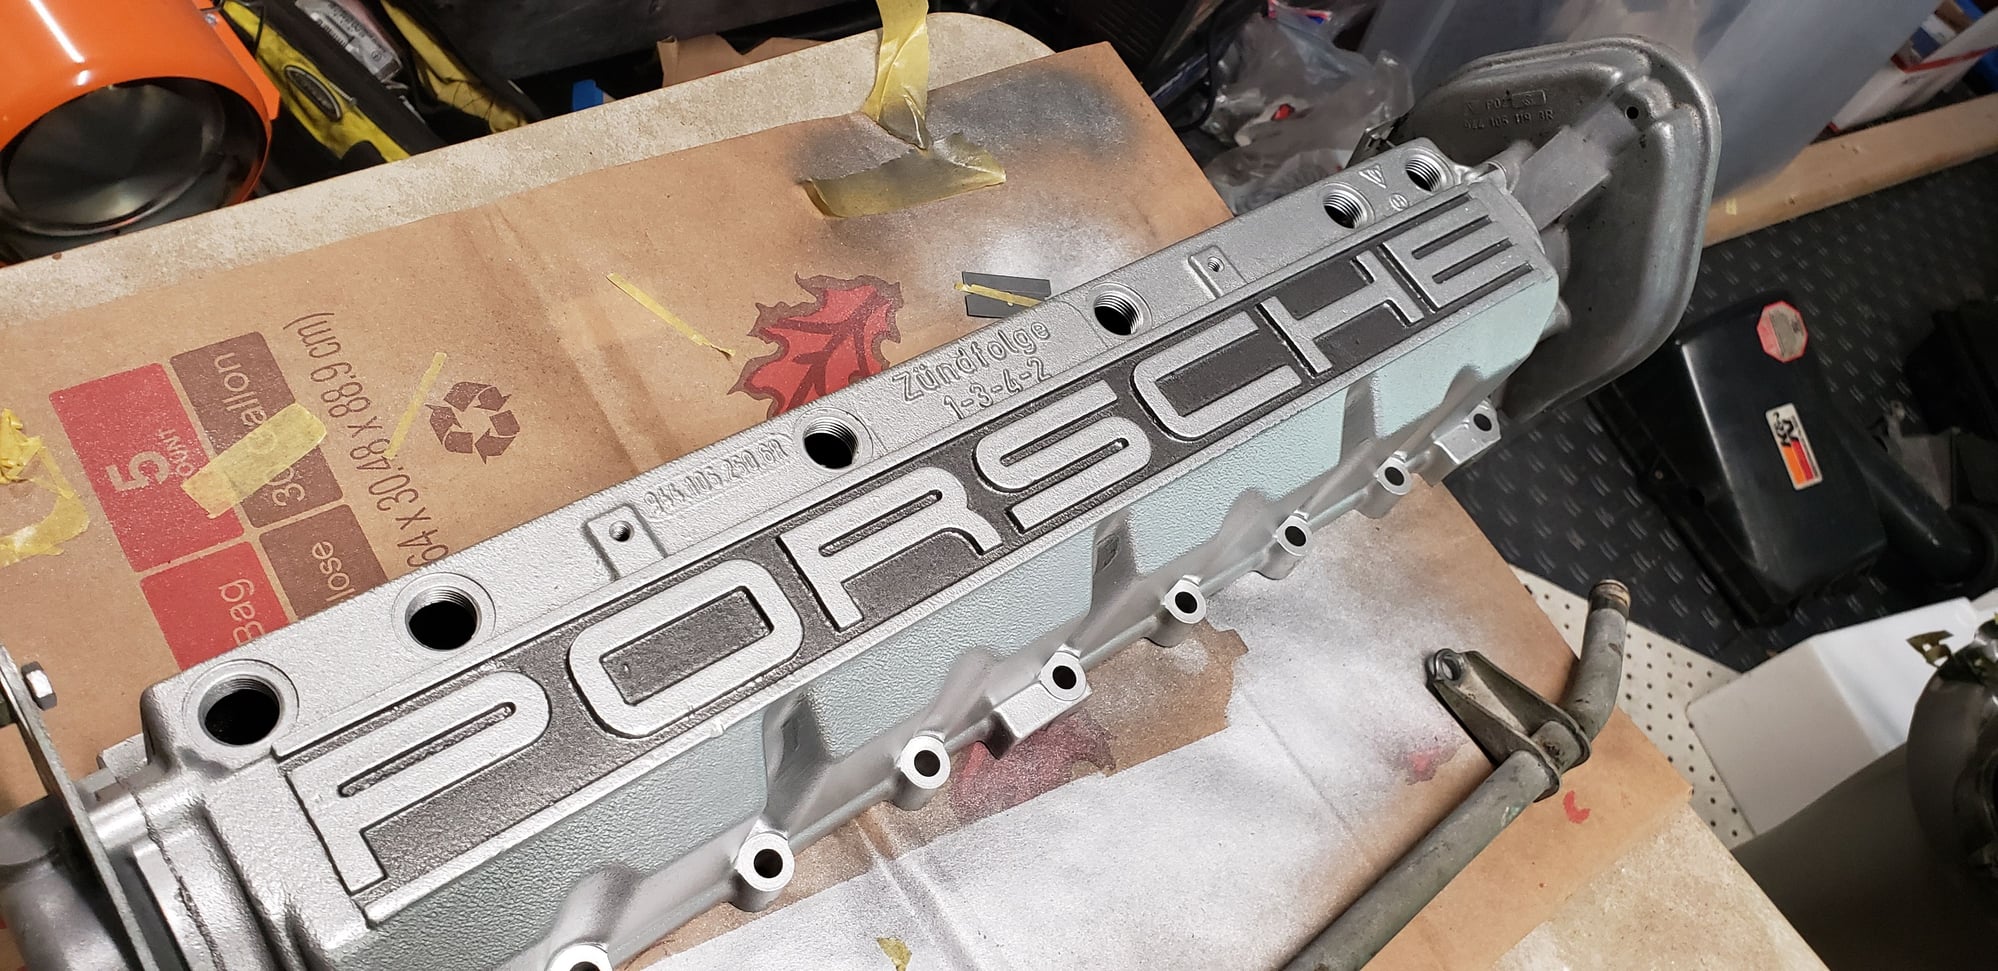
I am typically not a fan of painting these but even after the hi temp wash in a commercial machine, it just needed something a little more. A very light coat of rebuilder's cast aluminum was applied.
A little embellishment to wake things up a bit. I did the cam seals after this pic was taken using Greg Brown's silicone seal.
Excellent work so far! I'll look forward to your updates.
Thank you! I appreciate that.
Assembly time! I only get to work on this project about 3 hrs a week on a good week and then only in small increments. The order of assembly was particularly important as I didn't want to double back on anything. With the fuel hoses "roughed in" and some basic cleanup done, I started to prep the mating surfaces for reassembly. Since there was recent head work done on this car, this was pretty easy. I should note a couple of things at this point for those working on engine fires.......you may not always know how the fire was extinguished so check and drain fluids quickly so any water contaminants are removed. In my case, it looked as if the fire extinguished itself or was smothered. No signs of fire suppression or water use. All the same, I drained the oil and extracted the brake fluid. Here you see the replacement AOS fitted along with the reservoir for the M/C.
My total cash outlay at this point for parts is under $200 which covers gaskets and the new exhaust valve. At this point, I was still trying to hunt down a harness. The 85.5 parts car harness is in amazingly good condition but is wrong for the 87 in a few ways and while I could have made the adaptations, it would introduce too many variables to give me any confidence. For those interested, an 87 924s harness is unique and there is two variations for 87. An 88 924s harness will work but has an extra plug for an intake sensor. I bought a harness off ebay from a well known 944 supplier. He sold it as an 84 944 harness but it was in fact an 88 924s. Harness cost added another 119 dollars to the total cost.
Just curious as to the differences between the 85.5 and 924S wiring harnesses...
Good question. The 85.5 is an oval dash car so the harness enters the passenger side and integrates with the dash harness using a 14 pin plug. Also, no oil level sender on the 85.5. The 87 924s uses the old school square dash and the harness enters the driver side. It integrates with the dash harness using a six pin spade type connector behind the booster.
Using the proper or close to proper harness was a plug and play. It made spending the money well worth it. My 85.5 harness is Mint so I can likely sell it for nearly that amount.
I really enjoyed reading through your thread! Thank you for sharing the pictures and for taking the time to save the car! Will look forward to more updates!!
I really enjoyed reading through your thread! Thank you for sharing the pictures and for taking the time to save the car! Will look forward to more updates!!
Thank you! I appreciate it!!
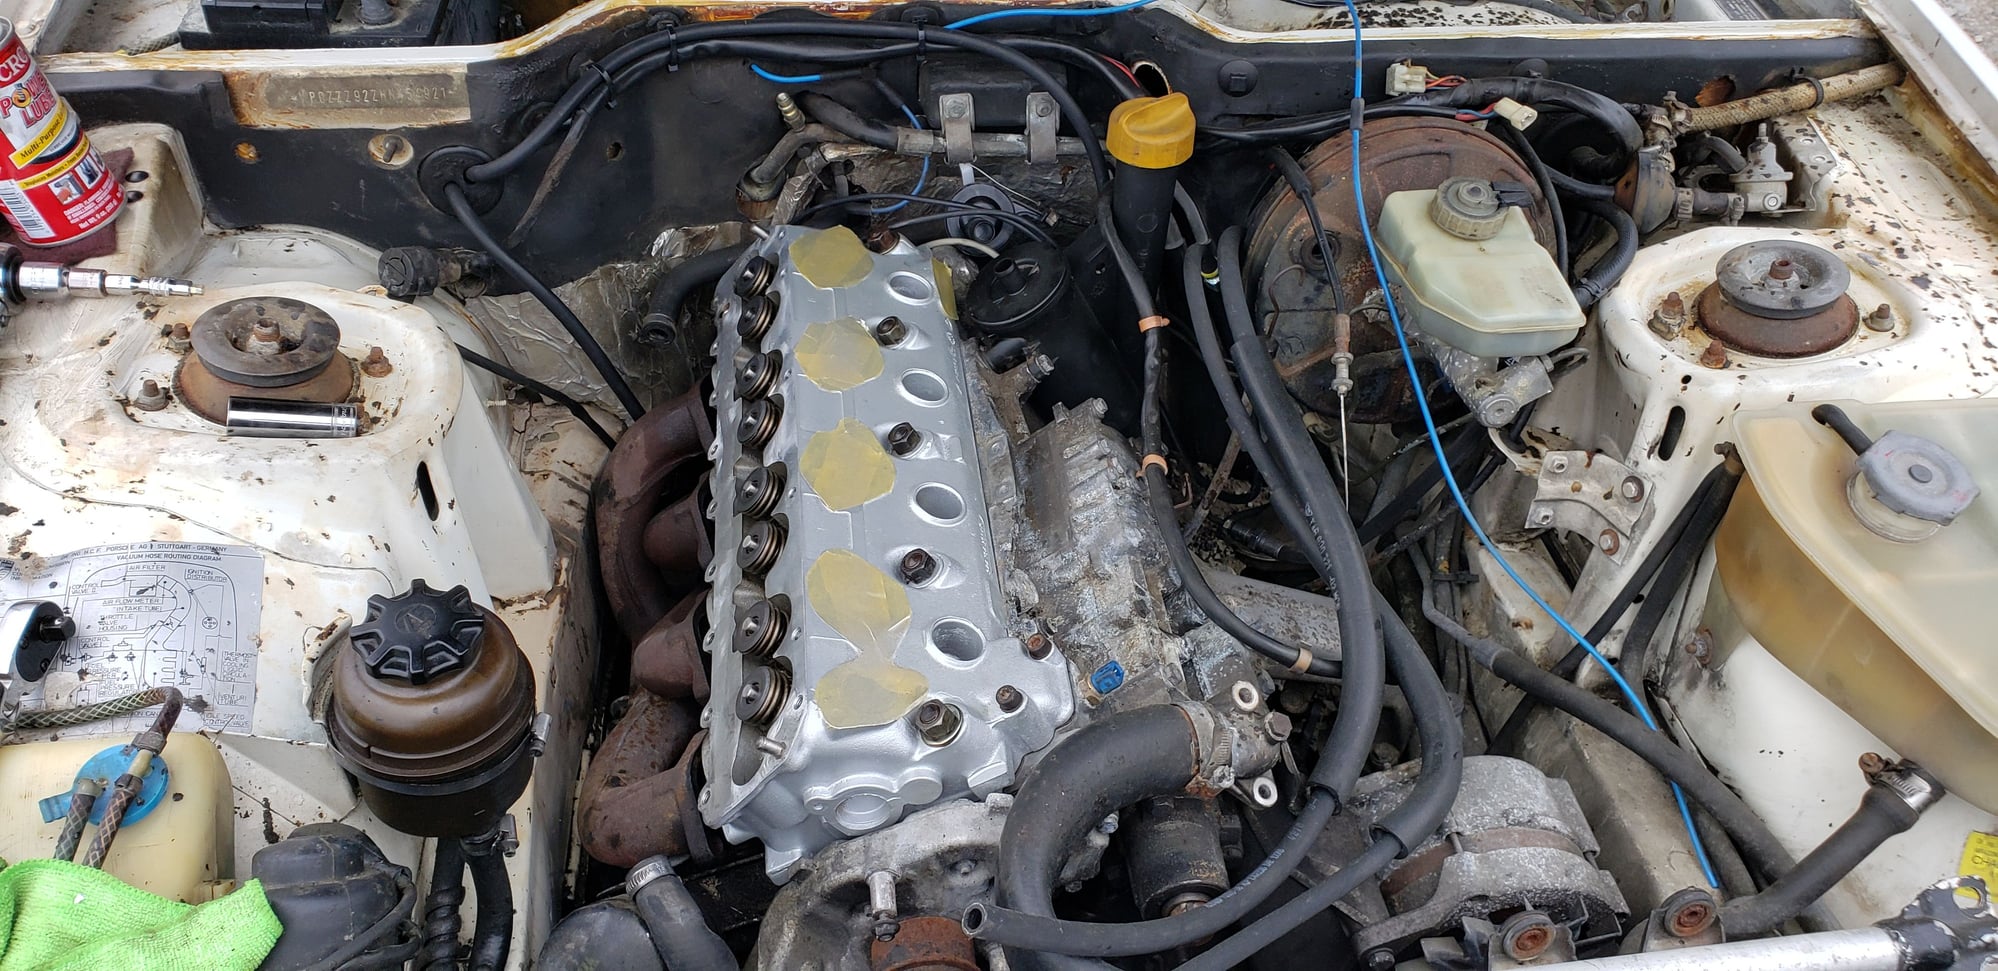
Around mid May, I installed the exhaust manifold and I installed the cam tower using a Greg Brown gasket. I must tell you that I was a little nervous as some previous ham-fisted mechanic used a rotary rolec disc to clean the surface. With that said, there were no obvious signs of leakage prior to disassembly so I went ahead with install. I put a dab of grease on each lifter to help keep them in place. I also had the engine locked at TDC and set the cam the same way during install. Would have loved to get the hardware plated as I did with previous projects but the budget just does not allow. Those gold cad parts are like jewelry! My 928 engine below
Prior to installing the wiring harness, I did a couple of continuity tests to be able to confirm the speed sensor plug since the tags were long gone. My parts car had newer sensors to donate to the project. Getting the old ones out was not fun given their fire damaged state. They were absolutely 100% seized in the housing. I actually resorted to cutting the roll pin in order to remove the bracket. I then extracted the old one and replaced it.
Installing the harness was interesting, not quite sure how Porsche ever intended anyone to get the wiring clamp for the harness back onto place by the bellhousing. It was crazy how tight the harness makes the area as it goes down and loops back up again. I tried to duplicate every method of securing it that was used at the factory. Luckily everything laid in place nicely. I did use the battery cables and starter harness from the donor with no issues. All connectors cleaned well prior to install, there will never be a better chance to keep electrical gremlins at bay!!
Really nice project and looks like a very nice car overall to save. Good luck with it.
Thank you! It's been a lot of fun so far for sure. One nice thing about the car is that with the exception of the aftermarket steering wheel and dash cap, everything else is untouched. Paint is about 95 percent original.
Here, the intake is started to be fitted along with vacuum lines. I actually lifted all the vac lines at one time from the parts car and transferred them over including the ISV. My plan was to get everything assembled and do the timing belt and balance belt last.
Here is my "workshop" for the past couple months. Even though I have a nice 3 car garage at home, I wanted to work in close proximity to the parts car. This old guy doesn't like working on the ground!

 06-01-2019, 11:17 PM