When you click on links to various merchants on this site and make a purchase, this can result in this site earning a commission. Affiliate programs and affiliations include, but are not limited to, the eBay Partner Network.
If your driving and your 'Electrical Load Shut Off' light comes on (It's a picture of a little red battery) then I may suggest you go straight home or at least get close to a tow truck or workshop. Because in about an hour or so, your car will shut down slowly then die. the A/C will shut off. the Instrument cluster will go dark, all lights shut off, no power windows, glass will fog up, then engine will lose power, and no matter how many times you pump the accelerator it will do nothing except limp to the side of the road, so don't be in the far left lane. once you limp to the next available right turn, then turn, and It will die right there, nothing, kaput� if you wait a few minutes, it will eventually start, and if you decide to drive, you will probably get 400 yards and it will die again. By now the car is running on the battery, so once the battery is low enough , End of Journey. I managed to Uber to Autozone, buy a new battery, put it in and drive straight home 20 miles, on battery power, so, the chances are YOUR ALTERNATOR IS FINISHED. Apparently this is a rare occurrence, So I am one of the lucky ones...
Hopefully this helps someone as well, and truly I hope this never happens to anyone, Local dealer wanted close to $4000 for parts and labor total, it takes around 11-12 hours from a tech apparently.
But I thought I would put a fresh thread as I think the last thread is dead over 2 years ago�
For anyone interested here is a copy of the manual for removing and replacing the alternator on the 955 Turbo models.
I had to split the pdf in two, as the file was too large.
The original alternator in my 2004 CTT is huge and it took me a good 30 mins to get it out, and in doing so, with a FULL Swear Jar, it split a rubber cooling line, there was NO OTHER WAY. PIA.
However, the new Alternator is, Drum roll�. about 1/2- 3/4" smaller in diameter, and boy was I glad, it just basically slipped straight in, phew!
Gaudin Porsche Parts of Las Vegas has the best deal for a new Alternator/Generator. Mark is very helpful!
948-603-015-EX GENERATOR (948-603-015-05) $373 OEM ($290 Core Charge)
Other parts required for the Alternator upgrade:
1 - 948-106-561-00 - NECK
1 - 948-106-462-00 - INTAKE TUBE CONNECTOR
3 - 999-073-103-01 - IGNITION COIL RETAINER SCREW
1 - 948-607-931-00 - HEAT SHIELD B CABLE
1 - 900-385-041-01 - HEAT SHIELD SCREW
1 - 999-512-652-09 - RETURN HOSE CLAMP
$24 to replace the split Coolant line 948-106-355-06, getting the Alternator out..
The end of the PDF Manual where you upgrade from the old 2 pin plug to the new 1 pin plug, I actually just reused my old 2 pin plug, as the new alternator still has a 2 pin plug socket. So far so good, No Problems, I guess it is ok, I will update if there is a problem with this.
When I look on the 2006 955 Wiring it only has 1 blue wire from the alternator and as my new alternator is the newer style, it comes with the new 1 pin plug. But the 2004 has 2 wires coming from the alternator, so thats why I just used the same 2 pin plug socket. All I did was use the new rubber boot from the new plug and slip it over the old plug, as the old rubber boot had to be cut off to get the plug out.
Also, I had no idea what put the hatch lock in service position means, I managed the project bypassing this step, so who knows lol.
Before I started this project I drove up the road slowly and put the air suspension in the highest setting, before reversing into the garage, this made a great difference in room under the vehicle.
I also disconnected the battery and removed it from the car. (I also changed the fuel filter and the 2 pre cat o2 sensors)
Harbor freight has some nice hose clamps to do the job for about $7, and anything else you need, no special tools if I can recall�
FYI I never drained my coolant empty either, maybe 4-5 quarts down, I bought the same coolant as what is in my car and some distilled water, so I didn't have to do all that special porsche cooling system filling technique blah blah, and topped it up, ran it for a few minutes, re topped it up, and it is perfect.
Nice job and thanks for posting that. You don't often hear about alternator failures on this car, but it does seem like something that will start to become more prevalent as a failure with the aging cayenne fleet, and more of them cresting the 100K mile mark.
I wonder why the new one is smaller? Was it made by someone else?
Yeah it is pretty rare the Porsche service techs around LA have seldom replaced these generators. I guess that's why the parts offices in all of these places I called in the area don't have the generators in stock on the shelves, they all come from Porsche in Atlanta.
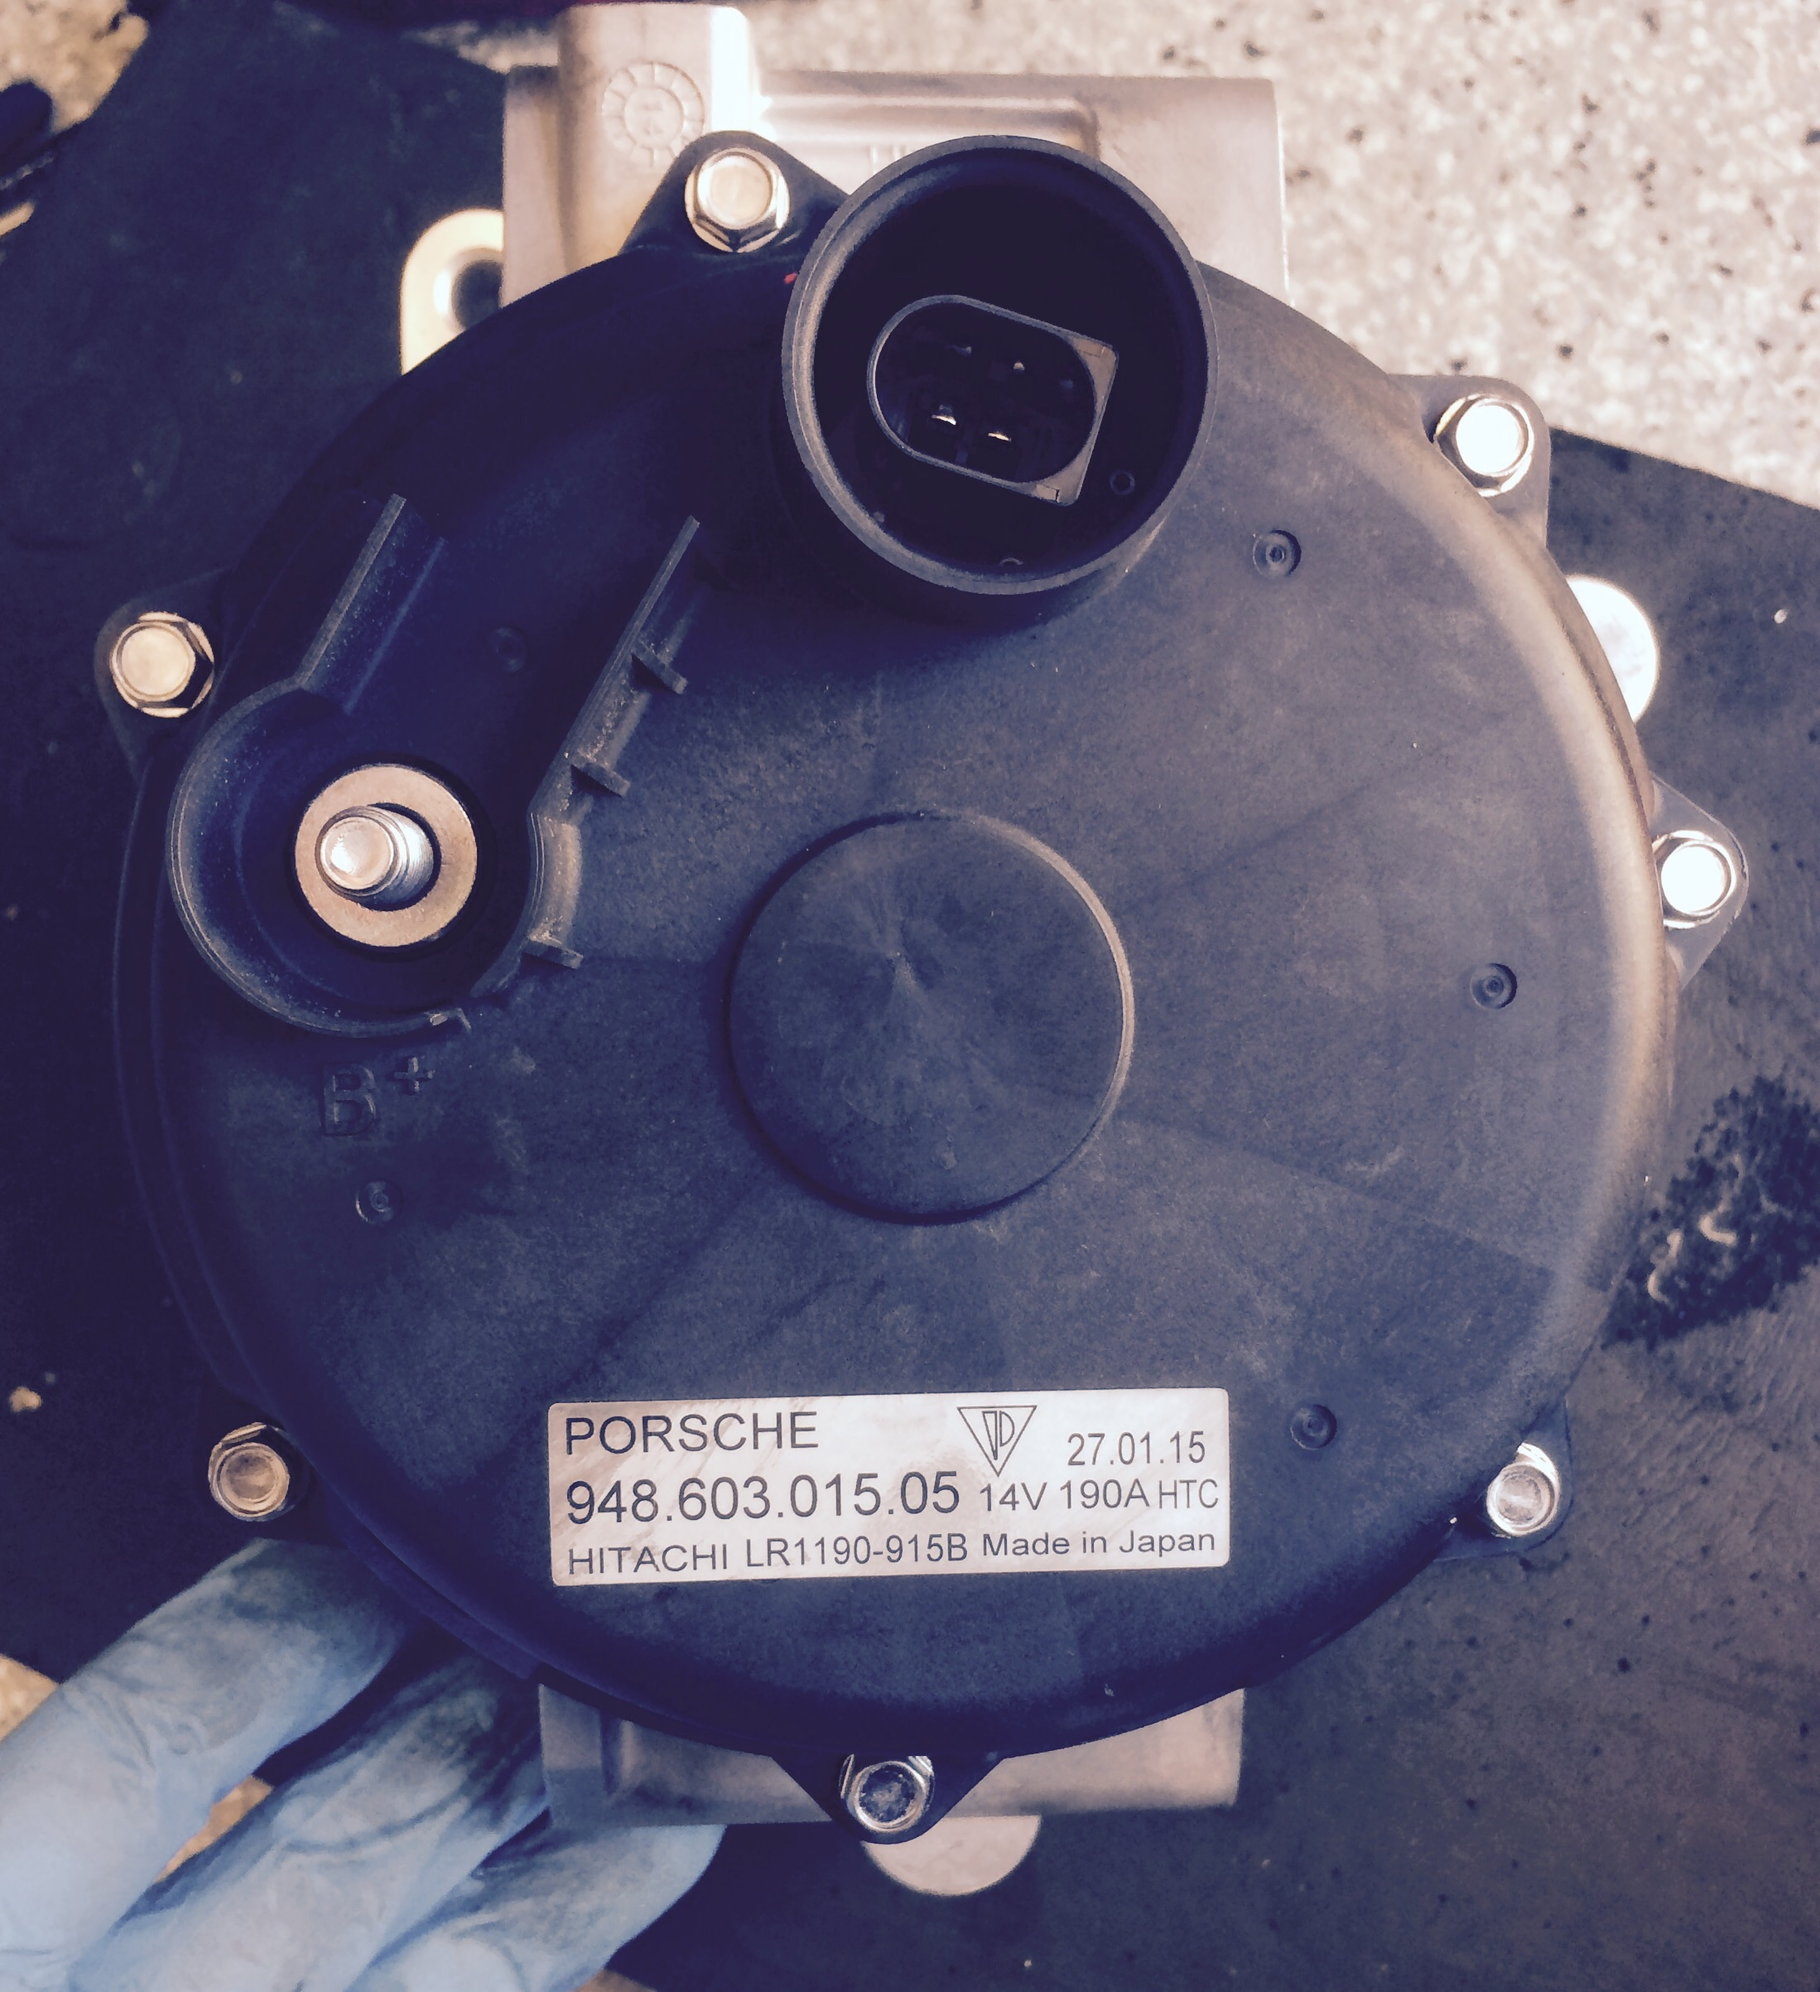
I believe it's a OEM refurbished with the outer casing the same and the internals rebuilt by Hitachi. So I guess that's what comes out of Porsche Atlanta HQ now when you order. Will upload a pic of the back.
My 04 CTT just hit 86004 miles when the Alternator gave up.
I actually wonder if more people have 'weak' or failing alternators. All of these crazy 'replace your battery and everything will be better' threads might be overlooking an underlying problem. I've read a couple of threads where they were tracking all sorts of issues, replacing batteries and the 'cure' ended up being an alternator replacement.
I know that since I've reduced my daily commute from 1hr each direction, freeway driving to 10 minute back road driving, I need to slap a charger on my cayenne every other week or I get a bunch of weird faults including 4-wheel drive, PSM, TPMS, weird entry and drive behavior, PCM issues, and choppy acceleration. Charge it up and most of that immediately goes away.
Hello guys I've got an 04 S. Here's the chronology. Yesterday driving around in Tampa the A/C fan speed slowed down while indicator was still at high speed (all bars lit up) A minute later got this message BATTERY GENERATOR which lasted 2 seconds and went away, 10 minutes after another message ELECTRIC LOAD SHUT OFF which is permanent now. Battery indicator now reads 11.9 or just below 12V instead of the usual 14V. I was able to get home about a 30 min ride. My first gut reaction is ALTERNATOR but want to make sure I explore any other options and not just throw parts at it specially a $500 alternator plus the pain in the rear to put it on. I've been looking online and seen different opinions and other options seem to be: 1) Ground cables and 2) V.E.S. module which does have some signs of going bad when you start getting weird little quirks like radio turning off by itself which happened to me last month once. Also my tailgate rarely opens form the back of all the sudden I have to hit the door switch first. Any other things that could be wrong before I go and by an alternator? I did replace both batteries (Interstate) 2 years ago. Is there a way too test the alternator without taking it somewhere? I made it home by luck I think. Also the fact that it is charging almost 12V would that be a sign that it is NOT the alternator meaning that when they stop working they just stop putting out voltage or can they just not work properly and just put out 12V instead of the 14V I always see in the dash? Really appreciate your help. Thanks!
By the way I do have DURAMETRIC
Last edited by Fabianrou; 07-24-2015 at 03:59 AM.
Reason: Additional info
I currently have a '06 CTTS and previous was a '05 CTT and I'm a little confused. Both of these had Watercooled Alternators? The pic you have doesn't look anything like the two that I've seen. Does Porsche replace them now with a non-watercooled Alternator or did the '03~'04 have non-watercooled?
First off, thanks to Metatron for posting in the other thread, and starting this one. I used the instructions to get a feel, and then subsequently bought a second hand set of the service manuals (pirated, on a couple of discs, but whatevs).
Metatron mentioned skipping the ‘detach lock mount – move to service position’ step. That’s a big step! I located the instructions for this step in the manual. Basically this steps means moving the whole front structure (the composite heat exchanger support) forward to allow further access to the engine. However, the rad hoses are still connected to the rad, as are the AC and oil cooler lines. This is typical VAG practice, even though I never did it on my B6 A4 (thank goodness) and we all know where the Cayenne’s roots lay.
Even then it was quite tight to remove the alternator, after filling my own swear jar, I eventually loosened the right side turbo’s wastegate actuator (just two bolts) and that finally gave enough clearance to get the alternator out. For the life of me, I have no idea how Metatron got his alternator out without moving the lock mount to the service position.
I also made a huge mess on my garage floor with coolant everywhere. I drained the rad, but access to the lower bolt of the alternator impact bracket (the U-shaped thing in step 6 of the alternator removal instructions – WTF does this piece do anyway?!?) was difficult as one of the coolant hoses to the oil cooler got in the way. Took that one right off and out came much more coolant. On the flipside though, that means I didn’t need to clamp the coolant lines to the alternator – which would have been a huge pain for access because the only hose pinchers I could buy are much larger, not like what is seen in the instructions.
Also very difficult was accessing the top bolt on the alternator itself. This one faces the front of the car, as opposed to the other two which are from the side. The problem is that there is no real direct sight to it, you have to feel your way. It’s located right next to the coolant line there.
I’ve spent about 5-6 hours getting the alternator out, but this is my first time working heavily on my Cayenne (though not the first time working on cars, lol).
There is a specific VAG tool to hold the lock mount in the service position (part number T10093 – google it and a bunch of links come up). I didn’t have this tool, but the instructions just mention using a bolt – would have been nice if they supplied dimensions, that would just make too much sense though. So I’ll save some of the guesswork – I used an M10 x 1.5 thread pitch bolt, probably about 150-200mm, just whatever I had on hand. I may go and acquire some longer bolts, as really the only limitation on how far forward one can pull the lock mount forward is the length of the rad hose and the other heat exchange lines.
After beginning this job, I think I should have just bitten the bullet and paid the shop to do it. It is a huge pain in the butt. But I will see it through, and as always, there is the huge sense of accomplishment when finished, not to mention that money saved on labour costs can then be applied to parts!!
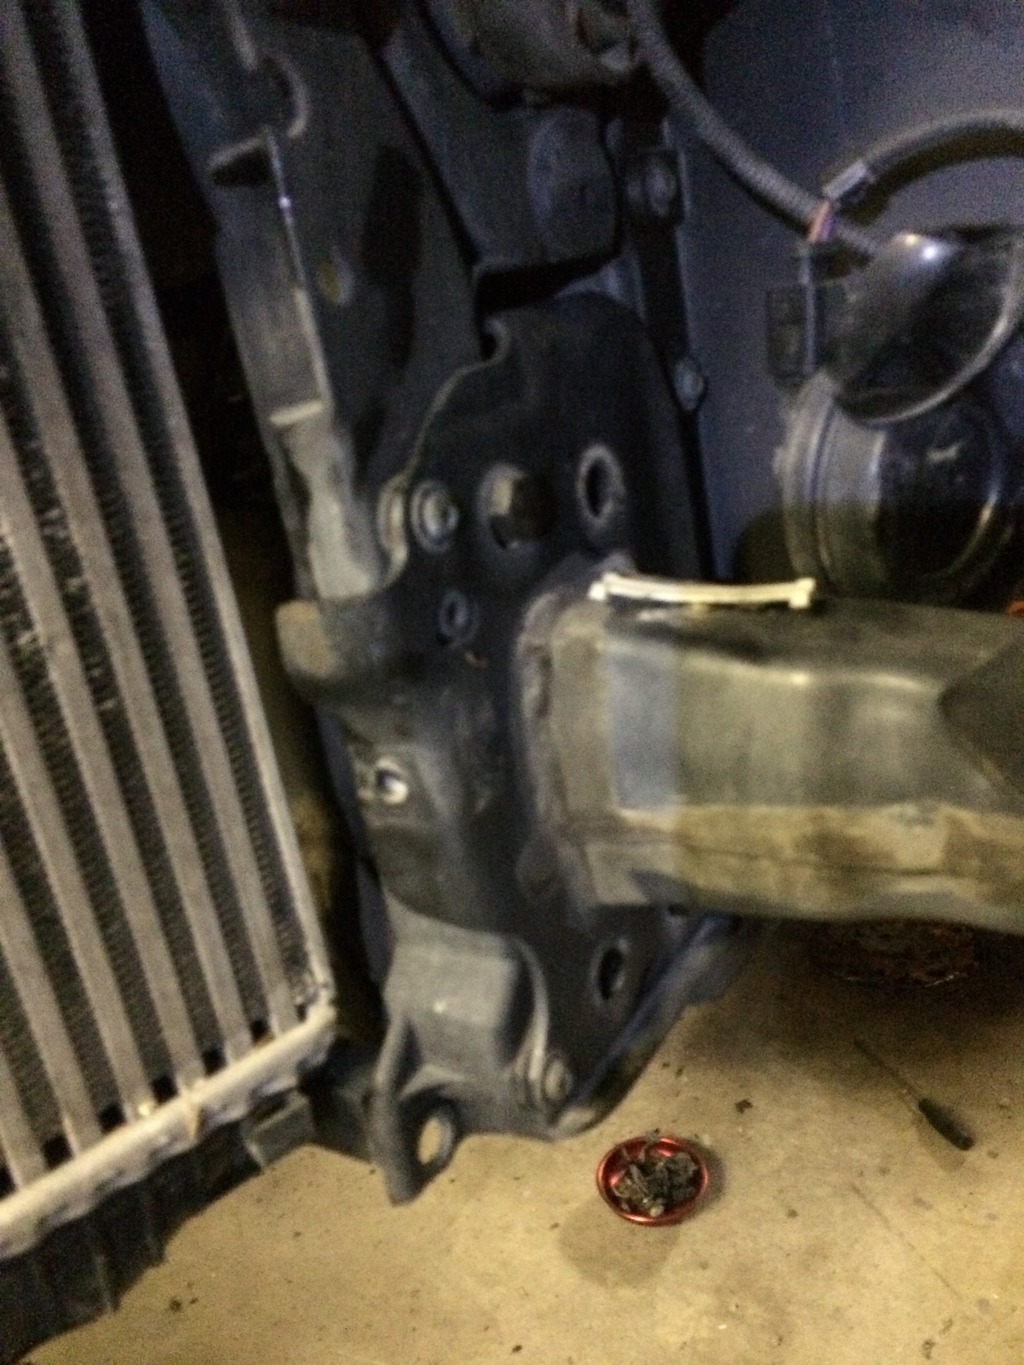
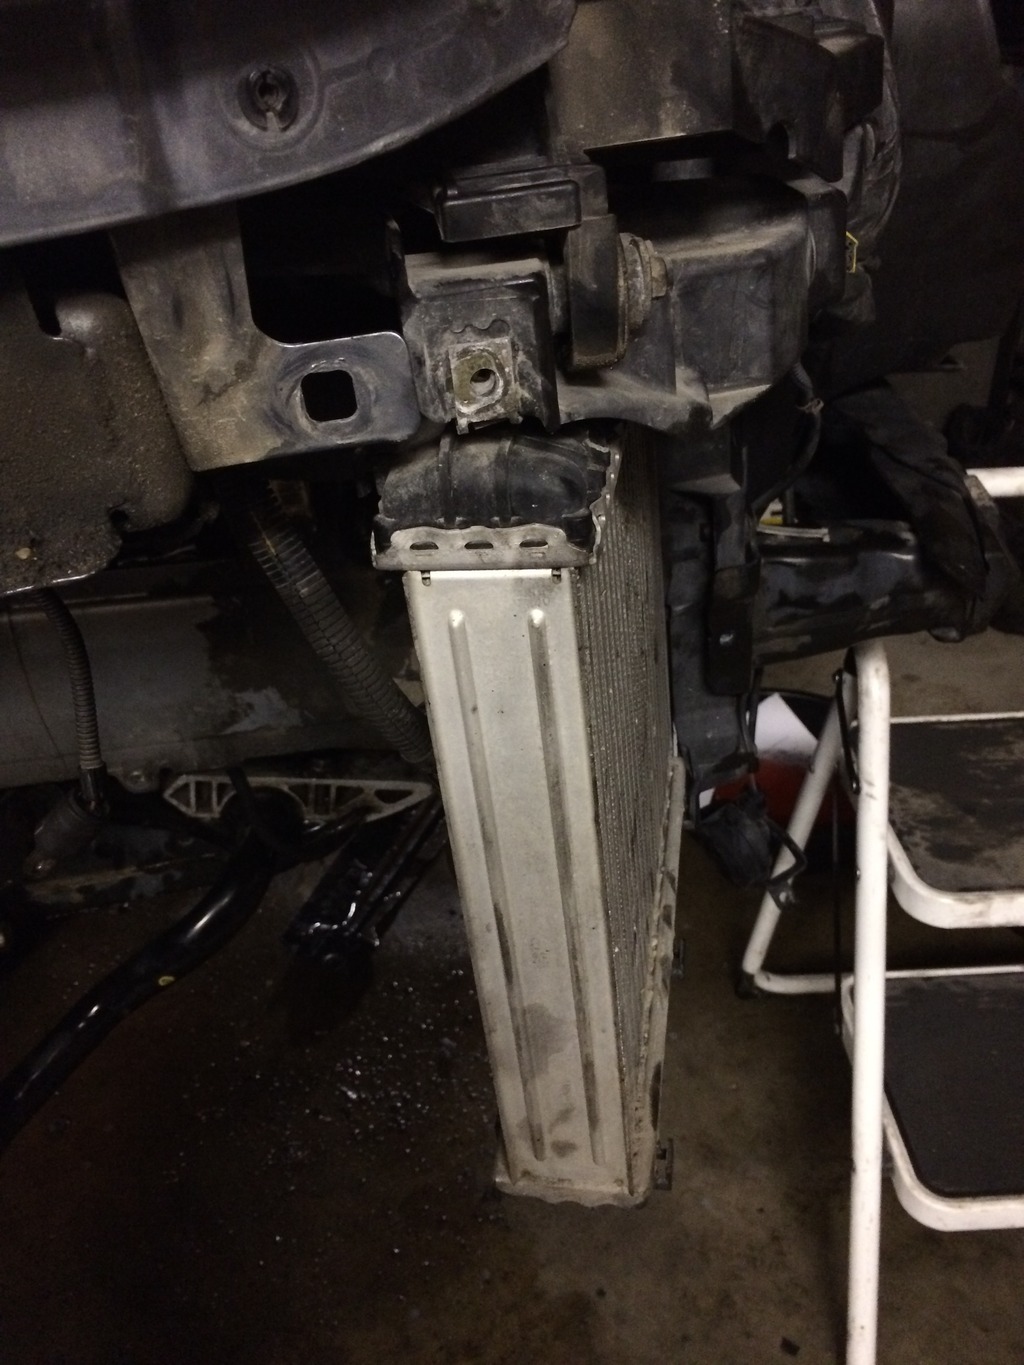
Some pix of the lock mount in service position, and you can see the difference. Also posting the instructions for the lock mount into service position step, as I couldn’t see any discussion anywhere.
A bit difficult to see in the first picture, but there are four bolts on each side that hold the lock mount to the chassis. Here, the picture shows those four bolts removed and my two bolts installed, and the whole thing slid forward to the ends of the bolts.
The second picture shows how far forward the lock mount has been moved.
Fail - the bolts for holding the lock mount in the service position should actually be M12 x 1.5, 150mm length should be enough.
That's interesting. My factory shop repair manual says there's no need for any special tool; just to "Use standard part (hexagon screw M10 x 105)". Quite a discrepancy from your actual experience, but since you're "hands on", I think I'd go with your findings over what the manual says.
I haven't had to do my alternator yet, but I can see how the labor time can add up with all of the disassembly necessary to put the lock mount in service position. Half the battle in doing repairs on the Cayenne is having to typically go through disassembly of multiple items just to be able to work on the intended part. And then many times, once you get there, even that is no walk in the park. Ah, the joys of Cayenne DIY ownership . . . .
First, the guy at the bolt shop yesterday actually gave me M8 bolts, not M10.
Second, I didn’t check them – either at the shop or last night at home when I tried putting them into the bolt holes, and just assumed.
Third, I posted the wrong info!
Comedy of errors. Result – the correct bolt is an M10 x 1.5 thread pitch. I managed to exchange them with the shop this morning, and I think I have them again at about 150mm length.
Local independent shop quoted $1250 to replace the alternator with the sane NEW Hitachi alternator that Porsche uses. People on this forum warn against using used or reconditioned alternators... seems to be a very high failure rate of used/reconditioned alternators and the sub-$400 price sure sounds like used/reconditioned. Cheapest source I can find for guaranteed/new Hitachi is about $850.
I have a b6 a4 that ive had the front off too many times. The Cayenne is almost exactly the same. For any repairs which place the core support in the service position I would advise to take a few extra minutes and disconnect the a/t cooler lines, rad hoses, associated wiring and swing the entire support off to the side out of the way. Once you learn how to do it you can get this level of access in about an hour. I say swing out of the way because you may not be able to remove the a/c condensor without disconnecting lines that pass thru the core support.
What im curious about are the differences in harness change to one wire and coolant fitting changes associated with the alternator update from Porsche? As far as I know 955's could have come with a Hitachi or Delphi alternator.
Thank you Metatron and others posted on this thread. After confirming that my 2004 CTT alternator was not charging the batteries, I decided to replace it myself with all the help from this thread. Could not have done it without it.
I thought I will share my experience with those coming after me. Replacing the actual alternator only requires removing three bolts that attached the alternator to the bottom of the passenger side of the engine. Most of the work is disconnecting enough stuff to get to the alternator. I bought the replacement alternator from my local Porsche dealer. To my surprise, their price was same as many of the online sites. My original alternator was a Delphi. The replacement from Porsche is a Hitachi ($710). At first, I did not understand why I needed the following from Metatron's message:
1 - 948-106-561-00 - NECK
1 - 948-106-462-00 - INTAKE TUBE CONNECTOR
It turned out that I needed the Neck and the intake tube to route the alternator coolant to the front of the car. The newer design alternator has the two coolant holes facing the ground instead of facing the radiator direction.
For a rookie like me, at first I did not understand what they mean by putting the car in Service Mode. What that means is that you have to pull the front end of the car out few inches in order to have enough space to get the alternator out. The front end is the radiator, the turbo coolers, and the front bumper, which is held to the frame of the car by 8 bolts. Four on the left and four on the right. I bought four M10x1.5, 150 mm long bolts to allow the front end of the car to slide on these four bolts. You basically replace the four bolts on each side with two of the long bolts on each side. This is also why you have to drain the coolant and discount the hoses before you can pull the front end out.
For the alternator, I also reused the existing wire connector. The wire with the connector that came with the alternator is too short anyway, which is why they sell the following parts to do the job:
948 607 931 00 heat shield, (1)
955 603 165 00 plug socket, (1)
N 906 845 02 plug connector, (1)
955 603 167 00 gasket.
But I did not get the above four items, since I did not use the wire and connector that came with the alternator. On the alternator side, the wire connector is exactly the same as the old alternator, except the new alternator only use one wire. But that is not a problem, the old wire connector from the engine fits right into the new alternator. No modification was needed on the old wire connector.
The trick is taking the new wire connector out of the boot and using the new boot to seal out the moisture. I carefully used a razor blade to slit the back of the new boot ( X shape) big enough to slide the new connector out and slide the old connector in.
Here is a quick summary of the steps to take out the old alternator. Systematically keep track of the screws, bolts, hoses, electrical connectors as where they belong. This will save you a lot of headache when you try to put everything back.
1. Put air shock to the highest position and service mode, if you have air shocks.
2. Disconnect the negative side of the battery under the driver seat.
3. Remove the front passenger tire and well cover.
4. Remove the air filter housing on passenger side
5. Remove the air pipes between the engine and the radiator. So you can partly remove the serpentine belt from the alternator from the top.
6. Remove the front plastic bumper that has the front drills.
7. Drain the coolant. Keep a pan or bucket nearby because there will be coolant coming out when you disconnect the hose from the alternator.
8. Replace the eight bolts with the four long bolts (from the hardware store or online) that hold the front end of the car to the frame. So, you can slide the front end out like it is on a rail.
9. Remove the serpentine belt that is on the alternator and leave the rest of the belt on the rest of the stuff e.g. power steering, water pump...etc.
10. Remove the impact bracket right the alternator.
11. Remove the alternator.
(Install in the reverse order) I have a Air-lift tool to fill the car with new antifreeze, which is almost a must have gadget. I also have been and still use Peaks antifreeze without any issues. I do not think the $$ Porsche coolant is necessary.
I have left out a lot of details that you have to fill in as you go such as disconnecting a lot of small sensors and hoses and whatever that keep you from pulling the front end out and getting the three long screws that bolt the alternator to the engine.
I took enough close up pictures of the wires and hoses, so I can use it as reference when I am putting everything back.
If you are doing this by yourself, another trick I used to get the alternator out and install it is with the help of a small rope and 2x4 stud. This alternator is heavy. After I have the coolant pipes and screws loosen or disconnected from the alternator, I tied a small rope through one of the holes on the alternator and tied the other end of the rope to a 2x4 stud. Imagine getting a heavy bucket of water out of a well. I slowly rotate the 2x4 stud (to shorten the rope) to pull the alternator up between the engine and the radiator. Just make sure the 2x4 stud is not sitting on something fragile on top of the engine that would break stuff on top of the engine.
One tip, while you can see the alternator from the passenger side under the tire well, the timing chain tensioner is right there on the passenger side of the engine near the alternator. Mine was actually loose and dripping oil.
The tensioner looks like a 30 mm or 32 mm bolt. The torque spec is 42 ft-lb, but I could not get a torque wrench in there. So I just hand tighten it with my best guess. Now I have stopped the oil drip from the passenger side. A bonus for replacing the alternator.
Last edited by Rickiteasy; 07-10-2020 at 10:47 PM.

 05-26-2015, 11:37 PM