When you click on links to various merchants on this site and make a purchase, this can result in this site earning a commission. Affiliate programs and affiliations include, but are not limited to, the eBay Partner Network.
The wheel rim scrapes are now history. Having run the wheels up on a Hunter machine and confirmed them as true, it was time to get the scrapes repaired and paint freshened.
Some trades are painfully slow so it was a matter of deciding a balance between cost, quality and time. I chose a mass market company in the end and masked the barrels so they would retain the original finish. I am happy with the result. Loading up the old Cayenne.
Pre repair and paint Barrels masked up. After paint. Barrels still with their original finish Markings still legible Center cap lined with with the tyre valve.
Nice work, John. Loving the trials, tribulations and subsequent progress.
BTW, we just picked up a 2010 Cayenne Base for our daughter to drive. Looking at the dash of the vehicle carrying your wheels I see you also have one. Kinda ironic that we have three of the same vehicles.
Each day is a small step forward for the Spyder. Today, the certifier signed off on the replacement air bags and seat belts. The air bags have stickers that will go in the guarantee and maintenance book. Everything is traced to the final compliance.
Nice work, John. Loving the trials, tribulations and subsequent progress.
BTW, we just picked up a 2010 Cayenne Base for our daughter to drive. Looking at the dash of the vehicle carrying your wheels I see you also have one. Kinda ironic that we have three of the same vehicles.
Mine is an ‘05 S. It’s currently misbehaving with a cowl leak.
When the Spyder left the auction house, the bumper, fender and left headlight were left behind with a friend as there was no where to store them in the car while being transported
Yesterday, I flew down there to harvest parts.
The bi-xenon lights are $$$$.
I bought a new base, then bought a used RHD light off the local EBay Predictably, the seller had harvested the expensive HID igniter and bulbs. All is not lost though, as I was able to get those off the old light.
I have no experience with bumper repairs so relied on a friend when deciding to rescue this. I will have to source welding rod for PP T20 plastic which is polypropylene reinforced with Talc. The grilles, inserts and DRL are reusable. I will need to replace the DRL surrounds. Luckily they are inexpensive.
While washing the bumper, it dawned on me that something was wrong. Why does a PDK car have a blanked off central vent?
A check of the part number and manufacture date confirmed this was a replacement made in May 2015. It was obviously for a manual car and the central radiator has had no air flow for years.
A special thought process must have gone into this repair. I will just have to remove the blanking plate before fitting the bumper.
[QUOTE=John McM;18889862]Simon, it arrived. You are a legend. Back in ‘21, I sent a 964 alternator to Tiaan in Canberra for parts. I’d like to think this is karma. Thanks
FWIW Porsche call this a filler piece.
Left one is 987.561.813.02
Right one is 987.561.814.02
Design 911 list each side as Ł30.24!
/QUOTE]
Hi John, loving this rebuild thread! Thanks for sharing your journey.
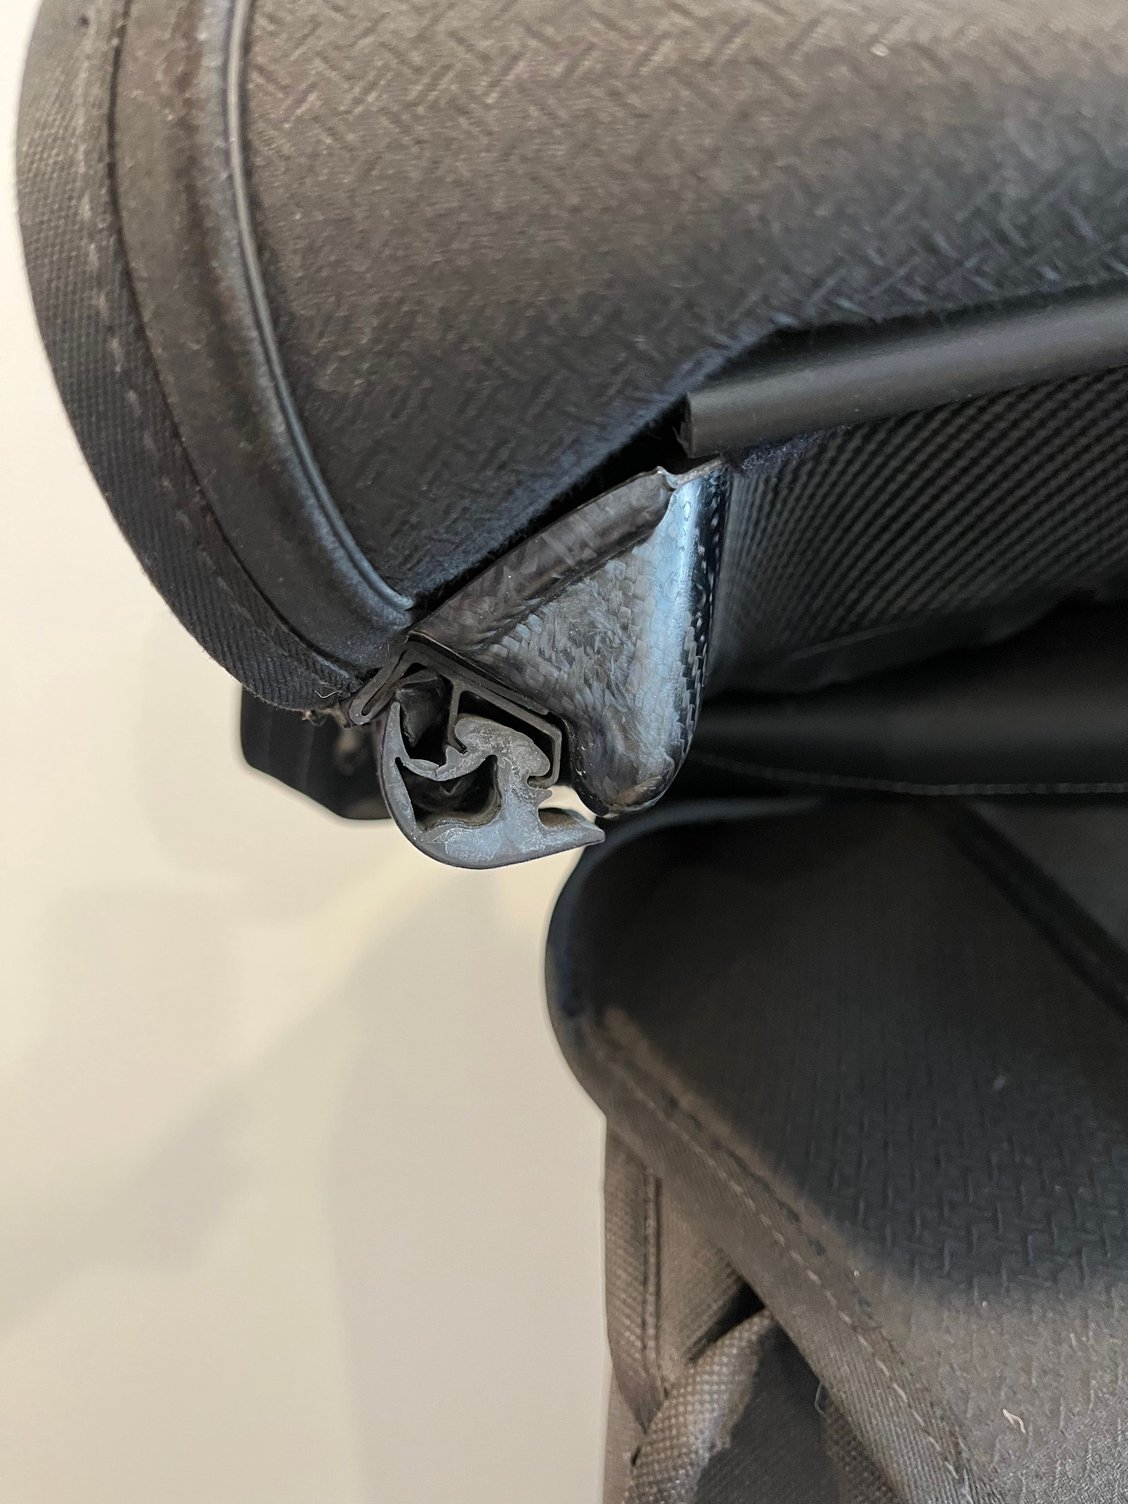
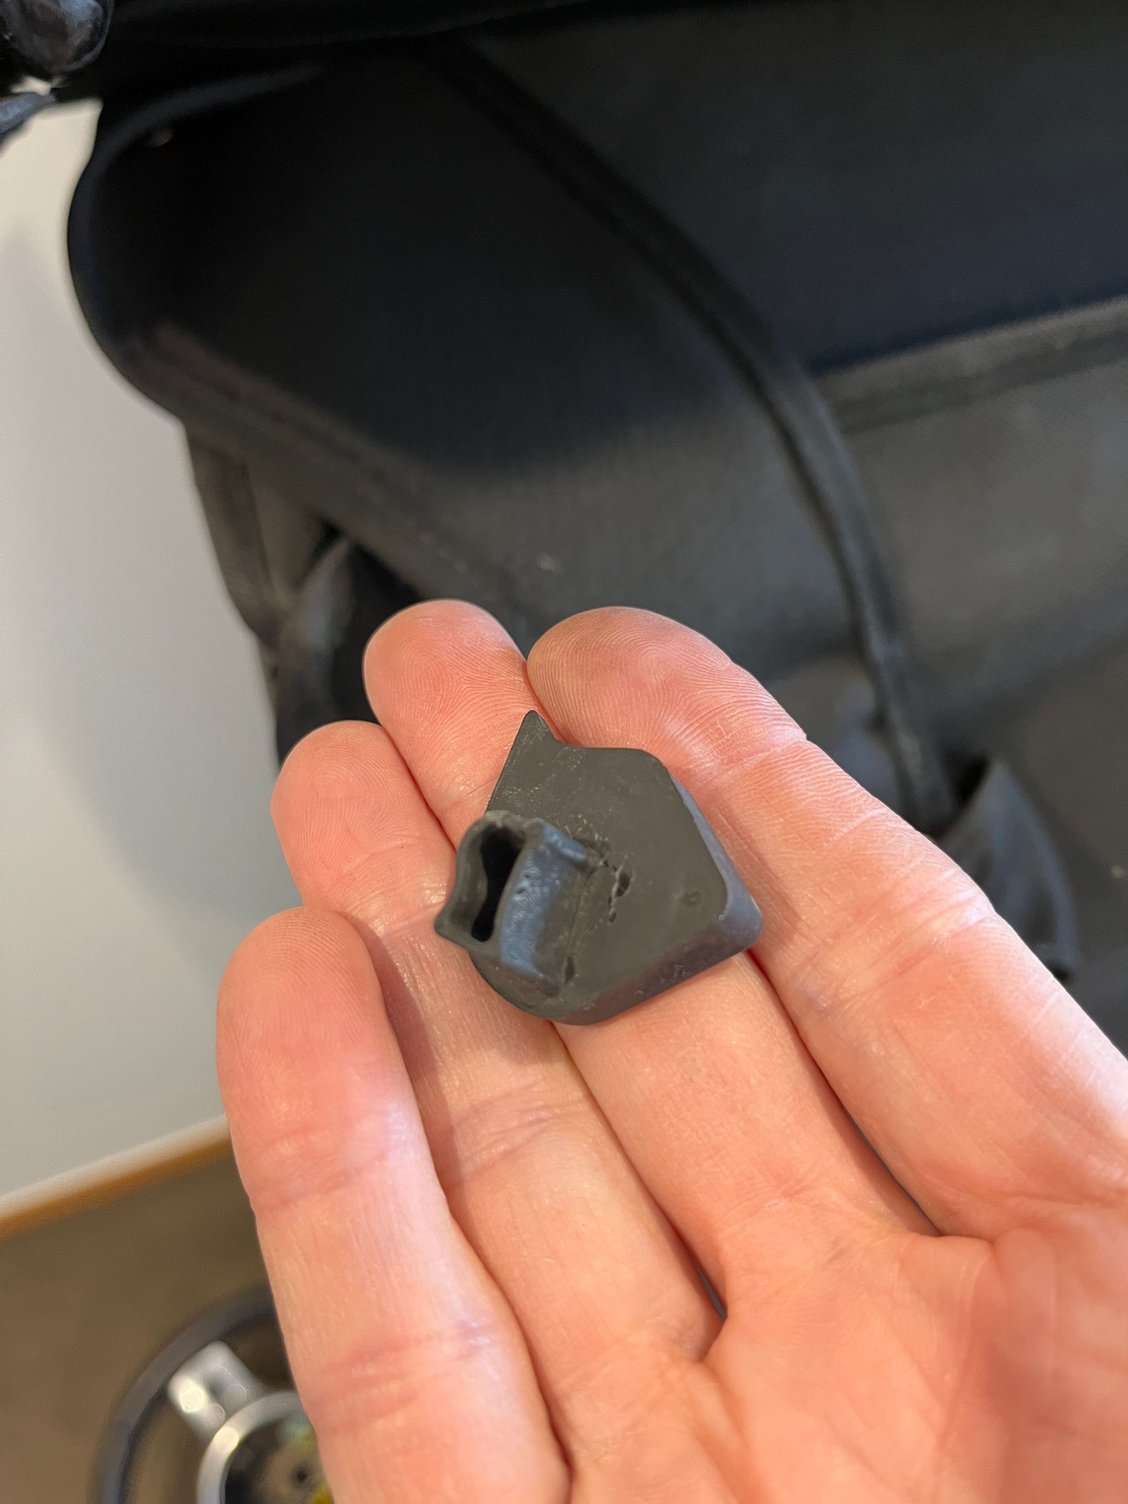
Just FYI those are not the correct part numbers. I only know this as I went down this path a few years ago with my first Spyder. Those numbers refer to the base roof not the Spyder top. I'd lost one of mine and ordered a replacement only to find it didn't fit. Contacted Porsche Sydney South and following a check with Germany they will not sell just the rubber end caps, you have to buy the complete rubber assembly including the CF frame from memory. Sold my first Spyder with one side missing and fortunately the new one has them both firmly in place!
Simon, it arrived. You are a legend. Back in ‘21, I sent a 964 alternator to Tiaan in Canberra for parts. I’d like to think this is karma. Thanks
FWIW Porsche call this a filler piece.
Left one is 987.561.813.02
Right one is 987.561.814.02
Design 911 list each side as Ł30.24!
/QUOTE]
Hi John, loving this rebuild thread! Thanks for sharing your journey.
Just FYI those are not the correct part numbers. I only know this as I went down this path a few years ago with my first Spyder. Those numbers refer to the base roof not the Spyder top. I'd lost one of mine and ordered a replacement only to find it didn't fit. Contacted Porsche Sydney South and following a check with Germany they will not sell just the rubber end caps, you have to buy the complete rubber assembly including the CF frame from memory. Sold my first Spyder with one side missing and fortunately the new one has them both firmly in place!
Thanks. I googled the part and you are correct. I will change my post.
These lights were a standard New Zealand new spec. They are stupidly complicated and stupidly expensive. They dynamically move the light as you corner so have a gimbal system with a step motor.
I bought the light body off the local EBay.
The previous owner had harvested the HID igniter and main beam xenon bulb. The igniter is very expensive but I was able to retrieve that from my old light.
FWIW the left hand step motor for these are USD 350. I’ve kept my old one, just in case.
Soon, I will be plastic welding the bumper. What better place to practice than on the underside covers.
I borrowed the welding kit off a fellow Rennlister, who gave me some tips, like using a steel plate to hold hot plastic in place while it cools.
I’m harvesting plastic off a wrecked wheel liner, which is polypropylene, like the under covers. Every Orange dot is a fault to be fixed.
First up was two tab reconstructions. Basically it’s cut a template, harvest plastic off the wheel liner then use heat to mold and weld to the existing covers. BTW holes will be drilled when refitting to the car so I can be certain of the placing.
 07-04-2023, 11:40 PM