When you click on links to various merchants on this site and make a purchase, this can result in this site earning a commission. Affiliate programs and affiliations include, but are not limited to, the eBay Partner Network.
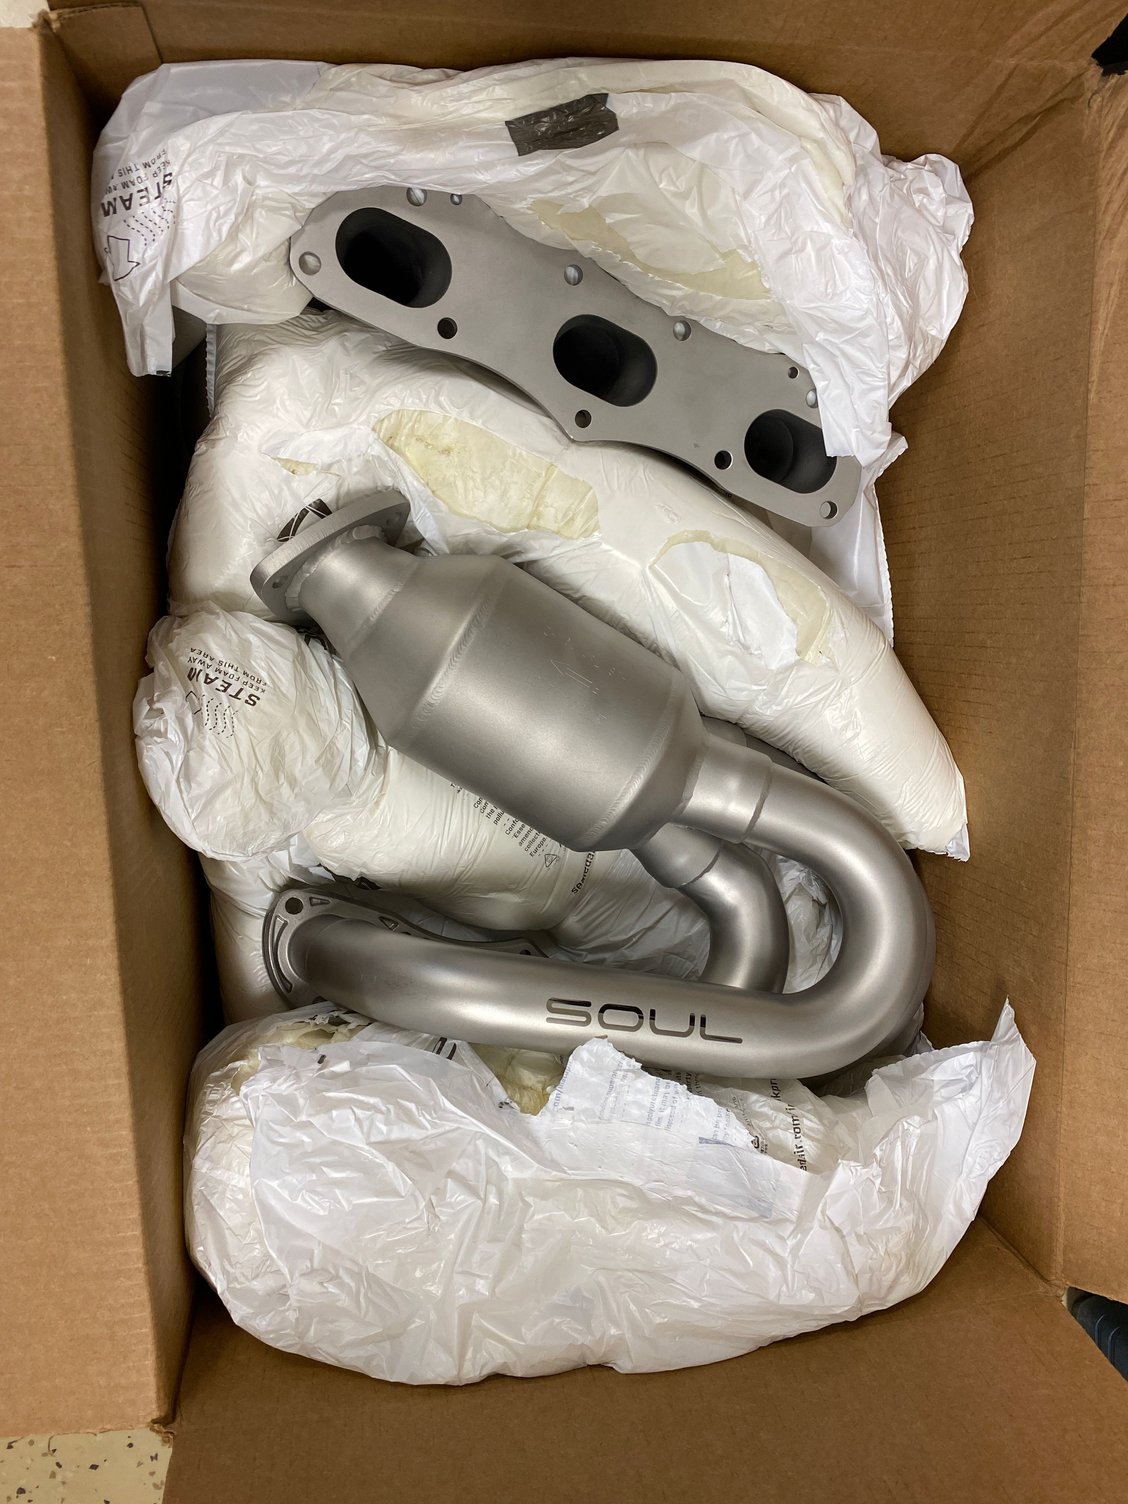
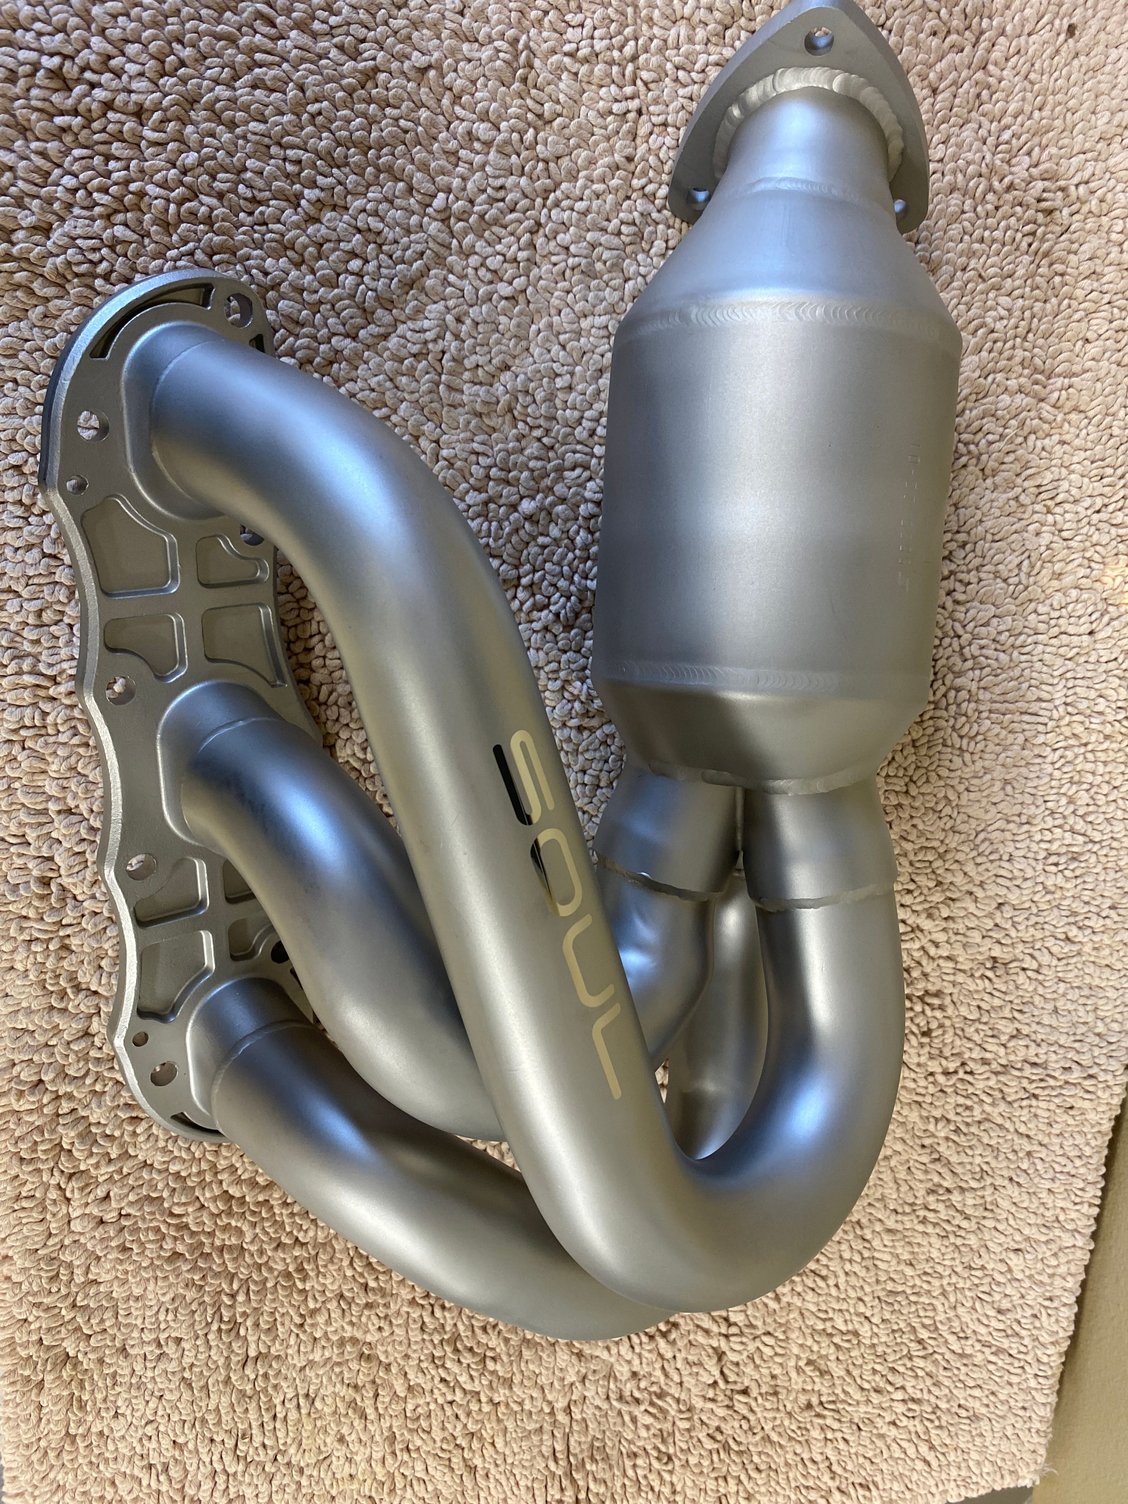
Well as we have some real quality home time in the Seattle area the last few days it has allowed me to get to some projects that have been on the back burner. Here are some pics (and a video) of my recent Soul Performance header install. This is a DIY project and is a real plug and play. I have had no codes after the install. It took me about 6 hours to do by myself with the usual "learning" curve as you go. Hopefully this write-up will make it easier for others in the future.
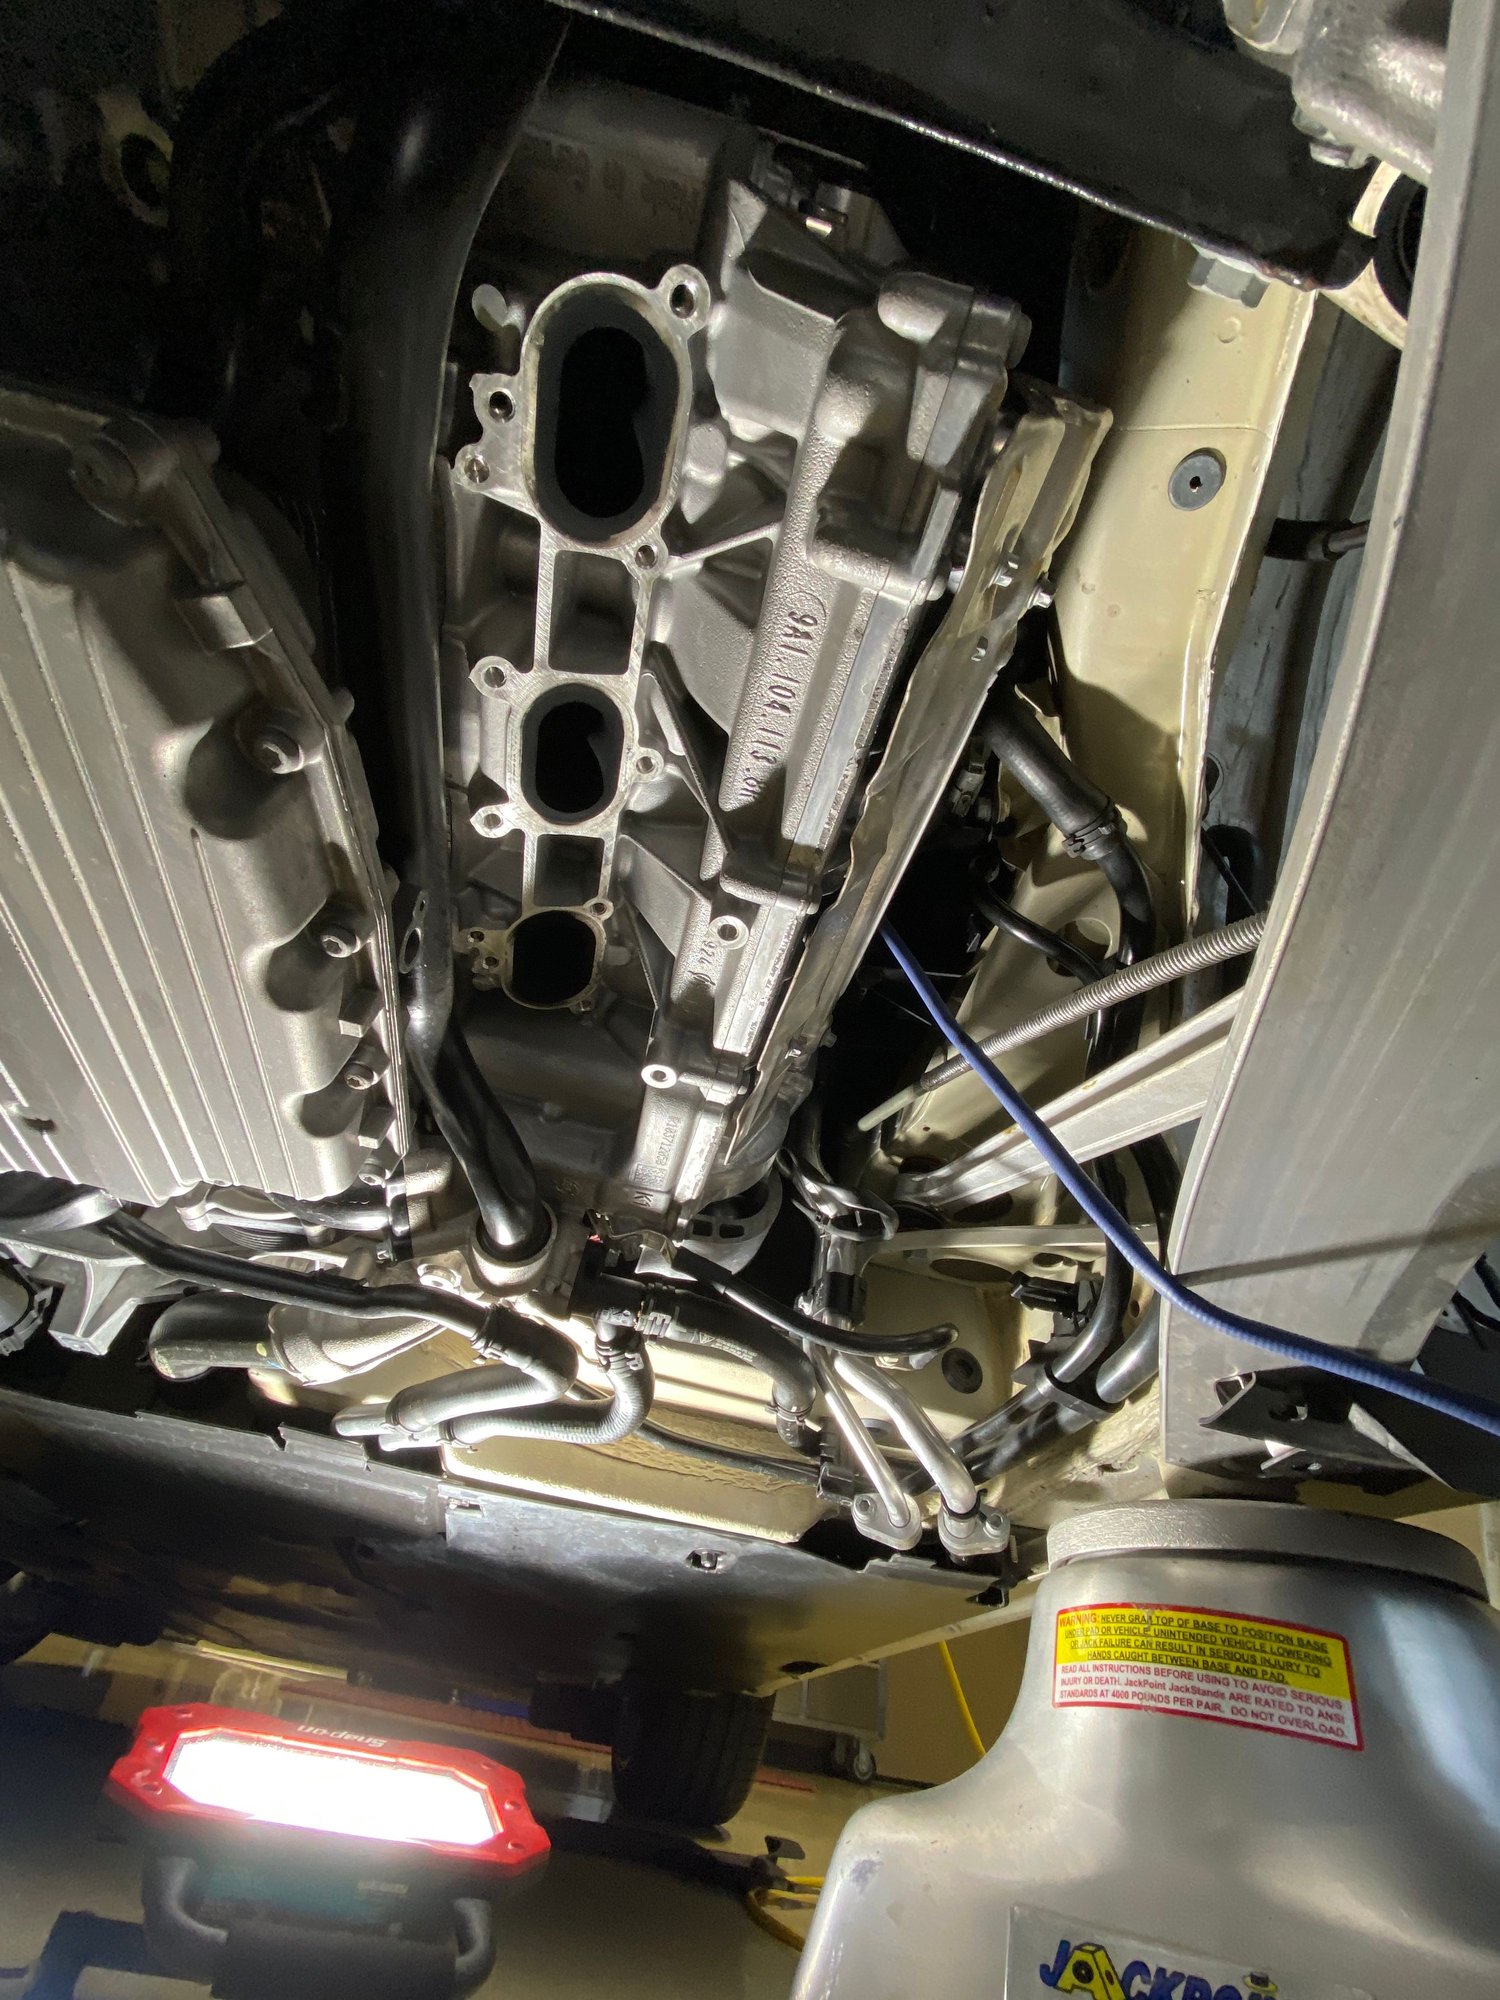
Recommend from the start opening up your engine access panel and loosening all of the O2 sensor harnesses. Just navigating the location of the harnesses and making sure you release the right ones took 45 minutes.
Recommend leaving the BLUE O2 sensor attached and just loosen from the top which allows enough play on the harness to allow it to drop to the ground when you release the last bolt on the stock manifold. The BLACK O2 sensor harness should be disconnected to allow it to be released to the ground.
I would like to start by saying that SOUL is not only a great product but also an outstanding company to deal with. When you are buying from them with their lifetime guarantee you are also buying lifetime tech. John Gaydos answered his phone to answer some questions during the install and was great counsel.
The instructions from SOUL are a great start and only lacked in the area of establishing torque for the header to engine (17 ft/lbs) and that of the the header to the exhaust flange (30 ft/lbs or so). I also referenced the tightening sequence for the bolts to the engine below.
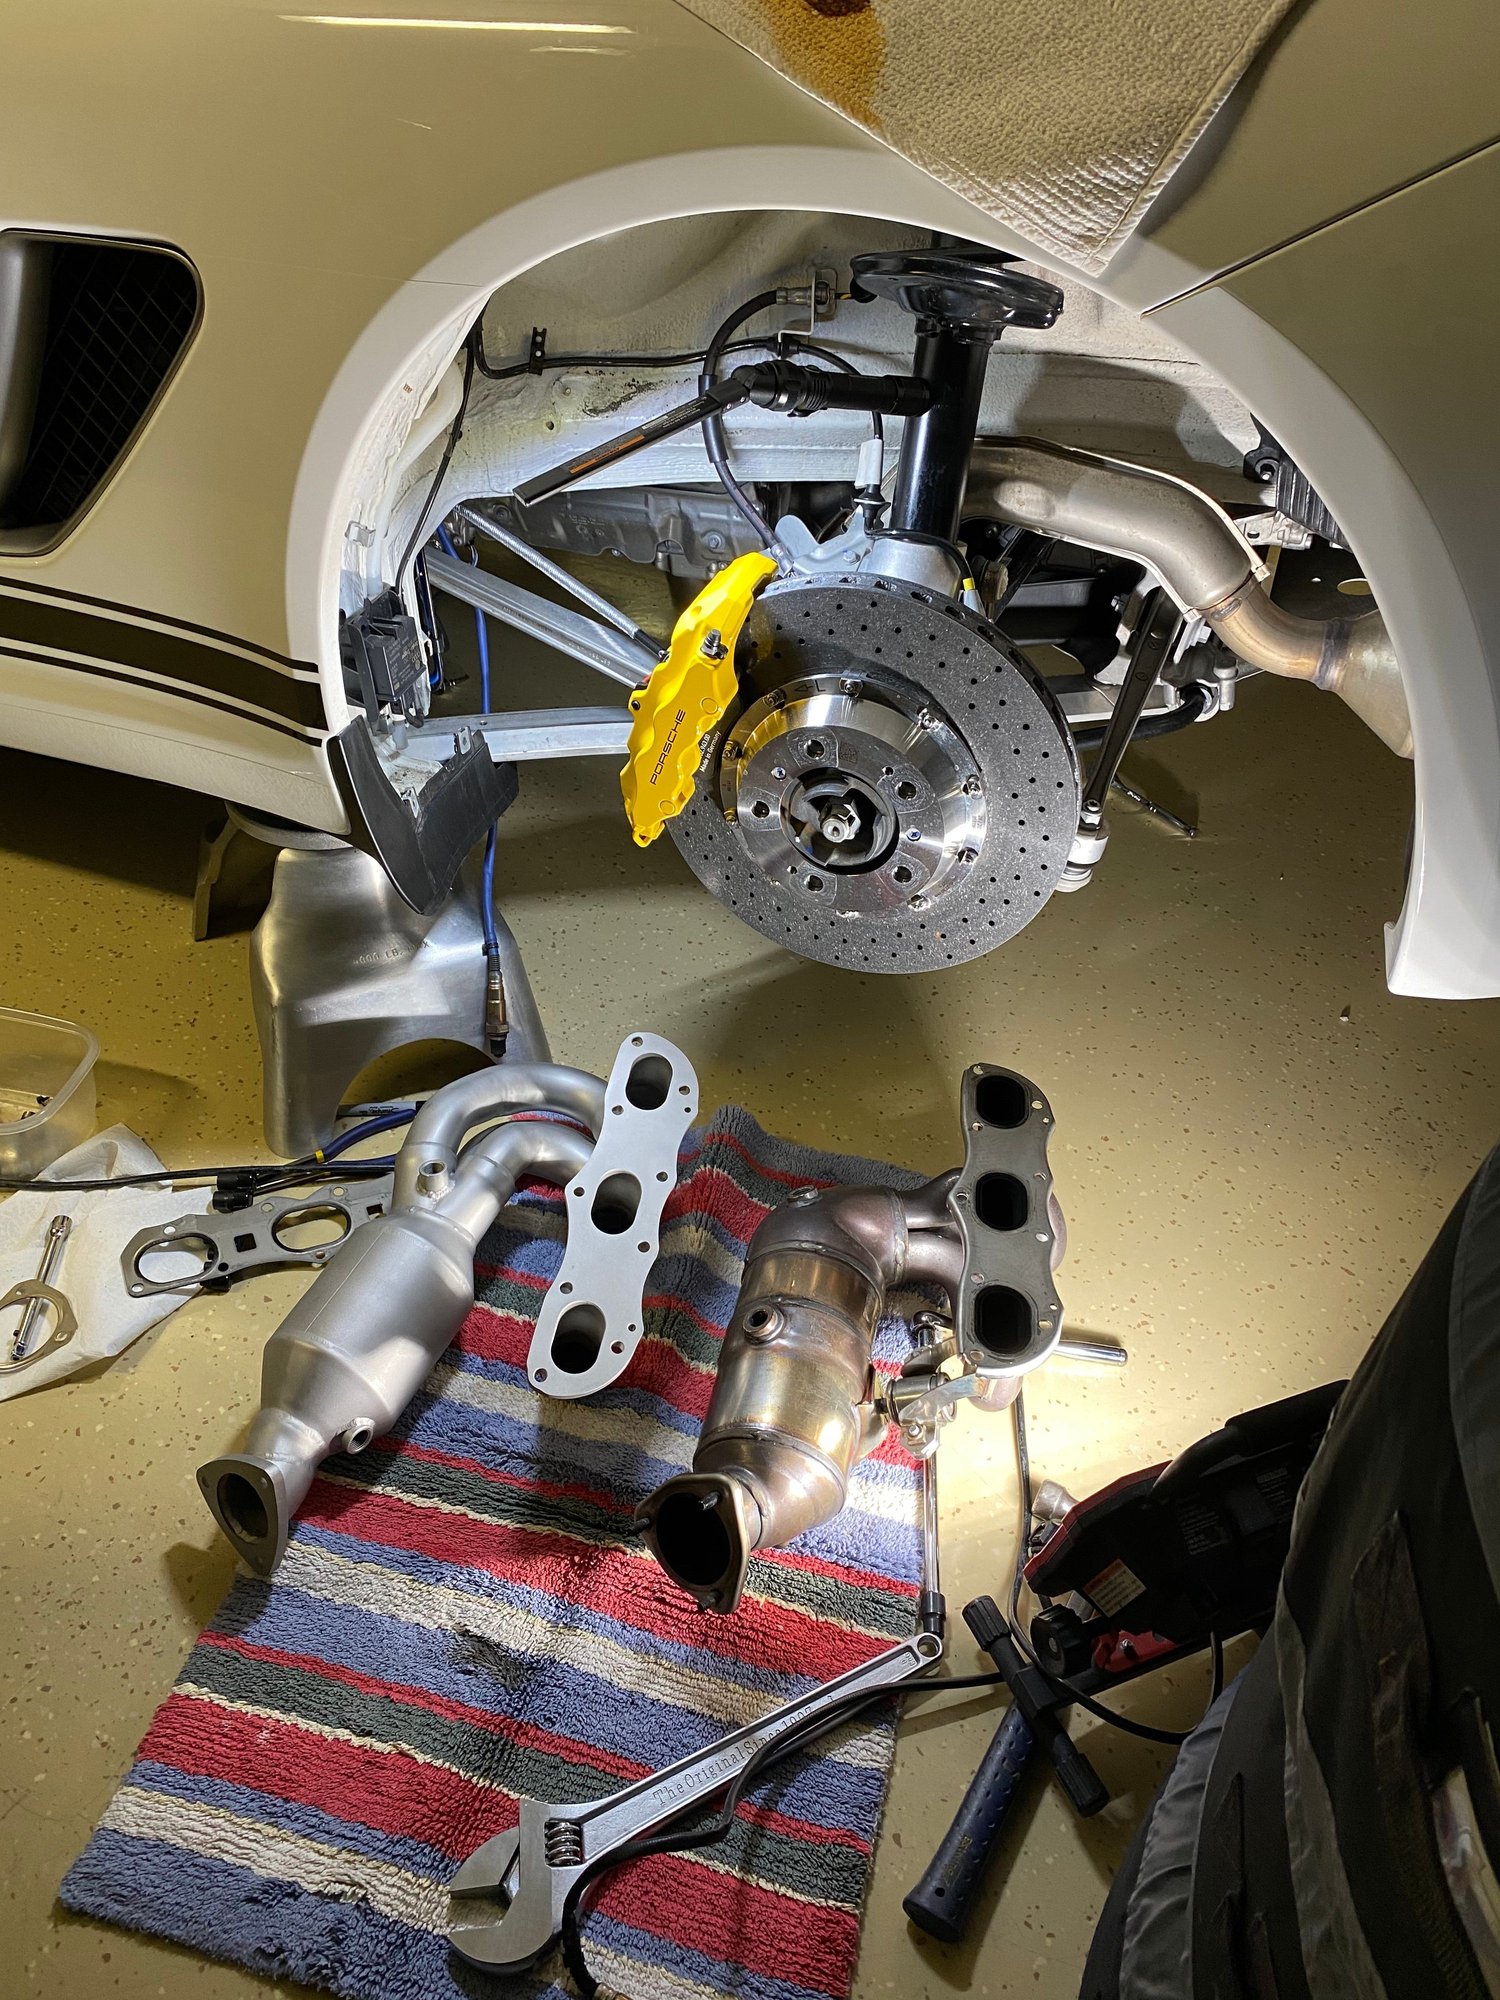
Recommend loading up your tool chest with a series of torx sockets, extensions, and multiple swivels. You can never have enough. Get both 3/8" and 1/2" as the 1/2" sockets and extensions where too large to fit in some tight spots.
I should have listened to John Gaydos and purchased the swivel socket he recommended as I had to use my grinder (on one of my sockets) to make it small enough to fit onto the bugger on the inside middle of the header attachment to the engine. Get this socket to save an hour or two and lots of skin on your knuckles.
Overall I am quite impressed. The car seems more lively and the headers definitely enhance sound of the exhaust and let SOUL out of the car out. Quality of the product is first rate. It is just unbelievable that Porsche did not offer this from the factory.
Check out the youtube video I created to document the difference between OEM headers and the SOUL headers.
The above red circle is the "BUGGER" of a bolt to get access to that needs a special tool to properly torque. My son learned some new swear words over this one...
Follow the below link for Torque Specs
Thank you for your support and your in-depth review - we appreciate you sharing feedback with all of us! I've added some additional updates to the installation guide to reflect torque specs.
-Mike
__________________ SOUL PERFORMANCE PRODUCTS Quality Exhaust Solutions, Fair Pricing, and Outstanding Service
John Gaydos- Owner, Performance Specialist
Cell - (484) 883-6197 johng@soulpp.com
What a write up! Thanks so much Geoff, it is great to see such enthusiasm. Working with you has been excellent, and I was also happy to hear this turned into a father/son project. Growing up working with my father on his Z28 (now mine) was one of the major sparks that put me down the path where I am now, and couldn't be happier with it. Major kudos! And MAN that is a nice looking 993
Originally Posted by evoq007
Great info. Sounds excellent! Looking forward to getting my catless ones.
I ran catless on my Cayman R for quite some time with the factory PSE, amazing setup.
Thanks for the write up. I�m just north of you in the Skagit valley and working with John doing the same.
Well thank you very much! I'd PM you to see who you are but you haven't been on Rennlist long enough to receive one haha. I appreciate the consideration, shoot me a text/call at 4848836197 so I can put a name to the name haha
Originally Posted by RGS
Wow ! Just what the doctor ordered! Perfect increase in noise and throatiness!! Nice work!
You make some pretty stellar product yourself, thanks for supporting the forum as a sponsor!
Recommend loading up your tool chest with a series of torx sockets, extensions, and multiple swivels. You can never have enough. Get both 3/8" and 1/2" as the 1/2" sockets and extensions where too large to fit in some tight spots.
.....
Another tool box item to obtain for this job is a "crow-foot" type socket for the oxygen sensors (I'm not advertising for Home Depot nor Tekton here; just illustrating what they look like):
I sacrificed an E12 socket to make it thin enough to fit on that middle top manifold bolt. Took E12 socket and put it on a powered screwdriver, then used that to rotate the socket as I held it up to a bench grinder wheel and took off most of the outer wall of the socket. Since the bolts only need to be torqued to 17 ft-lbs., it works fine for this application. It wasn't a big deal, but if I'd known the 10mm, 1/4" drive swivel socket works, I'd have done that.
I did mine on a 981 Boxster but the install process is practically identical.
On a 981, I was able to free up the oxygen sensors enough by clipping the last zip-tie type attachment. I was able to access the last attachment point from underneath the vehicle; not sure if oxygen sensor wiring is the same on a 987.
Major issues I encountered on my install were:
Corroded bolt on one of the OEM headers that attaches to exhaust. Ended up shearing the bolt off, which allowed for install. Had to replace bolt when I sold car and went to reinstall OEM headers.
Bolts that attach header to engine are steel; engine block where headers fit is aluminum. VERY easy to cross thread the socket in the aluminum engine block. I knew this going into the procedure but still managed to do it. Had to take car to my indy after install and have him clean up the socket and put the last bolt in.
Great recommendation on the O2 socket Out of curiosity, which hole did you cross thread?
Great recommendation on the O2 socket Out of curiosity, which hole did you cross thread?
Regards,
John Gaydos
Passenger side, rear-most cylider, socket on the bottom. It was weird, as that's probably the most accessible of the sockets and *should* have been the easiest. IDK, maybe b/c that was my thought process, I wasn't as careful as I should have been. Anyway, I knew it was "off" when I tried to insert the bolt by hand and it just wouldn't seat properly. Luckily, I did know enough not to force it so I bolted up the rest of the manifolds and my indy could clean it up without having to drill and re-tap the socket.
I torqued the bolts to 17 ft-lbs. which seems light until you remember the steel bolt-aluminum block thing. As others have mentioned, it's a good idea to check the torque after a few hours of engine time when you first install them. I also have gotten into the habit of checking them when I change the oil/filter (every six months). The car's up on jack stands so it's not a big deal to take the rear wheels off and put a torque wrench on the bolts. Usually a few are slightly loose and by the time I'm done, the oil has finished draining.
 03-17-2020, 09:02 PM