When you click on links to various merchants on this site and make a purchase, this can result in this site earning a commission. Affiliate programs and affiliations include, but are not limited to, the eBay Partner Network.
Looks straight forward.... Remove waterbridge, Remove Oil Filler neck, replace gaskets, orings, thermostat, etc... and reinstall. If I could do this in 4-6 hours with no ancillary issues (say over two evenings after work) I will probably do it.
No, I do not want to remove the intake and all the other stuff that goes with it. In fact, within the last 6-8K miles much of the intake was refreshed. Sadly, that was before my ownership and I don't know that they did a great job with the oil filler neck gasket.
Please comment if you've done exactly this, particularly if you aren't a pro wrench and how it went. I mean no offense but it doesn't impress anyone if you say "I did this in 118 minutes" unless you really did it in just under 2 hours.
I'd plan on 3-4 hours (total, to include jacking, draining a little coolant, etc.). My post on doing this starts here: https://rennlist.com/forums/928-foru...l#post15029586
The thread continues on the topic of removing the oil neck too.
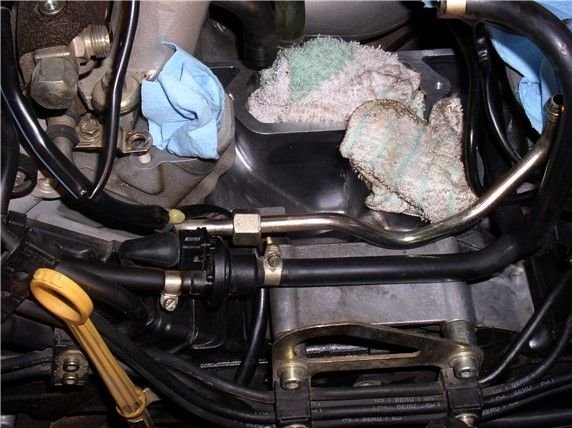
But it all starts with being able to remove the driver's side rear water bridge bolt. My $.02, start with that bolt. If the head strips, the show's over... Good luck!
But it all starts with being able to remove the driver's side rear water bridge bolt. My $.02, start with that bolt. If the head strips, the show's over... Good luck!
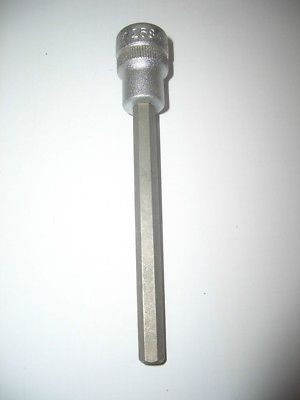
Spot on! Wake up the bolt first with a couple of taps, take a quality long allan socket (I use either Gedore or HAZET tools), SNAP-ON in the US should be fine and give it a try. Insert the tool into the allan head all the way, apply a little counterclockwise pressure to built up some tension with a breaker bar, take a short breath and give it a good jolt. This should break it loose. Worked for me so far all the time. If you succeed, talk to Roger he will set you up with a complete re-seal kit and you'll be fine for a couple of years. Do not just replace the rubber seals on the bridge and oil filler neck! Especially the oil filler neck will leak again in no time! Good luck!
you need to drain the coolant out of the block or you will make a mess..
some WB can be removed from under the fill tube,
some require the fill tube off first, this means moving the intake first.
if you have stuck bolts you can drill a Siamese hole into the bolt bore of the WB and fill it with PB blaster let it sit ,
and try the hammer the tool.
Use Drei Bond to glue the fill tube on be generous with it
Spot on! Wake up the bolt first with a couple of taps, take a quality long allan socket (I use either Gedore or HAZET tools), SNAP-ON in the US should be fine and give it a try. Insert the tool into the allan head all the way, apply a little counterclockwise pressure to built up some tension with a breaker bar, take a short breath and give it a good jolt. This should break it loose. Worked for me so far all the time. If you succeed, talk to Roger he will set you up with a complete re-seal kit and you'll be fine for a couple of years. Do not just replace the rubber seals on the bridge and oil filler neck! Especially the oil filler neck will leak again in no time! Good luck!
Im attempting to replace my orings on my water bridge. I've read horror stories about the driver side back allen bolt. Everyone states to make sure the allen key is seated straight. On my 88, because of the intake being in the way slightly, it has a slight angle. So have others encountered this and what did you? Do like Schocki did, use an impact.... Ive put some PB blaster on it but it makes me nervous.
cut a piece of the allen off thats about 3/4 of an inch long,
dip in water to keep the part from getting hot.
then use a wobble extension and a 6 mm 1/4 inch drive socket.
add a piece of towel or plastic bag to the socket so the small allen doesnt fall into the V
cut a piece of the allen off thats about 3/4 of an inch long,
dip in water to keep the part from getting hot.
then use a wobble extension and a 6 mm 1/4 inch drive socket.
add a piece of towel or plastic bag to the socket so the small allen doesnt fall into the V
Mr Merlin Im not understanding when you state 'dip in water to keep the part from getting hot', what am I heating up? im missing that part . Do you have pics for your illustration? Thanks
thanks. however on my 88...due to the intake in the way...my 6mm allen hex bit socket is at slight angle so there is not a good purchase. I just dont know how to get it house.


 06-23-2020, 01:16 AM