When you click on links to various merchants on this site and make a purchase, this can result in this site earning a commission. Affiliate programs and affiliations include, but are not limited to, the eBay Partner Network.
... - 928s in good cosmetic condition are very good at hiding neglected and aged electrical and soft parts that needed to be replaced 10-15 years ago.
And yet, contrary to legends, even with all of that stuff non- or partially-functional, a 928 will still move under its own power. Yes, perhaps with degraded performance, but it will still run.
And yet, contrary to legends, even with all of that stuff non- or partially-functional, a 928 will still move under its own power. Yes, perhaps with degraded performance, but it will still run.
Yes! And my car is one of them. Riding in another refreshed 928 at Frenzy was eye opening. Sean and Stan replaced the fuel lines on my car for one of the Frenzy tech sessions last year. Just based on the condition of the knock sensors they practically broadcast in stereo "That's 30 HP right there". The car has been perfectly drivable (though it did feel a bit sluggish for a Porsche).
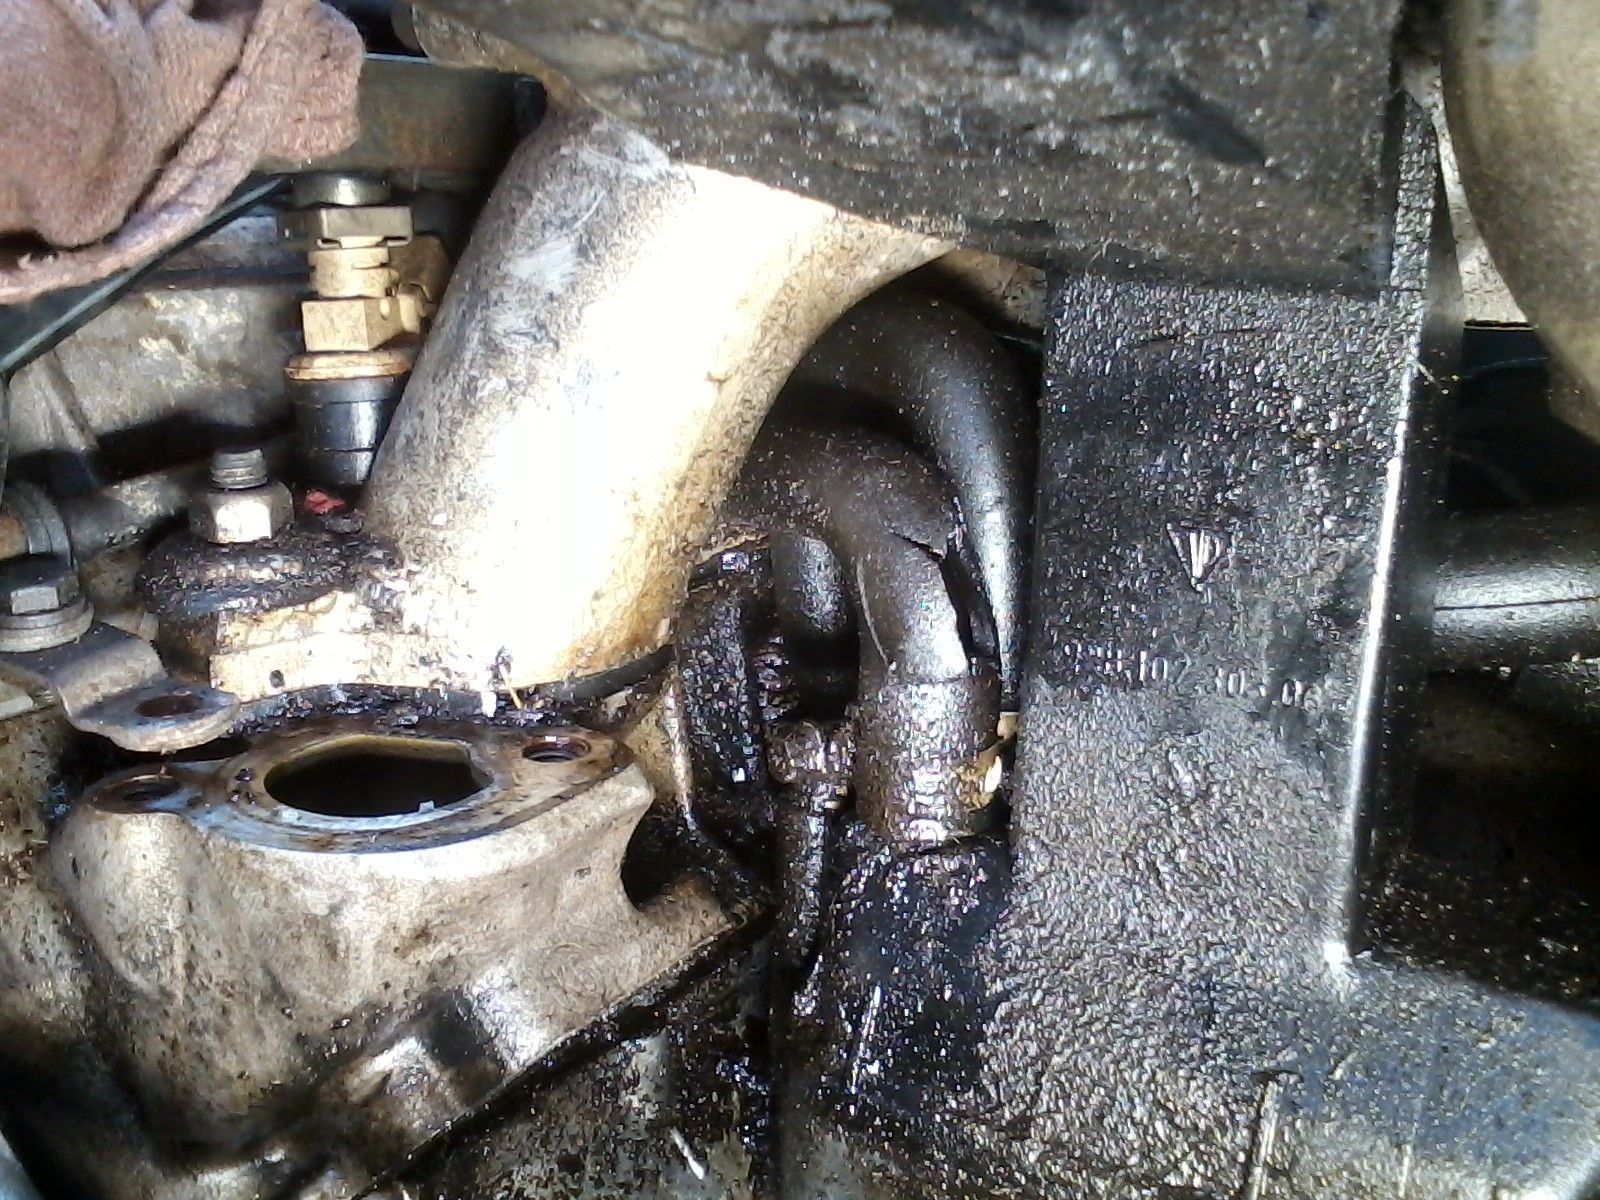
having a hard time comprehending WHY the oil filler gasket leaks to the point of it being an issue.
even with all the internal turbulence of oil inside the engine, why in the world,
is there leakage/seepage at this particular location. its not under pressure?? correct??
also, I am constantly seeing oil on the top of the temp ii sensor and the connector.
that can't be coming up from the base of the filler??? does this suggest that the oil filler tube
is cracked??
I thought that mine was leaking like a strainer.Turned out to be that the breather hose to the filler neck had rotted through. couldn't see it till the water bridge was off. put Gregs baffle in and gasket along with Honda bond.That was when I did the top end refresh and replaced all the rubber and other necessary parts.
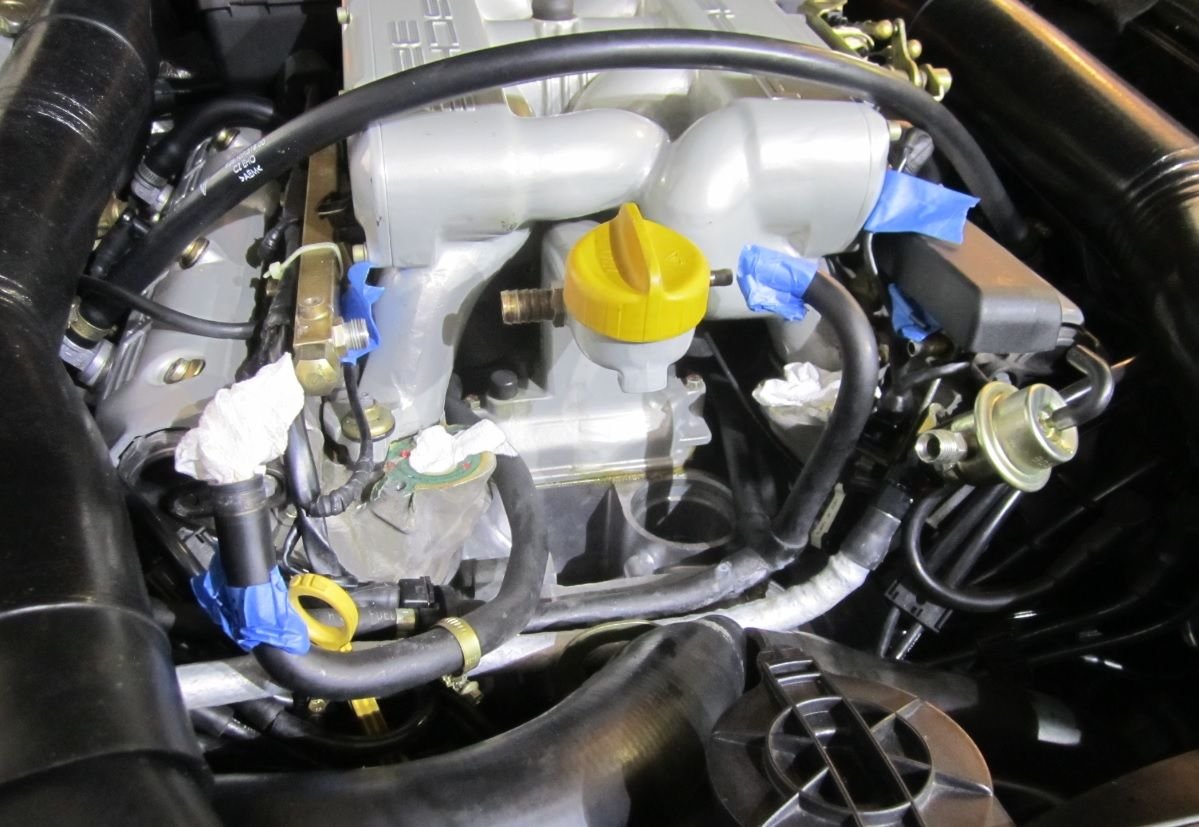
At the risk of sounding like Jeff Goldblum in Jurassic Park (whether it can be done vs whether it should be done), the answer is YES,it can be done. Whether you decide to try it is up to you. In my case, I just did an intake refresh 3-4 years ago so I wasn’t really digging the idea of doing all that again just to get to the water bridge.
I had a dribble leak from the driver’s side water bridge where it meets the head which is why I was super interested in this thread. My thinking was, everything that’s required to do this has to be done anyway, so it’s not a waste of time to try and remove the bridge first. BUT, I do give Dave C. props that the rear bolt on the water bridge could be the Achilles heel. Meaning, screw up that bolt head and you’re definitely removing the intake. So my $.02, start with that bolt. If it unthreads, your possibilities of successfully completing this job went up exponentially. However, if you dork it up, you’re removing the intake AND removing that bad bolt.
So following along with Dwayne’s page, the only thing I did different was remove both sensors from the water bridge to provide a little more rocking/side-to-side motion for it to clear the oil neck. I do think the reason none of the bolts gave me grief was because they were new and had anti-seize on them. If someone was trying this with 20-yr old bolts… good luck.
It took me 2 hours to get the bridge out. That’s everything from jacking the car up, draining 1/2 the radiator and both engine block drains, removing the hoses from the bridge and removing the fuel lines and getting the FPR out of the way. I know, I know, I’m slow…
I used drei-bond when I did the refresh so I’m not sure what to think of that. I also used it on the neck and valve covers and no leaks there (although it really discolors into a yellow/brown). So I’m on the fence on what to use for reassembly – or maybe just do it dry (?)
Shout-out to Stan and Bertrand for the PMs on this; you guys rock!
At the risk of sounding like Jeff Goldblum in Jurassic Park (whether it can be done vs whether it should be done), the answer is YES,it can be done. Whether you decide to try it is up to you. In my case, I just did an intake refresh 3-4 years ago so I wasn�t really digging the idea of doing all that again just to get to the water bridge.
I had a dribble leak from the driver�s side water bridge where it meets the head which is why I was super interested in this thread. My thinking was, everything that�s required to do this has to be done anyway, so it�s not a waste of time to try and remove the bridge first. BUT, I do give Dave C. props that the rear bolt on the water bridge could be the Achilles heel. Meaning, screw up that bolt head and you�re definitely removing the intake. So my $.02, start with that bolt. If it unthreads, your possibilities of successfully completing this job went up exponentially. However, if you dork it up, you�re removing the intake AND removing that bad bolt.
So following along with Dwayne�s page, the only thing I did different was remove both sensors from the water bridge to provide a little more rocking/side-to-side motion for it to clear the oil neck. I do think the reason none of the bolts gave me grief was because they were new and had anti-seize on them. If someone was trying this with 20-yr old bolts� good luck.
It took me 2 hours to get the bridge out. That�s everything from jacking the car up, draining 1/2 the radiator and both engine block drains, removing the hoses from the bridge and removing the fuel lines and getting the FPR out of the way. I know, I know, I�m slow�
I used drei-bond when I did the refresh so I�m not sure what to think of that. I also used it on the neck and valve covers and no leaks there (although it really discolors into a yellow/brown). So I�m on the fence on what to use for reassembly � or maybe just do it dry (?)
Shout-out to Stan and Bertrand for the PMs on this; you guys rock!
For what it is worth, what I do totally depends on what the two surfaces look like.
If the surfaces are very nice, I use the stock red silicone O-rings with a thin layer of Drei Bond.....no paper gasket.
If the surfaces are "rough" or pitted, I use the red silicone seal and the paper gasket. I don't use sealant on the paper gasket to the cylinder head surface....the sealant seems to "soften" the gasket and allow it to slip or split. I still use a very thin layer of Drei Bond on the silicone O-ring against the gasket.
...I don't use sealant on the paper gasket to the cylinder head surface....the sealant seems to "soften" the gasket and allow it to slip or split."
Thanks, Greg. That tracks exactly with what I'm seeing as it looks like the gasket split. For piece of mind I'm using new bolts (again) and anti-seize on reassembly. If I have to go back in, it's nice to know it can be done BUT it all depends on that rear driver's side bolt on the bridge.
Thanks, Greg. That tracks exactly with what I'm seeing as it looks like the gasket split. For piece of mind I'm using new bolts (again) and anti-seize on reassembly. If I have to go back in, it's nice to know it can be done BUT it all depends on that rear driver's side bolt on the bridge.
Just make sure the anti-seize doesn't "flow" out onto that paper gasket as the bolts thread in....certain gasket death.
Interesting revelation I just had. ......I've built Porsche engines my entire life. Most of them have "tricks" that I've learned, over the years...but not that much special knowledge required.
I find myself posting seemingly endless "tricks" for building the 928 engines and doing certain jobs. And while I consider these engines to be fairly straight forward, I just realized that almost every single step of working on these engines has some special "trick" that needs to be done, to turn out perfectly.
It's no wonder that I redo so much of the work other's do...I just realized that these engines are tricky!
My early '86 of course has the metal oil filler but when being used hard there's just loads of oil in the organ pipes.
Does anyone have experience with a solution similar to above? Don't want to go with ProVent and other things if possible.
Greg would you recommend your baffle/kit for an early'86 to help address the intakes getting oil soaked? I've done searches online but I'm not very good at it..tend to use Google...and really didn't have much luck finding a solution similar to above that solved the issue for them.
Any advice / direction appreciated...thanks everyone..
Interesting revelation I just had. ......I've built Porsche engines my entire life. Most of them have "tricks" that I've learned, over the years...but not that much special knowledge required.
Originally Posted by Niels Bohr
An expert is a man who has made all the mistakes which can be made, in a narrow field.
My early '86 of course has the metal oil filler but when being used hard there's just loads of oil in the organ pipes.
Does anyone have experience with a solution similar to above? Don't want to go with ProVent and other things if possible.
Greg would you recommend your baffle/kit for an early'86 to help address the intakes getting oil soaked? I've done searches online but I'm not very good at it..tend to use Google...and really didn't have much luck finding a solution similar to above that solved the issue for them.
Any advice / direction appreciated...thanks everyone..
matt.
Thanks all
On my 85, I installed Greg's baffle kit, and the difference in the amount of oil I see inside the intakes is striking. Use to be there were large pools of oil. The last time I had the intakes apart [2 years after installing the baffle] I only had a light coating of oil, no pools of oil. And I drive ~5000 miles per year.
On my 85, I installed Greg's baffle kit, and the difference in the amount of oil I see inside the intakes is striking. Use to be there were large pools of oil. The last time I had the intakes apart [2 years after installing the baffle] I only had a light coating of oil, no pools of oil. And I drive ~5000 miles per year.
Thats awesome to hear....it looks pretty tight down there....any thoughts on whether it would make any sense to attempt to do this without removing the intake...I'd like to not go there if possible...


 05-22-2018, 12:32 AM