When you click on links to various merchants on this site and make a purchase, this can result in this site earning a commission. Affiliate programs and affiliations include, but are not limited to, the eBay Partner Network.
HiFi and Standard Door Pocket Reinforcements
Next batch going out in two weeks...
If you are interested in a set of HiFi or Standard door pocket reinforcements (next trip to post office will be Friday, 30th September):
Follow up with a PM that has your name and mailing address
When you complete the 2 steps above, I will PM you a link for paying with PayPal. Use a browser (not one of the mobile apps) to view this PM because links in PMs are disabled by the mobile apps.
$10 per HiFi set, $11 per Standard set. And this includes shipping to the US via USPS. Add $10 if shipping to Canada. PM me first if you are not in the US or Canada. No items get shipped until PayPal payment received.
If I receive your payment by Wednesday September 28th at 8PM CST your item will ship on Friday, September 30th.
Current list of members for HiFi and Standard door pocket reinforcements:
HiFi and Standard Door Pocket Reinforcements
If you are interested in a set of HiFi or Standard door pocket reinforcements (next trip to post office will be Friday, 30th September):
Follow up with a PM that has your name and mailing address
When you complete the 2 steps above, I will PM you a link for paying with PayPal. Use a browser (not one of the mobile apps) to view this PM because links in PMs are disabled by the mobile apps.
$10 per HiFi set, $11 per Standard set. And this includes shipping to the US via USPS. Add $10 if shipping to Canada. PM me first if you are not in the US or Canada. No items get shipped until PayPal payment received.
If I receive your payment by Wednesday September 28th at 8PM CST your item will ship on Friday, September 30th.
Current list of members for HiFi and Standard door pocket reinforcements:
Would it be a good solution to us ABS plumbing pipe adhesive to fuse the new ABS to the old rather than glue? It partially melts the surface of abs on both parts and when presses together they fuse into a single piece of plastic. Makes for a rather robust finished part.
Would it be a good solution to us ABS plumbing pipe adhesive to fuse the new ABS to the old rather than glue? It partially melts the surface of abs on both parts and when presses together they fuse into a single piece of plastic. Makes for a rather robust finished part.
I used ABS adhesive and it seems to have done the job. I can't compare it to other options though.
HiFi and Standard Door Pocket Reinforcements
If you are interested in a set of HiFi or Standard door pocket reinforcements (next trip to post office will be Friday, 30th September):
Follow up with a PM that has your name and mailing address
When you complete the 2 steps above, I will PM you a link for paying with PayPal. Use a browser (not one of the mobile apps) to view this PM because links in PMs are disabled by the mobile apps.
$10 per HiFi set, $11 per Standard set. And this includes shipping to the US via USPS. Add $10 if shipping to Canada. PM me first if you are not in the US or Canada. No items get shipped until PayPal payment received.
If I receive your payment by Wednesday September 28th at 8PM CST your item will ship on Friday, September 30th.
Current list of members for HiFi and Standard door pocket reinforcements:
I used black ABS plumbing adhesive. Worked very well.
It's a great solution to a real problem, it's cheap, easy to install - can't ask for anything more than that, in my opinion. A very happy customer here. Thanks again, BTB!
Iv'e used the ABS cement as well. Too many times I've tried to use SuperGlue, JBWEld or similar on plastics and had so so results or just failure. ABS is the proper stuff to use here since it "melts"/chemically bonds the two surfaces properly.
I thought I'd share some installation notes and a few illustrations and part numbers as I'm just completing this project. A big thanks to BesideTheBox. Not just for a great and simple product, but also for taking the time to walk me through the process and share his draft instructions. Very helpful, thanks BTB.
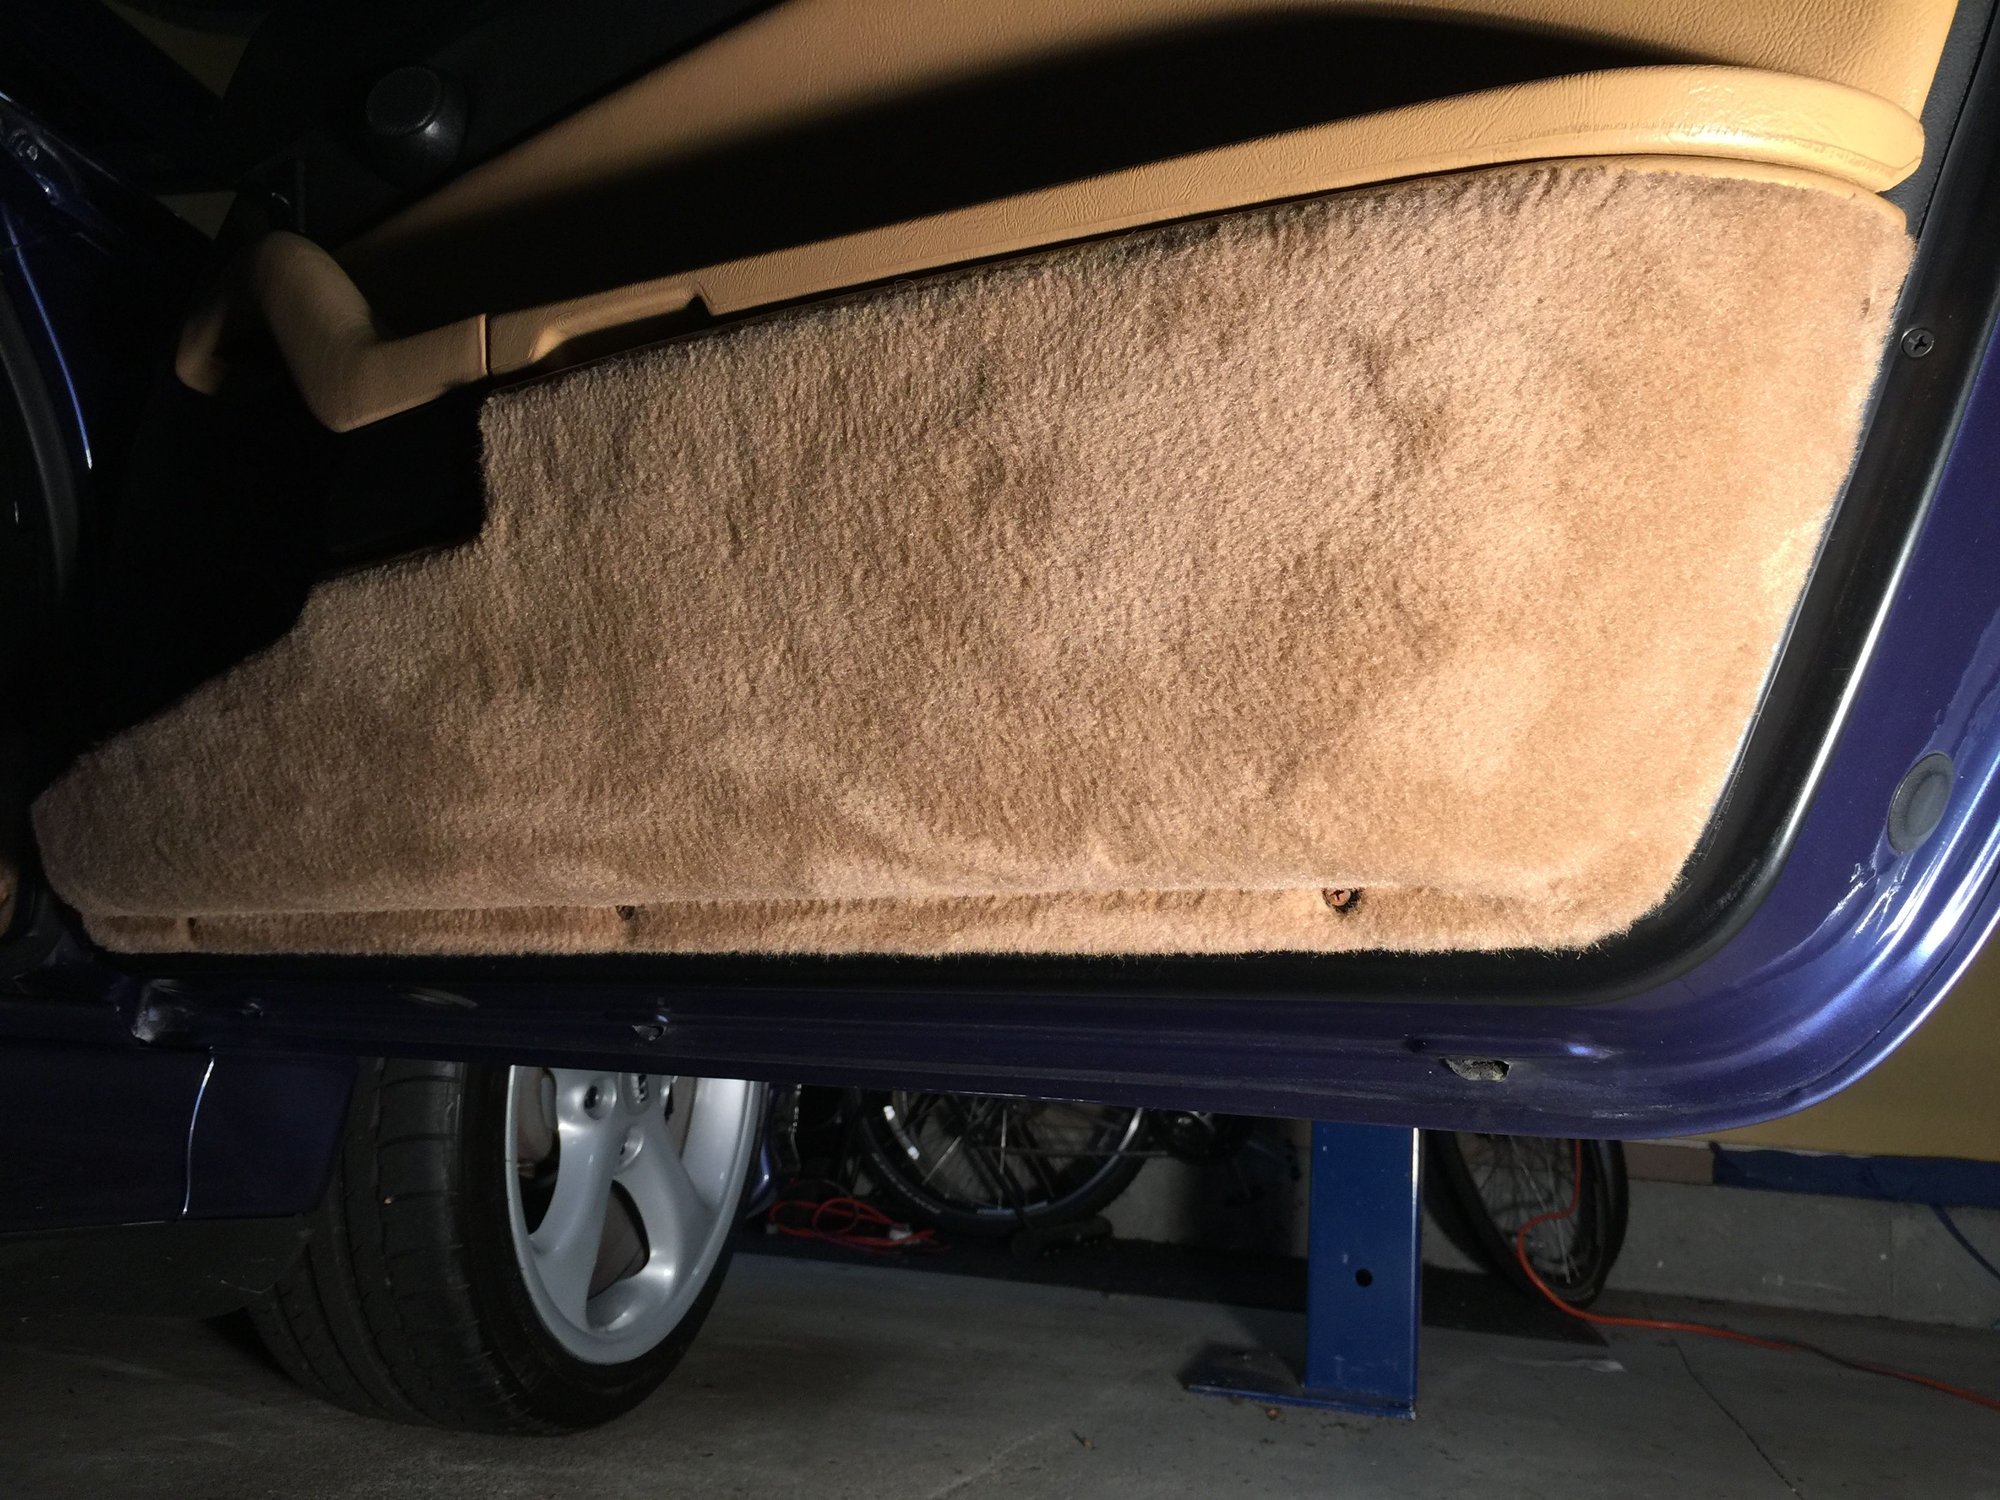
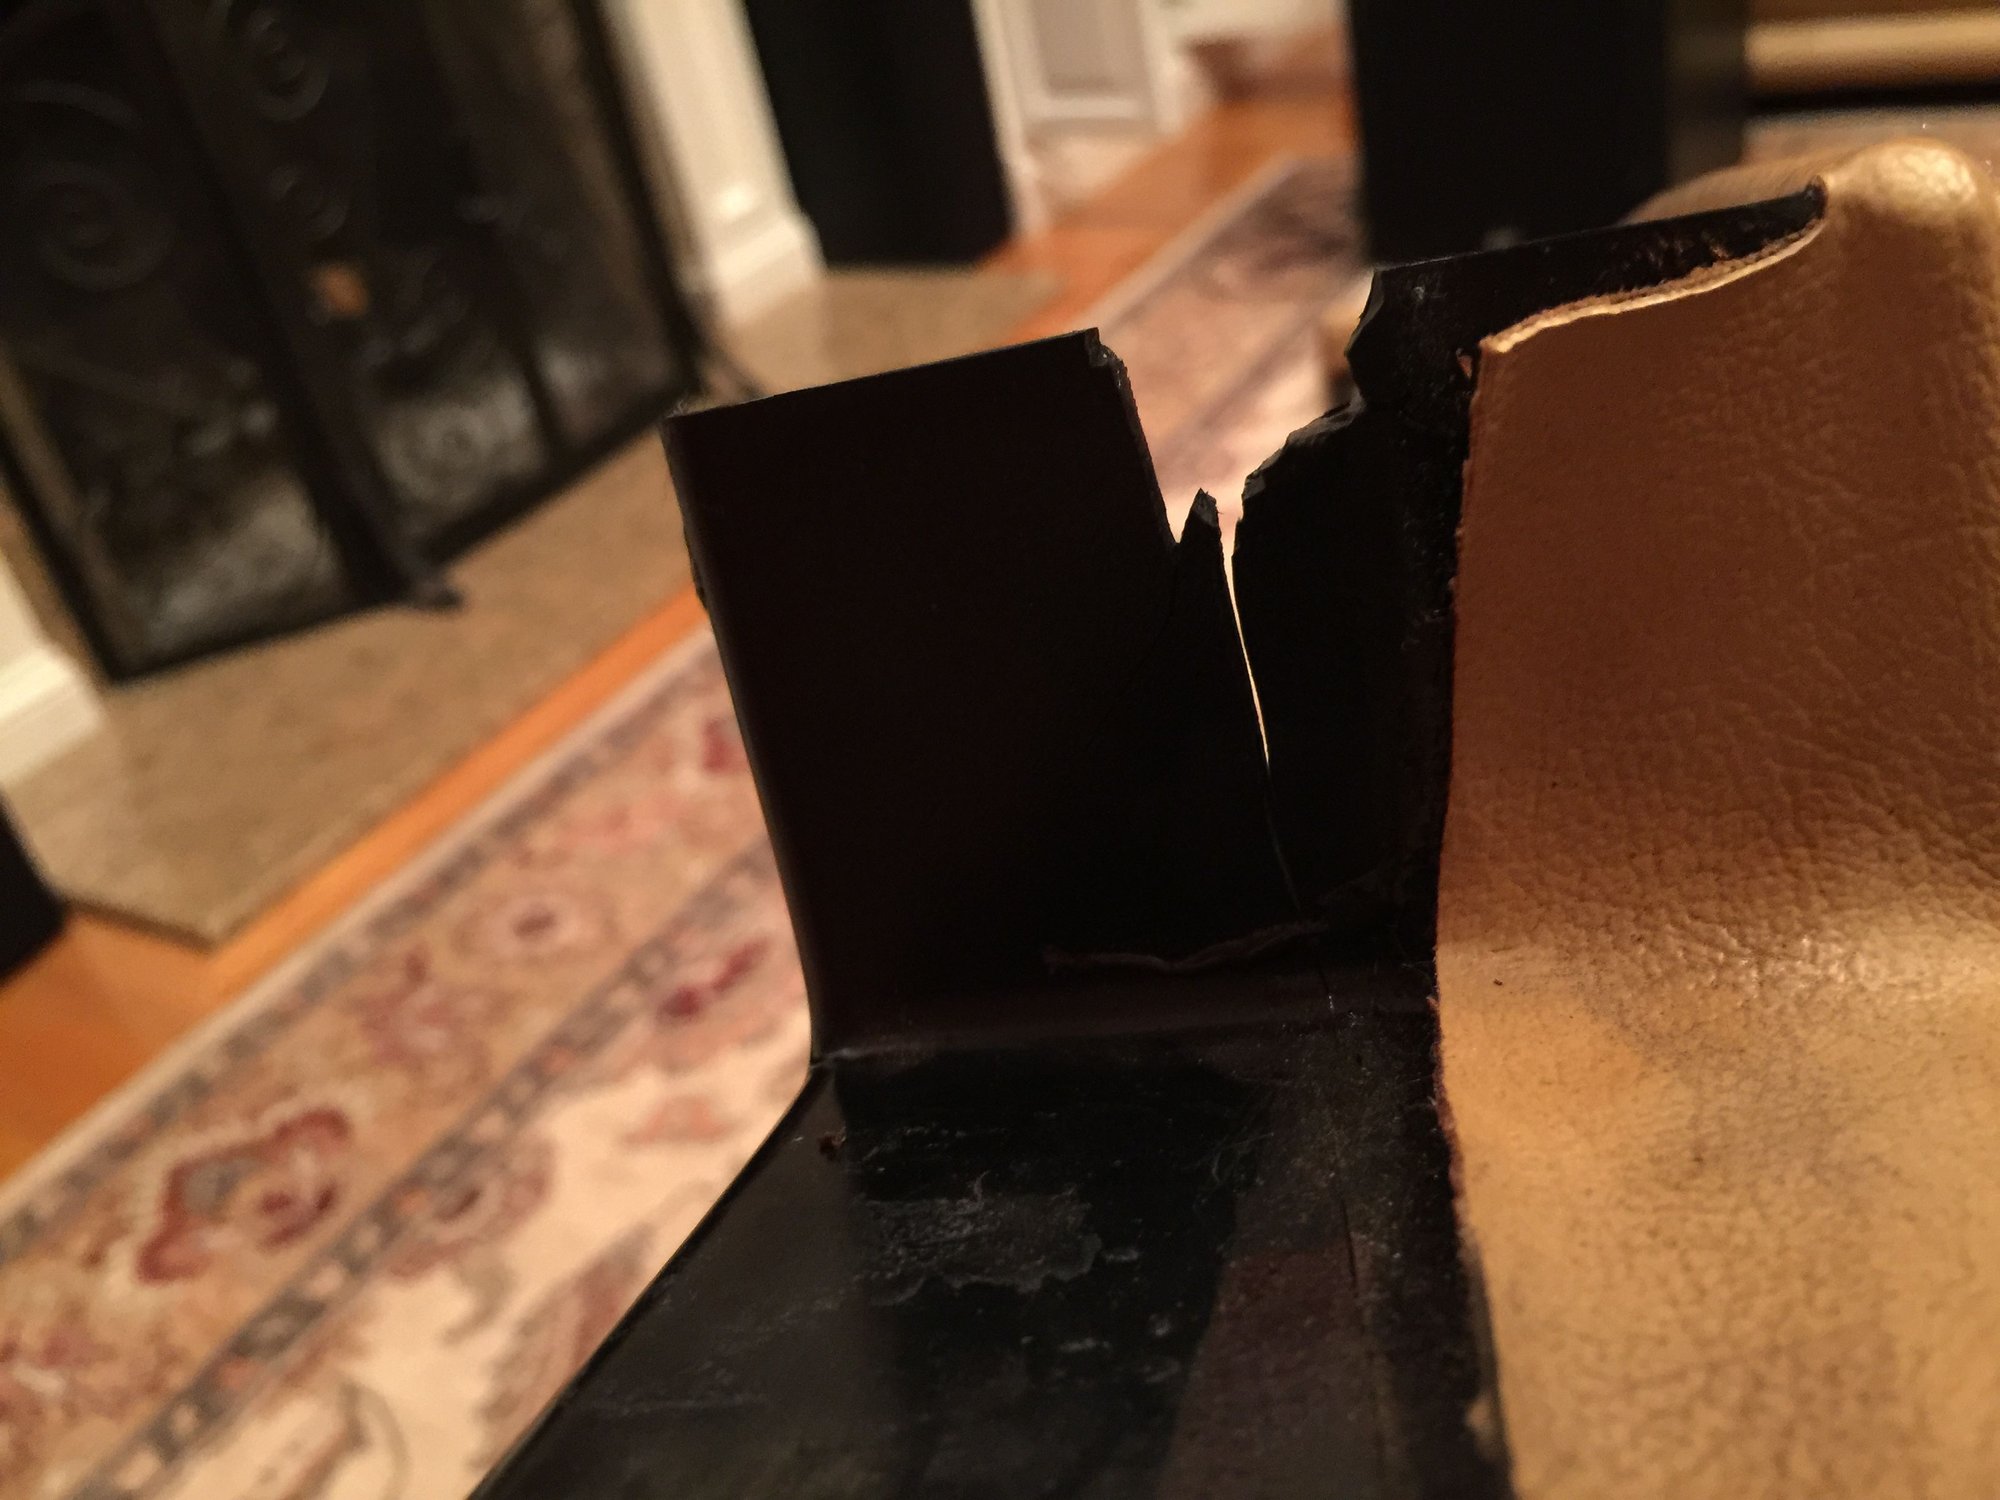
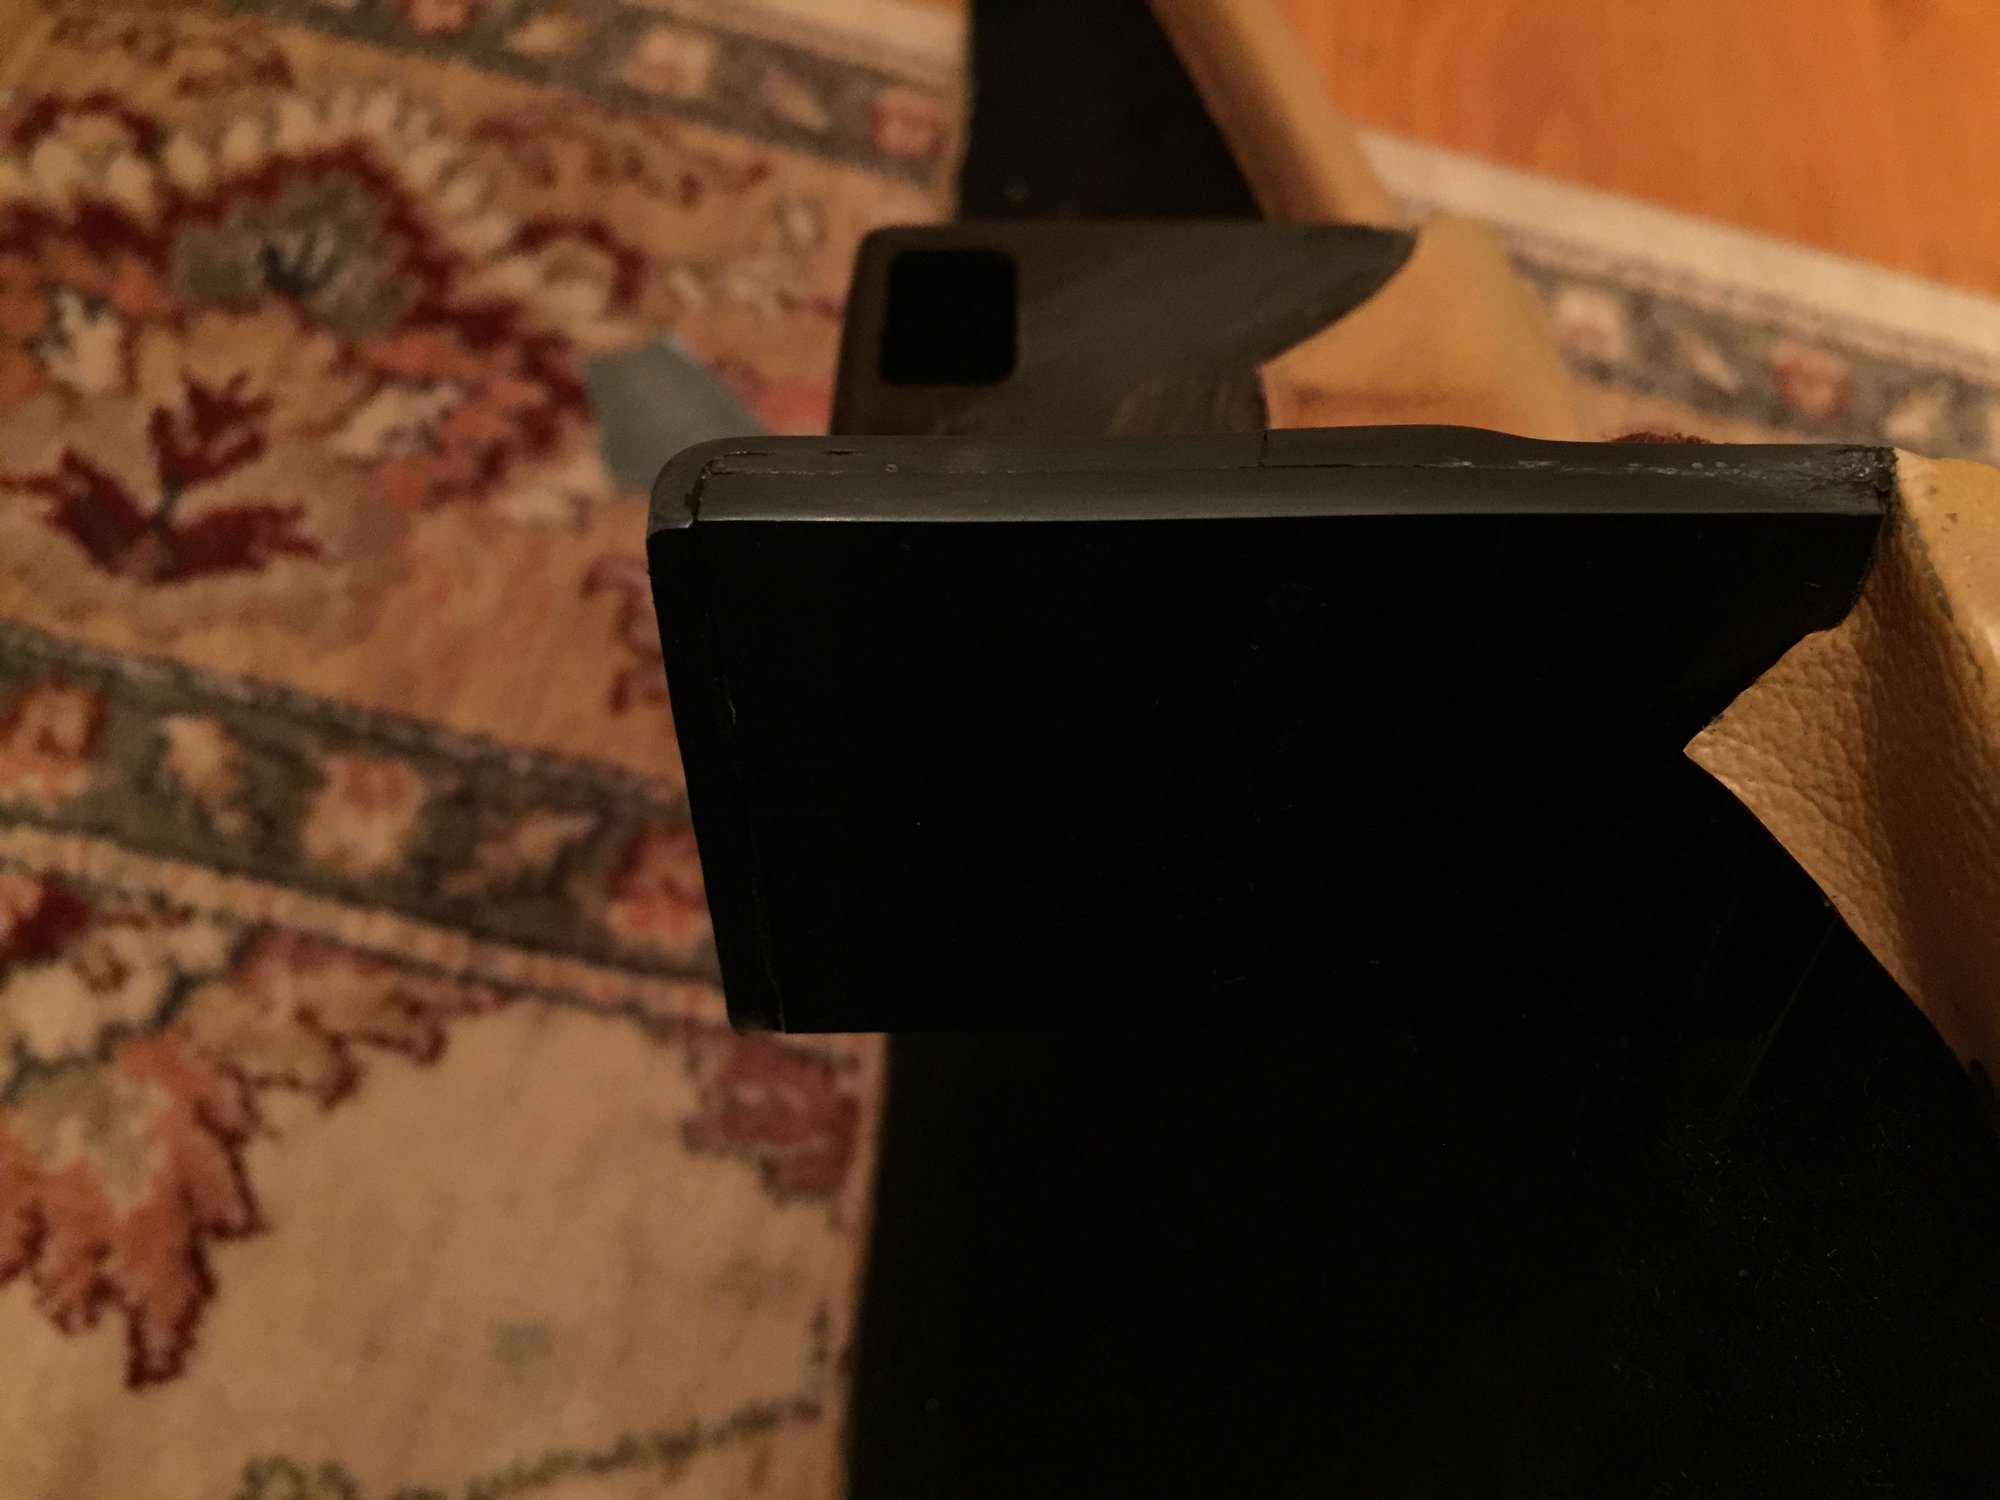
I didn't realize how badly I needed to reinforce my door pockets until I got into this project. The right door pocket attachment was badly cracked, and held in place by a large washer installed by the PO. Behind the washer, I discovered a large gaping hole. The left door pocket attachment was also badly cracked, but still largely intact. The longer you delay in doing this project, the more you risk a gaping hole and more repair work. My left door pocket was so loose that the plastic retaining clip under the arm rest (part 26 in the PET illustration below) had failed and disappeared. The good news is that even a gaping hole is easily reparable and the door can be properly secured with BesideTheBox's repair kit and some Oatey's medium black ABS cement. And with some patience and a little wet-sanding it's a marked improvement visually as well.
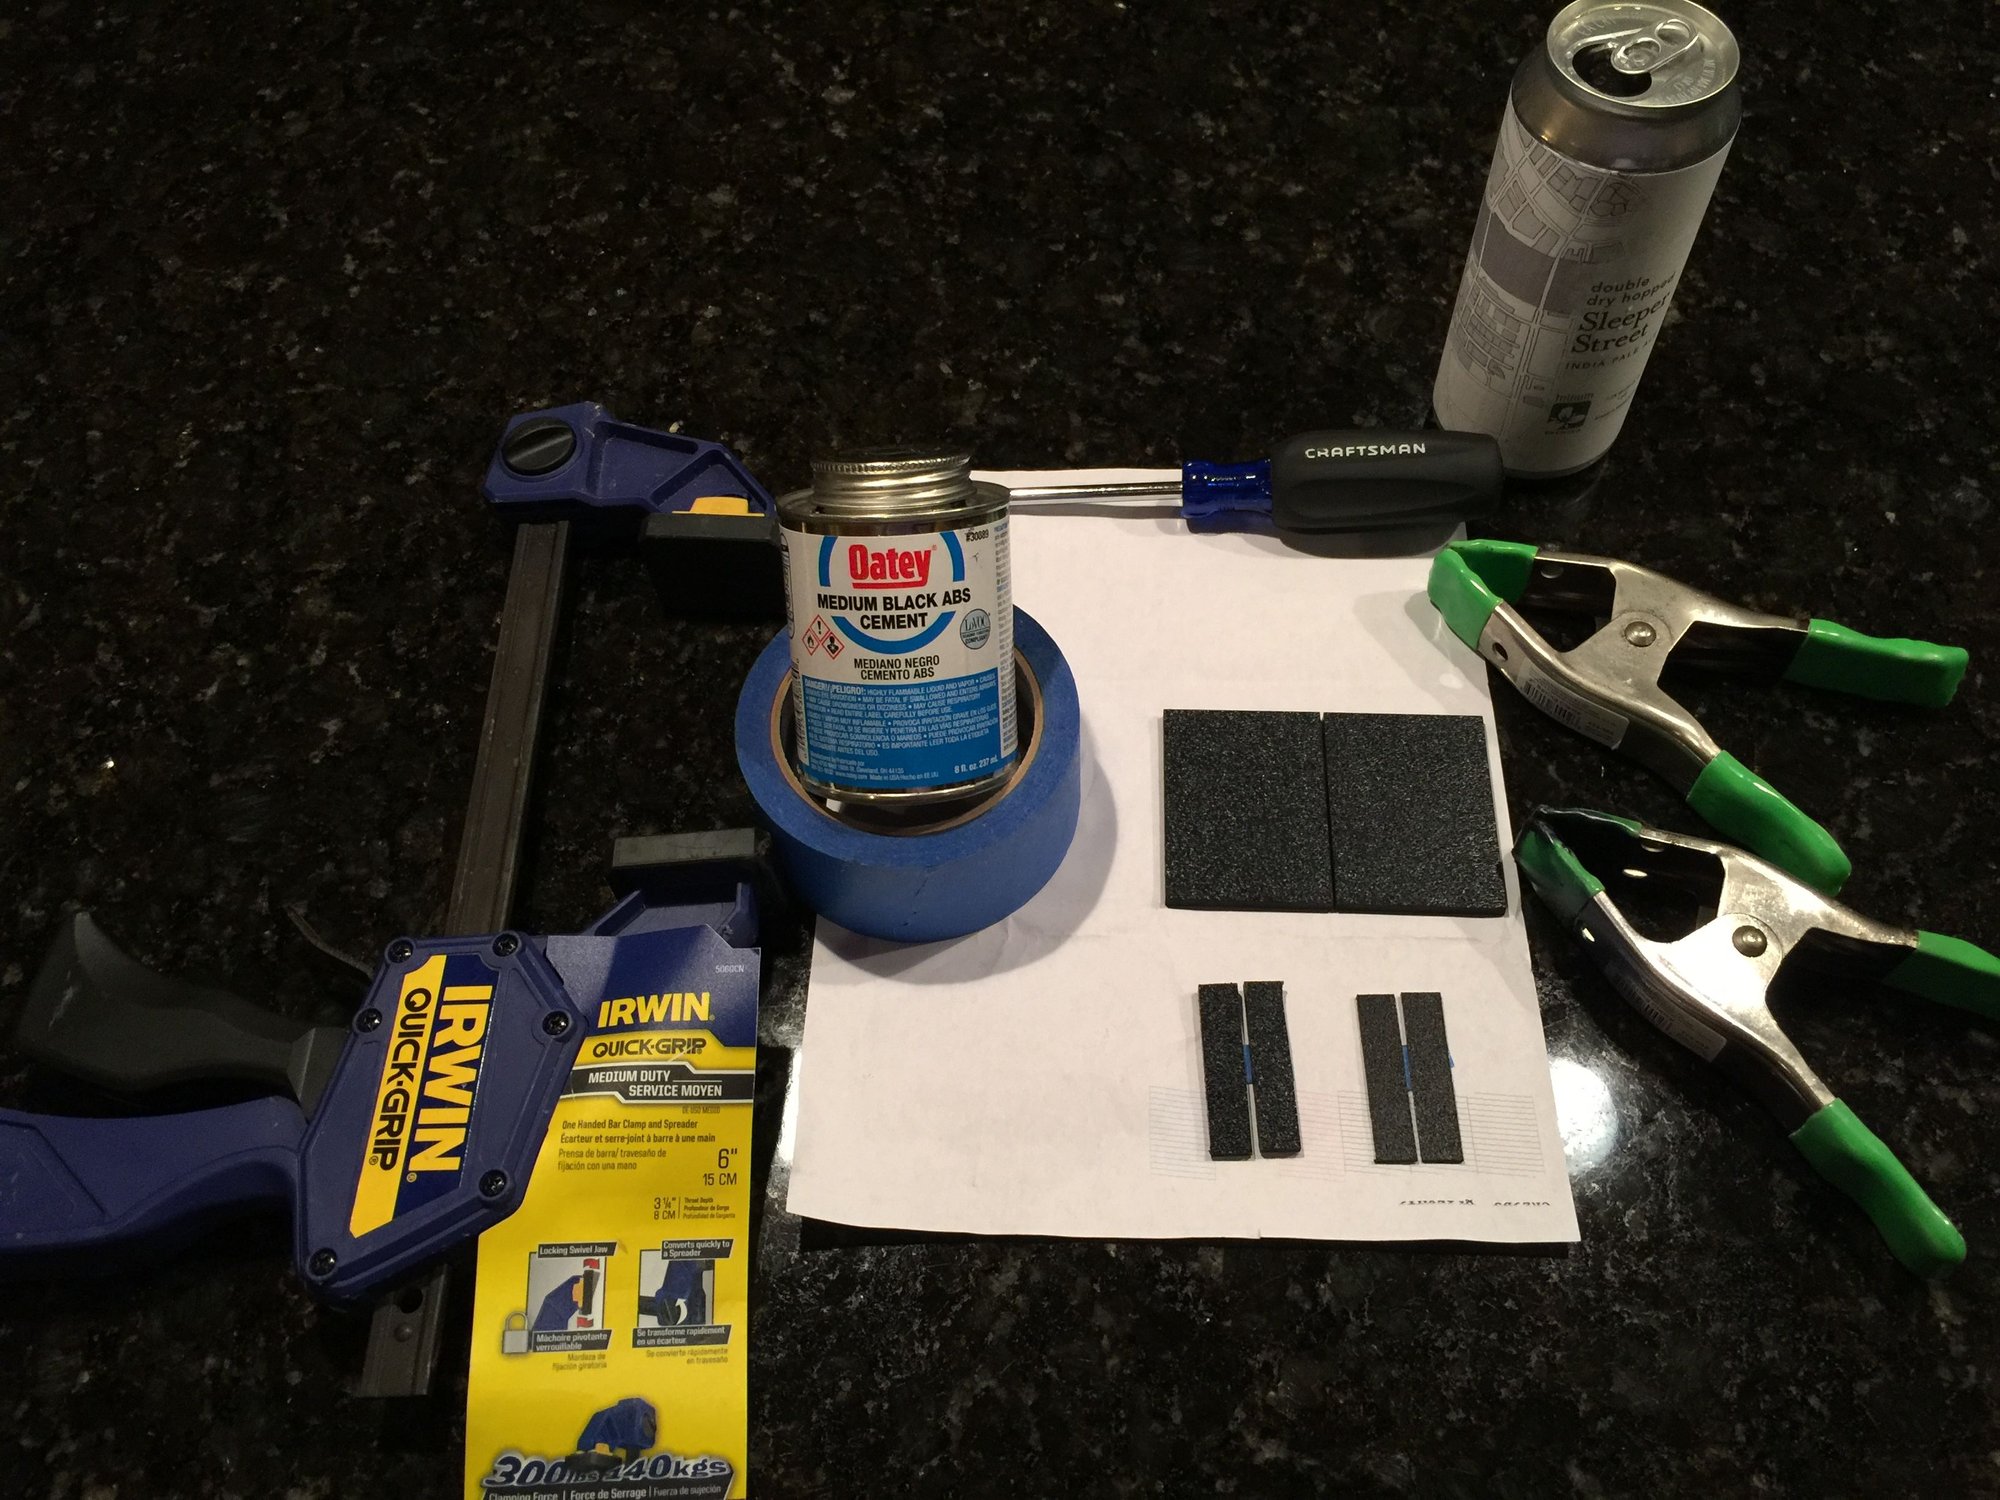
You really don't need many tools for this project, and I would rate it a 3 on a 1 to 10 scale of difficulty. Other than cure times (read, "beer") this is a quick and easy project. A Phillips head screw driver, BTB's kit, Oatey's medium black ABS cement, a drill with a 5/32 or 3/16 drill bit, some painters tape, and a few clamps is all that you need (and some 150 sandpaper, and 250 and 1500 wet sandpaper if you want to fine tune the finish and/or insert a piece to fill the gap in the small channel). There is no substitute for the Oatey's ABS cement. Call your local Home Depot to make sure they have it in stock. I had to do a store search to find one precious can 30 miles away. They can usually have it shipped to the store free of charge if you call in advance.
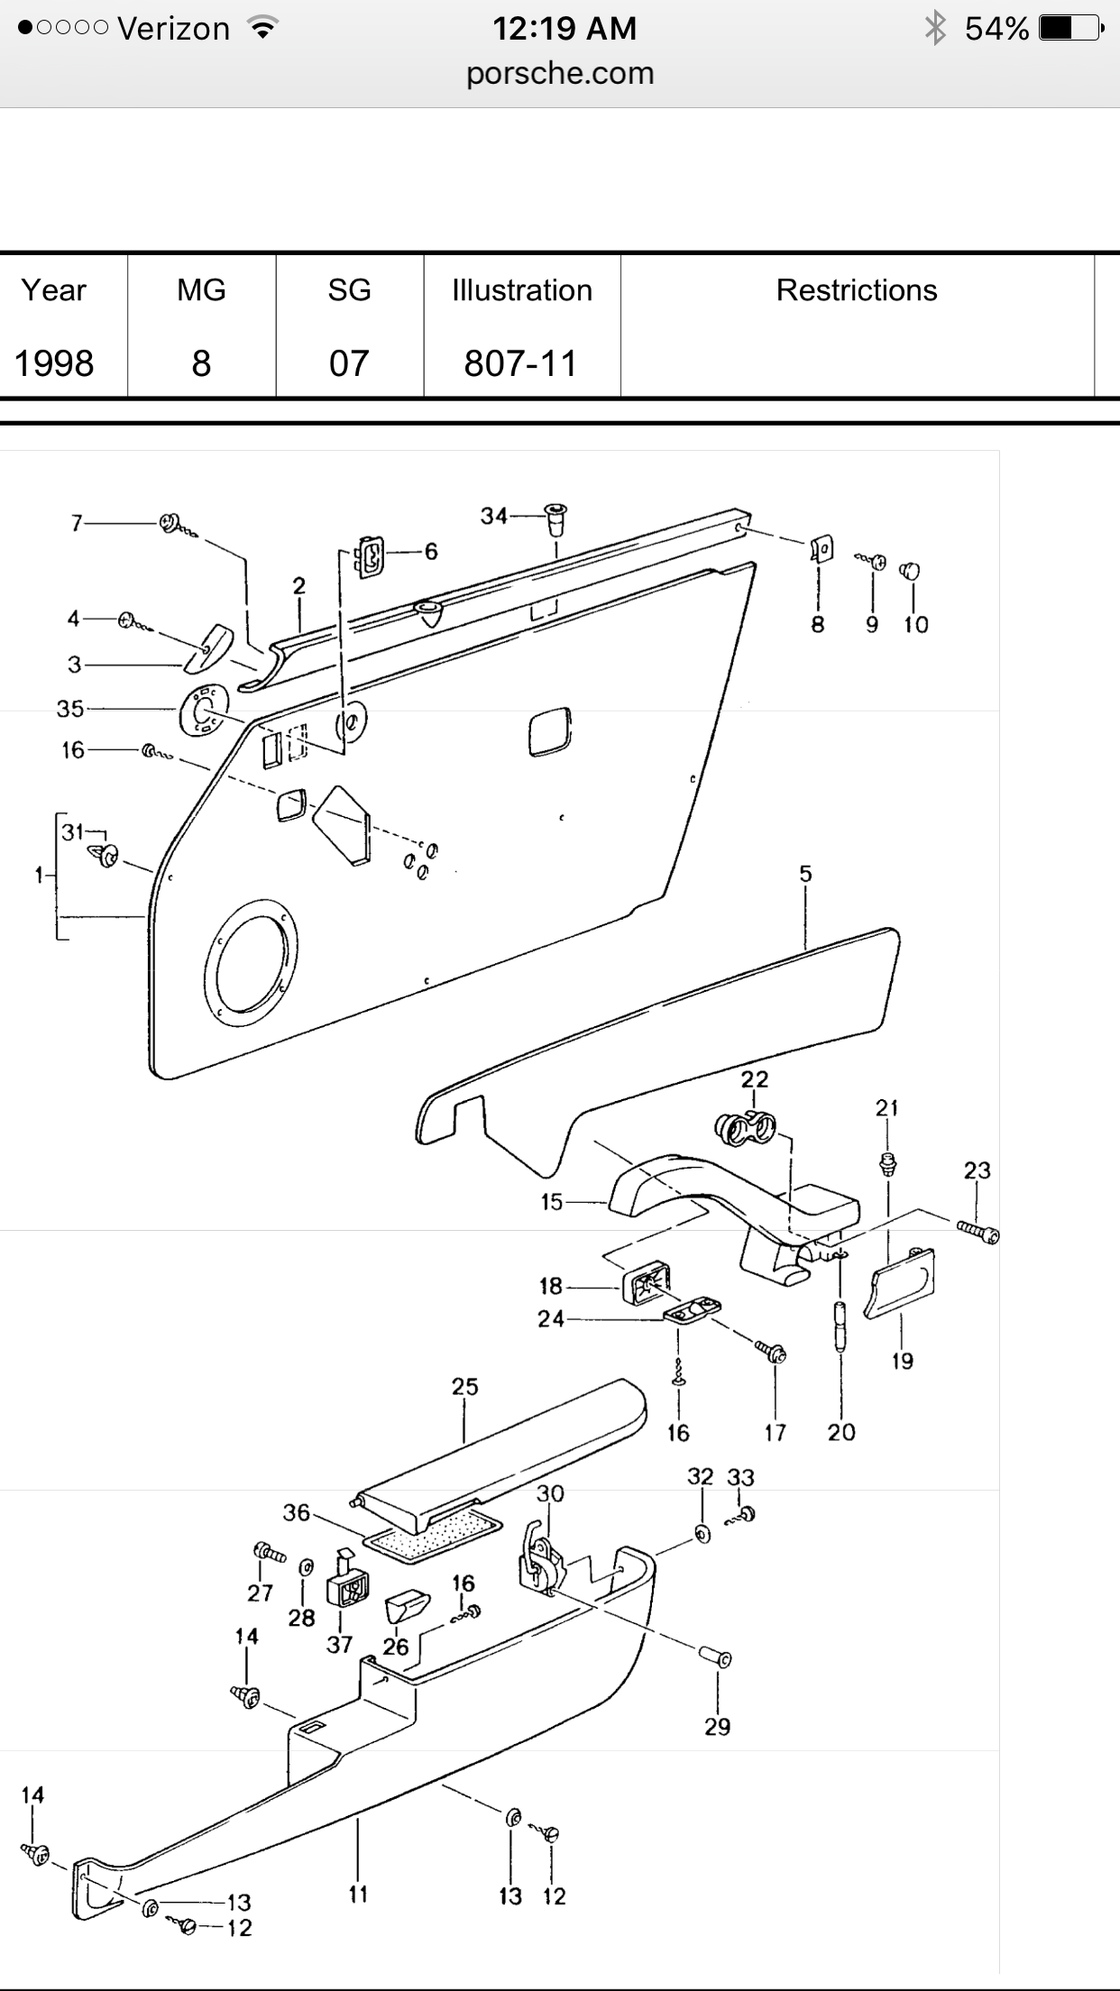
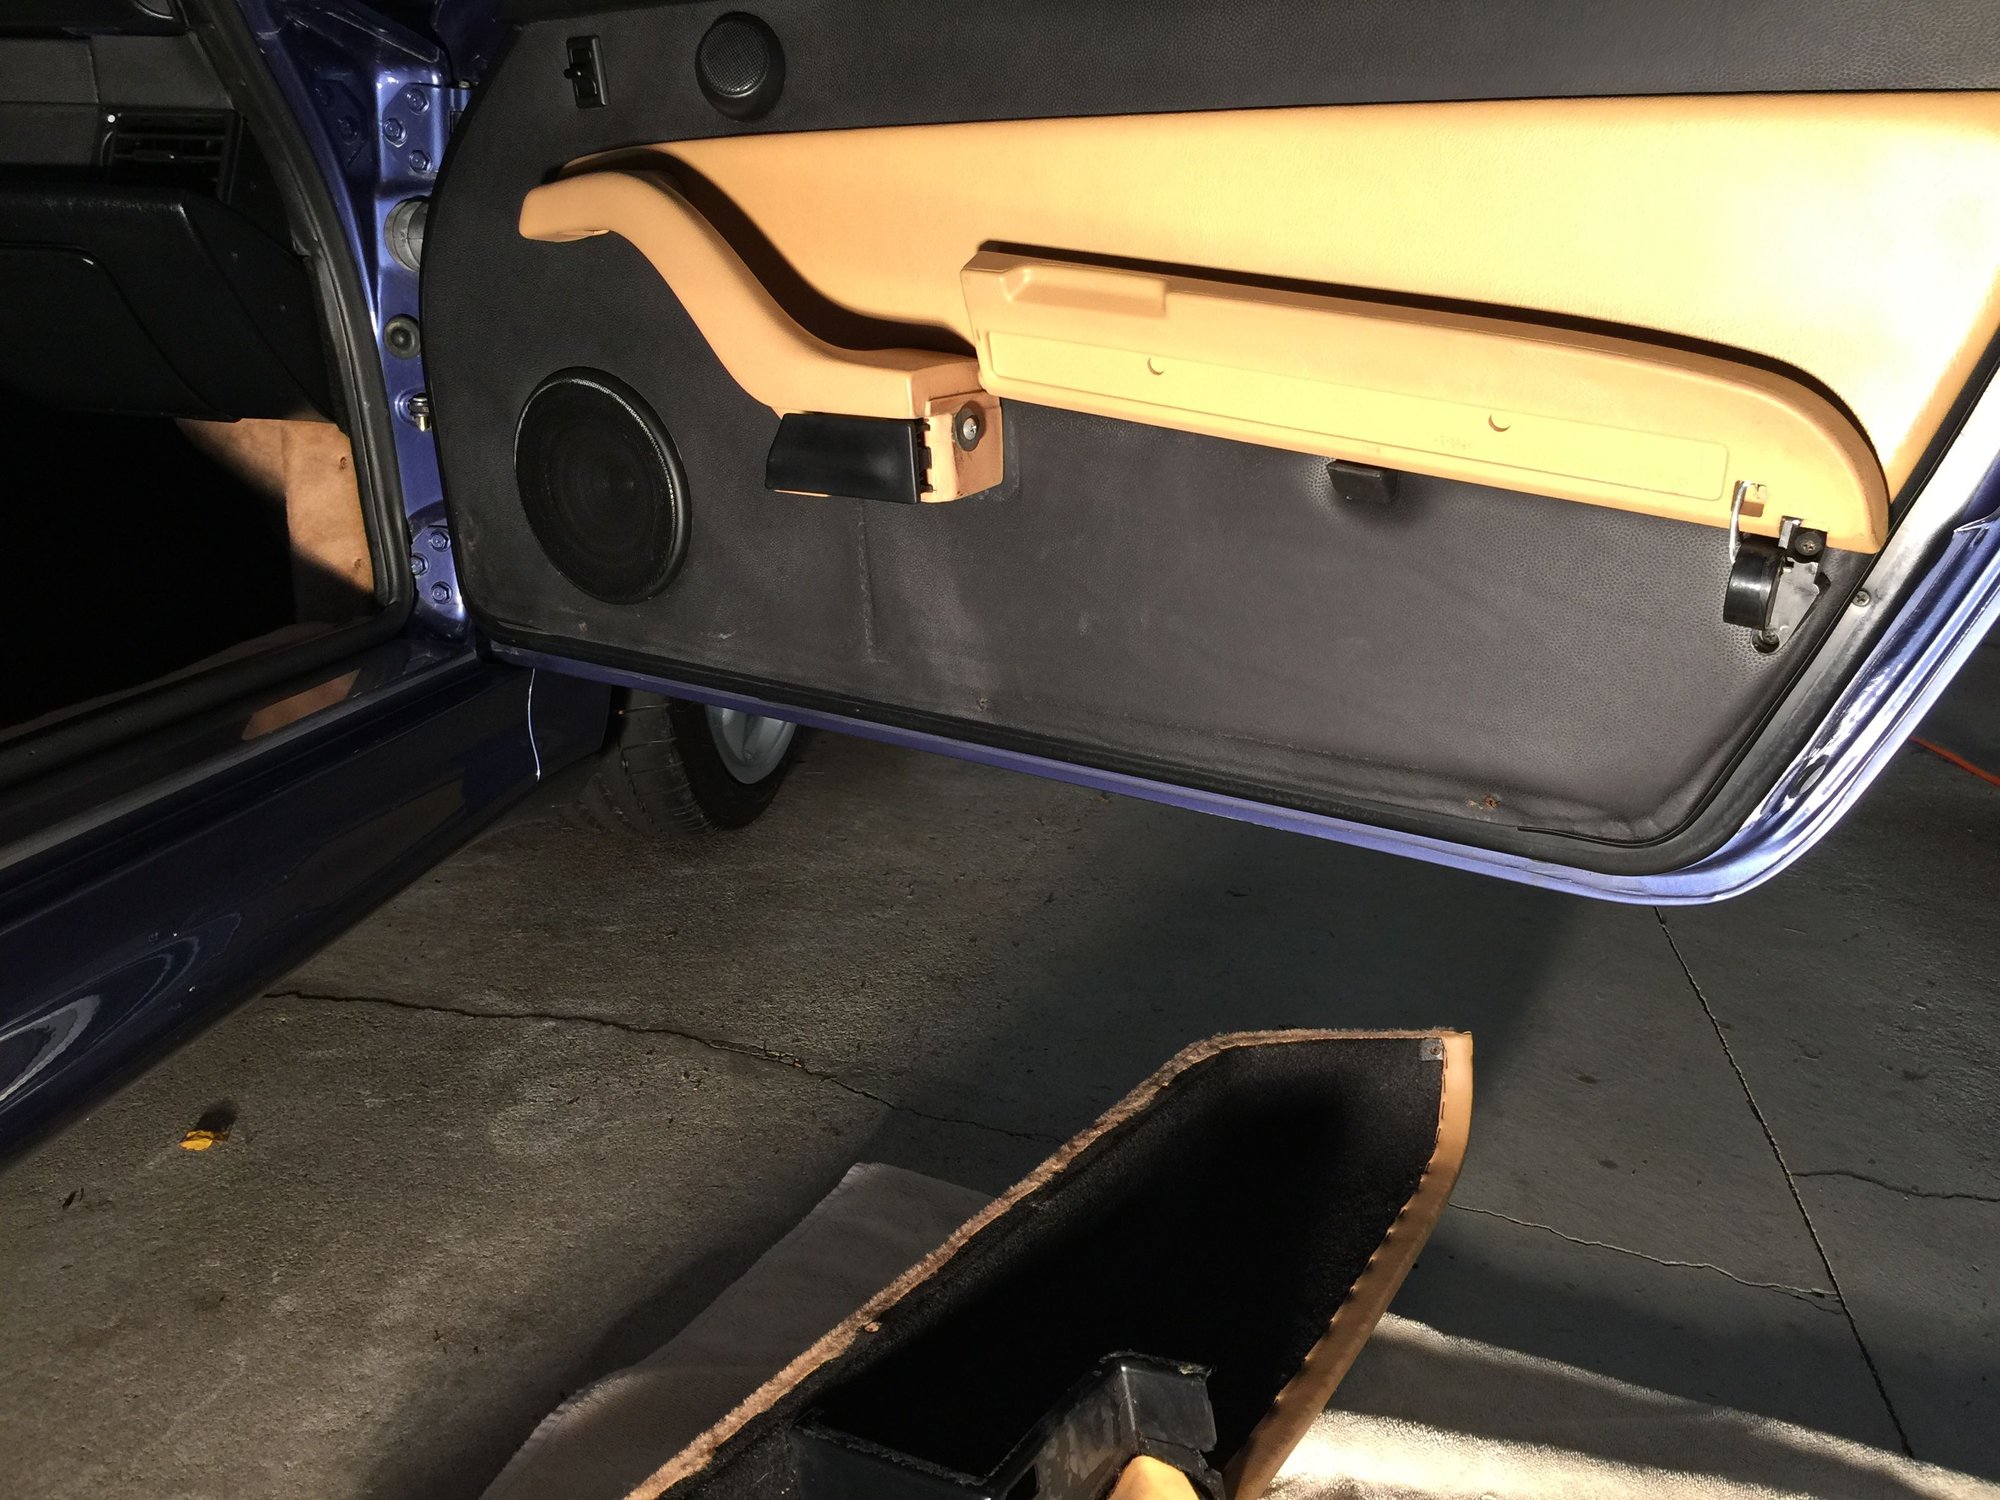
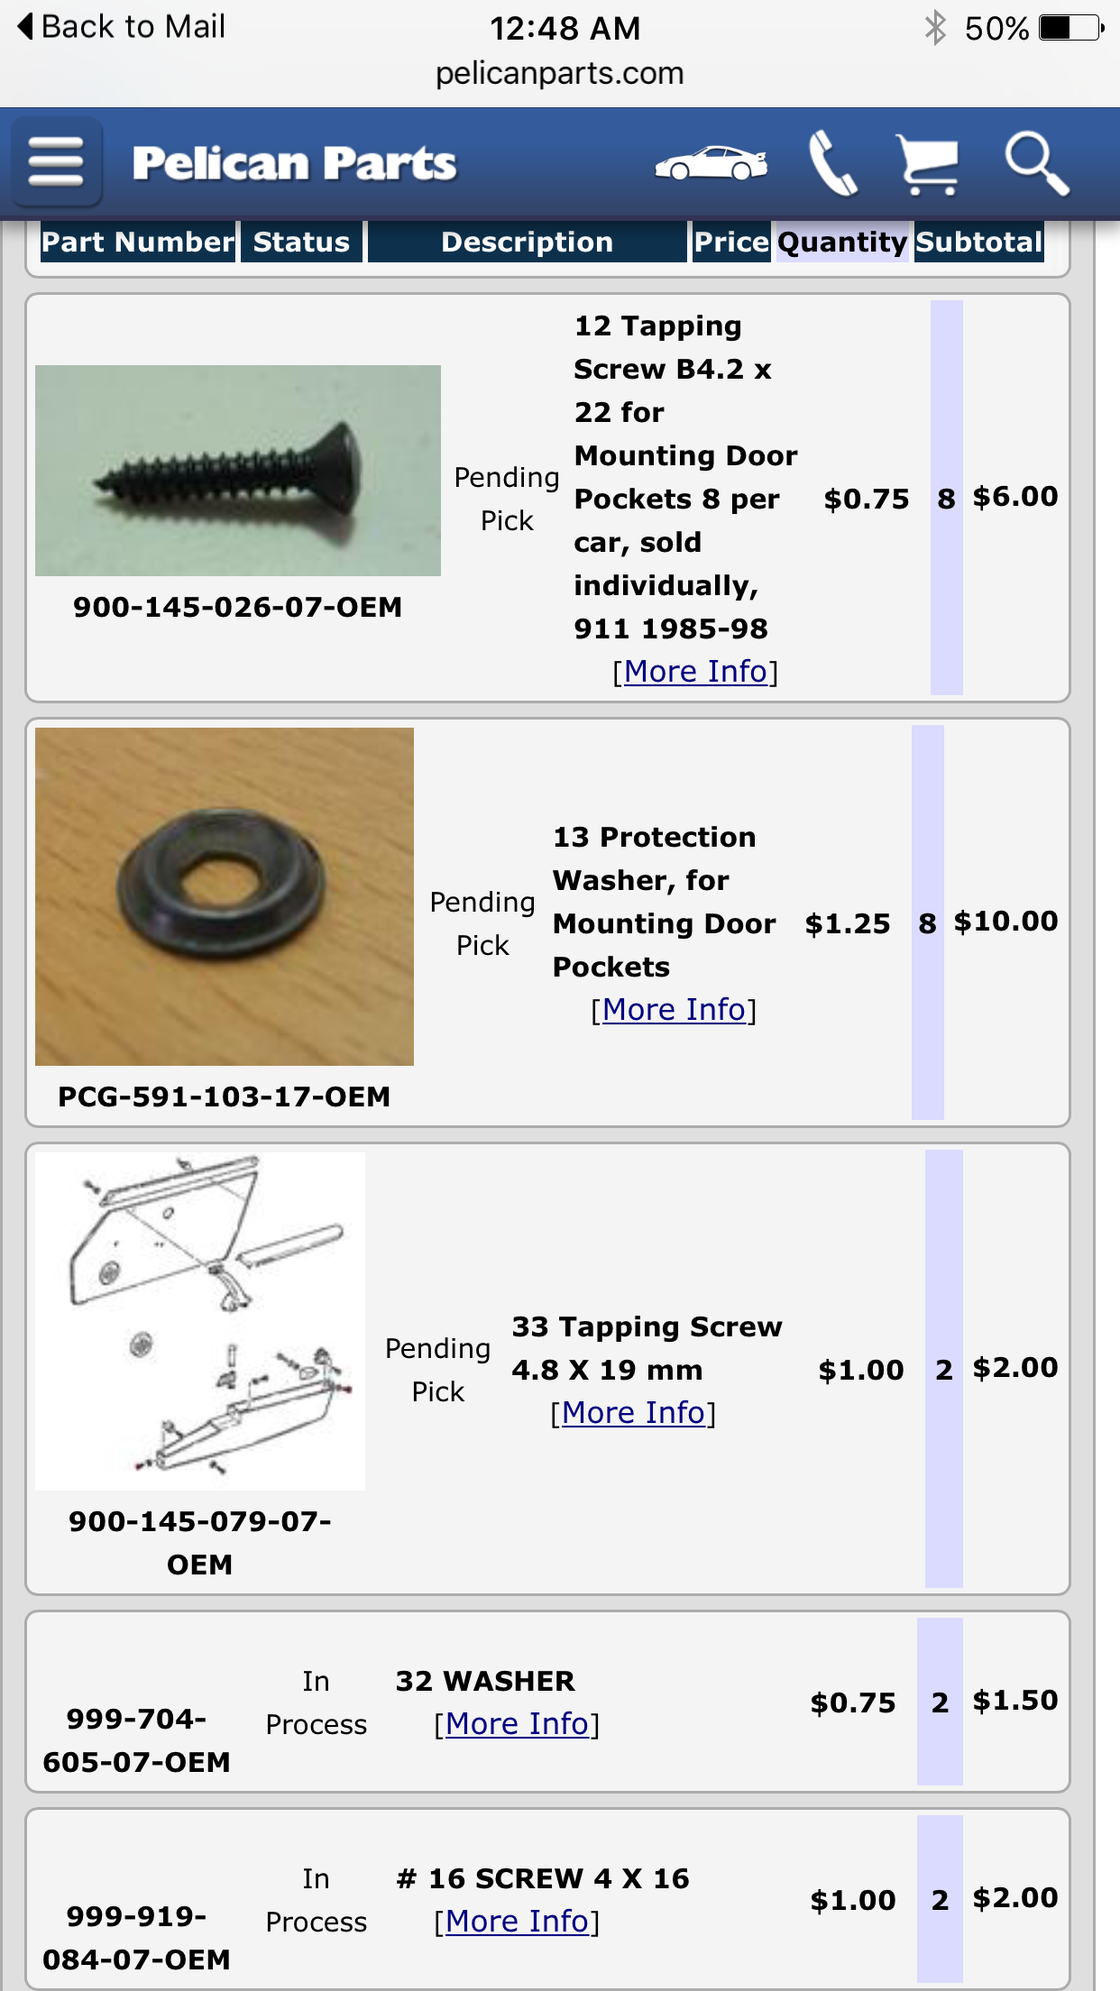
To do this job correctly, you need to first remove the door panel. BTB pointed me to P-car's how to remove a 993 door handle. http://pcar.com/diy/ard/ Just remember, you only need to follow step one - don't take the whole door apart like I almost did. I'm working with standard non-hifi doors FYI unlike the hifi door pictured by P-Car that has 8 screws along the bottom of the door, plus the one securing screw inside the door pocket. The standard door has only 6 screws that you need to remove. There's one screw (#16) for inside the door pocket, one screw (#33) and cone washer (#32) that attaches to the rear side of the armrest, and four screws (#12) with protection washers (#13) along the bottom and side. The hardware all looks the same, but there are three distinct types of screws and two different types of washers that are easily confused. See the picture below courtesy of Pelican Parts showing the various hardware and part numbers. Much of the hardware on my car had minor surface rust. Easy to brush off the surface rust with a wire wheel and a drill. But since I needed to replace the missing retaining clip that had disappeared I ordered all new hardware from Pelican.
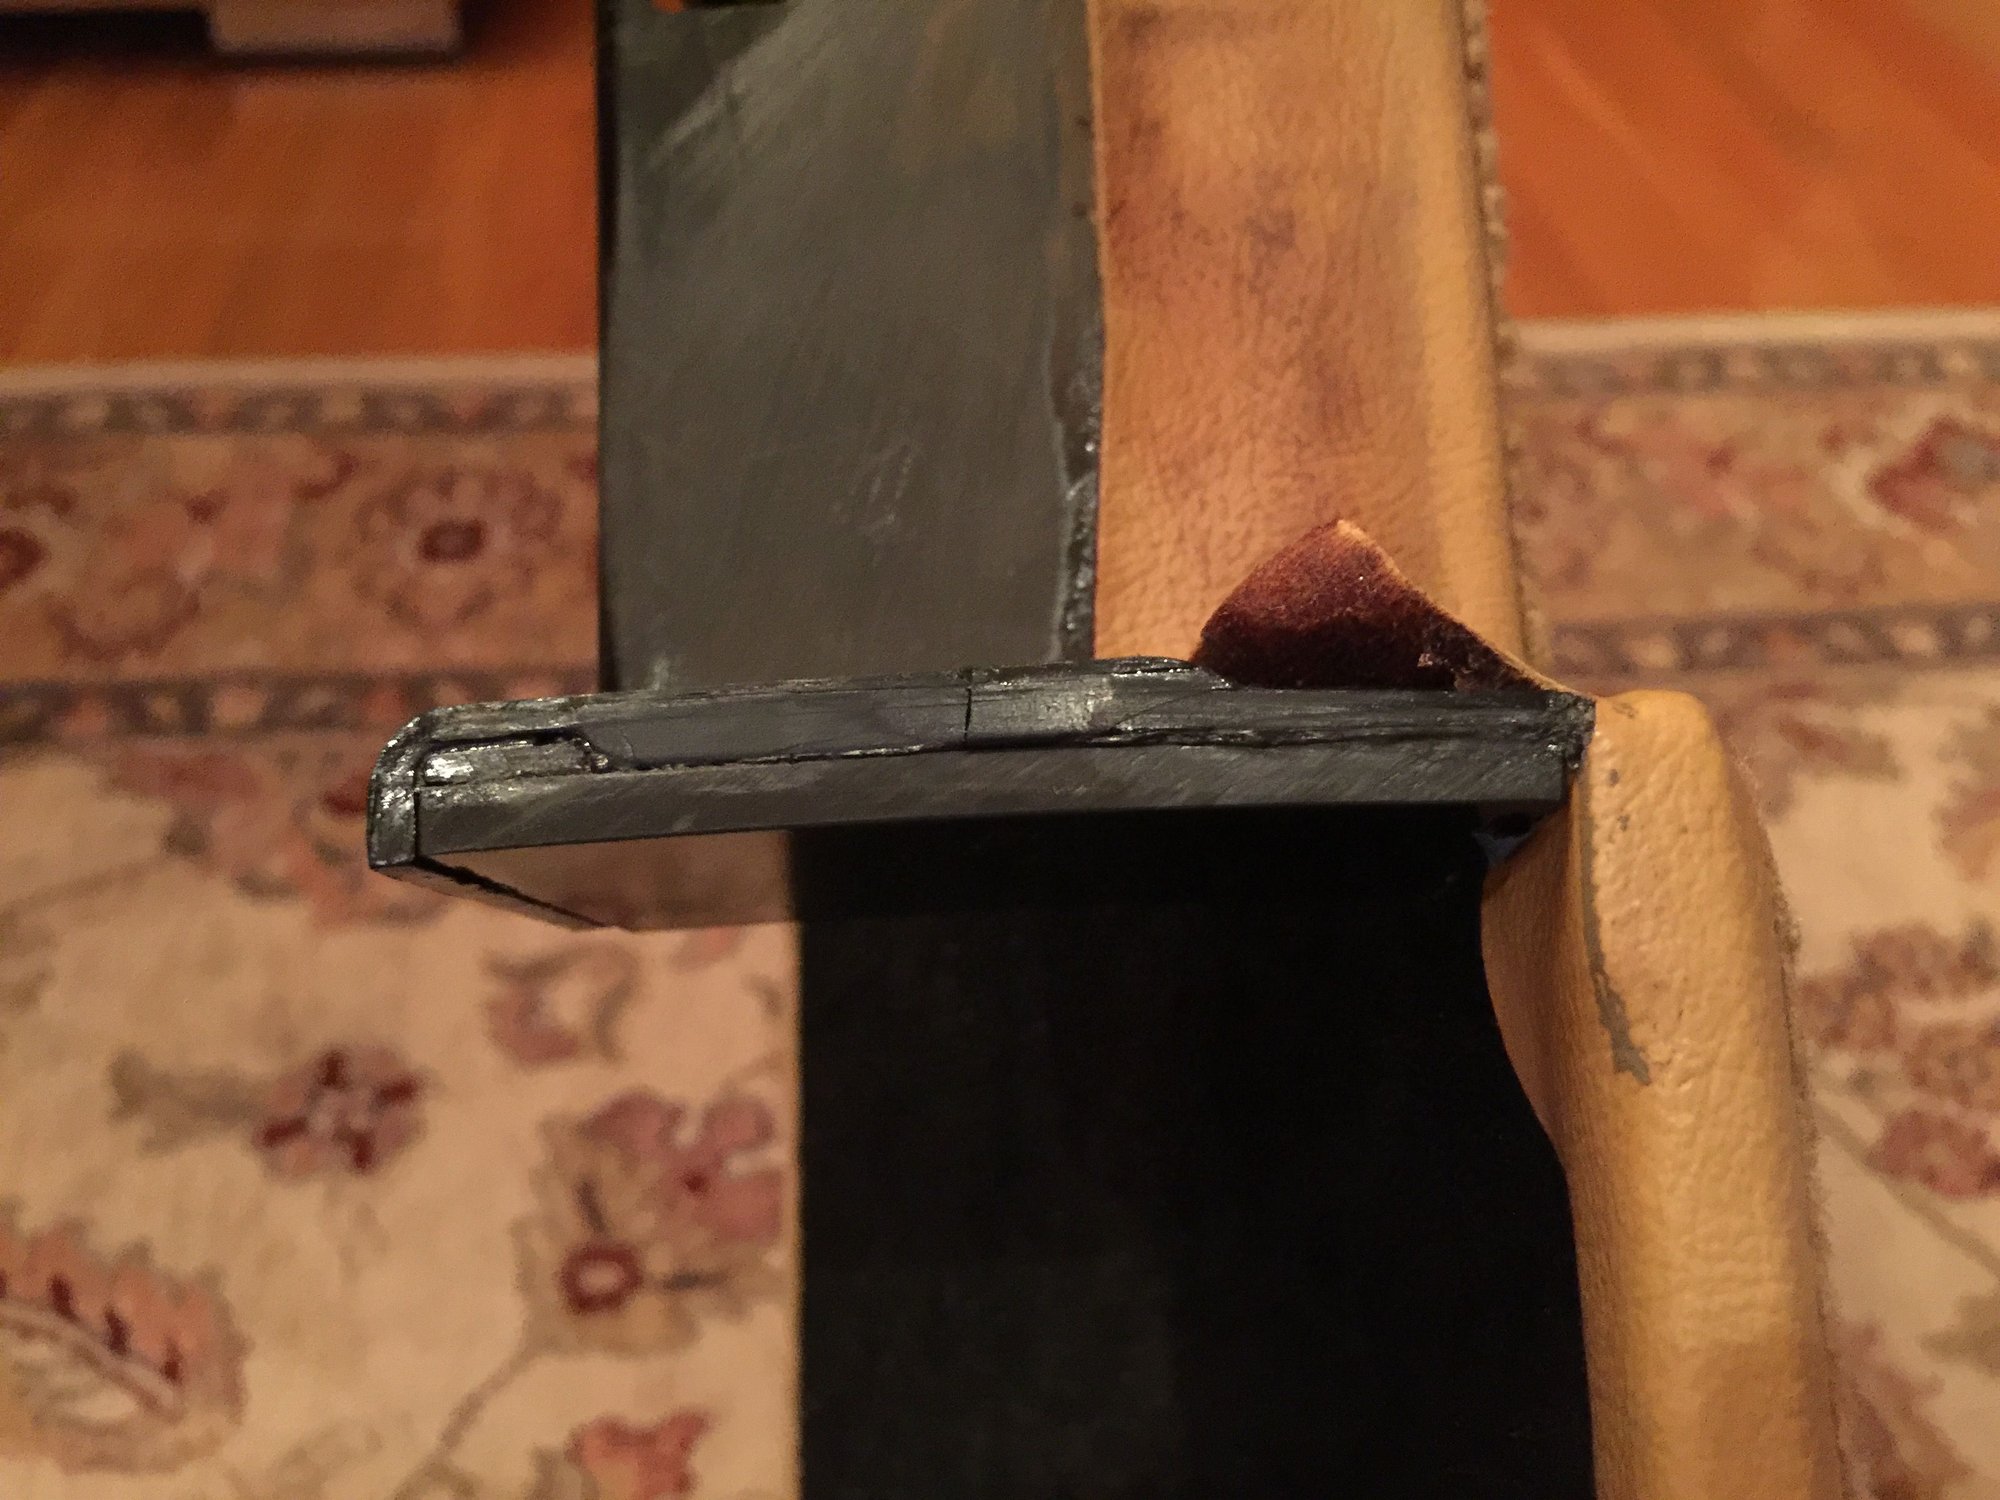
Removal of the door pocket is very straightforward and only requires a Phillips head screwdriver. If you look at the PET illustration below, the first screw to remove is part #16 that screws through the door attachment. Next remove part #33 (oval head sheet metal screw) and part #32 (cone washer). (the #33 screw is slightly shorter snd wider than the remaining four #12 screws, and the #32 cone washer is deeper and cone shaped compared to the remaining four #13 "protection washers". Finally, remove the remaining four #12 screws and #13 protection washers. Two are depicted clearly in the PET illustration below, one in the bottom center, and one on the side toward the front end of the car. There are two additional screws and washers to the left and right of the #12 and #13 screw and washer located at the bottom center.
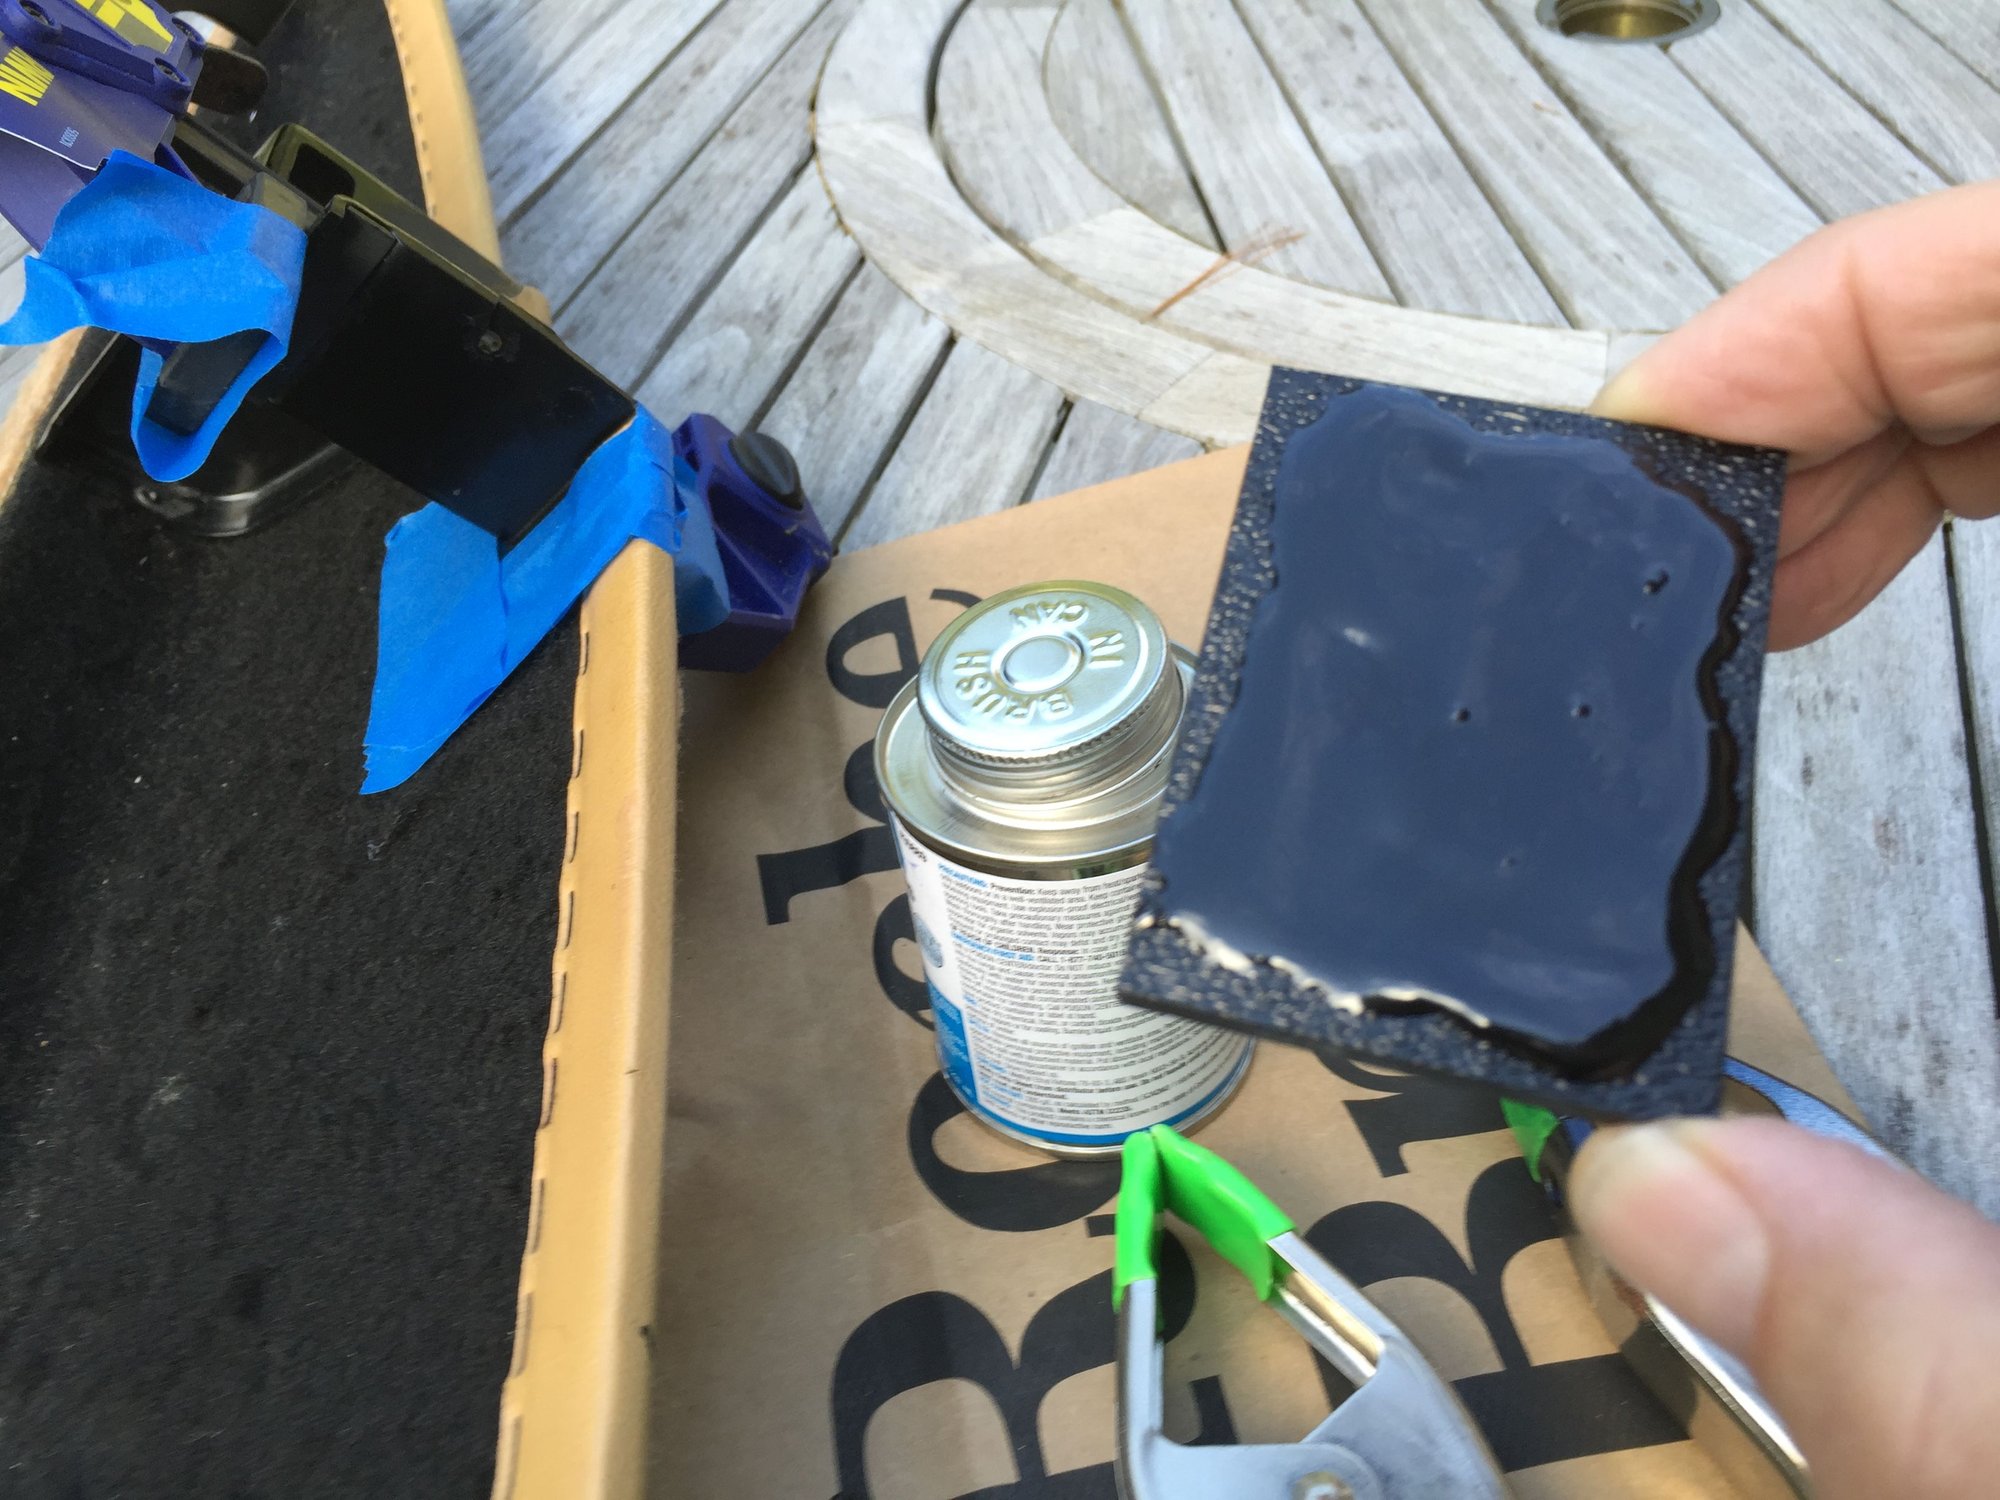
With the door pocket off, now you can make ready to attach the plastic reinforcements. If you're not worried about the aesthetics, you can proceed immediately with gluing the reinforcements in place. But if you'd like to fill the small gap in the channel on each side, BesideTheBox has thoughtfully included a few additional small strips of plastic that can be used to fill these voids. I chose to fill in the channels which I think may also enhance rigidity, as well as adhesion with a larger contact surface area. The small strips are also quite effective for some reconstructive surgery if, like me, you have a large gap to fill. I wanted something to fill the gap along the top edge where my right door card attachment had disintegrated and fill in the gaping hole. Cutting off a small piece of the extra strip of plastic combined with a generous dose of ABS cement really did the trick. For filling the two channels, sand the small strips down to size with some 150 grit sandpaper and sand as necessary. See the photos below. Test size for fit before gluing into place, using the new square reinforcement for the test fitting. Once your satisfied with the fit, glue the small strip into the channel with the ABS cement using the painters tape and newspaper to avoid any spills. Allow about eight hours to fully cure.
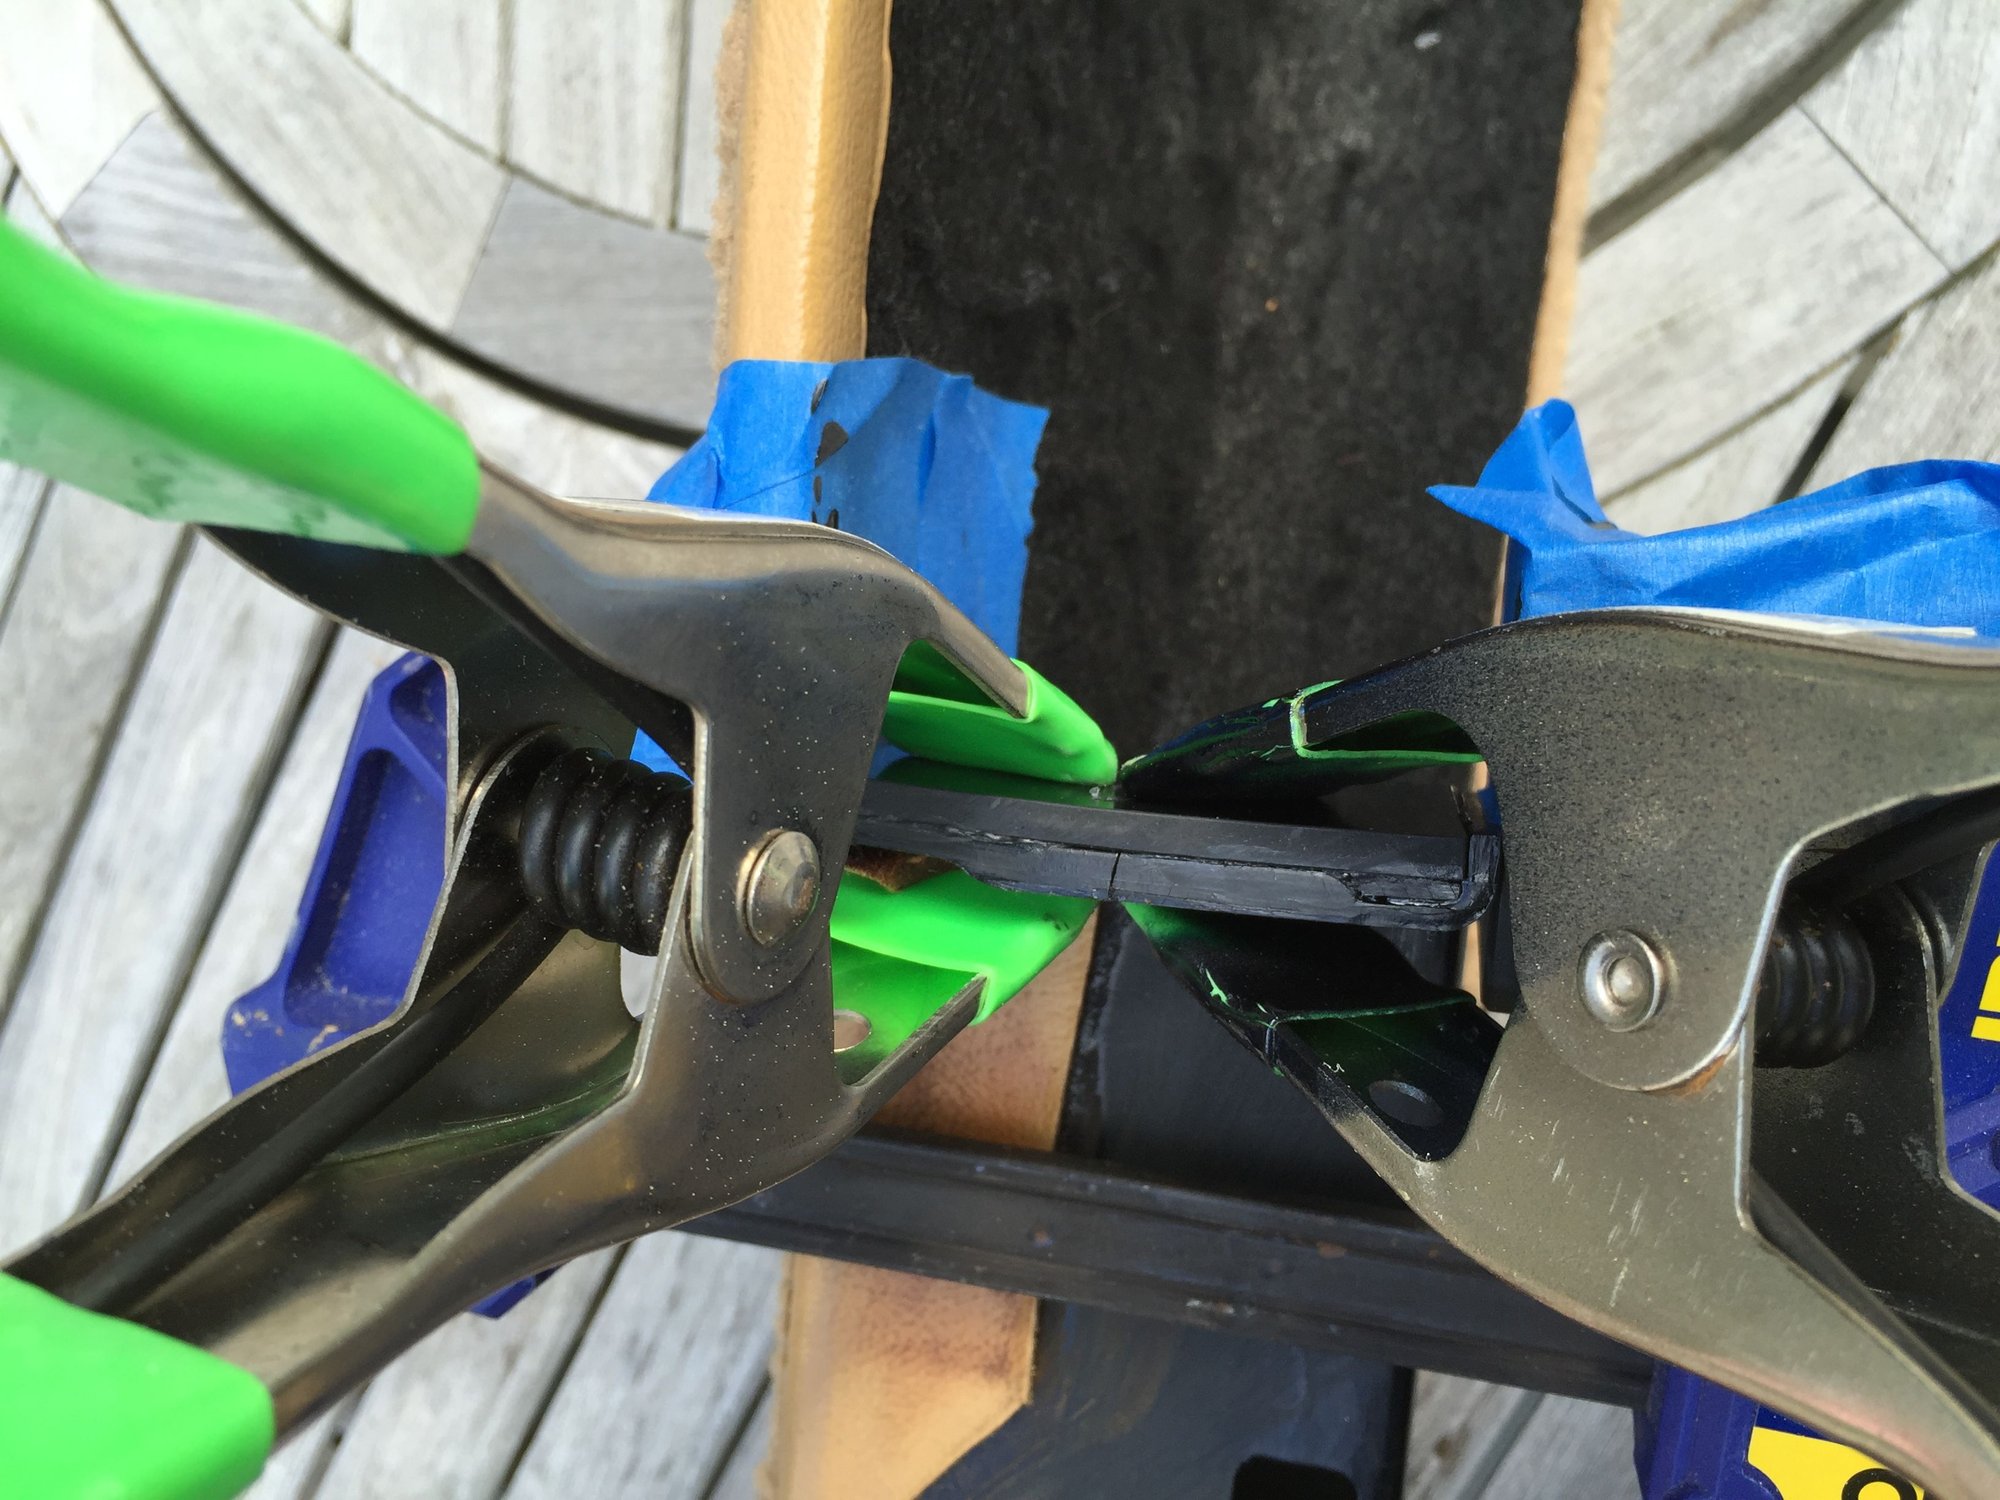
Once the channels are filled in, or if you've elected to skip that step, now you're ready to attach the new reinforcements. This is very straightforward and only takes a few minutes. Apply the ABS cement to the rough side of reinforcement piece and a small amount on each side using the built in applicator brush, leave a 1/4" or so around the edges to avoid spillover when clamping. Keep a few paper towels around in case you need to wipe off any excess. The ABS cement dries and set very quickly, so don't delay. If you're planning on sanding this won't be a problem. Expect a small amount to ooze through the hole where screw #16 passes through.
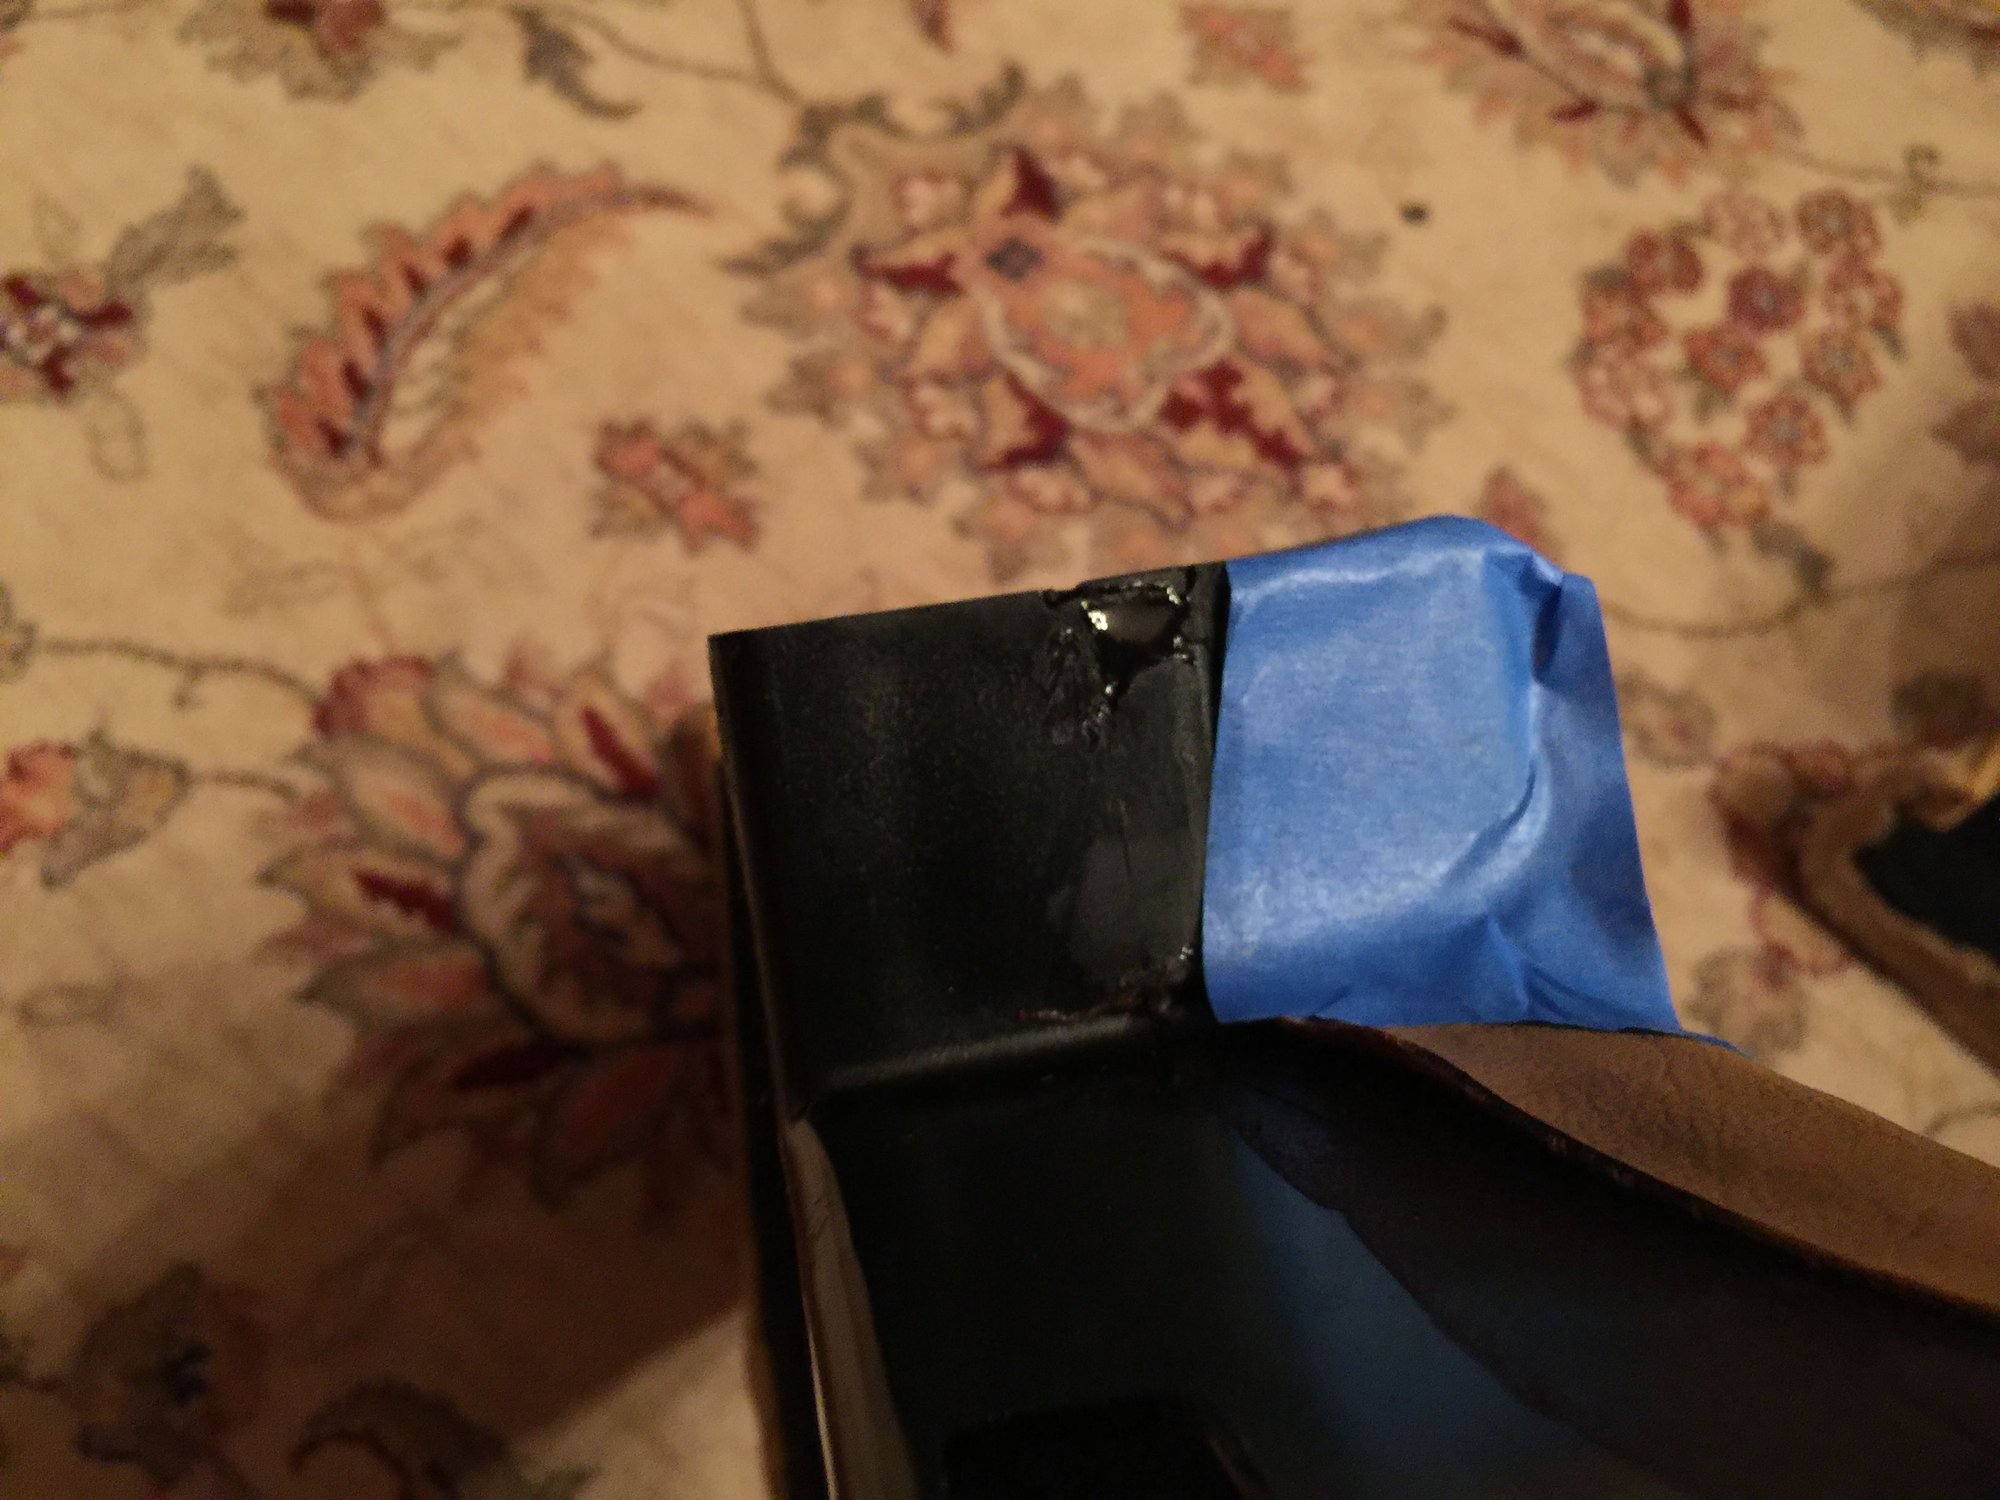
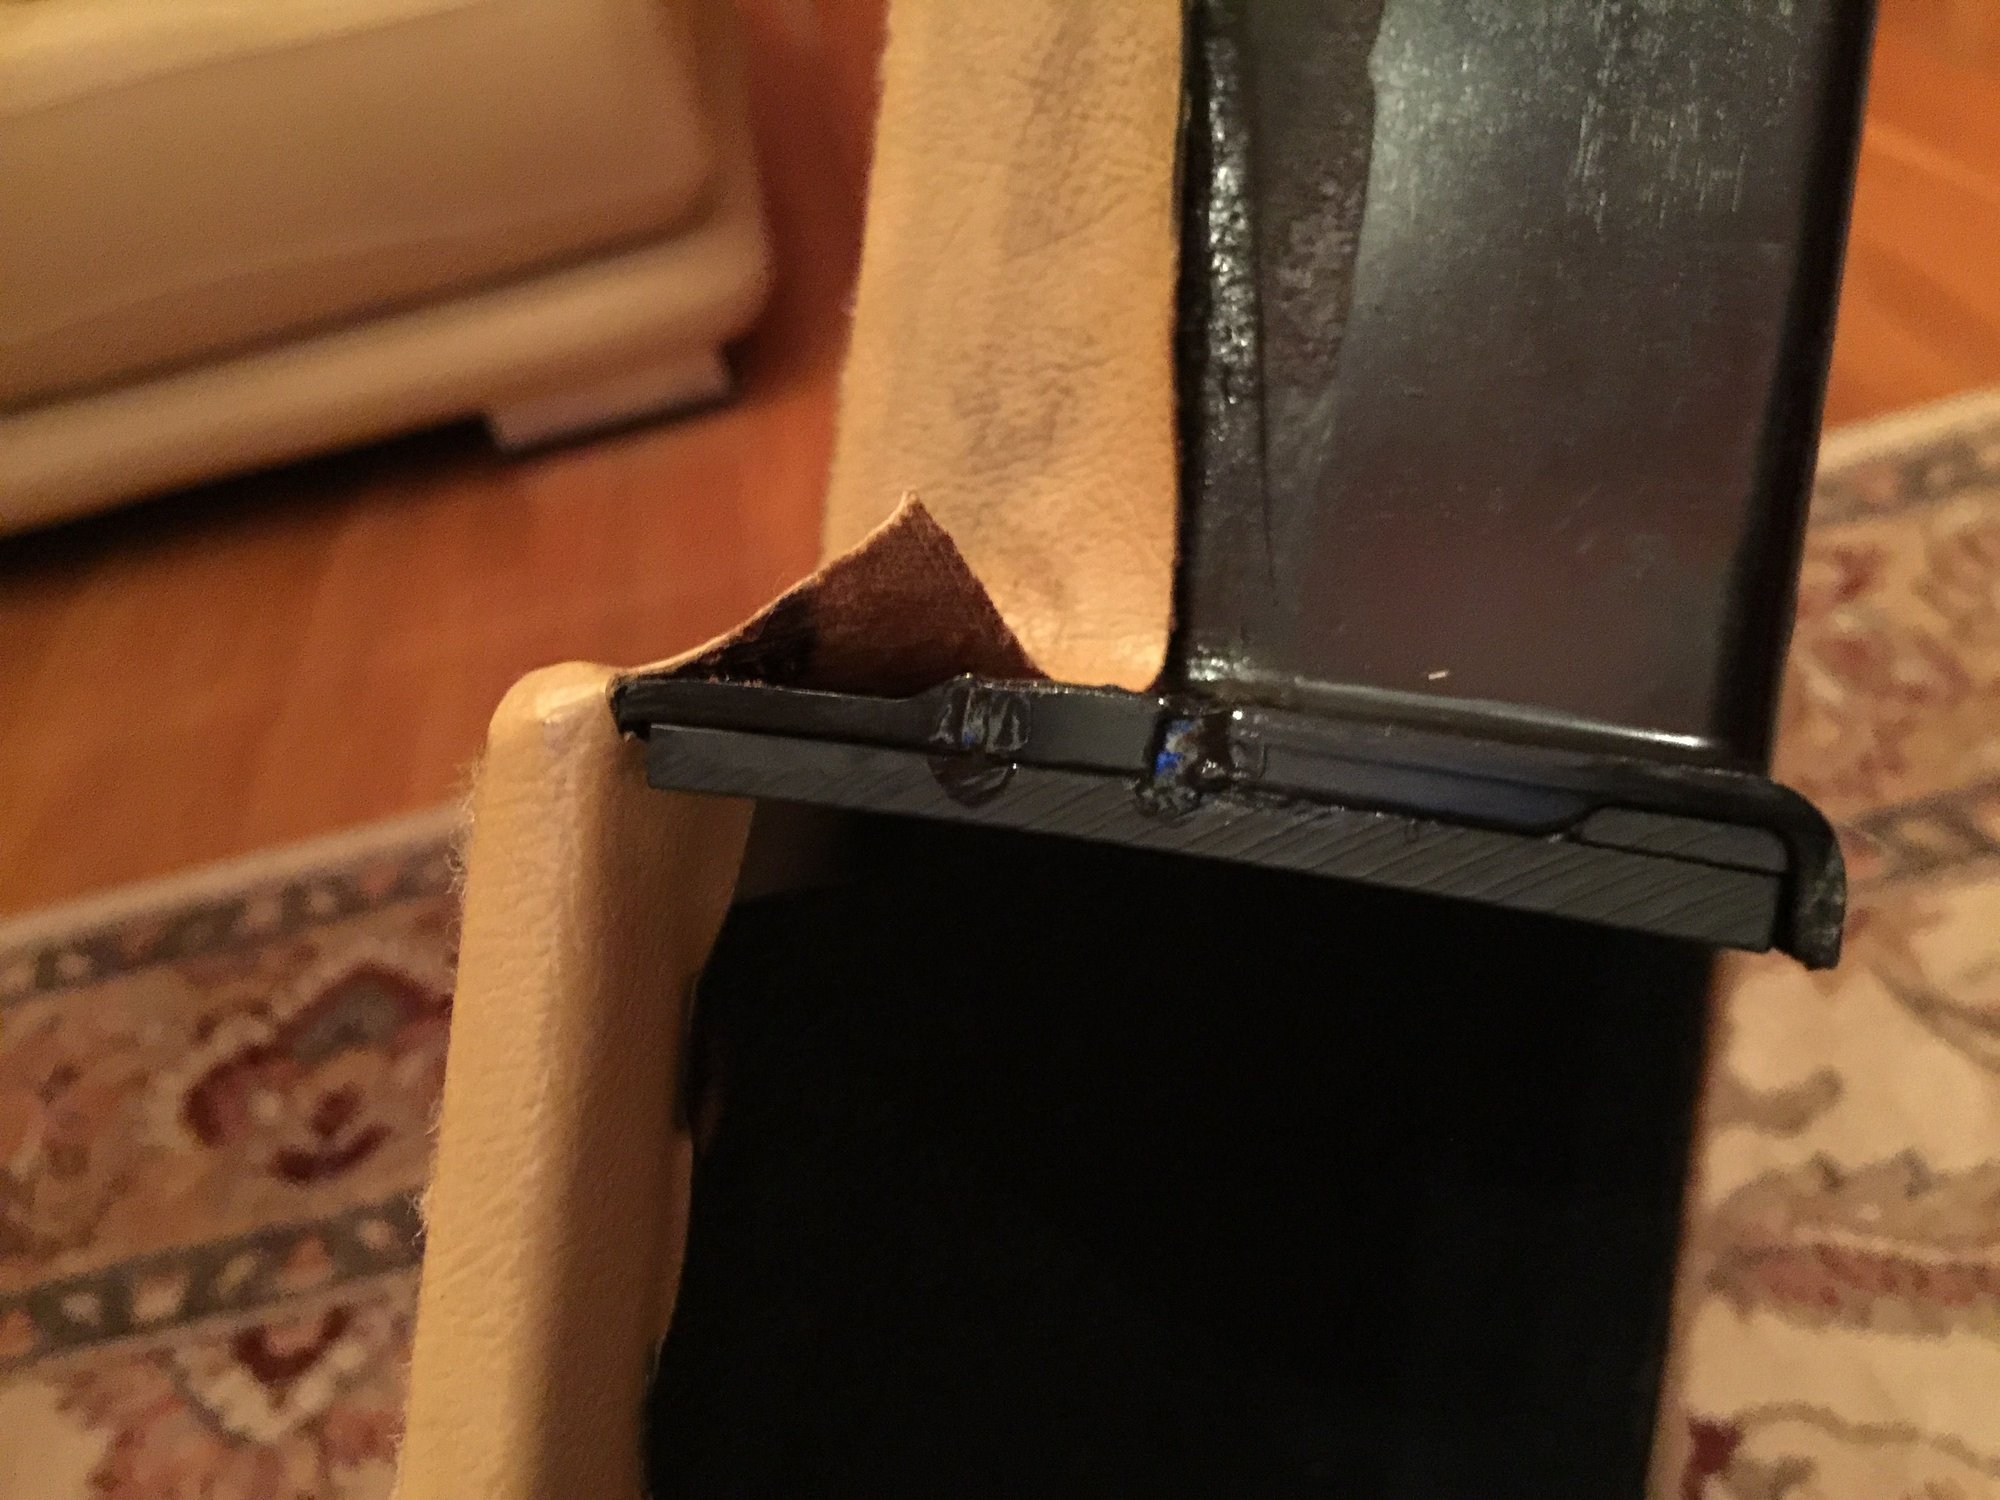
If you need to do some reconstruction and fill in a gap or two, now is the time. The reinforcement will provide backing. You can cut a small piece like I did to re-build any gaps in the top, and use the ABS cement like bondo body filler. You can wet-sand the top down with some 250 wet sandpaper for an even but dull finish, followed by 1,500 wet sand paper if you want to restore some of the shine. It's not perfect, but the finished product looks great from the inside and pretty darn good looking down from above.
Next take your 5/32 drill bit and drill a hole where the former hole was positioned. You're done. Installation is reverse of removal, and you will no longer have a cracked and loose door-pockets. Thanks again to BTB for making this repair so easy.
Jim
The tools
The hardware
You can see most of the screw and washer locations here
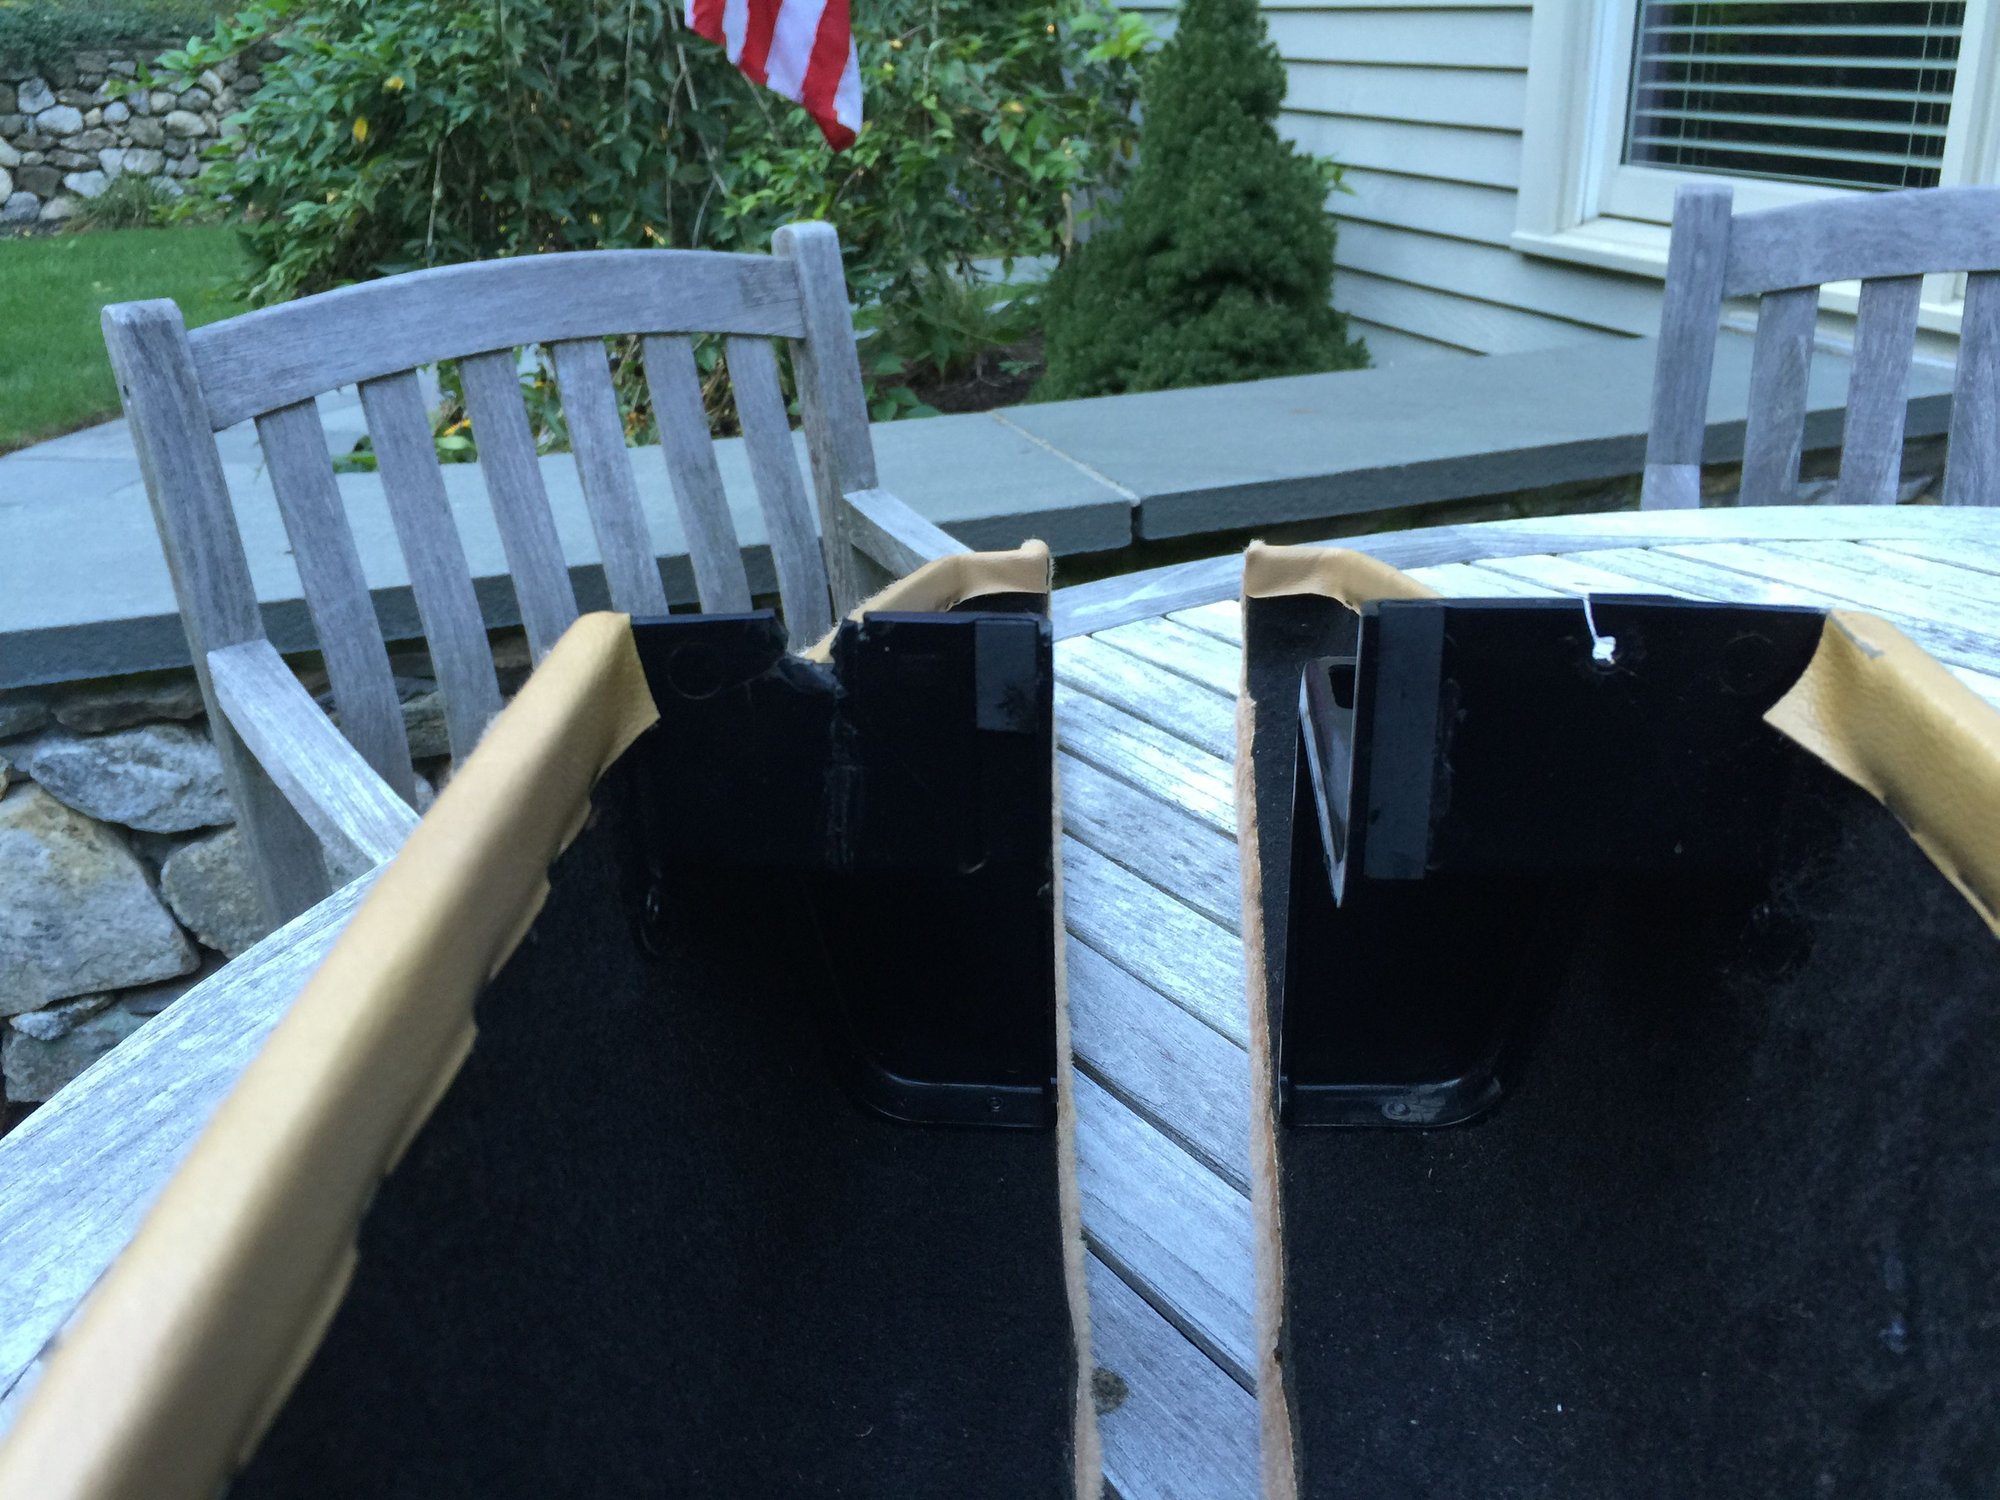
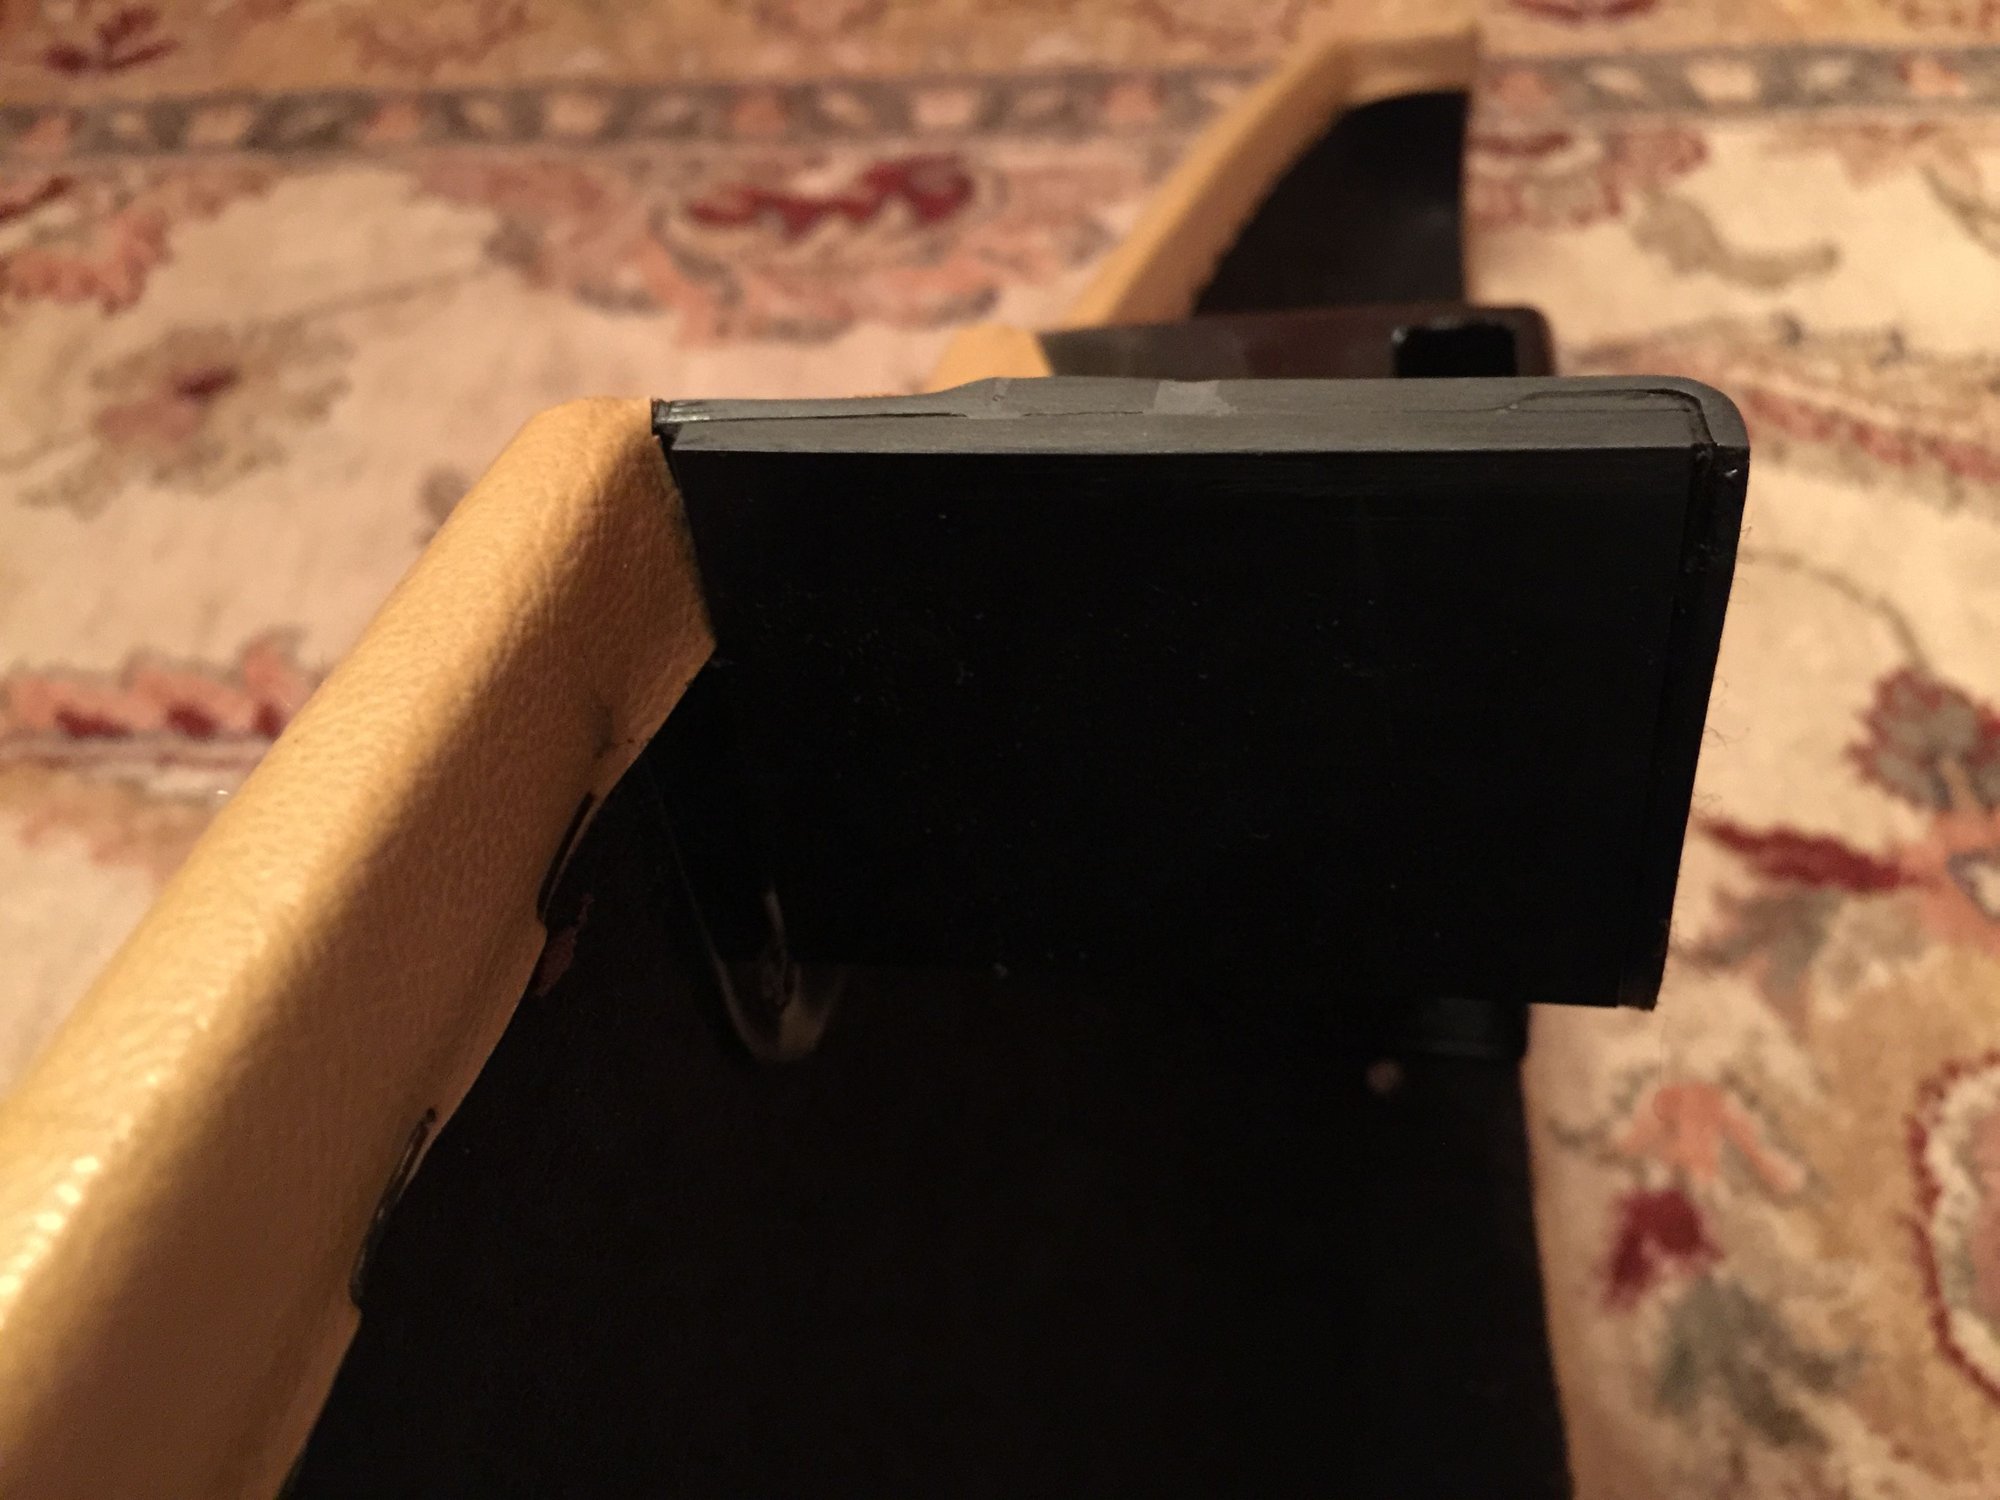
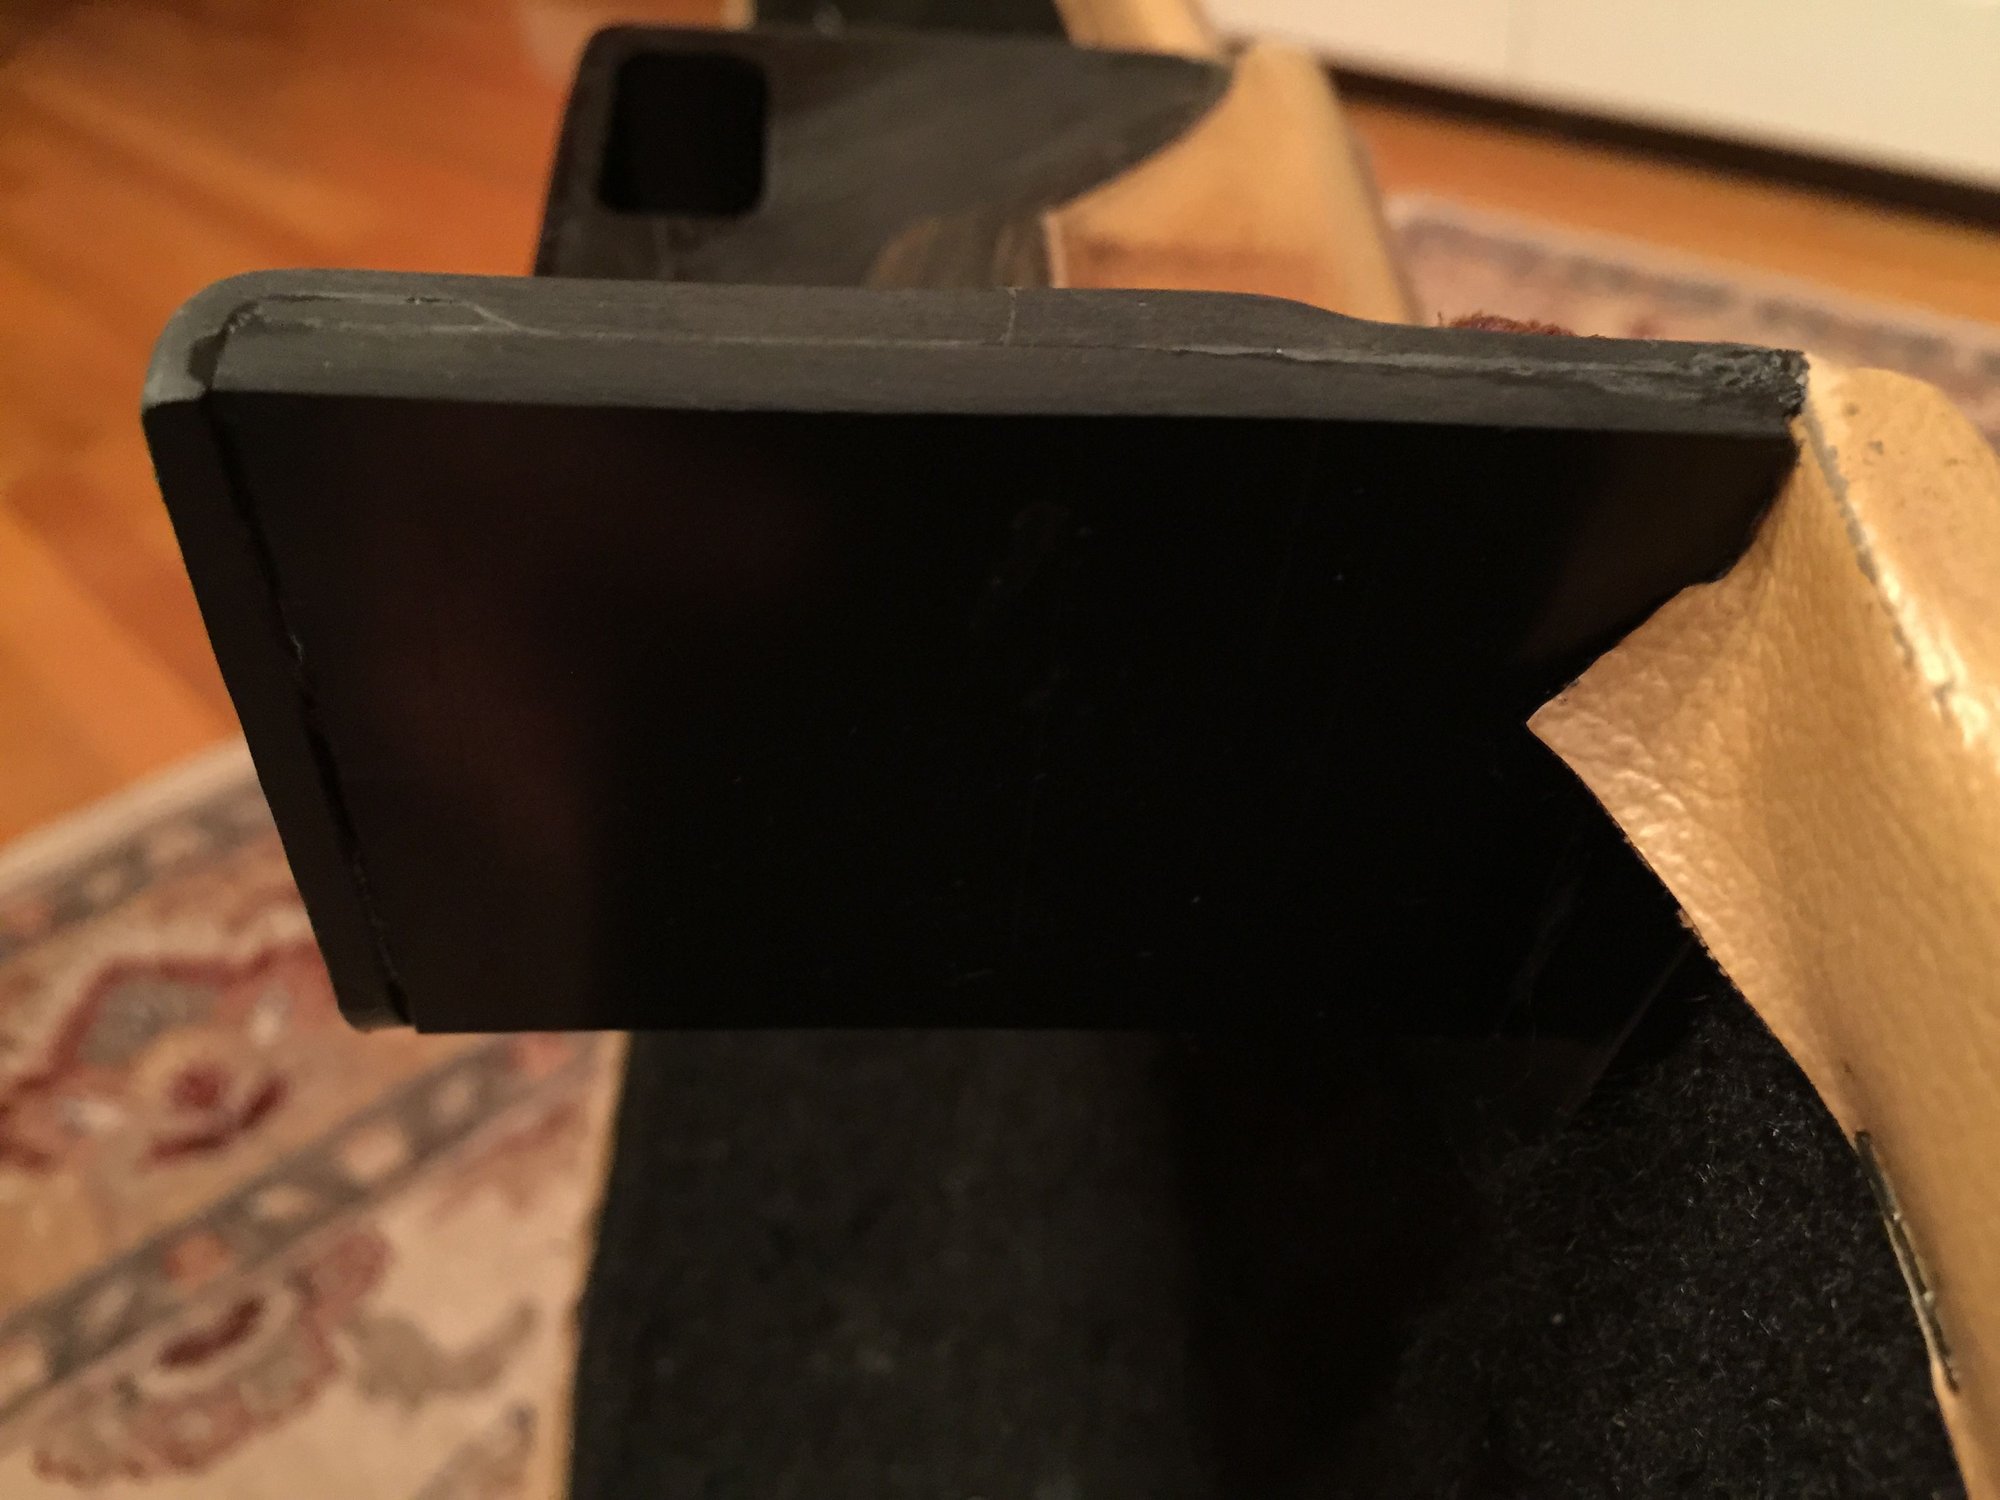
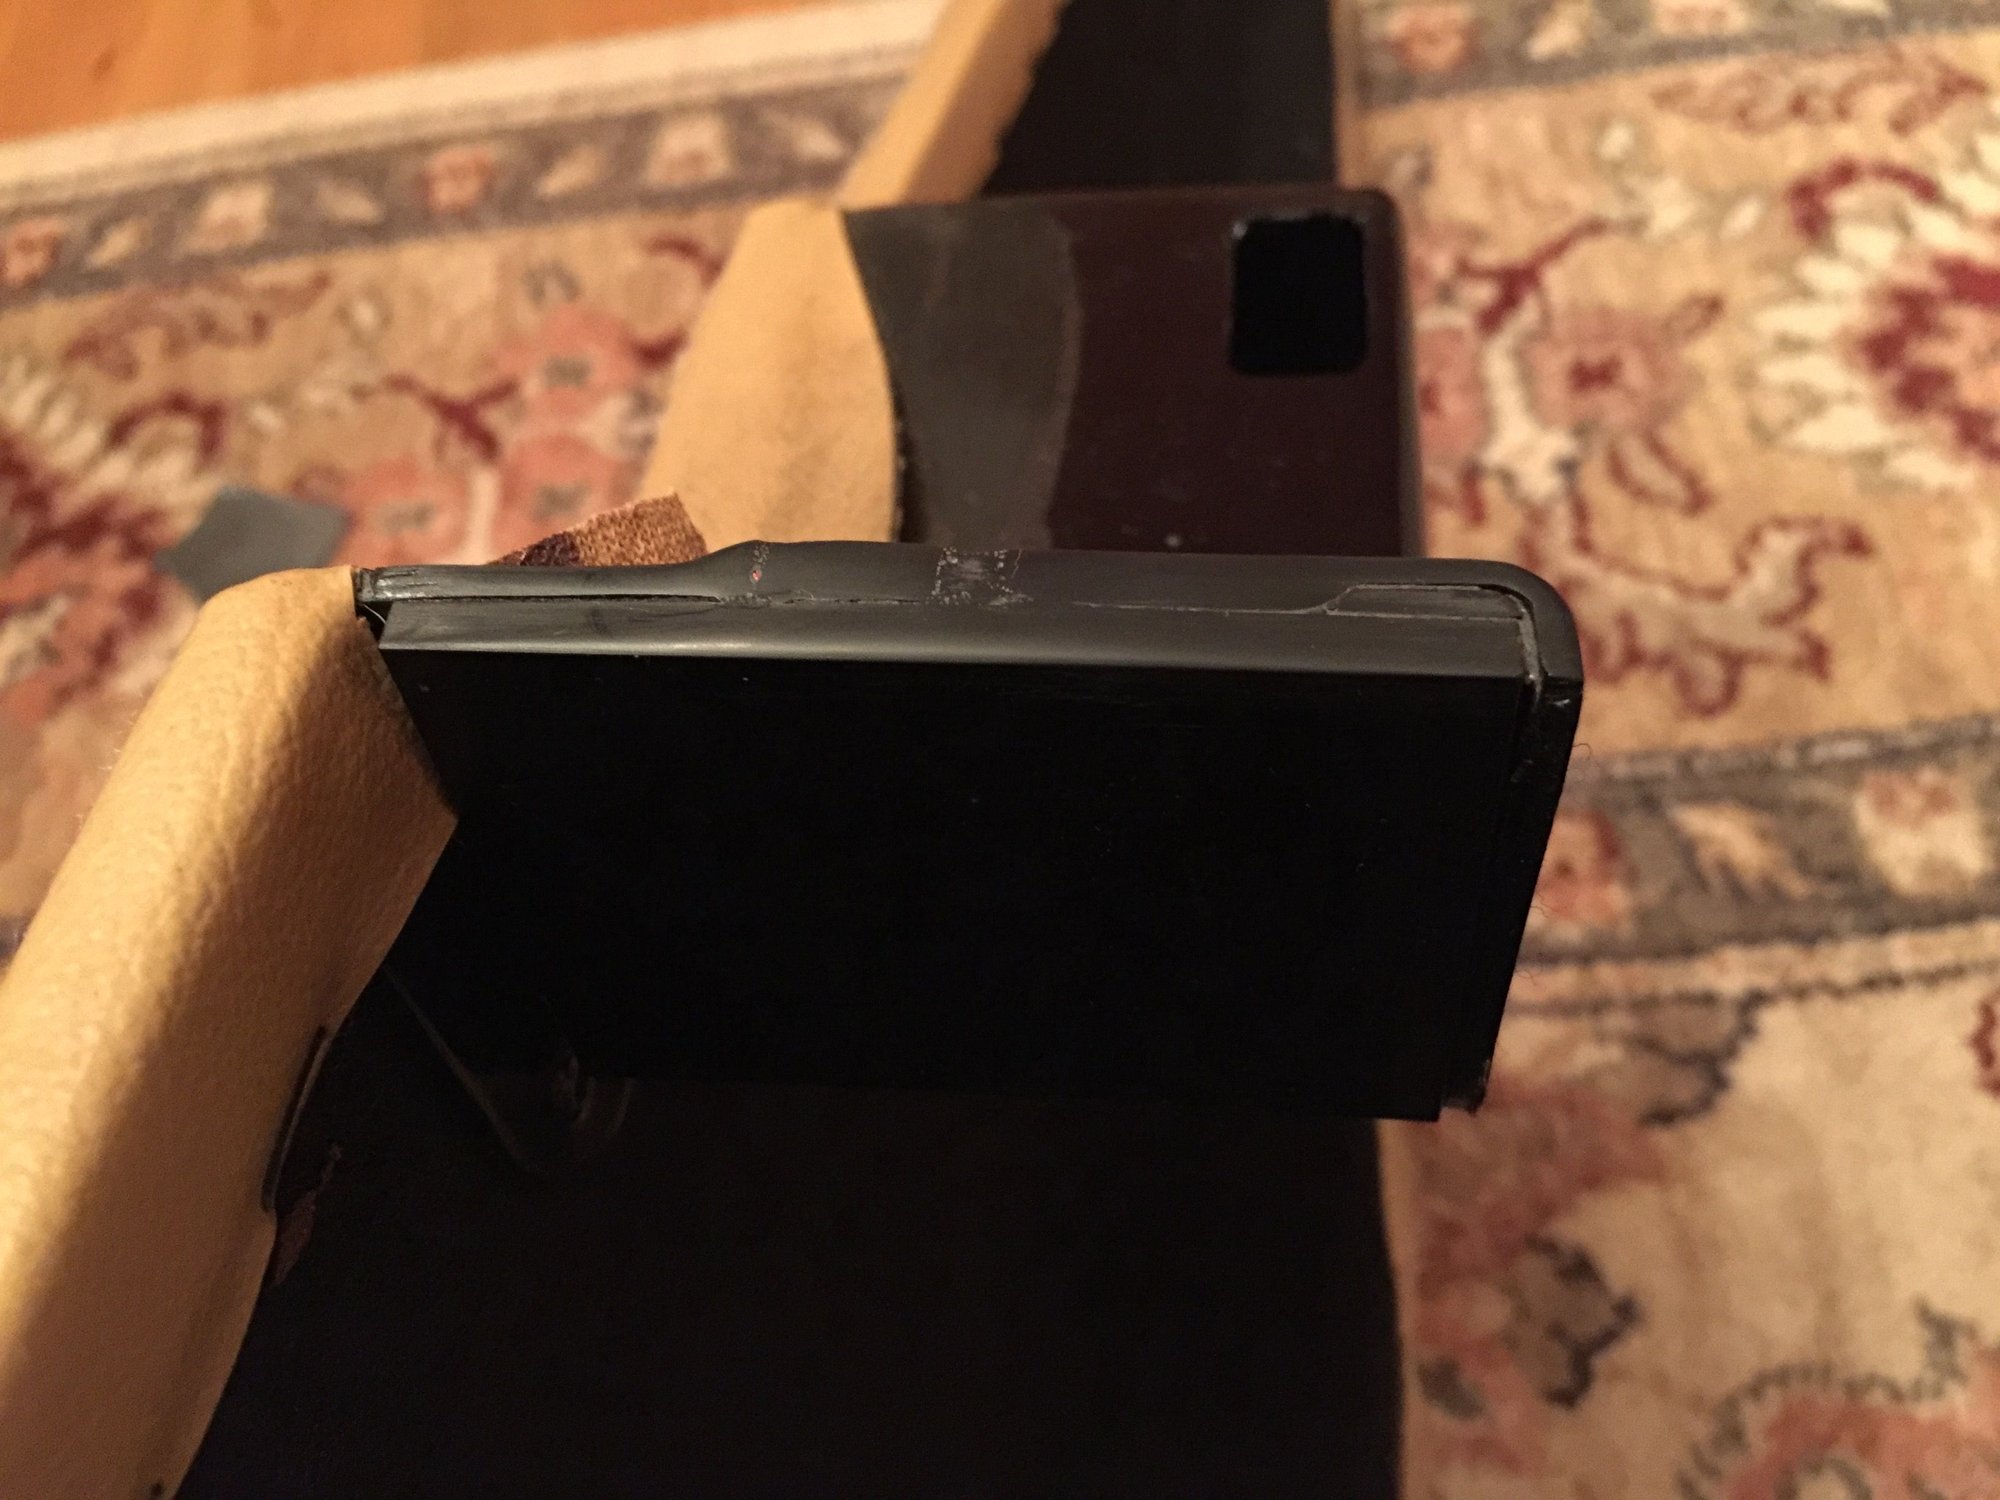
Door pocket removed.
A gaping hole on left door pocket
Test fitting sanded down small piece of plastic in the channel (dry fit)
Glued small pieces into the channels and let cure
Cementing reinforcement with clamps (note gap at top, will repair and fill this next)
Apply ABS cement to rough side of plastic reinforcement
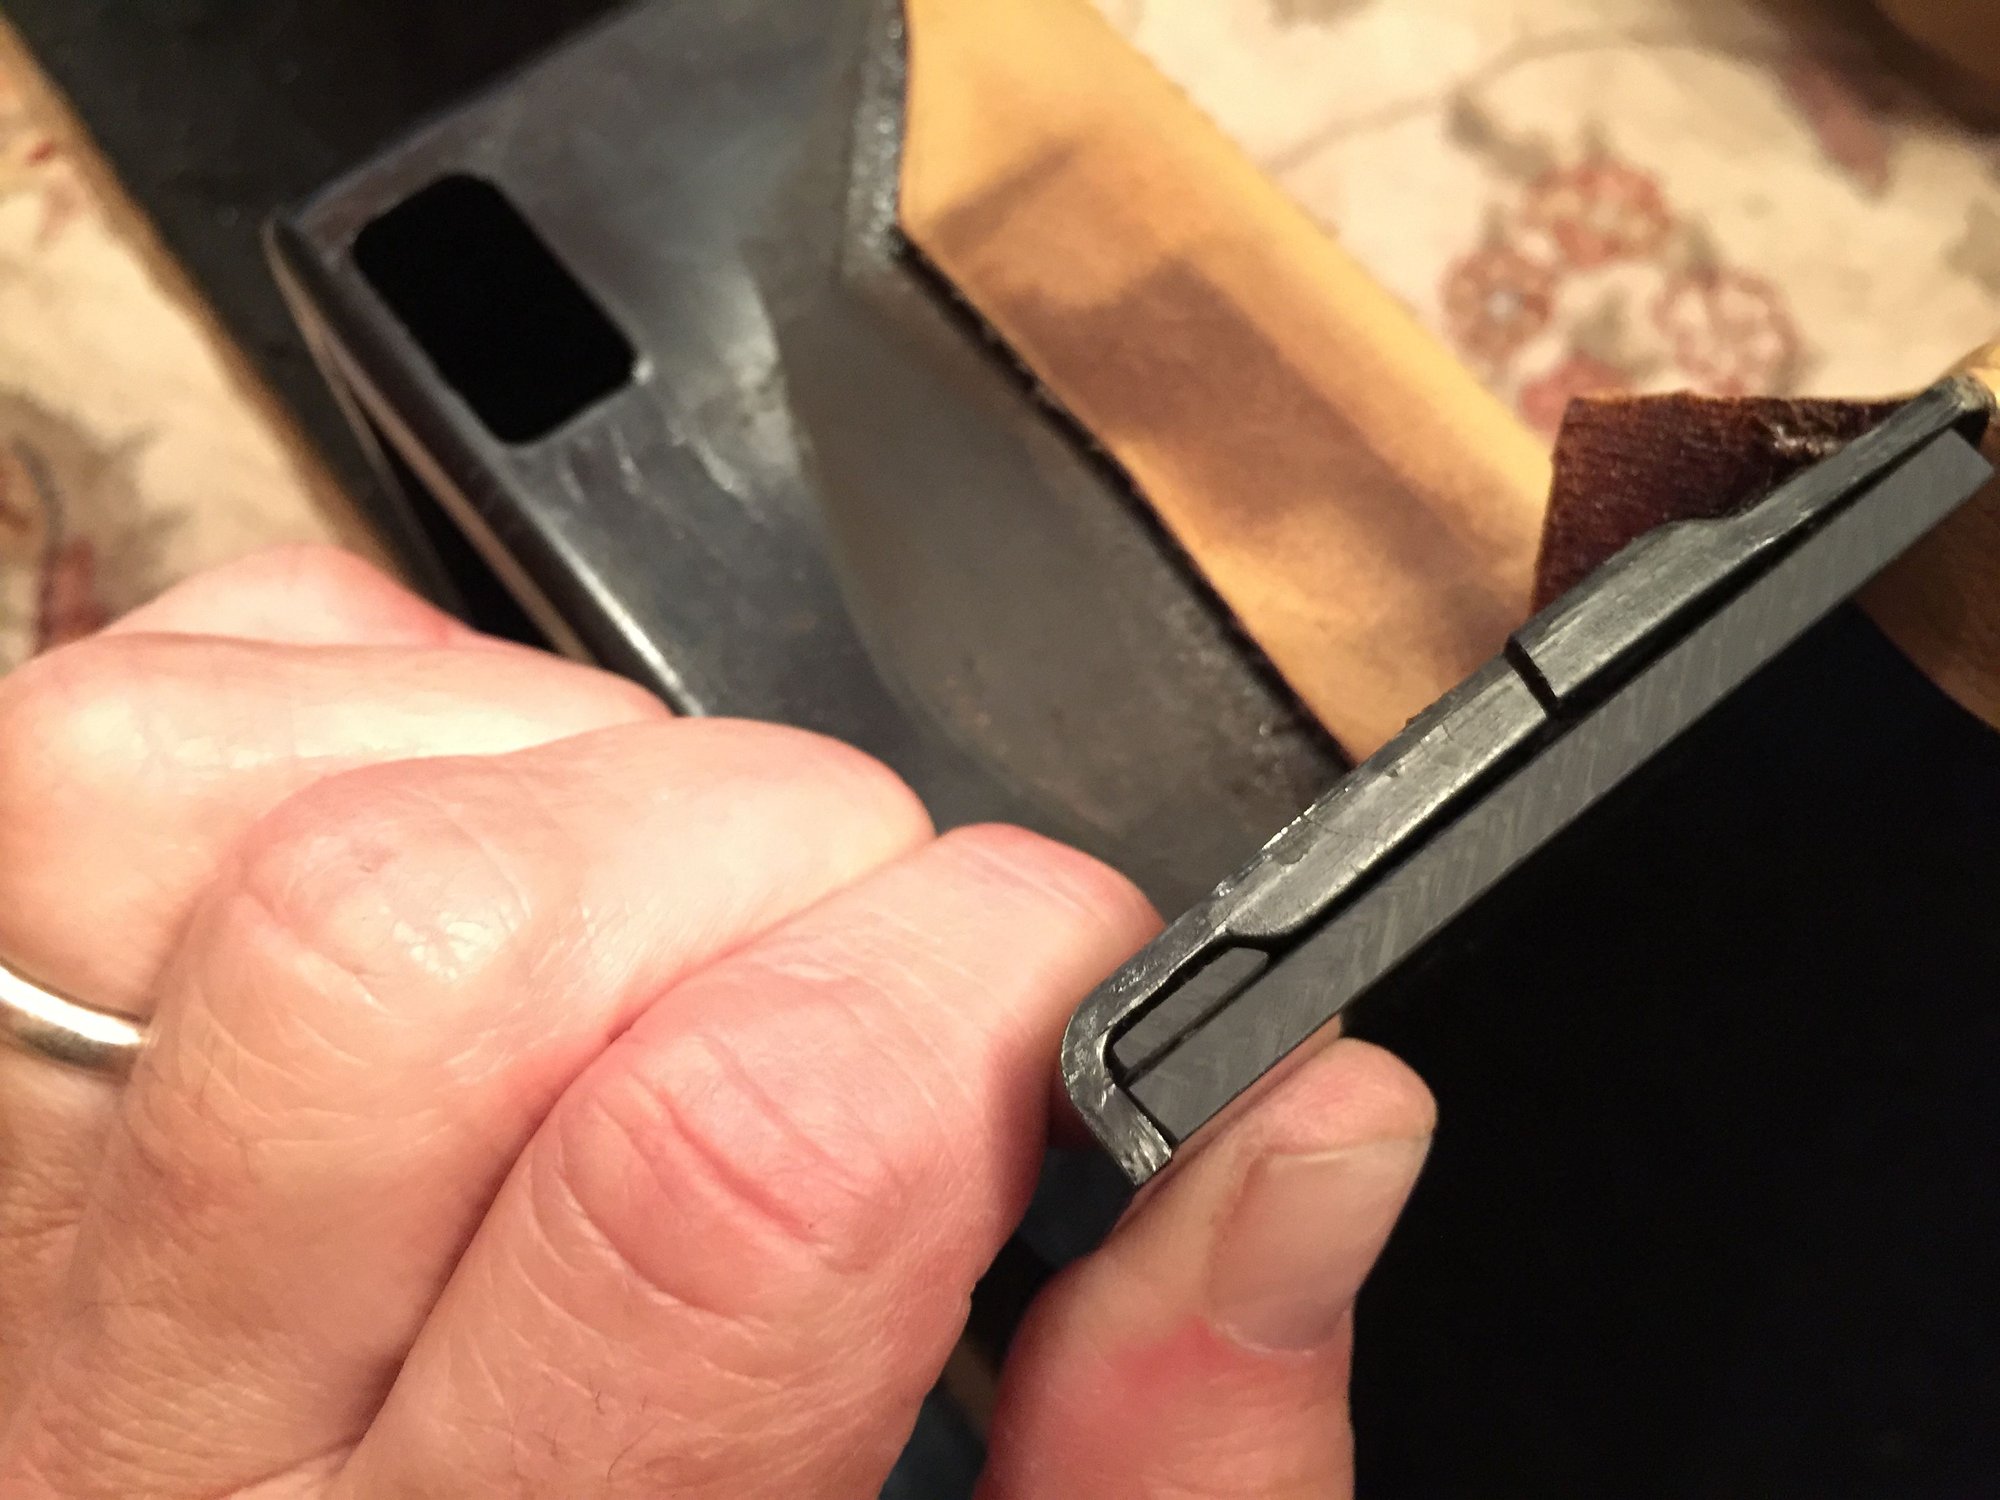
In addition to two clamps to secure reinforcement, I used a kwick clamp to press split plastic back together and close the seam.
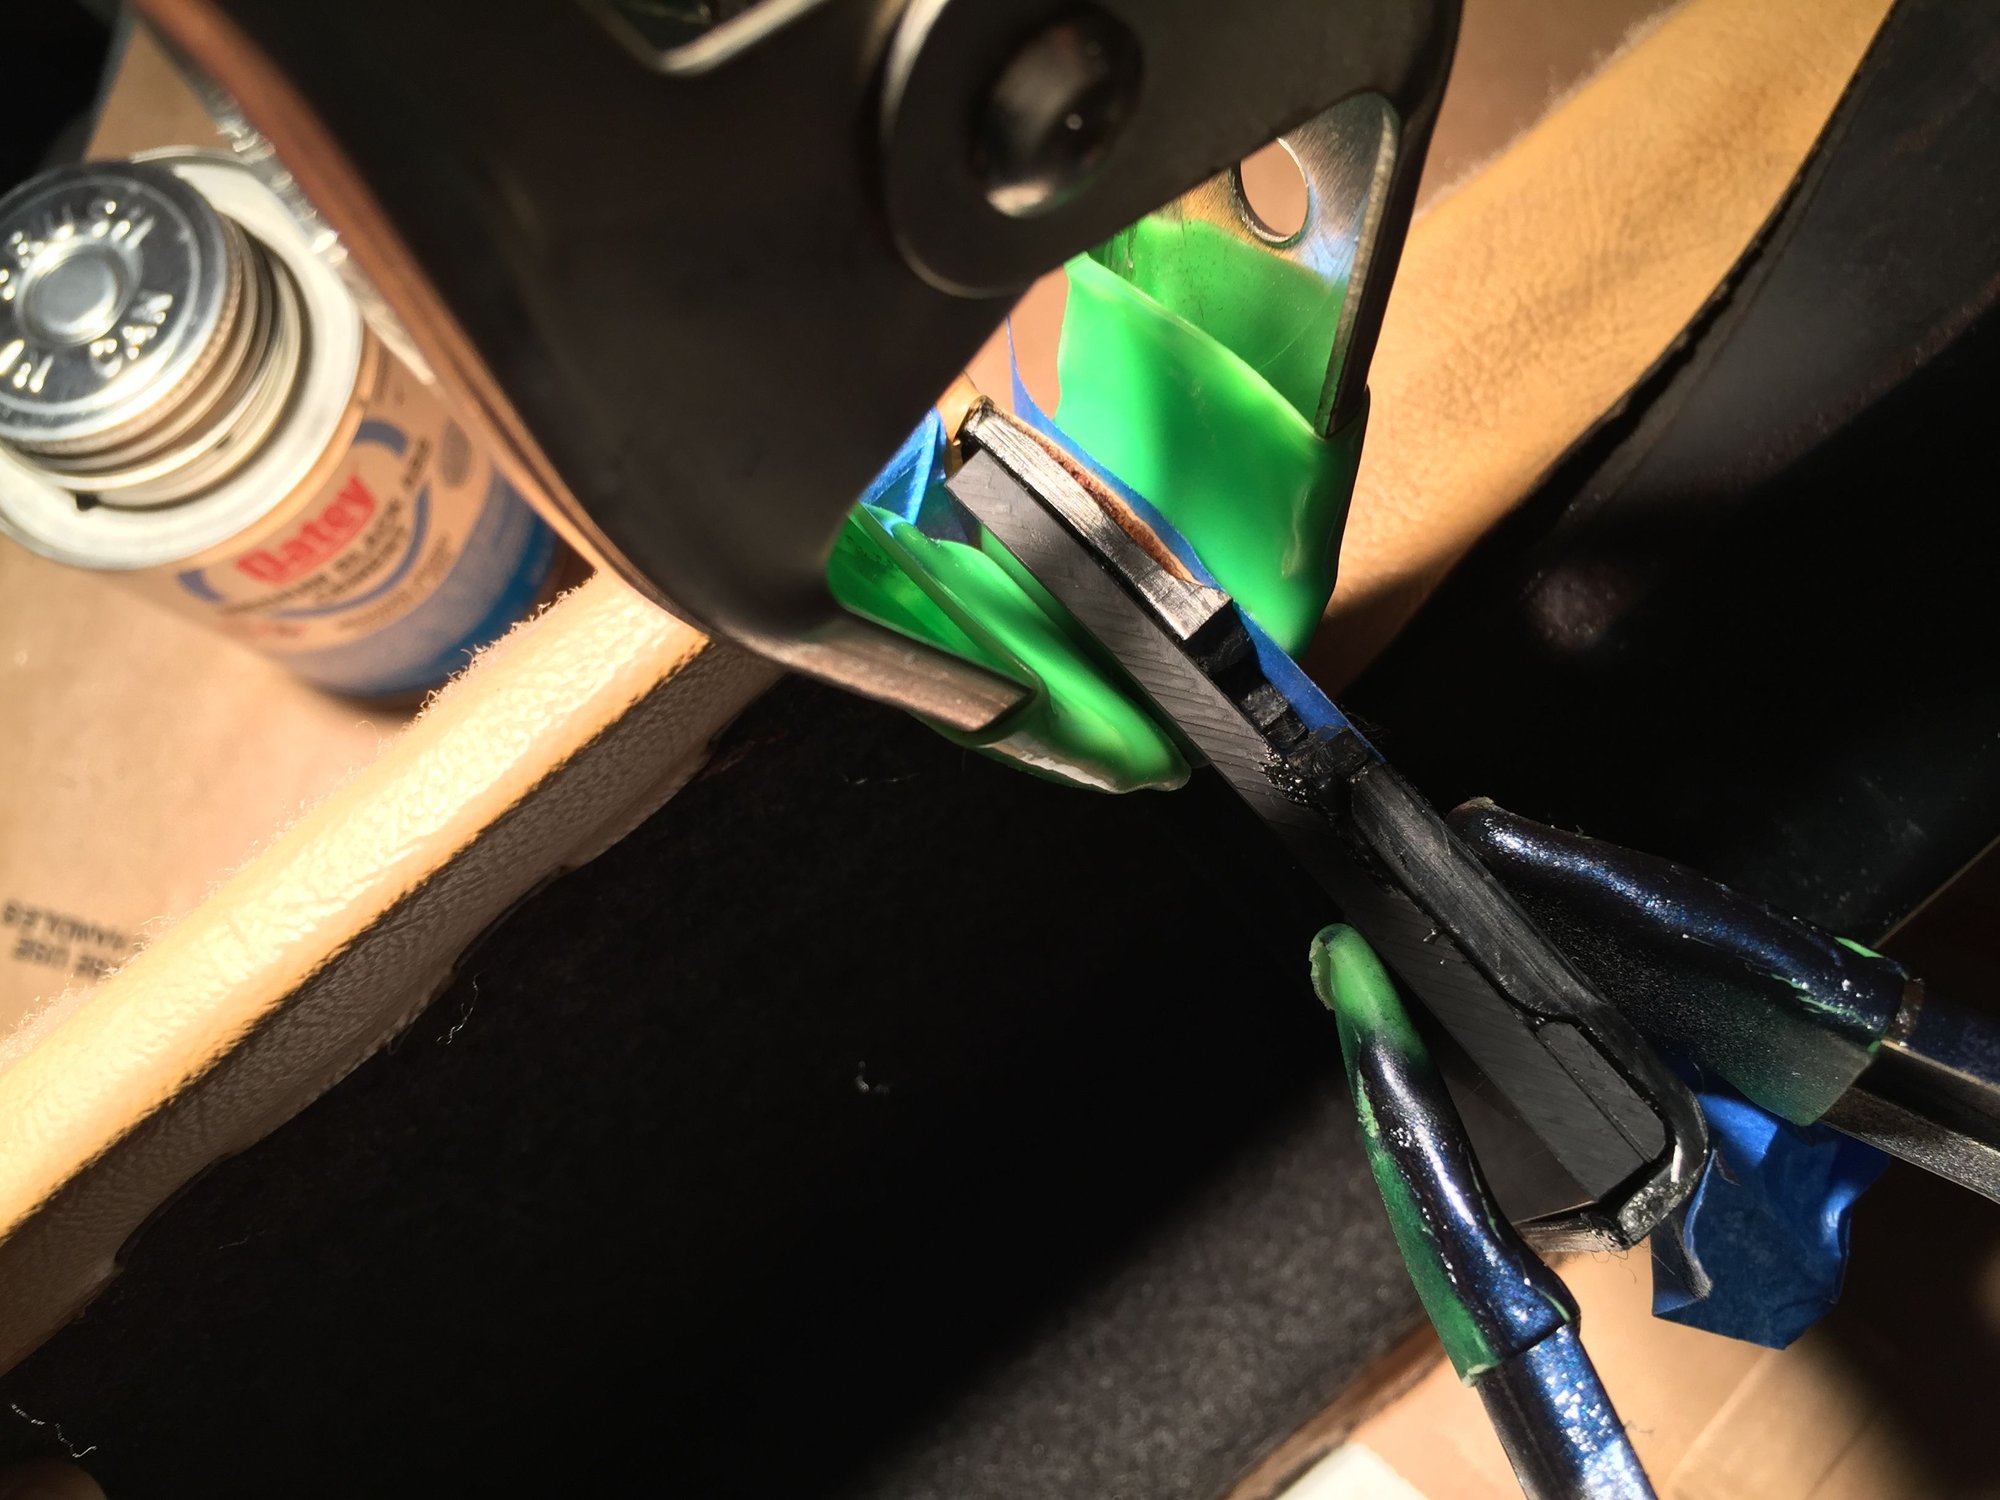
Repairing the gap
Note new piece of plastic I cut and glued to fill in void at top

 09-16-2016, 10:50 AM