When you click on links to various merchants on this site and make a purchase, this can result in this site earning a commission. Affiliate programs and affiliations include, but are not limited to, the eBay Partner Network.
I finally got to spend some quality time working on the Red Witch this weekend. Due to rain, I did not get to overhaul the AC system. For now, I will just keep pouring in R134a. I have updated my AC kaput thread on this.
I started out on Friday by replacing the headlights. The PPI had flagged the headlights as being 'cloudy'. I thought this meant they were damaged. So, I ordered a set of Hella 7" H4 E-code headlights, part number 002395801, and Osram Night Breaker Ultimate H4 12V 60/55W bulbs.
I cleaned the sockets with DeOxit D5 prior to reassembly. Disassembly of the headlights was no big deal. The new Hella units dropped right in.
Of course, I later figured out that the 'cloudy' was just dirty. I cleaned the Bosch 7" H4 headlights that I took out. I sloshed some glass cleaner around inside the headlights, followed by a rinse of hot water. Good as new. They have now been sold to Jim Doerr of 928 Classics.
I have noticed the fluting is a little different on the Hellas as were the Bosch. The Hellas are E-code, while I noticed that the Bosch have 'DOT' molded near the bottom of the lenses.
Out driving, the light is excellent, though low. I need to adjust the headlights up some. High beams are phenomenal!
Note, I have all the materials needed, including a write-up by Alan, to wire in four relays, with separate fused power leads for the head lights. I will do that in due time.
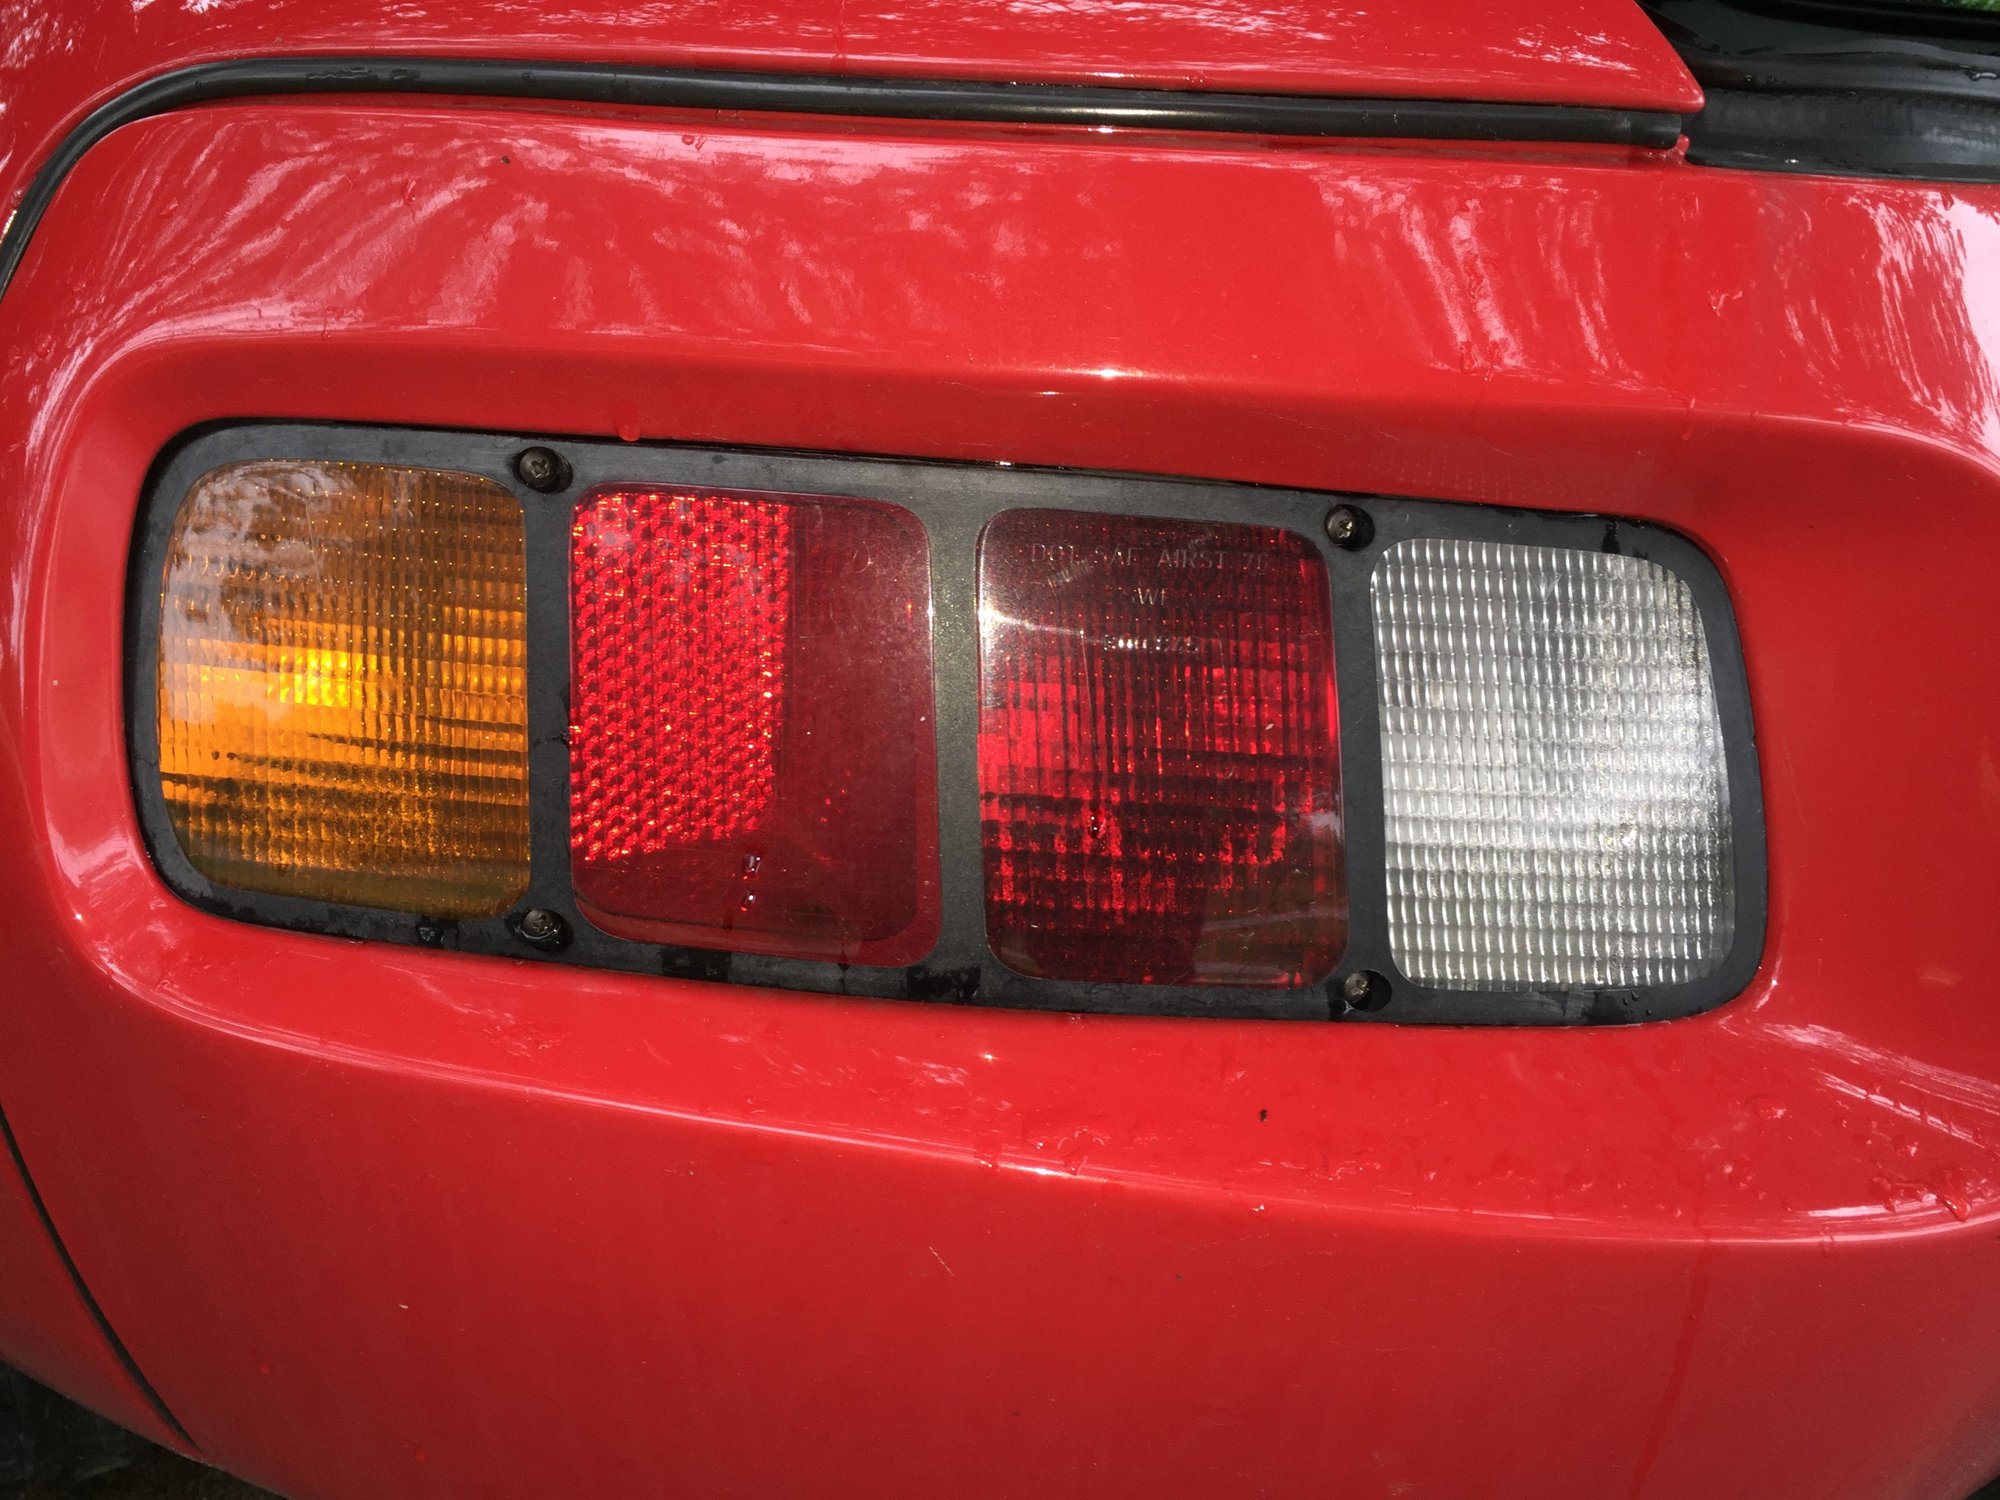
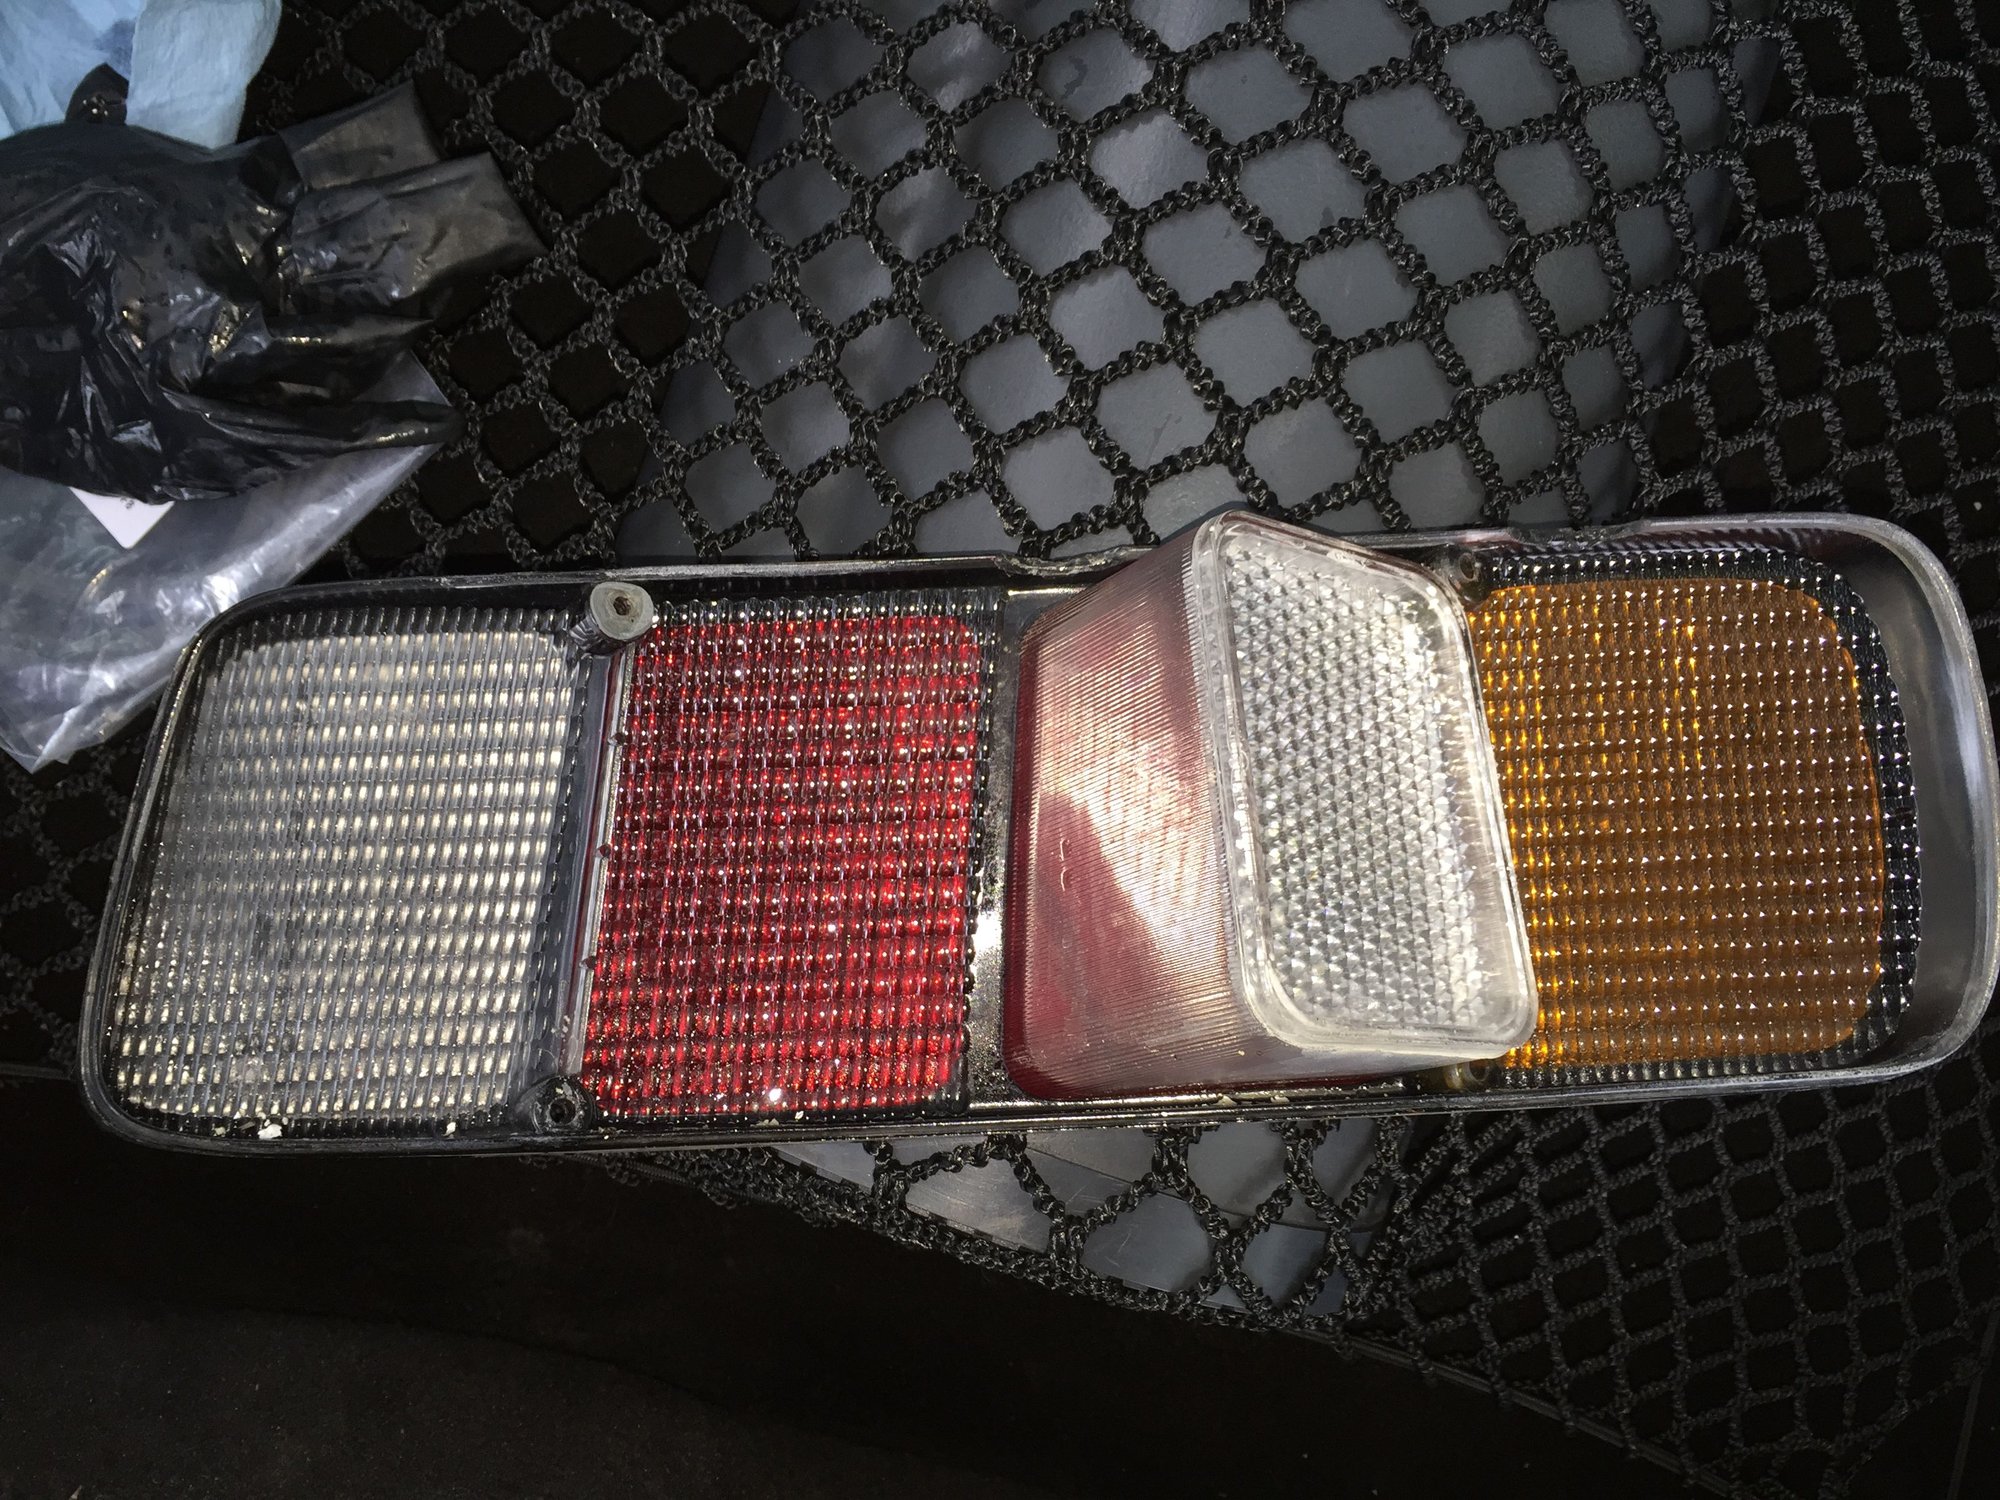
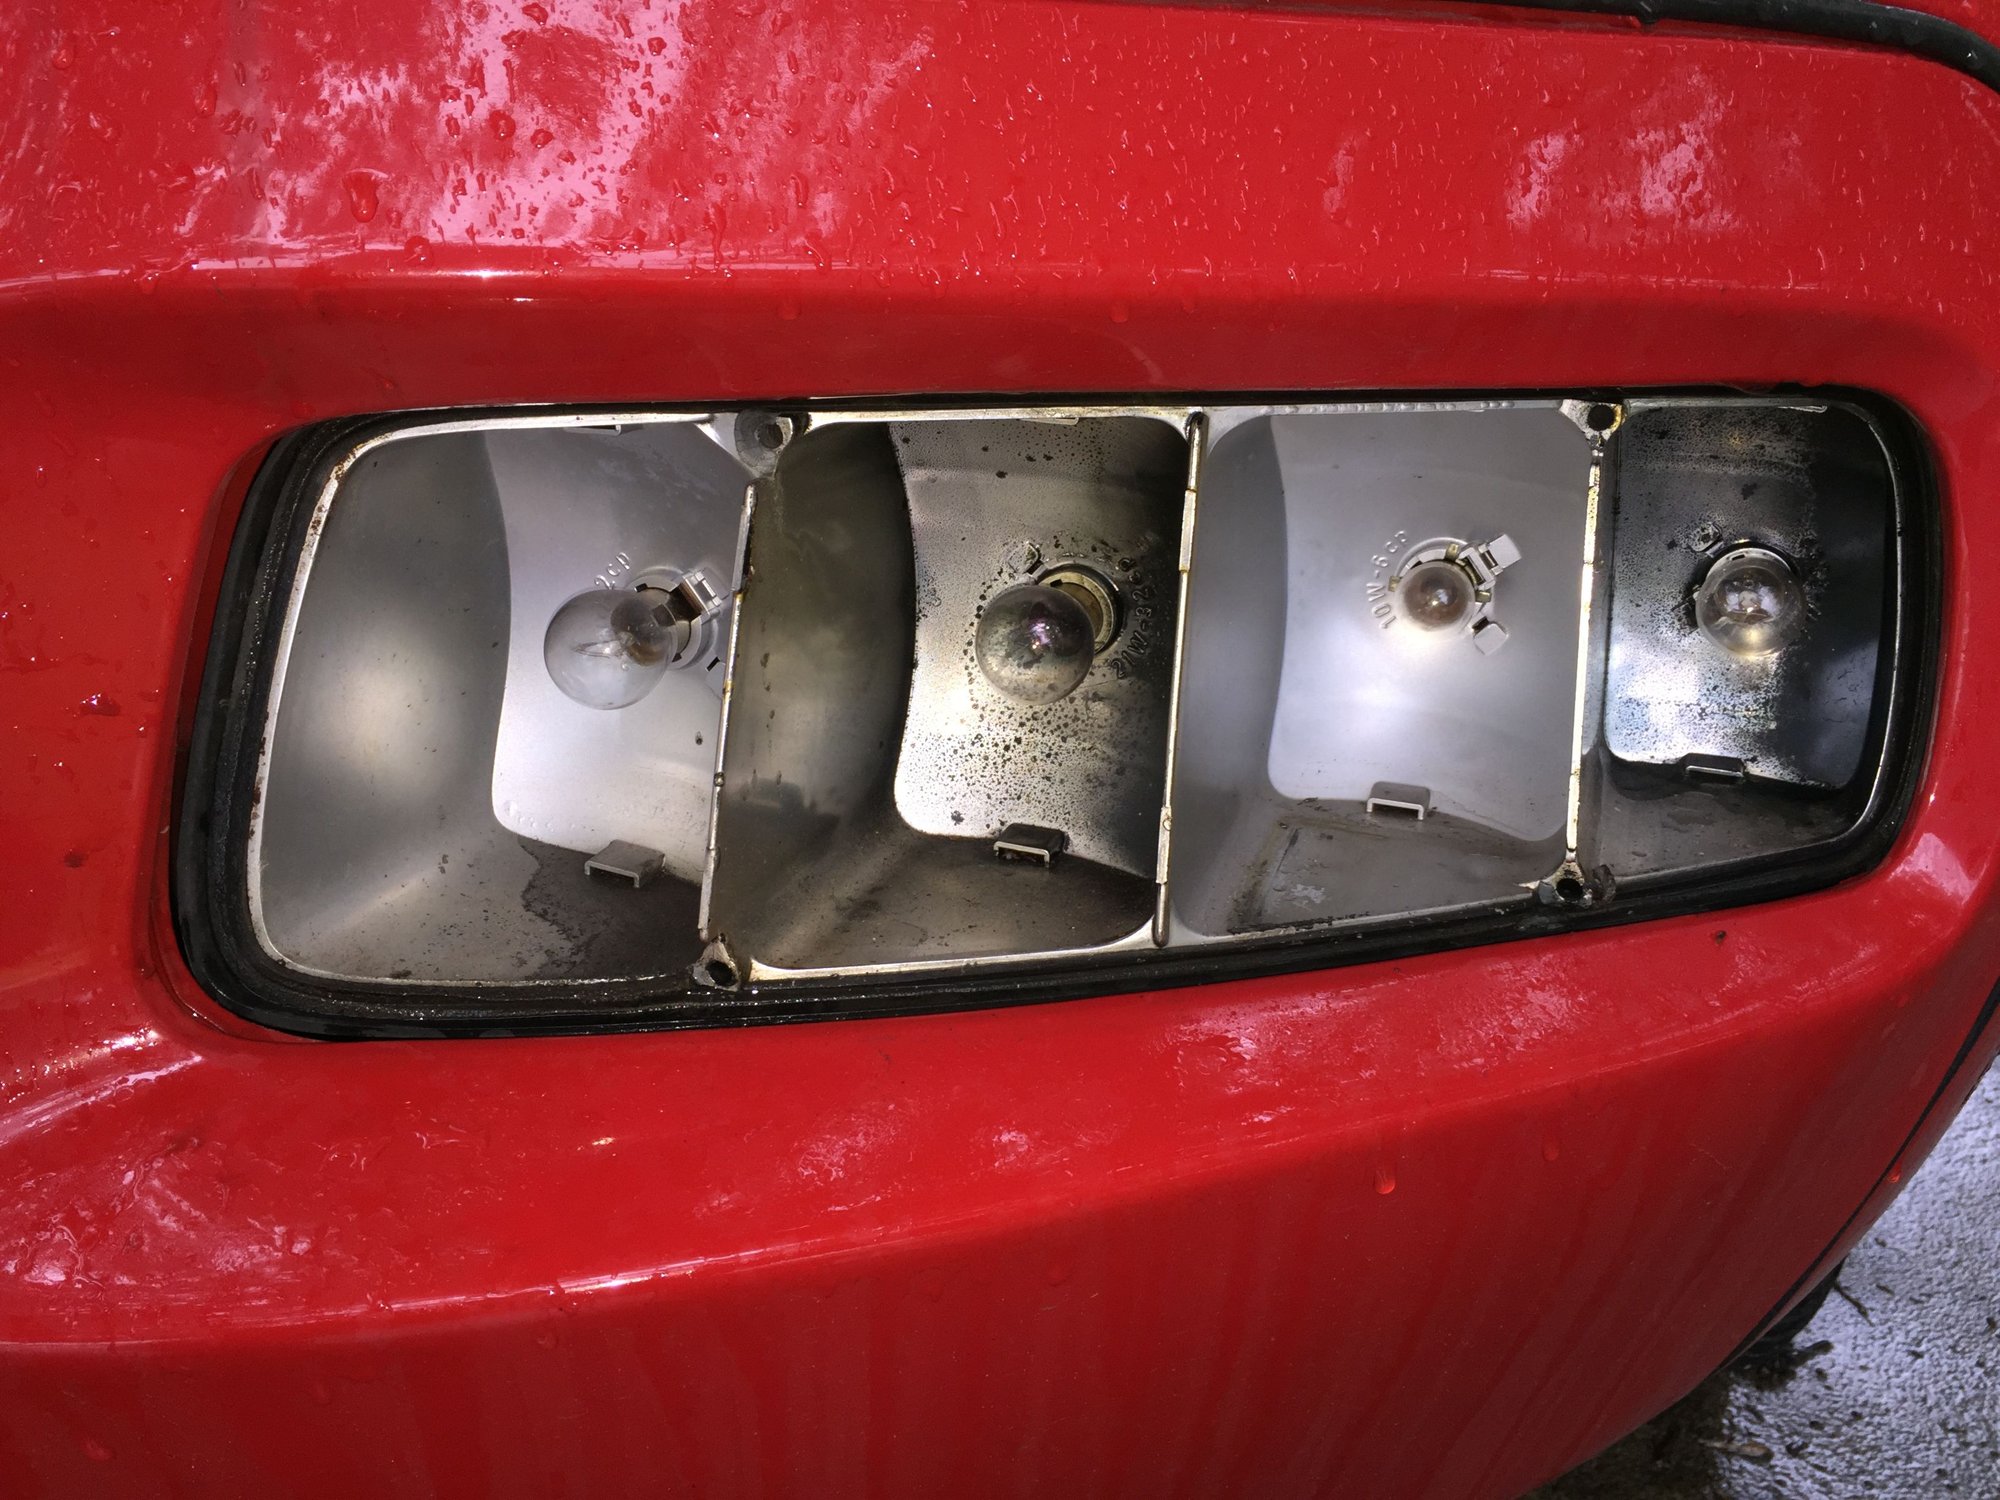
Flush with my success on the headlights, I moved on to the taillights. There was nothing wrong with them that I could tell. I just wanted to do a clean and inspect.
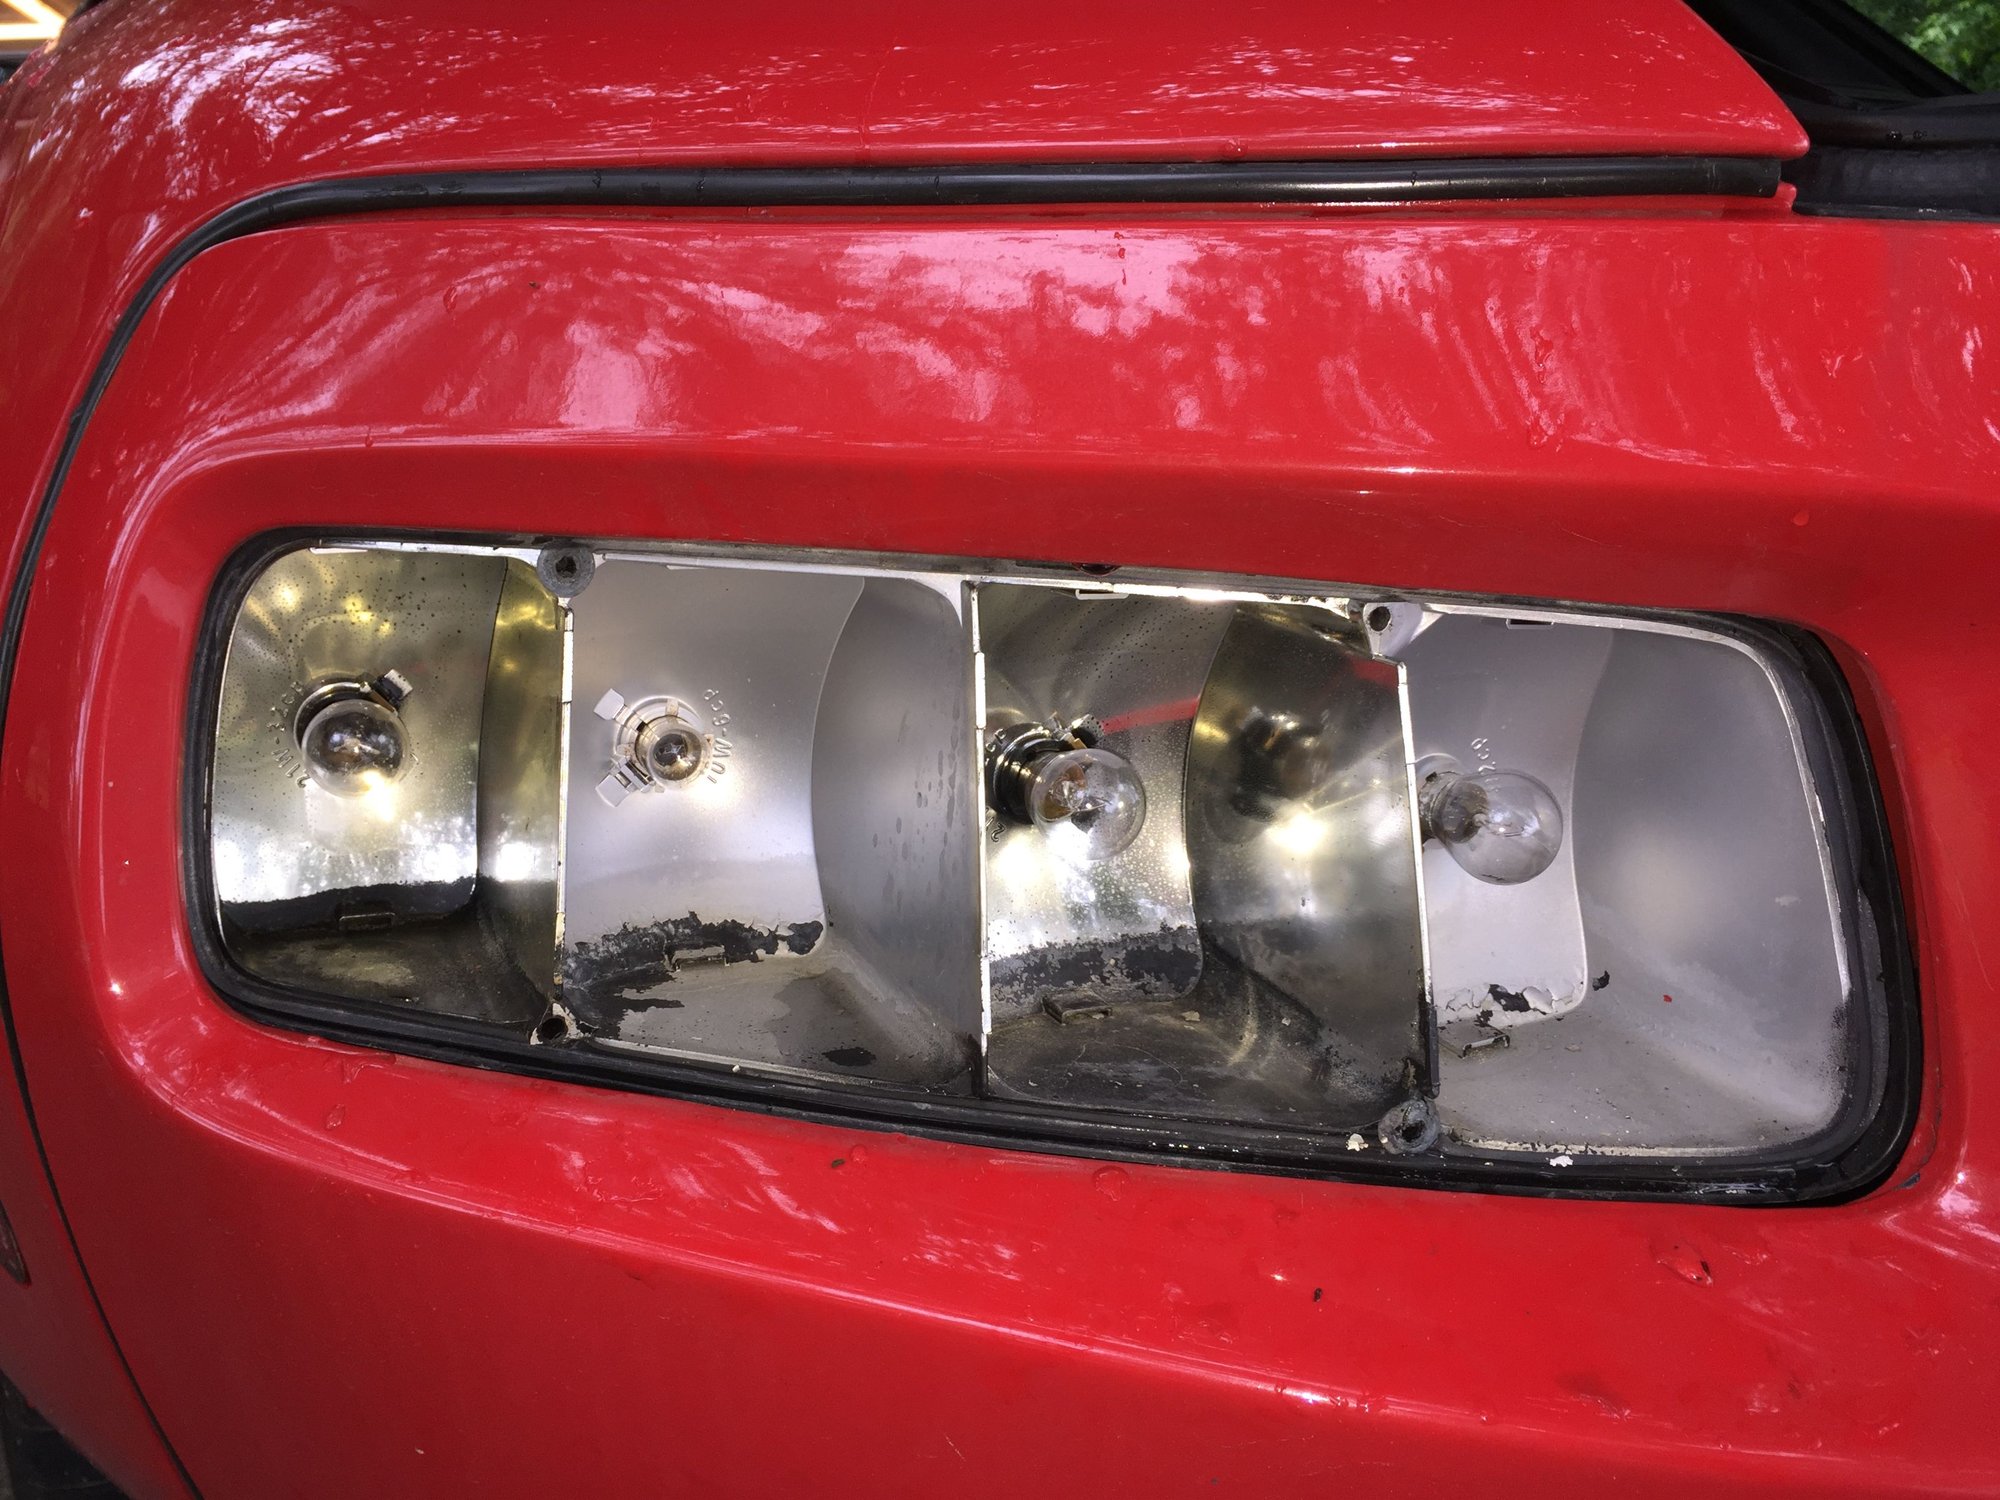
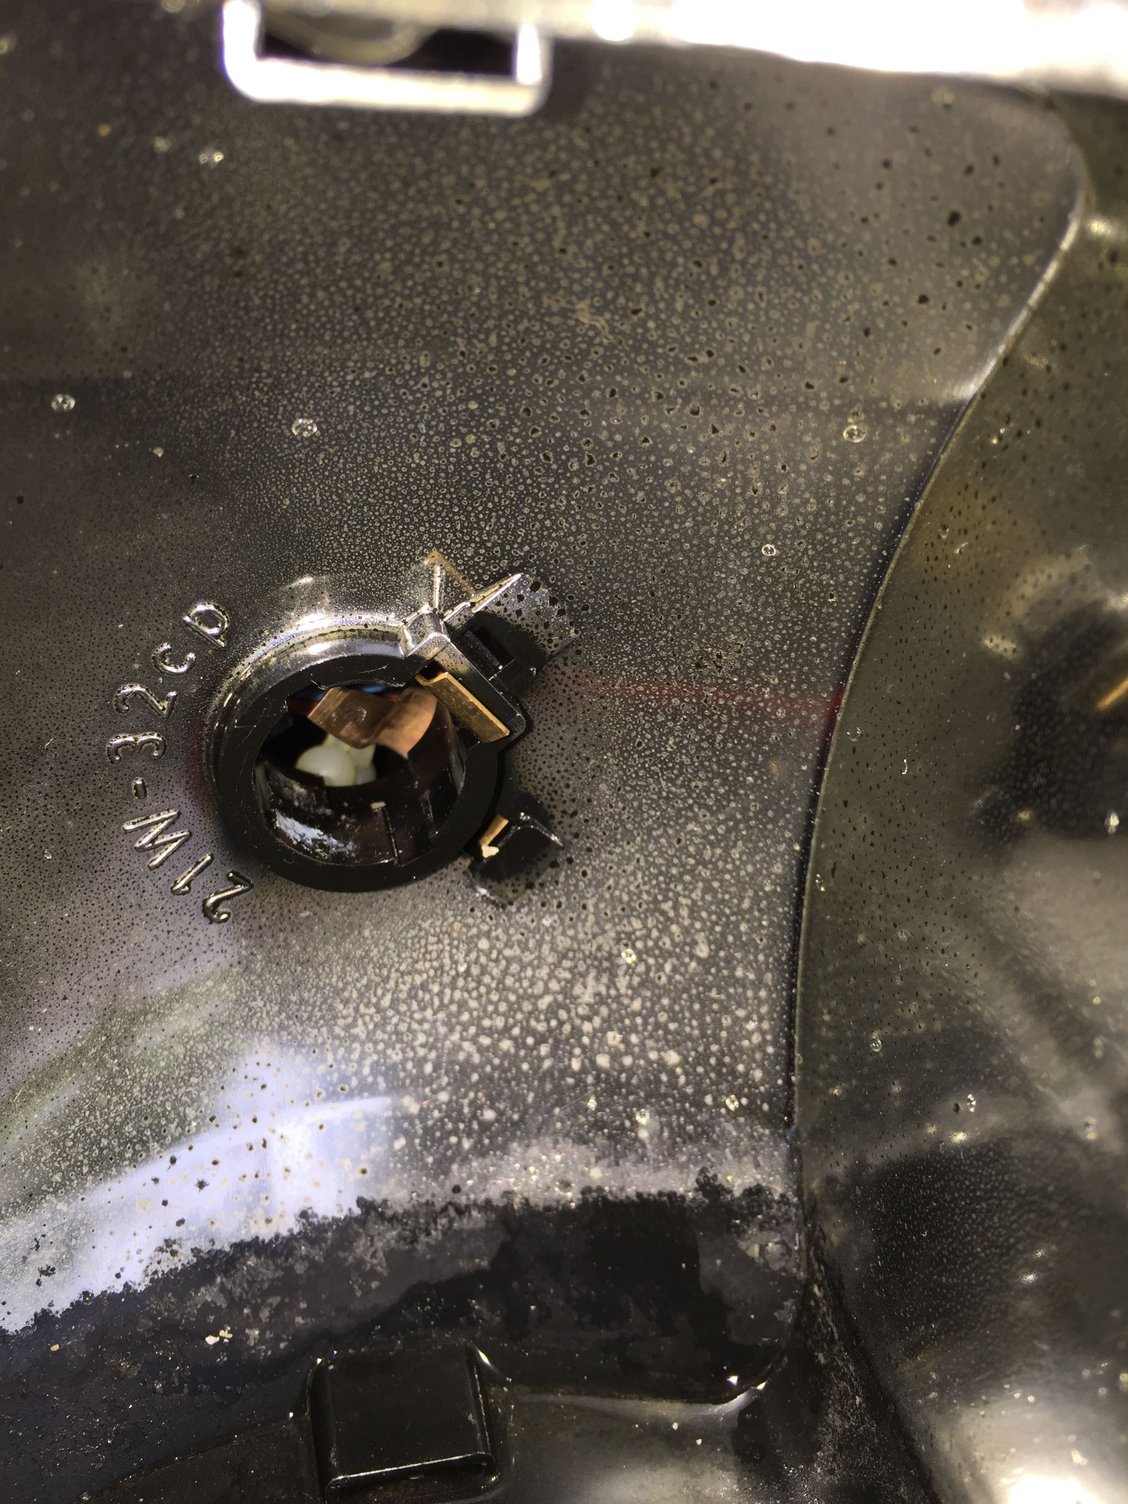
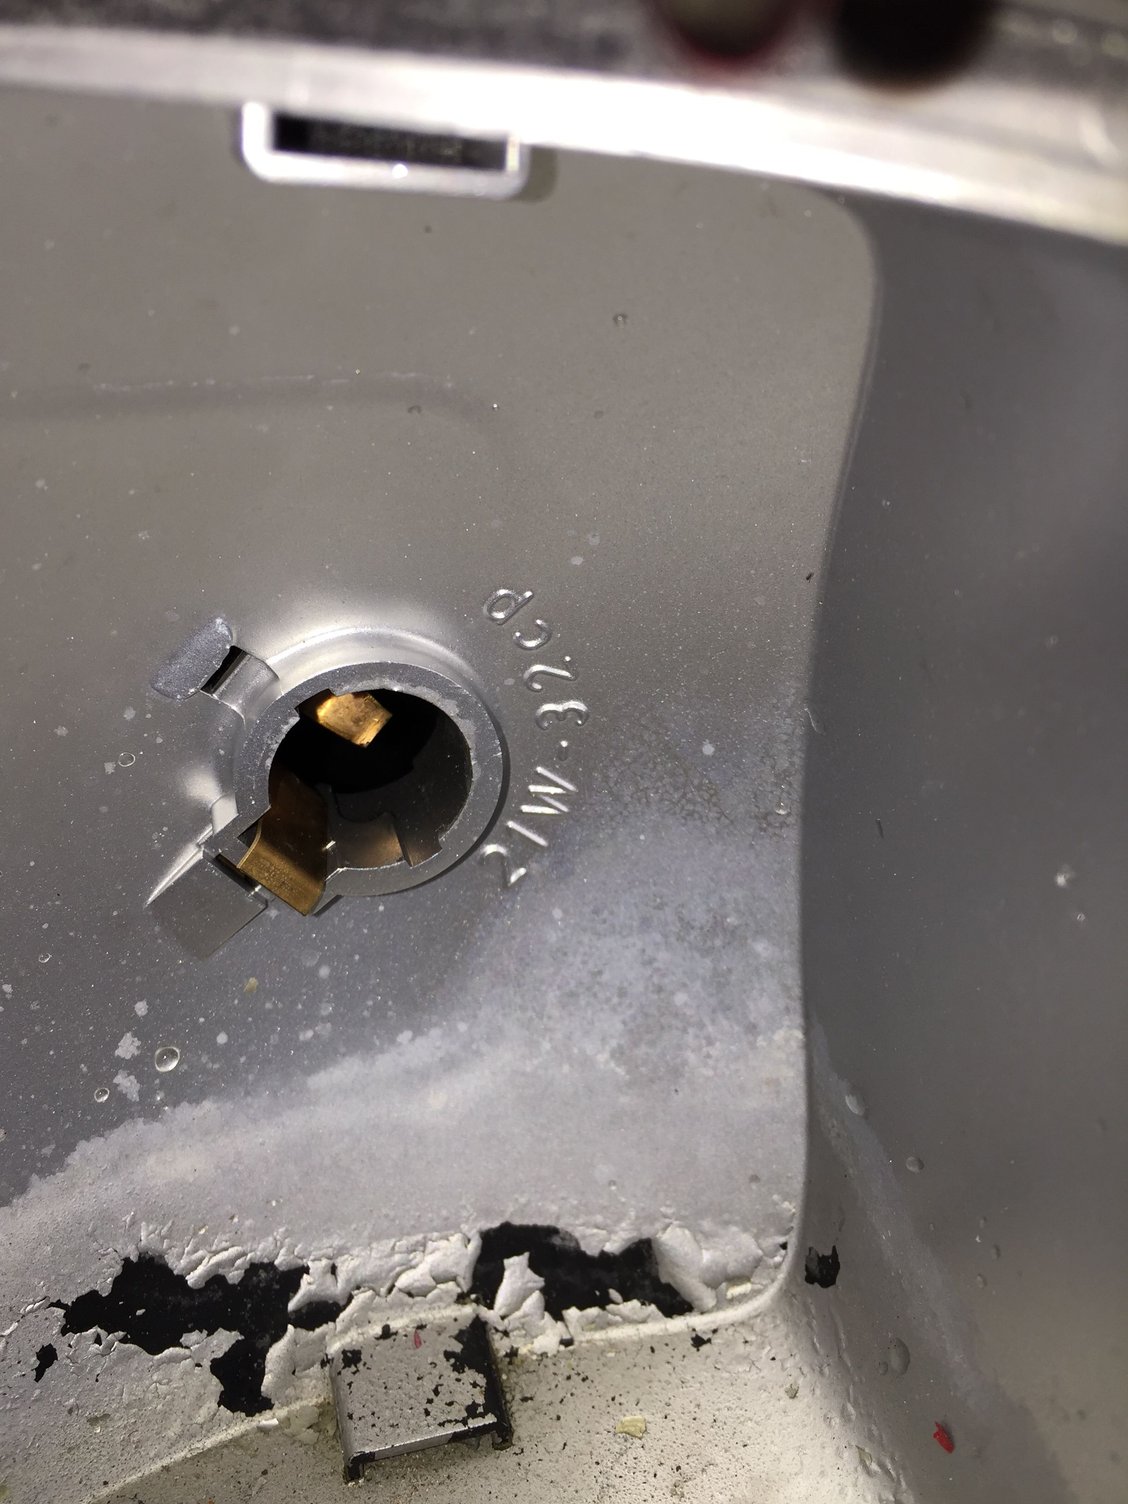
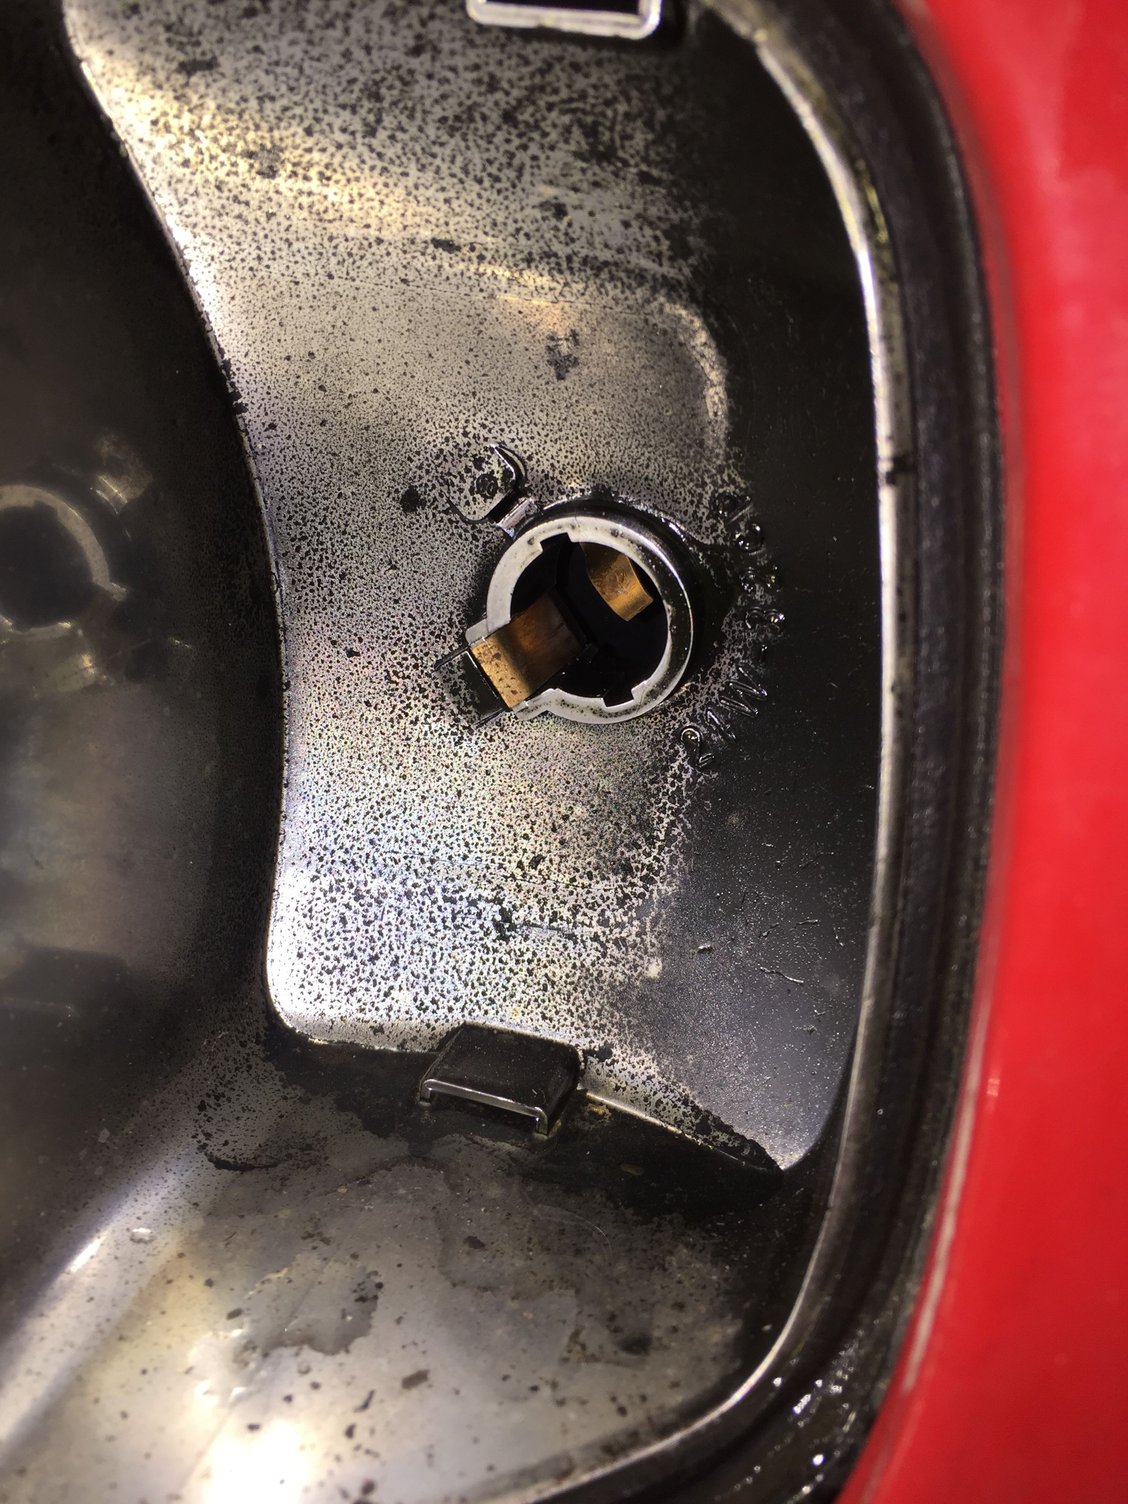
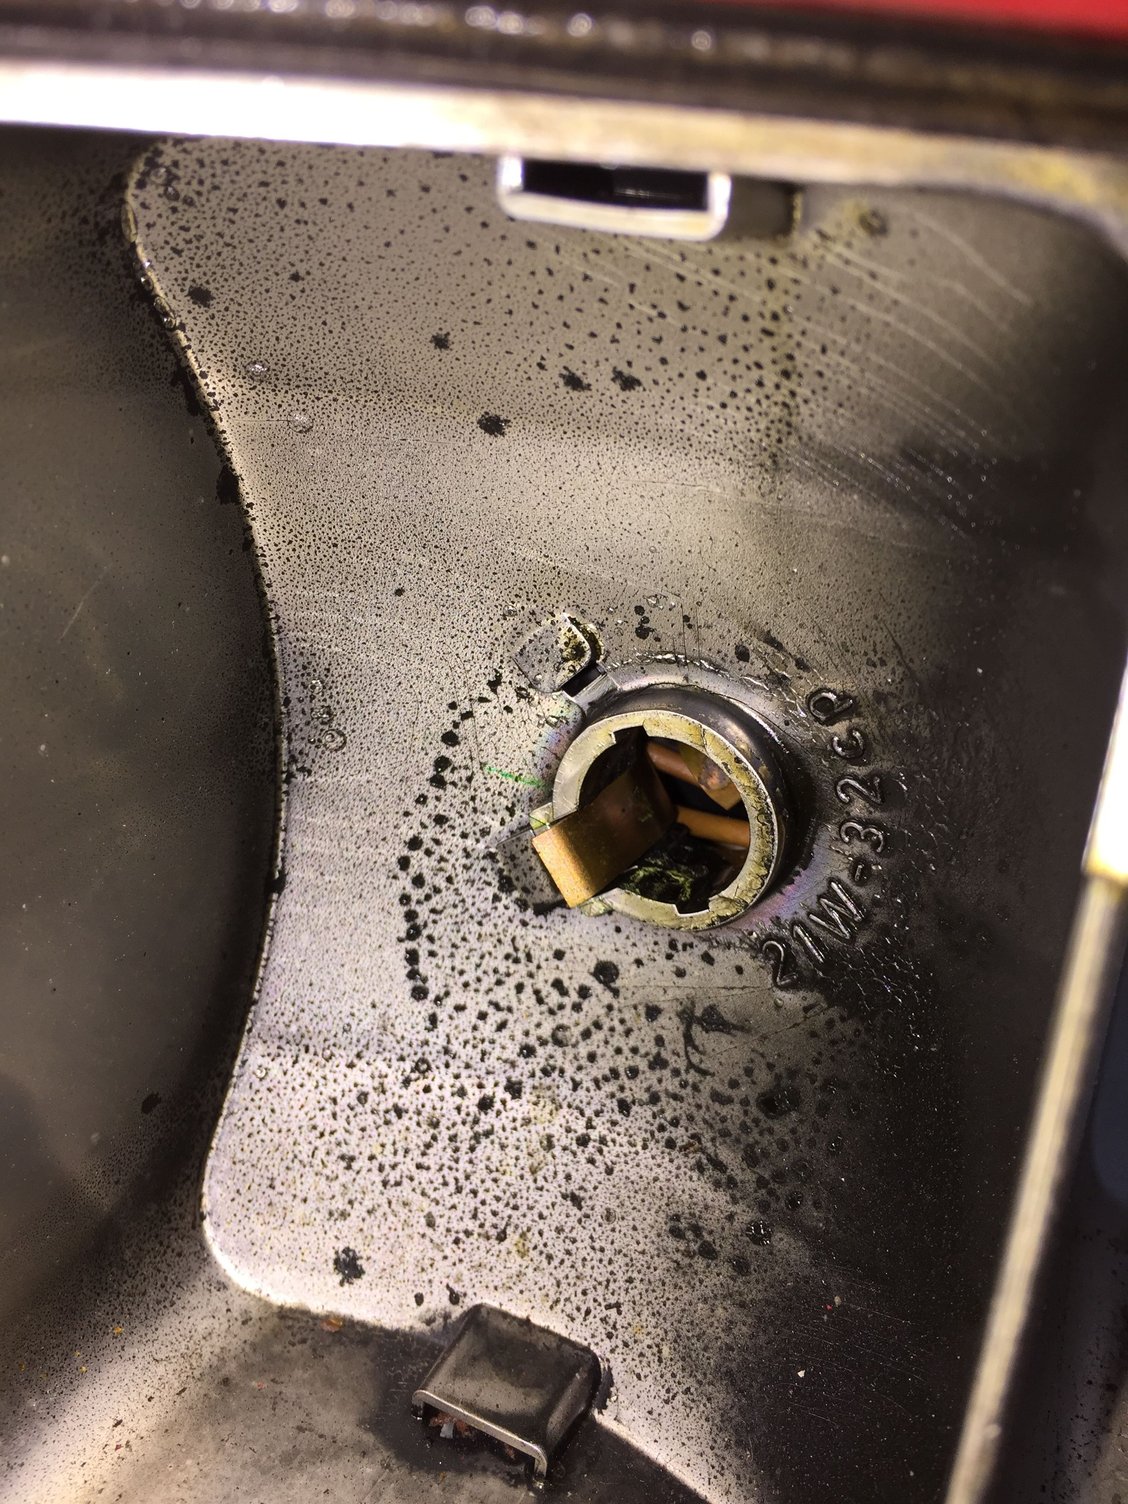
Only thing horrible was the driver's side taillight bulb had some pretty nasty corrosion in the socket. I cleaned it with a battery terminal brush. All the sockets got cleaned with DeOxit D5. I wiped out all the cavities in the housings, and washed the lenses gently with glass cleaner. Granted, the reflective surfaces in the housings could use refinishing, but I will deal with that later.
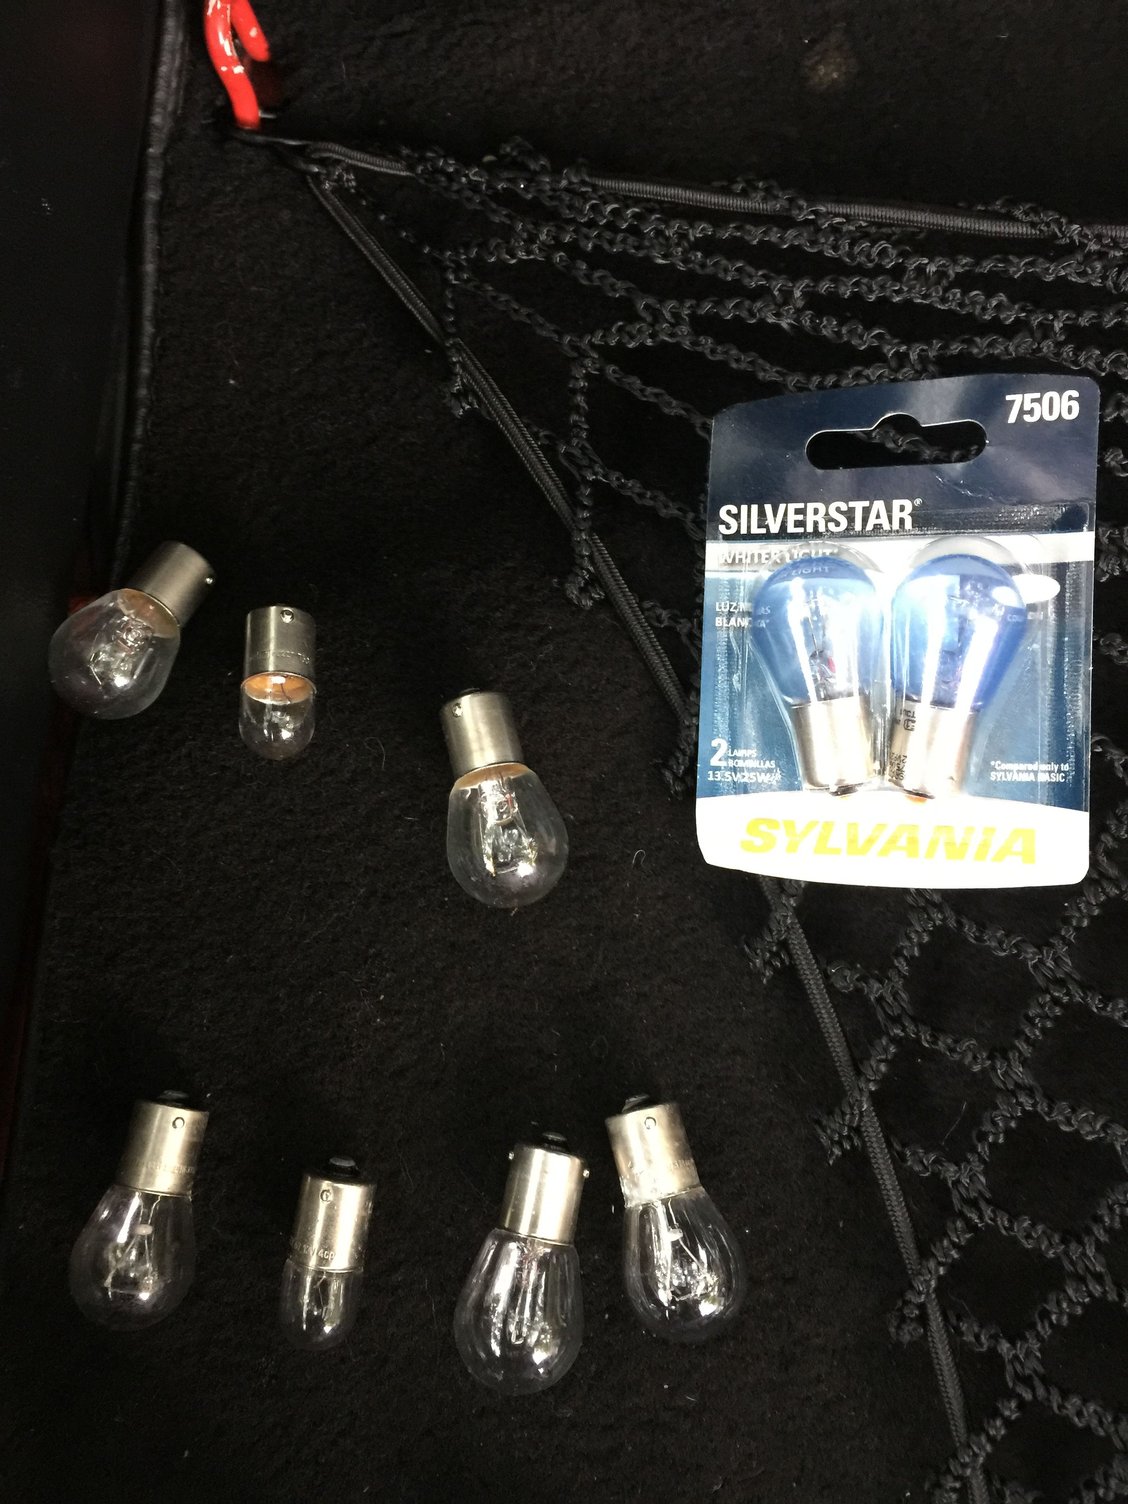
I reassembled the taillights with new gaskets, new OEM bulbs in the turn, stop, and taillight positions. In the reverse light positions, I installed Sylvania SilverStar 7506 25W bulbs. I have a thing about good reverse lights. My Explorer and S-10 have 55W halogen bulbs in their reverse lights.
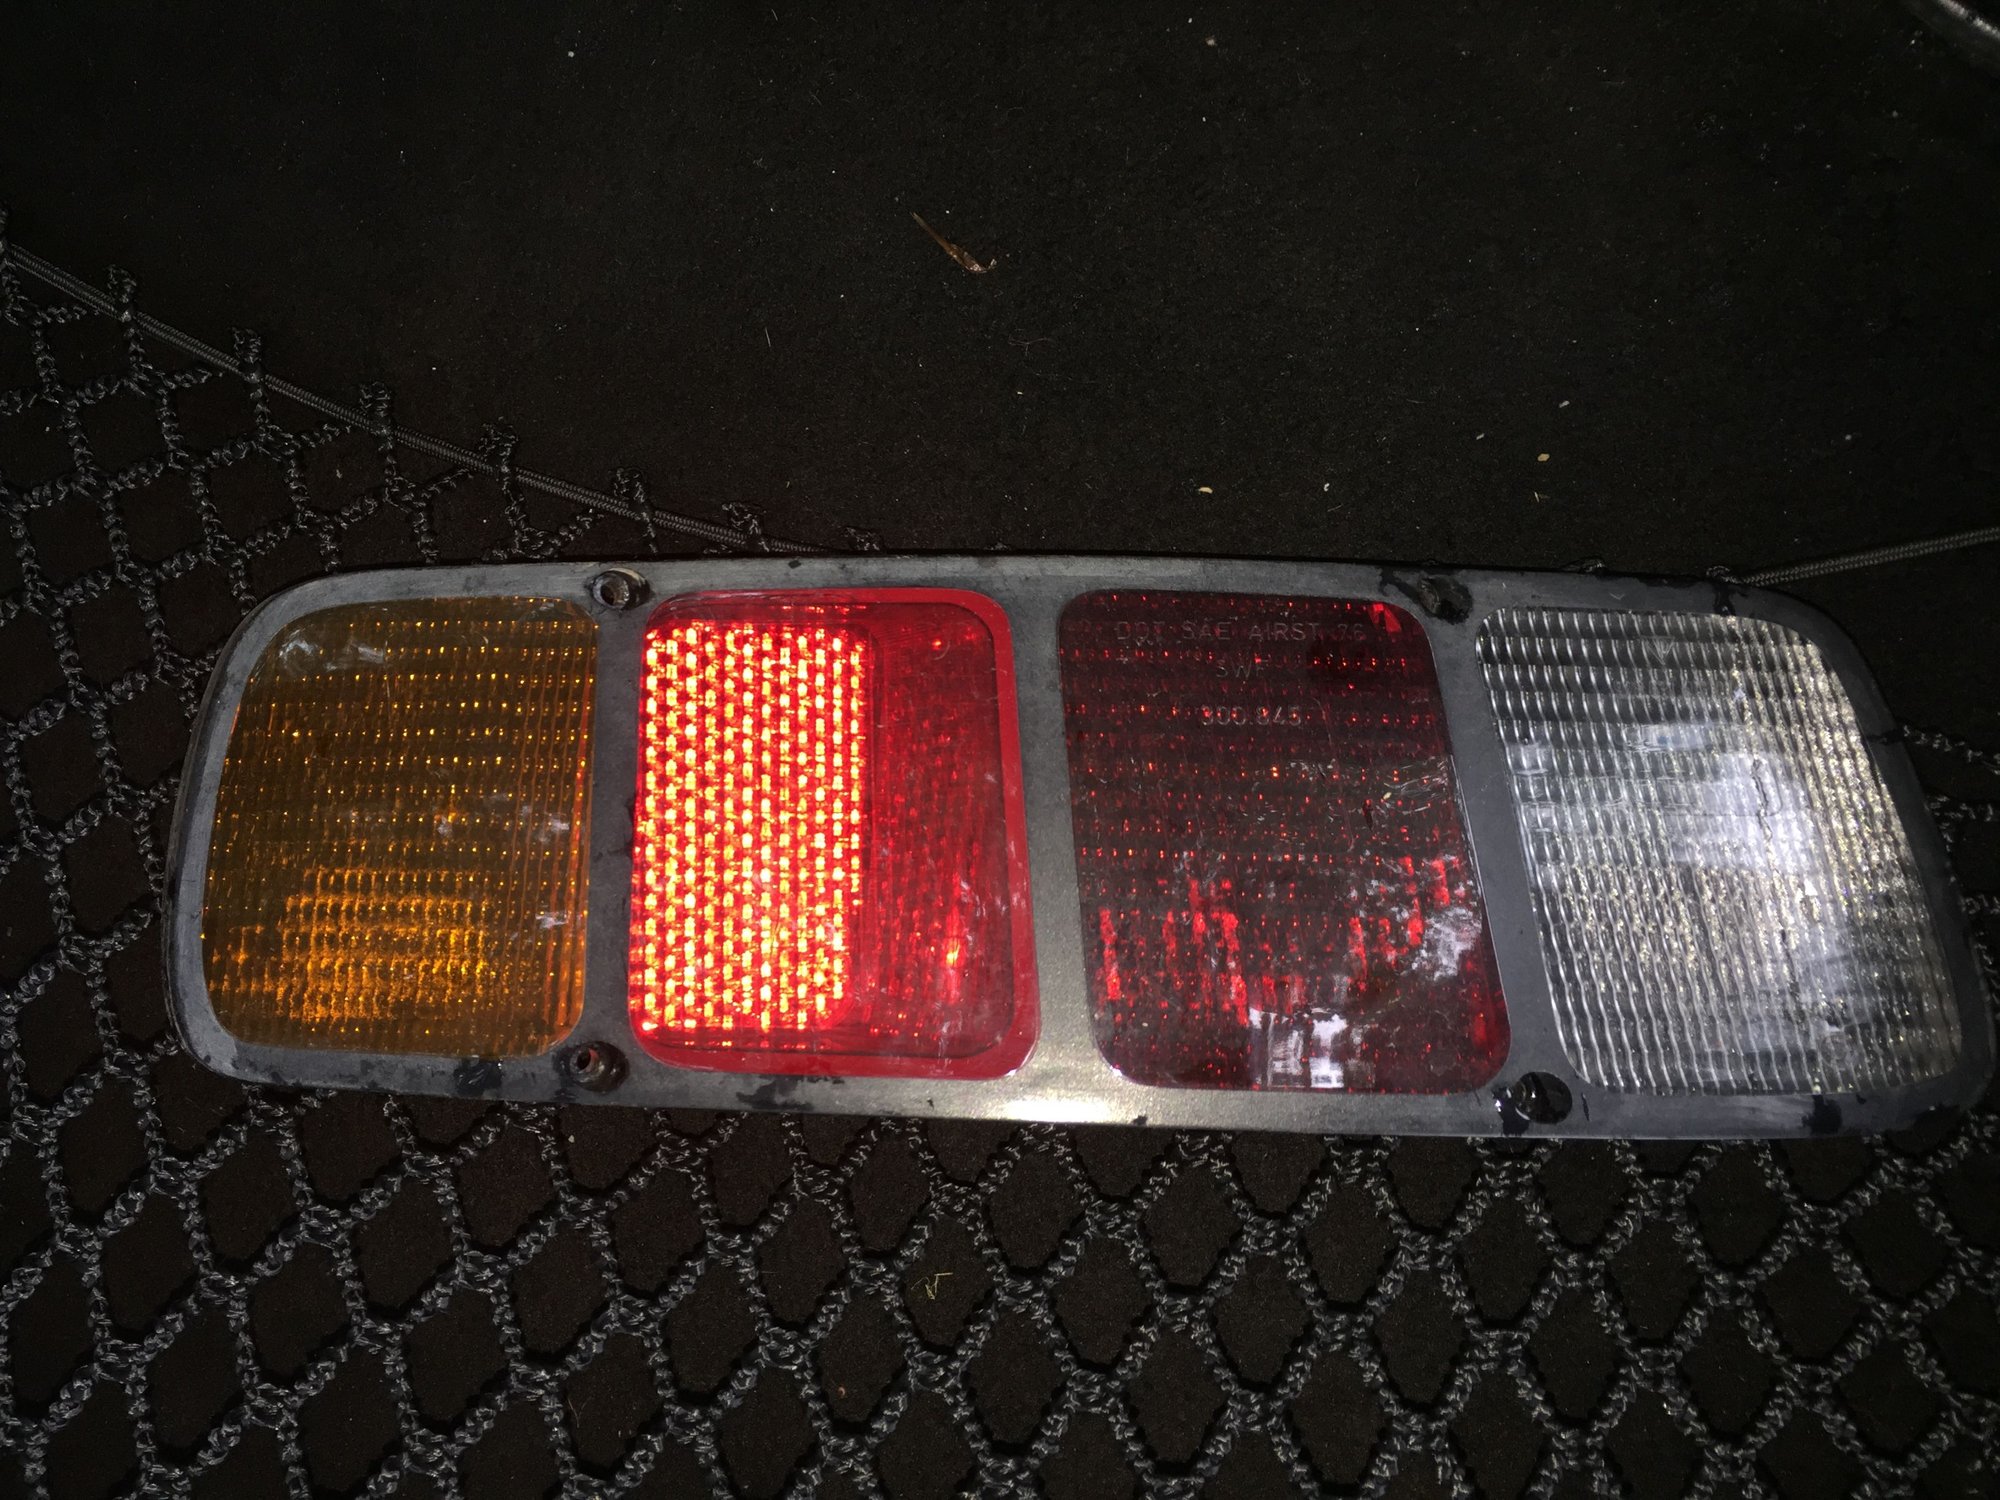
Taillights turned out well. I will let the photos speak for themselves:
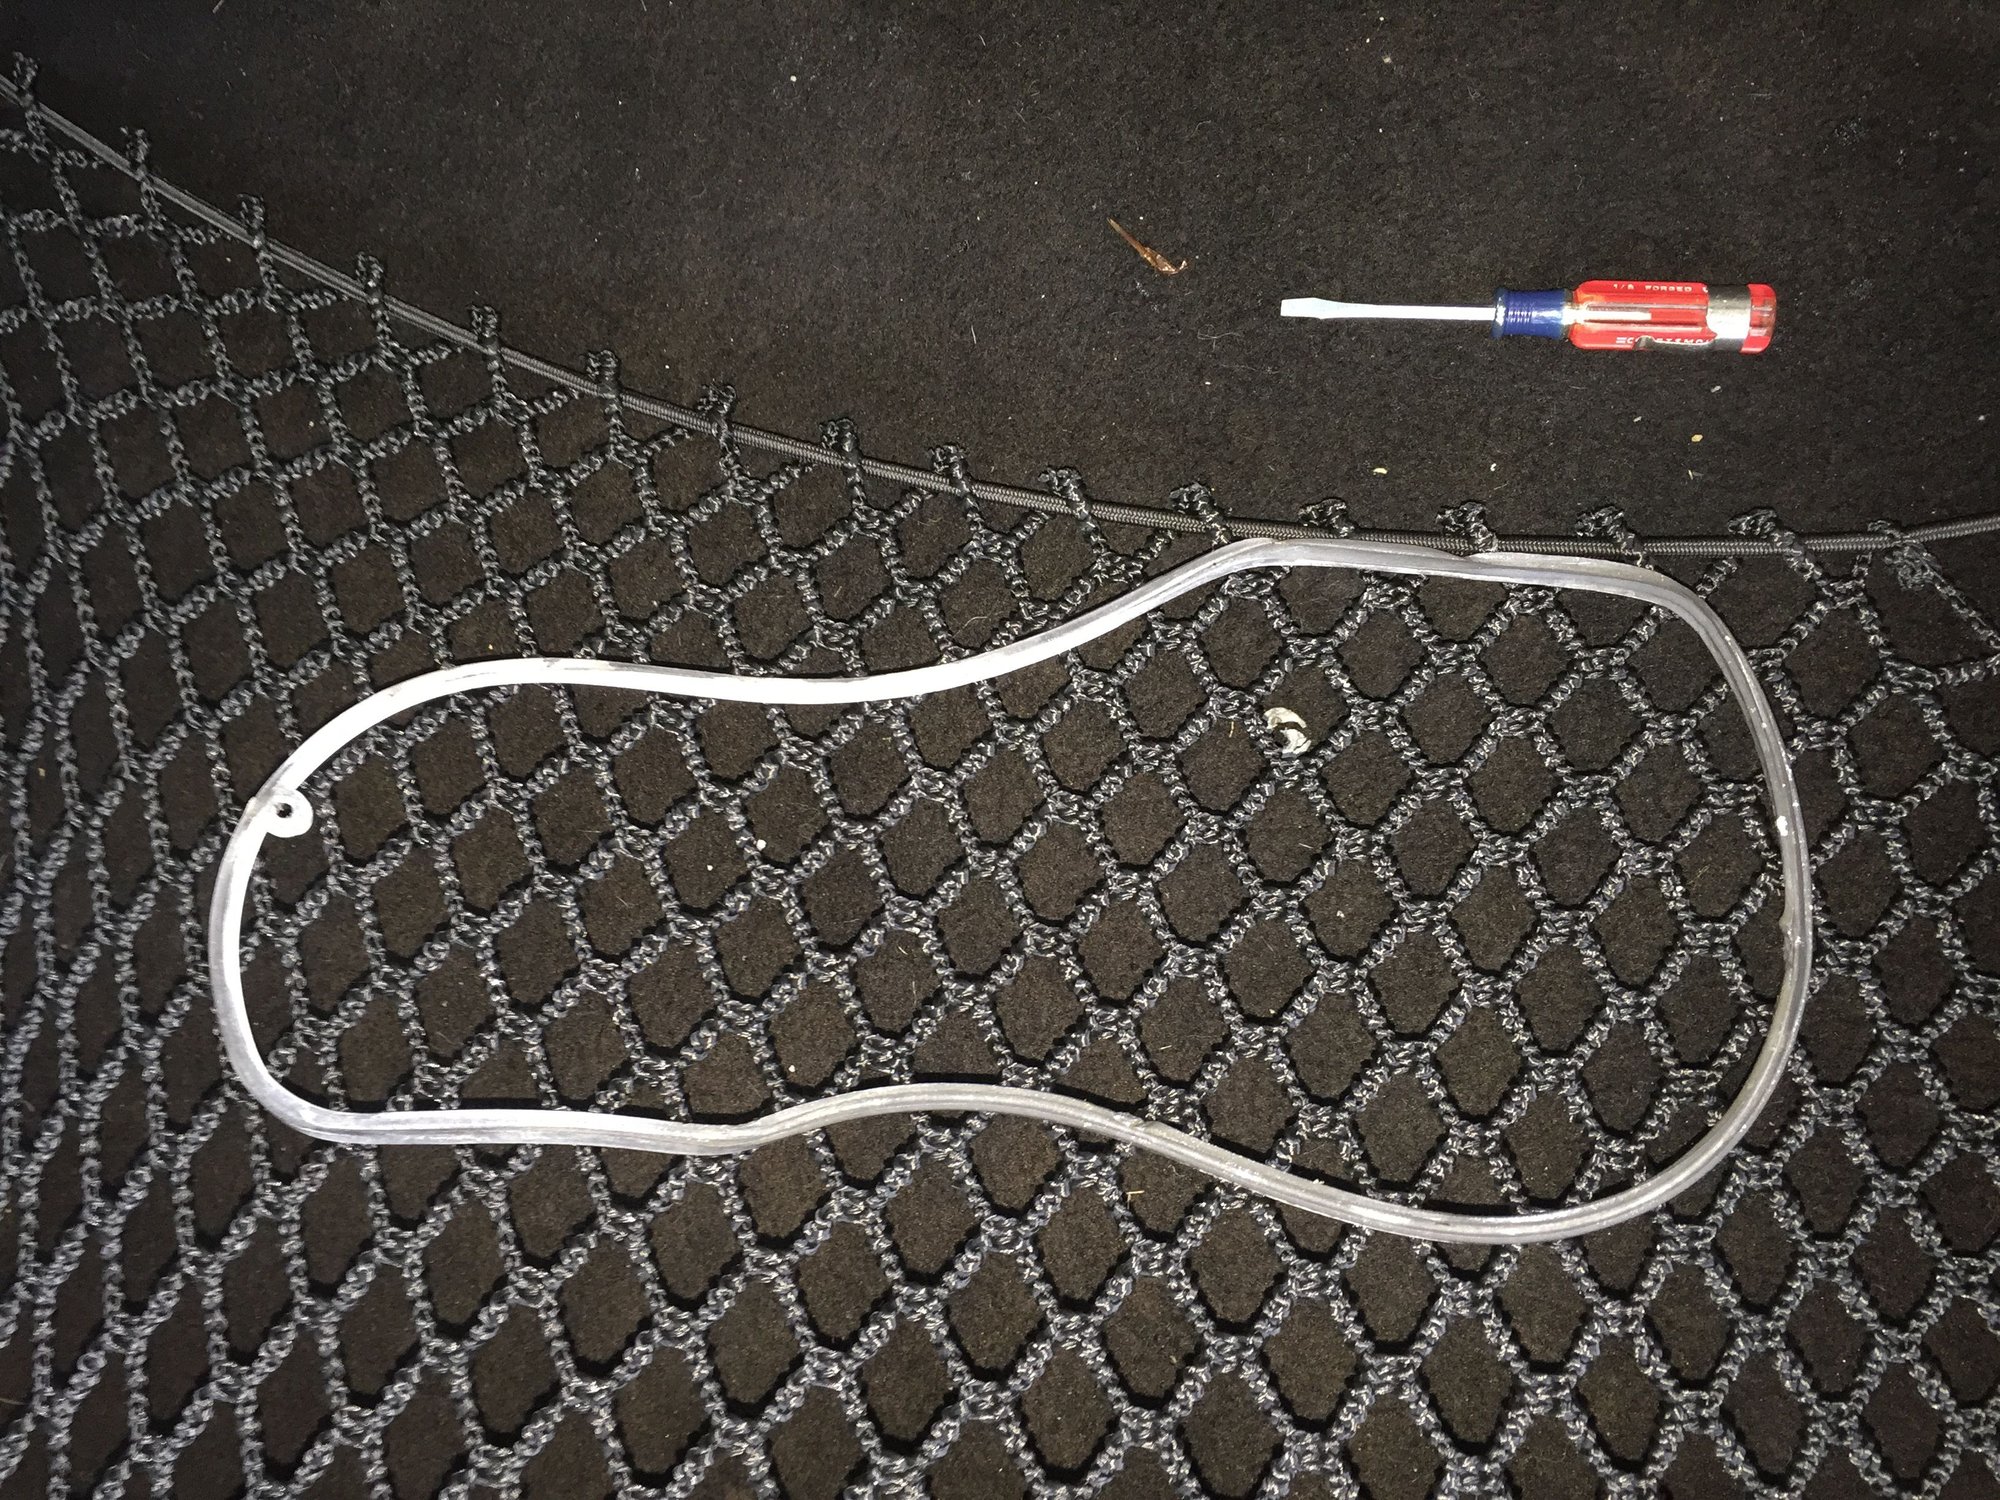
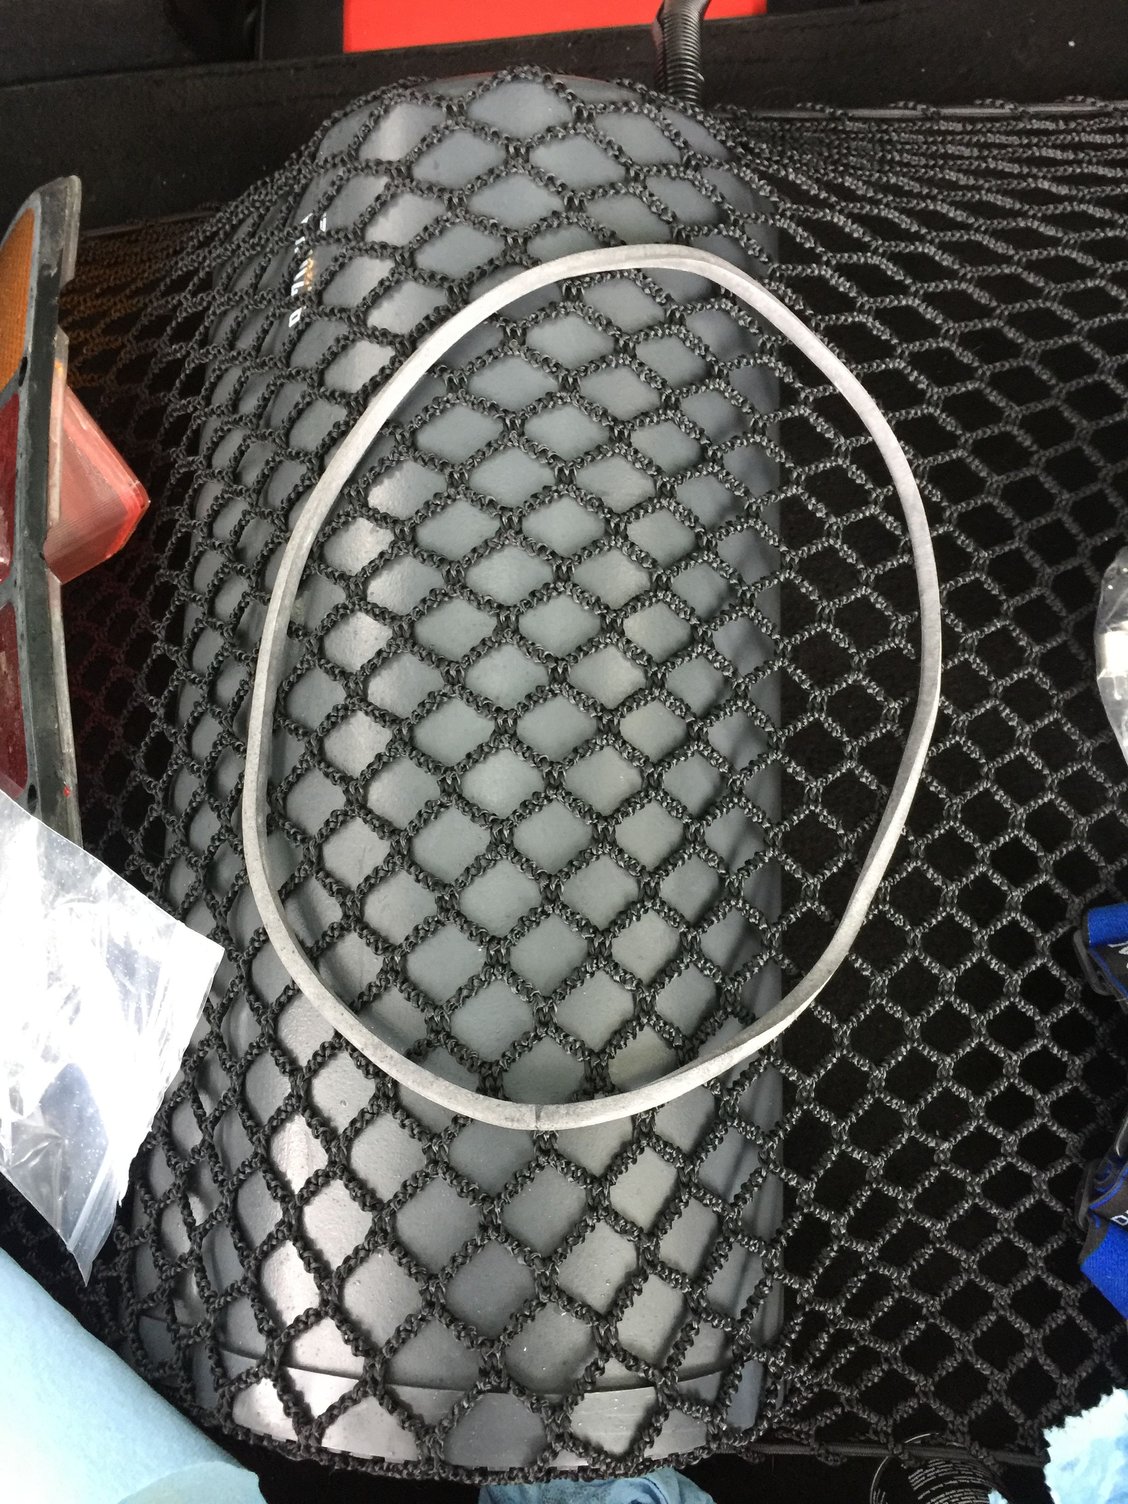
Old gasket.
Yikes!!! This might be why I was getting the occasional 'taillight' warning indicator on the instrument cluster.
New gasket.
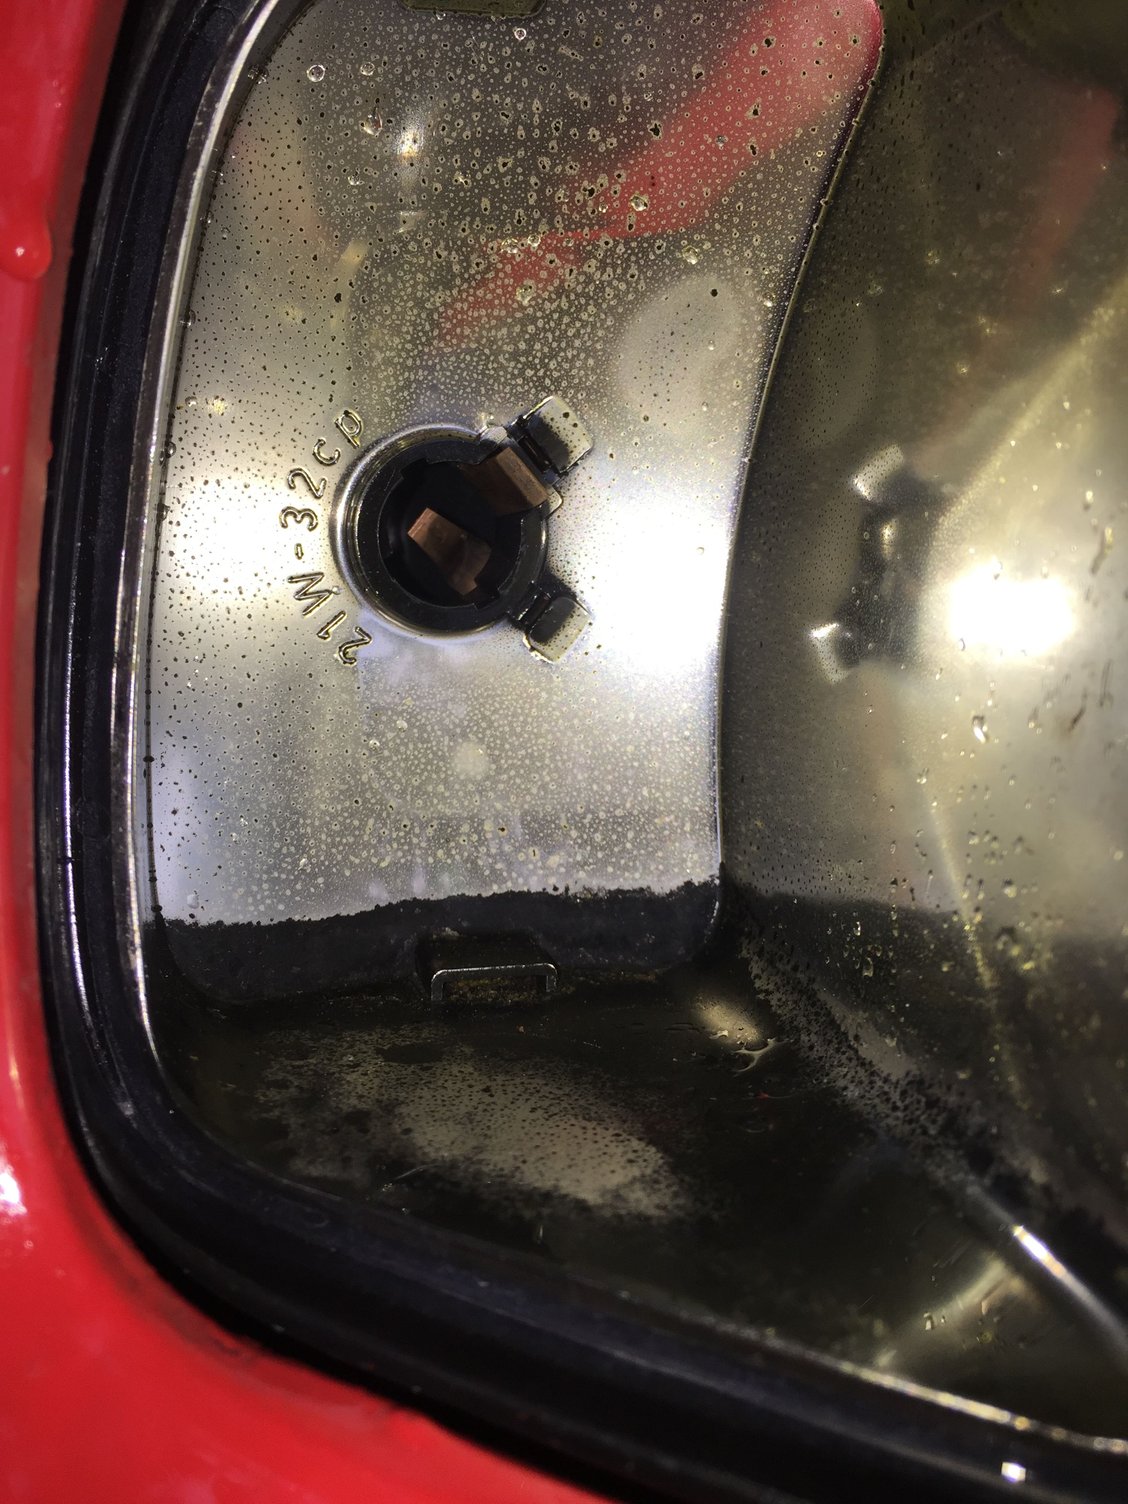
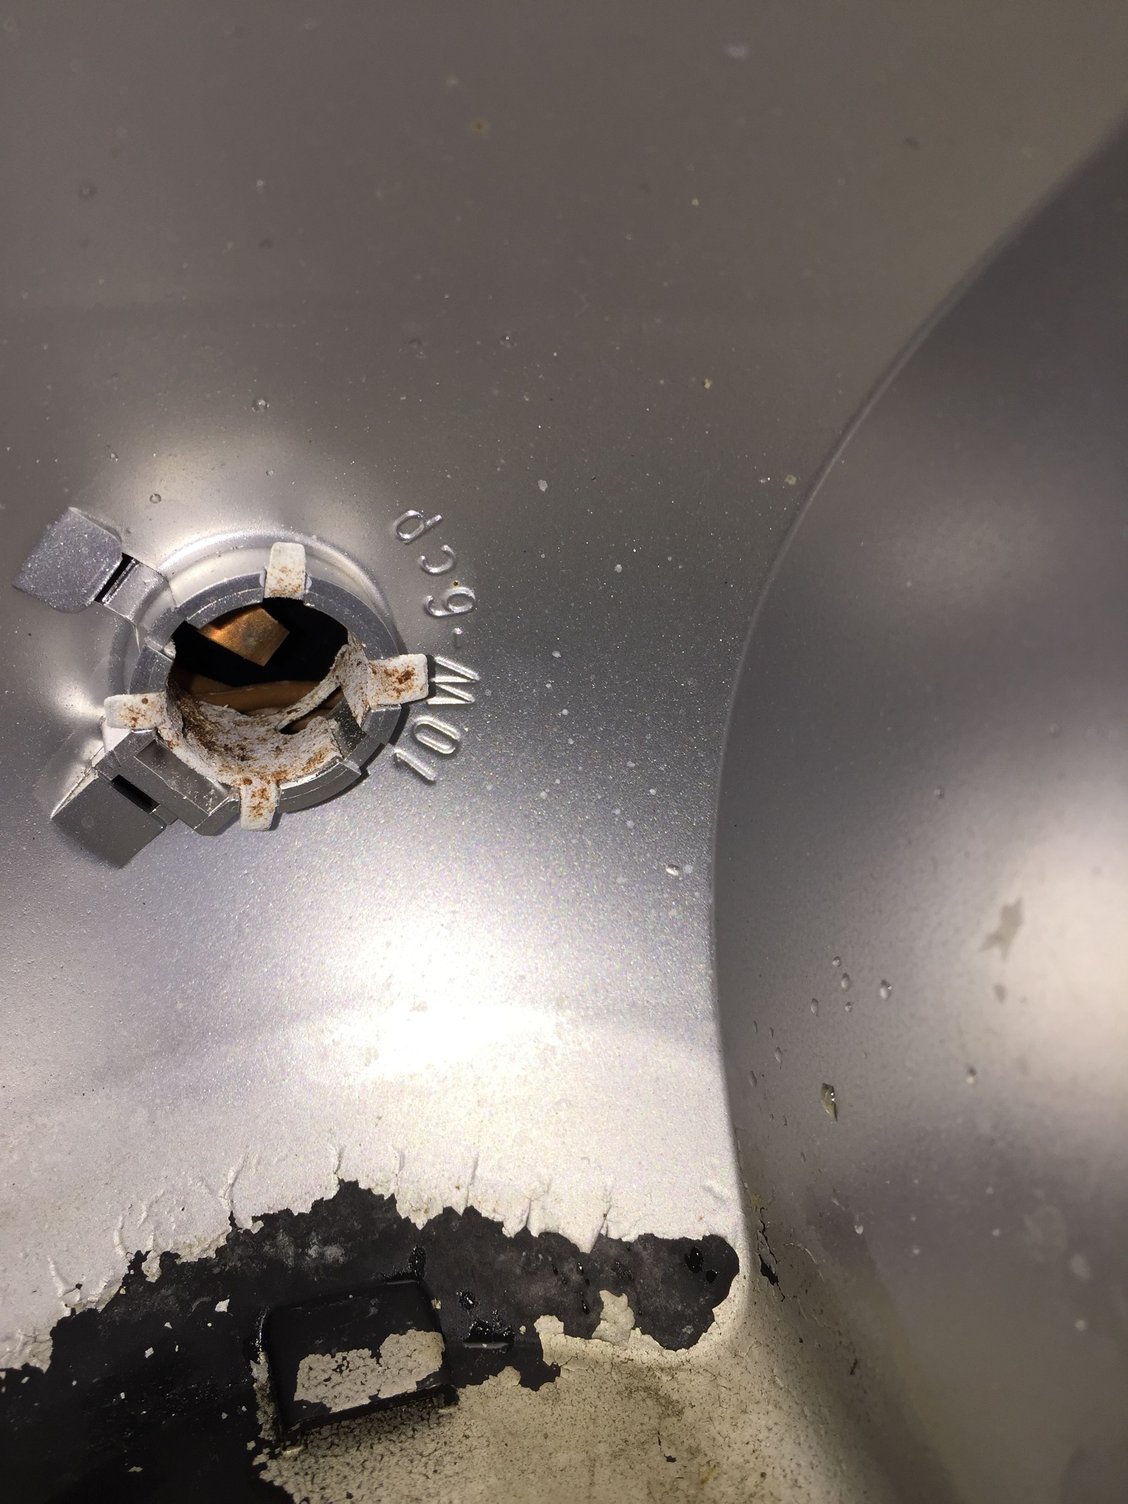
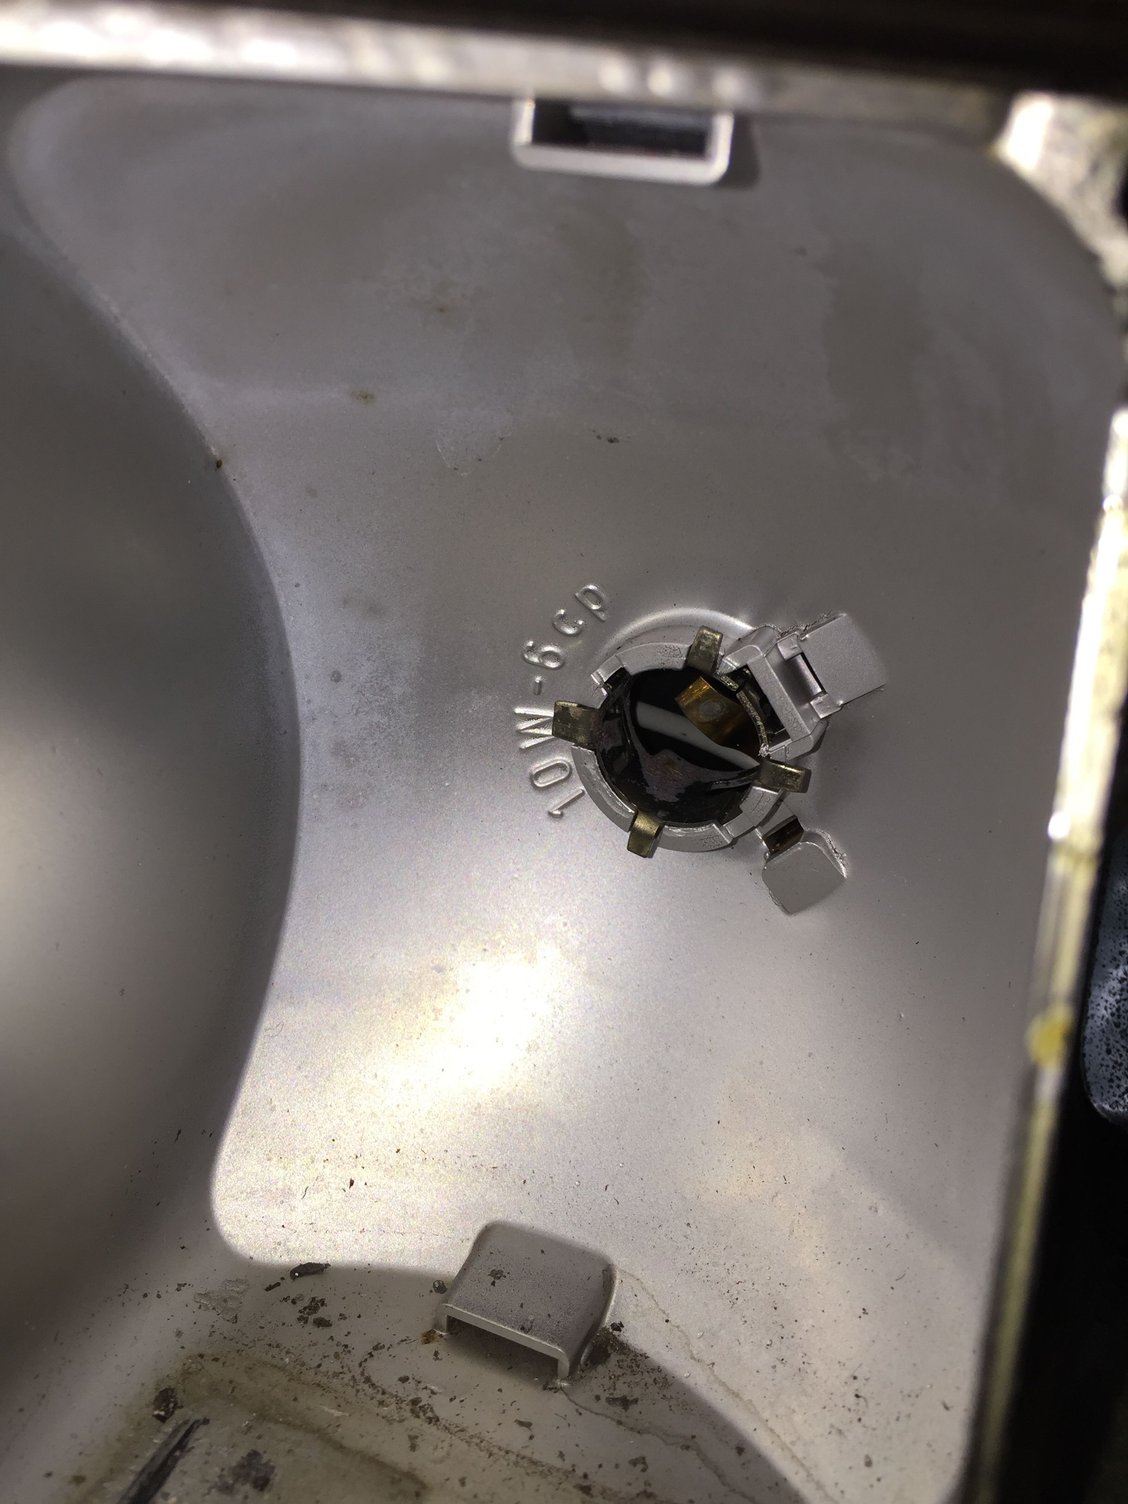
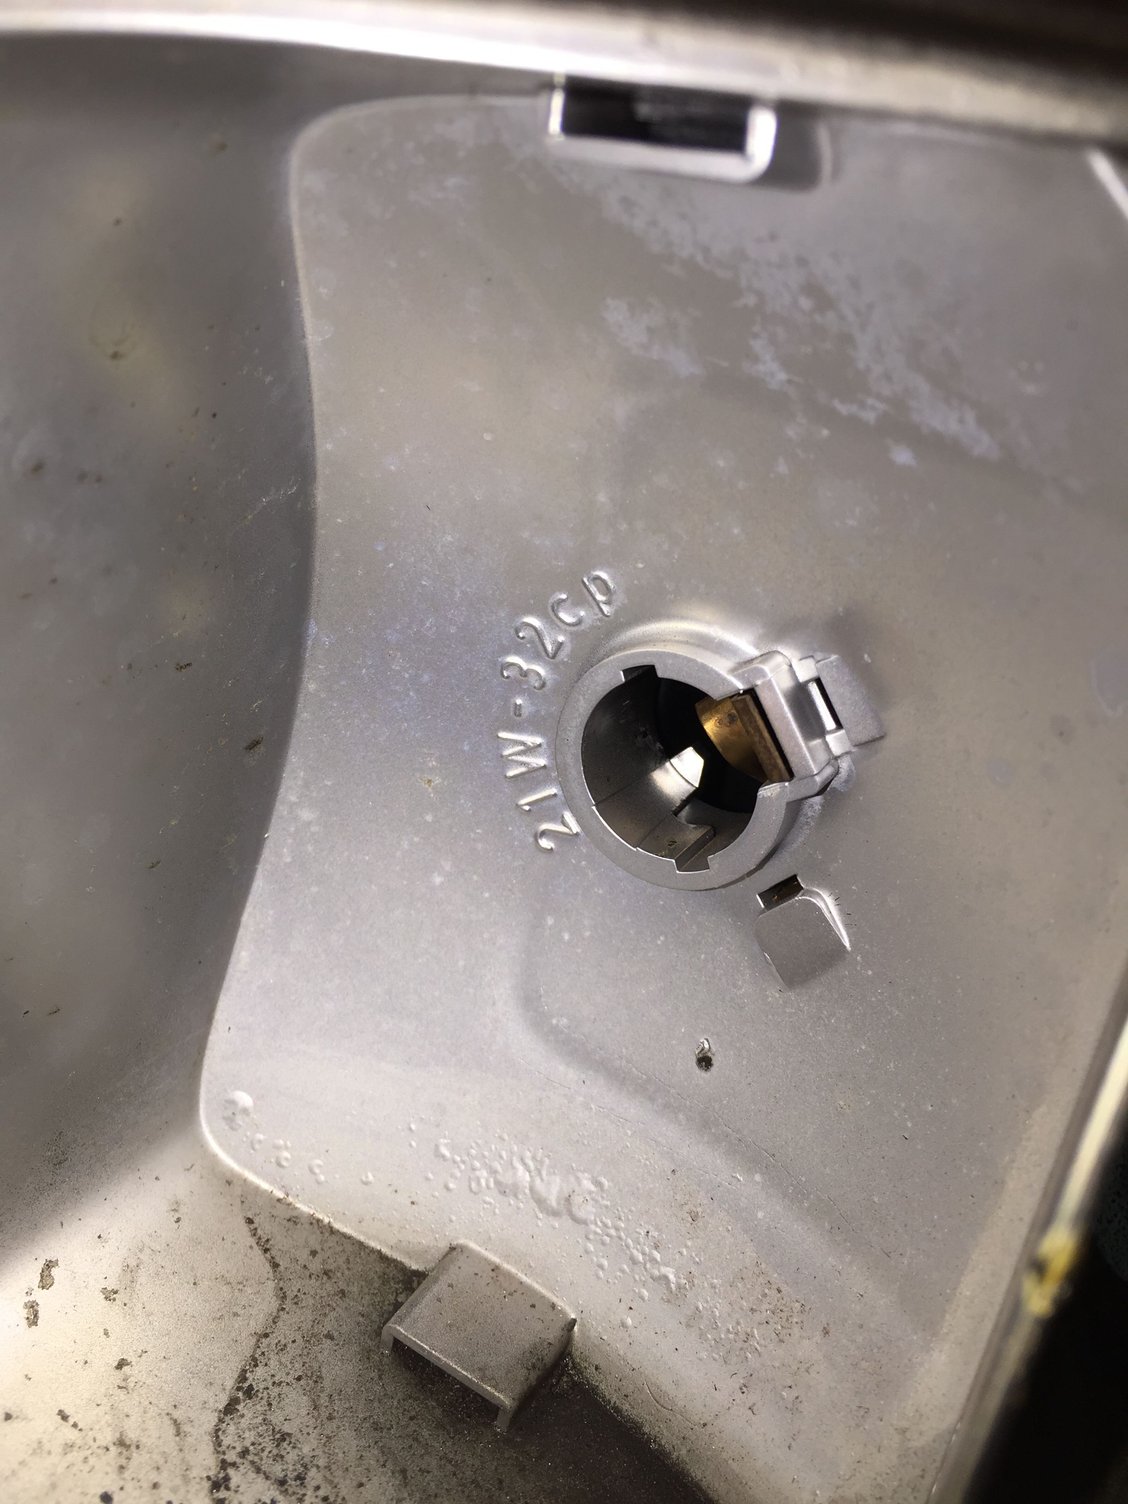
After looking at these photos, I realized that the correct bulb wattage and size were molded into each cavity by the socket. Whoa...
During the PPI, the battery failed its load test. I bought a new one in Ohio, but didn't have time to install it. Having read issues with an old ground strap, I ordered a new one and had it with me in Ohio. Also didn't have time to install that as well.
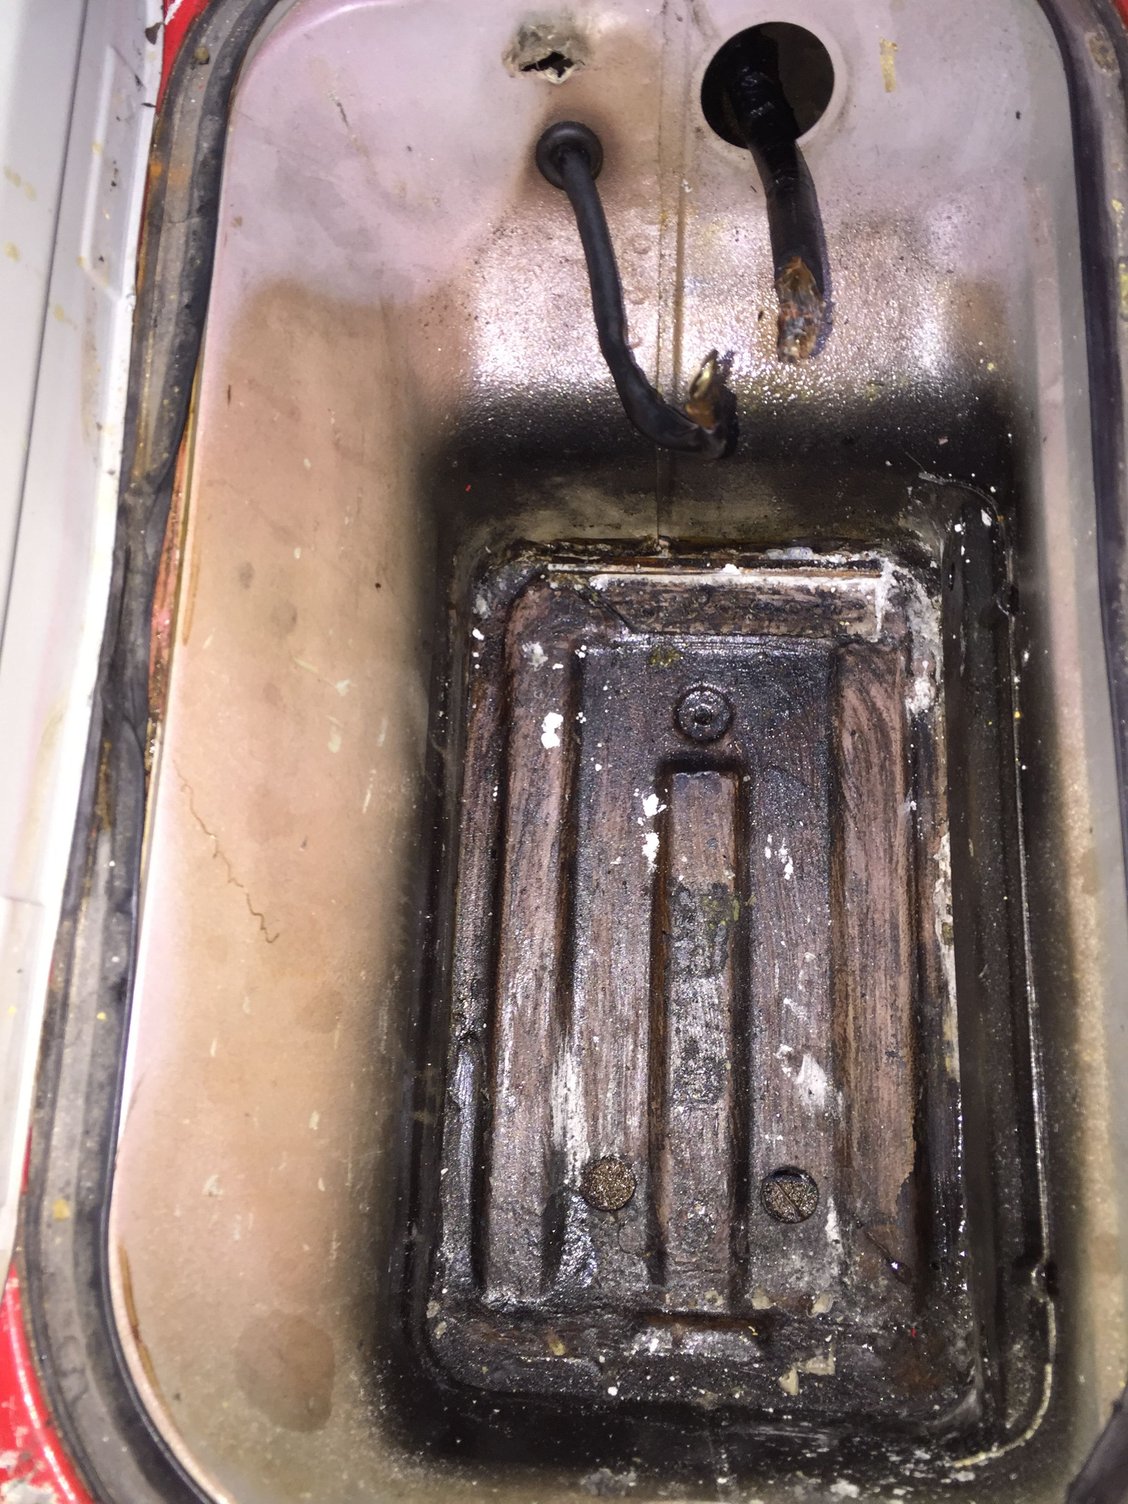
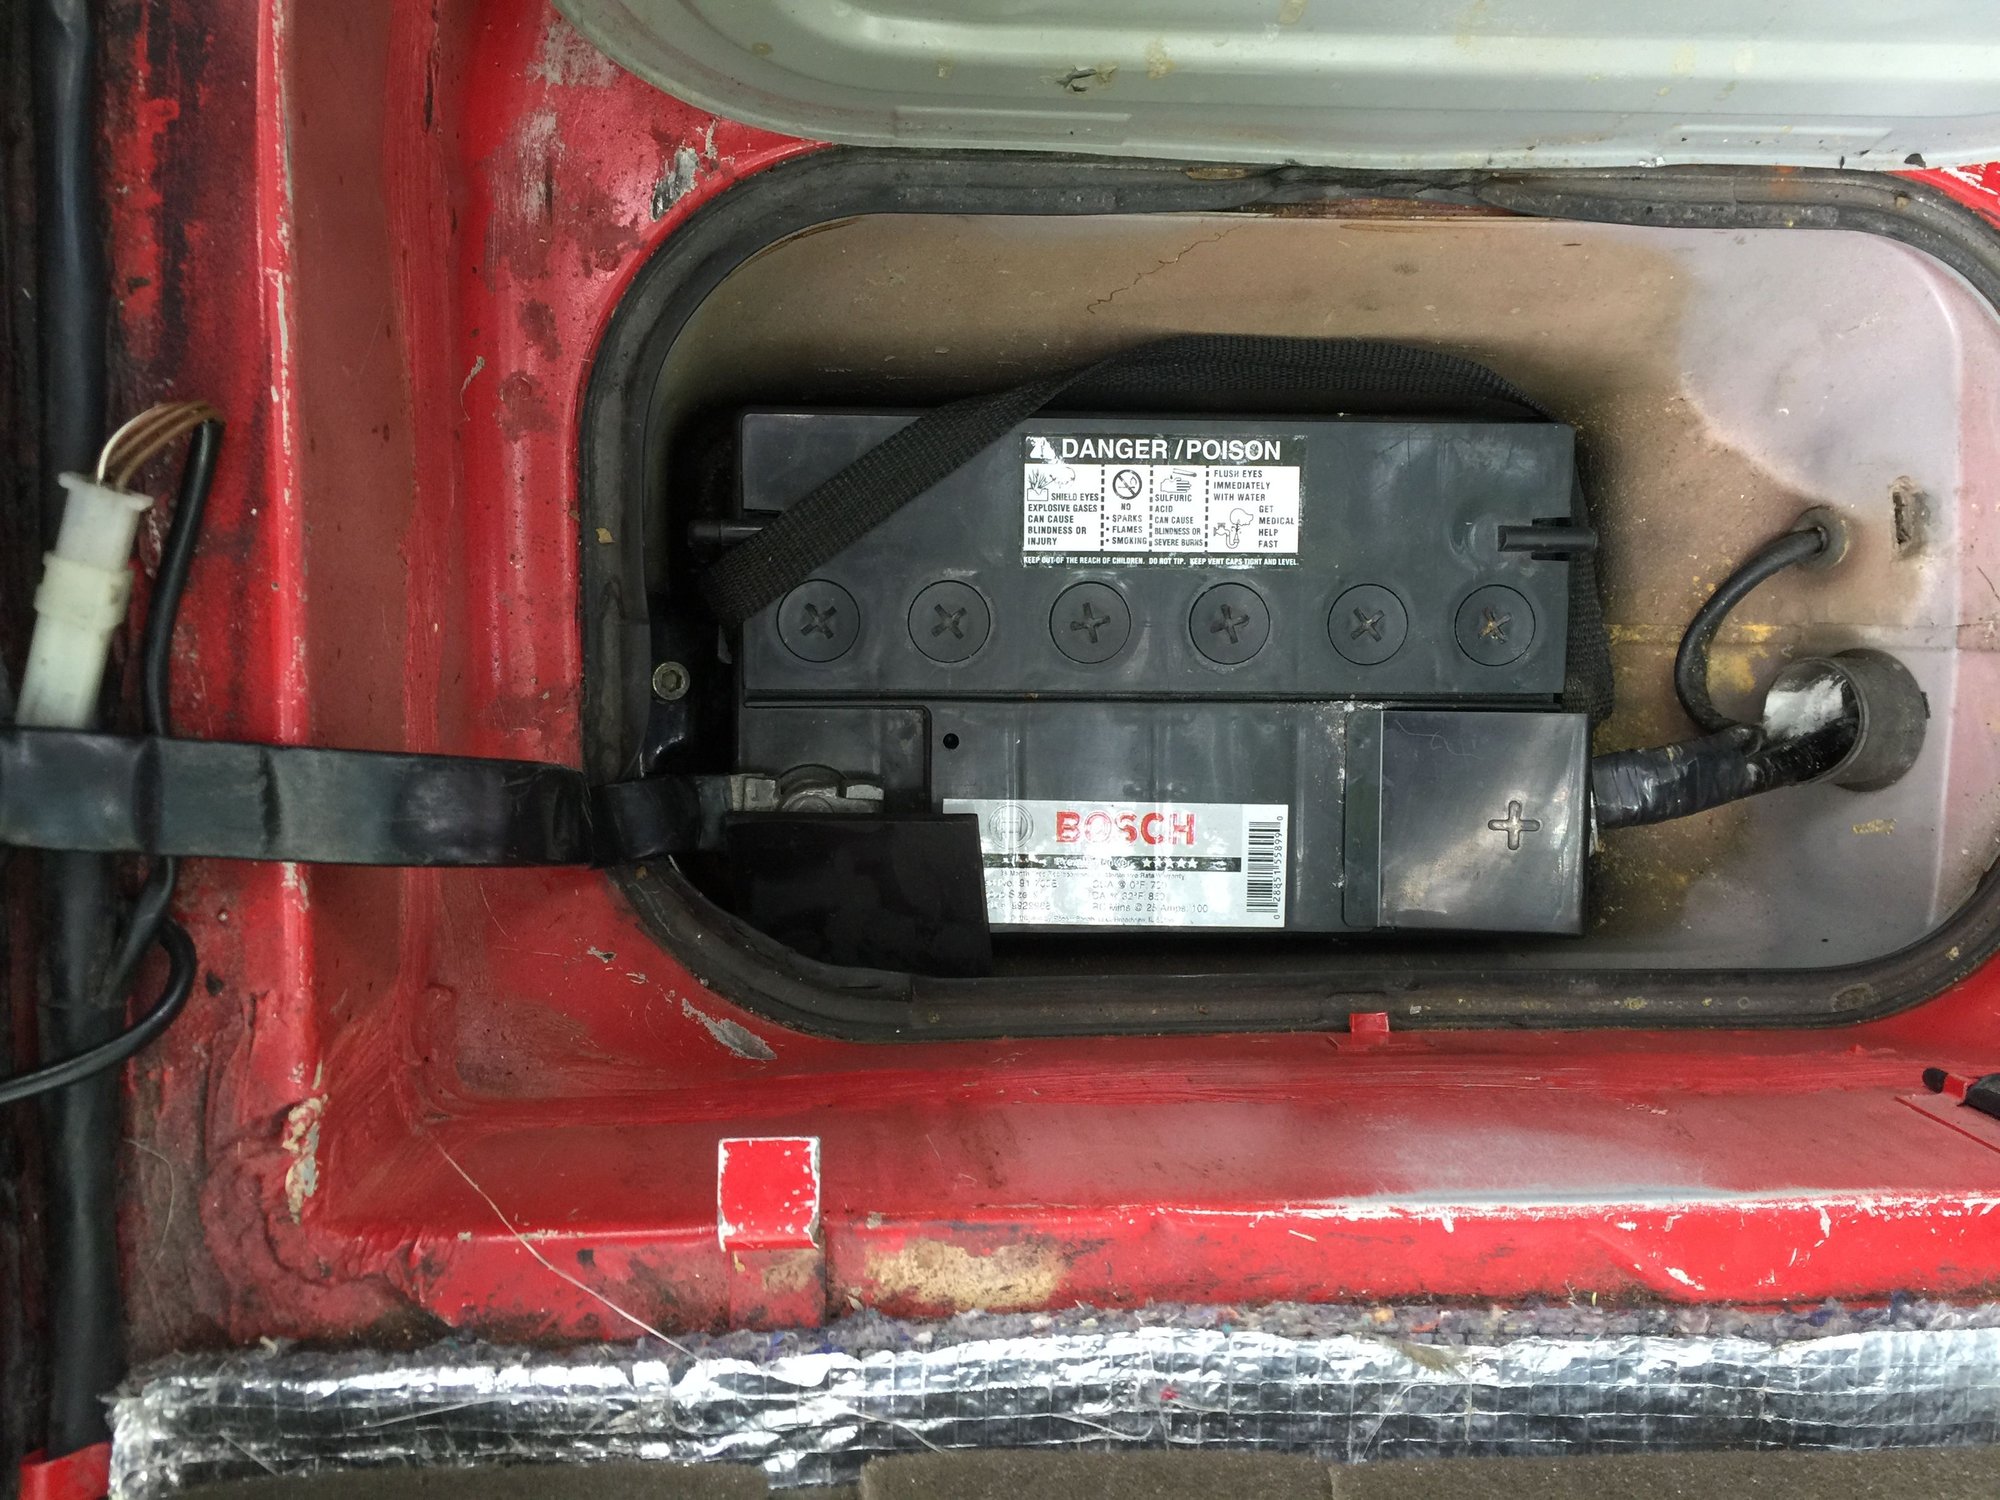
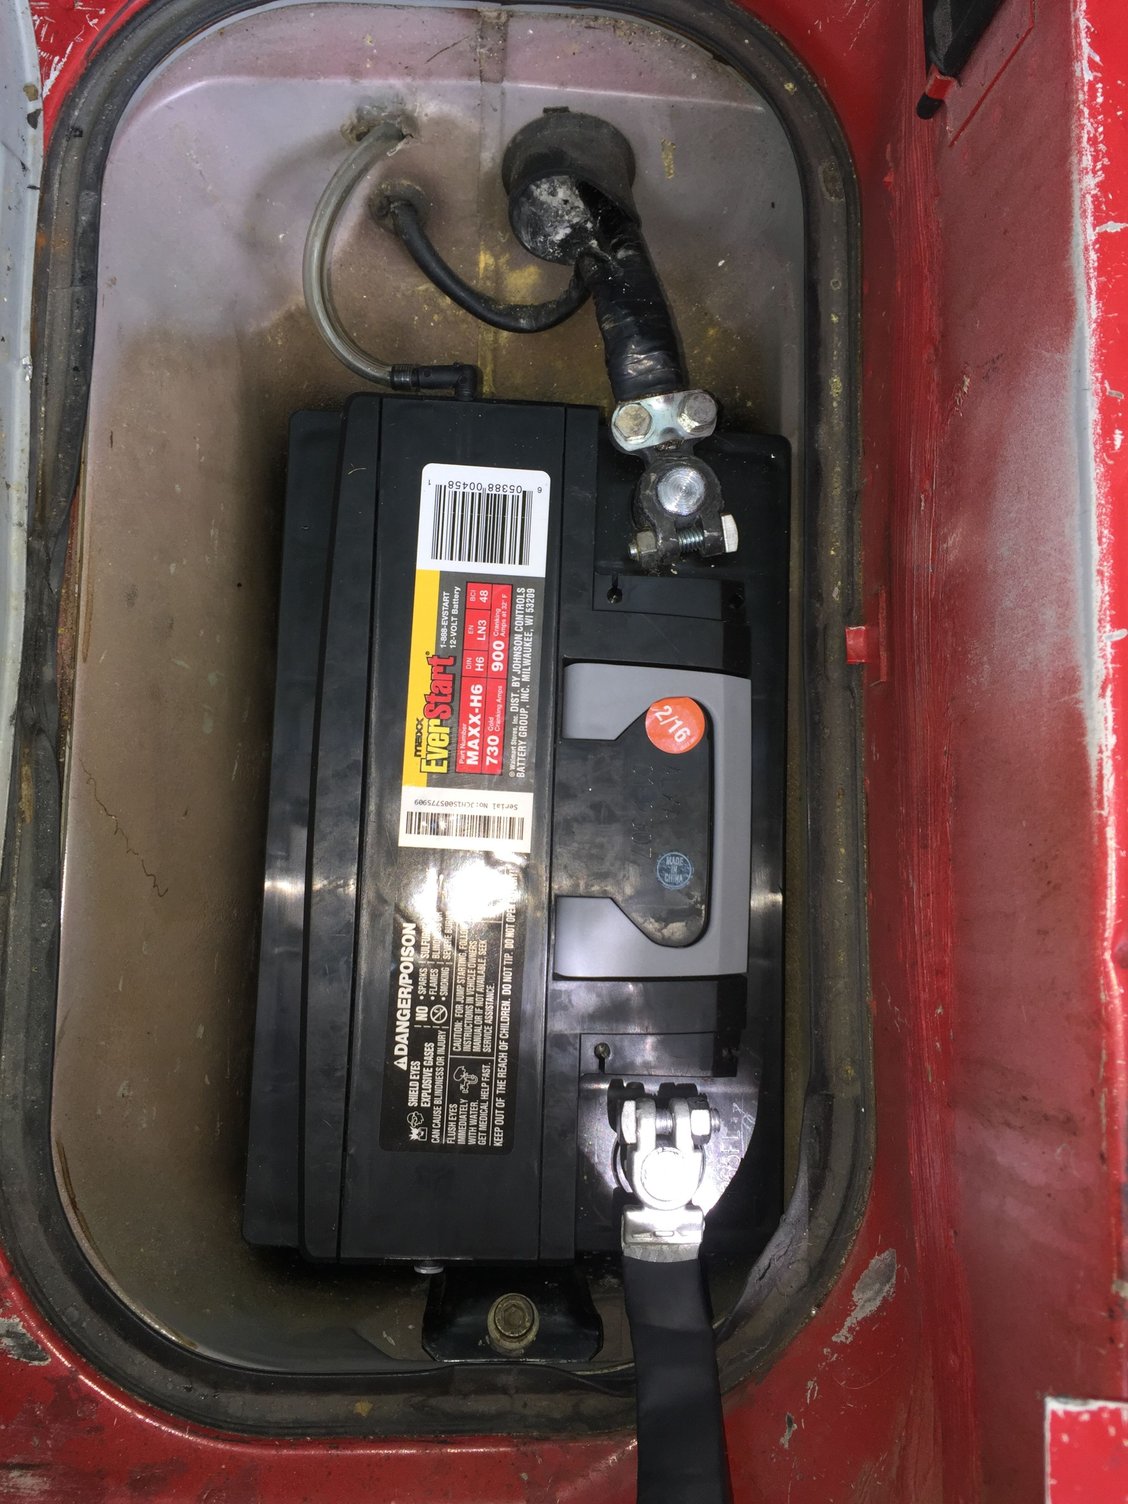
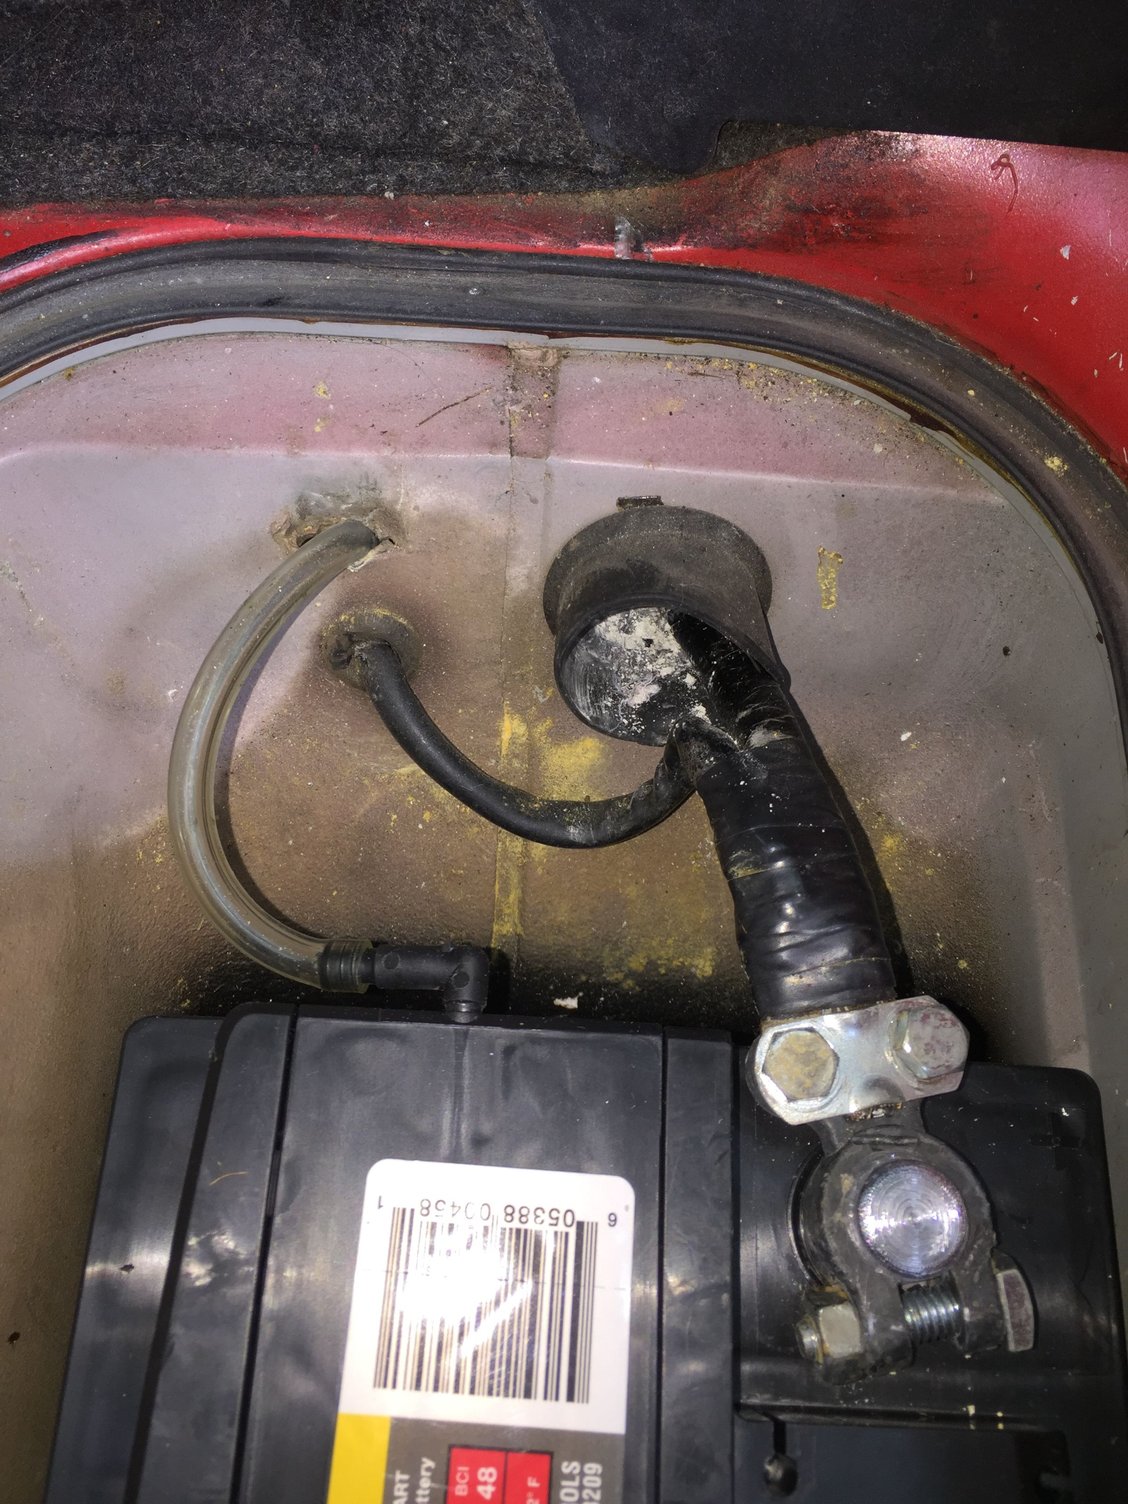
On May 9, I installed the new battery and ground strap. I found a few issues. There was no vent tube. As a result, there was powdery white corrosion in the bottom of the battery box, as well as on the (+) terminal. The (+) terminal was a universal lead replacement terminal. Other than being ugly, it worked for now. I did see some more white powdery corrosion in the rubber grommet for the (+) battery cable. Being a little short on time, I cleaned the corrosion as best I could with brake cleaner. Chlorinated brake cleaner. Which took most of the thick black paint (undercoating? Bed liner? ???) off the bottom inside of the battery box. Oh well, as I intended on being in here again soon.
I did clean the (+) terminal with a battery brush and contact cleaner.
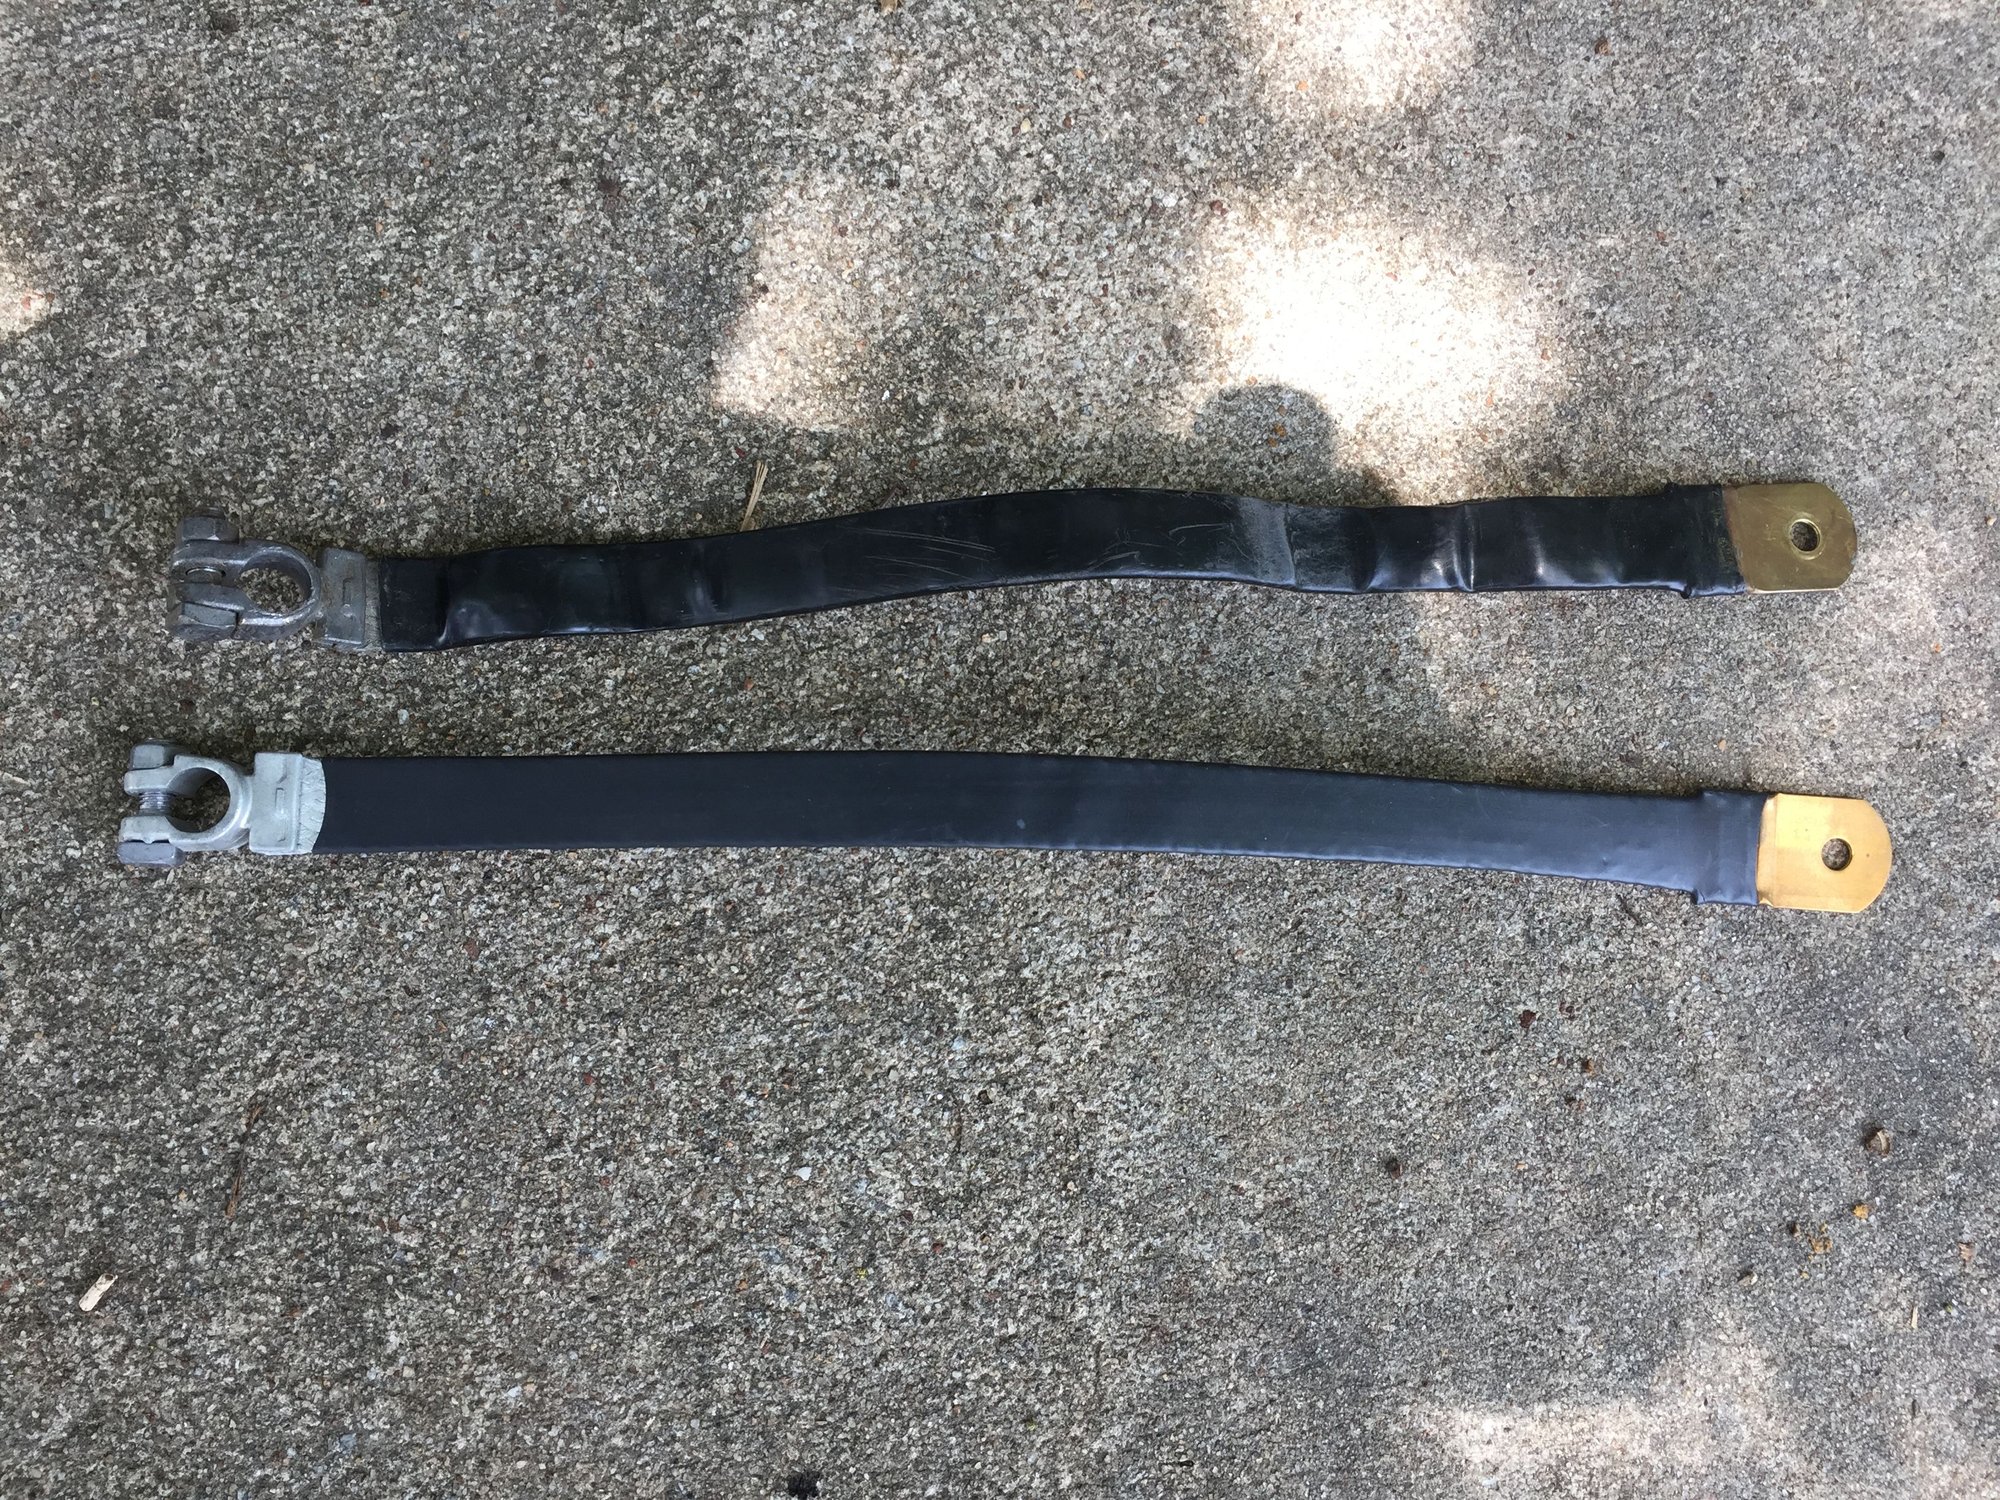
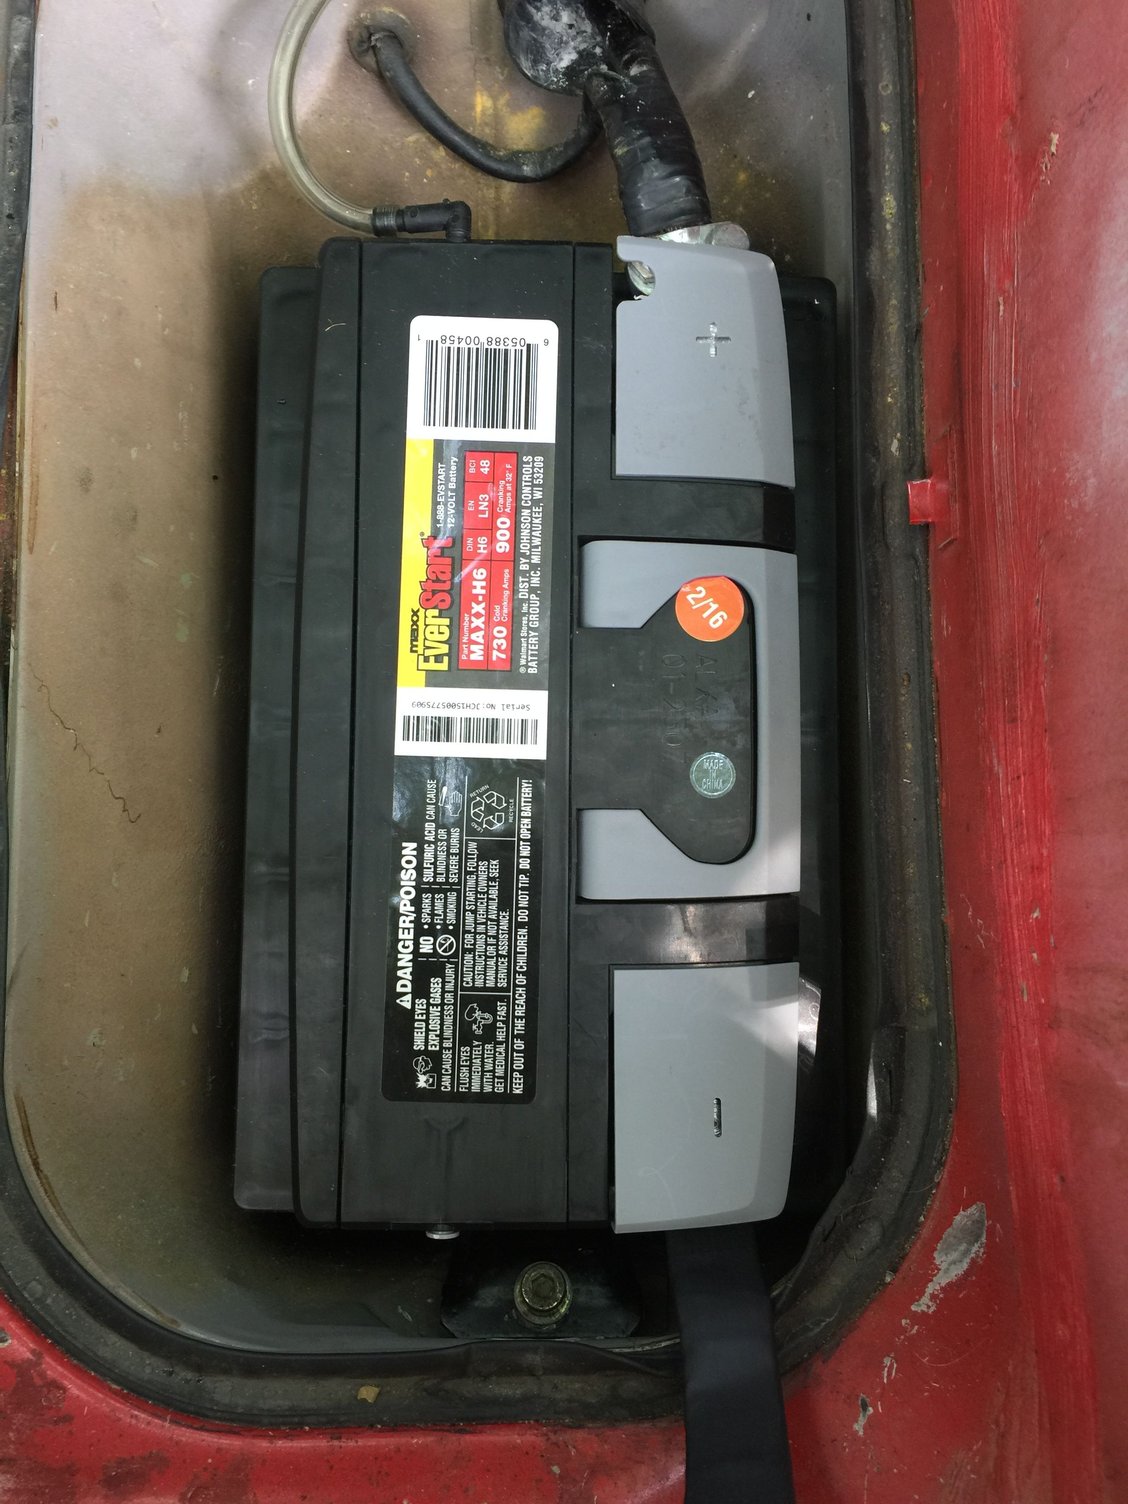
Battery and ground strap as delivered.
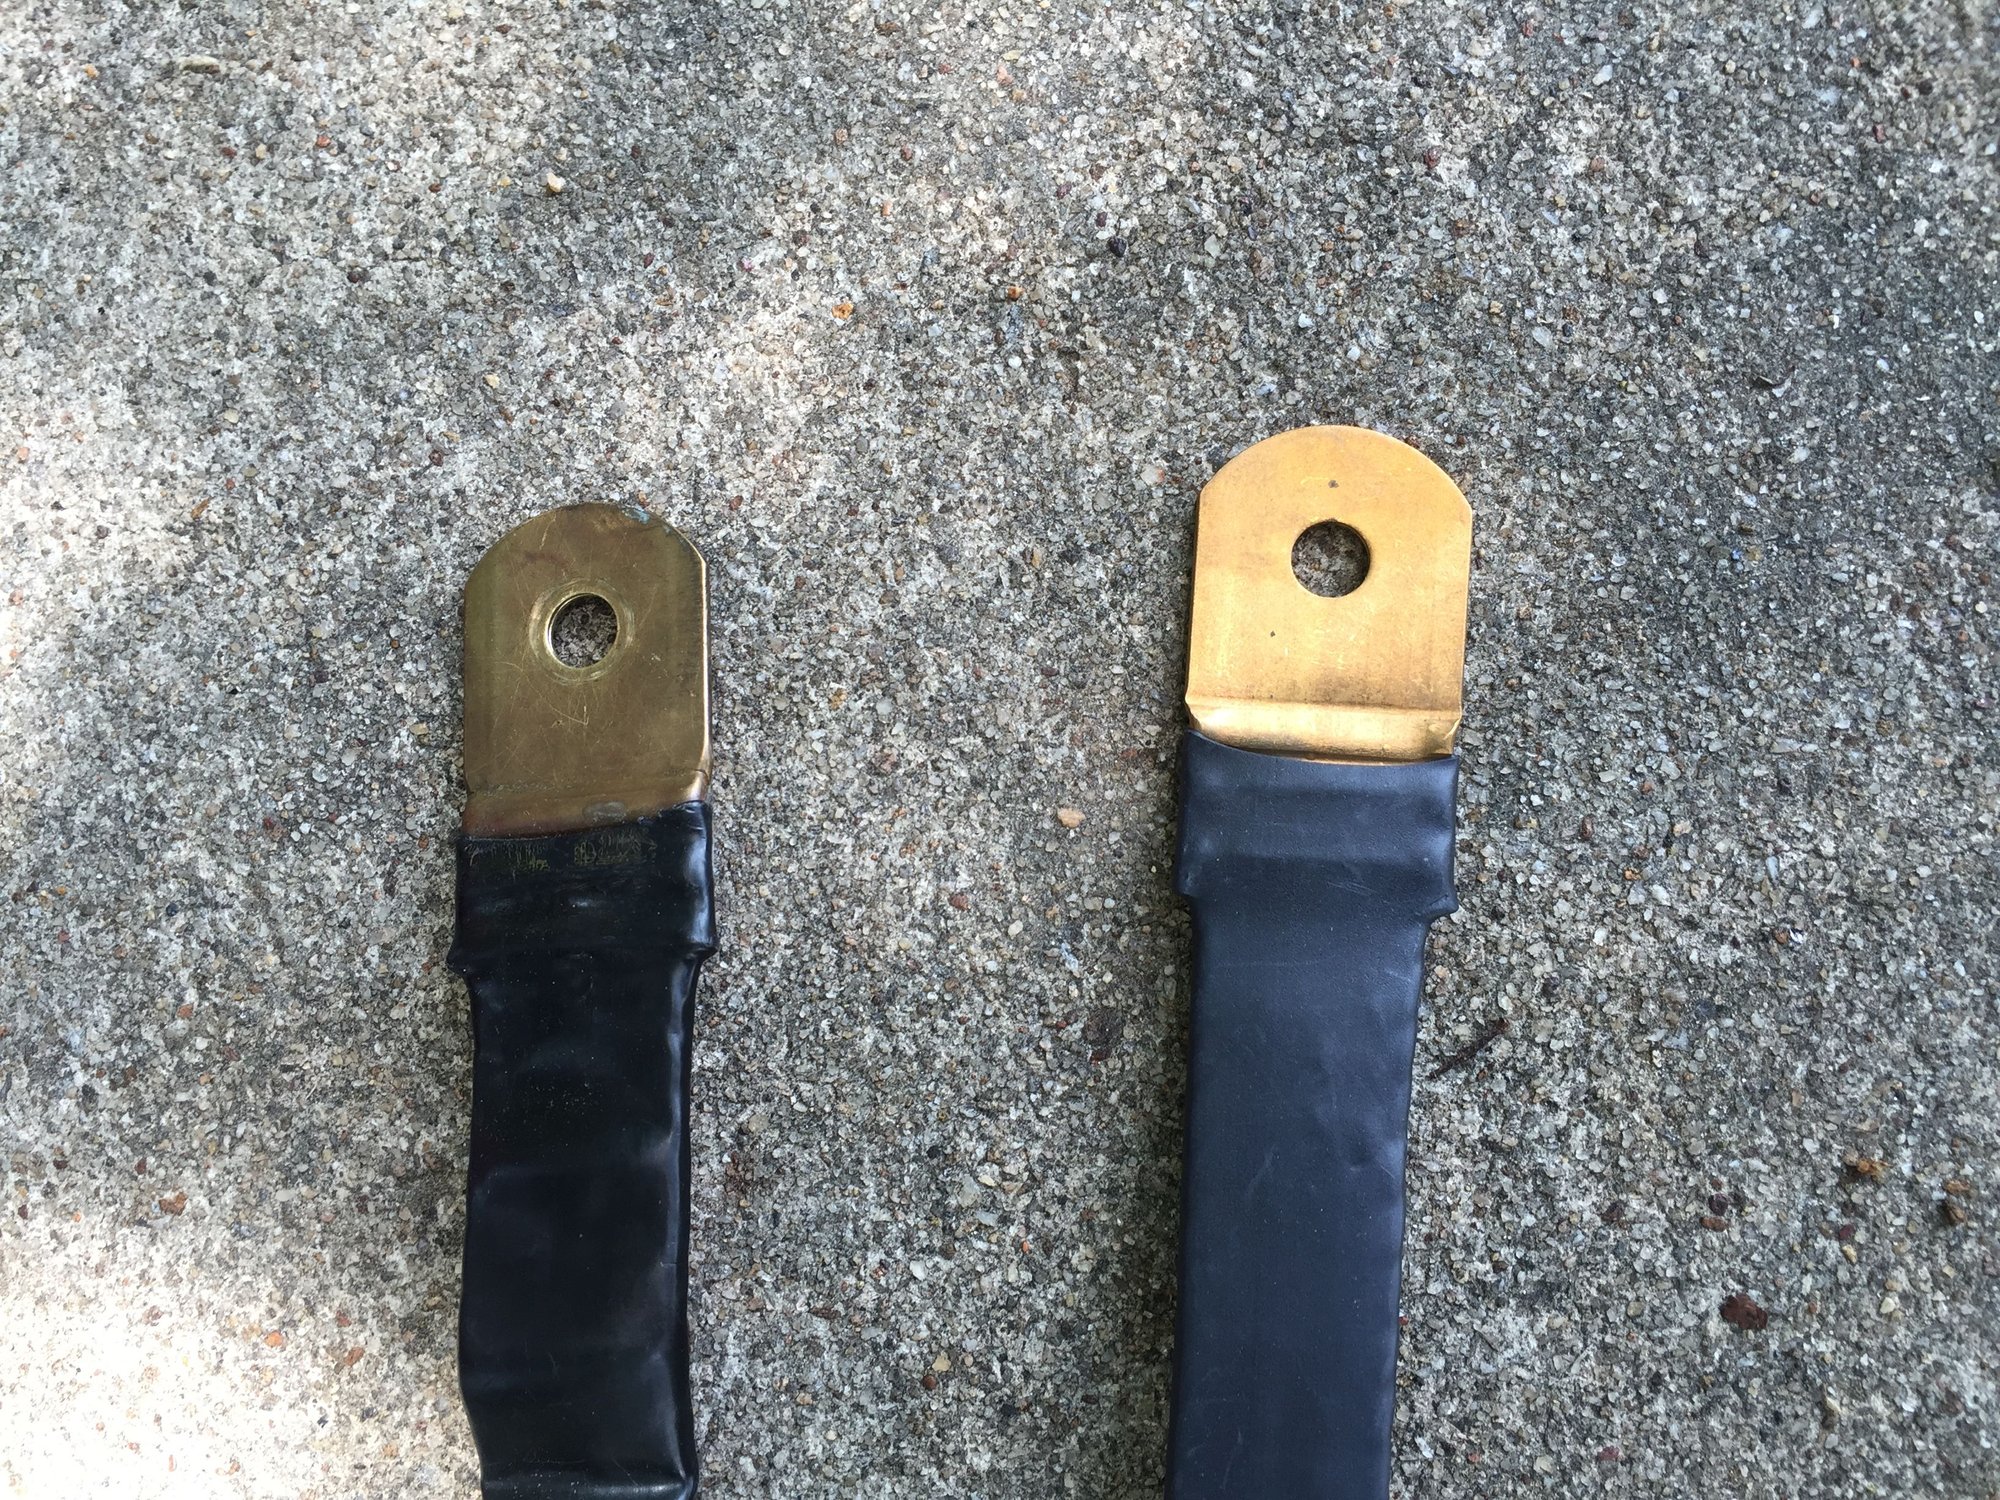
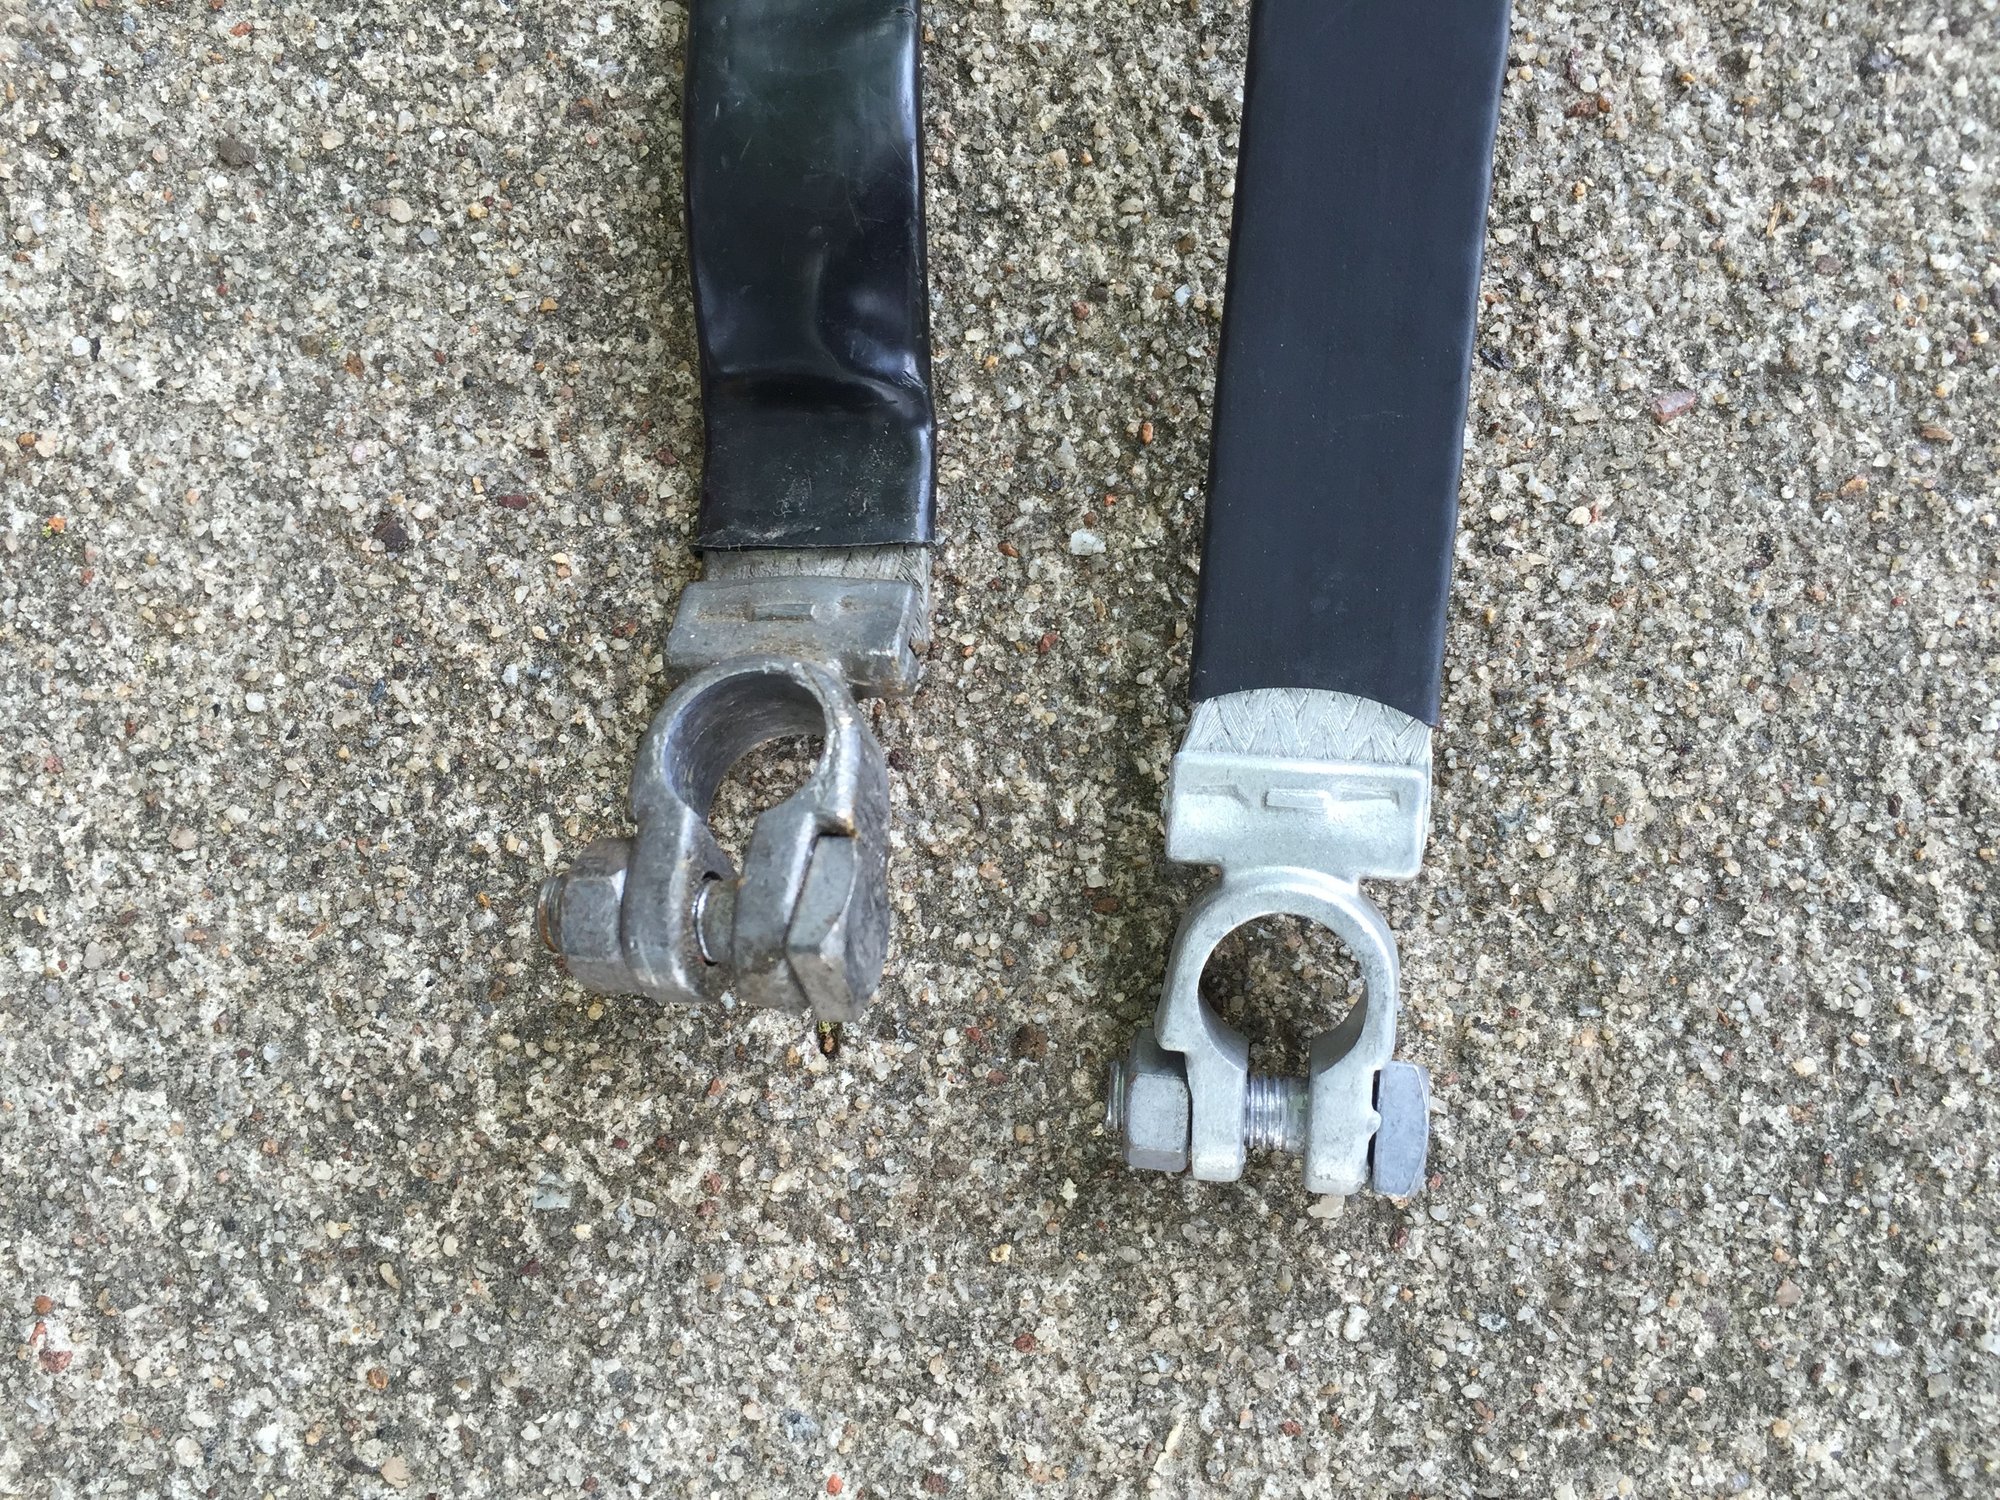
I don't know if the old battery cable is original or not. I am not sure, as it looks very similar to my new replacement.
Old cable to terminal joint didn't look too bad. But...
I was able to rig up a vent tube and route it through another hole in the battery box. I have a nasty feeling the amp power cable is going through the existing vent tube hole and grommet.
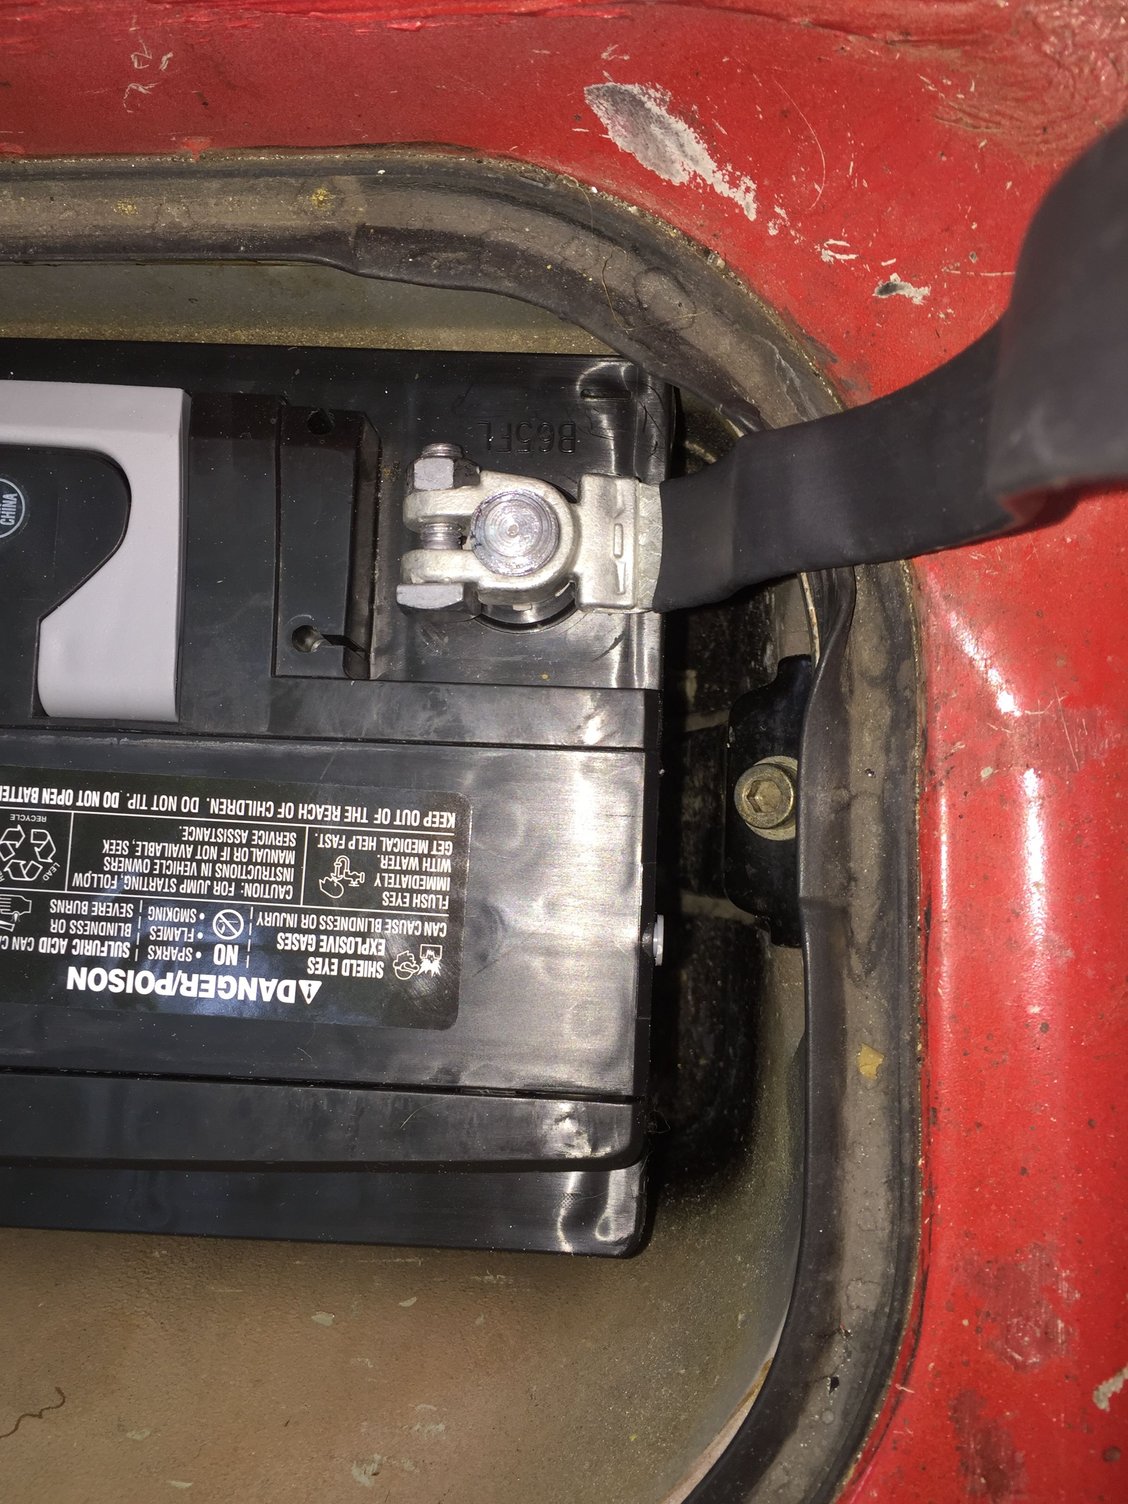
I had to work and fold the ground strap to get it to fit comfortably.
I trimmed the terminal covers so they would fit over the terminals.
So...Friday, I was determined to revisit the battery.
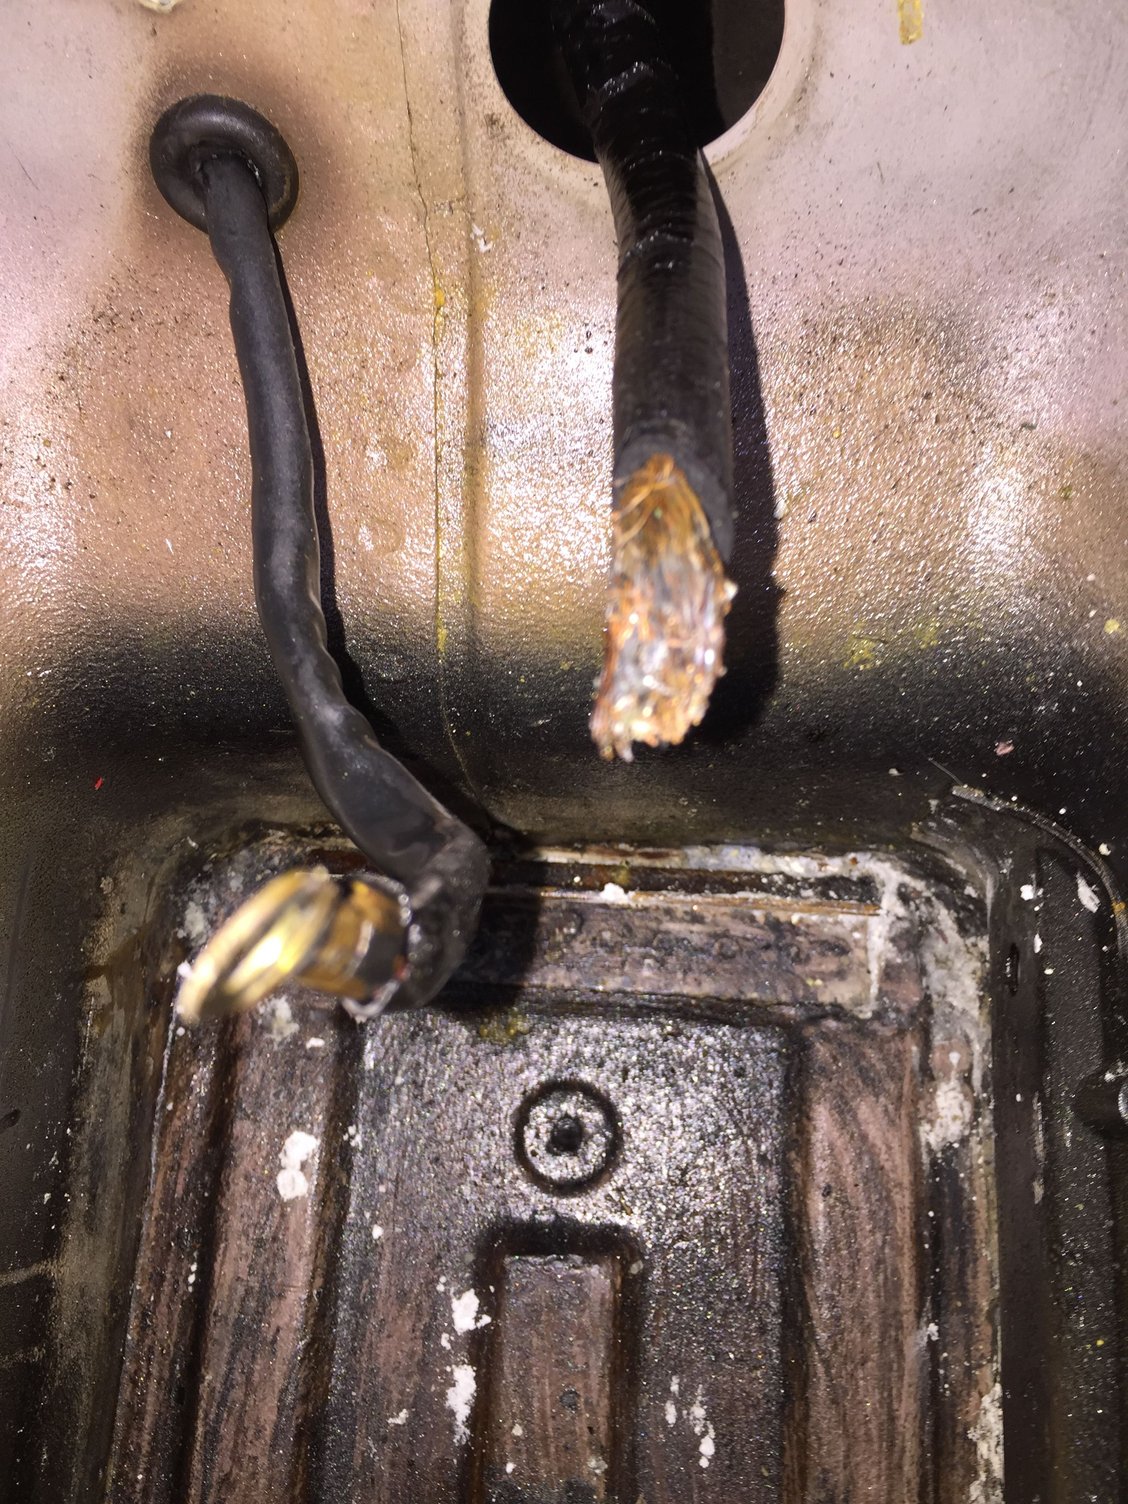
I removed the battery, ground strap, and universal lead (+) terminal. Oh the horrors I found under that terminal clamp. The copper strands of the battery cable were full of white corrosion.
Time for DeOxit D100! I spread the strands apart as best I could, then gave it hell. I sprayed probably far more than the recommended daily allowance of DeOxit D100 on that cable. You know what? It worked!!! The cable is still fugly, but relatively clean. However, there was some melted lead on some of the strands. Grrrr... The cable isn't long enough to trim back to better copper. I have to work with what I have.
As for the white corrosion that was still in the battery box...that is what a box of baking soda and several buckets of hot water are for. I got happy with a long paint brush type scrub brush. It isn't perfect, but its better than it was.
I bought a new gold plated battery terminal with a compression type connection for the cable. I cut a little insulation back on the cable to give me a little more copper to seat fully into the connection. I planned on covering any exposed copper with thick heat shrink tubing. I worked the copper strands until they were relatively smooth and would fit through the compression nut. My intent was to use the battery post as a holding fixture. I would clamp there terminal on the (+) post, then tighten the compression fitting. I was going to counter hold the terminal to prevent side loading the battery post.
Notice I said, "...was going to..." The terminal was tight on the battery post and wouldn't seat fully. I have a set of top post battery terminal spreader pliers. Very handy to have. So, I opened the terminal a little. It was still tight on the post. So, I opened it up some more. And broke it. I have a nasty feeling that was a (-) terminal for a smaller (-) battery post.
So...the universal terminal got cleaned up better and put back into service. I drilled through the threaded holes for the clamp. I reassembled the terminal with longer 1/4-20 bolts and keps nuts for a stronger connection. It is fugly, but it works. I did put anti-corrosion washers under the battery terminals.
Next time I go shopping, I will pick up a few different types of (+) battery terminals and come up with a better solution.
End result, the battery box is better than it was, but still has a ways to go.
Photos speak for themselves:
After cleaning with chlorinated brake cleaner, but before cleaning with baking soda and hot water.
(+) cable simmering in DeOxit D100.
Now I remember, I didn't take any more photos of the battery and box because I was ashamed of what I had done.
Now on a cleaning binge, and really beginning to dig DeOxit, I started cleaning electrical connections.
Here is what I cleaned on Friday using DeOxit D5:
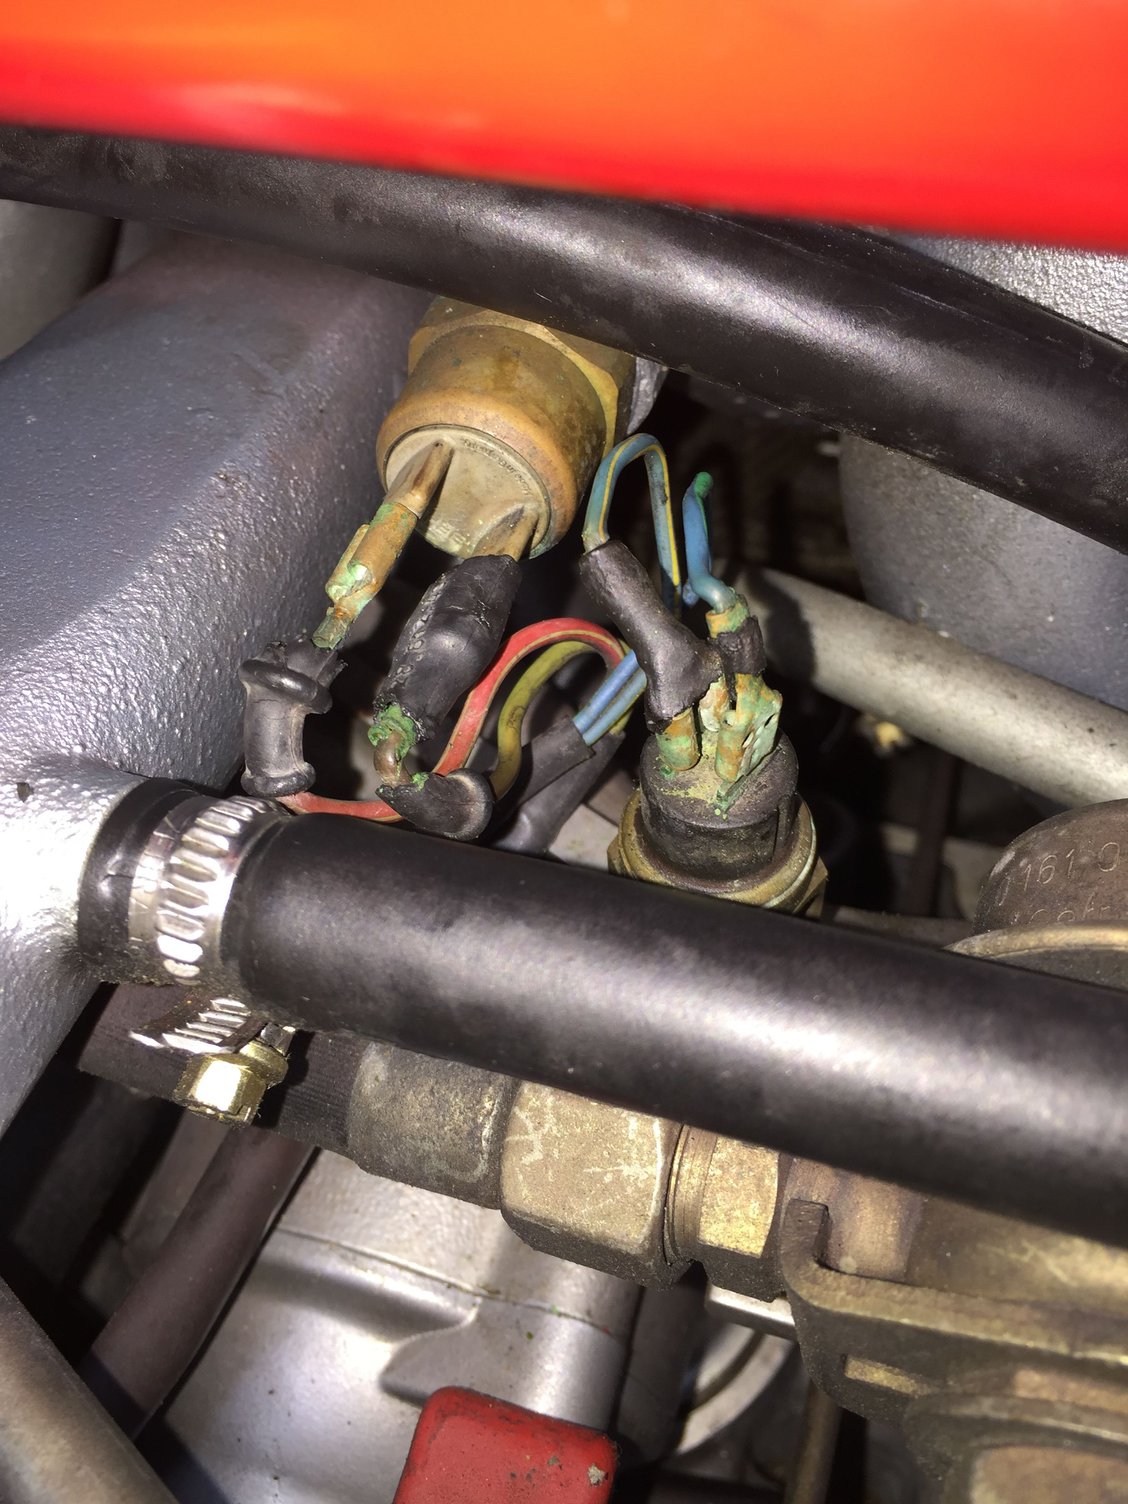
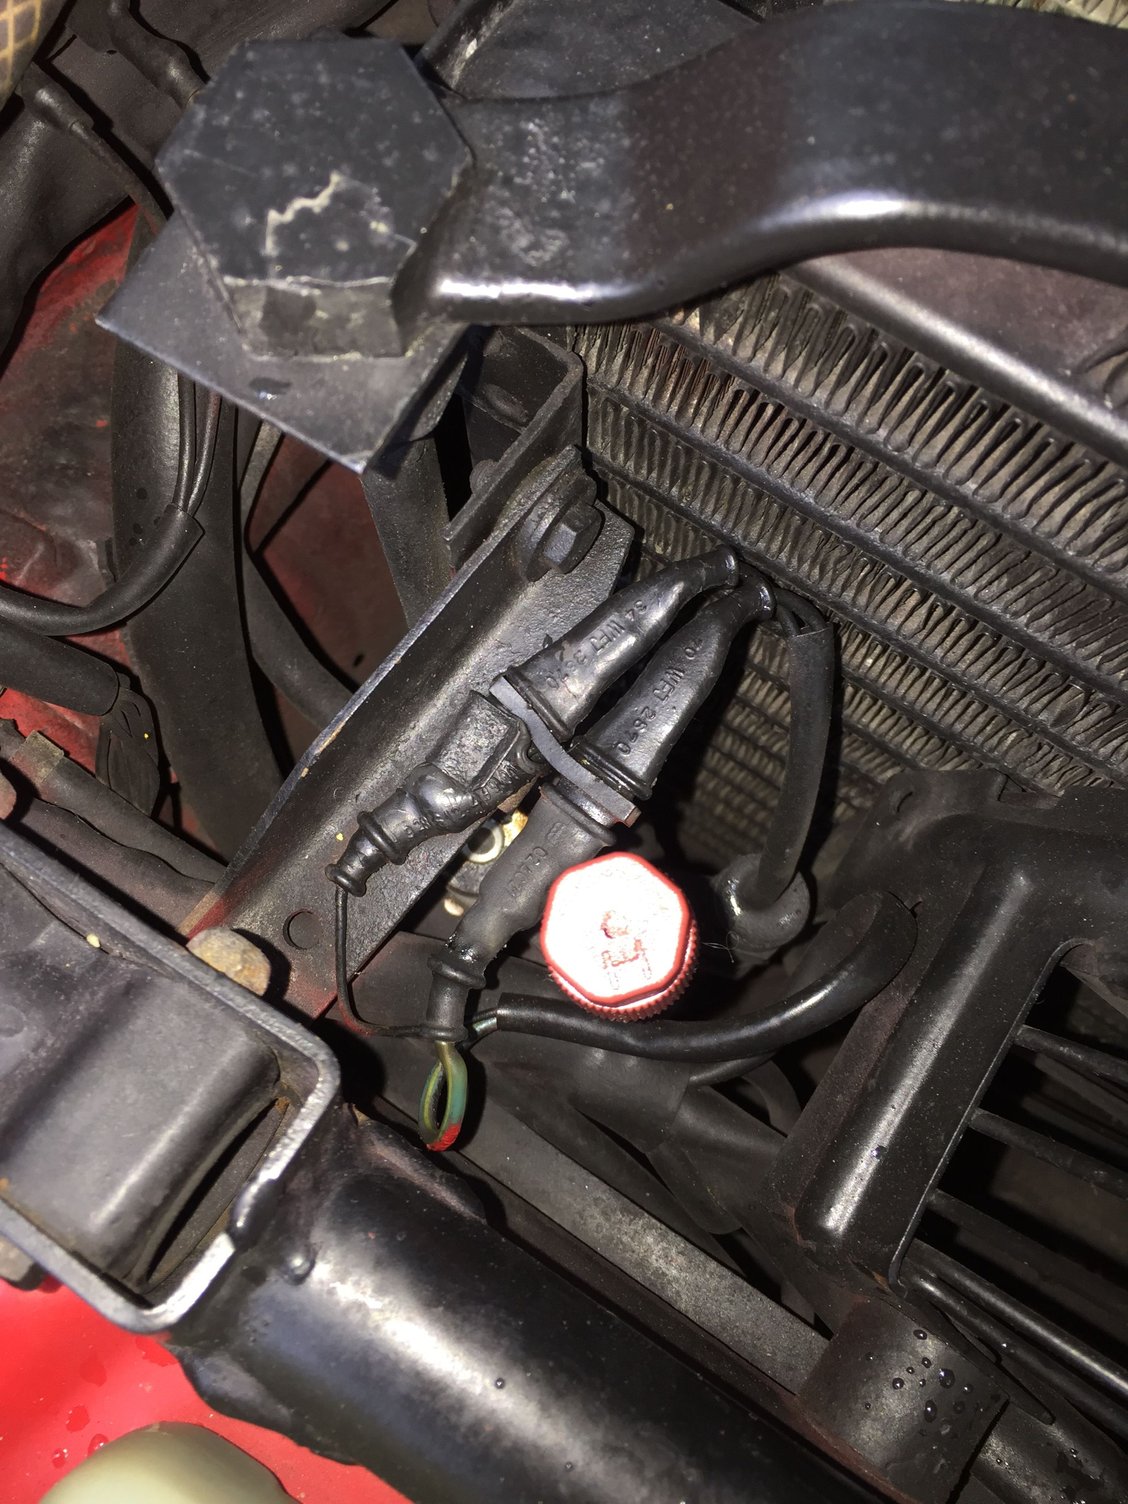
-intake manifold temperature switch above water bridge
-coolant temperature switch in water bridge.
I need to revisit these connections and clean them with DeOxit D100, then put heat shrink over the female spades, at least until I can get new boots.
-auxiliary condenser fan motor connector
-AC pressure switch connectors at receiver/drier
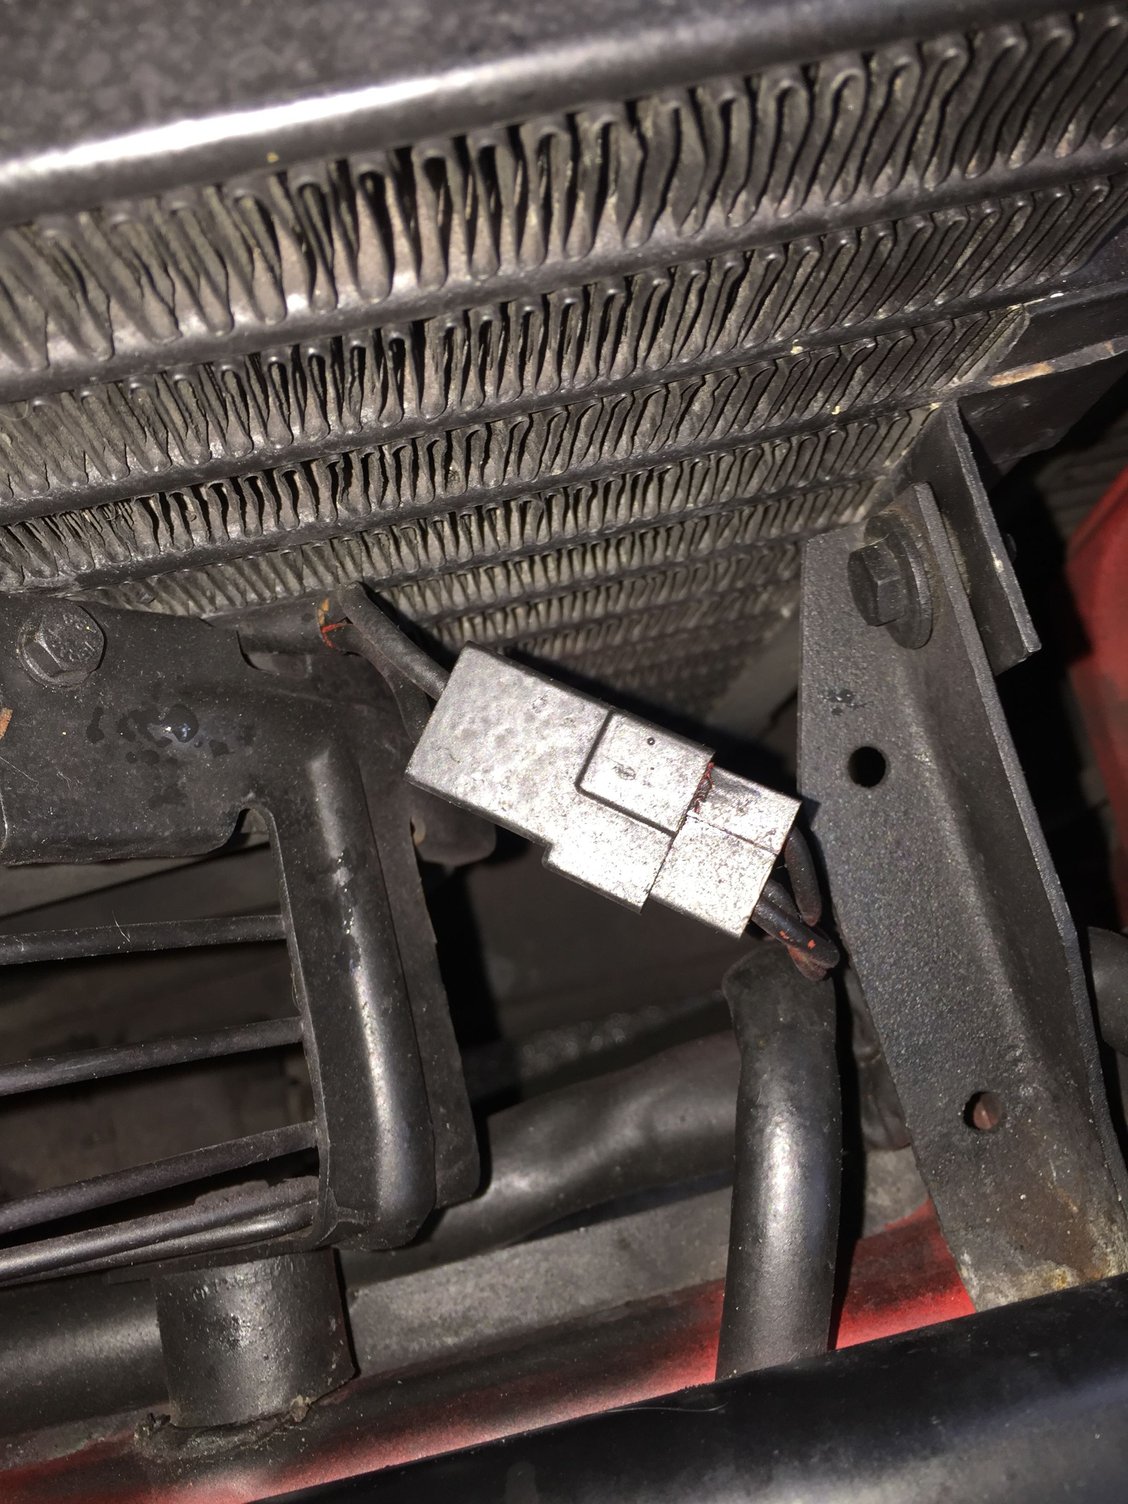
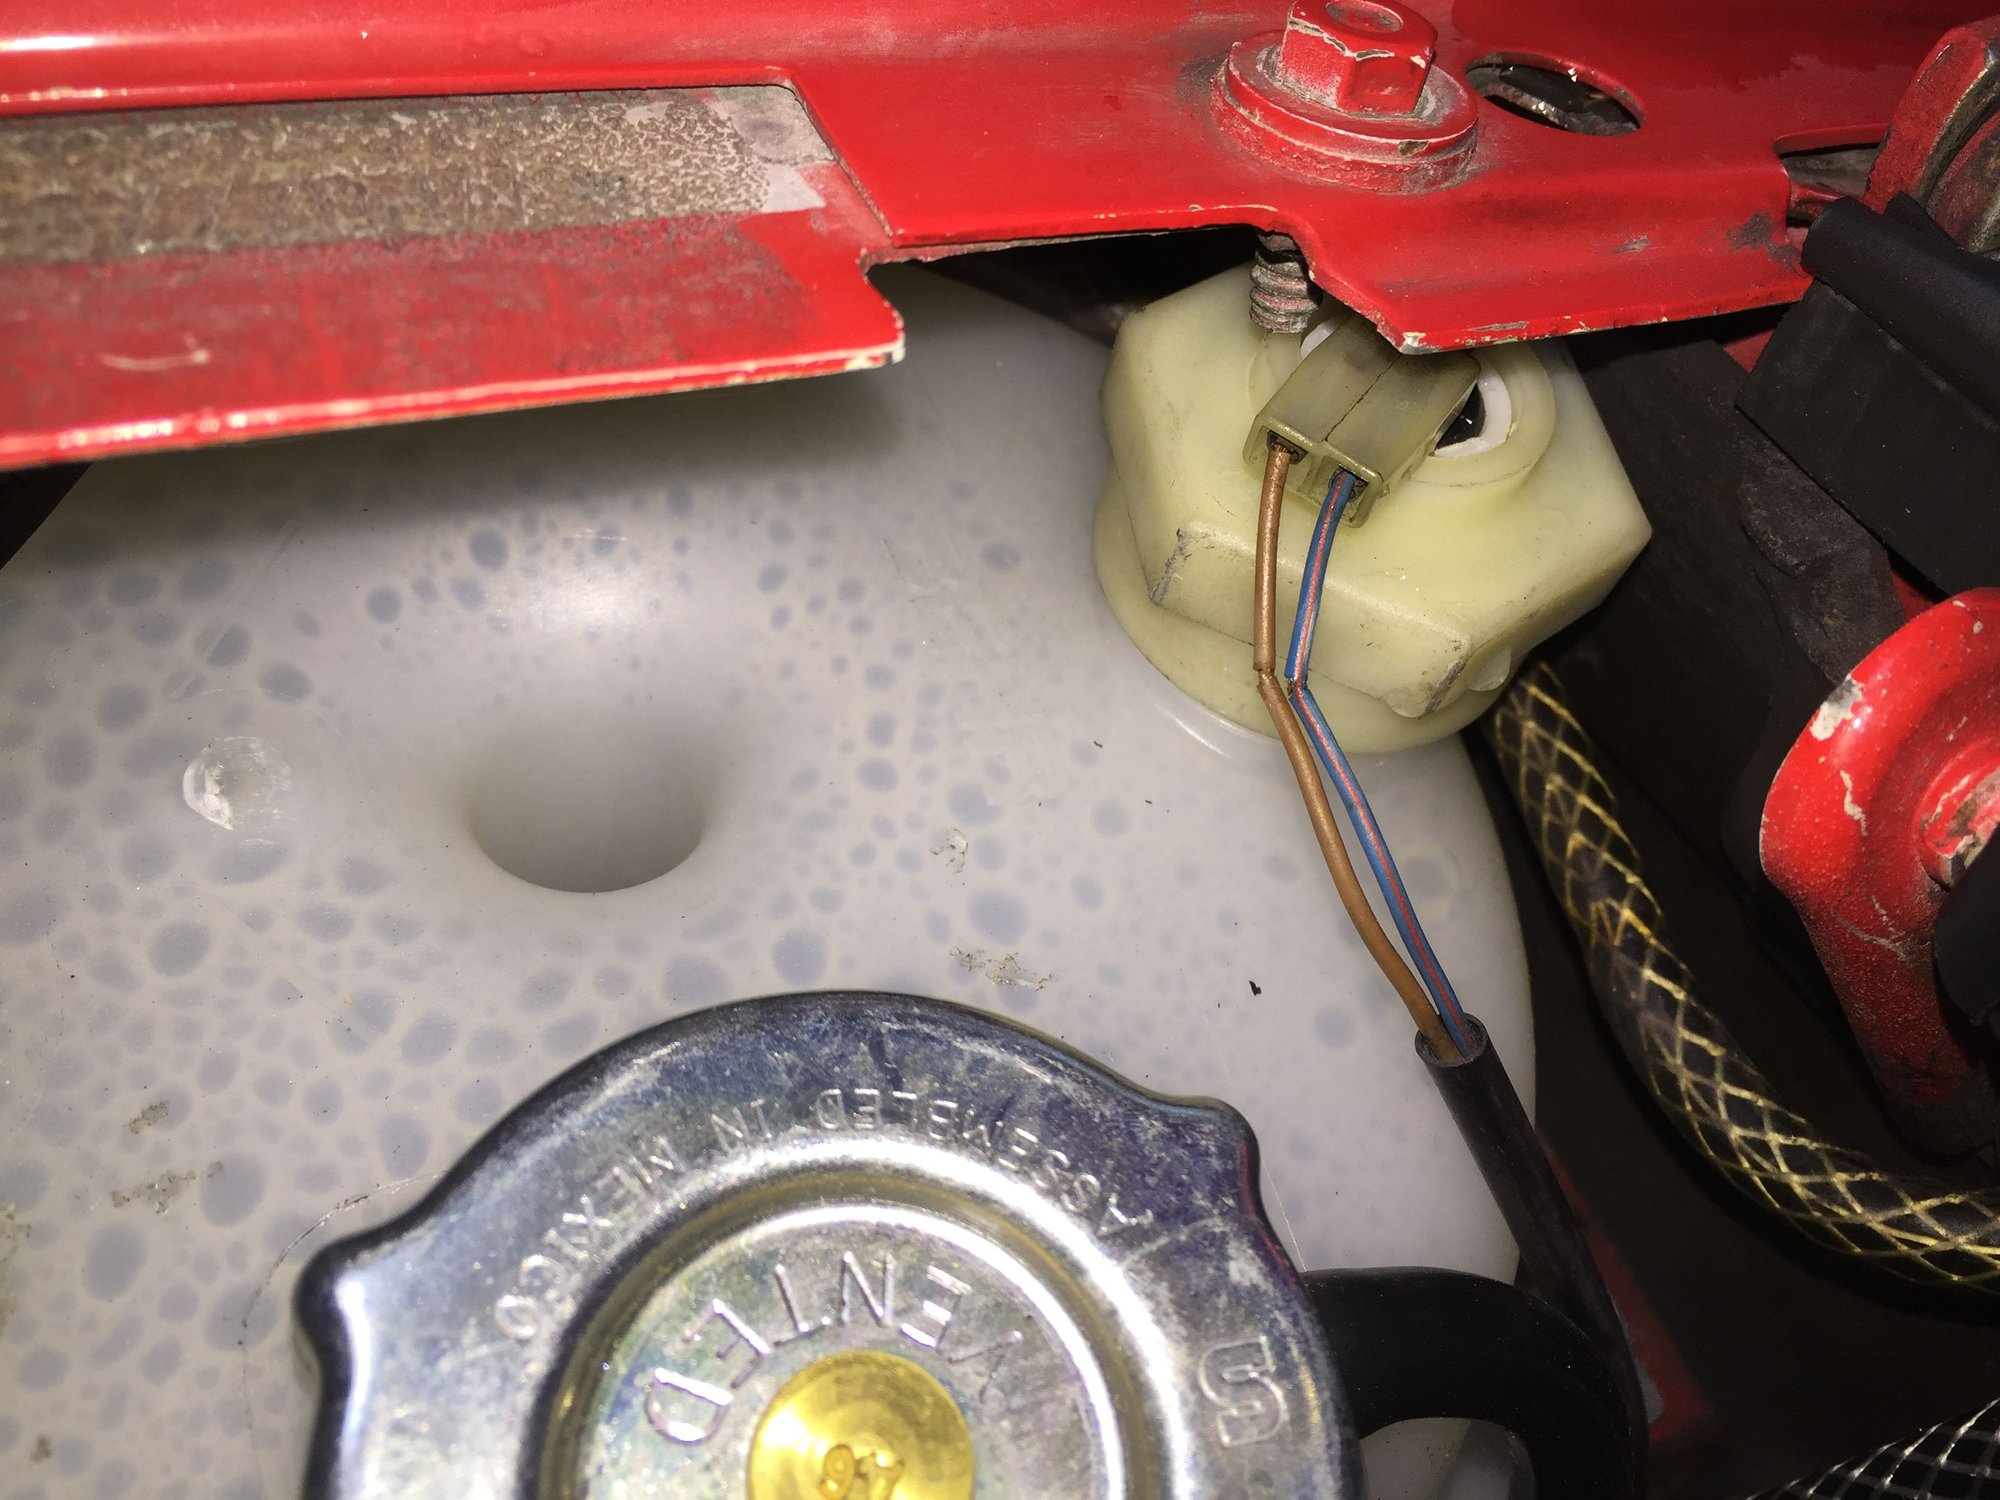
-coolant header tank level float switch
I need to revisit this as I later noted that the insulation is broken on both wires. I might need to splice both wires. This might be why I have a relatively constant (on 75% of the time) 'coolant' warning indicator on the instrument cluster.
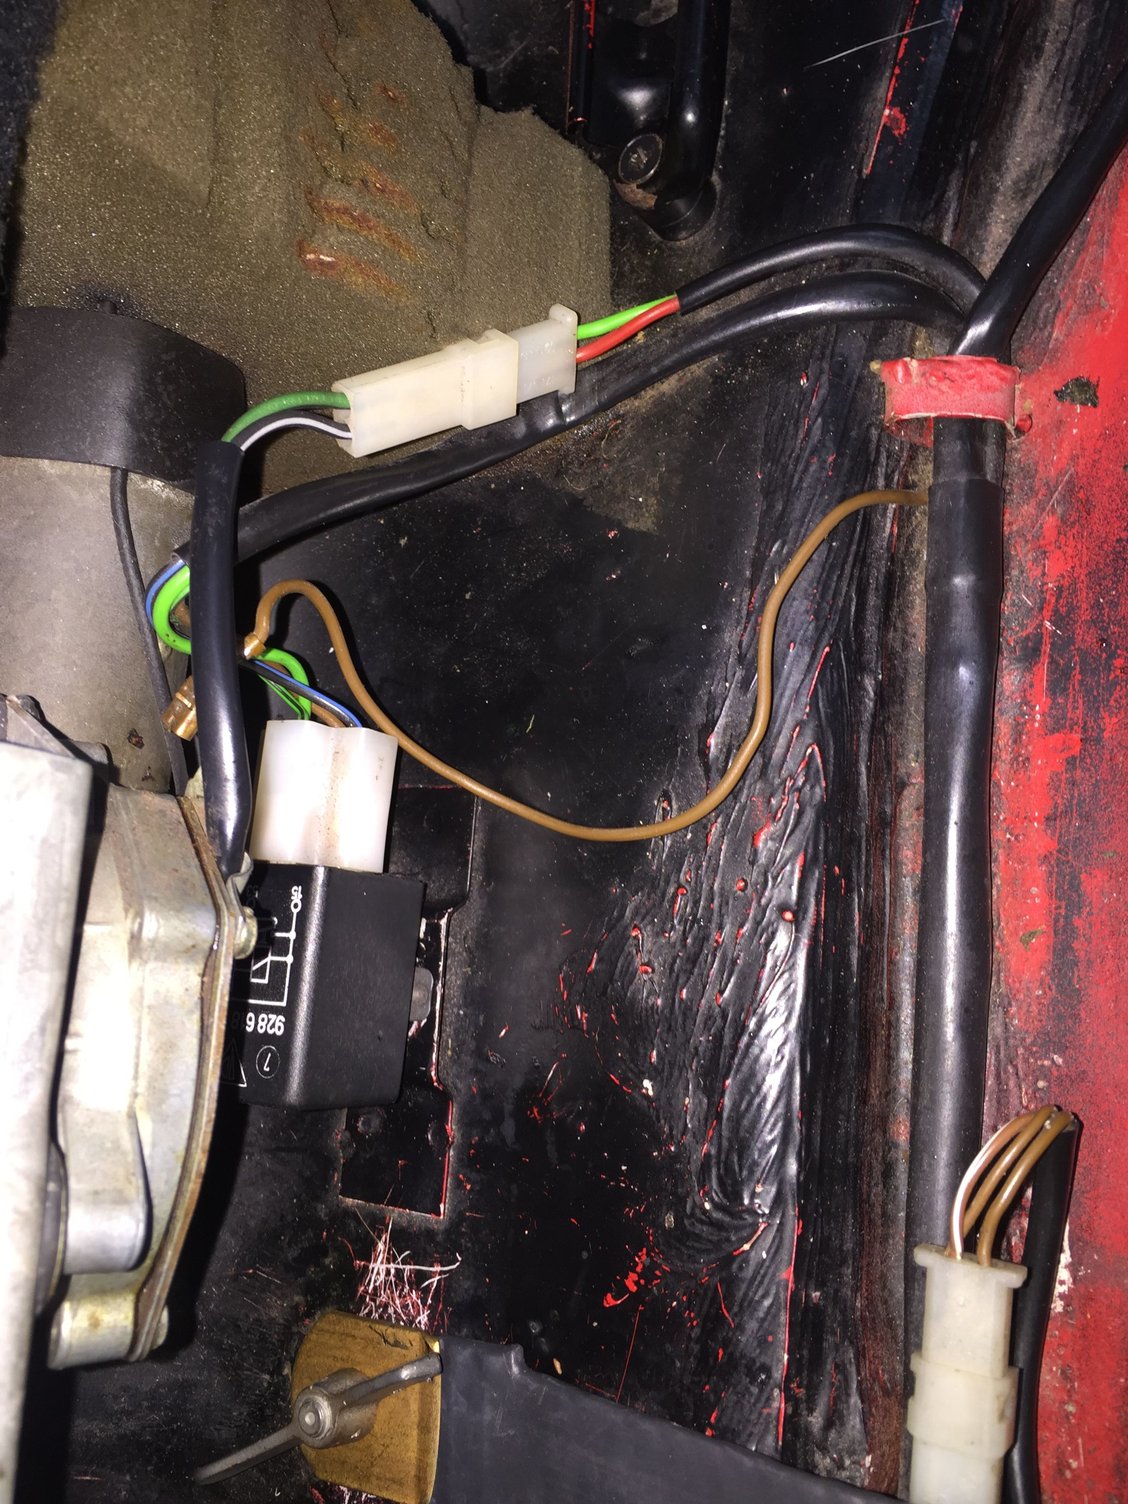
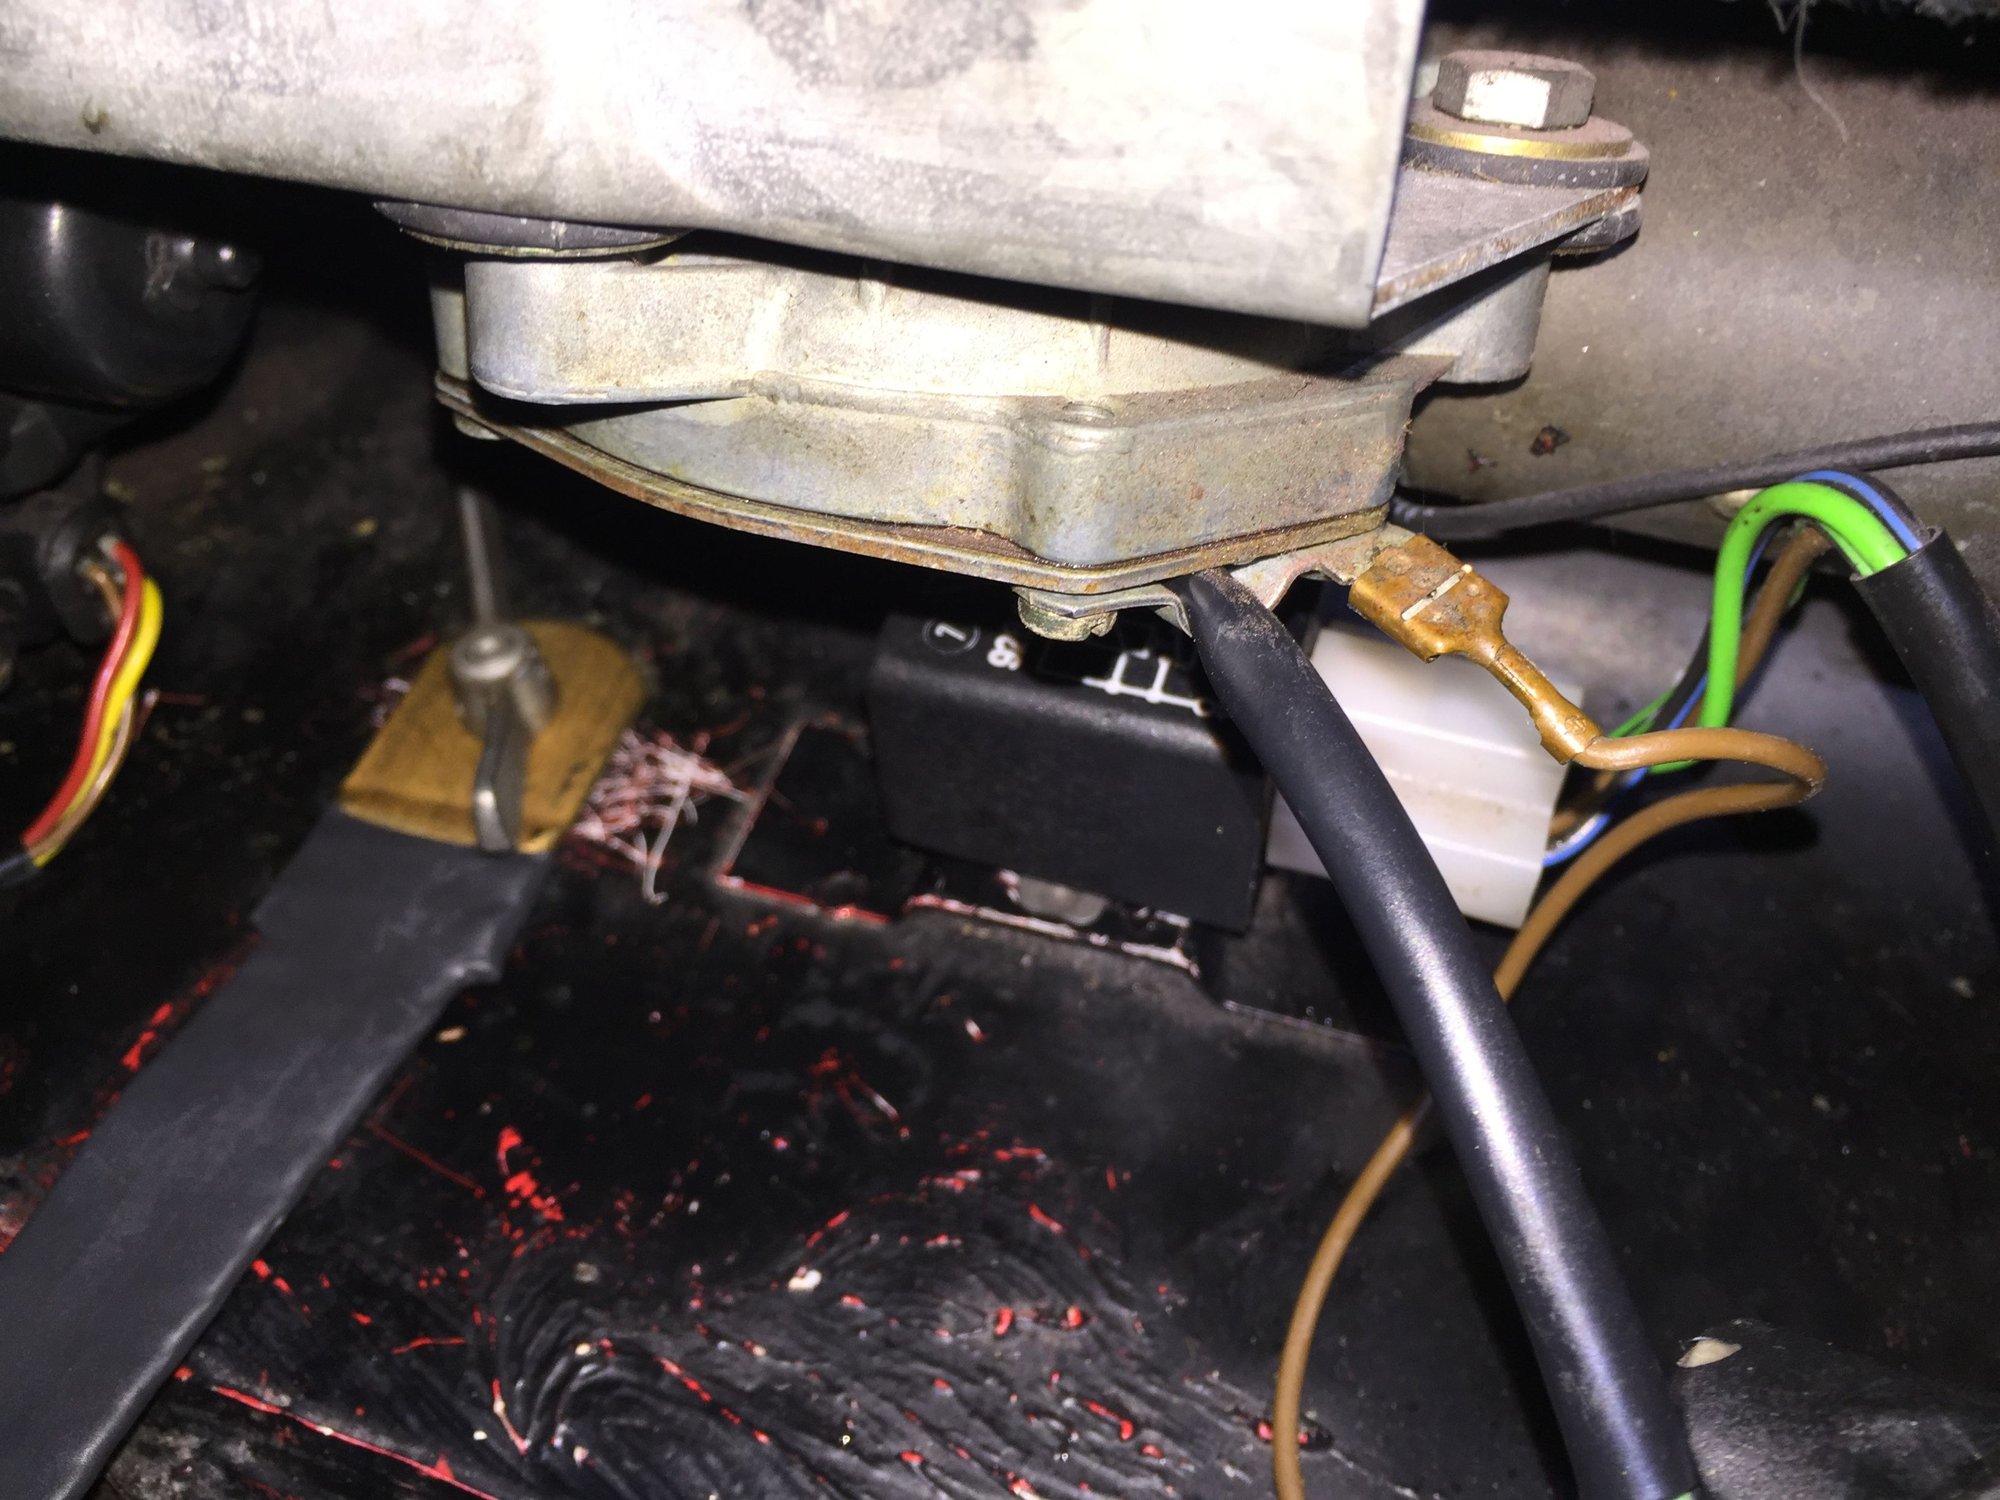
-relay in the rear hatch under the rear wiper motor
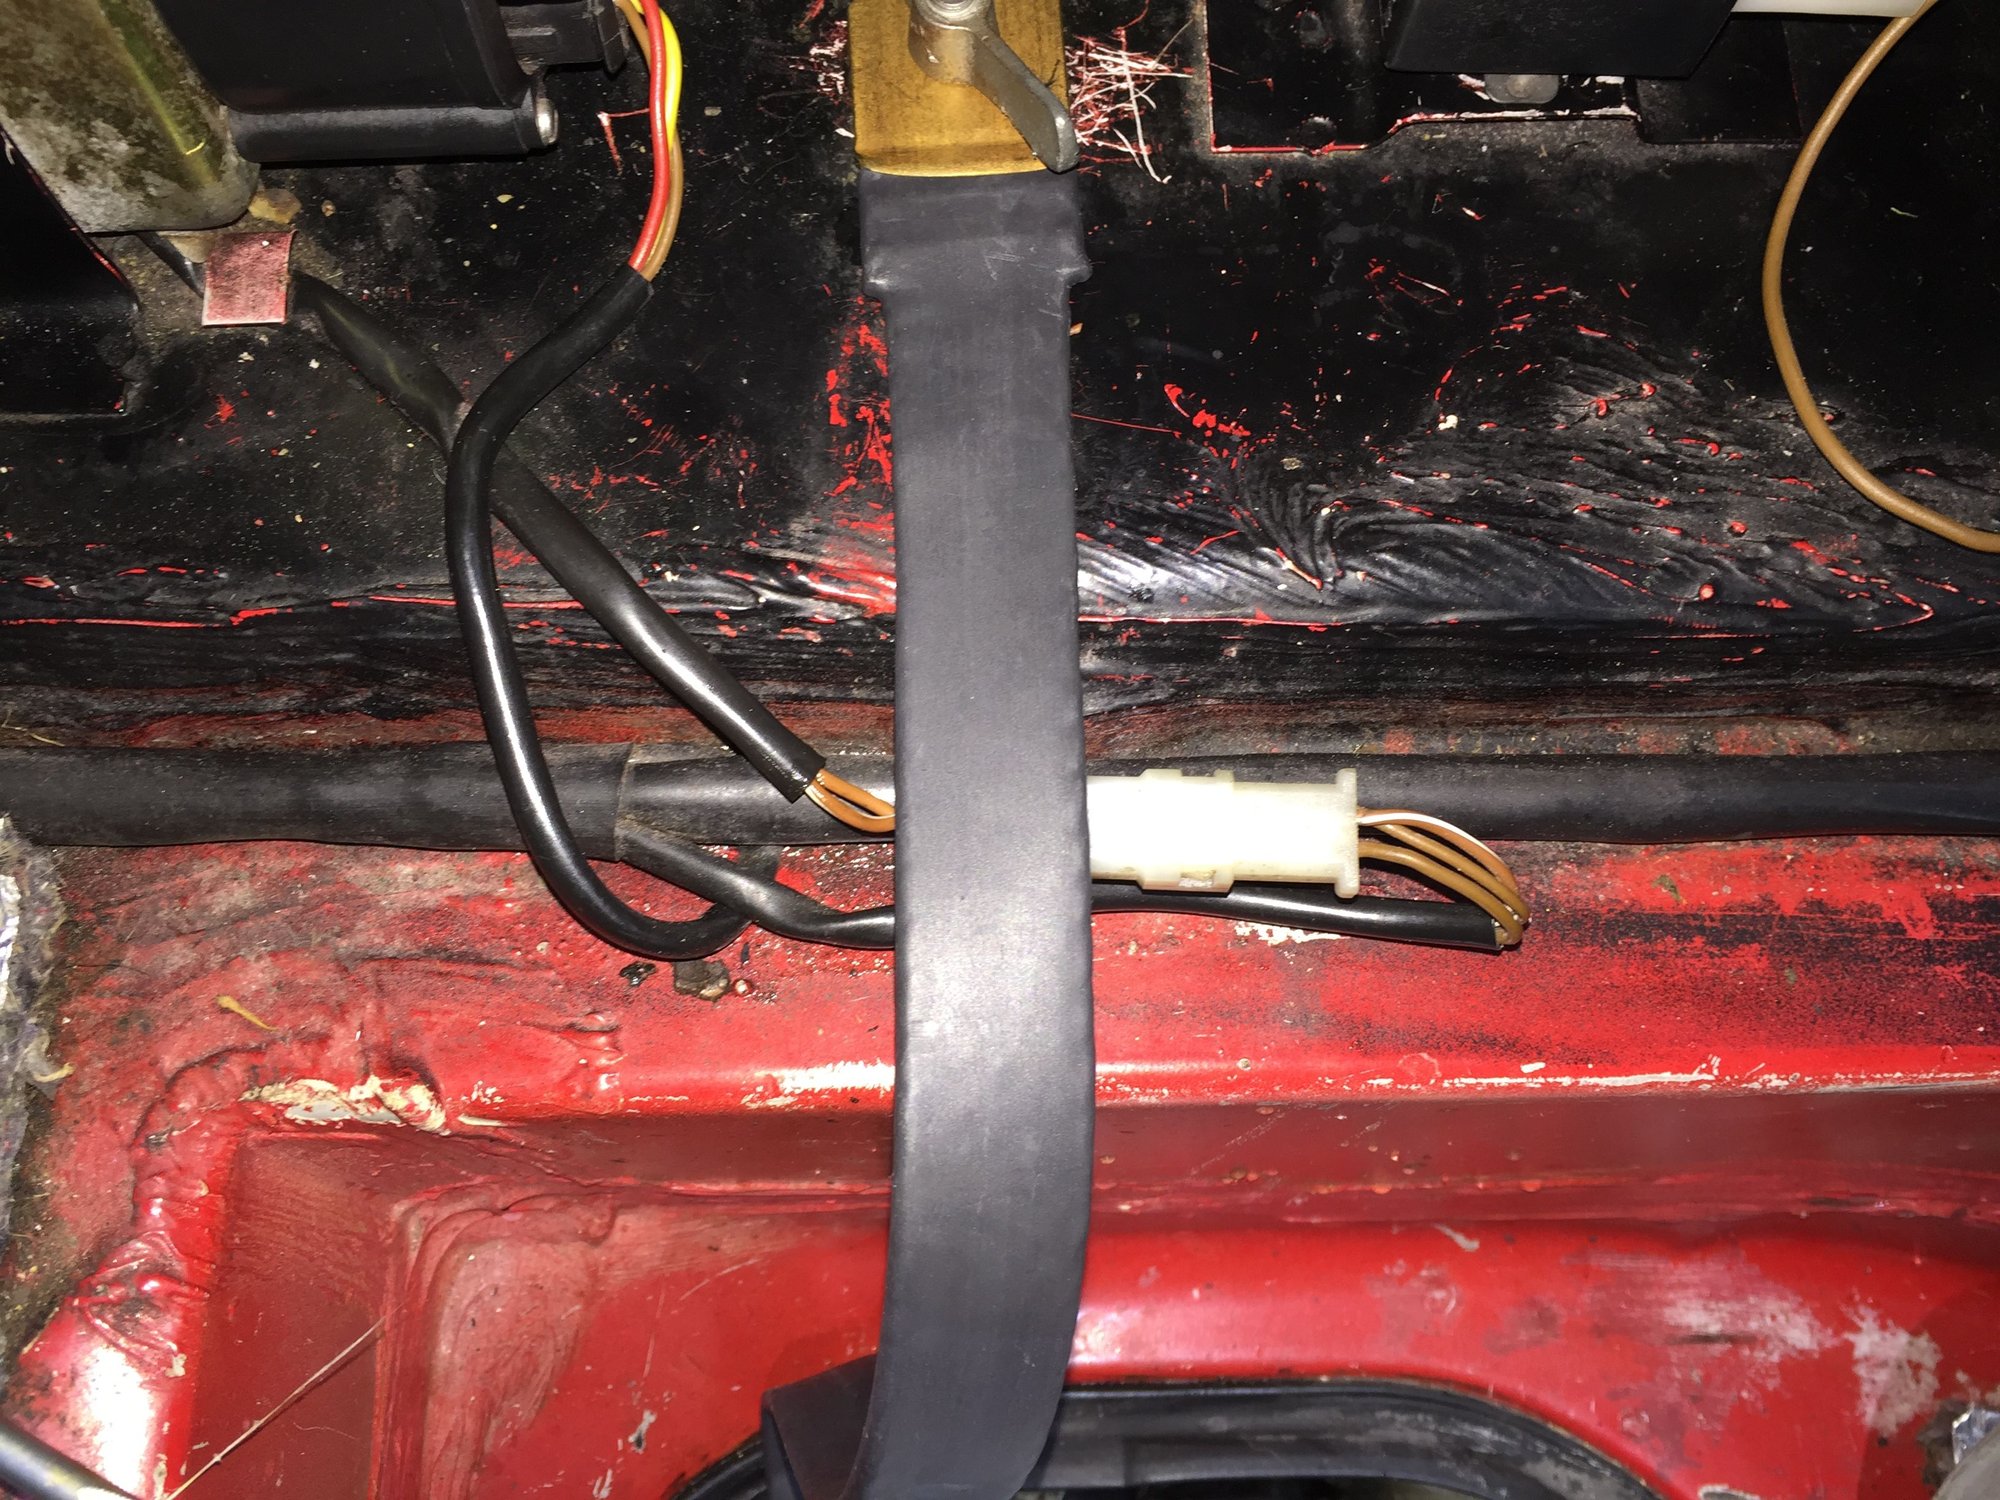
-wiper motor ground and power connector
-rear hatch actuator connector
At this point, I was getting tired, and wanted to recharge the AC before I went in for the night. I had been up somewhere around 22 hours at that point.
Photos:
This is AFTER cleaning. I will be back in there with DeOxit D100. Question: The brown center section of the intake manifold temperature switch (horizontally oriented switch in this photo) would turn while I was working the female terminals off the spade connectors. Would that mean it is broken? The engine ran fine Friday night, Saturday night, Sunday, and to/from work last night. Should I look into replacing it anyway?
Note the breaks in the insulation.
What is this relay?
The screws were loose on this plate on the bottom of the wiper motor. I tightened them then cleaned the ground tab.
OK, that wraps up Friday's work. I need to be in bed now, so I will work on this thread tonight. Still have to cover Saturday AND Sunday...
Looks like you are off to a flying start! New owners of the cars would do well to note all the "casual stuff" that needs attention, even on a well-kept car that came from a recent pre-purchase service session.
The deoxit works well on stuff it touches, but the vapors from the battery migrate up the strands. So you probably know already that a new positive cable is in your immediate future.
I have yet to see a 928 that had a battery vent tube installed from original. So corrosion is too common. When I got the car (long ago and very low miles) I fitted a vent tube that exits next to the positive cable in the grommet, then routes down between teh heat shield and the battery well to end an inch or so below the bottom of the box. Kind of a battery 'road draft' tube.
---
I know a lot of folks are enamored with brake cleaner as a universal cleans-everything product. I'm not. It has the potential to do a lot of damage to painted surfaces (as you've found), any plastics it touches, and most seriously to the user. It has the potential to cause nervous system problems, even in the non-chlorinated versions. It's extremely fat-soluble, so it passes pretty effortlessly through skin. Vapors go through the lungs to directly to the bloodstream, and through the eyes to optic nerves and the brain. So unless you are working on something that needs the special solvent properties that brake-cleaner offers, find something else, water based, with less toxic fumes. [/rant mode]
Hello dr bob! Thanks for replying! In my world, NO project is ever done. There are always things to be dealt with, large and small. Just because the Red Witch passed her PPI, doesn't mean she is issue free. I am just trying to learn the lessons of others.
Big thing is electrical issues on a 928. So, I am starting the process of cleaning all the connections and ground points. Little by little...
That (+) battery cable definitely has to go. I am going to research replacement options. I like the 'bigger is better' mentality when it comes to battery cable. My project truck is strung with battery cables from a Class C motorhome.
Oh...I thought 928's had a vent tube. Good to know. On yours, what kind of tubing, and what size, did you use for the vent tube? I like your routing idea.
Yeah...I am an offender. For years I have had my own personal hole in the ozone layer above my workshop. I don't necessarily use brake cleaner as a universal cleaner. However, I am not afraid to use it for cleaning metal and/or machined parts. I won't assemble anything precision without a thorough cleaning.
I have used brake cleaner with gay abandon for decades. It is only in recent years that I have been more careful about ventilation, safety goggles, respirator, etc... I have always worn protective gloves of some kind. Learned that lesson working with chemicals in the engine rooms on naval vessels.
In this instance, I chose brake cleaner because I wasn't sure what else I had that would deal with the corrosion. I don't think the paint was very good, or it was already softened by the battery fumes. In my experience, brake cleaner hasn't been bad on properly cured automotive paints (meaning underhood and drive train, not body.)
However, I have been reading your posts for a couple of years now and have taken notes on some of your cleaning methodologies. Good to learn.
Rant understood and accepted. Thanks for yor time and experience!
I awoke to a beautiful, sunny Saturday morning. My intent was still to overhaul the AC system. As such, I removed the cross bar, intake tubes, complete air cleaner assembly, and the cowl cover. This gave me a good look see at the back of the engine.
It all looked more or less OK, though there is some slime and grime living down in the valley. It didn't look fresh. I will deal with that when I pull the intake to rebuild the MAF prior to going the S300s chip upgrade.
I poked and prodded, it was all very interesting. As far as I can tell, the fuel lines seem OK. I am still going to replace them in the near future.
At this point, as documented in my AC kaput thread, I had given up on overhauling the AC. So, I moved onto other things.
I noticed that the PS fluid had a red tint in the reservoir, but was brown on the paper towel. Time to change. I have all the crush washers to R&R the hoses, just not the desire at this moment. I will settle for draining and refilling the reservoir several times. I used my vacuum oil extractor to pull as much fluid from the reservoir as I could. I noted no debris in the reservoir, just a little grey film at the base. Not bad. I have a new reservoir to go on. Probably when I overhaul the AC/check belt tension/do the ignition system service.
Anyway, I refilled the reservoir with approximately 8oz of NAPA Dexron III ATF. I will do this drain/refill process as many times as necessary until I am happy with the fluid.
Going back to the electrical work, I got started cleaning connections again. I cleaned all the connections under the cowl cover: blower motor, freeze switch, hood light, and wiper motor. All of the connections looked good and corrosion free. Again, lots of DeOxit D5.
I next cleaned the ground point near the headlight motor. It wasn't corroded at all.
I bit the bullet and went into the infamous 14-pin connector. I freely admit to not knowing how to get that connector apart. To Rennlist! Using two small screwdrivers, I was able to gently pry it apart. To my relief, there was very little corrosion. All the male and female pins looked good. There was no deterioration of the plastic halves, either. I pried the backs off the halves. There was very little corrosion in there, as well. The only thing I saw noteworthy was a little heat discoloration on the larger yellowish wire in the female pin side. It did not look too bad. Also, the wiring harness did not look too bad. However, I did not test my luck and flex the harness to see.
I thoroughly cleaned all parts involved with DeOxit D5. Good stuff!
The new jump post cap did not fit due to an add-on wire under the jump post. The ring terminal had a big plastic end that prevented the cap from seating on the jump post. I traced the wire and found a quick disconnect pig-tail for a trickle charger. SCORE! I reterminated the (+) wire with a more suitable ring terminal. Now, the jump post cap sat properly on the jump post. I reterminated the (-) wire for the pig tail under the mounting bolt for the right radiator mount, using toothed lockwashers for good conductivity.
Even though I gave up on the AC overhaul, I still wanted to do something productive on the system. I wired in a relay for the compressor clutch. It is a generic Bosch style 30A SPDT relay. I fed it with a 10A fused wire from the jump post. It feeds down to the compressor clutch wire. The relay is triggered by the original clutch wire, and grounded through its mounting bolt. I used toothed lockwashers under the ring terminal and the relay tap to ensure good conductivity. I wired the feed and trigger wires to the car wiring using spade terminals so as not to damage the car wiring.
The relay is mounted to the bracket for the underhood plunger switch at the passenger's side fender, behind the cross bar mount.
This relay will take the heat off the little blue relay on the HVAC controller. I have the relay to do the upgrade mod, but will do it in due time.
While I was at it, I wired in a 5A fuse for the freeze switch. I couldn't remember if this was still necessary since I had wired in the clutch relay. However, it can't hurt, and is plug and play using spade connectors.
I wrapped up Saturday's work by replacing the air filter. Sometime in the past, the PO had fitted a K&N filter, part number 33-2591. I am not a fan of K&N filters, so it had to go. This filter is currently for sale. I did note that the filter did not appear to have been over oiled. The media was not shimmering in oil. There was not a film of oil in the lower air box, nor on the MAF inlet screen. I replaced the filter with a new Mahle LX-311 stock filter. Again, I freely admit to being confused. I could not figure out which way to install the filter. There were no arrows. To Rennlist again! I figured it out. Curved section up, tabs down on the lower air box.
After awaiting yet another pouring storm to pass, I reassembled everything. I finished up by joyriding and showing off to family. A good time was had by all.
In these four photos, the connectors are wet with DeOxit D5.
Added compressor clutch relay next to the infamous plunger switch.
White is heat shrink tubing as an extra layer of mechanical protection to the compressor clutch wire from the relay. You can see the red male spade connector and orange wire down low.
I should put heat shrink on the top ring terminal to cover the exposed crimp.

 05-23-2016, 06:23 AM


 I got happy with a long paint brush type scrub brush. It isn't perfect, but its better than it was.
 I have a nasty feeling that was a (-) terminal for a smaller (-) battery post.