When you click on links to various merchants on this site and make a purchase, this can result in this site earning a commission. Affiliate programs and affiliations include, but are not limited to, the eBay Partner Network.
DR explained the (cord) rope trick to me at at the '14 SITM and it worked like a charm. He had a tweak or two IIRC so might be worthwhile contacting him if problems persist.
For those that haven't had the pleasure, here's the profile of the trim pieces, and the shape of the underside of the corners.
Trim piece cross section, and 'spine':
The trim pieces got powdercoated, we wondered maybe whether the heat may have warped these a bit and that's contributing to the issue?
The corners are _only_ held on by their grasp on the main trim pieces.
Here are the ends of the channels for the main trim pieces, in our case you can see how they 'gap' a little bit- We can get the assembled trim pieces to sit in the seal channel on the window when sitting on the table, but the distortion of the assembly when installing causes the ends to pop out of the gasket.
The white is P-80 Thix assembly lube- it may be counterproductive in this case, not sure.
We have been starting by installing the window and seal into the forward corner, as it has the tightest radius, but I'm wondering whether we should just place the window in on the bottom edge, and work the corners in, as maybe that would keep compression on the ends of the channels?
Probably guilty of overthinking this but it is frustrating!
To me...it looks like the groove is twice as wide just before the corner. Groove seems much tighter/narrower about two inches forward. Lube is probably not helping at this point.
Don't know if you could possibly, very carefully, after removing all lube, reshape the groove with a heat gun? Heat mildly, squeeze slightly, let cool?
Just thinking out loud...
Brian.
Last edited by The Deputy; 04-07-2016 at 06:04 PM.
Agreed that the lube is counterproductive at this point- I think the next step is to pull the windows, clean the channels, assemble with trim on the bench, and carefully re-install. No lube in the channel to get as much purchase on the trim tang as possible.
The powder coating fattens up the parts so that might be your problem. Try installing an original part as a test to see if the coated trim parts became "too fat".
Good thought, we were thinking about that too- possibly the powdercoating made the pieces too 'fat' or the heat distorted them. Will see if we can test fit some non-PC'ed pieces to check that idea.
Dr. Bob provided the excuse for a new tool- behold the Sunex 284319, in blingy pseudogold:
For those playing along at home...
I went the "other" way. Mark (and others...) sell a plastic-lined wheel-nut socket that doesn't mar the finish on the lug nuts. It's something like a 13/16 or 7/8 socket with a plastic hex insert with 19mm innards. A trip to Fry's netted a stick of white shrink sleeve that fits over the socket, easy to write the size on with a marker. I trimmed the sleeve after heat-shrinking it, so it hangs over both ends of the assembly. That keeps the plastic sleeve inside, plus it pads the front corners of the socket. No hard impact-wrench duty for the plastic-lined version, so no issues with a properly lubricated and torqued wheel nut.
Rob ... looking at the pic of the rubber seal in the corner, it looks like it is sitting up, and not seating fully into the corner. If that's the case, it could be that the rubber is too 'fat/distorted' at that point and is not allowing the trim piece to sit down properly. Looking at that same corner, it looks like the seal is 'pulled' around the corner by too much pull on the top, which could contribute to the seal not properly seating in the corner.
When I've fitted windows I've found it vitally important to ensure the corners of the seal aren't pulled around the corner of the glass, so that they seat properly in the opening, and that the seal has a straight run up to the corner. If those runs up to the corner aren't straight it makes the trim want to move off a straight line and take the corner piece with it. I've marked a few straight lines to illustrate what I'm rambling on about.
Could be my wild imagination, but I'm just trying to grasp at a few straws for you. I've been down the same path myself on lots of occasions and feel your pain .... I found swearing to be very therapeutic BTW.
Struggled some more with the quarter windows today, got closer but there's no amount of trickery that'll keep them in 100% the way around. Will leave it to the pros...
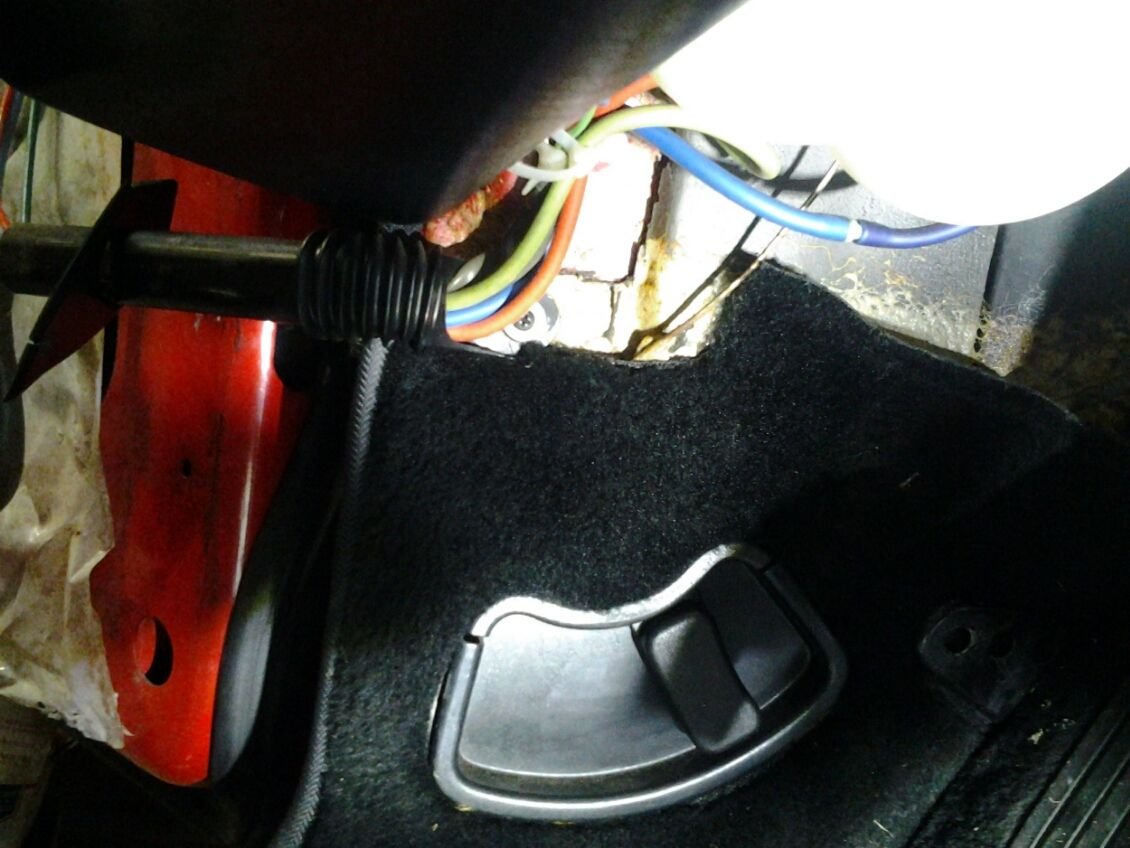
I have a billion pictures, but overlooked taking a shot of the screws (?) that hold the door wiring harness tubes to the body just forward of the door openings. Anyone got an idea of what holds them on?
I have a billion pictures, but overlooked taking a shot of the screws (?) that hold the door wiring harness tubes to the body just forward of the door openings. Anyone got an idea of what holds them on?
It's been a few months since I messed with my guide tubes (928 555 551 02, thinking Sept of last year), but IIRC it was pretty straightforward. A nice trim screw with a washer at the screw head, going into the body panel, and it secured nicely.
I think it goes right into what appears to be the hole in the foam.
Even though, it was 25 degrees and five thirty on a Sunday morning...I braved the brutal elements and risk the lack of sleep loss and its effect on aging to produce this picture.
Yes, now, there will be a nap commencing at about noon...(granted, one was probably going to happen anyway...lol).


 04-07-2016, 12:00 PM