My garage Reno and lift install
 04-03-2013, 10:27 PM
#31
Love my Race Deck 
 04-04-2013, 12:00 AM
#32

 04-04-2013, 12:15 AM
#33
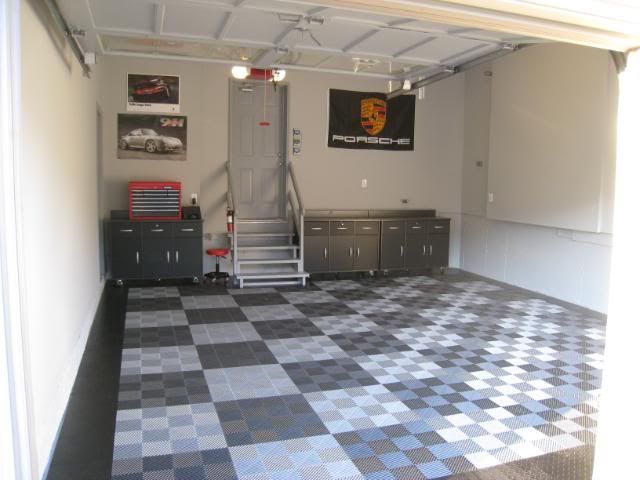
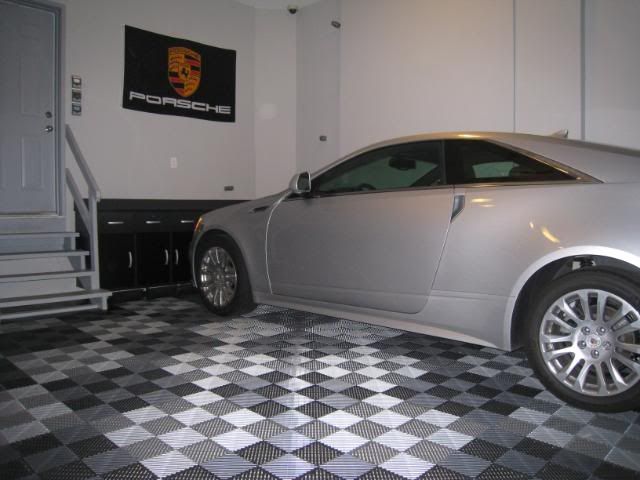
Race Deck free flow...I recommend this if you are parking your DD in the garage during the winter . I had the solid Race Deck and found that the water accumulated under the tiles if it was cold. The free flow tiles allows the water to dry quickly and all the grunge falls underneath. A quick hose down in the springs washes the crap away. Join garagejournal.com and you'll get a 15% discount from Race Deck. Also, ship to CBI or UPS in Buffalo and get free shipping. I think my two car bays cost me about $1,000.
A fellow on garage journal used the costco mat flooring and found it covered in mold on the backside after one winter...
I have my 4 post lift sitting where the Caddy is, but I don't have a pic handy of it. Sits right on top of the Race Deck without any problems.
A fellow on garage journal used the costco mat flooring and found it covered in mold on the backside after one winter...
I have my 4 post lift sitting where the Caddy is, but I don't have a pic handy of it. Sits right on top of the Race Deck without any problems.
Last edited by Onami; 04-04-2013 at 12:33 AM.
04-04-2013, 08:31 PM
#34
Race Deck free flow...I recommend this if you are parking your DD in the garage during the winter . I had the solid Race Deck and found that the water accumulated under the tiles if it was cold. The free flow tiles allows the water to dry quickly and all the grunge falls underneath. A quick hose down in the springs washes the crap away. Join garagejournal.com and you'll get a 15% discount from Race Deck. Also, ship to CBI or UPS in Buffalo and get free shipping. I think my two car bays cost me about $1,000.
A fellow on garage journal used the costco mat flooring and found it covered in mold on the backside after one winter...
I have my 4 post lift sitting where the Caddy is, but I don't have a pic handy of it. Sits right on top of the Race Deck without any problems.
A fellow on garage journal used the costco mat flooring and found it covered in mold on the backside after one winter...
I have my 4 post lift sitting where the Caddy is, but I don't have a pic handy of it. Sits right on top of the Race Deck without any problems.
04-14-2013, 10:49 PM
#35
Rennlist Member
Thread Starter
Getting closer and closer.
As far as the floor, I think I'm just going to leave the slab as is. Owning a 28 year old P-car there is always at potential for leaks, plus I'm a bit clumsy and don't want to get OSD over my floor.
Today I tore down the ceiling, cut out all of the framing and removed tons of foam insulation so I could get to the joists. I will be putting a vapor barrier up just in case I compromised some of the foam by ripping out a good helping.
I will also be moving the one cold air return that you see right in the middle, it's going to run in the joists and then down and along the top of the wall on the right side.
Next weekend I will tackle the framing in of the hvac bits and hanging of the drywall.
My poor 928 is calling me!
Last edited by Adamant1971; 04-14-2013 at 10:59 PM. Reason: added pics
 04-19-2013, 01:06 PM
#37

I had a company come out today and quote Epoxy, it came at $550 if I do some of the prep, $200 more if I do nothing. They showed me photo's, nice work.
They suggested that they do it after my lift is installed, but I'm concerned about moisture getting trapped under the base plates as the Epoxy will create a lip around the base plate. I'm going to ask Direct Lift what they would recommend, before or after.
I'm still not sold on any one option, they are:
1: Versa roll from Costco. $380
2: Epoxy $550 +
3: Fast Flor (or Similar) $550
4: Just clean the concrete and nothing else $0
?????
The modular tiles specially the ones with the drain was the option that really caught my interest but after pricing it out I kept looking around. Costco got rid of their g flooring, same idea as versal roll and had them on sale. Per roll was $115 with tax I think it was 7.5' by 19' got two of those and called it a day. Love it! For the price it was a no brainer for me. This material comes with a 5 year warranty and I will pull it out at least once a year to clean underneath just in case. I did bring up the mold issue but looks like if your cement is sealed it should solve that.
Can't wait to see your finished product.
04-22-2013, 08:06 PM
#38
Rennlist Member
Thread Starter
One week to lift install and lots of work to do. I did a 14 hour day yesterday on it and a couple today. Sore as hell.
This weekend I will be finishing up the drywall, mudding and hopefully getting some paint done on Sunday.
Renting a drywall lift sure makes things easier, I can't imagine trying to put sheets up this high without it.
This weekend I will be finishing up the drywall, mudding and hopefully getting some paint done on Sunday.
Renting a drywall lift sure makes things easier, I can't imagine trying to put sheets up this high without it.
04-24-2013, 07:37 PM
#39
One week to lift install and lots of work to do. I did a 14 hour day yesterday on it and a couple today. Sore as hell.
This weekend I will be finishing up the drywall, mudding and hopefully getting some paint done on Sunday.
Renting a drywall lift sure makes things easier, I can't imagine trying to put sheets up this high without it.
This weekend I will be finishing up the drywall, mudding and hopefully getting some paint done on Sunday.
Renting a drywall lift sure makes things easier, I can't imagine trying to put sheets up this high without it.
Looks like u are running drywall to the floor, any thoughts of water soaking into the drywall from the floor? Do you have something in mind to prevent this? Edit - looking at the pic again, I think the orientation of it on my iPad isn't accurate....I may not be looking at the floor.
Did you reinforce the studs with horizontal pieces of wood? For mounting cabinets etc.
04-24-2013, 09:04 PM
#40
Captain Obvious
Super User
Super User
I've started insulating my walls, 1.5 sides to go then drywall.
Looks like u are running drywall to the floor, any thoughts of water soaking into the drywall from the floor? Do you have something in mind to prevent this? Edit - looking at the pic again, I think the orientation of it on my iPad isn't accurate....I may not be looking at the floor.
Did you reinforce the studs with horizontal pieces of wood? For mounting cabinets etc.
04-24-2013, 10:20 PM
#41
Rennlist Member
Thread Starter
Ya my photos get rotated when posted from my ipad. The walls are existing, it's the ceiling that I'm boarding up.
04-26-2013, 10:25 PM
#42
Rennlist Member
Thread Starter
Got the drywall finished up today. Mud tomorrow and hopefully paint on Sunday. I wont be doing much sanding, the existing walls would require way to much work to get the joints smooth.
4 days till lift installation. Woo Hoo
4 days till lift installation. Woo Hoo
04-28-2013, 11:20 PM
#43
Rennlist Member
Thread Starter
3 gallons and two coats later I have an orange garage. My 4 year olds favourite colour. 
I'm loving the new lights, it's going to be much easier while working on my car.
It could really use a third coat, plus I could have done a better job on the joints. But it will serve its purpose.
Lift on Tuesday and then my baby can come home.
I'm loving the new lights, it's going to be much easier while working on my car.
It could really use a third coat, plus I could have done a better job on the joints. But it will serve its purpose.
Lift on Tuesday and then my baby can come home.
04-29-2013, 07:59 AM
#45
Great job on the garage.
Now you just need a big screen TV, some tunes and a mini fridge - will be cool place to hang out.
Very daring on the orange walls / pink doors combo!
Now you just need a big screen TV, some tunes and a mini fridge - will be cool place to hang out.
Very daring on the orange walls / pink doors combo!