When you click on links to various merchants on this site and make a purchase, this can result in this site earning a commission. Affiliate programs and affiliations include, but are not limited to, the eBay Partner Network.
My 2012 CTT has 70k miles. For those who don't know, our cars have direct fuel injection systems. That means our fuel injectors are in the cylinder heads and spray fuel directly into the combustion chambers. That means no fuel passes over the back side of the intake valves to keep them clean. With heat and the oil vapor that does pass over the backside of the valve it cokes up the valve and disrupts the intake air charge. Whether you think this job is necessary is your call. This won't be a step by step diy. Just an overview of what is involved and what to expect. Whether you pay a shop to do it or do it yourself.
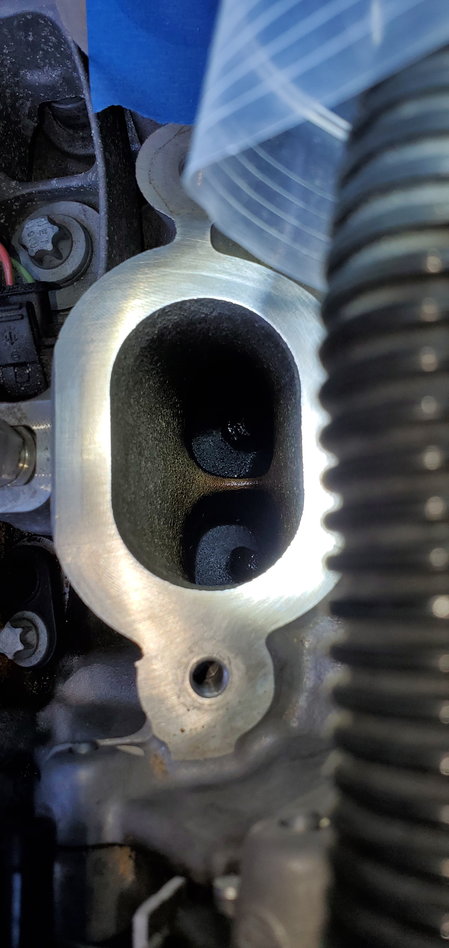
I will lay out what tools I used to turn this
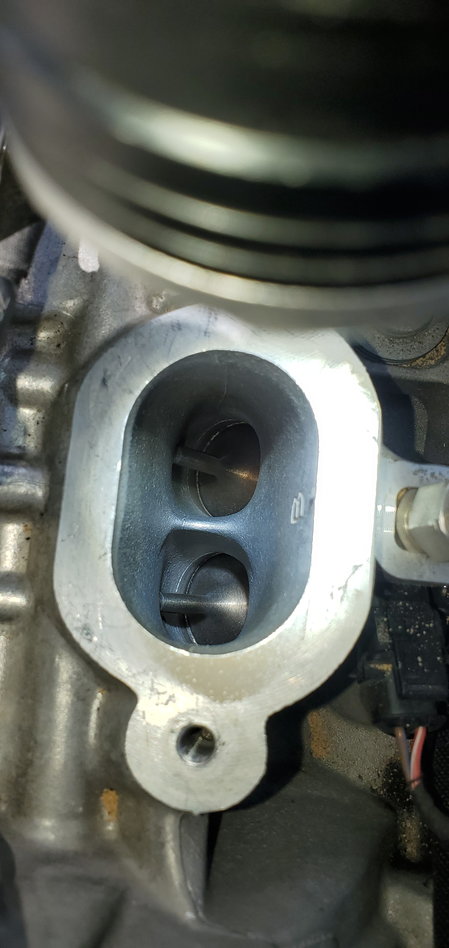
Into this.
Last edited by twodollardoug; 07-08-2020 at 03:34 PM.
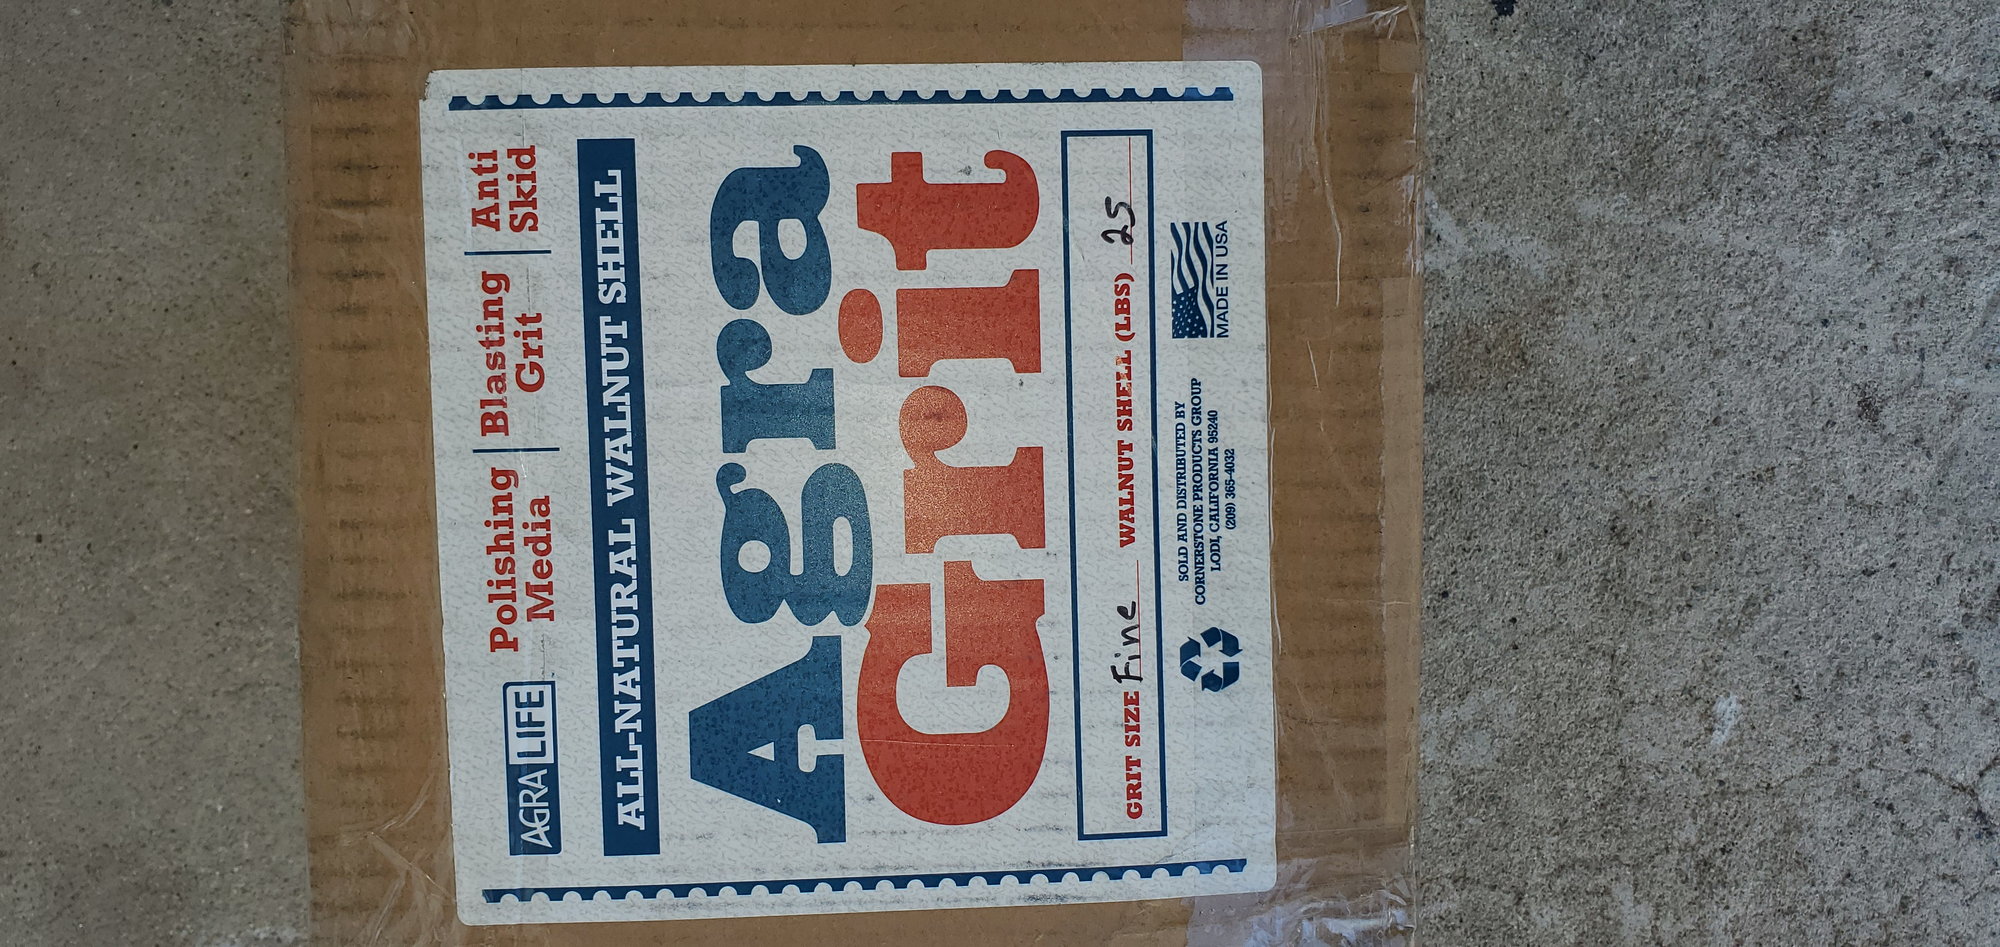
I cleaned my intake valves by blasting them with fine walnut shells for my blasting media.
First of all you are going to need a good compressor with dry air. The bigger the compressor the faster it will go. It is possible to do with a small compressor, but it will take longer because it uses a lot of air to do this job you will be constantly waiting for the compressor to catch up.
Dry air is important. Air compressors create moisture. With moisture in your air lines the media won't flow properly and will be a constant battle trying to get the media to flow.
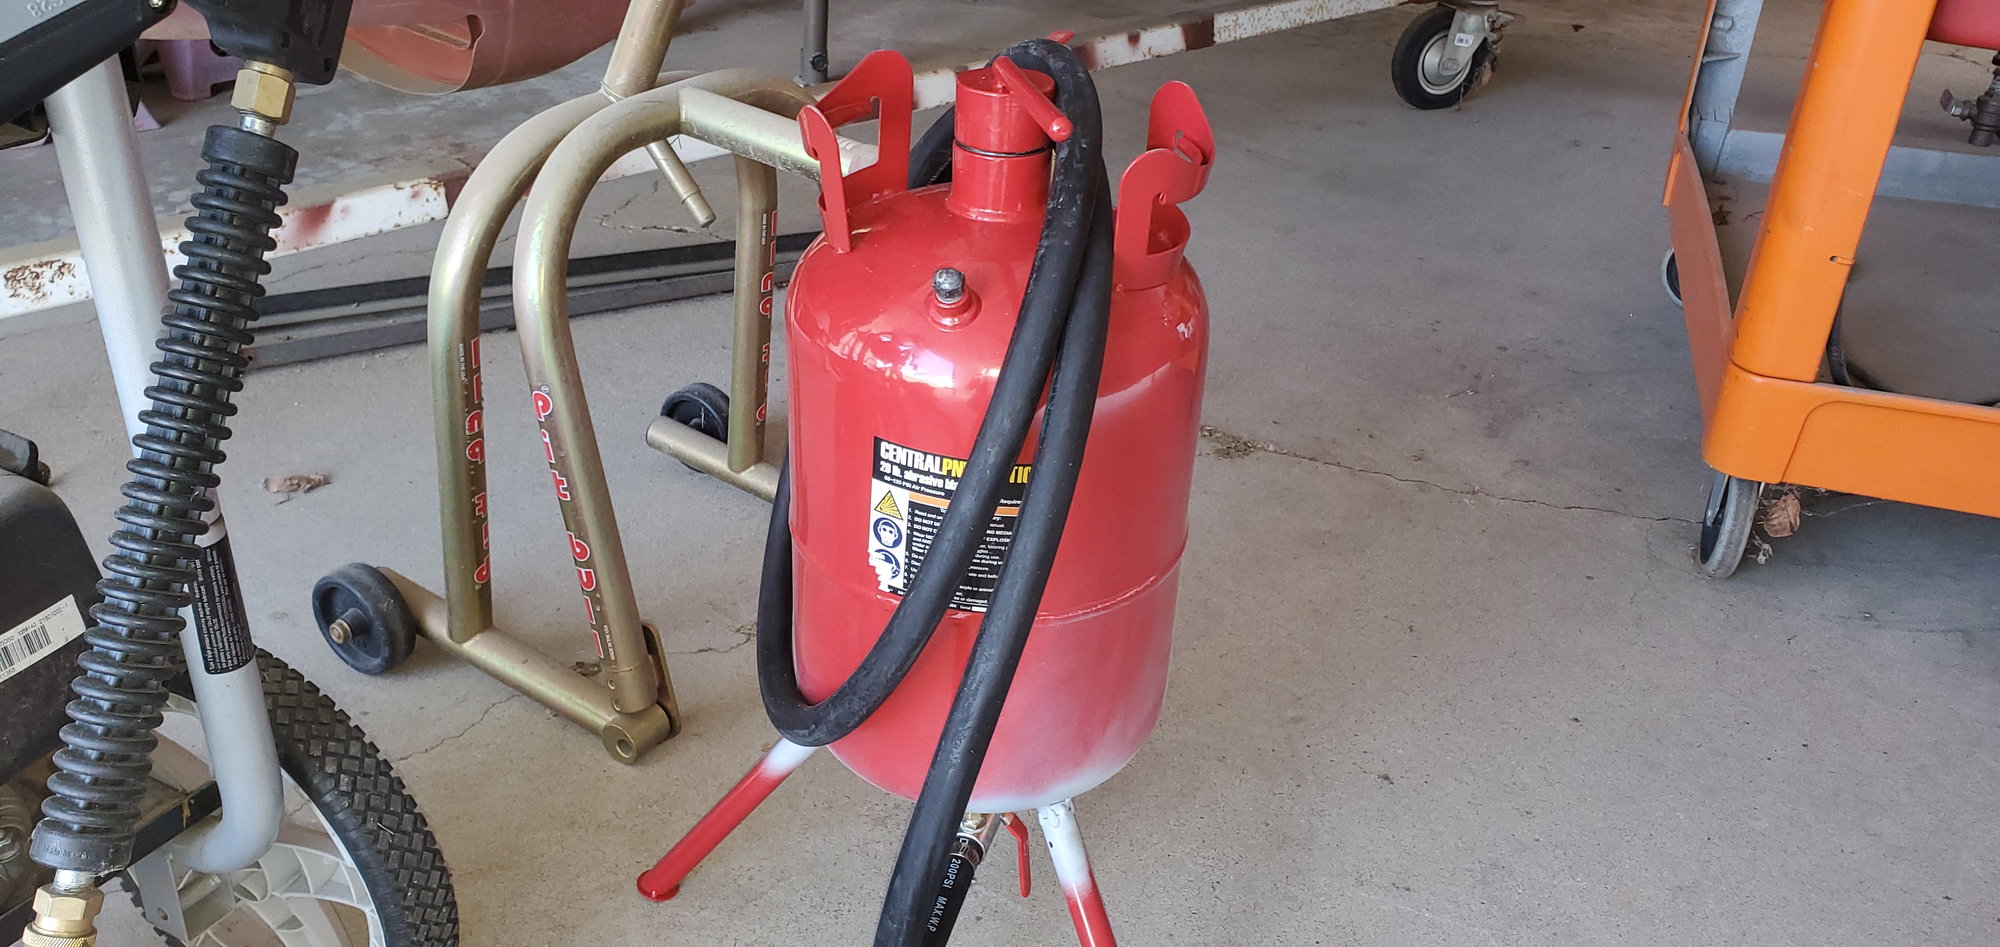
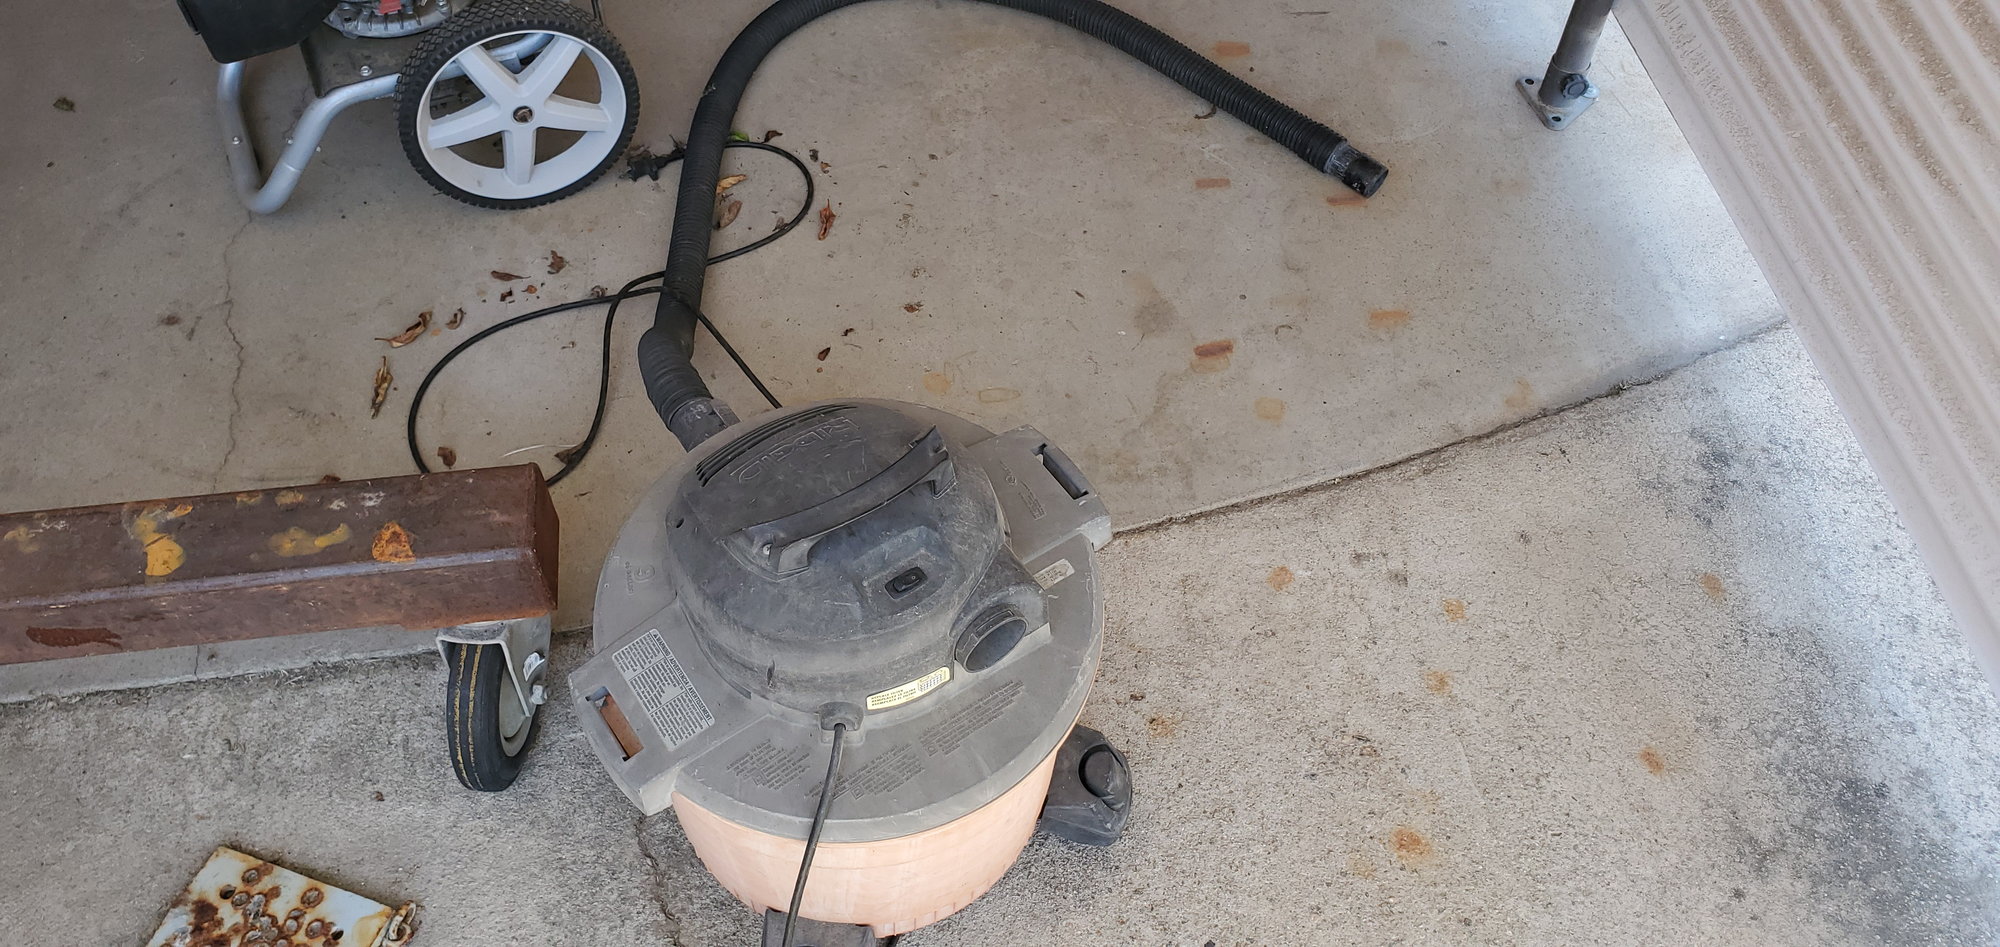
I bought a media blaster from harbor freight. It worked perfectly with a few mods I made to it when I was putting it together. I will cover those mods. Here is a picture of the blaster I bought.
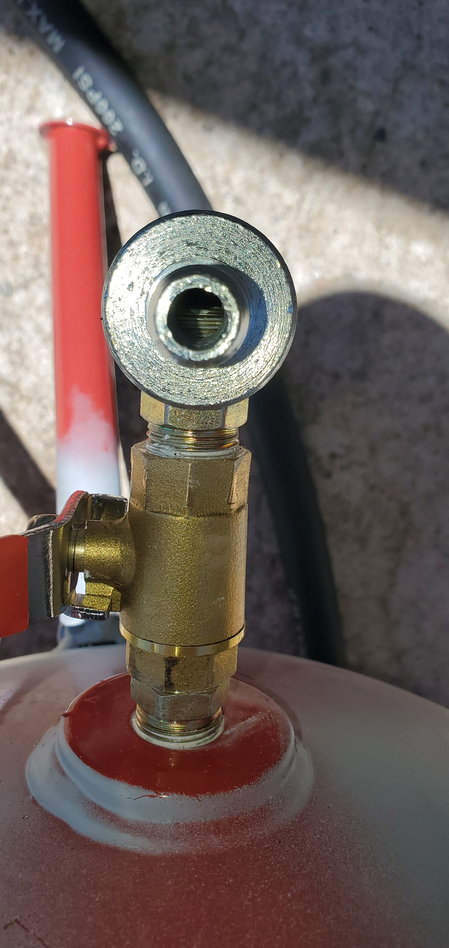
On the bottom of the tank, there is a nipple that the media flows through in which a funny T shape fitting screws onto. When you tighten the T on the nipple the nipple threads so far into the T it will block your media flow.
So I used a drill bit that was the same size as the outlet hole and drilled out the bottom of the nipple that protruded in the T like so.
Every thing else on the blaster was put together per the instructions.
You will need a shop vac. The shop vac sucks out the spent walnut shells as you are blasting. My old shop vac worked just fine.
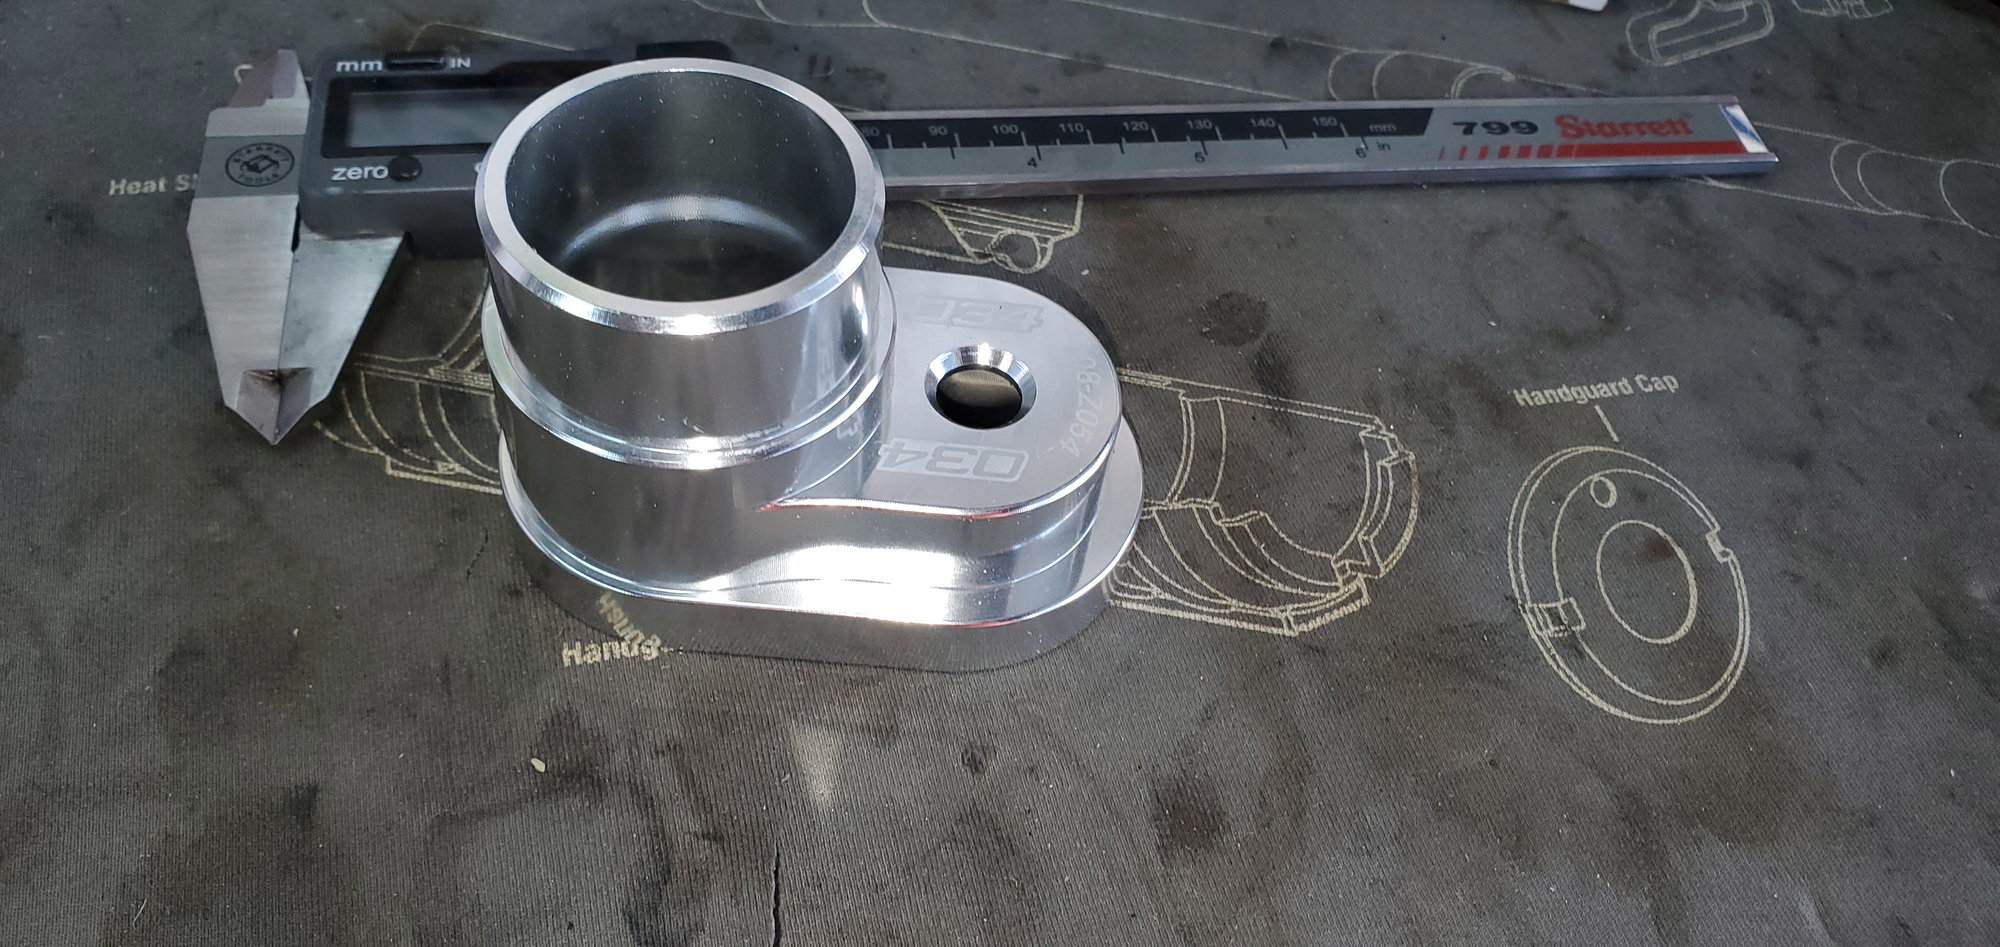
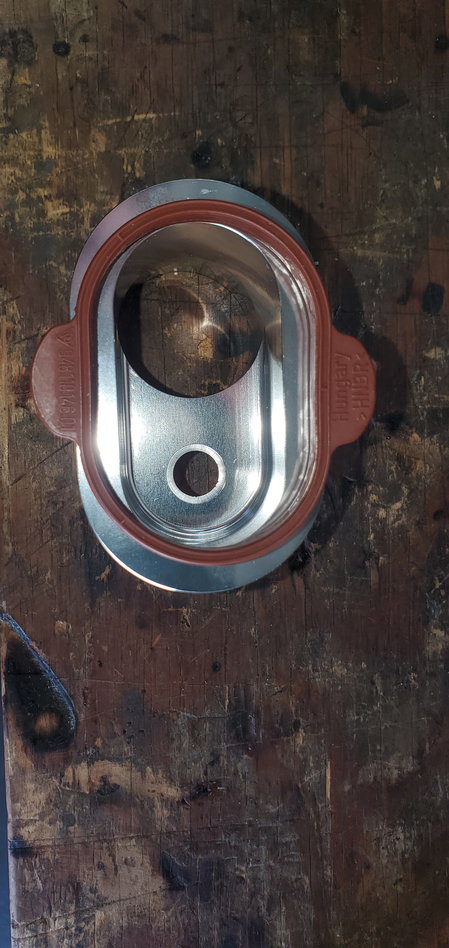
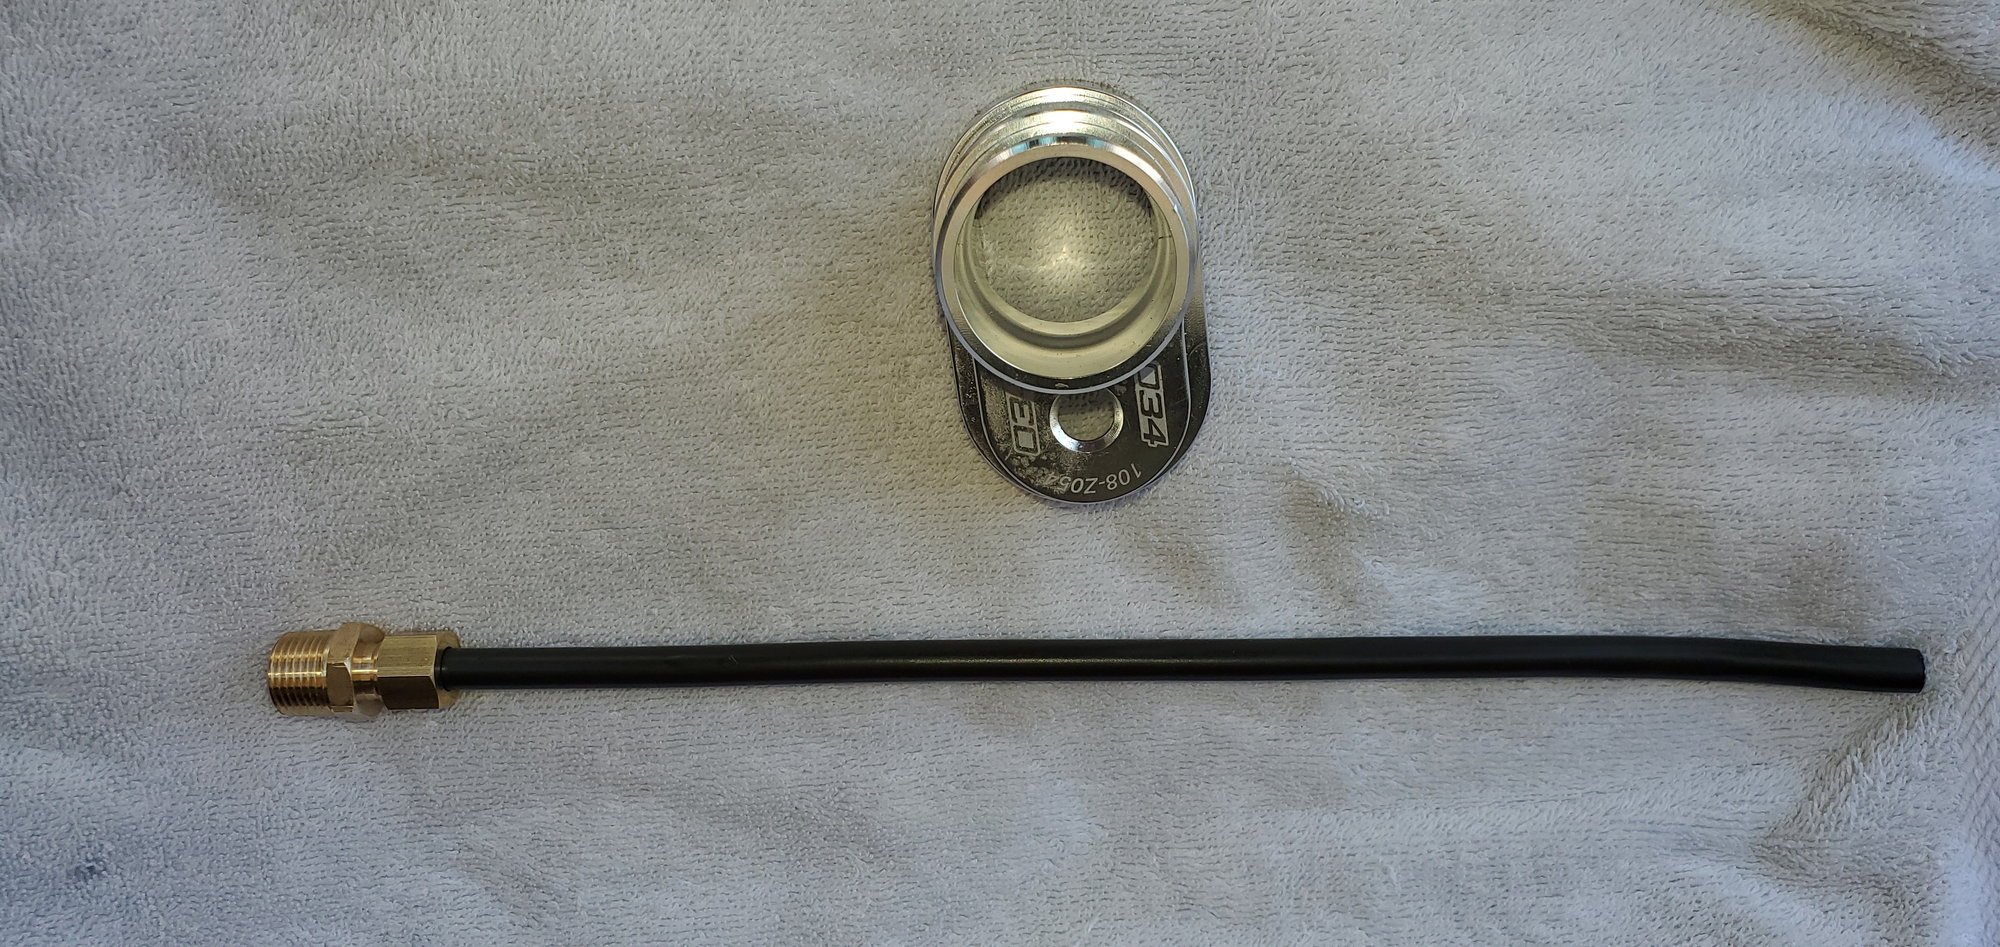
I also bought an adapter.
This adapter is made for an Audi/VW and worked perfectly for this task. It serves a few purposes. It covers the intake valves runner so you don't get a face full of walnut shell dust. It gives you a place to attach your shop vac hose so you can be vacuuming the media as you work. And a hole for your media blasting wand to pass through so you can blast the black carbon off of those valves.
Just below the adapter is the media blasting wand I bought. It is probably a little long for the job and if and when I use it again, I will probably cut it down some.
Last edited by twodollardoug; 07-02-2020 at 02:44 PM.
The media I used was fine grit walnut shells from home depot. I bought two 25lb boxes and had about a half of a box left over. If you recycle the media you can probably get by with one box.
I reused my intake manifold gaskets because they were near new. I had my manifold off about 10k miles ago and installed new gaskets at that time. If you have a decent amount of miles and are taking it apart for the first, these are the gaskets I would replace, (8) intake manifold gaskets, (1) throttle body to intake manifold gasket, (1 each) for the oil separator that sits on the driver side valve cover. The oil separator uses two gaskets and they are different so make sure you get both of them.
You will also need (8) coil hold down screws. The are made of aluminum and are single use bolts. As well as (2) new torque arm bolts which are also single use aluminum.
Last edited by twodollardoug; 07-03-2020 at 02:58 PM.
I think I have covered all of the specialty stuff we need. Next we will need to prep the car.
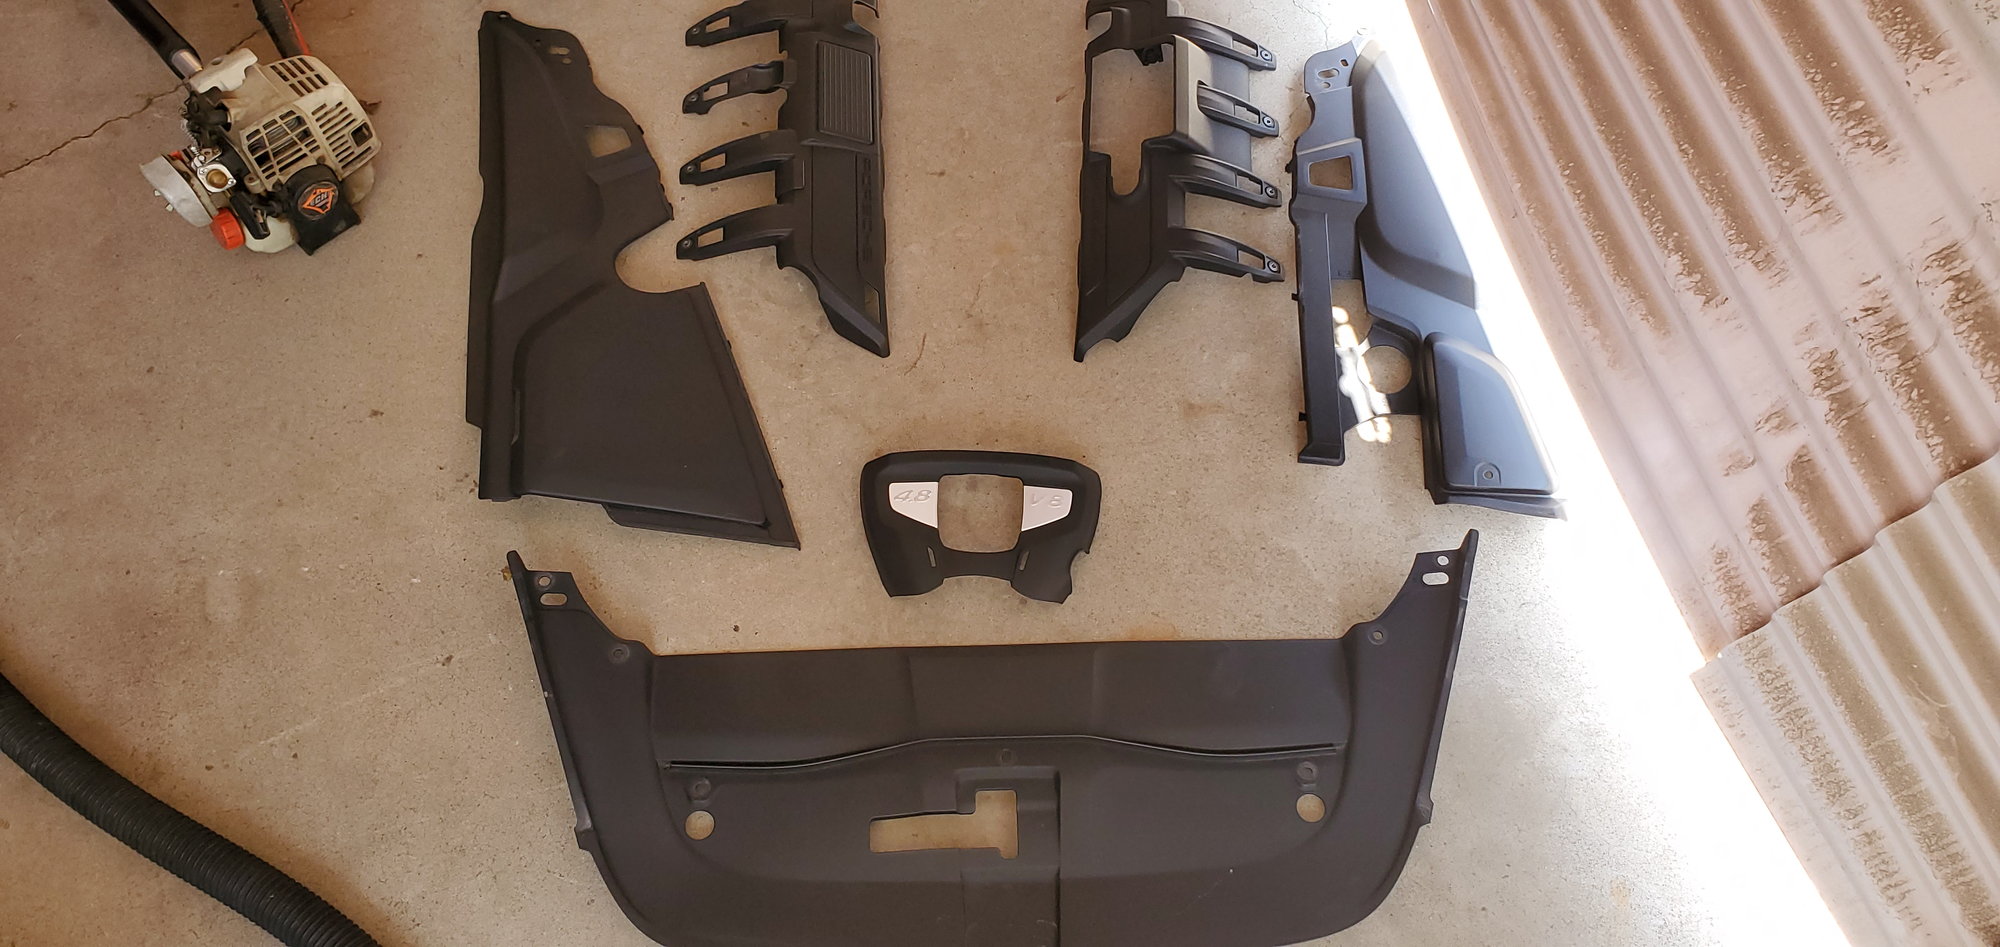
First thing I did was to remove all of the plastic engine covers.
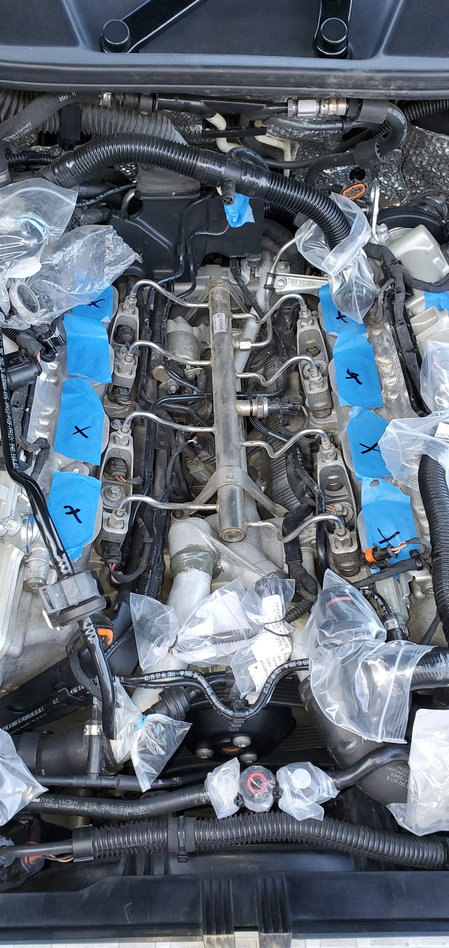
I removed all the ignition coils, spark plugs, engine oil separator, the rubber intake bellows, the Y pipe, the throttle body and finally the intake manifold.
This next step is very important. Knowing that the walnut grit is going to get everywhere, I took extra time to seal everything. I bagged every electrical connector with samwich bags and rubber bands. I also bagged all the breather hoses. I used two inch blue painters tape on all the flat surfaces including the spark plug holes, intake ports, the big hole in the valve cover where the oil separator was. Be meticulous. I took brake cleaner and a white rag to wipe the surfaces down before the painters tape. I just want to emphasize the importance of making sure that everything is perfectly sealed. The grit gets everywhere even with the vacuum it still gets everywhere. The media was super easy to clean up. No water was needed, I just blew it all out of the nooks and crannies before I started putting everything back together.
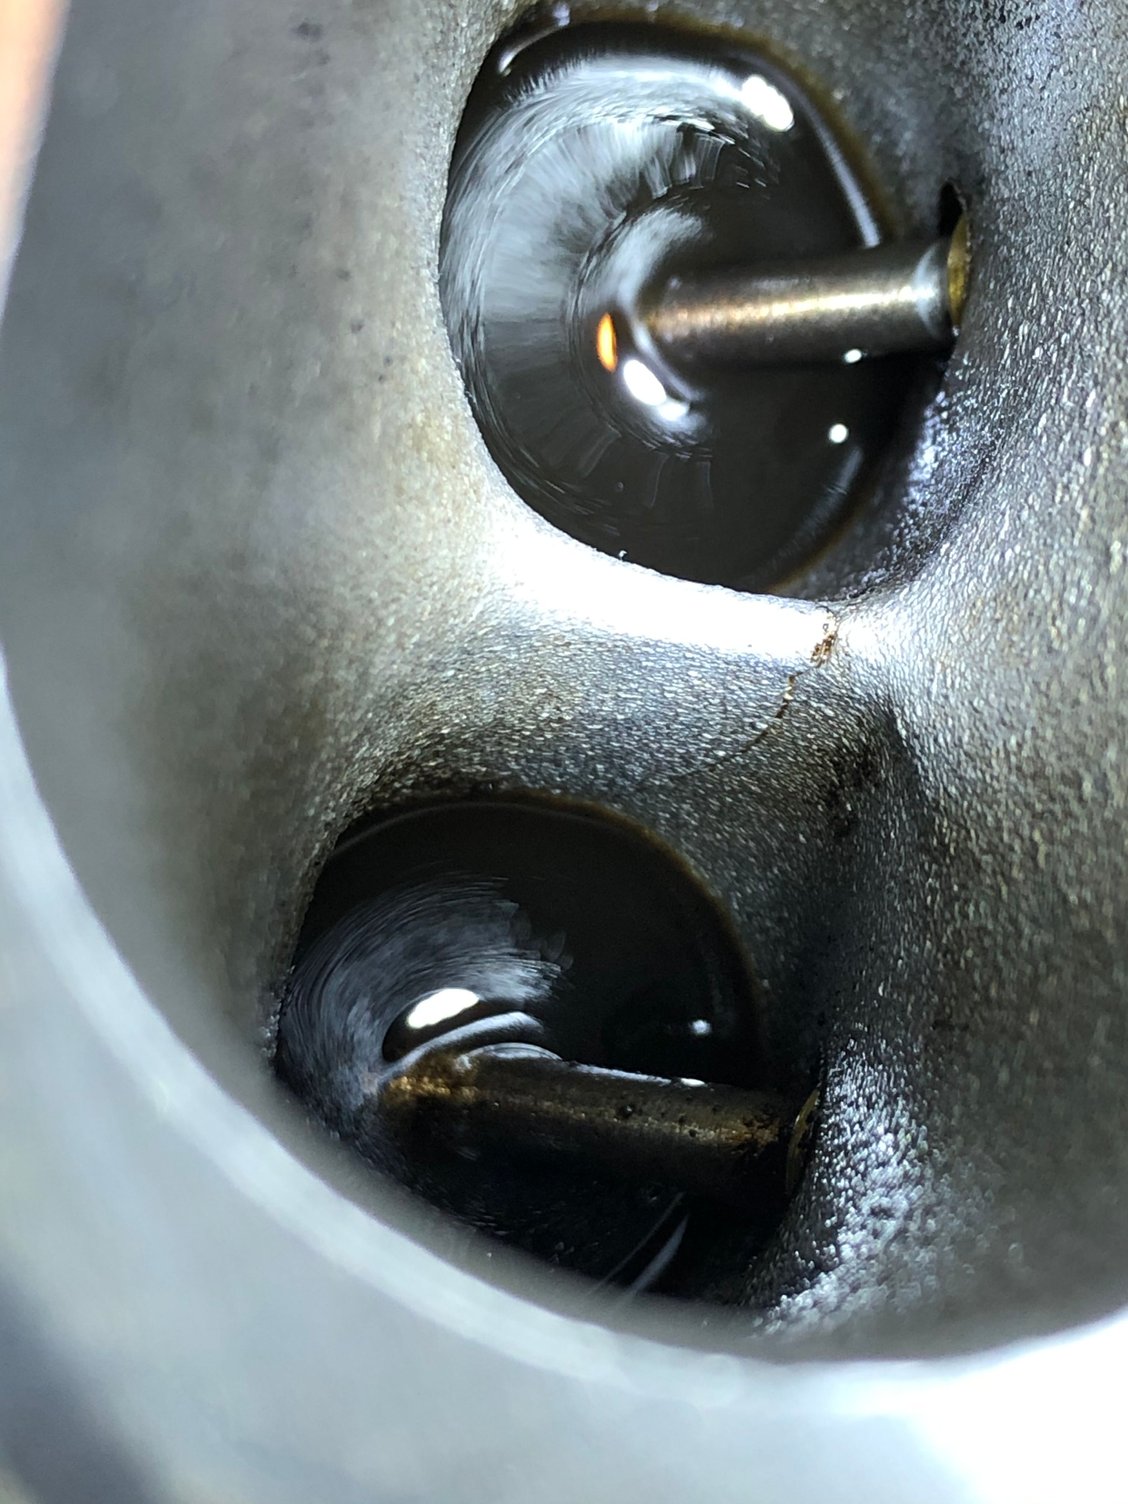
Satisfied that I was sealed up tight the next step was to pick a cylinder to start. I chose the passenger side bank and the cylinder closest to the front of the car. With a flashlight I looked the intake runner and saw this...
It was difficult to tell if the valves were closed all the way. What to do. I have a leak down and compression test kit so I screwed in the rubber hose into the spark plug hole and gave it a pretty good blast of air. My masking on the intake runner didn't bulge or pop so I was sure the intake valves were in the closed position. If you don't have a leak down test kit you can cup your hand over the spark plug hole and blast the air through your fingers. I got lucky and shut my engine off at a point where 7 of my 8 cylinders intake valves were closed. I also noticed that our cams must not have a lot of overlap because I didn't hear air escaping through it exhaust valves. Just to be certain make sure you should blast enough air into the cylinder. Even the slightest movement on the taped intake runner would mean that the valve is not closed and you would need to move on to the next cylinder. If you have any doubt, don't guess. You could spray brake cleaner or pour rubbing alcohol down the running and let it sit for a minute. If your alcohol or brake cleaner is gone after a minute it means the valves are open and you should move to the next cylinder. Make note of that cylinder because you will have to come back to it later. If your liquid is still pooled up after a minute your good to go. Take a rag on the end of a screwdriver and try to get most of the liquid out of there. It doesn't have perfectly dry. The walnut grit will dry it out immediately when you start blasting. Retape the spark plug hole and remove the tape over that intake runner.
Time to start blasting. I started off with a blanket covering the entire engine bay with a small slit for the adapter to poke through.
This idea worked perfectly in my mind on the lead up to this project. But in real life it lasted about 15 seconds. So after I abandoned the blanket the work began. I have never done this before so the first cylinder was about coming up with a procedure. I will share it with you. With the vacuum turned on the adapter will hold itself to the head. Poke the wand through the hole in the adapter, turn the valve on the bottom of the media tank about halfway open. Then pressurize the top of the media tank to about halfway, this helps to push the media under pressure. Then turn the main air valve to WFO. Now go to the car put one hand on the adapter/hose and your other hand on the wand and open the valve on the end of the wand to WFO and hang on!!!
You'll want to move the wand up and down and try to move it to each of the valves. It doesn't take much, maybe 45 seconds. When you think you done enough and want to take a look. Shut of the valve on the end of the wand. That is the only one you need to mess with. The other valves can be left alone. Depending on the size of your compressor you may need to adjust your media feed and media pressure valves. Mine worked best at the halfway mark. Yours will probably be different. My main air stayed at WFO and I just used the valve on the end of the wand to control the operation.
Time to take a peak. Turn the vacuum off and pull the adapter off the head. At this point 75% of the carbon should be gone. I could see that the some carbon on the back side of the valve stem. Tried it again and still couldn't get that carbon. It needs a little help so I grabbed my hooked dental pick (the longer the better) and scraped the back side of the valve stem. It scrapes off easily, at least mine did. Just let the chunks fall. We are going to do one more clean up blasting. Your gonna have to try and remember the spots you missed when you do your clean up blasting. What sucks about this whole operation is that you can't see where you are going or how you are progressing because you can't see thru the adapter. After a cylinder or two you will get a feeling for how long to blast. The dental pick really worked well and I was able to remove 100% of the carbon from both intake valves and the intake runner. So now that cylinder is blasted it's time to clean it up. Remove the adapter from your vacuum hose and vacuum out all of the media off the back side of your valves. I used green brake cleaner to wash down the intake runners and valves then push a small piece of rag with a long screwdriver to mop up the excess brake cleaner. Then gave a blast of clean air to dry everything up. At this point this is what mine looked like..
Happy with the results I taped up that runner and put an "X" on it to signify the this cylinder is blasted and cleaned.
On to cylinder number two. I won't go through the process again because it's no different than the first cylinder. Unless... The intake valves are open. This didn't happen to me until I got to cylinder number seven. And I probably spent 45 minutes trying every which way I could think on how I was going to turn the crankshaft. I thought it would be easy and be able to turn it by hand with the spark plugs removed. Not a chance... I almost gave up... Frustrated, I grabbed a big pair of channel locks and put it on the a/c pulley from underneath the car and it worked. This was the first time in the project that I need help. I had to have my kid look down the intake runner with a flashlight while I turned the pulley (clockwise). It's kind of a ghetto way to turn the engine I know. But the front of the a/c pulley is shaped like an octagon and the channel locks fit well. And it didn't have to turn much until the valves closed. Not trusting my helper I gave it a shot of air and a pool of brake cleaner to make sure the valves were shut.
And that was it. After that last set of valves were blasted and cleaned up it was time to clean up and put it back together. The mess was remarkably easy to clean up. The walnut shells are not like sand. They are very light. I took the wand off the media blaster and put a fitting on it and used it to blow out the dust from the valley of the V8 and the engine bay. Of course being very careful not to shoot air directly at my masking taped areas or my baggies covering my hoses.
After it was all cleaned up I simply put everything back together. In all the job took me a full day and I was running before the sun went down.
My conclusions. Was it worth the time and effort? I would say yes. The throttle response seems to be better. Did I gain 100 hp? Definitely not. I have about $200 in the system and will be able use it on my other cars and motorcycles. So if I gain a half mile per gallon I'll be happy and it will pay for the tools with the gained fuel mileage.
I purposely didn't post links to the tools because after a while links break it kinda sucks clicking on broken links. But we can talk about where to get the tools and I can try to answer any questions you might have. Thank you for being patient and letting me finish this write up.
Last edited by twodollardoug; 07-06-2020 at 11:06 PM.
just wanted to thank you for your posts. I�ve Followed a few of your guides and love the quality and detail so thank you.
I�m part way through chemically cleaning my valves and have noticed something which looks like a �crack� in my cylinder head (in the divider between the two valves).
Looking at your pictures it looks to have a similar witness mark which makes me think this may just be a normal manufacturing mark but really not sure.
Do you have any high res photos of your cleaned valves to verify if what I�m seeing was consistent with what you had post-cleaning please? (I�ve still got cleaned pooled up at the bottom of the valves.)
I'm glad the DIYs are helping your. I had the same "cracks". They aren't cracks. What you see is the casting marks from the manufacturing process. Just like you thought. They caught me off guard too.


 07-02-2020, 03:15 AM