DIY 958 HVAC Blower Motor Replacement
#16
So brandlj - where do you live? I've been wanting to drop out my blower motor to lubricate the bearings in it.. but mine has a wiring harness that runs under it, and I gave up when my back started really hurting. So I'd invite you over for lunch.. since it only takes 10 minutes to R&R, adding my lube time into it - figure 30 minutes max.. I'm in NJ at the shore? You?
#17
Banned
Join Date: Mar 2011
Location: Spring Lake, NJ, US of A
Posts: 10,085
Received 1,160 Likes
on
767 Posts

BTW - OT - I just got the last car in my SIG - and I've had a number of projects I want to do to it, that involve squirming into small spaces or laying on the floor doing "stuff". I have bad arthritis and a bad back (Xray looks like a pretzel) and not happy hips. I'm usually constantly in some sort of skeletal pain... but - when I got working on the car - I surprised myself in what I was able to do without pain. The pain pretty much disappeared until the very end of the project - when I needed to lift myself off the floor (I was there intentionally - reinstalling headlights on the Boxster..) Then ALL the stored up pain hit me like a wave - and slowly disappeared. FWIW - the headlights look MUCH better with LED inserts in them, basically plug and play, no error codes and the pattern on my garage door looks excellent. Anyway - doing something like these sort of projects must block the pain somehow. I'm looking for more of them to do.
#18
Instructor
I am so glad that I read this post. I ordered my Blower motor from RockAuto for $134.00. It is the exact blower assembly that I have in my 2014 Cayenne S. The sticker under the VDO sticker on it has the VW logo and The Porsche Logo.
I read the instructions here and then I also read a post that stated that you had to replace the middle A/C vent, the right A/C vent and the glovebox. I then decided to look things over and went ahead and signed up for a 1 year AllData DIY membership for $24.95. I am very impressed with the site and I am so glad I did. The pictures and descriptions of the process involved were excellent. You DO NOT have to remove the glovebox. It slides directly out the bottom. It took less than 10 minutes to get the old blower out and about 15 minutes to put the new one in. The screw locations are challenging to an old back and neck like mine, and the seat rails on the front passenger seat kept digging in my back.
Everything went in great, and now I have ALL speeds with my fan motor.
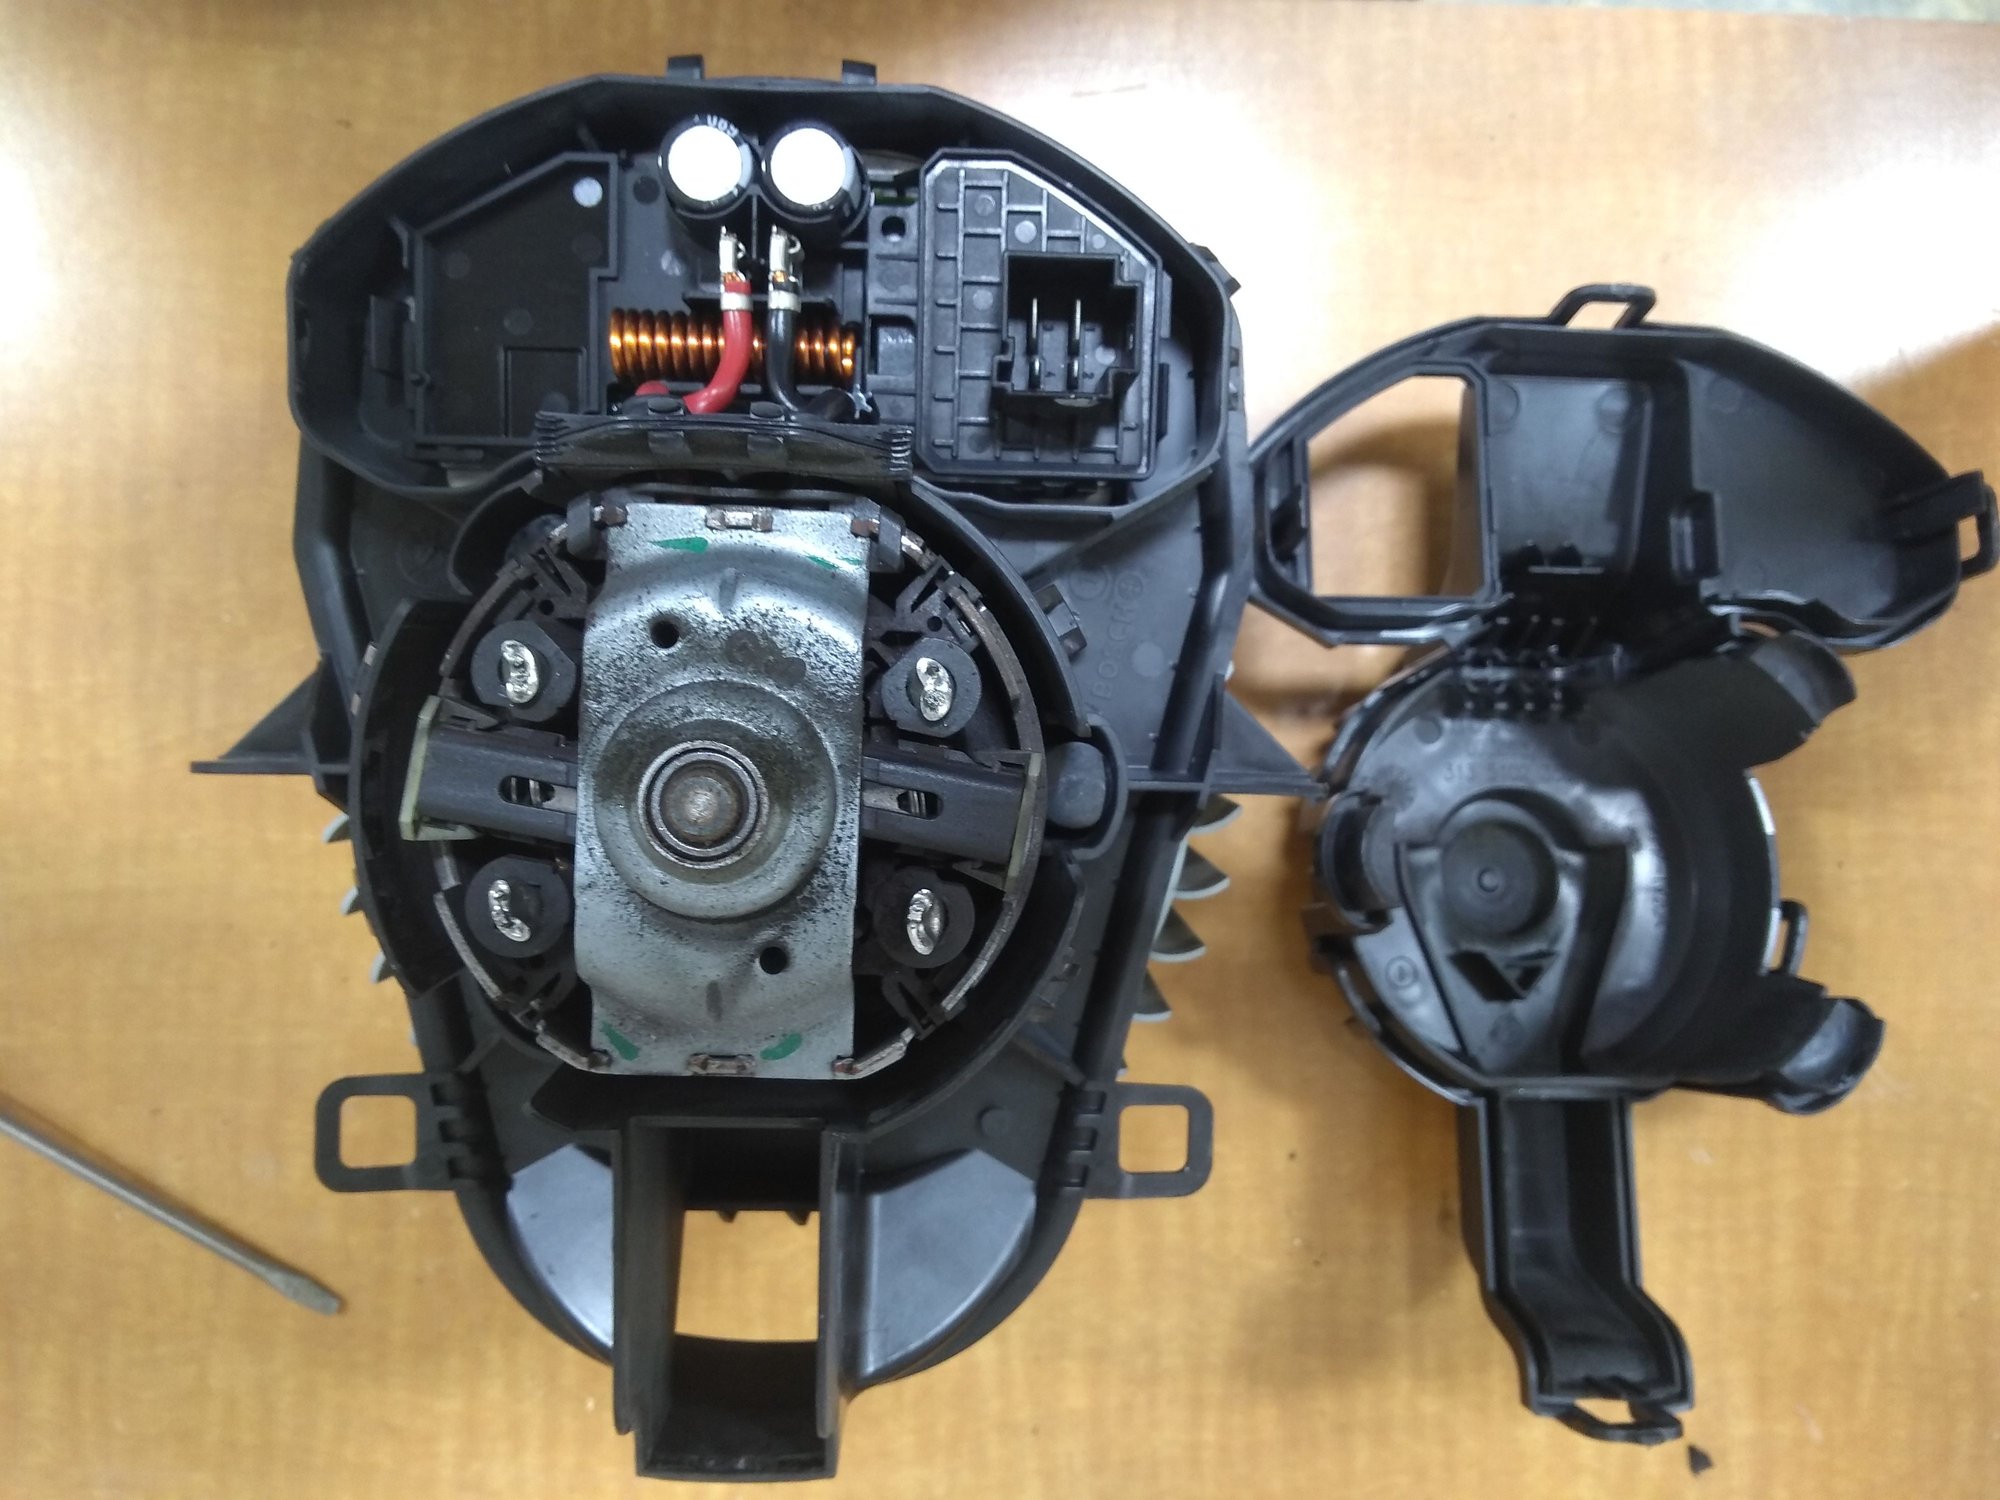
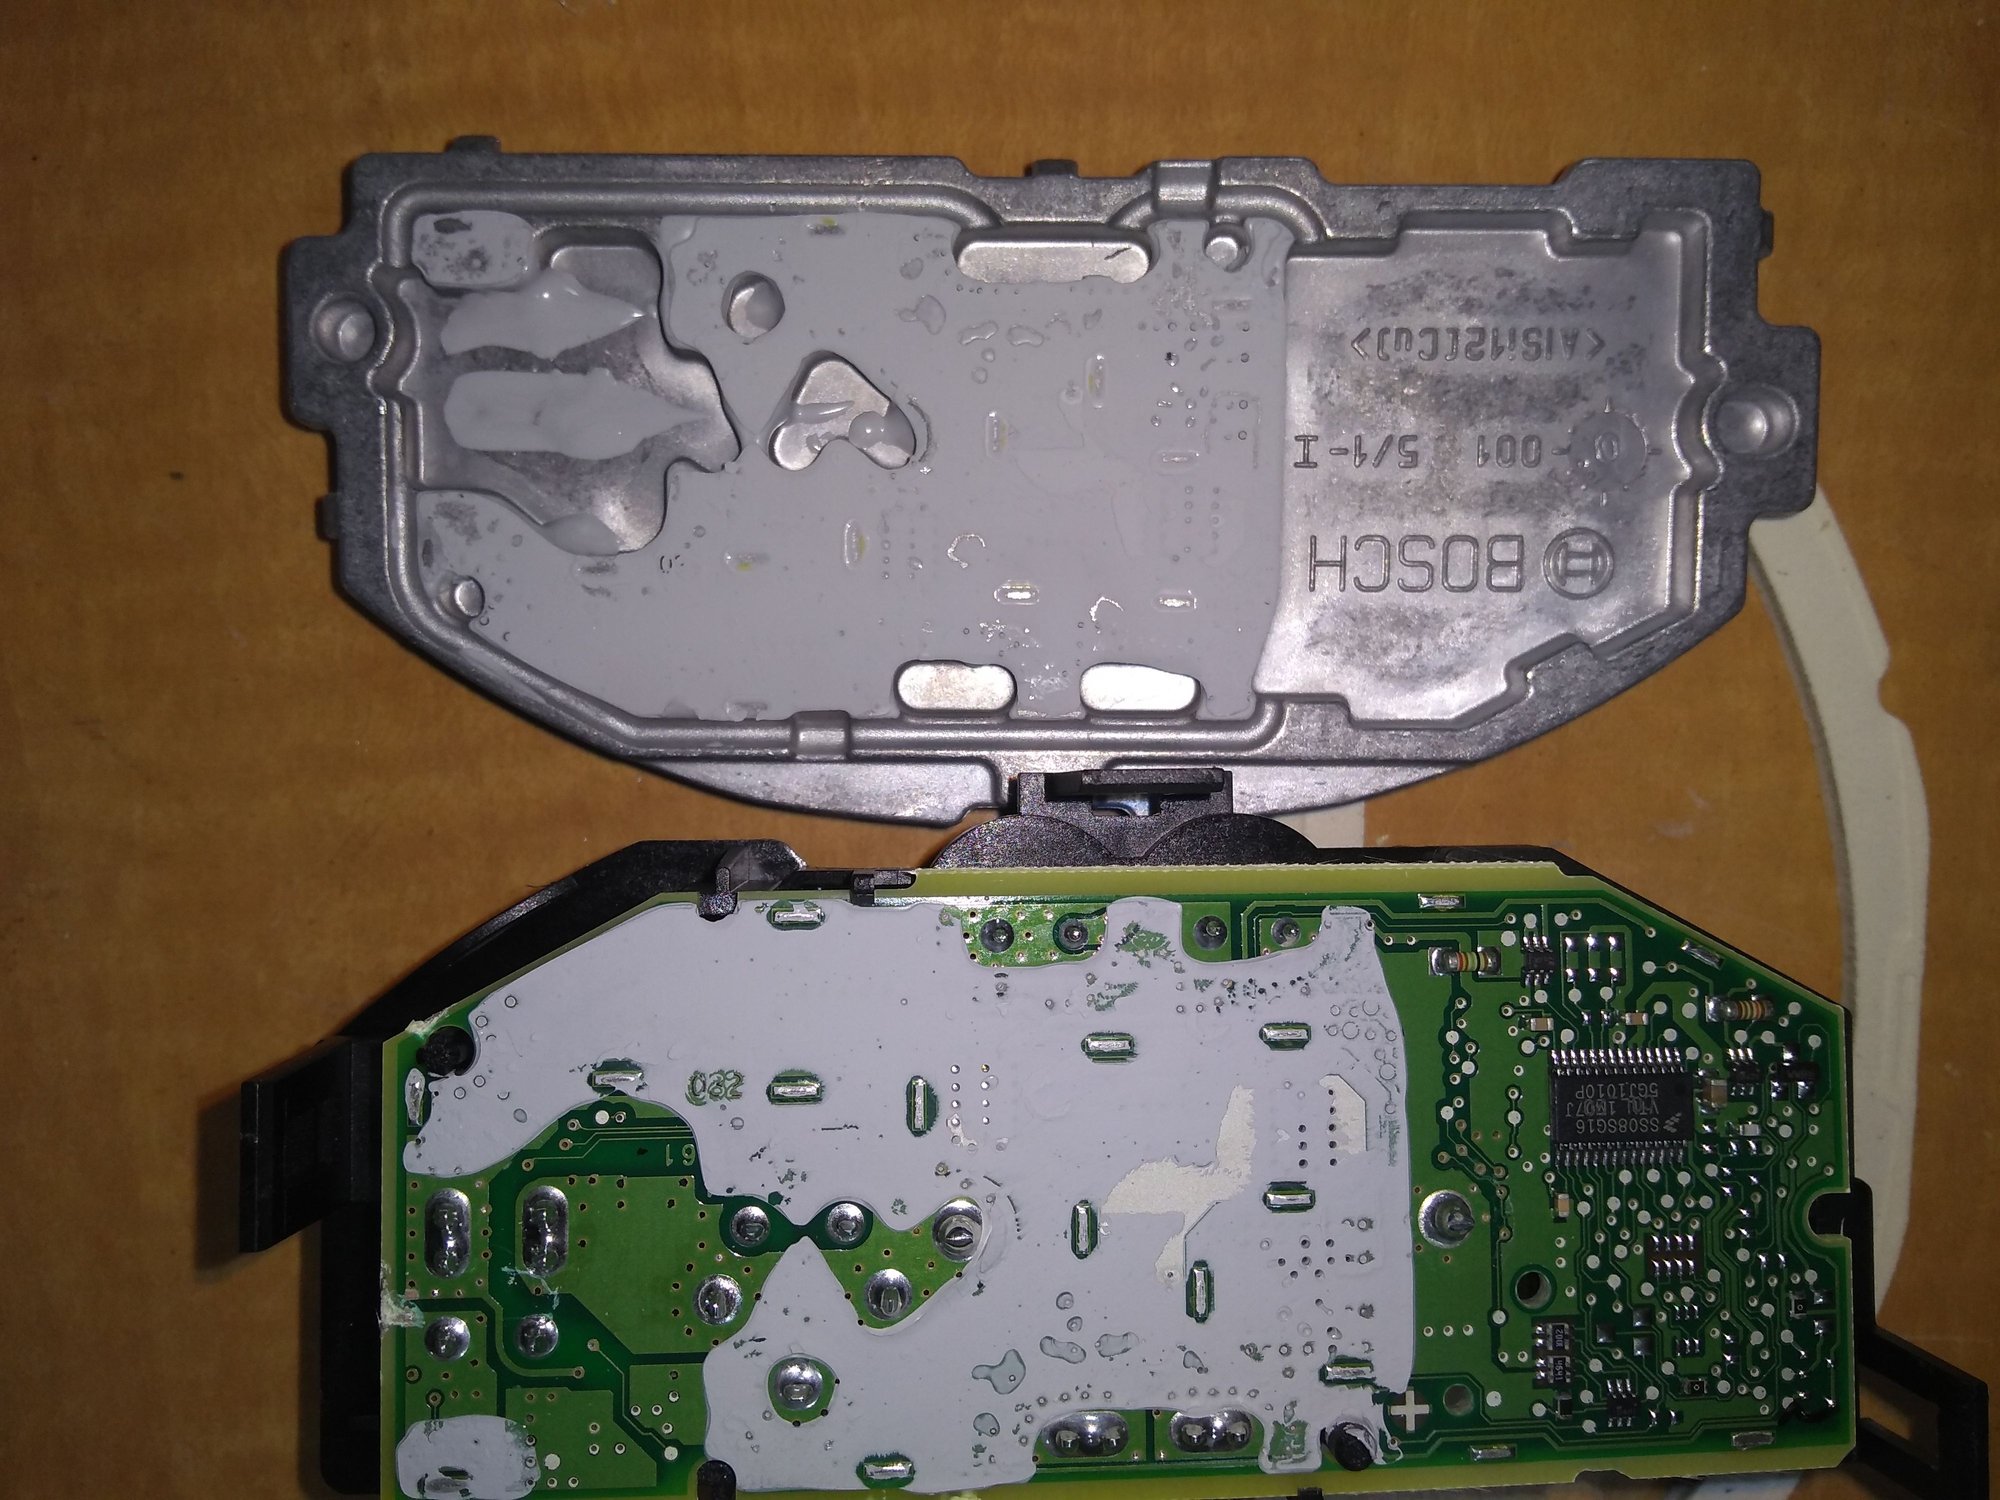
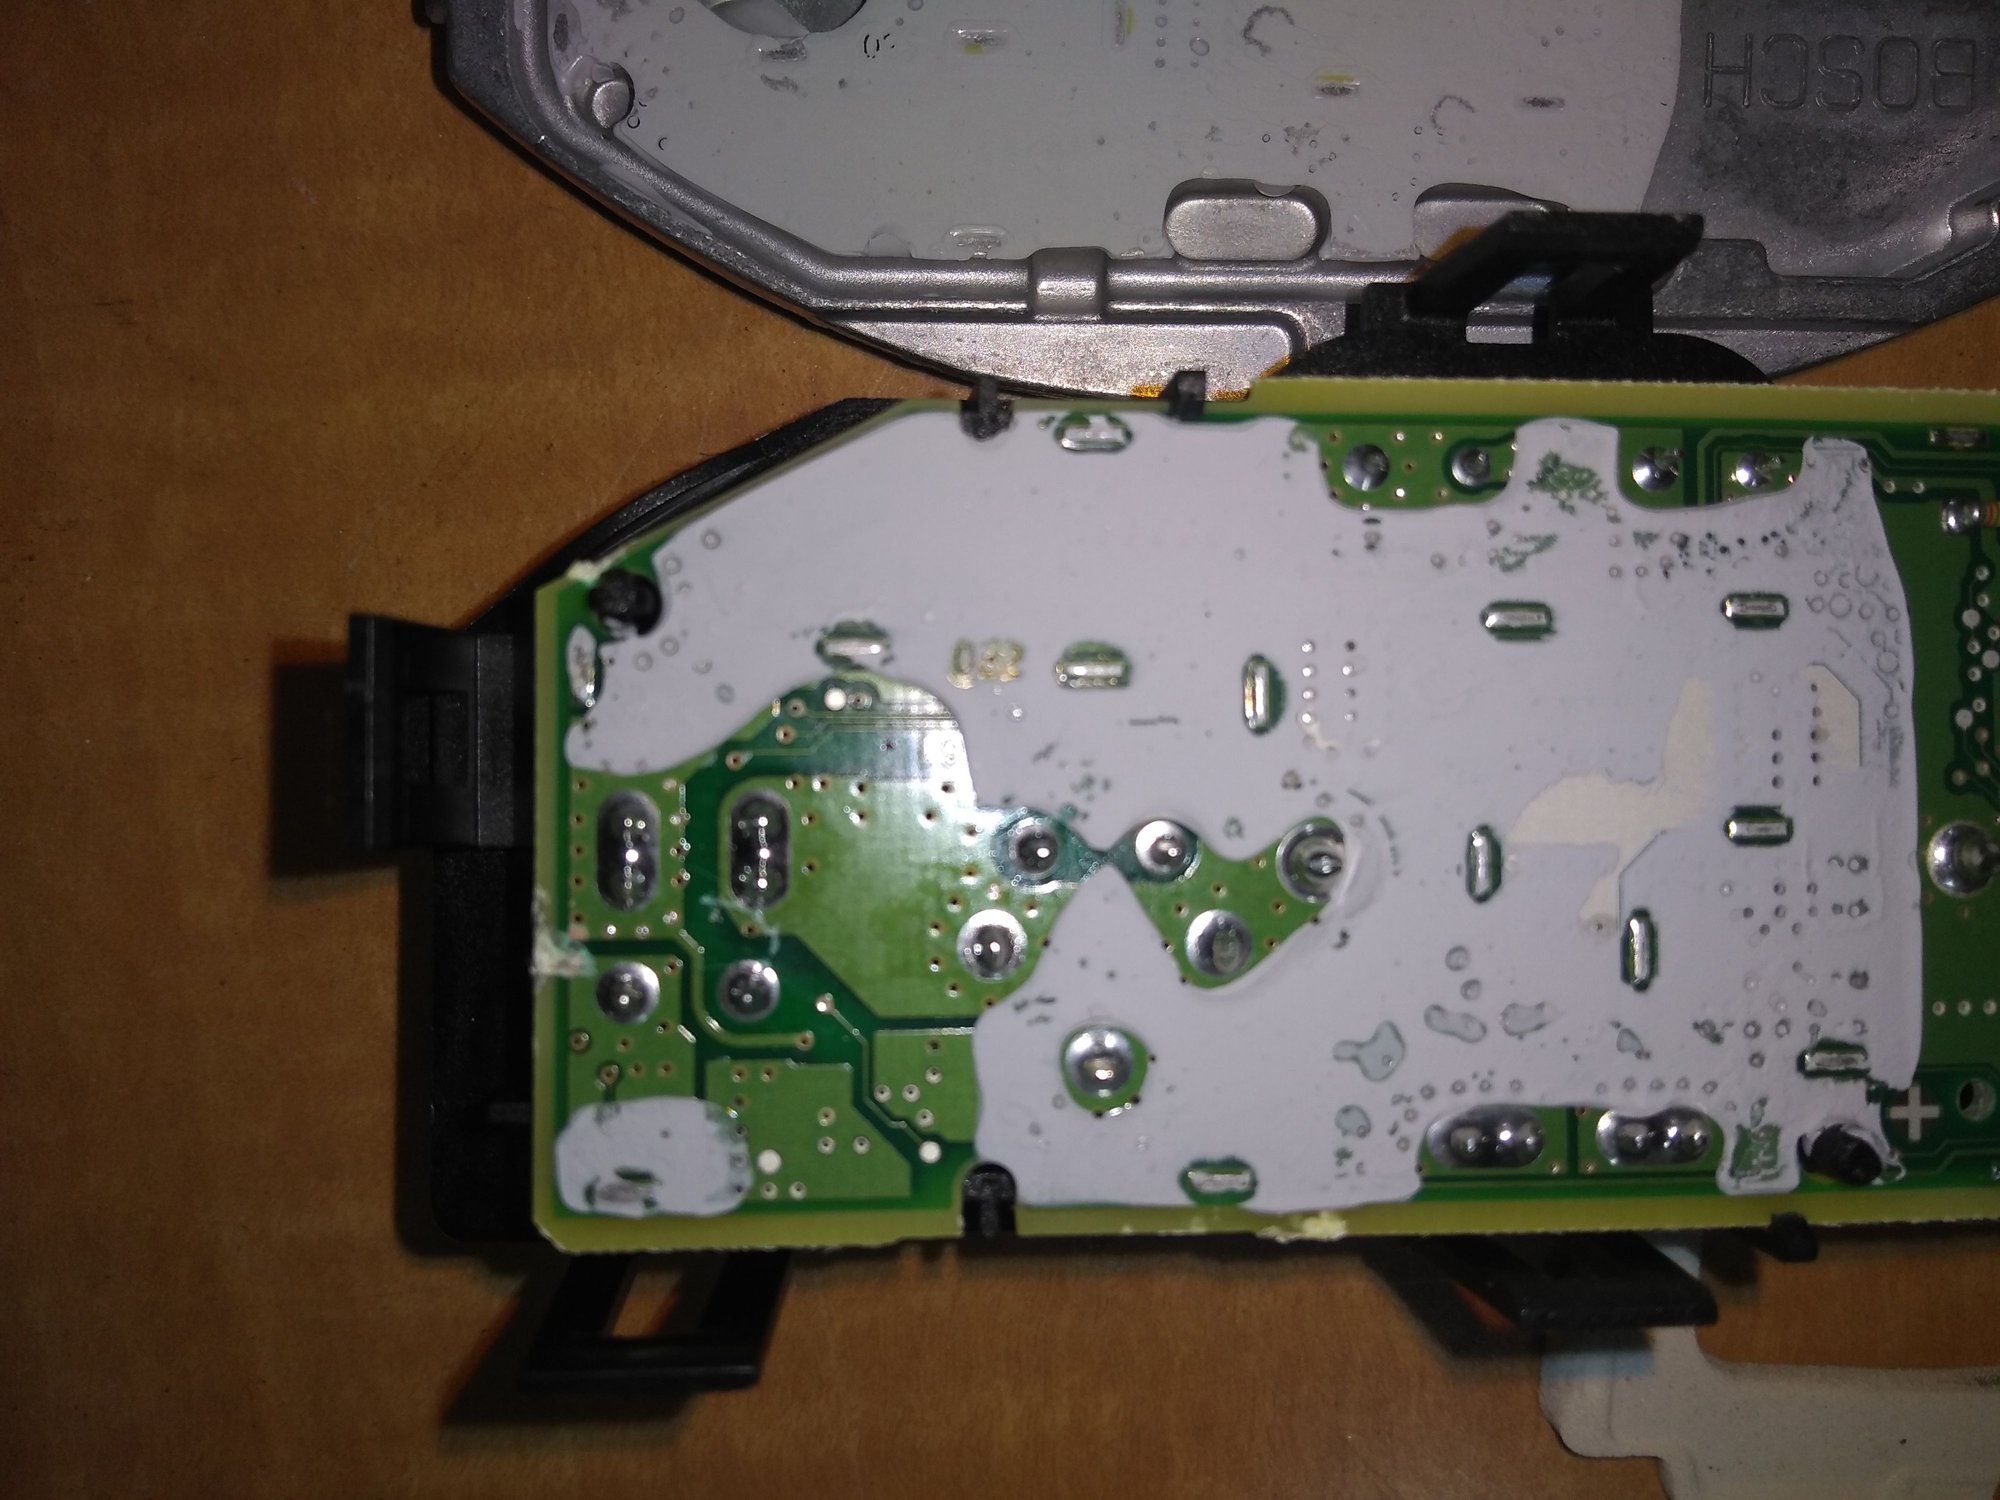
Interesting note. I took apart the old blower assembly to look over the resistor pack. There is a Bosch number on it so it can be replaced separately from the blower motor assembly. BUT it cost $104.00 just for the resistor pack. The $134.00 price from RockAuto for the whole assembly is the way to go.
#19
Rennlist Member
Thread Starter
The 100% working new part number does not blow any stronger than the 100% working one that came from the factory. If you are not getting ever increasing flow beyond 4 or 5, then most likely the resistor pack is at fault.
Resistor packs modulate the blower speed, which gets a signal from your fan switch on you center console.
To test yours, start the fan speed at one bar (kicks the system out of auto which is good), let it stabilize, then try 2 bars and stabilize. Do this for each step. You should hear and feel a detectable increase at each step.
In my case, I noted that the increases stopped when I went from 4 Bar to 5 Bar. That told me that most likely something in the resistor pack had gone bad. Since the resistor pack, and most likely a circuit board, are all integrated into the blower fan unit, it was time to replace the unit.
After replacing it, I performed the aforementioned test and now had ever increasing flow at each step all the way to max. There is a NOTEABLE difference in flow between 4 and maximum.
The following users liked this post:
Tryfon (10-09-2019)
#20
The 100% working new part number does not blow any stronger than the 100% working one that came from the factory. If you are not getting ever increasing flow beyond 4 or 5, then most likely the resistor pack is at fault.
Resistor packs modulate the blower speed, which gets a signal from your fan switch on you center console.
To test yours, start the fan speed at one bar (kicks the system out of auto which is good), let it stabilize, then try 2 bars and stabilize. Do this for each step. You should hear and feel a detectable increase at each step.
In my case, I noted that the increases stopped when I went from 4 Bar to 5 Bar. That told me that most likely something in the resistor pack had gone bad. Since the resistor pack, and most likely a circuit board, are all integrated into the blower fan unit, it was time to replace the unit.
After replacing it, I performed the aforementioned test and now had ever increasing flow at each step all the way to max. There is a NOTEABLE difference in flow between 4 and maximum.
Resistor packs modulate the blower speed, which gets a signal from your fan switch on you center console.
To test yours, start the fan speed at one bar (kicks the system out of auto which is good), let it stabilize, then try 2 bars and stabilize. Do this for each step. You should hear and feel a detectable increase at each step.
In my case, I noted that the increases stopped when I went from 4 Bar to 5 Bar. That told me that most likely something in the resistor pack had gone bad. Since the resistor pack, and most likely a circuit board, are all integrated into the blower fan unit, it was time to replace the unit.
After replacing it, I performed the aforementioned test and now had ever increasing flow at each step all the way to max. There is a NOTEABLE difference in flow between 4 and maximum.
I'll be replacing my blower motor next week. Something tells me this is a known problem Porsche is going to end up addressing eventually after we've all paid for the improved part out of pocket.
Has anyone taken apart a broken one after replacement? I would love to see the guts as an IT architect to see where the part failed and if people can prevent them ahead of time so I'll be breaking down my old one next week.
The following users liked this post:
DemonBG (11-09-2022)
#22
Instructor
Thanks everyone on this thread. I replaced mine earlier this week after it was intermittently working in some very cold weather. I ordered mine from Rock Auto and it was even cheaper than the part listed above, around $118. Shipped with taxes came to $140ish. Works flawlessly if someone is concerned the slightly more expensive one used in this thread is not available. Thanks Rennlist!
#23
Thanks everyone on this thread. I replaced mine earlier this week after it was intermittently working in some very cold weather. I ordered mine from Rock Auto and it was even cheaper than the part listed above, around $118. Shipped with taxes came to $140ish. Works flawlessly if someone is concerned the slightly more expensive one used in this thread is not available. Thanks Rennlist!
#24
Thanks for the detailed DIY. This was spot on. Last week my 2016 base cayenne blower started acting funny. It would either not work at all or stay on regardless of the fan speed adjustment. I followed the instructions here and was able to replace the blower motor and get it working again. A few things to note:
- Some other DIY posts mention removing the glove compartment. This is NOT necessary. The instructions here are accurate.
- I had to use a 5.5mm socket to remove the screws. I bought it at Home Depot. The 5/32 socket did not fit.
- There's a bundle of wires wrapped in a black covering that is difficult to maneuver. There are 2 screws hidden above it.
- The screws near the edge of the footwell are at risk of dropping into the trim and being lost. I stuffed a small microfiber towel in that space so that when I dropped a screw, the towel would catch it and fall to the ground.
- I initially bought a replacement blower from Amazon ($90) because it got good reviews but the air flow was noticeably weaker and I think louder. I returned it and bought the VDO/Continental one from Rock Auto ($157.55 delivered) that behaves just like OEM.
- Take your time fitting the blower back into the compartment. It took me a few tries to get it back in there correctly and for the screws to line up properly. Same thing with the cover.


