When you click on links to various merchants on this site and make a purchase, this can result in this site earning a commission. Affiliate programs and affiliations include, but are not limited to, the eBay Partner Network.
Ah ok, I see it. These are the two bolts under here I�m up to. Was also looking at the driver side - looks like I need to unbolt one of the coolant pipes to get to the last bolt
Yup, I know what step you are on. I was able to move the wire way up enough to get a 1/4 inch drive torx socket and u-joint with extension on it. And you are correct. You are going to have to remove the 3rd removable pipe from the t-stat housing.
Ok the front one I got undone using a pry bar to pull up on the harness, the rear one is really low and while I got it loose I need to find a way to pull it out. Then I need to pull everything out.
do you recall how to remove the rear vent Y vent line (the one that�s under the fuel lines)
Ok the front one I got undone using a pry bar to pull up on the harness, the rear one is really low and while I got it loose I need to find a way to pull it out. Then I need to pull everything out.
do you recall how to remove the rear vent Y vent line (the one that�s under the fuel lines)
The vent line is just attached with one of those spring type hose clamps. It was easy.
The bolt is a tamper proof allen. It is reccessed in the plastic. With that bolt removed it should give you enough play on the wire way to move it enough.
Just a footnote on this job. Any of the bolts with the center pin (tamperproof) are aluminum and are considered by Porsche as being one-time-use. Partly because they aren't that strong being made of aluminum, and partly for fear of them seizing in the threads when reused since they may be in dissimilar metals (aluminum and magnesium). Just a general heads up.. I suspect reusing them once wouldn't be a big deal.. but take a lot of care when torquing them back down. And second time I'd want some new ones on hand.
I've experienced it firsthand and from here on out, will always get new bolts for every job on this car. Those aluminum bolts can even break on their own. You torque it down, go about your life and they just break when they want. Next tim you go to remove the bolt, it's gone.
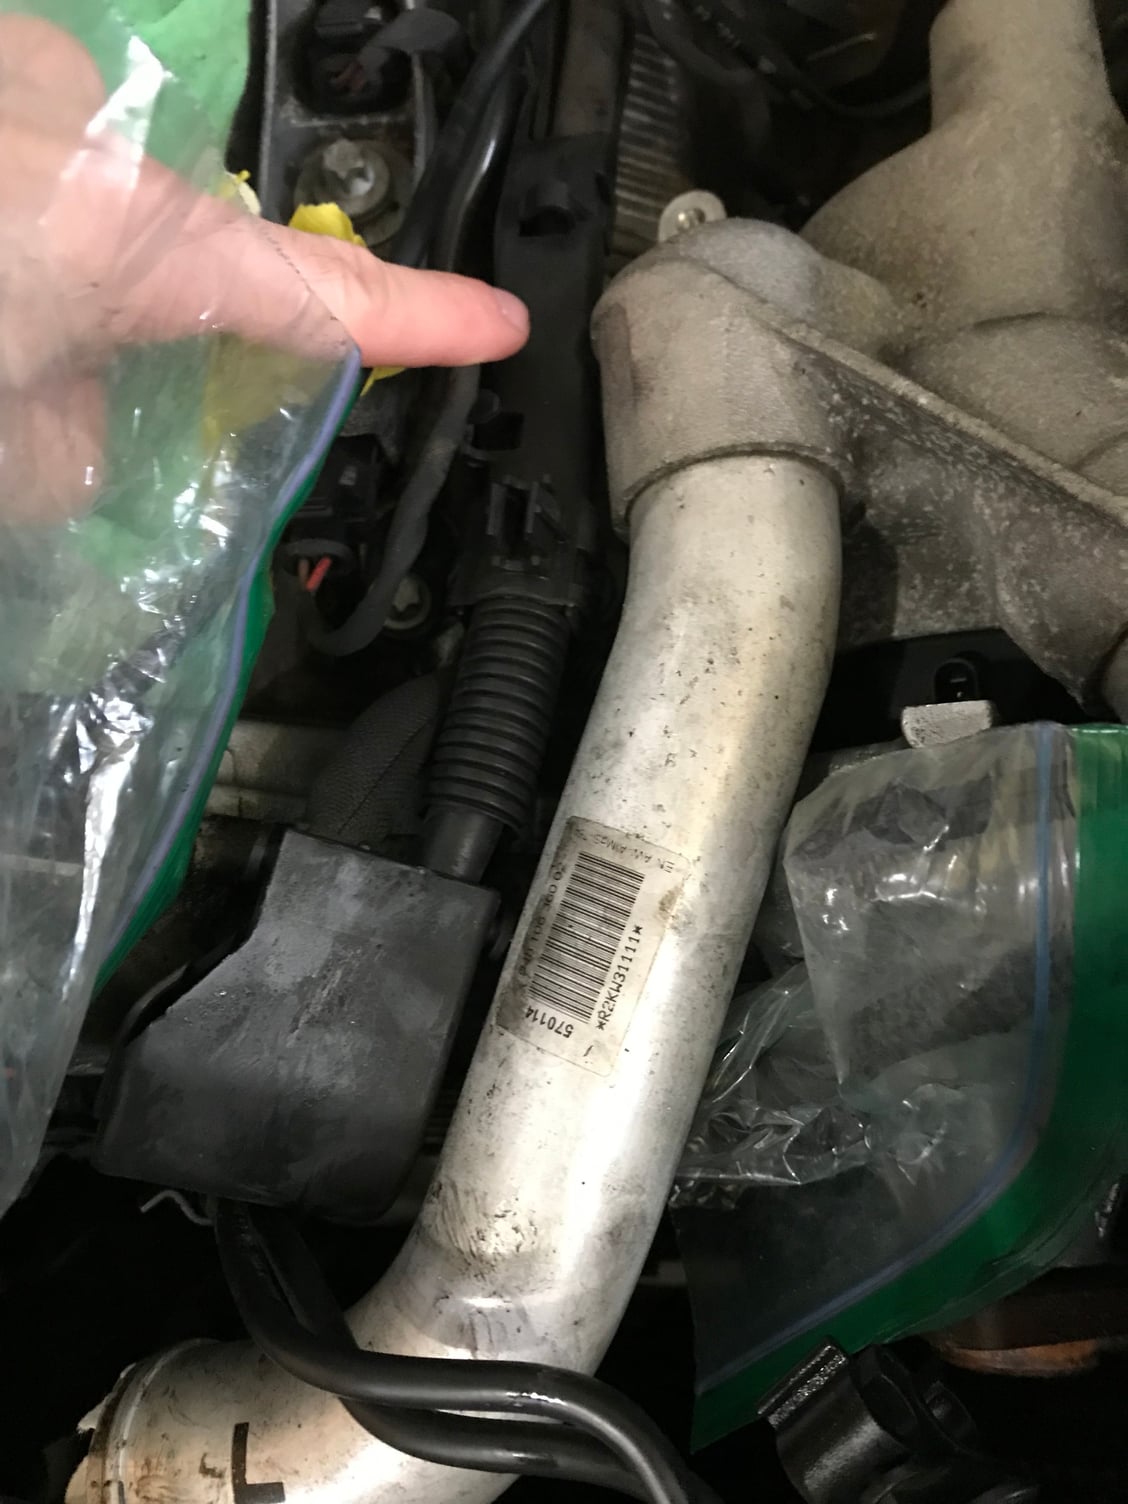
Ugh, they sent me the wrong water pump. That long rear pipe off the back of thermostat housing - just two bolts way in the back and it will lift with thermostat housing - or is there some way to pull it out
For that pipe that comes out of the back of the t-stat, I took out one of the bolts. The bolt that you can get out.... The other bolt I just loosened. If I remember a regular 10mm box end wrench will work for them. That gave me enough play to wiggle the t-stat housing out.
Vent line - pull towards you, there�s a spring clamp. The two screws for the coolant are on the right. Everything removed - don�t forget to remove and replace the two rubber gaskets where tstat housing sits - two holes on opposite sides of the valley Two electrical wires -12 guage
Ok got the tstat and housing out and got the new one in (also removed the vent line - which was in perfect shape). Definitely need to remove the screws from the two electric line brackets on either side of valley - right one lifts more than left. Then remove the one screw for the lone aluminum coolant line all the way back - the 2nd one that�s behind that plastic wall can just be loosened as far as you can without removing it. I used a stubby 5/16 to do that. The tstat I removed by sticking two 12 gauge electric wires through the holes and then a large pry bar - I used the main drive pulley to lever. The housing itself was a pain - but I was able to get it up and then rotated counterclockwise to get the old one out. My housing pipes were completely solid and intact - I wonder if this is an issue for hot climates and or long/spirited driving. Awaiting new pump, bolts and Y piece before completing the job. Only thing I�m stuck on now is the serpentine belt - there�s a bracket with the small coolant line from tstat blocking plus some small vent line - not sure how the latter removes.
My vent line was in good shape also,but I had a new one so went ahead and replaced it. My t-stat tubes seemed okay but I went ahead and JBWelded them. I was already there and not knowing if and when they were going to fail I played it safe. It didn't cost anything to fix them and now I am confident they will not fail.
Which brackets are you talking about preventing you from getting the serpentine belt off? Can you get a picture?
I�ll try tomorrow to get pics, but it�s looking down the driver side - right near the tensioner - one is a vent line, the other is the smaller coolant rubber pipe to tstat
I�ll try tomorrow to get pics, but it�s looking down the driver side - right near the tensioner - one is a vent line, the other is the smaller coolant rubber pipe to tstat
If it's what I'm thinking that bracket is bolted to the block.

 05-19-2019, 07:58 PM