When you click on links to various merchants on this site and make a purchase, this can result in this site earning a commission. Affiliate programs and affiliations include, but are not limited to, the eBay Partner Network.
Glad to see others are doing this as well! I am curious if you notice a difference in MPG or performance post the cleaning.
OK, from the pcm consumption readout I used to be hover around 13 mpg and now it says 15 mpg. I find it hard to believe that I picked up 2 mpg. Who knows... I didn't do back to back test runs or dyno sessions. I do feel better that it's done. That is what really matters to me.
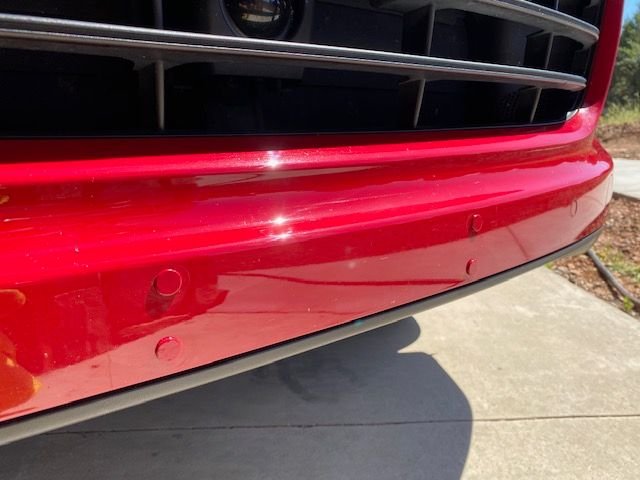
While I admire the entrepreneurial spirit of bumperplugs.com, I couldn't justify the price of $30/pair, $60 for a set of four that I would have needed to plug my old front license plate holder on my 2015 Cayenne. Already had some Carmine Red touch up paint, so went to the local ACE Hardware store and bought some plastic plugs and painted myself. Total cost, under $5. Looks good enough for me.
Today�s project was to upgrade the hard drive in my PCM from an old Toshiba disk/platter-based drive to a high performance SSD, and now my PCM is as fast as my iPhone.
Looks good! But there is always an option to fix and repaint the whole bumper
Originally Posted by DarkHorseMC
While I admire the entrepreneurial spirit of bumperplugs.com, I couldn't justify the price of $30/pair, $60 for a set of four that I would have needed to plug my old front license plate holder on my 2015 Cayenne. Already had some Carmine Red touch up paint, so went to the local ACE Hardware store and bought some plastic plugs and painted myself. Total cost, under $5. Looks good enough for me.
Looks good!
I really wish that clock was real clock. Instead of this big seconds hand. Is the installation pretty simple? I'm thinking about finding something similarly sized and sticking in there.
Originally Posted by Caudy
No I bought it from eBay.
Its come from china but the quality is as close to oem as you could get.
Ive just fitted it and its spot on, really happy with it
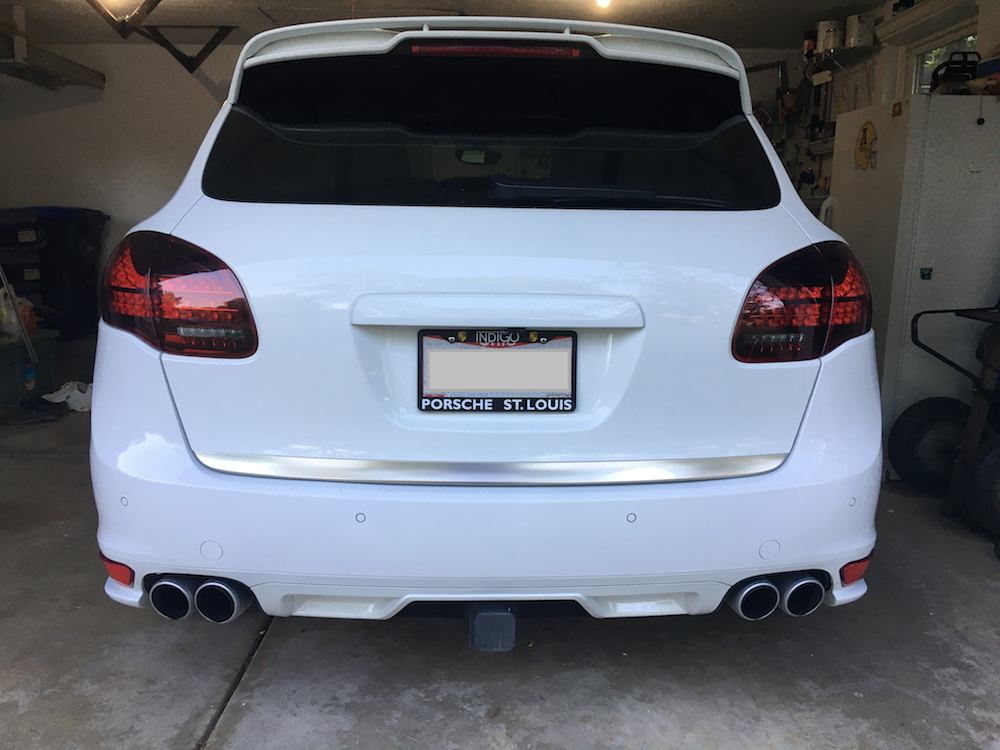
Debadged after having to repaint the tailgate. I couldn't bring myself to pay for all those overpriced plastic pieces and the labor involved to put them on right. The cleanness is growing on me but may eventually rebadge.
Changed the Battery with a Platinum Duralast from Autozone as recommended and following the DIY on this forum... was easy thanks to the DIY. Battery was the original from 2014.
Flushed my brake fluid to day. The Porsche brake fluid I got recently came in a round can this time, not as easy to pour into master cylinder than the rectangular can.
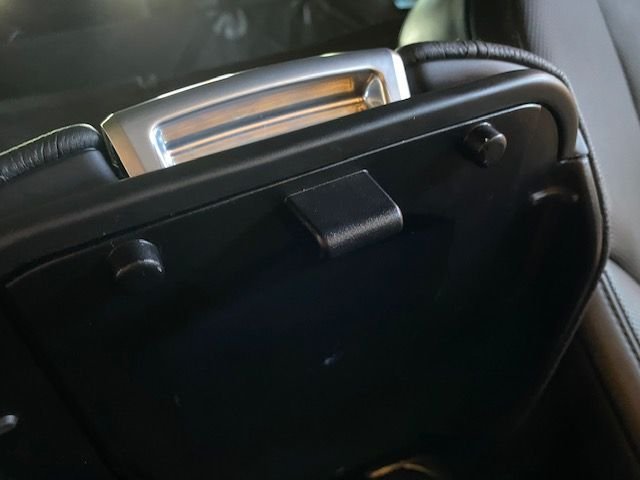
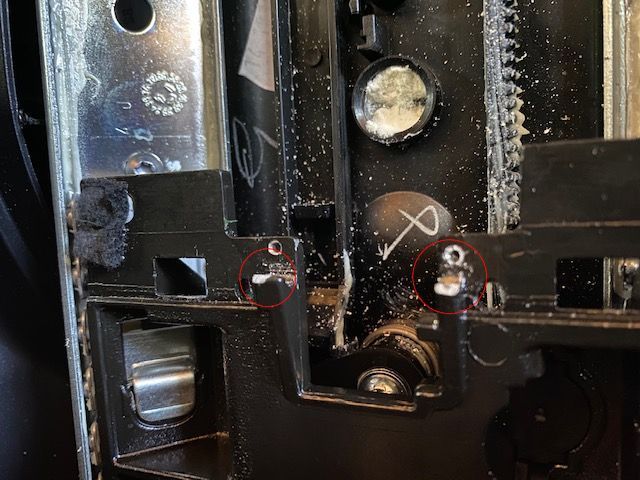
My center armrest console lid latch broke. I just acquired this 2015 CD, and either the dealer or previous owner attempted a fix, but it turn out to not be reliable. The metal that holds the latch was broken. From what I read, the replacement is a pain to do and expensive.
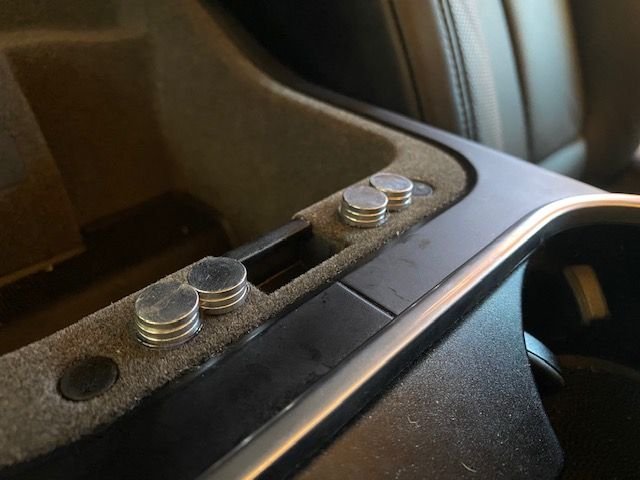
So, I decided to use some neodymium magnets... I had a bunch of them on hand from a previous bulk purchase via eBay or amazon, pretty inexpensive. They are actually quite handy to have in your MacGyver toolchest.
Using a hot glue gun, I glued 4 small magnets to the bottom console base. These will only be seen when the console is opened.
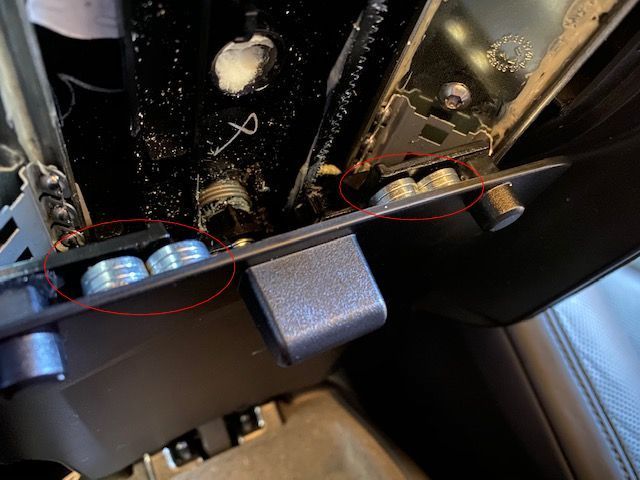
I then pulled down the upper lid plastic inside cover that housed the latch. Removed the loose latch, springs, debris and let the plastic cover lay flat (as if the lid was closed.)
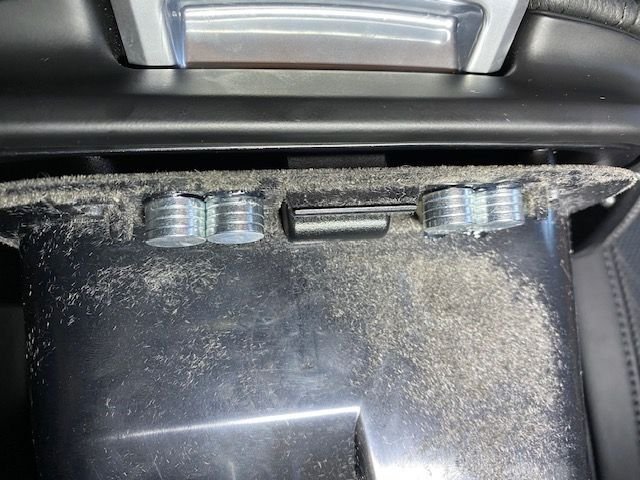
I glued 4 magnets to the top of the plastic cover that aligned with the magnets I had glued onto the base. I could feel the force of the magnets when they were aligned.
Then, snapped the plastic cover back onto the upper lid and when closed the magnets should hold the lid down tight. I had to stack multiple magnets to get the strength needed to give it a good solid close feel.
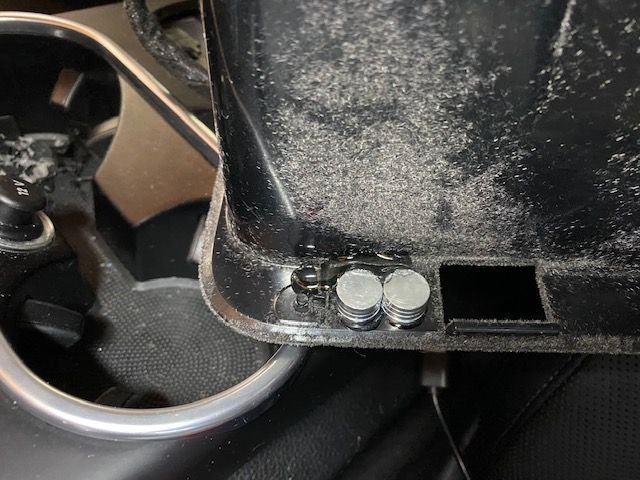
UPDATE: removed bottom tray of console and put magnets underneath... now magnets are not visible at all... and the magnets stay in place better. but, i had to dremel away some of the plastic frame to make space for the magnets.
Last edited by DarkHorseMC; 07-06-2020 at 10:32 AM.
Reason: new information


 06-22-2020, 02:04 PM