When you click on links to various merchants on this site and make a purchase, this can result in this site earning a commission. Affiliate programs and affiliations include, but are not limited to, the eBay Partner Network.
Hello super helpful fellow car enthusiasts. I have used this incredible site for intake manifold removal, coolant reservoir replacement, spark plugs, and now the valve cover gaskets! It's time for me to join the fold with a paid membership and commitment to participating with other diy'ers.
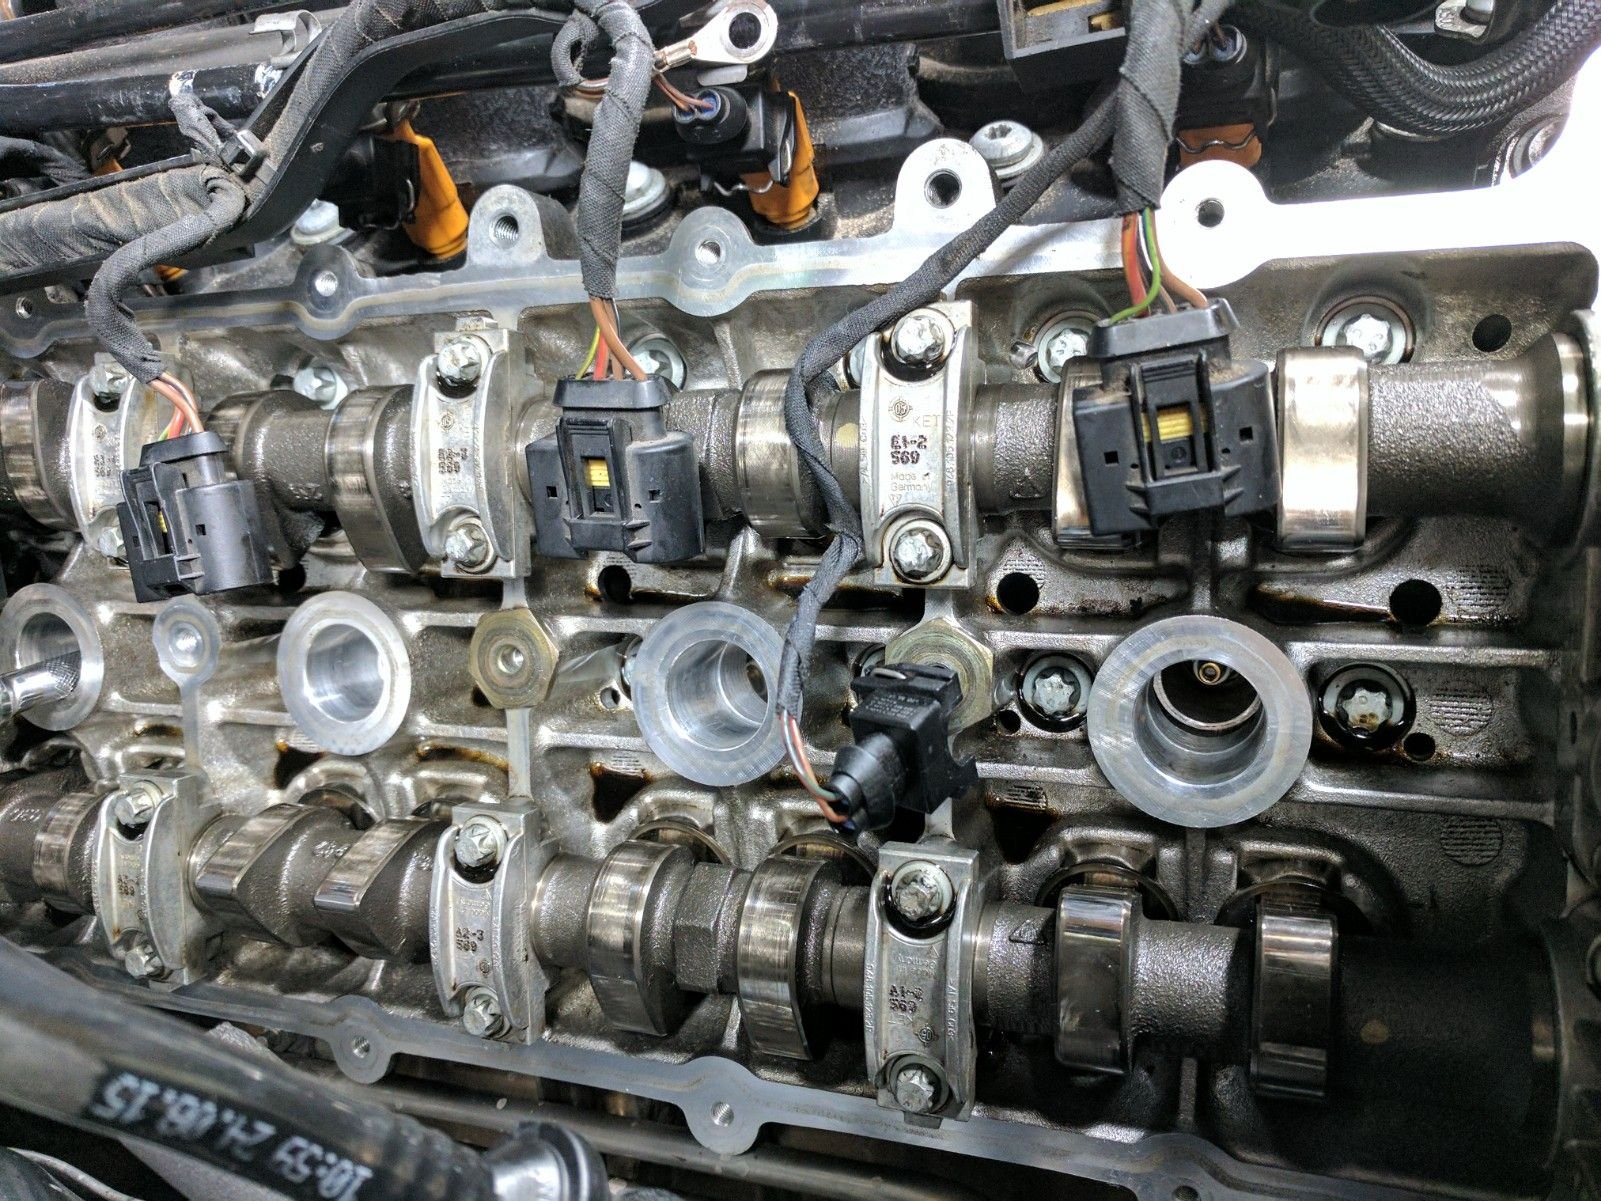
I am currently in the middle of removing the driver side valve cover. All bolts are off, but this odd wire runs across the cover from the harness to some mystery location underneath the valves. It runs alongside the spark plug nearest the driver headlight. I do not see it mentioned in other diy's or posts except for someone in the Pelican article comments that says it is "on the generator".
Is there a place to unplug this wire? I have traced it down with my fingers and removed it from a couple metal brackets. This has created enough slack to possibly slide out the valve cover but I think it would make proper reassembly with bead very difficult. I am open to cutting and resplicing this wire with solder & heatshrinks if that is the recommended method. I was trying not to as my tools for that are currently 100mi away.
It seems like a big obstacle to neglect so perhaps this is unique to the 2006 V8 engines.
Thank you, RT. You were on the money. Unfortunately I just couldn't get it unclipped. After 20 min of really trying to squeeze my hand down there I ended up cutting the wire to move things along. I figured it was better than risking pulling the wires out of the connector or damaging a hose down there. Perhaps I could have accessed it from the wheel well?
Sounds like you may be past this point, but if not, be very careful removing and reinstalling the valve covers. The cams have metal tabs on the back that you can bend. In my case one broke. A new set of cams will cost you 1k or more. Most expensive DIY I ever did. Best of luck.
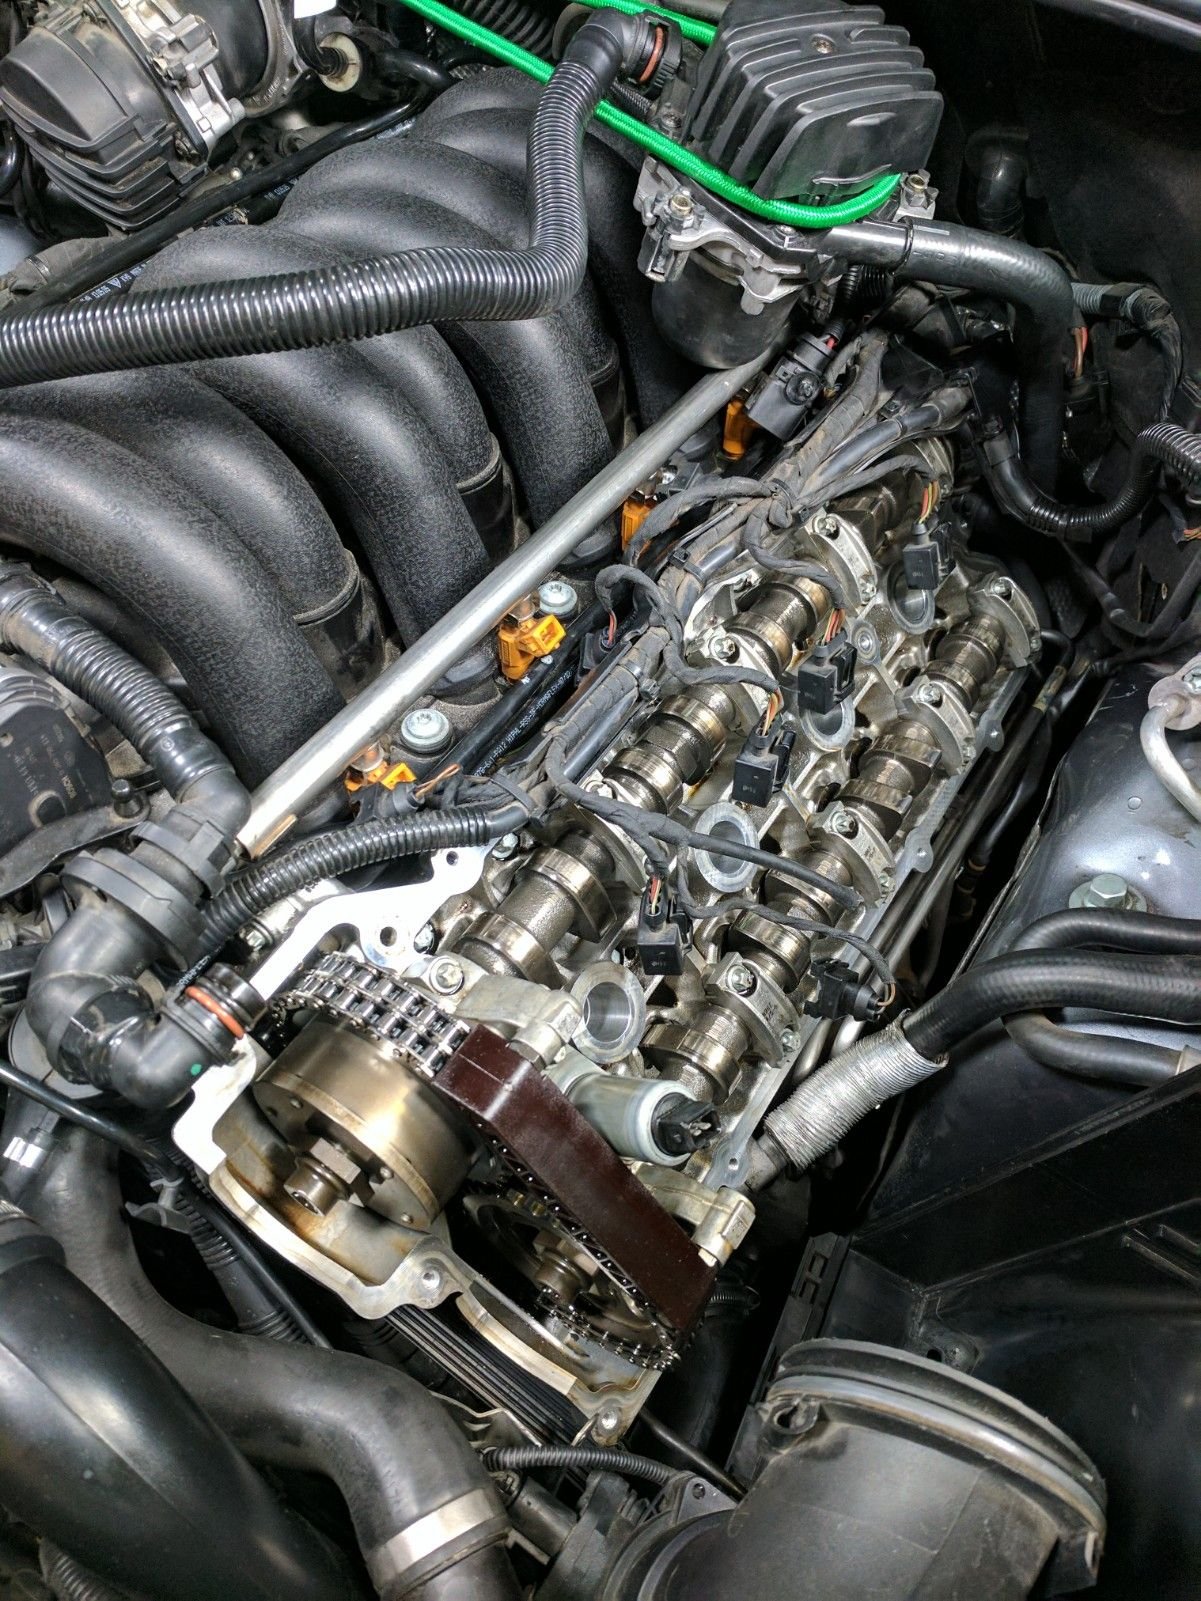
I was also unsure what to do with the wire harness/tray running above the driver side valve cover. To help others in the future anyone care to share how they dealt with the wire harness/tray? Is it even necessary to remove it?
GrandOak: As for the wire harness/tray above driver side valve cover I unclipped the connectors going into the manifold, the two hex screws holding down the ground wires, and the black Torx screw holding down the tray in the back. After removing the two metal brackets under the tray there was just enough play to lift up the harness and maneuver off the cover. I may have cut a ziptie or unclipped something else but it's been about a week since I did that side. I wish I had seen the recommended shallow torx driver tool you referenced in your 'failed' post! I ended up getting
and it did the trick. Fortunately just about all screws turn by hand after a half turn or so of loosening.
Also, thanks for posting the info on accessing the wire from underneath!
drift1492: Thank you for reminding me of the passenger side L tab! I'm just about to replace the cover and completely forgot about that.
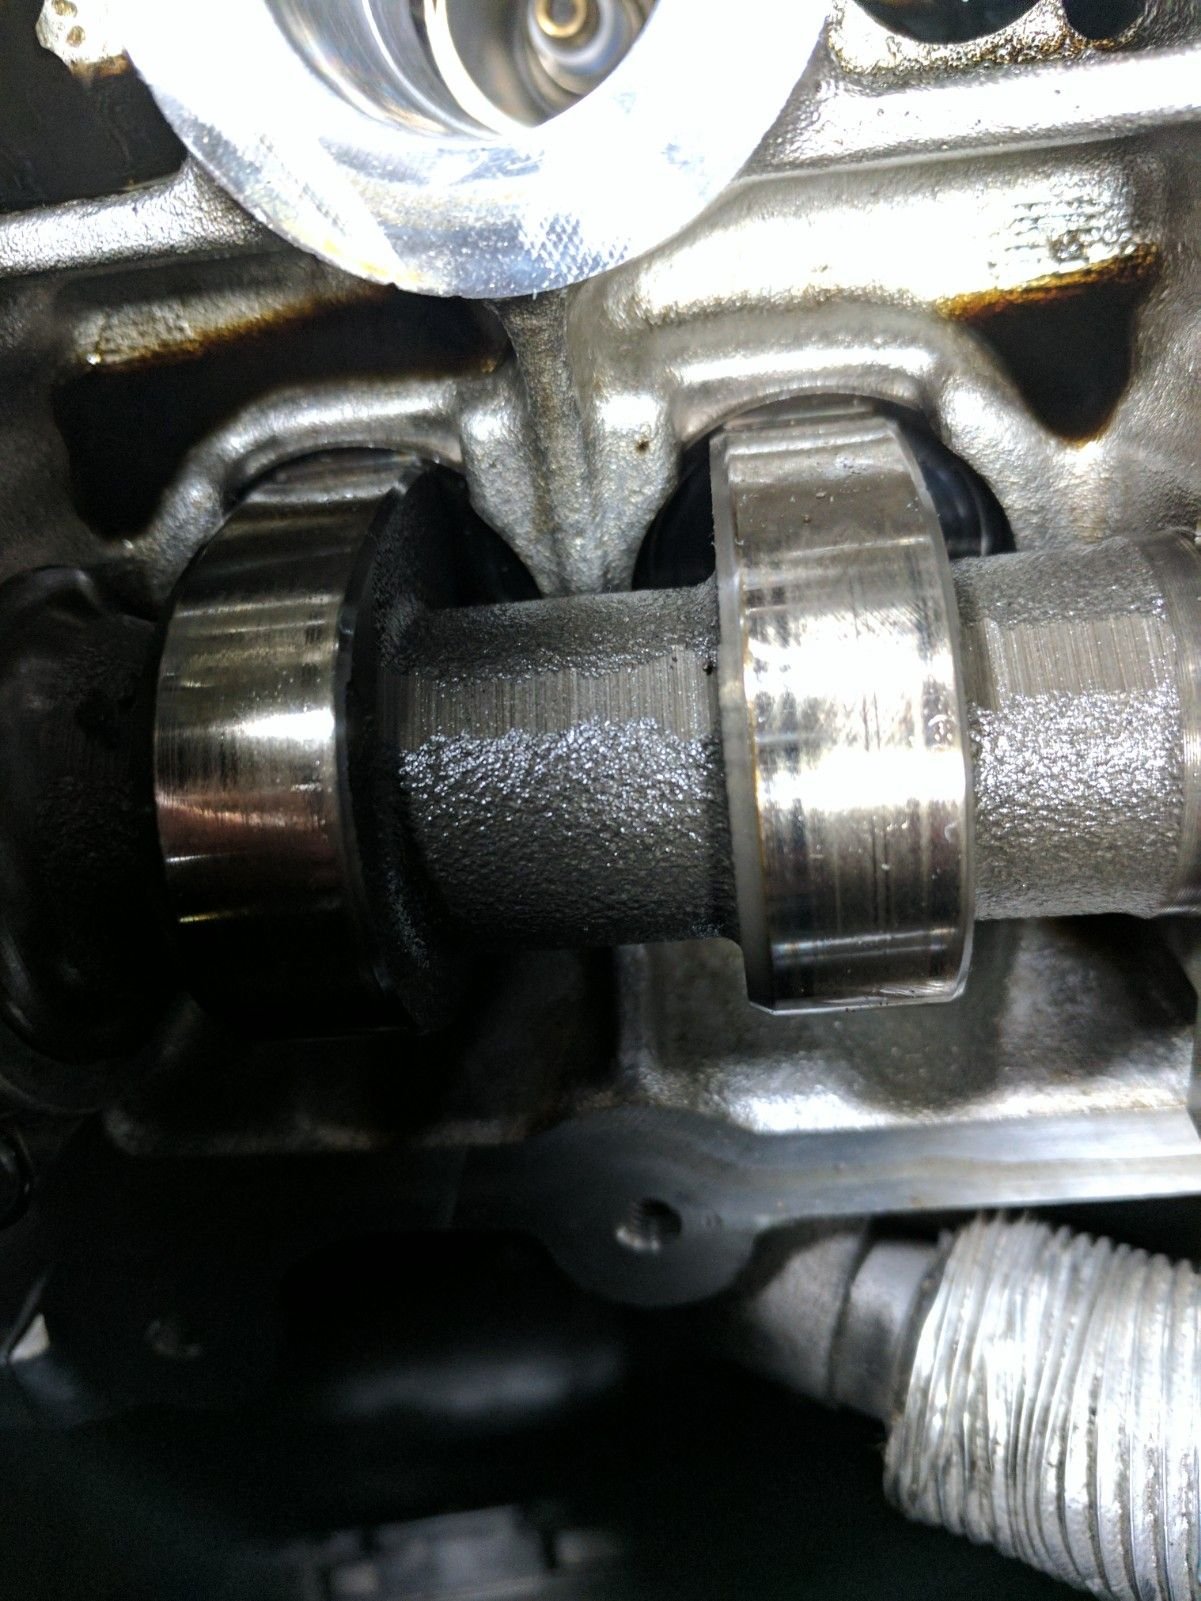
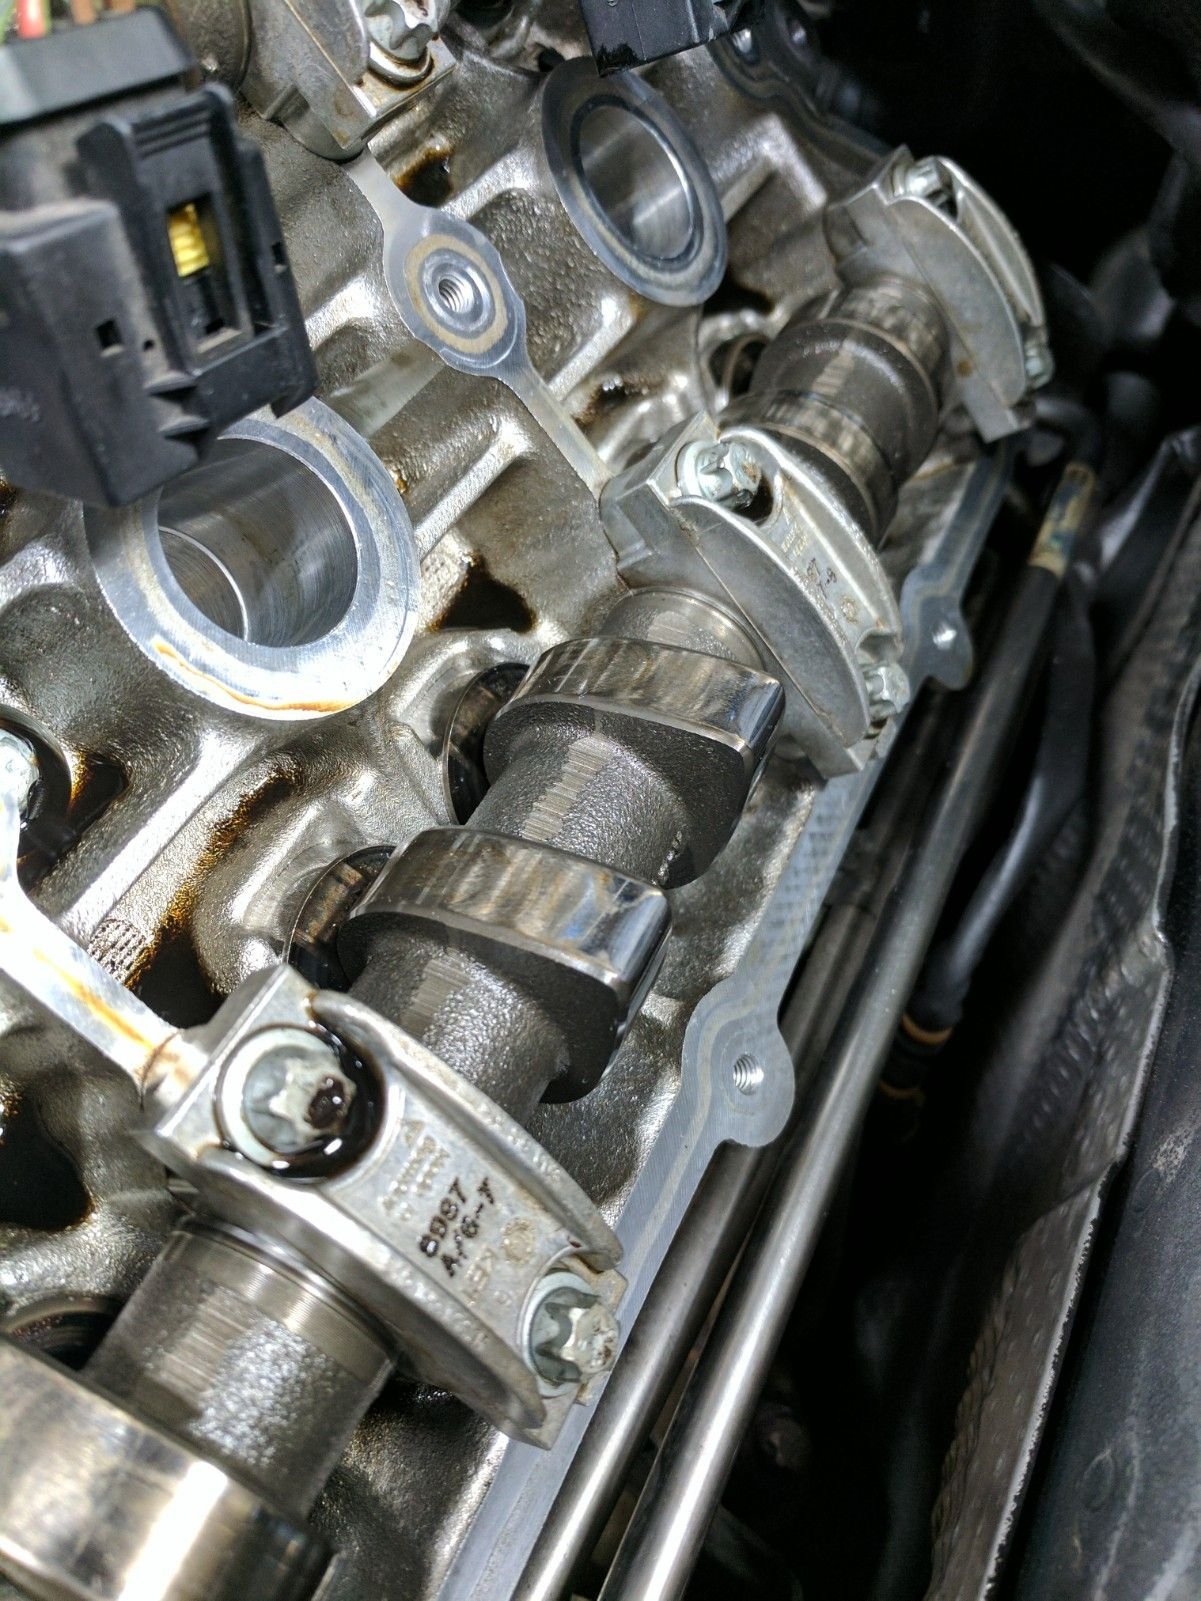
I was surprised to see the cam shaft wear pictured below. It was bad on the lower driver side shaft and also present but not as bad on the upper passenger side shaft. Does anyone have comments on what this may mean? The pitting certainly doesn't strike me as normal wear.
If anyone else bends a coil plug hold-down screw (or several) they are called Hexalobular screws with part number 948 105 145 03. They cost around $6 each and take a few days.
If anyone else drops one of the many valve cover screws in the engine bay and can't find it, they are called M6 30 screws and are part number 999 073 341 01. They cost around $1.50 each on Pelican or $5 each from dealership, where they should be in stock.
I was surprised to see the cam shaft wear pictured below. It was bad on the lower driver side shaft and also present but not as bad on the upper passenger side shaft. Does anyone have comments on what this may mean? The pitting certainly doesn't strike me as normal wear.
Passenger side
Driver Side
Driver Side
Driver side
I may be late to the game but I'd up your zinc in your oil by quite a bit.
Thanks for the comment. Not late at all because I've been mostly out of town and only put 1000 miles on it since.
If you have a moment I'd like to know a little more about this.
Sure, zinc, called ZDDP in your oils or oil additives was formulated to prevent camshaft and valvetrain wear. It became super important after the removal of the lubricating lead from our fuels. You can find it in some oils (Royal Purple and Shell Rotella are what I use in my 928). You can get it from various manufacturers to put in with your oil. Lucas makes one called TB Zinc-Plus. I add that to my 928 and Cayenne as well.
Hemmings Motor News also put out a good article on this a few years ago.
Does anyone have a good picture of the metal cam tabs for the timing, that can be easily broken off?
Im going to attempt this job, my passenger side is leaking near the front, not smoking but smelling for sure. LiquiMoly oil saver didnt do anything.
I have a feeling its leaking at the front where some of you have mentioned you need to apply some RTV/sealant. Guessing thats the week point.

 05-18-2017, 04:53 PM