When you click on links to various merchants on this site and make a purchase, this can result in this site earning a commission. Affiliate programs and affiliations include, but are not limited to, the eBay Partner Network.
You have to remove the windshield wiper arms for several jobs on the Cayenne including: replacing the wiper arms (not blades), accessing the wiper motor, accessing the bolts for the upper suspension mounts, replacing the brake vacuum booster or line, and likely some other tasks. I've not seen a writeup on how best to do this, so here's some notes and pictures from my experience. With the right tools it's not too bad and can be done in under an hour (and probably considerably less once you know what you're doing).
Tools needed:
- 16mm or 5/8 socket and associated u-joint and socket wrench/ratchet
- Wiper arm puller tool (description below)
- Some sort of rust penetrant (PBlaster, Kroil, Liquid Wrench, etc)
- Small screwdriver
- Blue tape or a Sharpie
- Roll of shop towels and/or some blankets
- Maybe a small hammer
1) Before starting, with your wipers in their resting position, use some blue tape or a Sharpie to mark the position on the wipers on the windshield so you know where to put them back.
2) Open the hood and pop the three round covers off of the wiper arms. The two caps in the center came off using only my fingers, the one on the driver's side (LHD) took a small flat blade srewdriver to pop it off.
3) Spray the three nuts on top of the wiper arms with a rust penetrant of choice. Letting it sit for a while may help in subsequent steps.
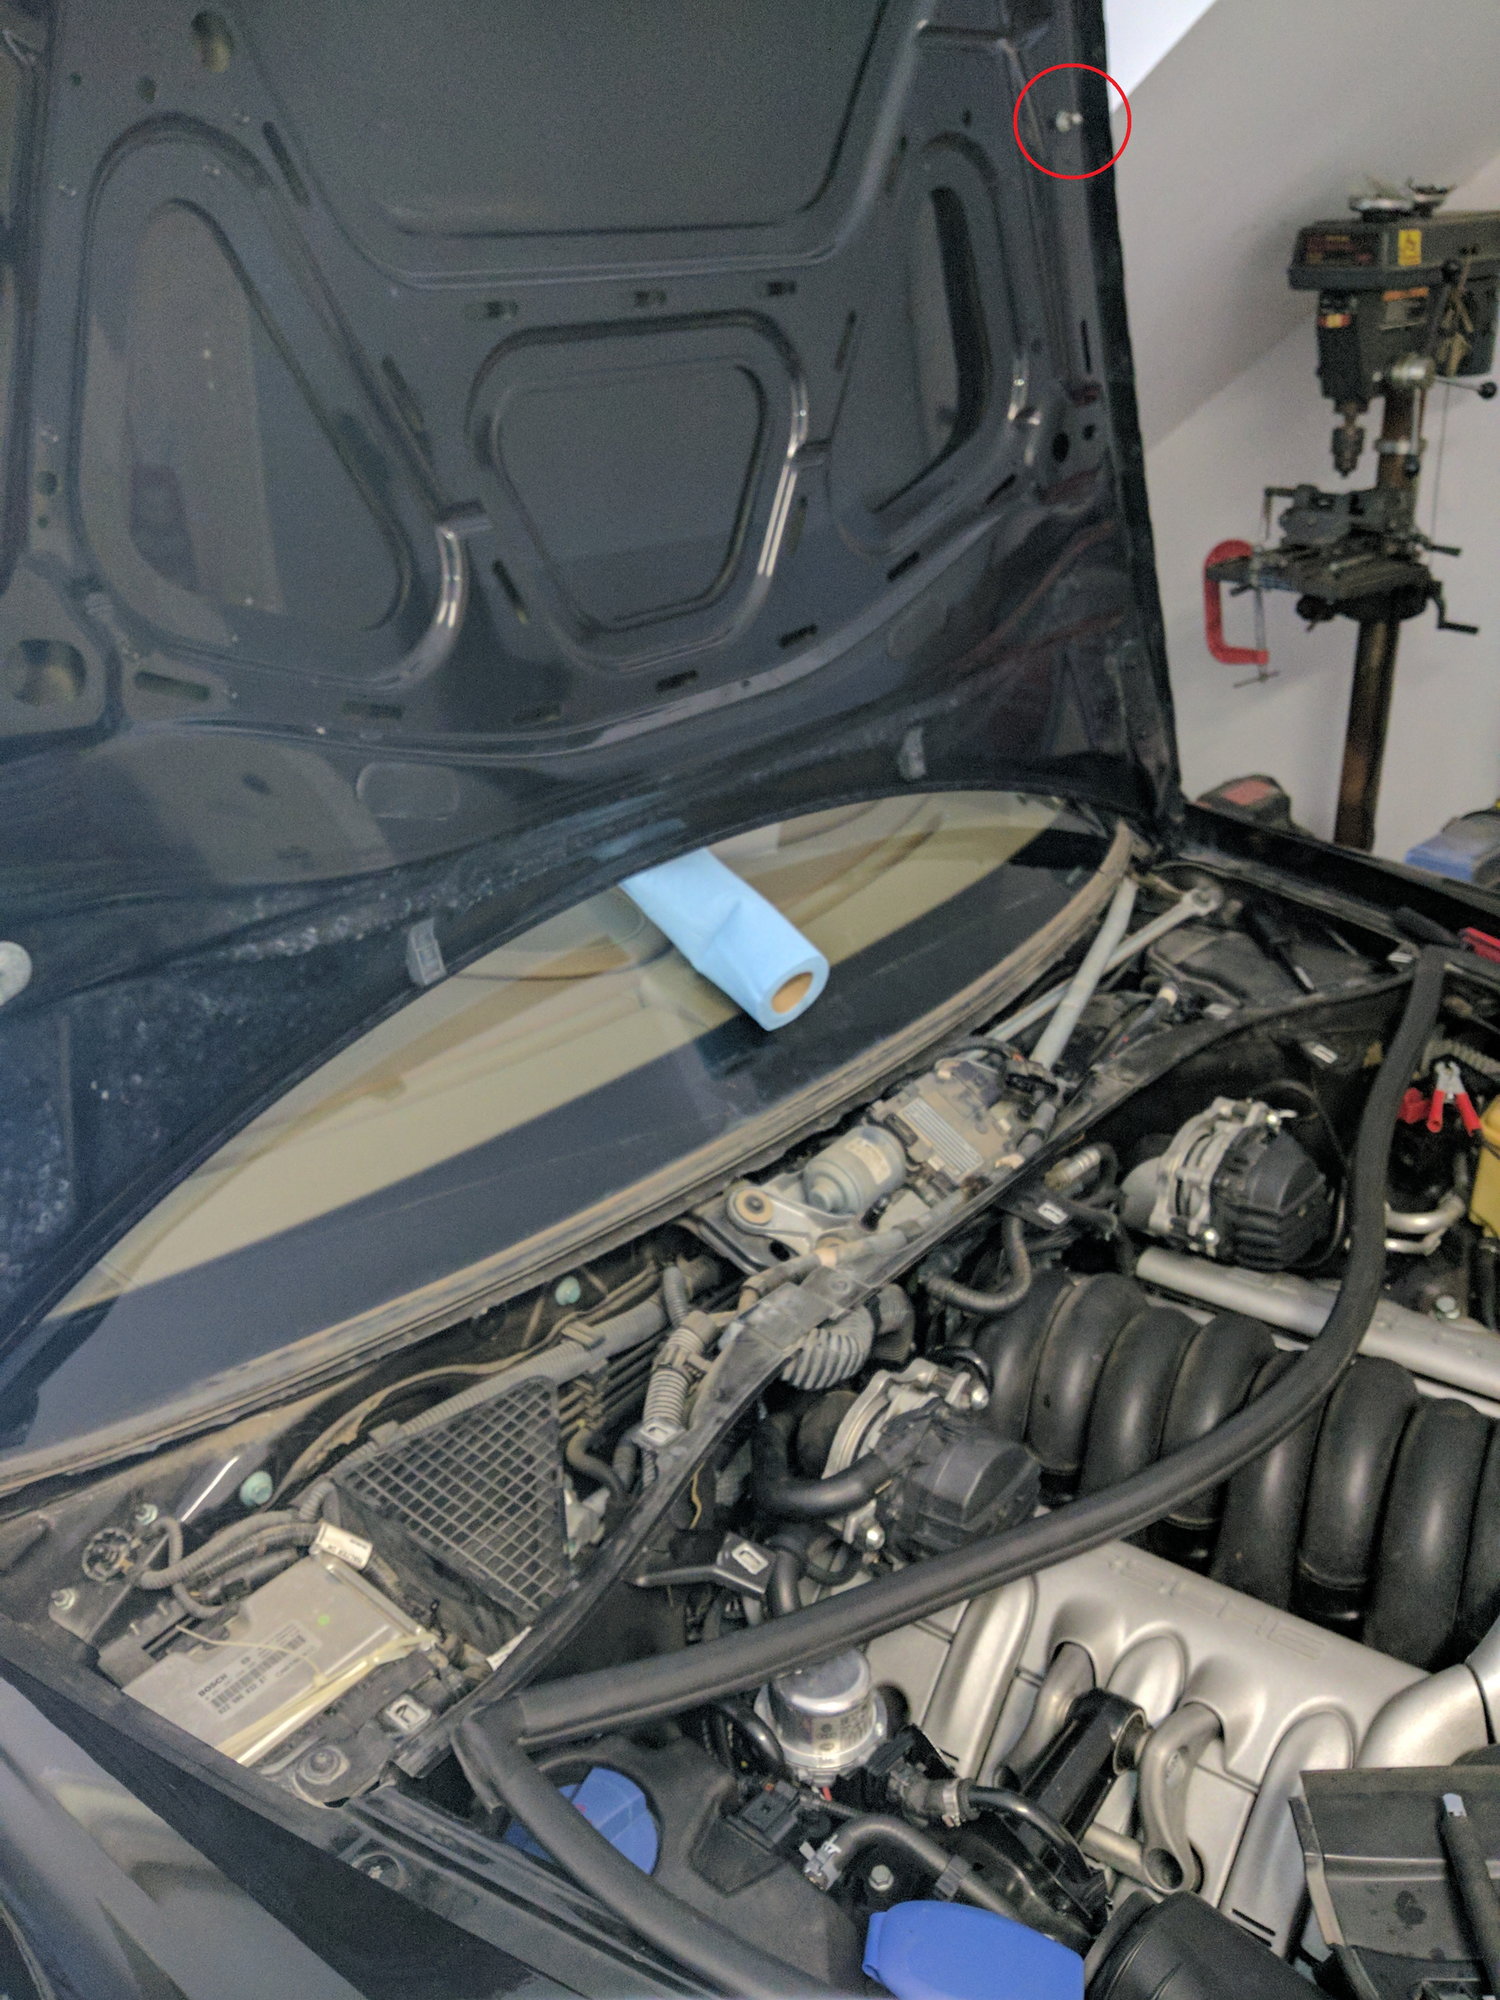
4) Put a heavy blanket and/or roll of paper towels on the windshield. Using a small flat blade screwdriver, lever up the metal spring clip on the hood side of the air spring that holds the hood in the up position. While supporting the hood with your head (or a friend), pull the end of air spring off of the ball joint on the hood. Mine was surprisingly easy to remove -- it just popped right off with hand force. Now that the hood is free, very gently push it back toward the windshield. I pushed mine just past 90 degrees upright, and used a roll of shop towels to keep it from falling backwards into the windshield. It didn't really want to fall, but I certainly didn't want a new windshield or new hood. I did this so that I could get enough room to do the next couple steps using the puller I have -- you might be able to skip this step if you have a lower profile puller. Here's what my hood looked like when flipped back -- red circle shows where the air strut would otherwise be connected to the hood:
5) Using a 16mm or 5/8th socket, loosen the nuts on the tops of the wiper arms but do not completely remove them. The nuts should be loosened so that nuts are capturing only about 1/2 to 2/3 of the wiper bolt -- that leaves a little recess in the center of the nut for your puller to center on in the next step.
6) You'll need a wiper arm puller to get the arms off -- don't event bother trying without one, life is too short and Porsche parts are too expensive when you break them. Just buy the tool. I used this one
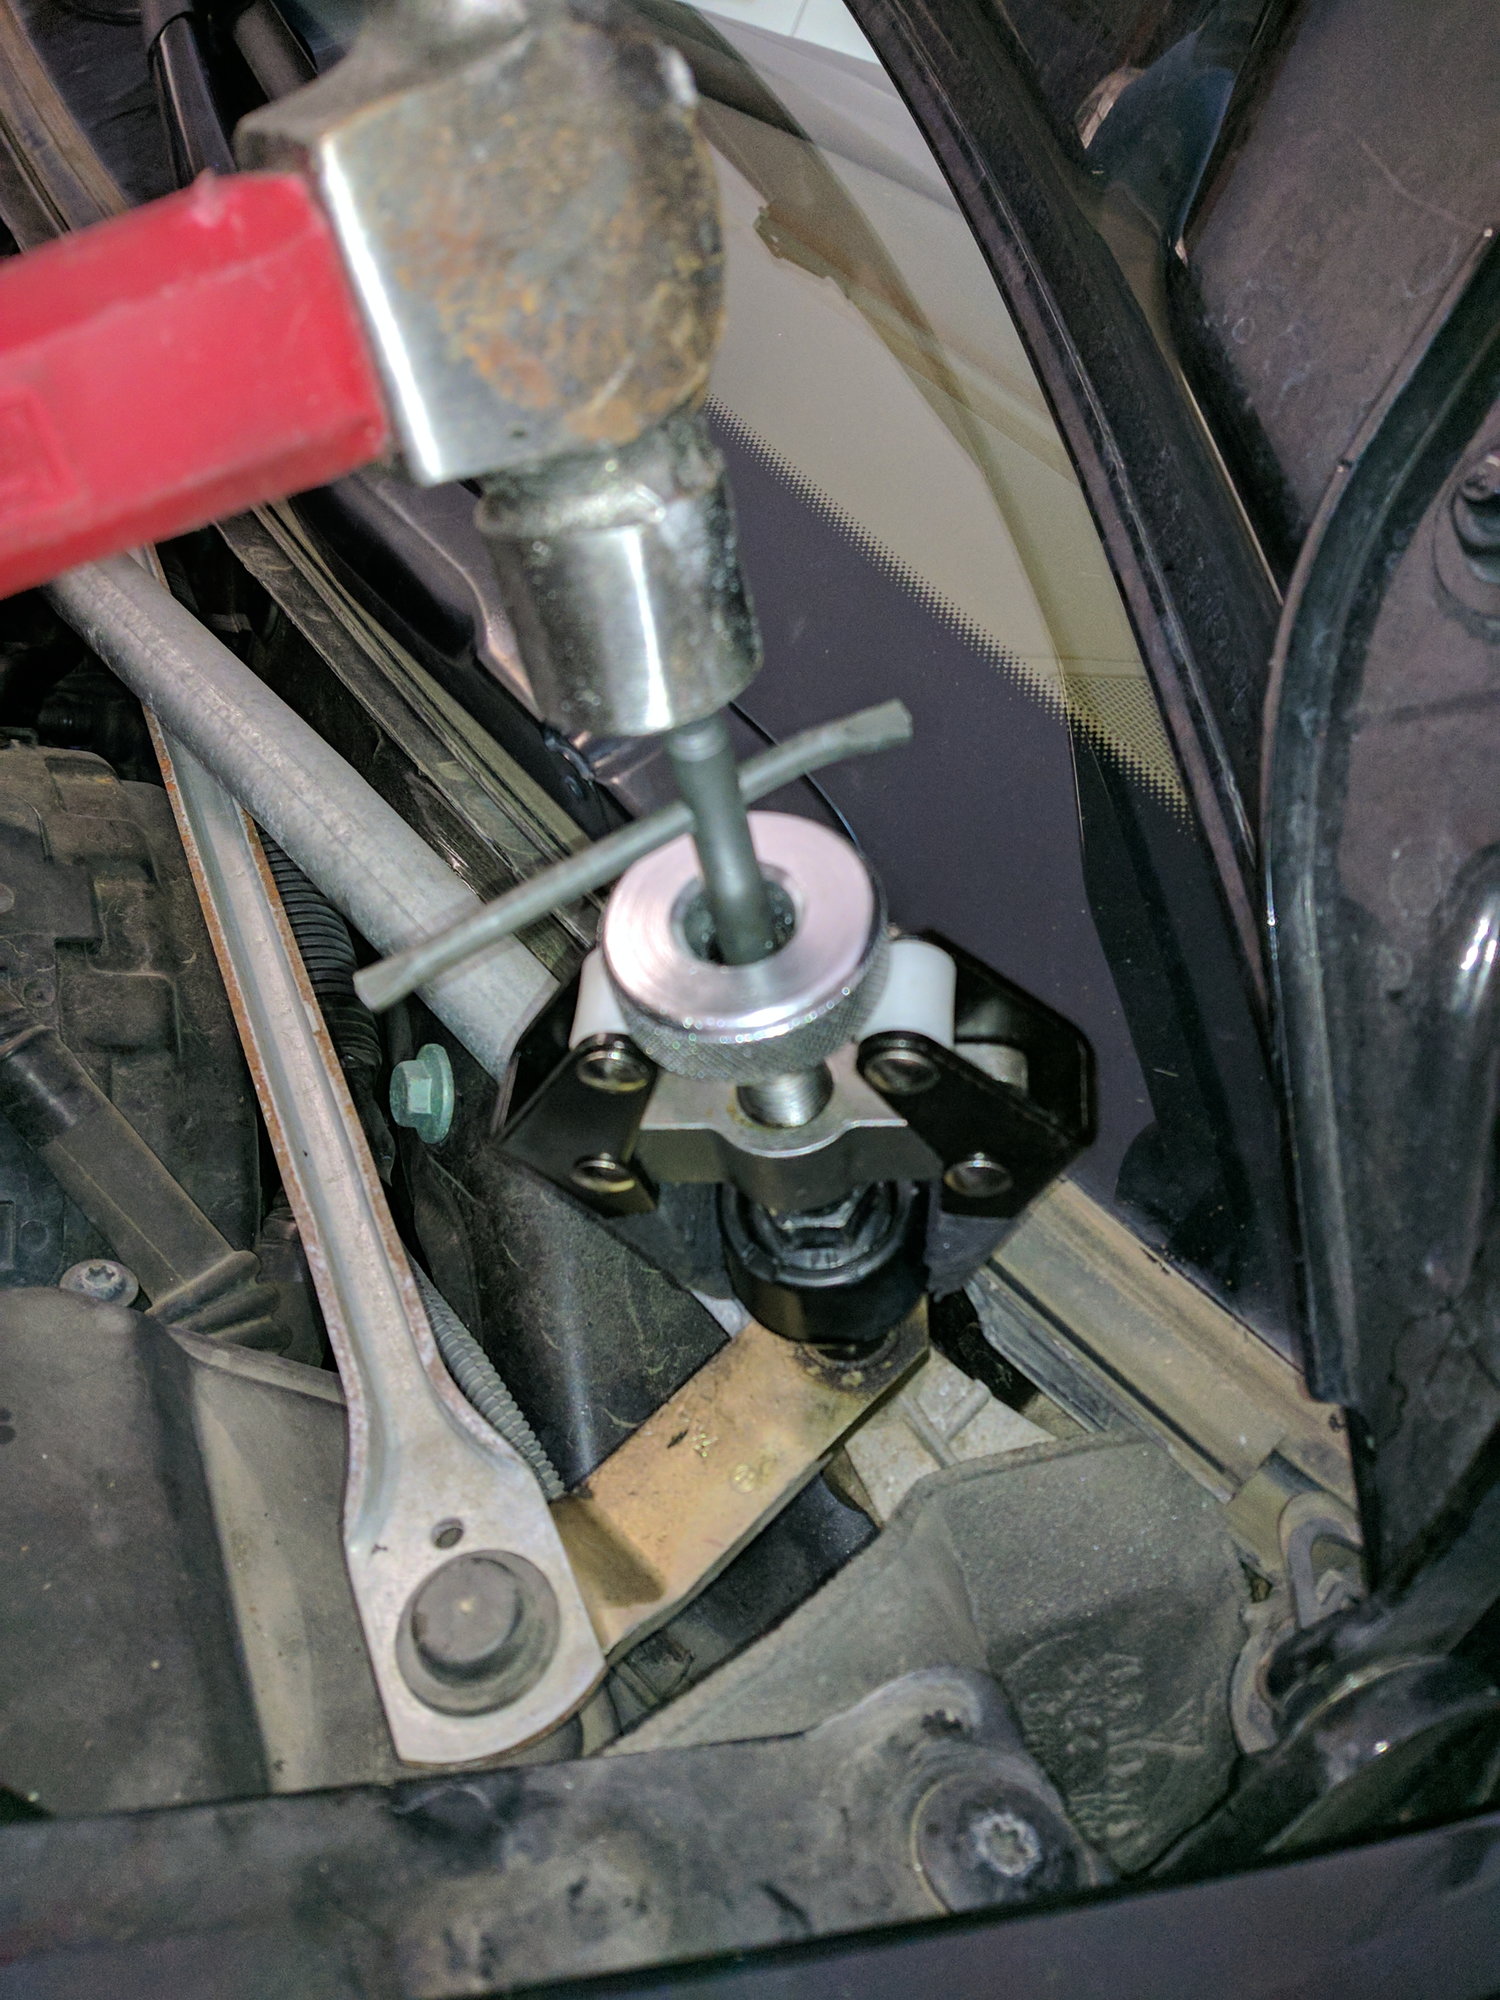
would probably work better because it's slimmer around the wiper arm. Setup the puller something like the picture below. Note that the plastic cowl is missing in my photos (I took the pictures after I succeeded), but the plastic cowl makes access around the arm very tight (but doable) using the tool I used. Also, the driver side was frozen tight, even with the puller snugged up (and starting to deform). I used a small hammer to gently tap on the top of the puller several dozen times while the puller was torqued up and eventually it popped loose with a bang.
7) The arms should now be able to be separated from the wiper shafts. Finish removing the nuts and remove the wiper arms.
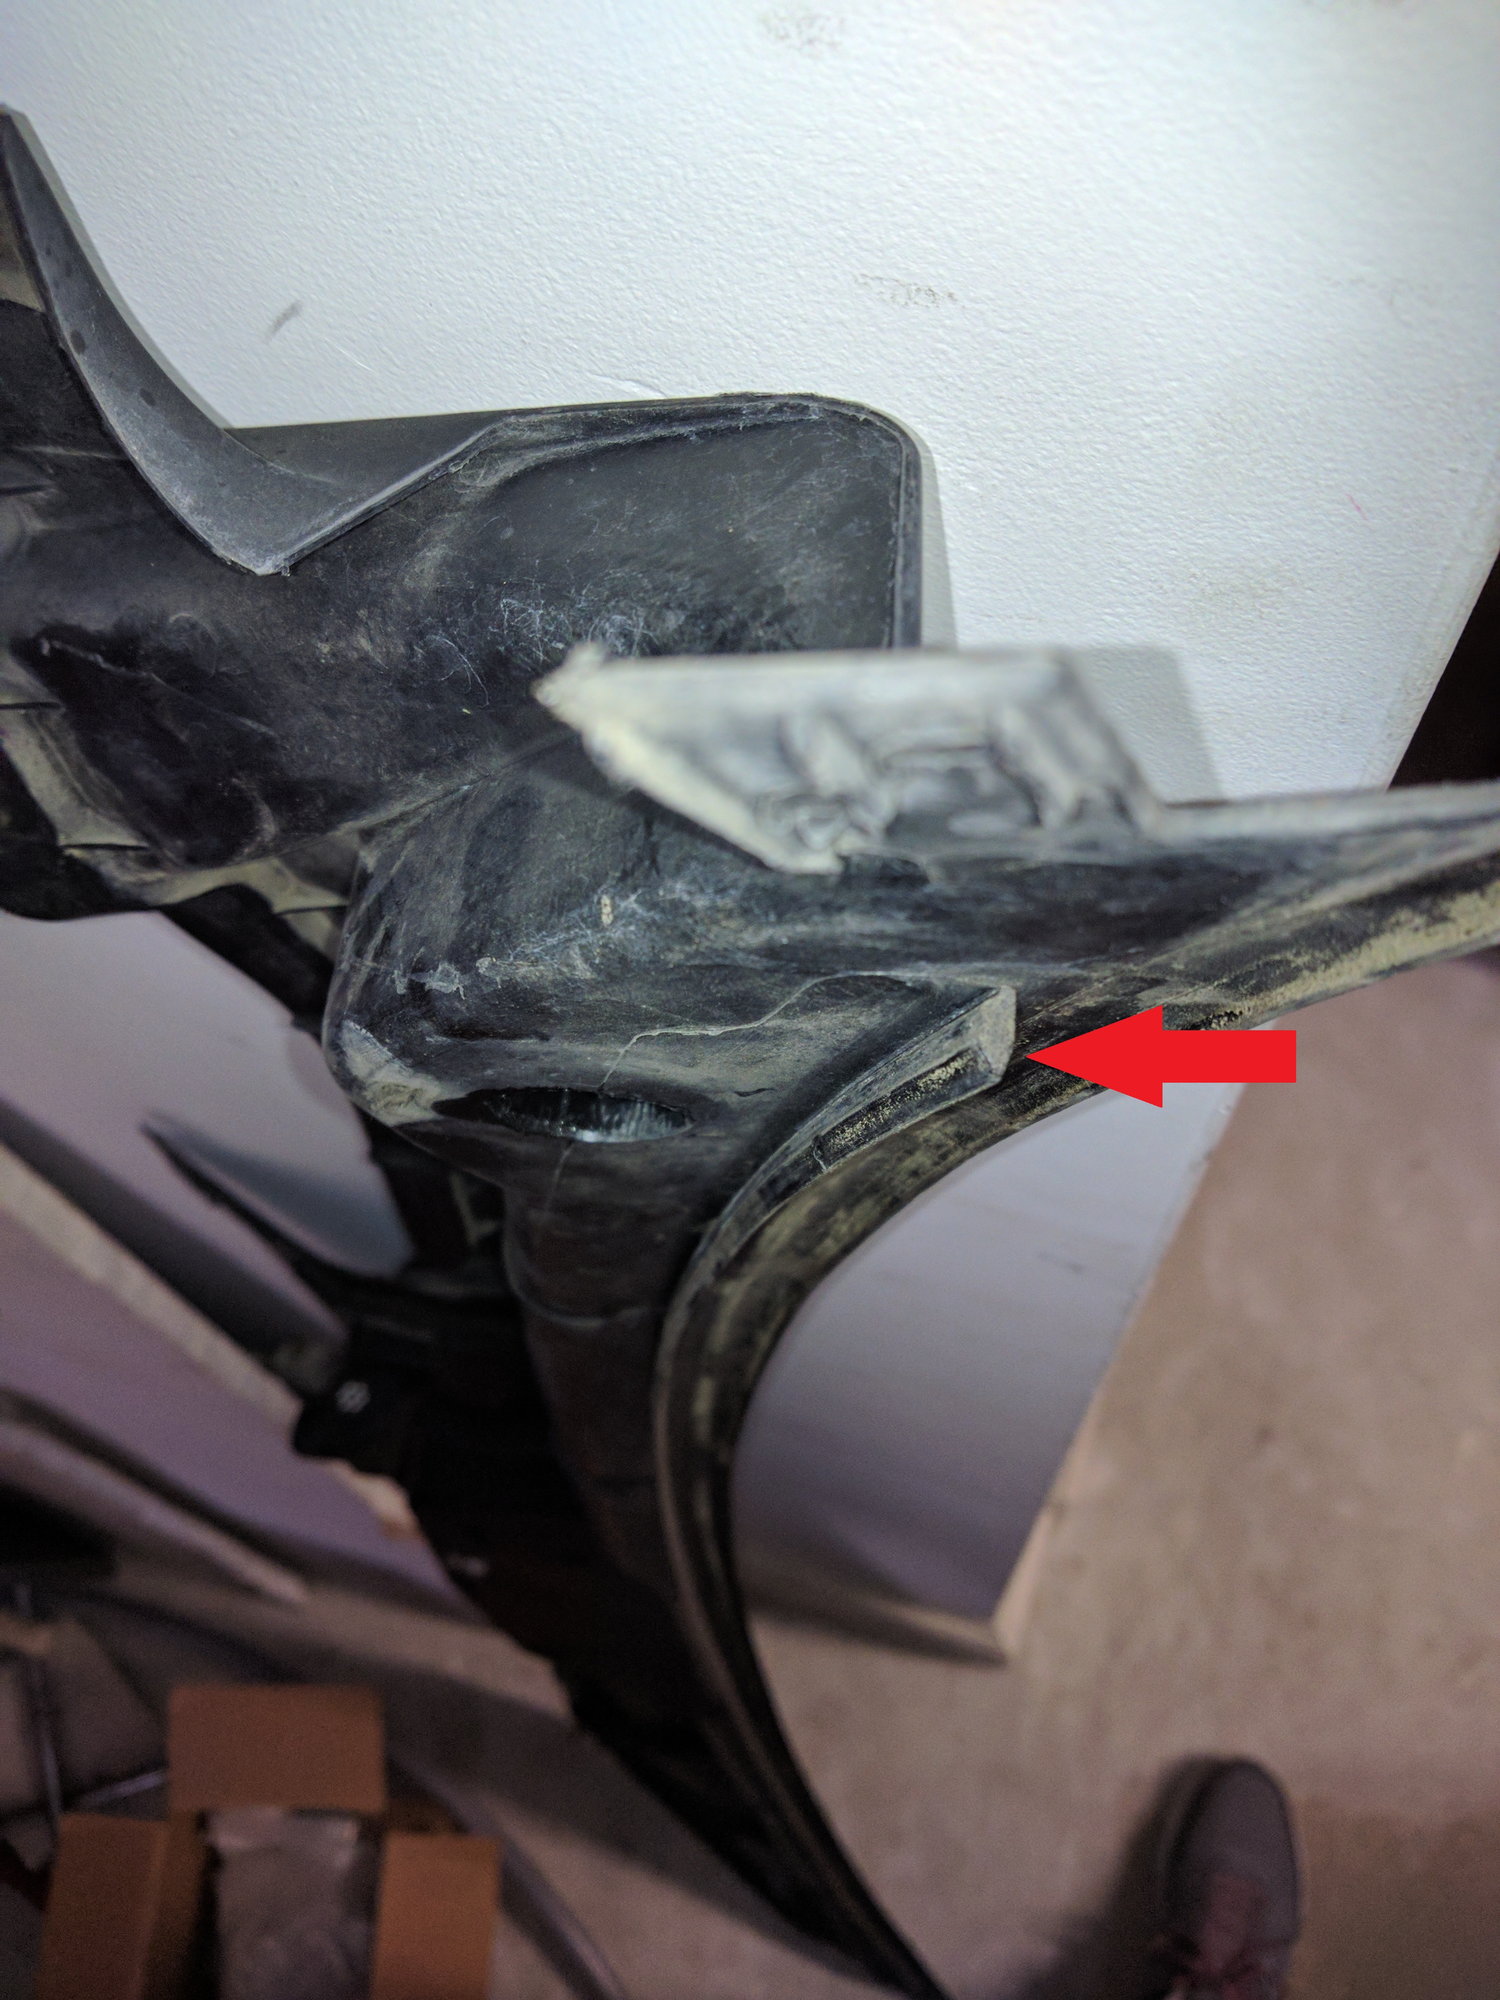
8) Pull back the rubber trim around the front edge of the cowl and loosen the plastic quarter turn fasteners -- these fasteners are captive and wont fall into The Abyss like the ones on the front beauty covers -- that's kind nice for a change. You should now be able to lift up the front edge of the cowl, but it will feel stuck along the windshield. The back edge of the cowl is captured in a groove and just needs to be pulled upwards -- I found it easiest to do this from passenger side -- just pull the cowl straight up from above the ECU and the back edge should release. Work it loose all the way to the driver's side an you're done. Here's a crappy photo down the side edge of the cowl. The red arrow shows a perpendicular lip that's captured in a groove at the base of the windshield.
Re-Installation Tip:
You're likely to move the wiper motor position while removing the bolts/arms. After reinstalling the cowl, but before installing the wiper arms, turn on the ignition and cycle the wipers. This will put them back in the resting position. Now you can put the arms back on and line them up with the tape/marks you made and retighten the nuts.
Bonus Photos:
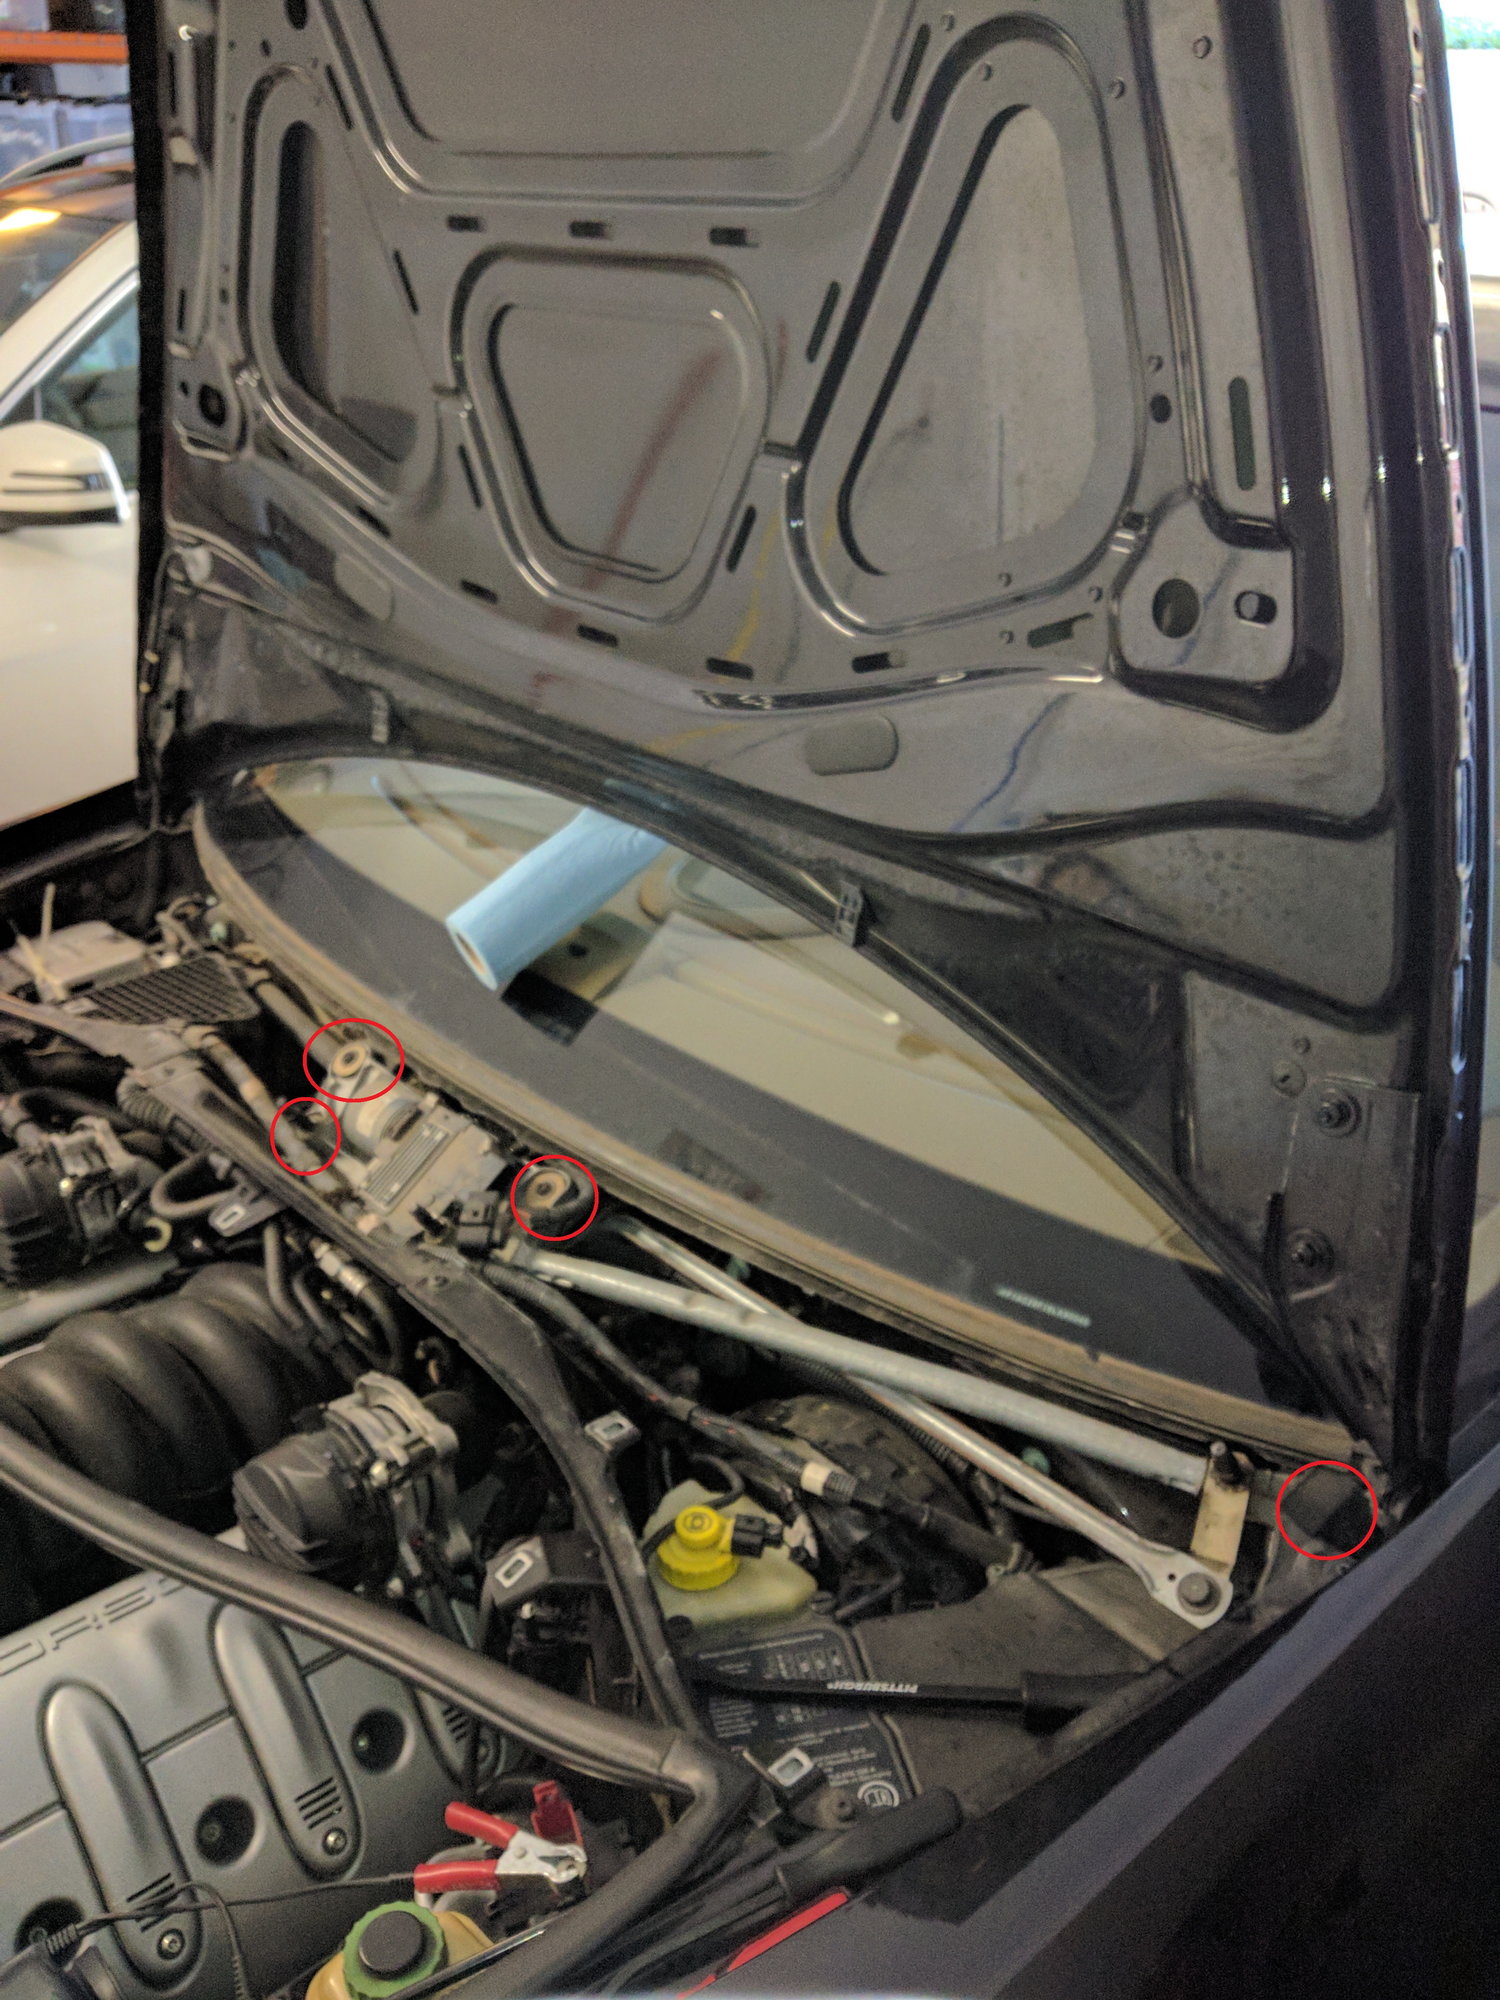
The wiper motor is in the center, and appears to also be bolted near the base of the arm on the driver's side. I'm guessing you have to remove that whole thing (looks like 4 bolts in red circles) if you want to access the brake vacuum lines that run underneath it.
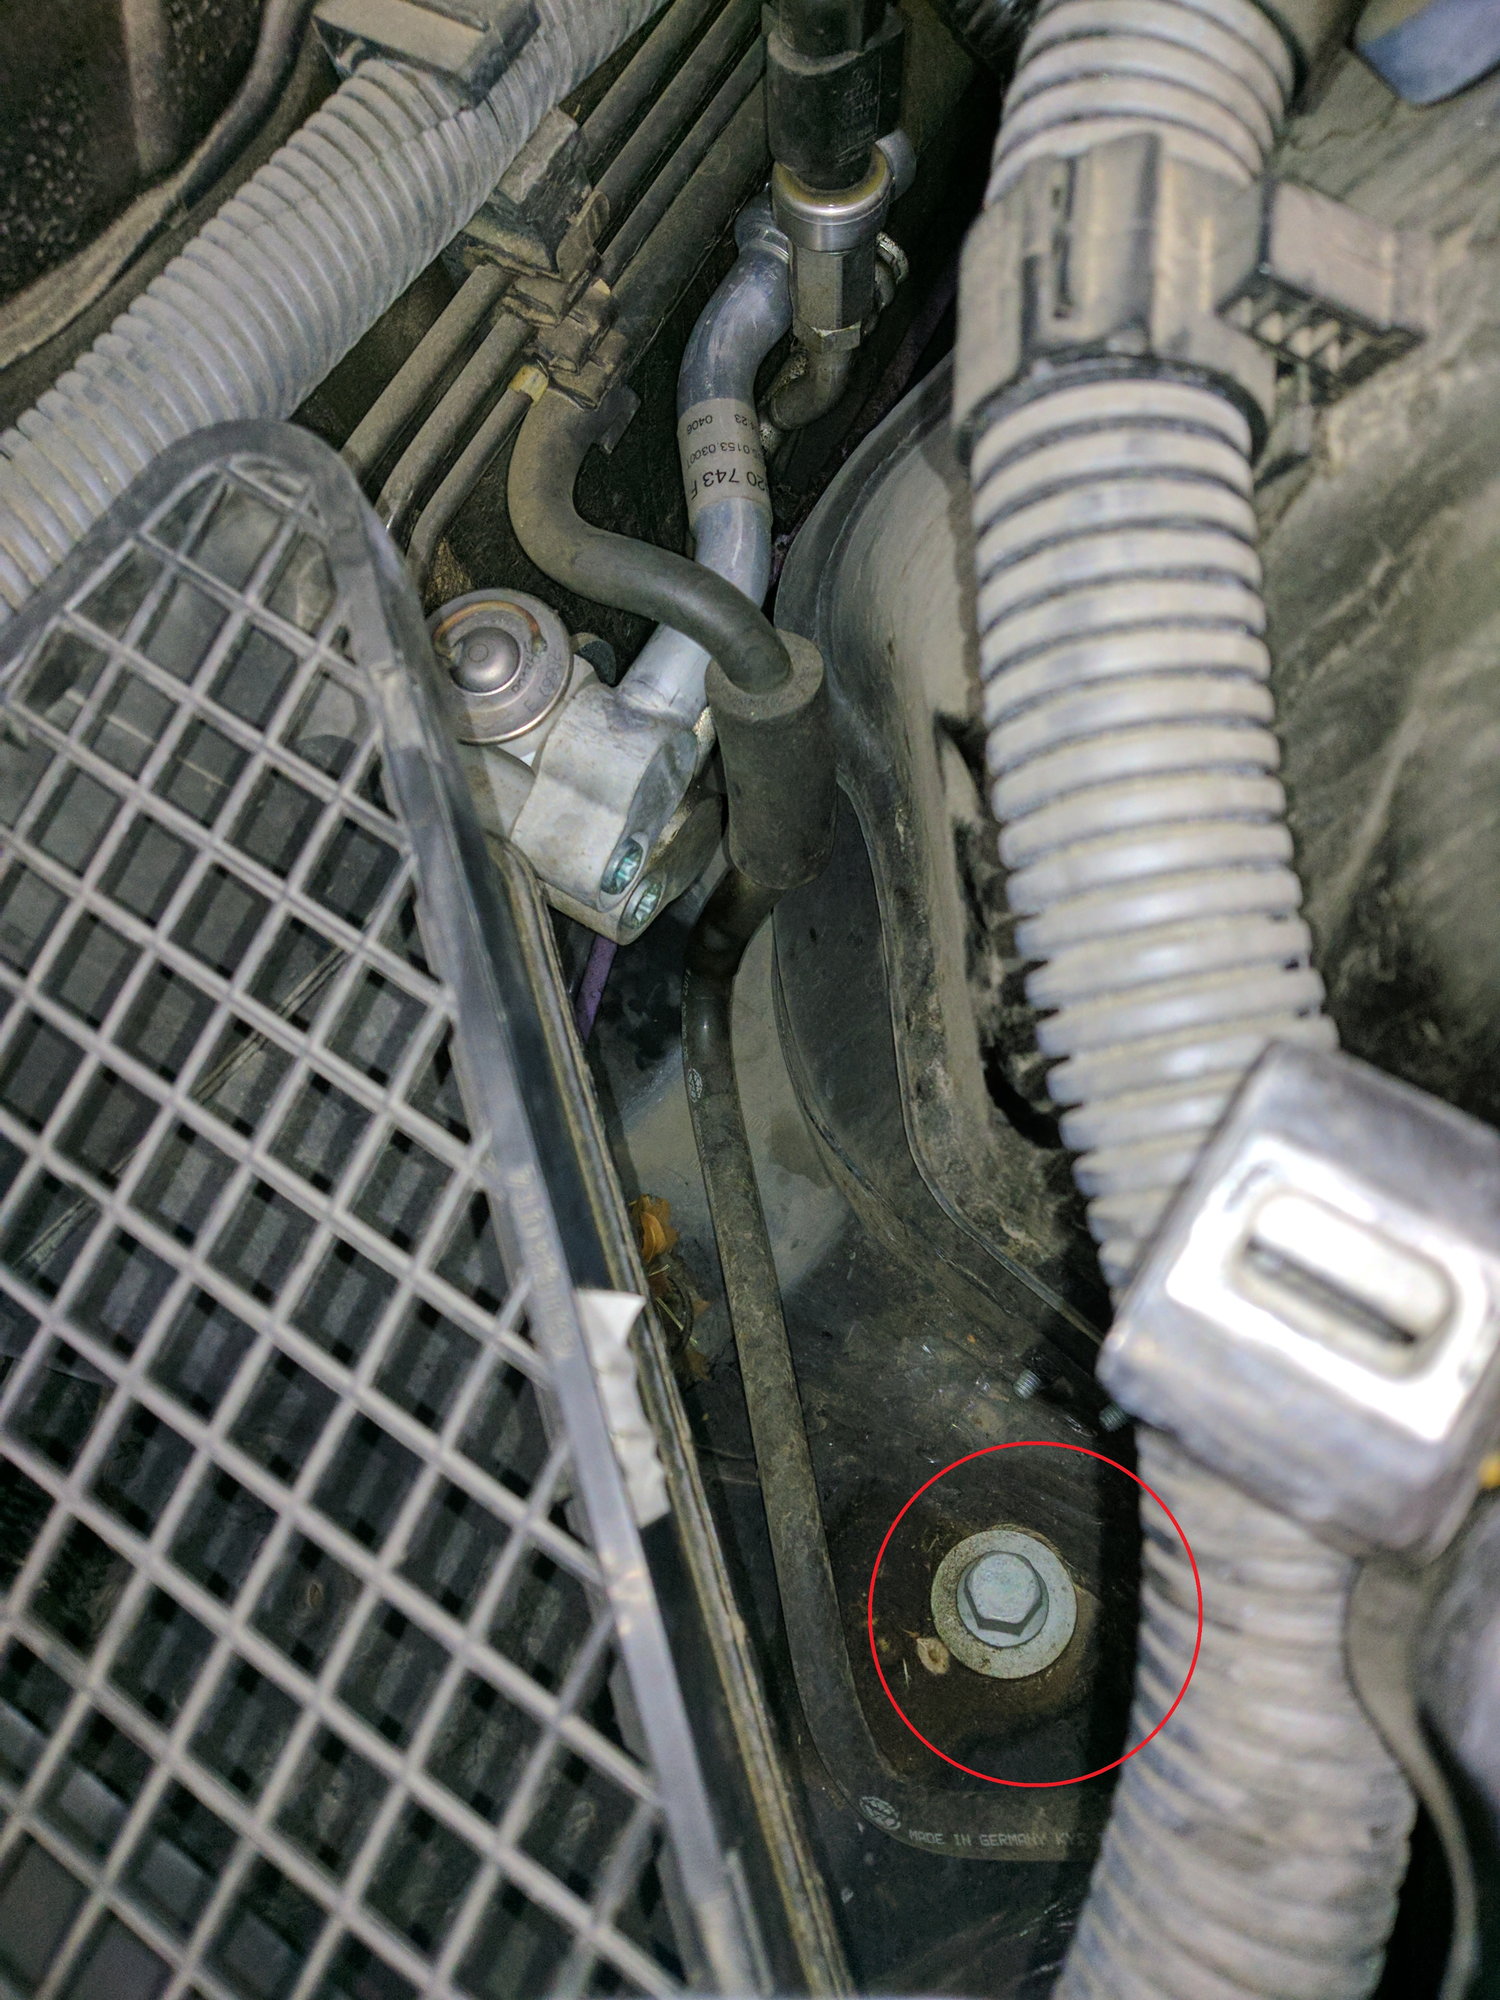
This is a shot of the passenger side shock tower mounting bolt:
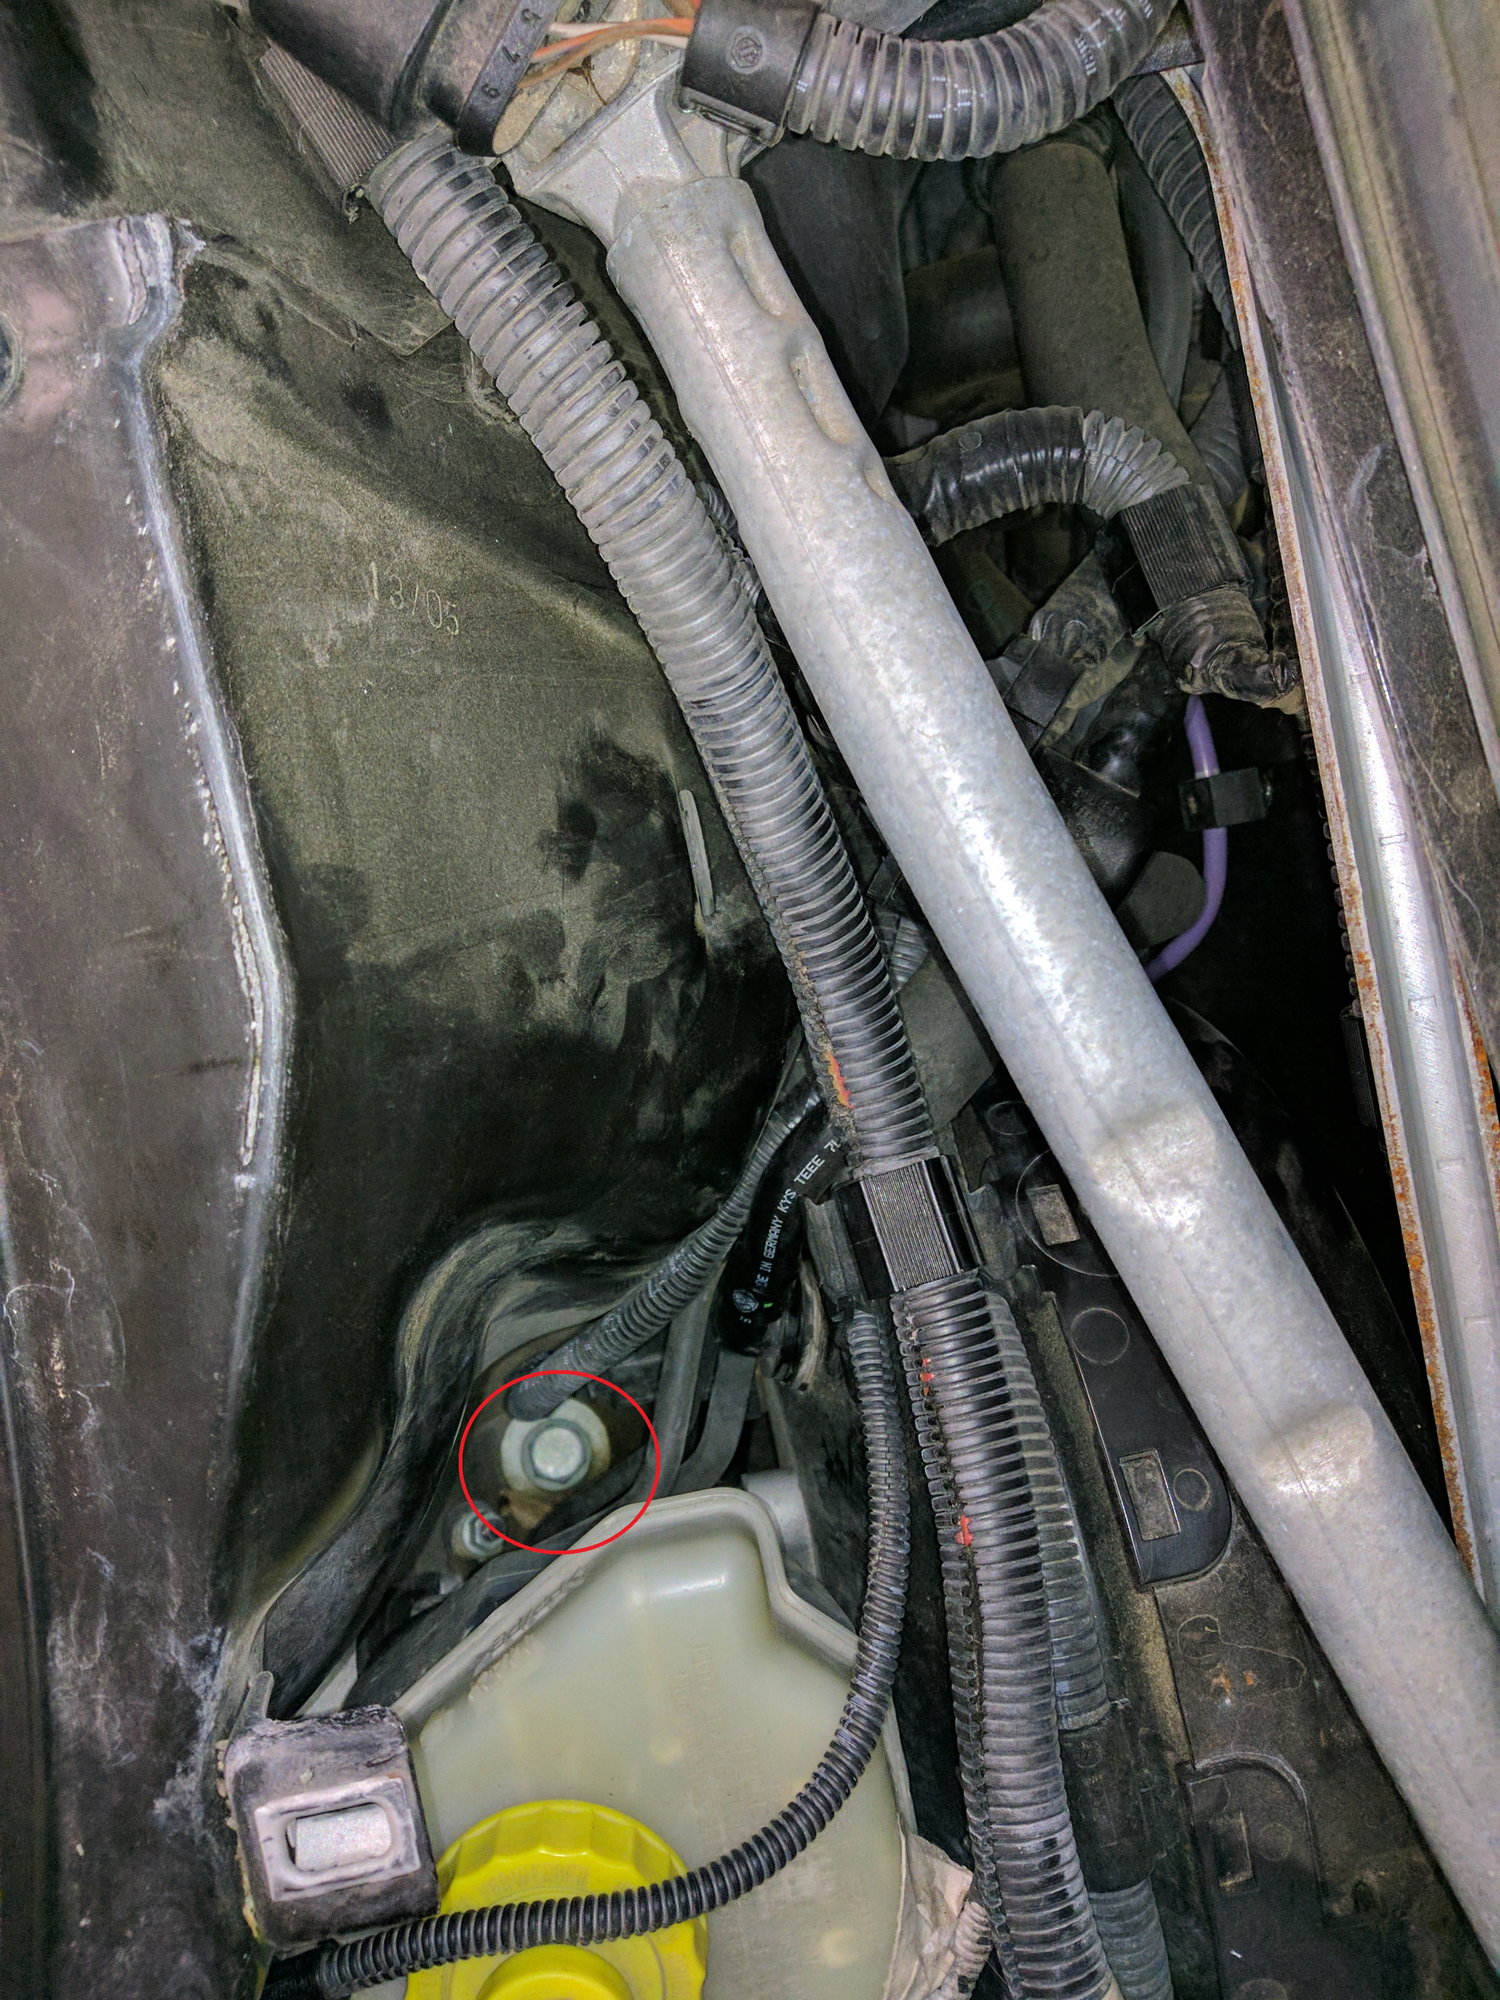
And here's a shot of the driver's side shock tower mounting bolt. It's hidden pretty deep in there, but should be able to get a long extension on it.
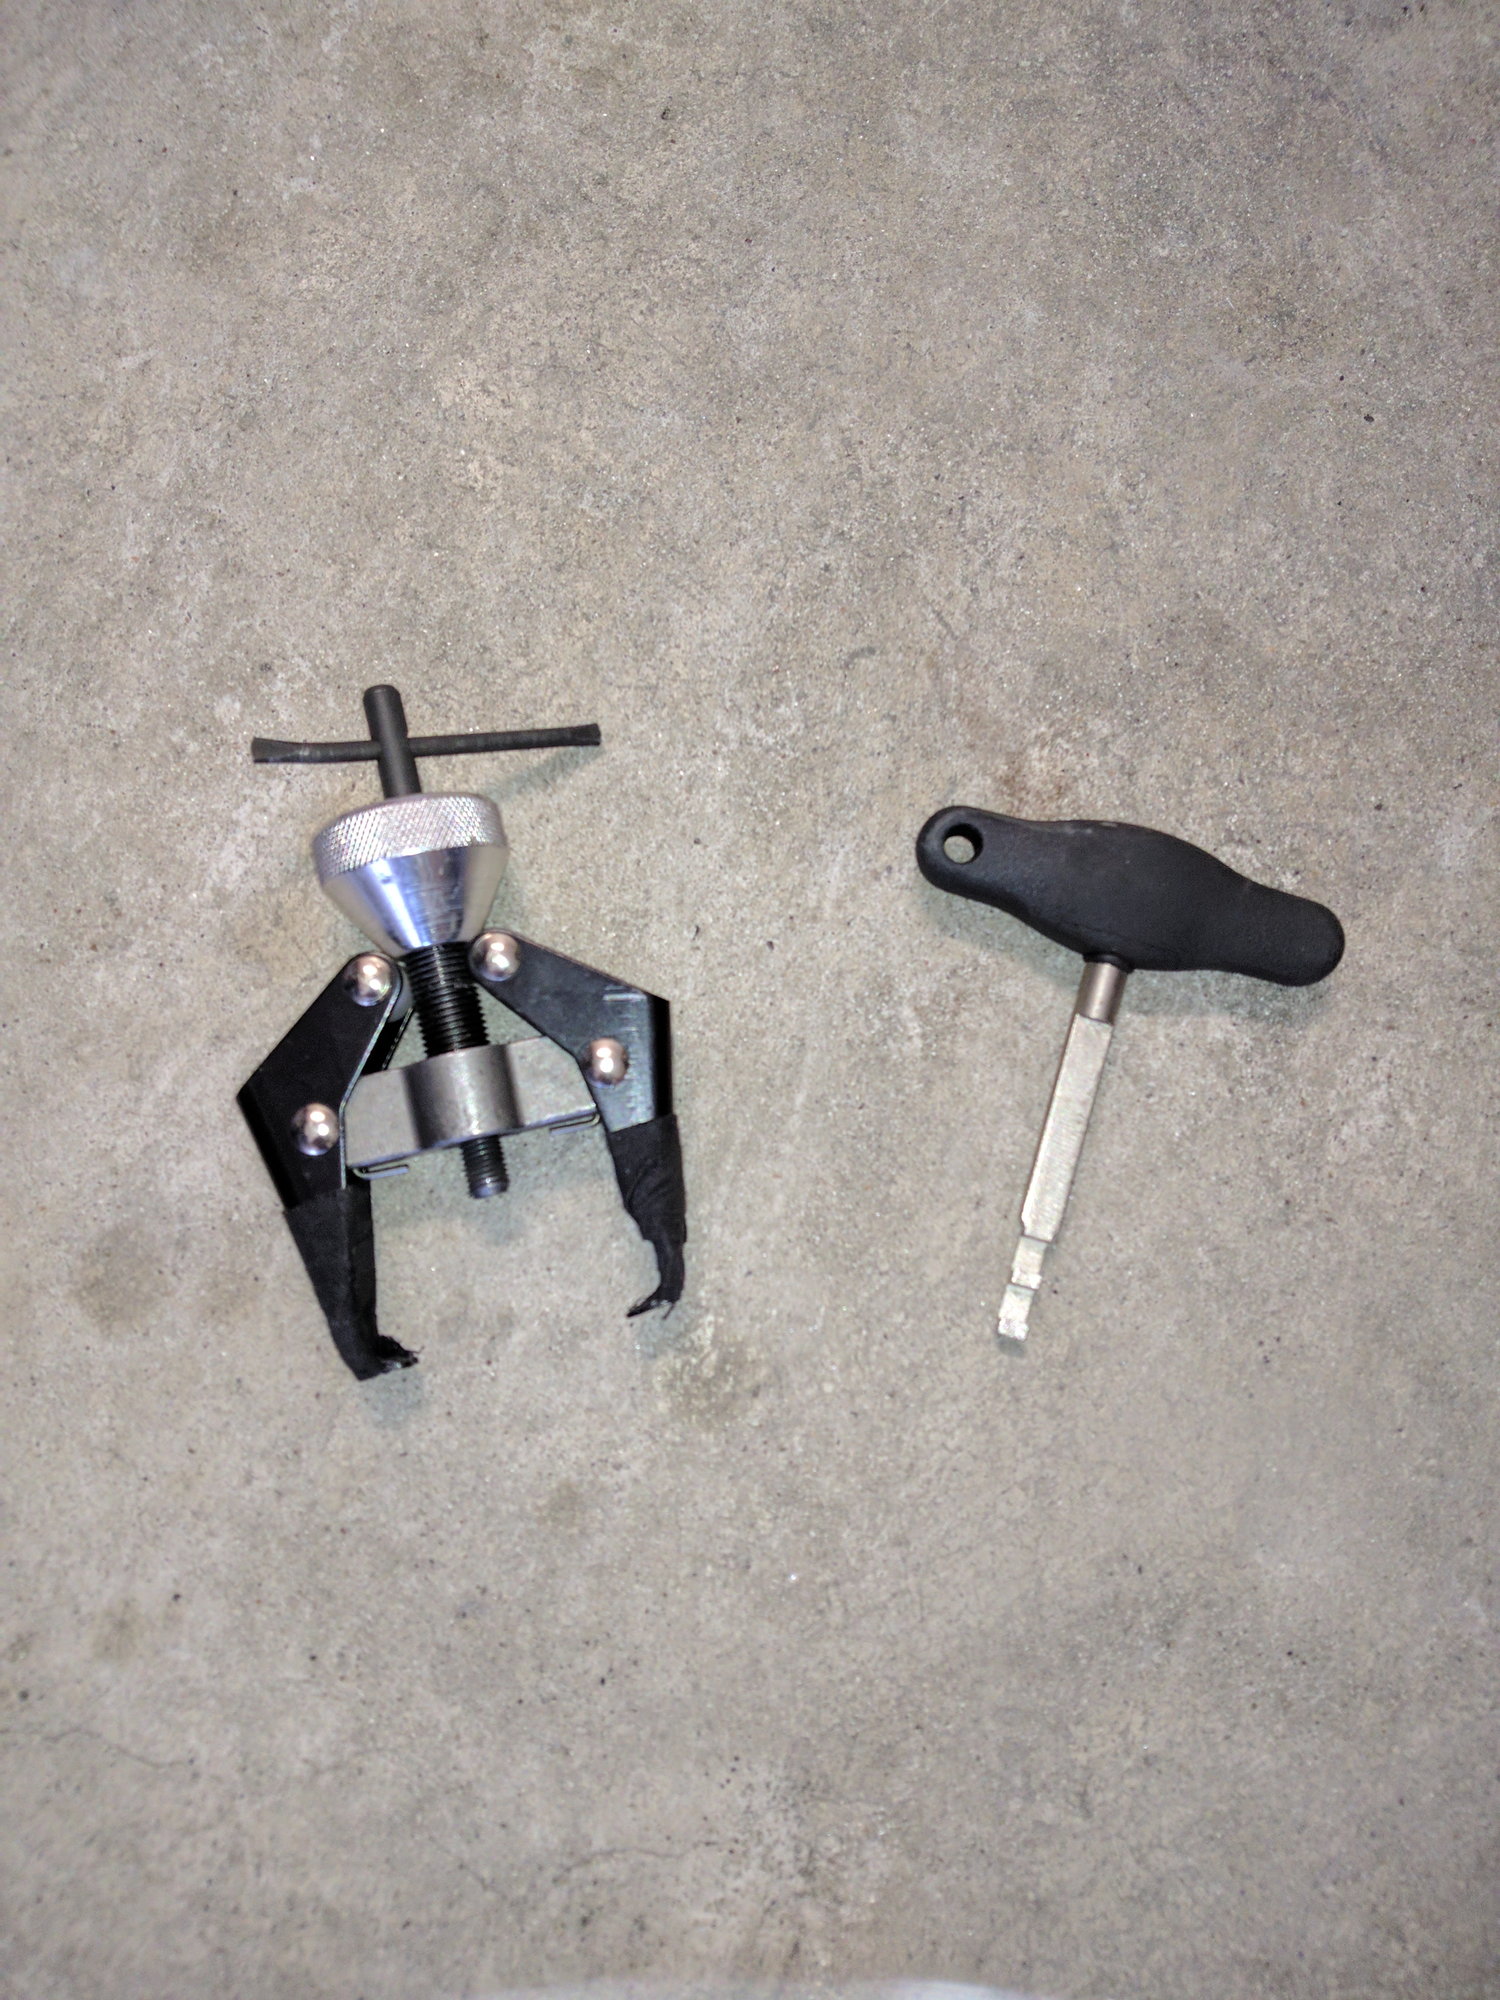
Picture of my actual wiper puller, and bonus shot of the VW/Audi/Porsche electrical connector decoupler tool. You can buy these for cheap on Ebay and they do make disconnecting the factory harness connections much easier (example, the one that goes to the wiper motor in the photo above):
Another great write-up for Don to move to the DIY section. 👍
+1 These write up's take a lot of time which is why I don't do any. I just don't have enough available. I struggled with the wiper arms a while on my first engine pull. Thank you Brainz.
Thanks much to Brainz! It's in the DIY forum: https://rennlist.com/forums/cayenne-...l#post15562923 - I included 958? since it appears it would be exactly the same on my '11 CTT - and I've been meaning to do that sometime just to clean up behind the false firewall..
Brainz - just curious - did you happen to notice the alarm siren under the wiper motor? That's where it's located on the 958 - and that question did come up on a 955 recently..
I did not notice the siren, but it's all still disassembled, so I'll take another look. There's a surprising amount of stuff crammed under that cowl.
I just took another look and did not see a siren. It's possible it's under the fuse box on the driver's side or under the ECU on the passenger side - - I can see there's room under there, but I can't get a good look without removing things.
I just took another look and did not see a siren. It's possible it's under the fuse box on the driver's side or under the ECU on the passenger side - - I can see there's room under there, but I can't get a good look without removing things.
J'sworld said they used the standard behind the bumpers and prone to flooding horns on the 955/957.
I didn't say they were prone to flooding. There is no siren. I've had the car in a million pieces several times and have been geeking out on it for 8+ years.
I didn't say they were prone to flooding. There is no siren. I've had the car in a million pieces several times and have been geeking out on it for 8+ years.
No - I said the bumper mounted horns are prone to flooding. I don't think you can really question that considering how many replacement horns Porsche has sold..

 01-12-2019, 08:29 PM