When you click on links to various merchants on this site and make a purchase, this can result in this site earning a commission. Affiliate programs and affiliations include, but are not limited to, the eBay Partner Network.
Report back again:
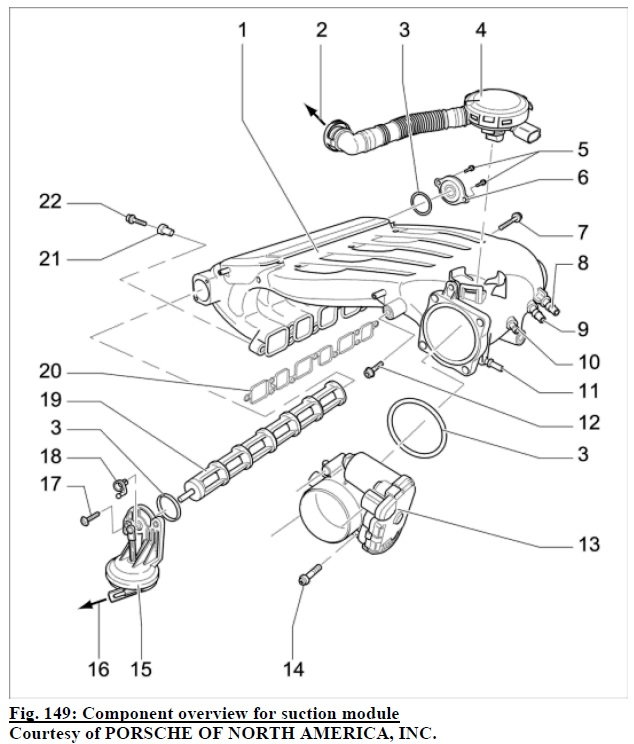
Today I remove the air hose in the front and directly inject smoke into intake manifold, no leak found.
So just like what I suspected, the throttle is completely closed. Last time when I do smoke test at the far end, the smoke cannot get into intake manifold at all.
Cayenne is not equipped with that spring pulling mechanical part to easily open and close throttle. I use a plastic tube insert to keep it open.
I think the intake manifold is also sealed and the vacuum lines connected to it are closed too , so the smoke won't get into other vacuum line from intake manifold, thus, anything out of it is not tested. Now at least I know everything is fine from the air filter to intake manifold.
I try to locate the break booster hose but it is hidden behind everything, in order to pull it out, it seems that I need to remove wipers, covers, etc.
So I follow all the hoses I think related to air (all of them looks fine, no crack). but I don't know where I can insert the smoke for testing.
On the back between engine and the wall, I think this is the Purge Valve.
Looks like this is the purge valve. The red arrow point to a hose running to the left front of the engine.
Here is the hose I want to lose and use for the smoke test, but I am afraid I will break something.
The hose is what the red arrow point at the picture above. I want to lose the metal clamp for smoke test.
Is it a good spot to insert smoke
You are correct your white arrow in the first picture is the tank vent valve. The red hose delivers the tank vapors into the intake. If you remove that hose from the intake you can smoke test the intake from there. You do have to be careful, that is a plastic nipple that can be broken off. Almost guaranteed that hose is really stuck on. That being said the throttle does not completely close air tight so you should be able to smoke test at the throttle body, that is how it is done in the factory workshop manual.
You are correct your white arrow in the first picture is the tank vent valve. The red hose delivers the tank vapors into the intake. If you remove that hose from the intake you can smoke test the intake from there. You do have to be careful, that is a plastic nipple that can be broken off. Almost guaranteed that hose is really stuck on. That being said the throttle does not completely close air tight so you should be able to smoke test at the throttle body, that is how it is done in the factory workshop manual.
Thank you, PETC, I do test from the throttle body. The closed throttle looks like airtight so I use a plastic straw to make it open a bit and blow the smoke, but I did not see smoke coming from anywhere else. Maybe I need to repeat this.
A Russian guy sell "Diaphragm Valve Cover engine Porsche Cayenne 3.6 M55.01" on ebay for under $30. I guess besides this, I also need to buy a valve cover gasket too.
I could not find the step by step DIY instruction to replace this on Cayenne. Only found one on youtube to replace VW diaphragm:
I ordered intake manifold gasket, valve cover gasket, a PCV valve (same as VW and Audi), a coolant flange and its seal.
The first time I removed the actuator on the front of the engine and found that the arm inside it is broken so I have to order one (about $110) and wait for one more week to restart the work.
It is not an easy DIY for me because this is the very first time I 'open' an engine valve cover and intake manifold.
Here is some tips:
1. As shonuff mentioned, that facing up T25 torx screw is very hard to remove, it takes me 2 hours just for this screw. I use a sheet metal hex washer screw replace the T25 screw, now I can easily use an open wrench to remove it.
2. The fuel line. I am too worried to make any damage, so I removed the fuel line from both ends.
Then I use a string to hang this line when installing it, not easy, but I managed to put the grass fitting in place and tighten it.
3. The coolant flange on the back, there is a bit leak from there. Since the intake manifold is out, I can easily change it. They look fine, I feel if I just tight a bit, it may work. But the flange is actually very deteriorated, so anyone remove intake manifold, should consider replace it ( a cheap part)
4. When remove and install the flange, somehow I broke that Y coolant connector.
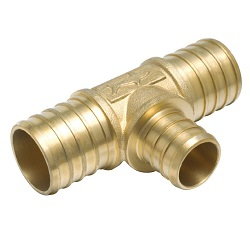
Just like the flange, this connector is deteriorated too. I don't want to remove all the hoses, so I use a brass 1 x 1 x 3/4 in. PEX Barb Tee to replace the broken one. Cannot find 1 x 1 x 5/16 anywhere.
The O.D of the water hose is 9/16, exactly can be inserted into 3/4 barb, then I use Self Fusing Tape to seal it. Now finger crossed ... https://www.homedepot.com/p/SharkBit...6LFA/202270628
My valve cover gasket also reaches its end of life. It is hardened, when I try to pick it out, it broken into small pieces. Somehow the intake manifold gasket looks OK.
5. Be careful when tightening the valve cover bolt, I snap two before reaching 89 in lb torque and have to extract them. At the end, I just hand tighten them.
6. The space is too limited, so prepare a short torque wrench if you want to torque the intake manifold bolts. It takes me long long time to put the intake manifold in place. To avoid the gasket to be scratched loose, I use Red RTV silicon to 'glue' it to the intake manifold. When tightening the screw, no matter how I try, I cannot put the M10 on the back into place. I have to leave it to the last. After tightening all the rest, the holes line up so I can put the screw in.
Even though the screws are M10 size, I found M9 triple bit actually works much easier.
If you only want to change the PCV valve and never did this before, probably it is better to find an experienced indy mechanic.


 07-15-2018, 10:07 AM