When you click on links to various merchants on this site and make a purchase, this can result in this site earning a commission. Affiliate programs and affiliations include, but are not limited to, the eBay Partner Network.
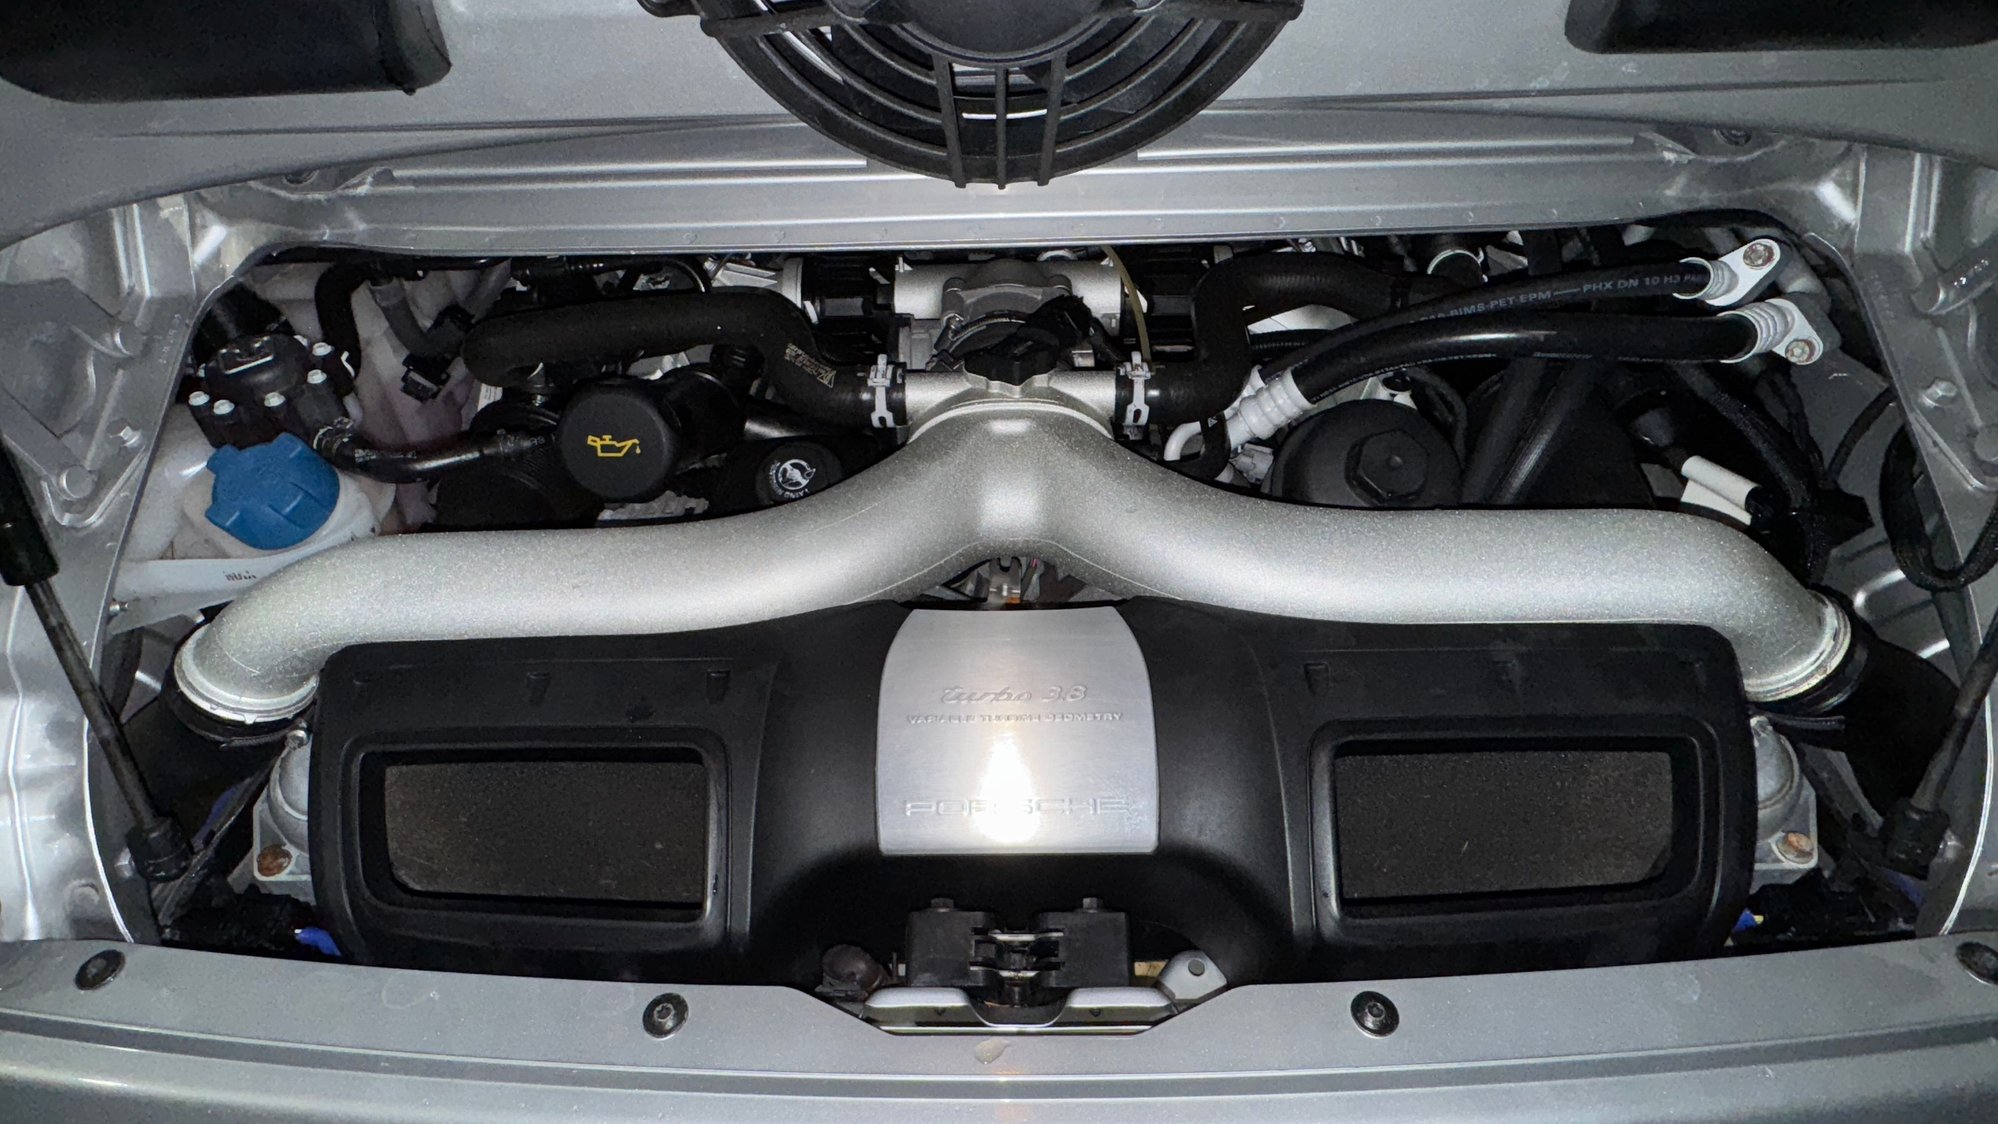
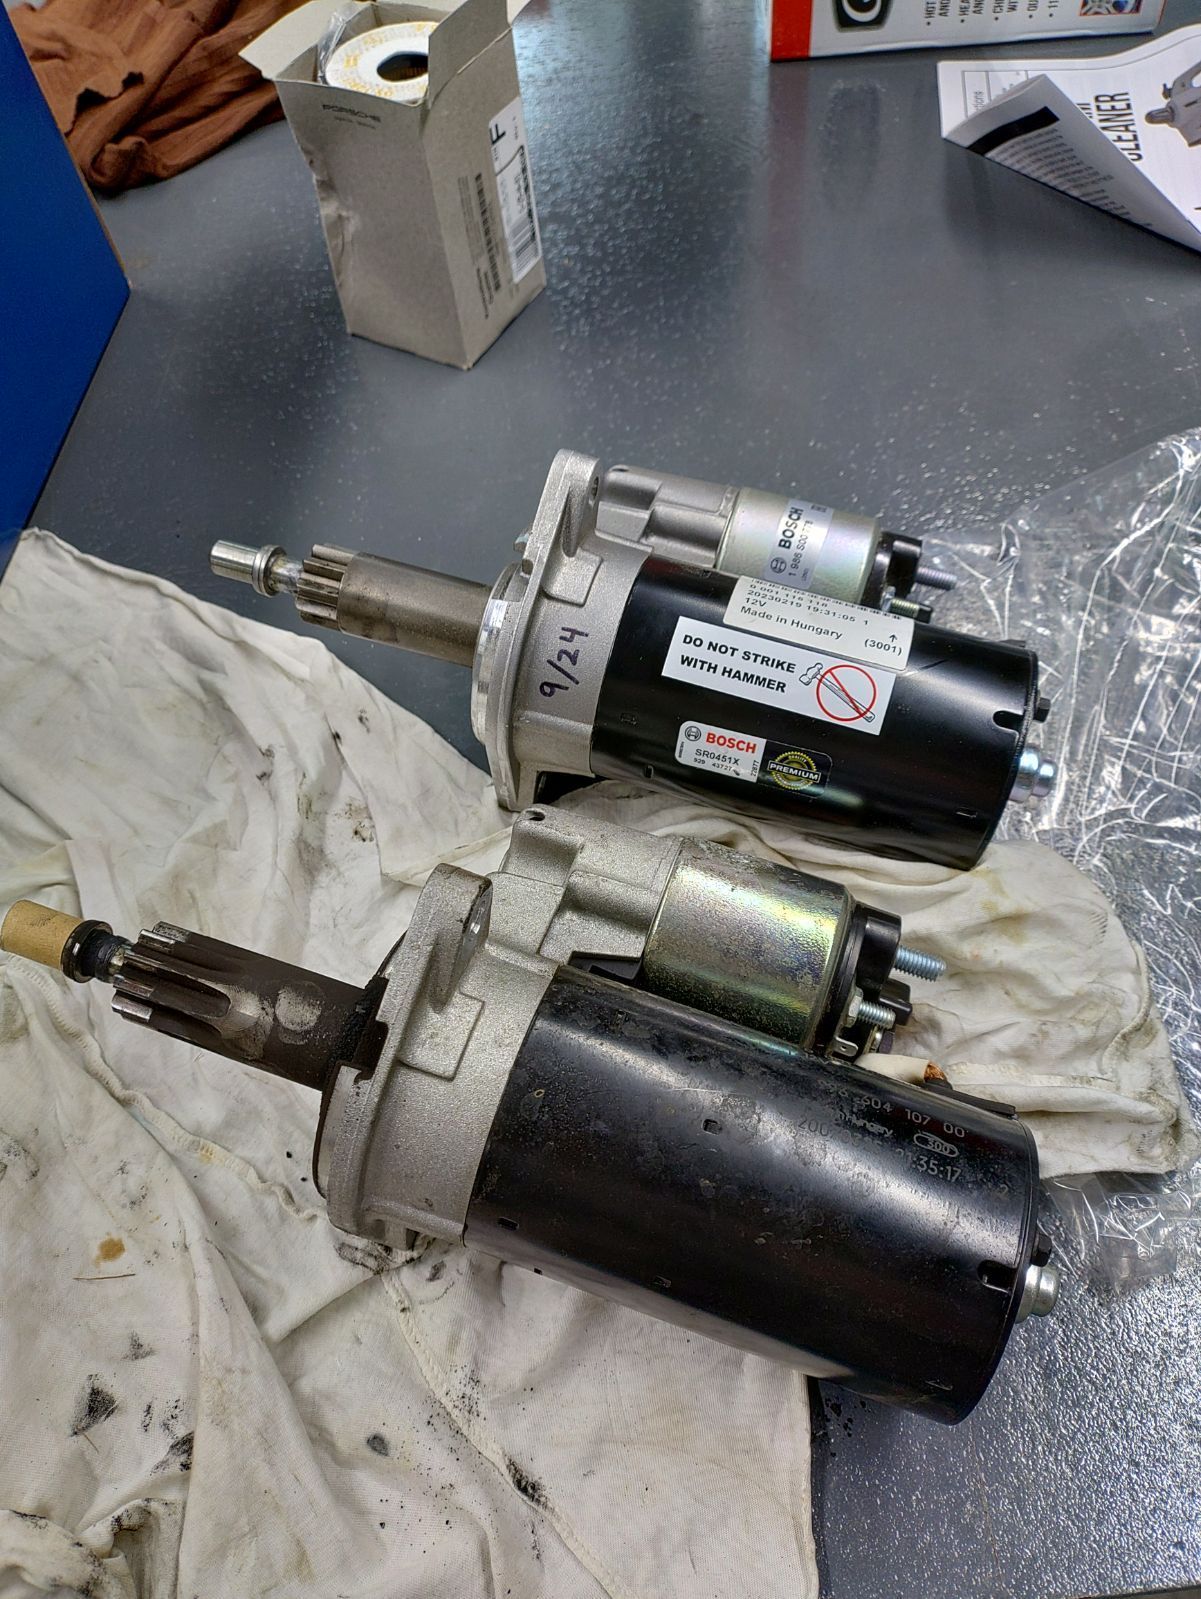
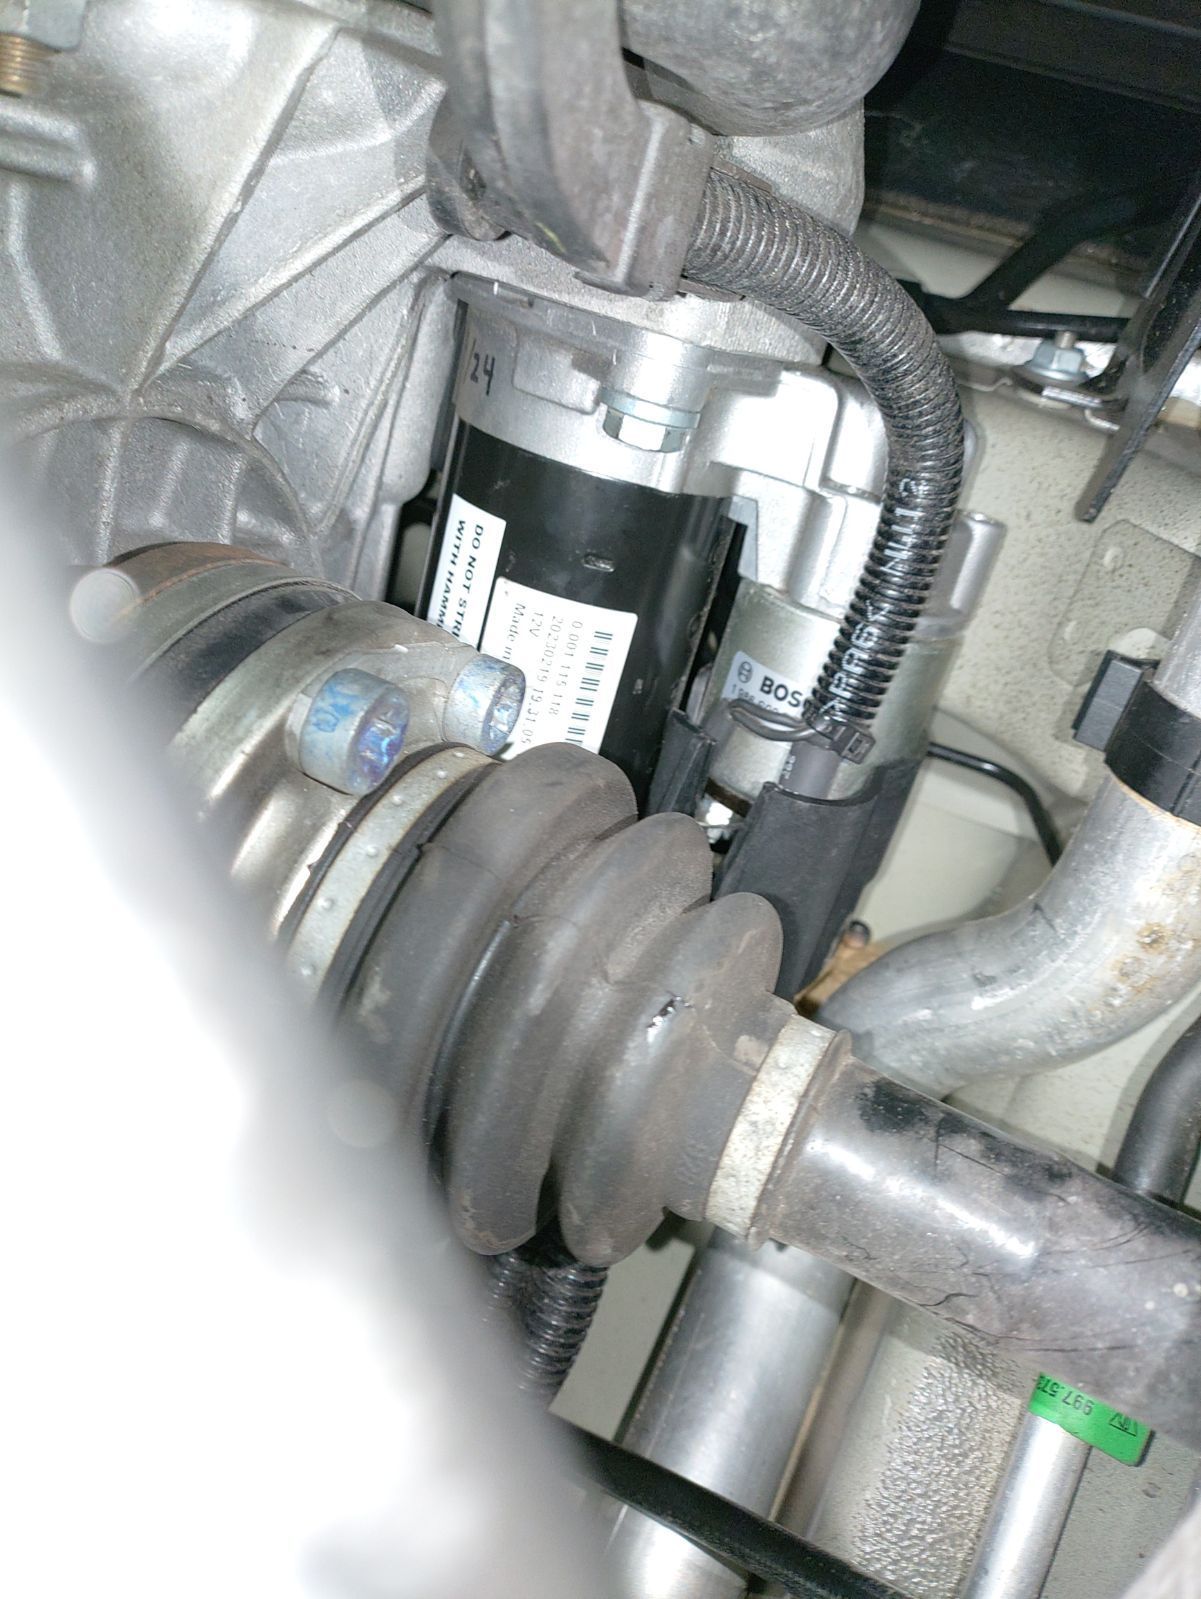
After having trouble with the car starting on the first key turn lately, I changed out the starter with a Bosch brand re-man from Pelican ($130). Access is not too bad. The top bolt is a little tricky but I've dealt with worse. Car starts right up and I can tell the new starter cranks much faster. I'm assuming the one removed was original to the car. I also checked out the positive post on the firewall for good measure. I t was not corroded. I did clean it and put a thin coat of dielectric grease and reinstalled.
While I was in there I installed the Function First cable ends. Super easy to install. Shifting does feel a bit better - although I liked how my car already shifted as I have the factory short shift. I have the Function First shifter kit I plan on installing the next time I take the console down.
While I was in there I installed the Function First cable ends. Super easy to install. Shifting does feel a bit better - although I liked how my car already shifted as I have the factory short shift. I have the Function First shifter kit I plan on installing the next time I take the console down.
I got the same thing and also this too...this was much harder to install but the efforts were well worth it. The car feels much more direct shifting wise..
I got the same thing and also this too...this was much harder to install but the efforts were well worth it. The car feels much more direct shifting wise..
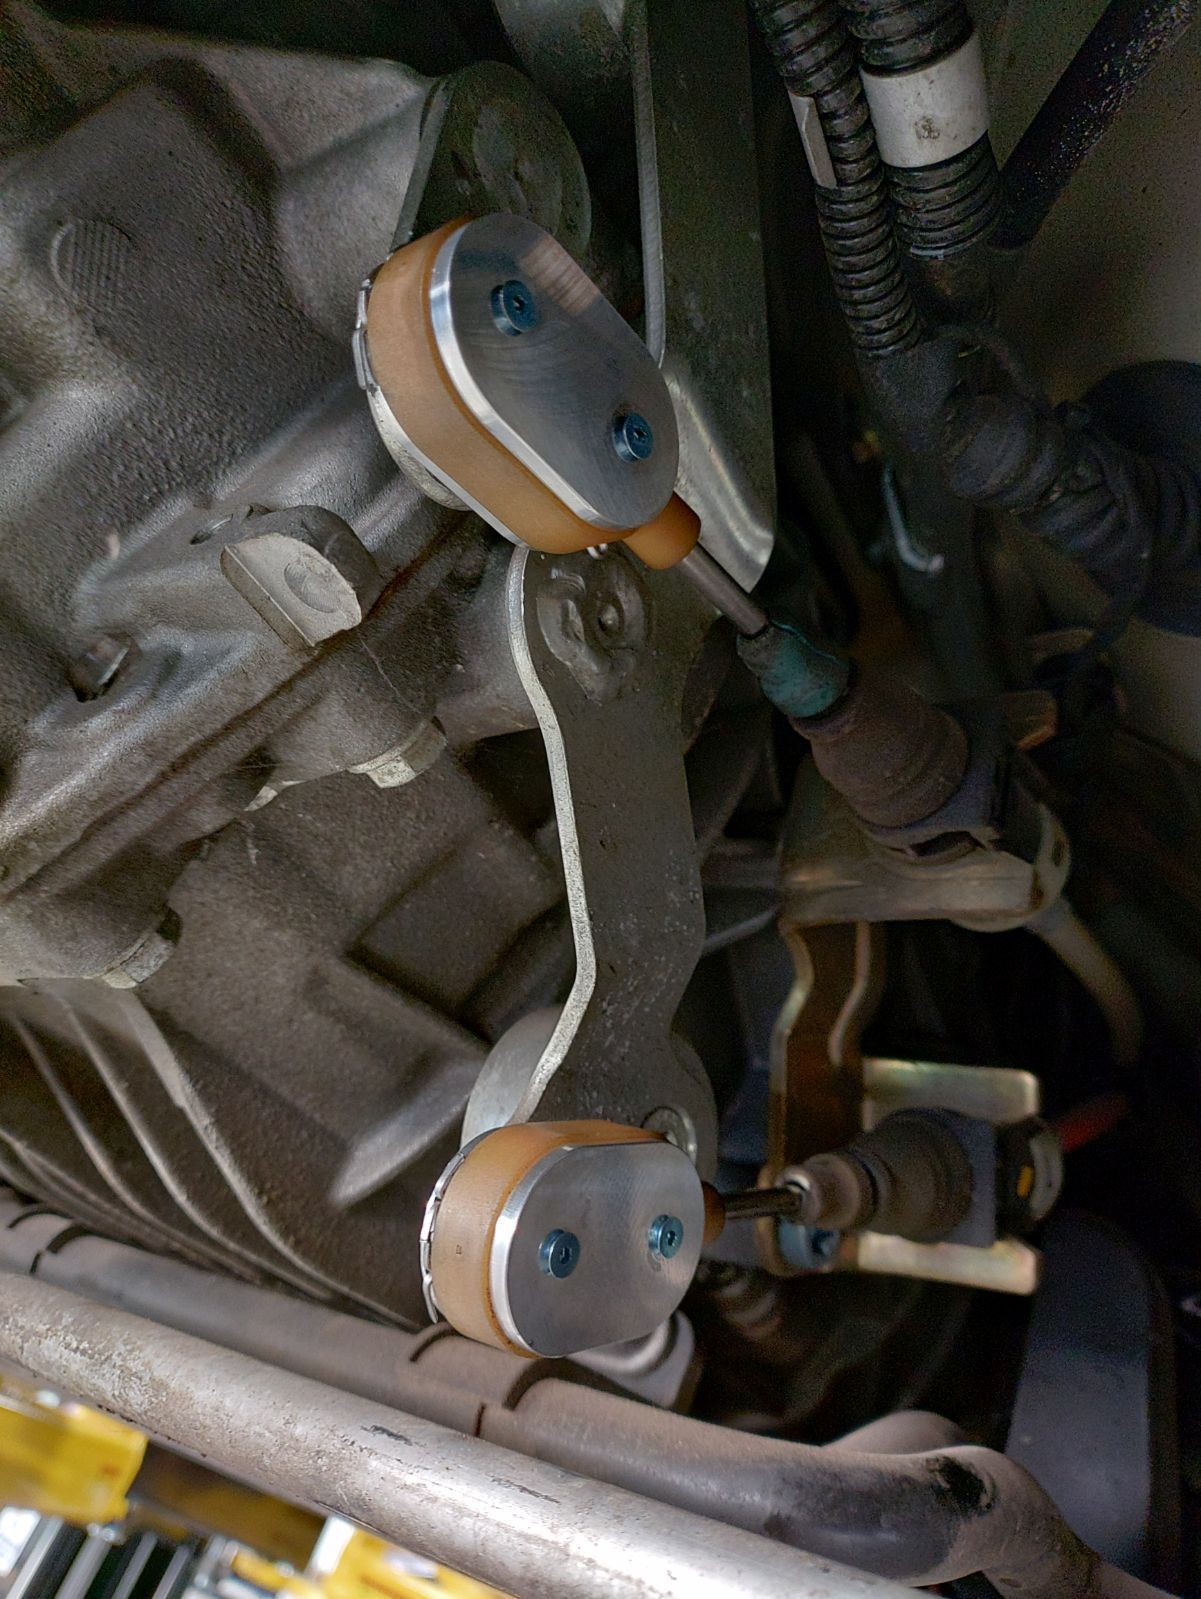
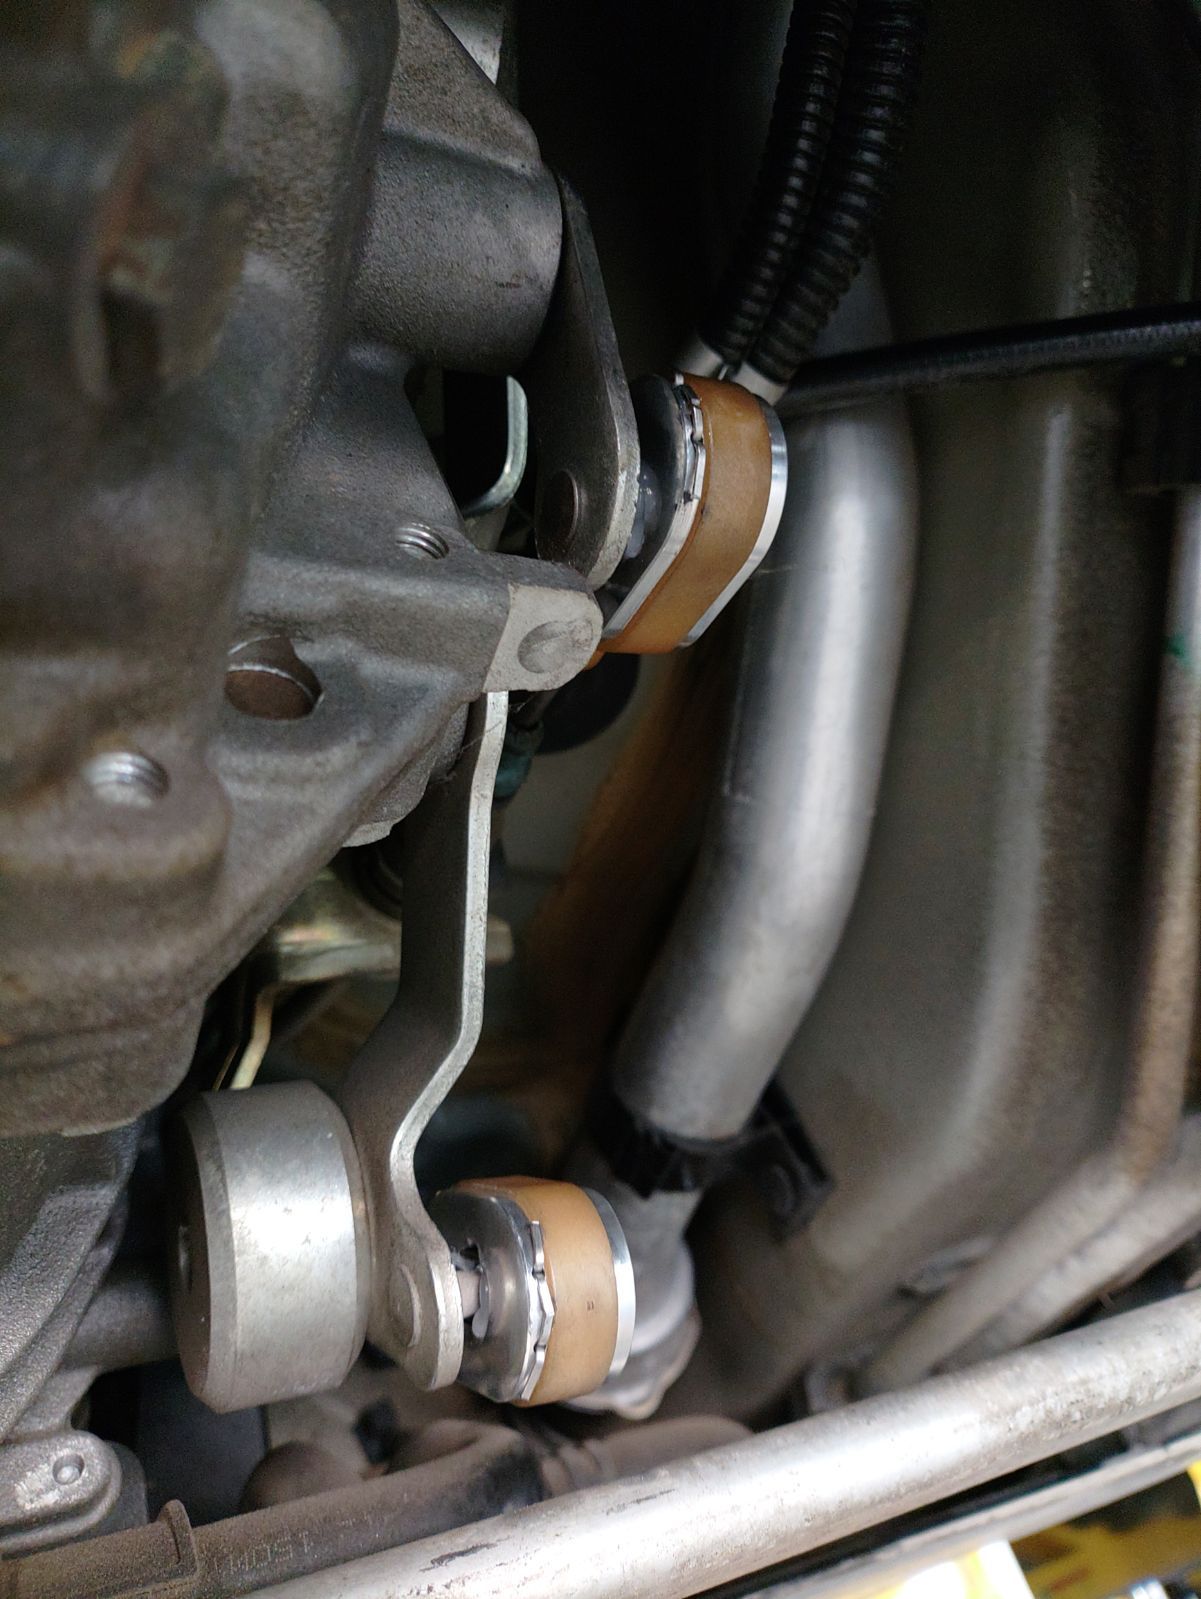
I actually have a set of these transmission inserts and motor mounts from Function First. Both should be going in soon. I am hoping all of these component together round out a really nice shift feel.
I actually have a set of these transmission inserts and motor mounts from Function First. Both should be going in soon. I am hoping all of these component together round out a really nice shift feel.
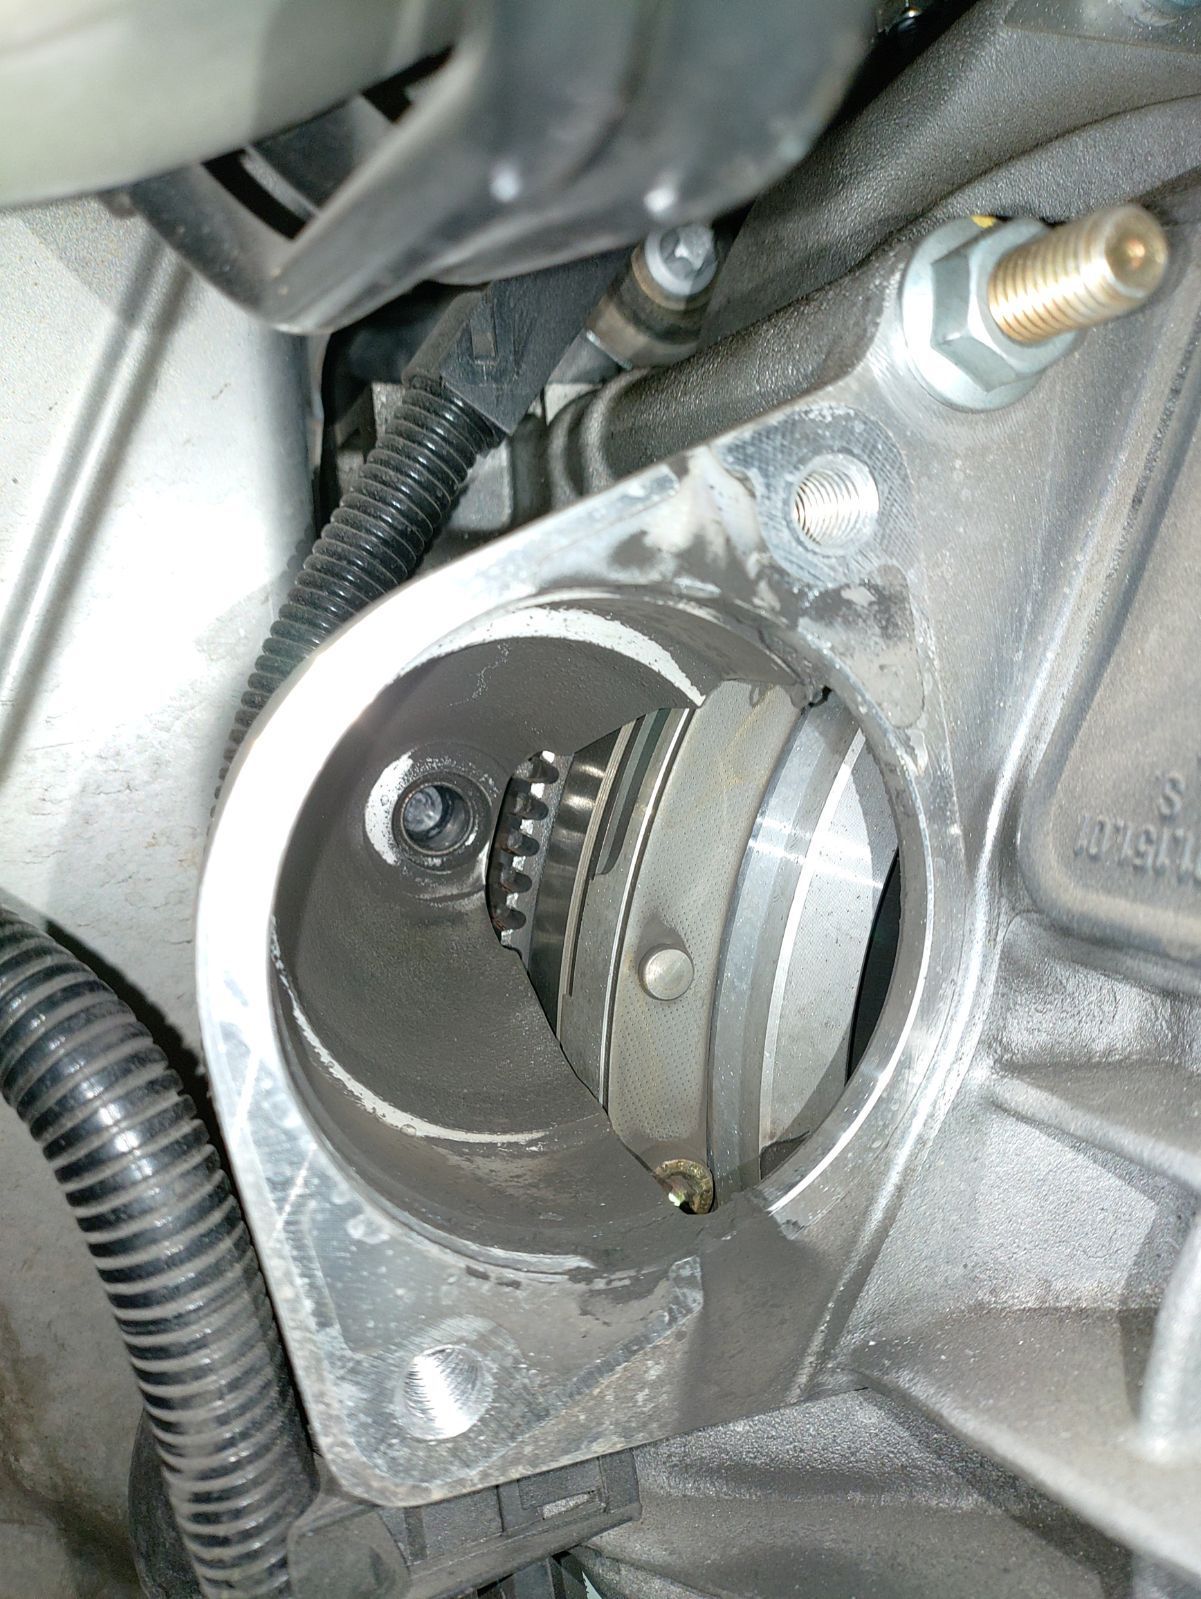
I used my iPhone camera in video mode with the light on to line up the "hole" before putting the bolt in. That's the only tip that I can give you when putting it back together. I decided against getting the motor mounts as I don't want it to be too "rough."
His name is John and his username is Jgoga. He's a great guy and very helpful if you get stuck with the install.
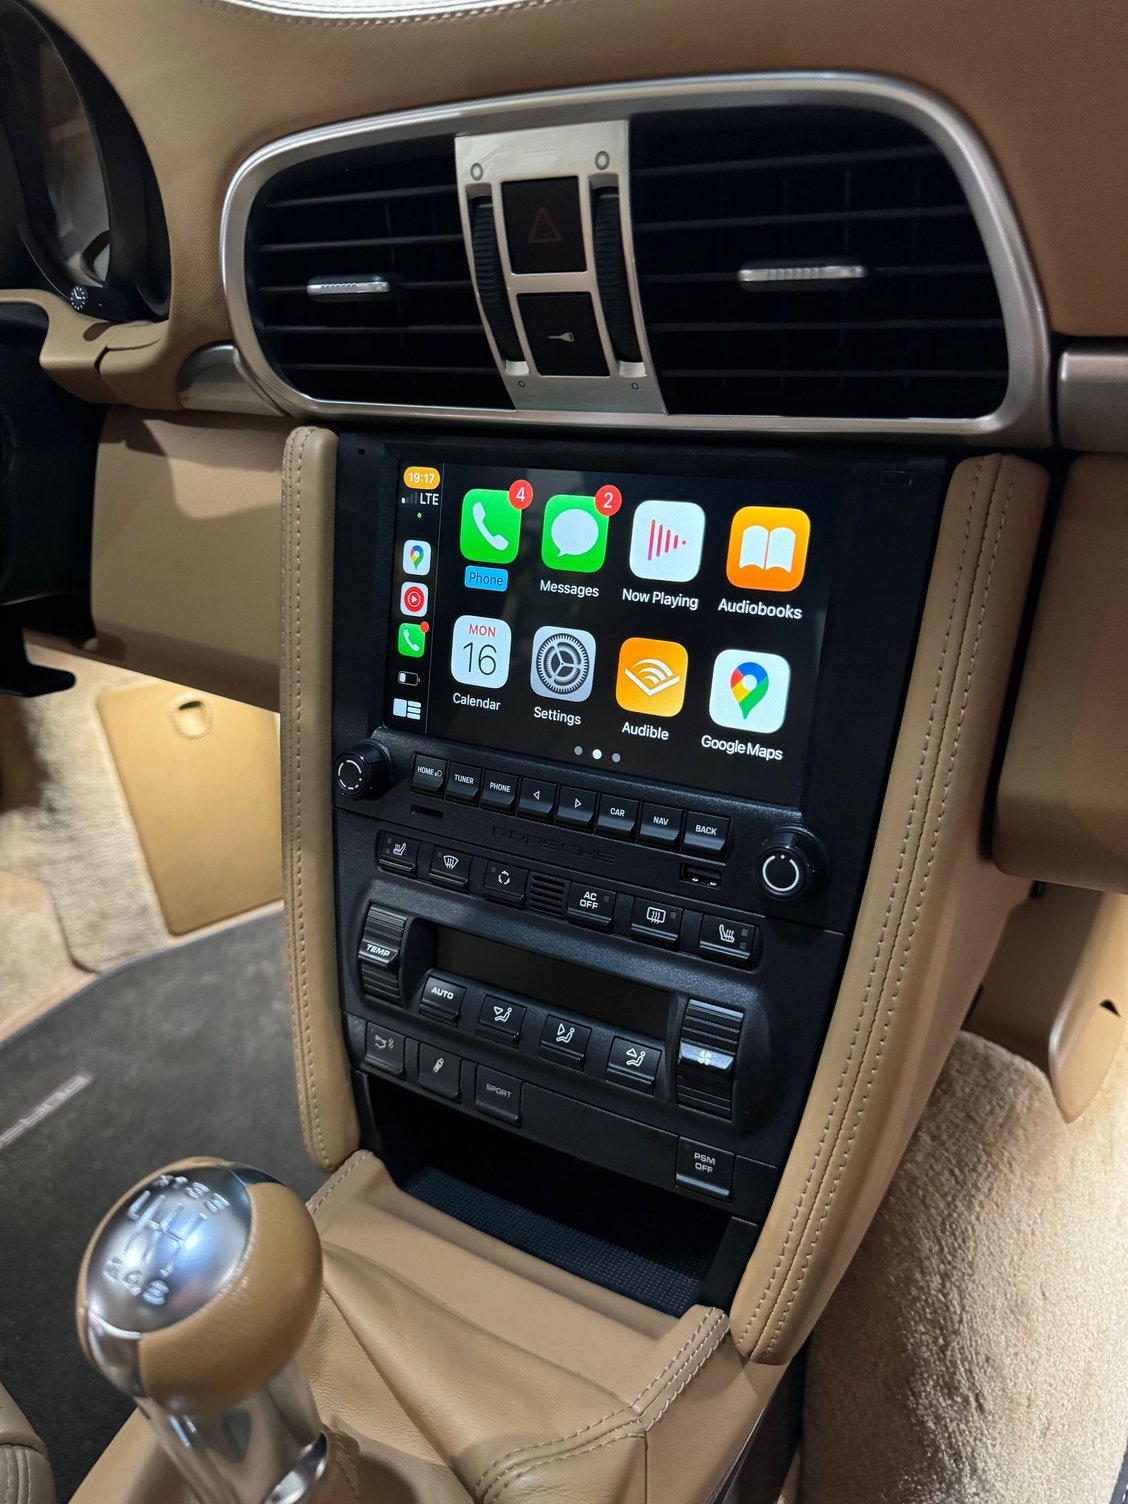
@jgoga is THE man! I bought the cables and installed them over the weekend. True wireless CarPlay with NO wires showing. Took about 20-30 mins beginning to end.
This is how PCCM+ should�ve come from the factory. Hugely improved the whole interior for me.
@jgoga is THE man! I bought the cables and installed them over the weekend. True wireless CarPlay with NO wires showing. Took about 20-30 mins beginning to end.
This is how PCCM+ should�ve come from the factory. Hugely improved the whole interior for me.
Looks great..i agree it should've come like this from Porsche.
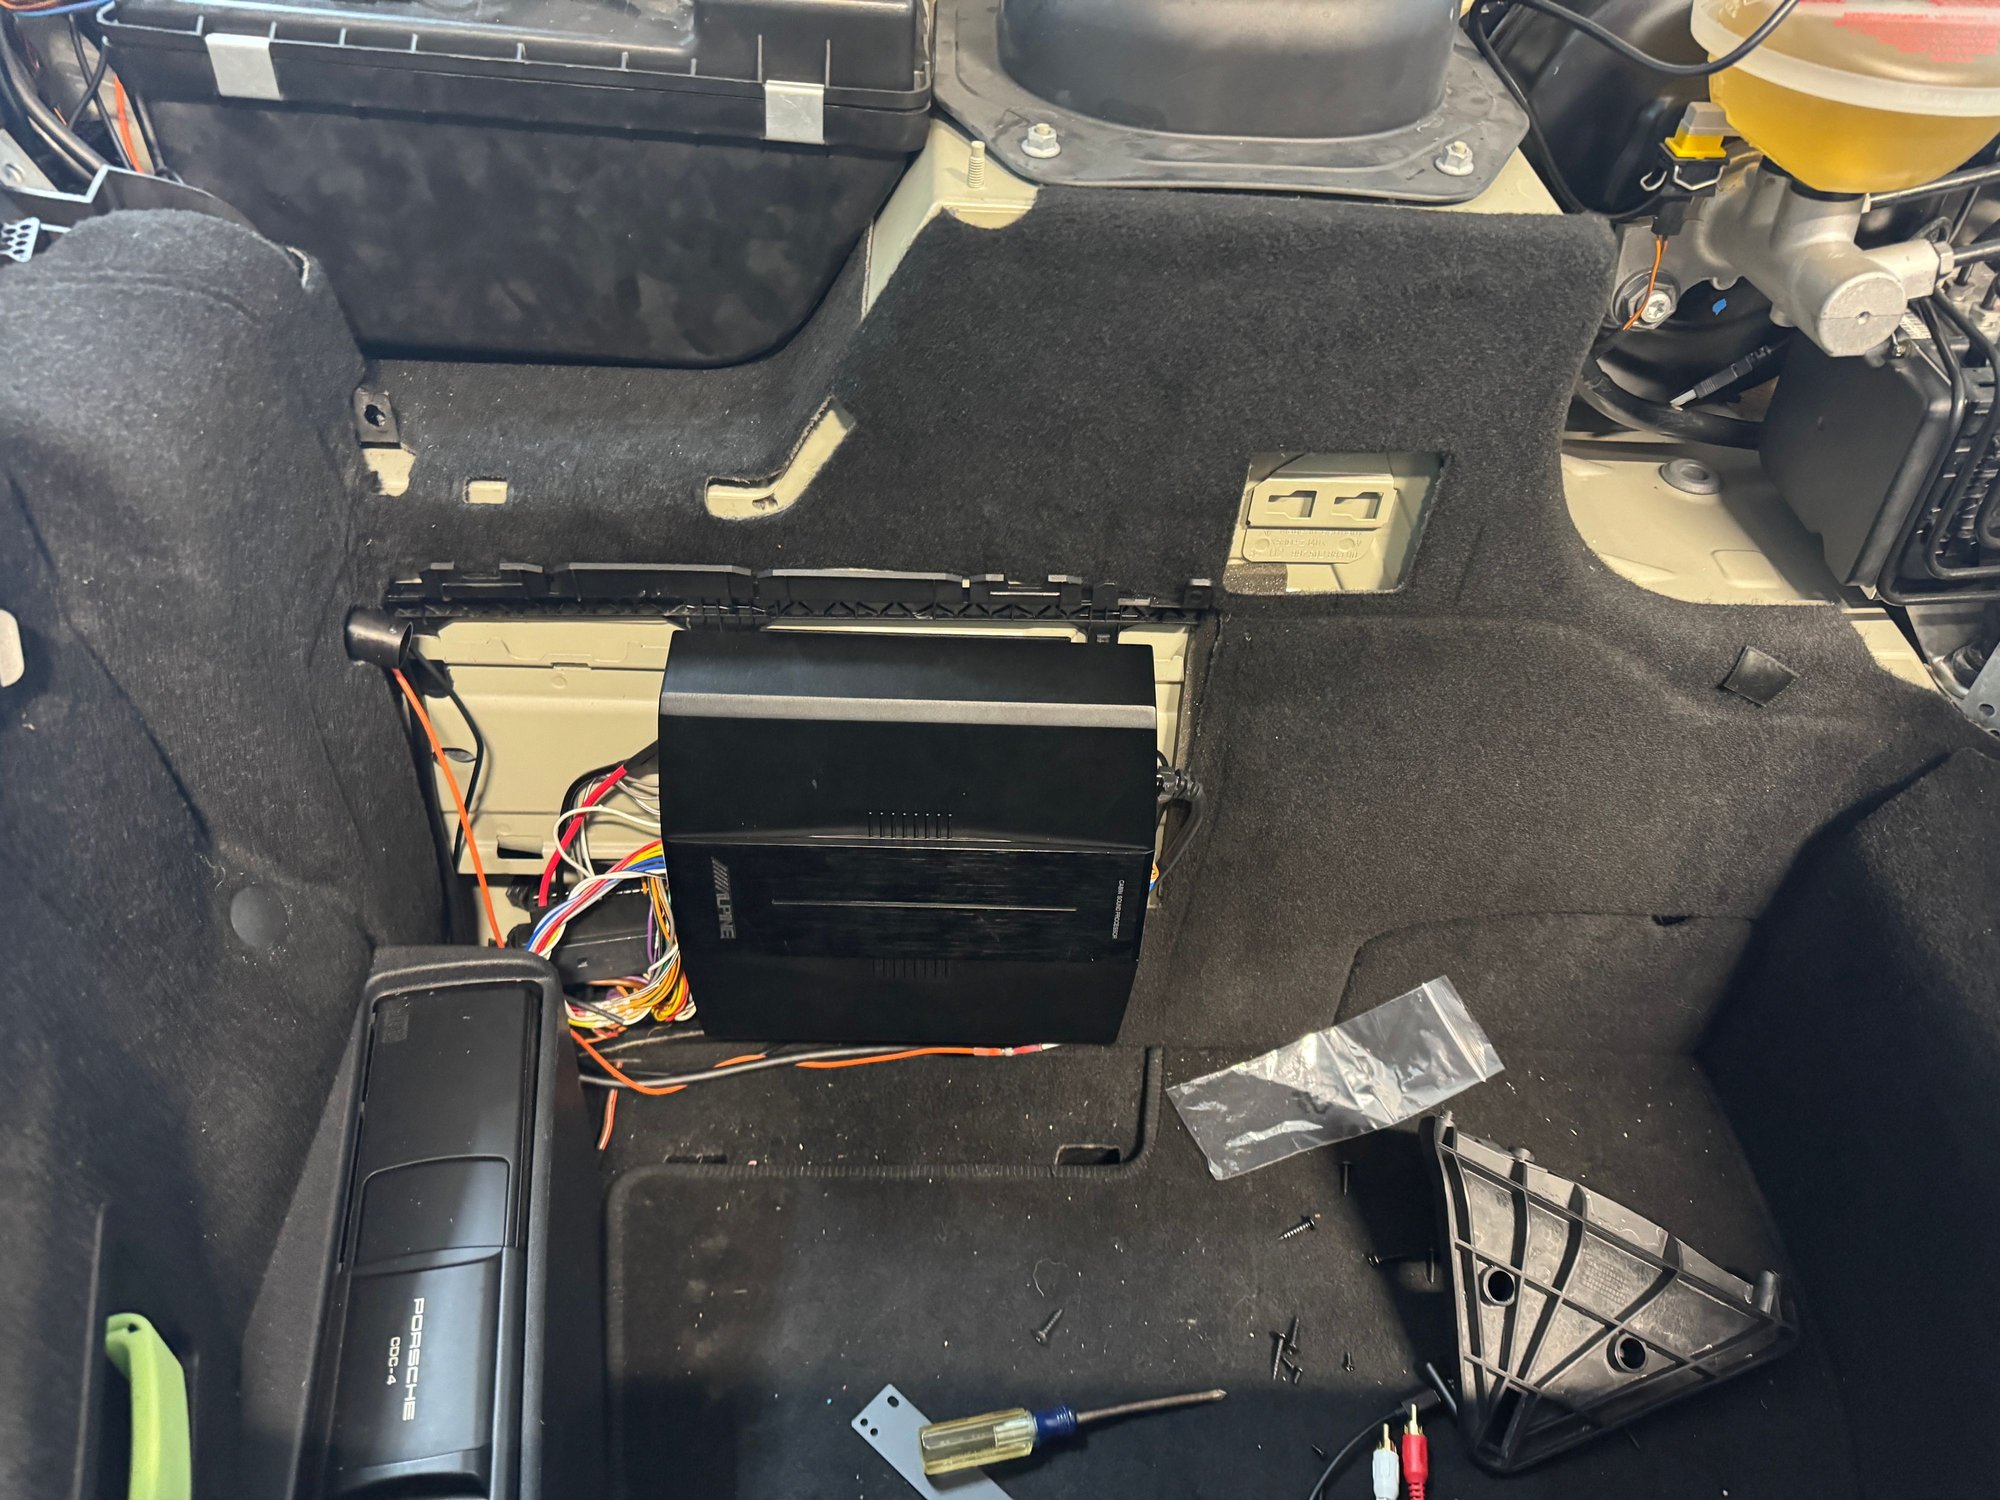
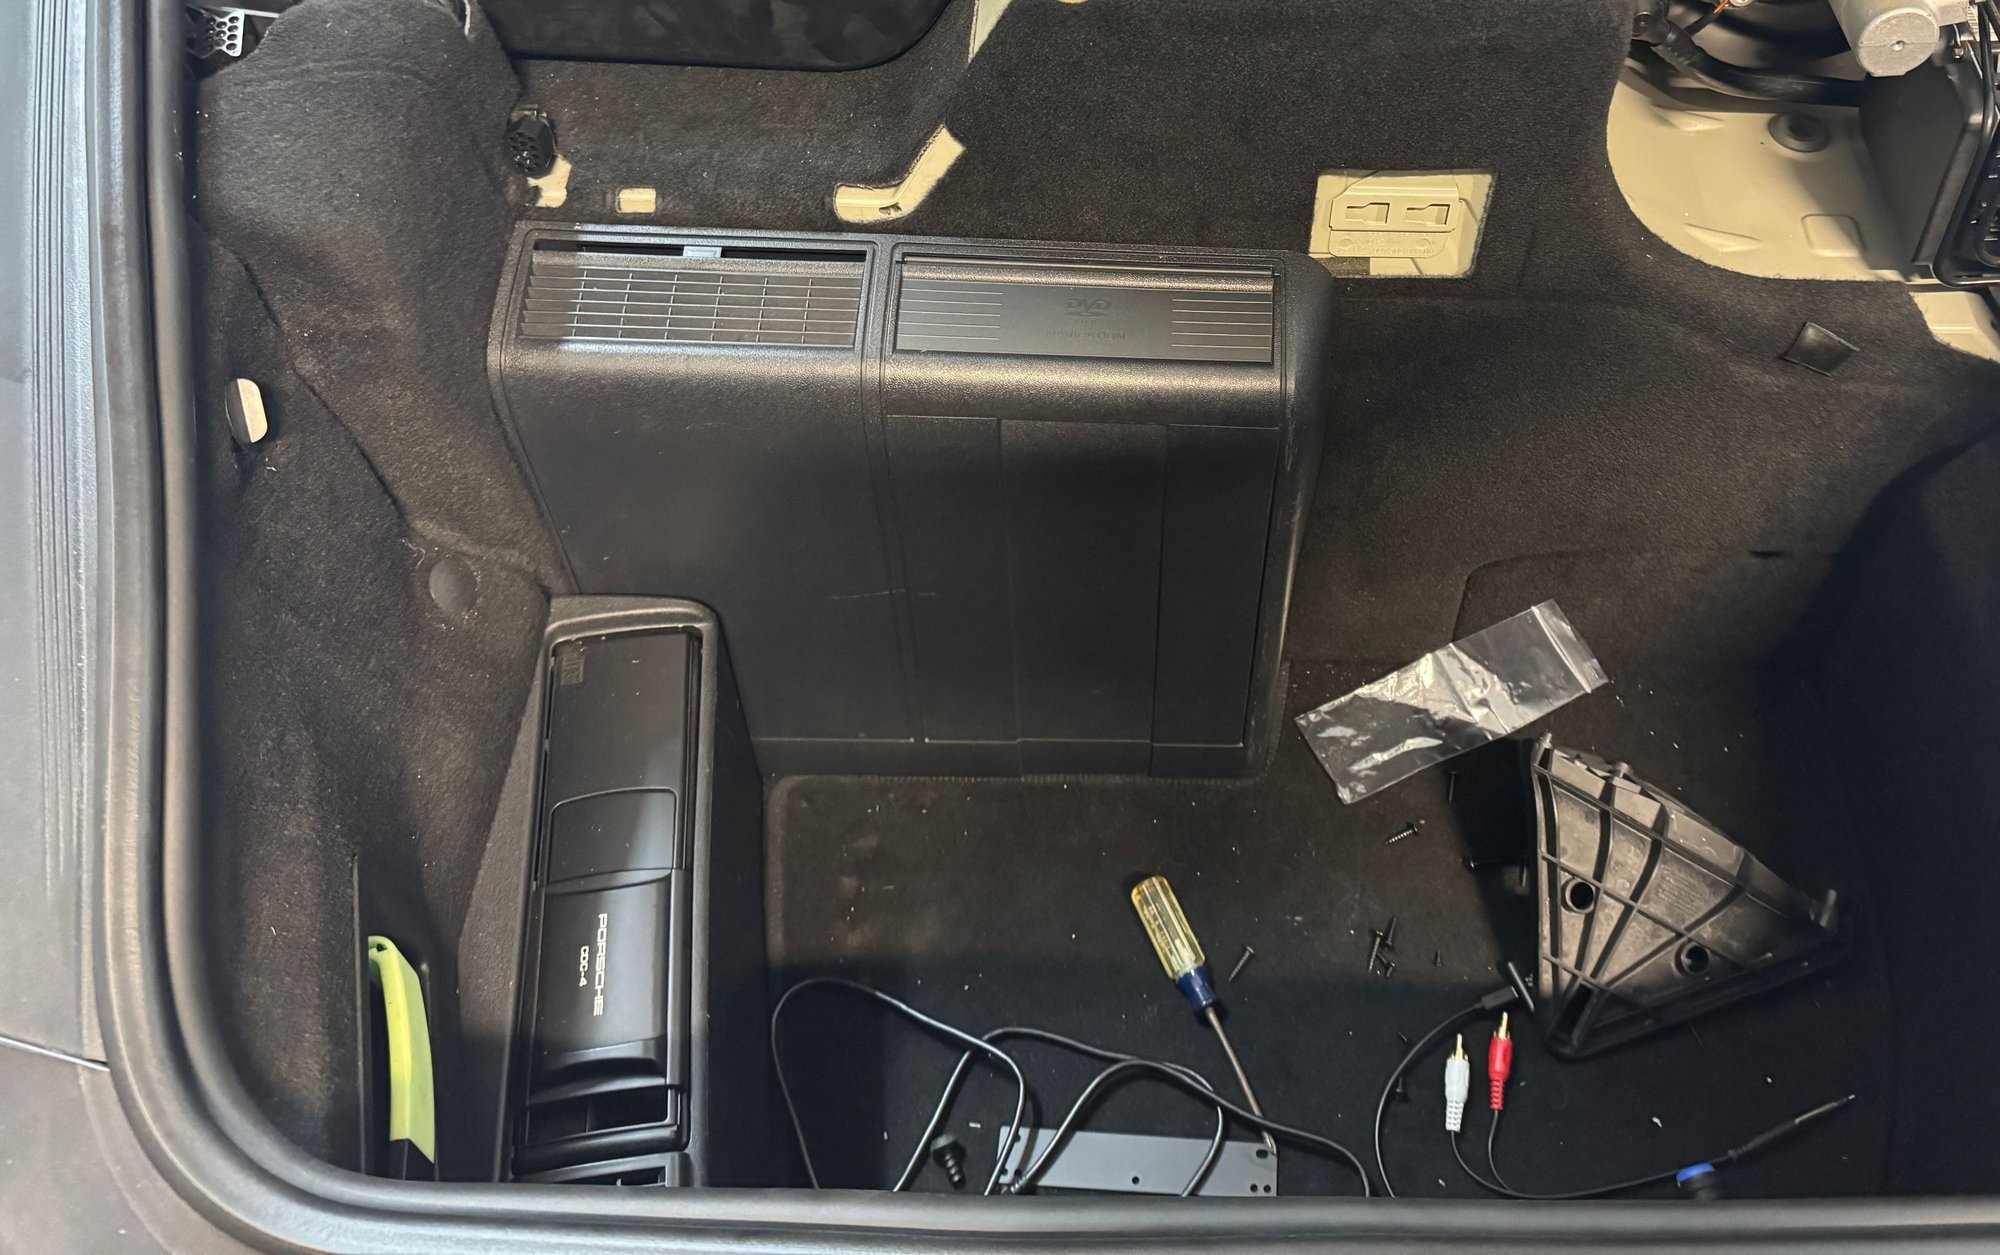
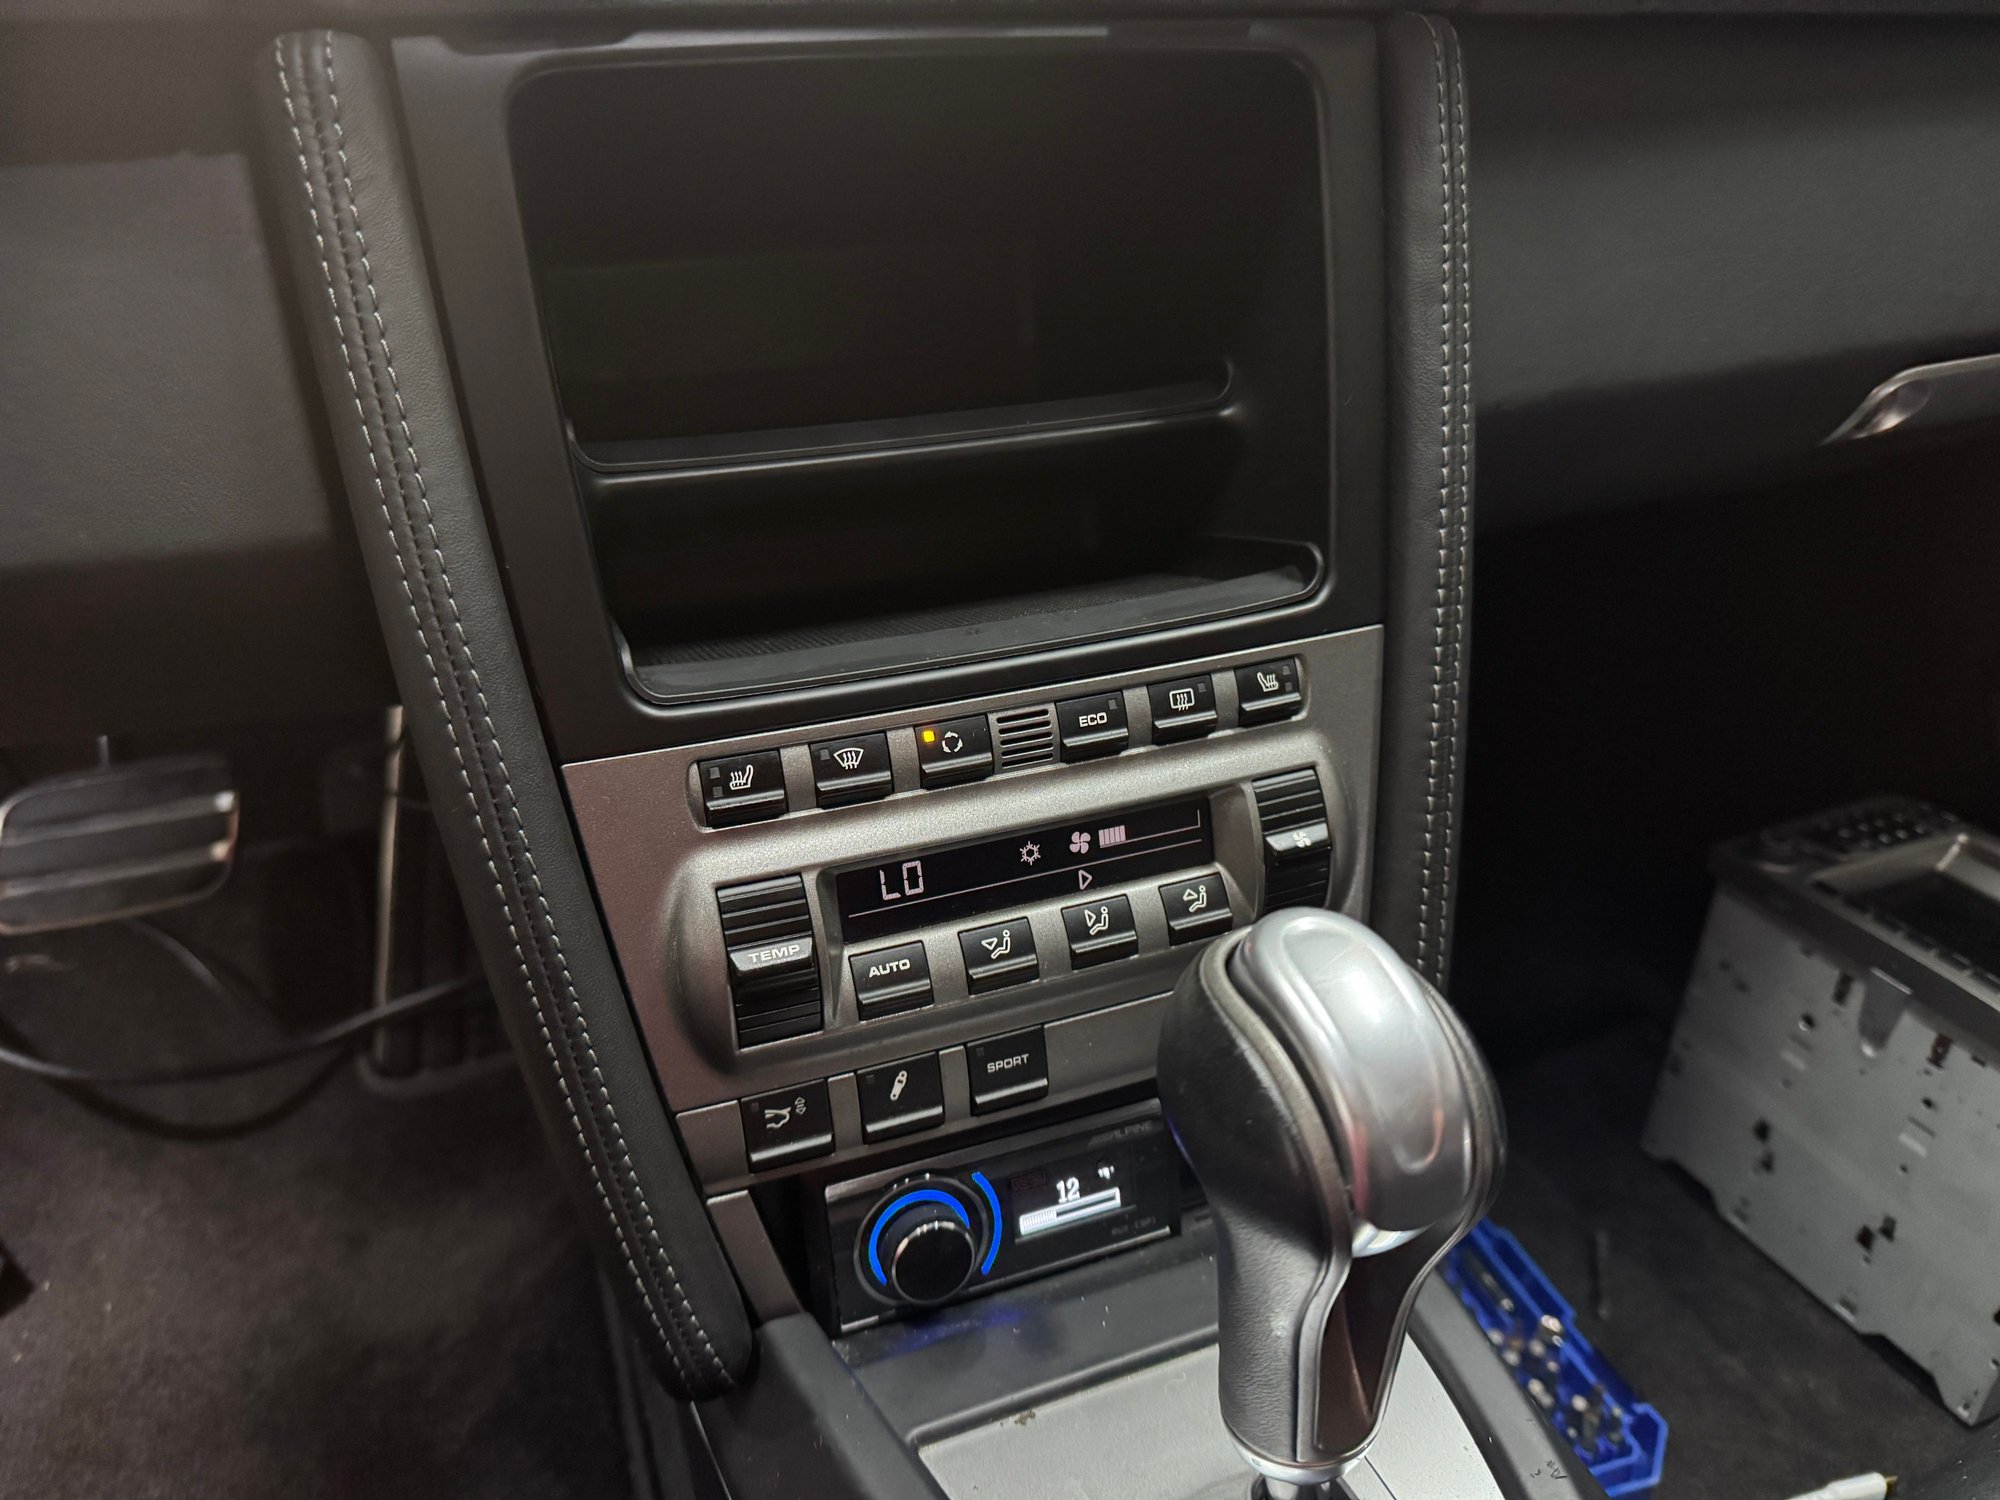
Finally got around to removing the Bose system and replace it with a standard alone system and added some needed storage. Still haven’t decided where to install the phone mount since I have a few options. No wires were cut and it is completely reversible. Need to finish with wire clean up but this is all my back could take for the day. Will be changing the HVAC and sport button to black and deleting the steering wheel controls as well.
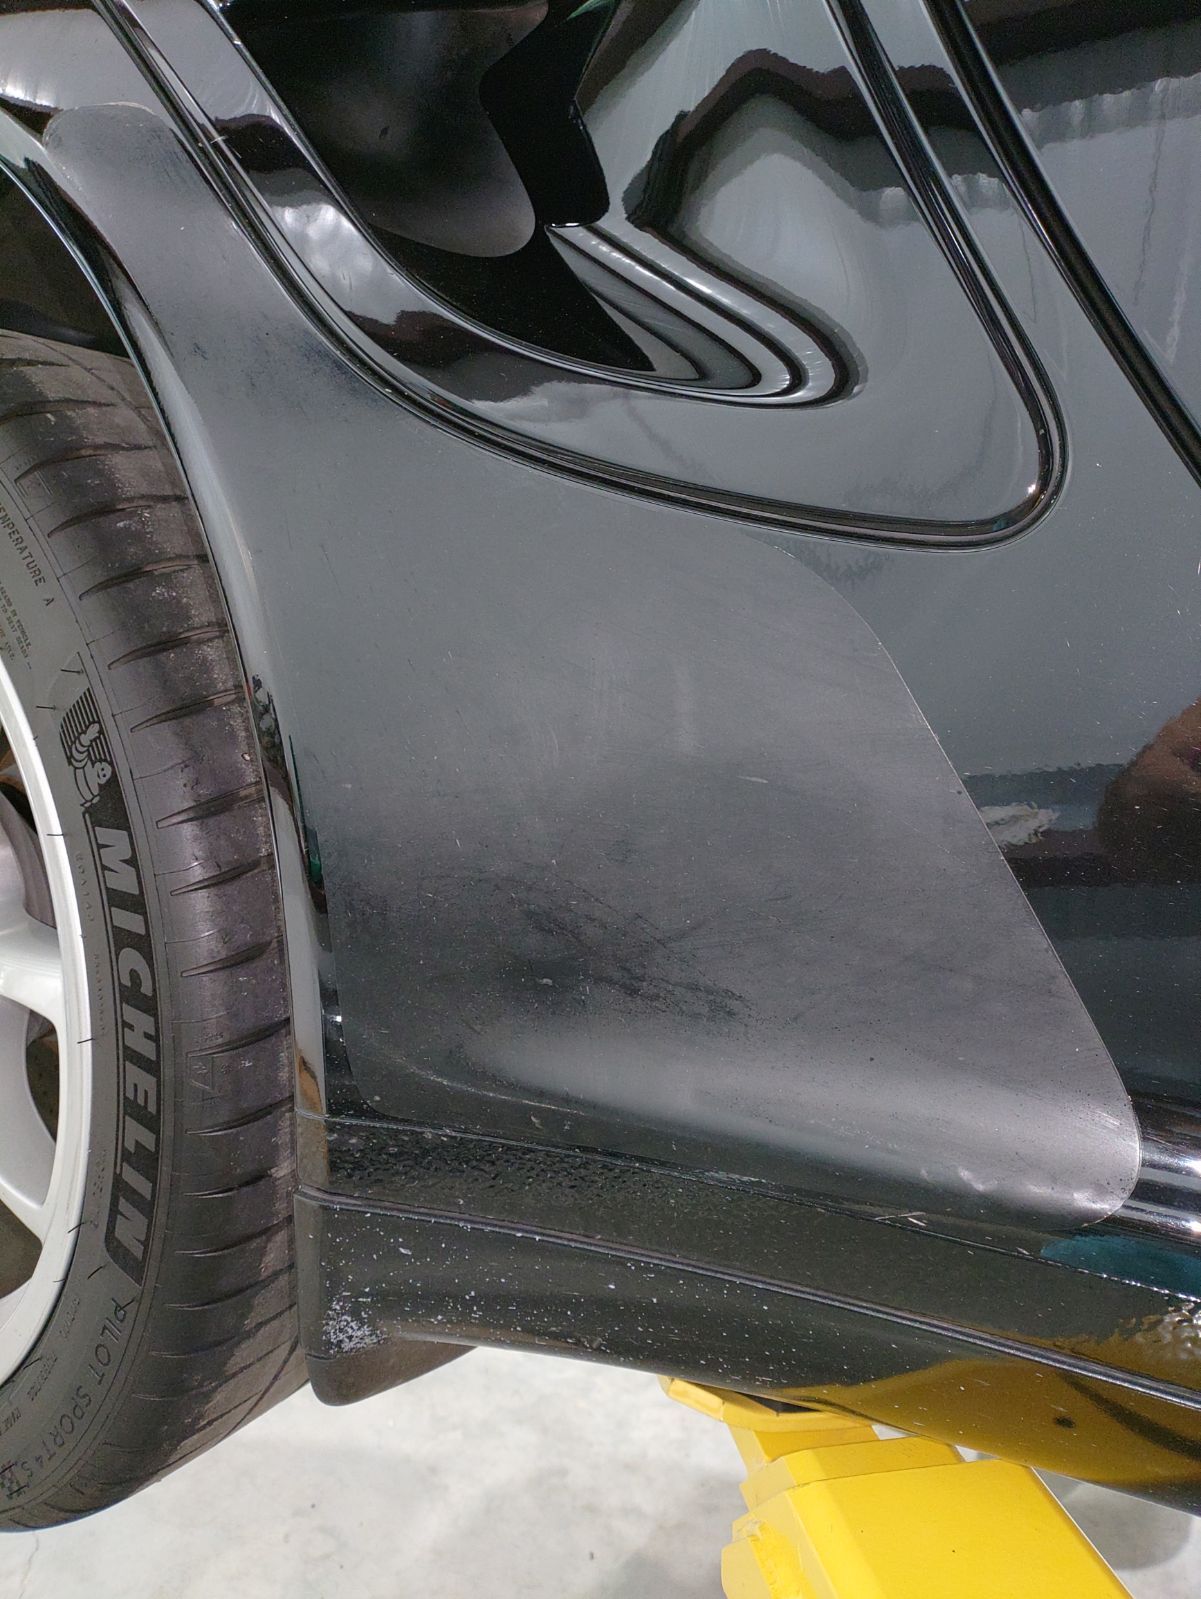
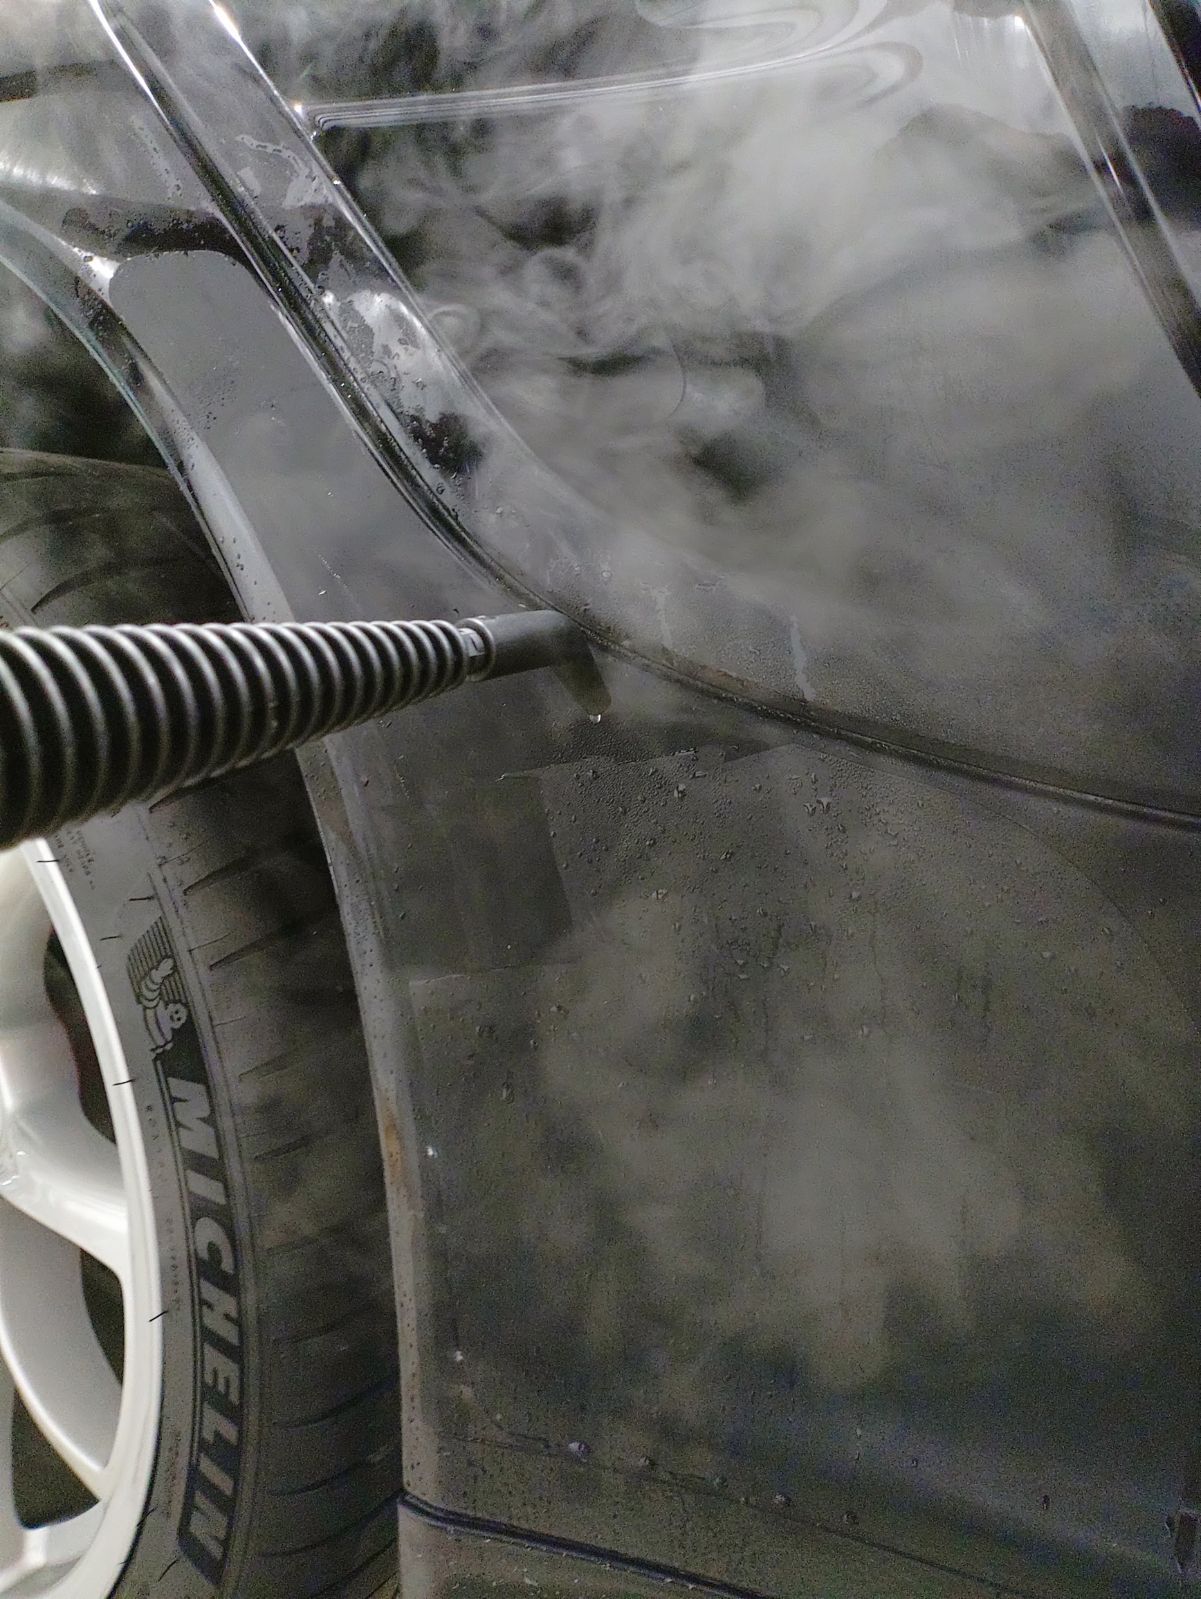
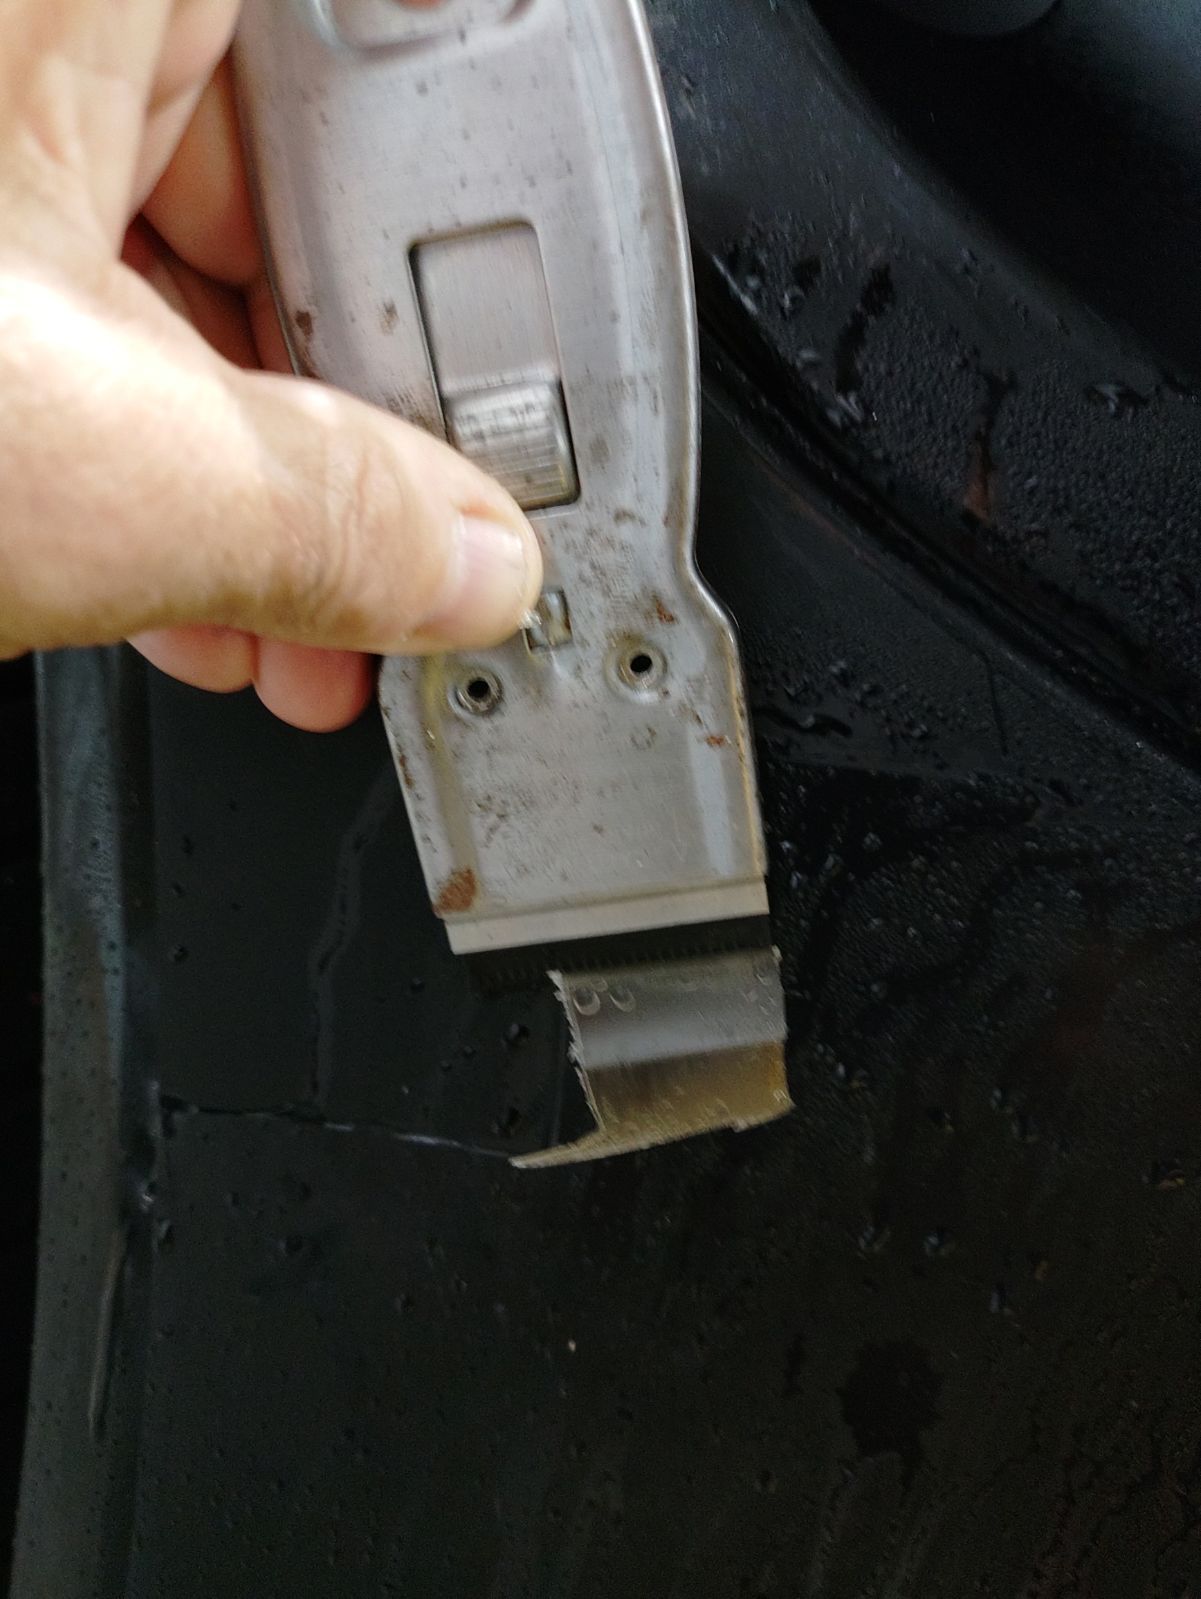
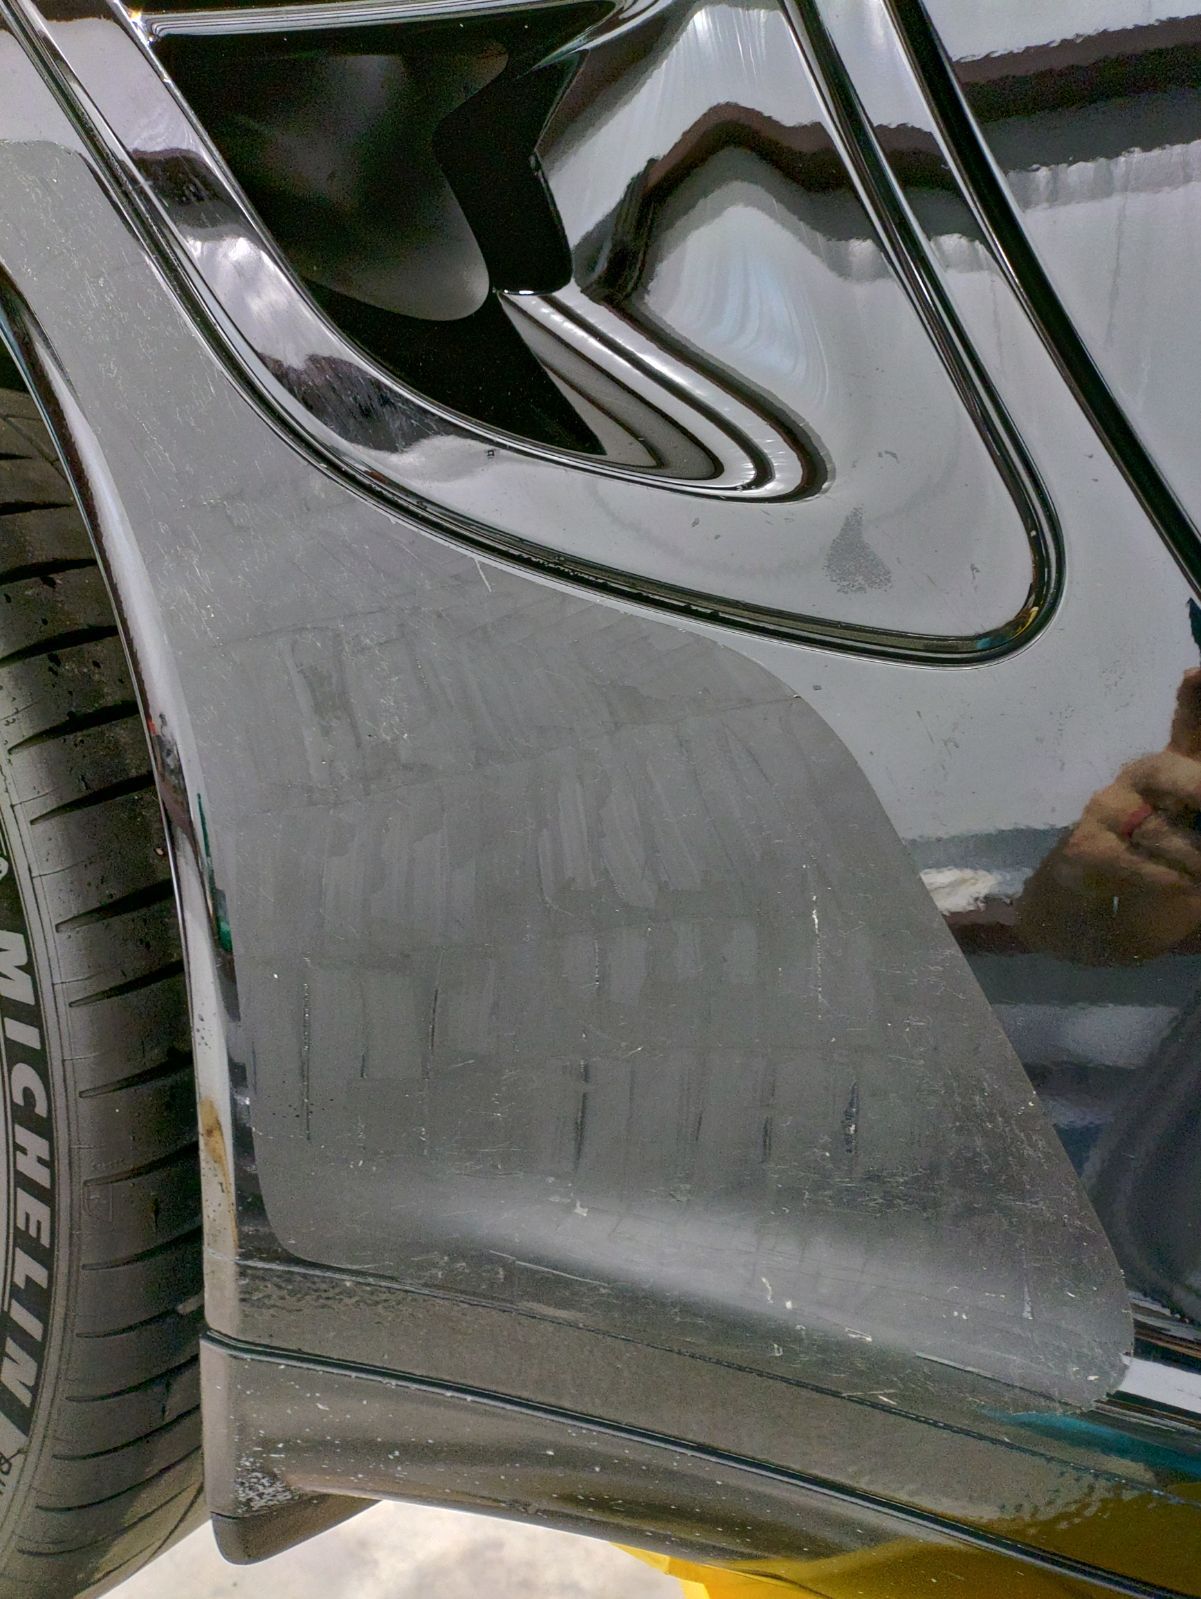
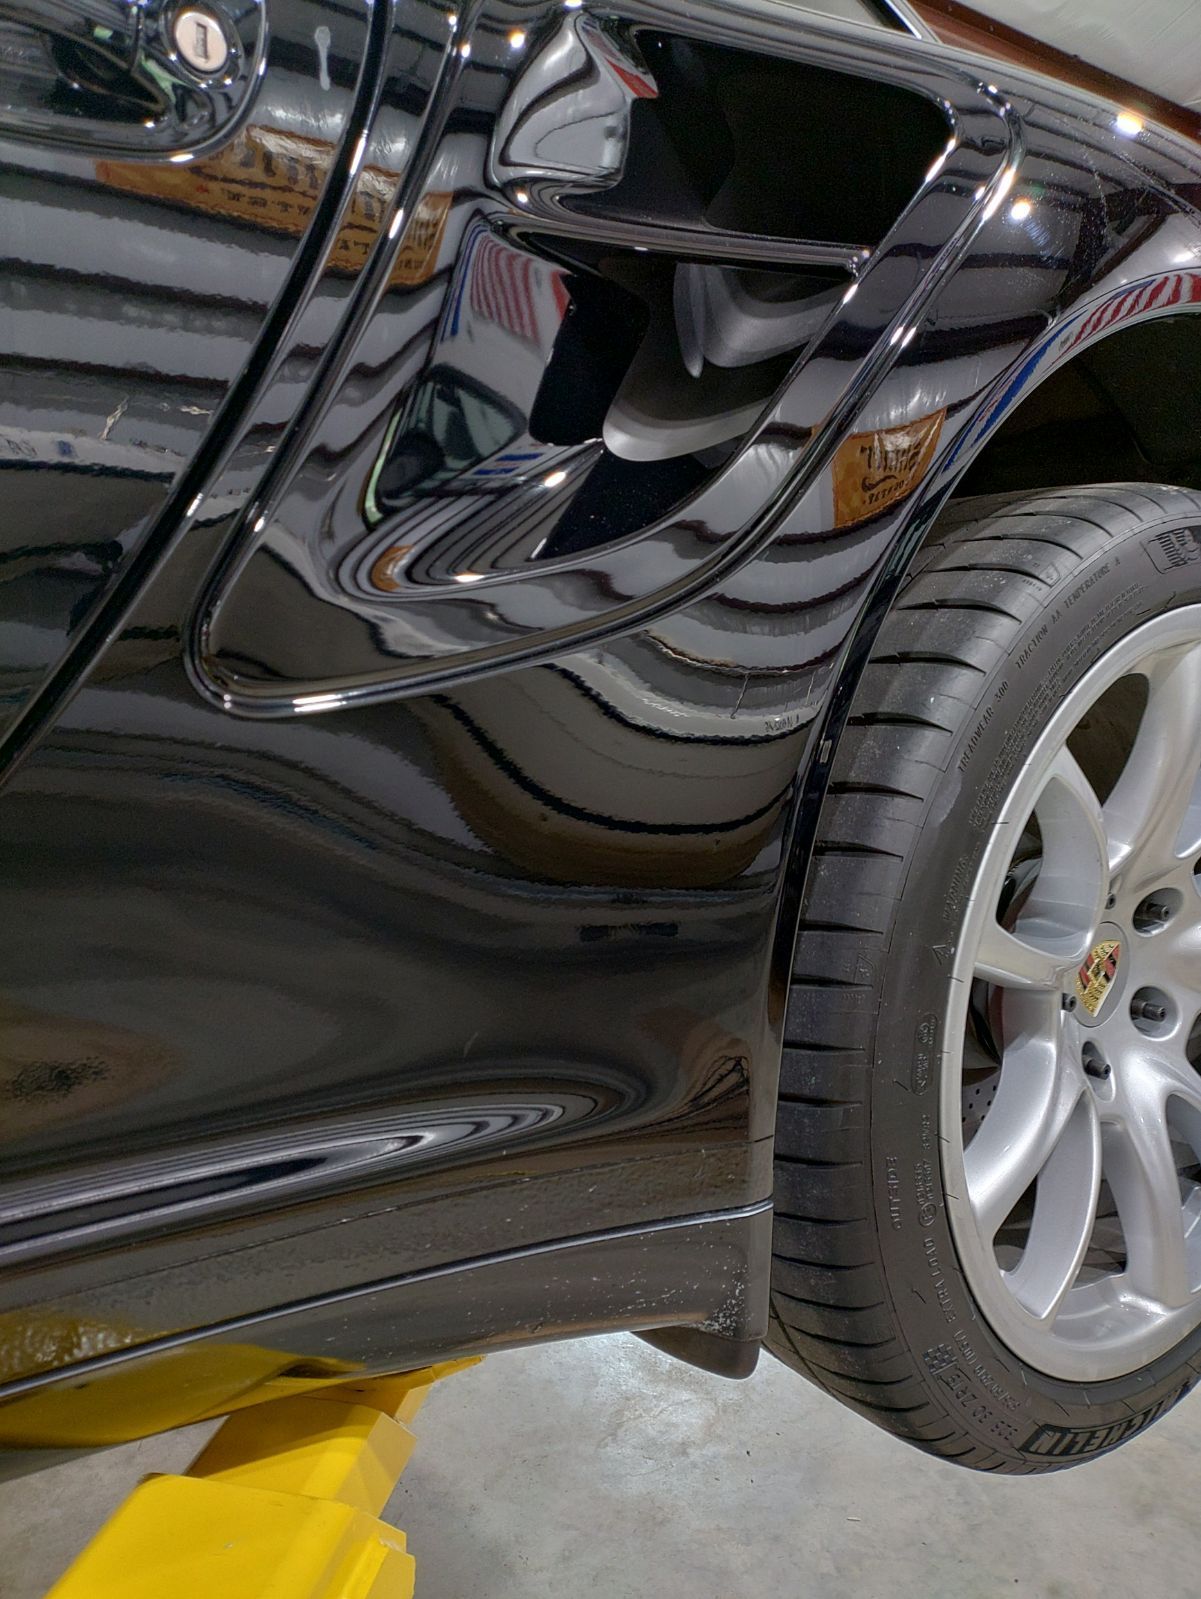
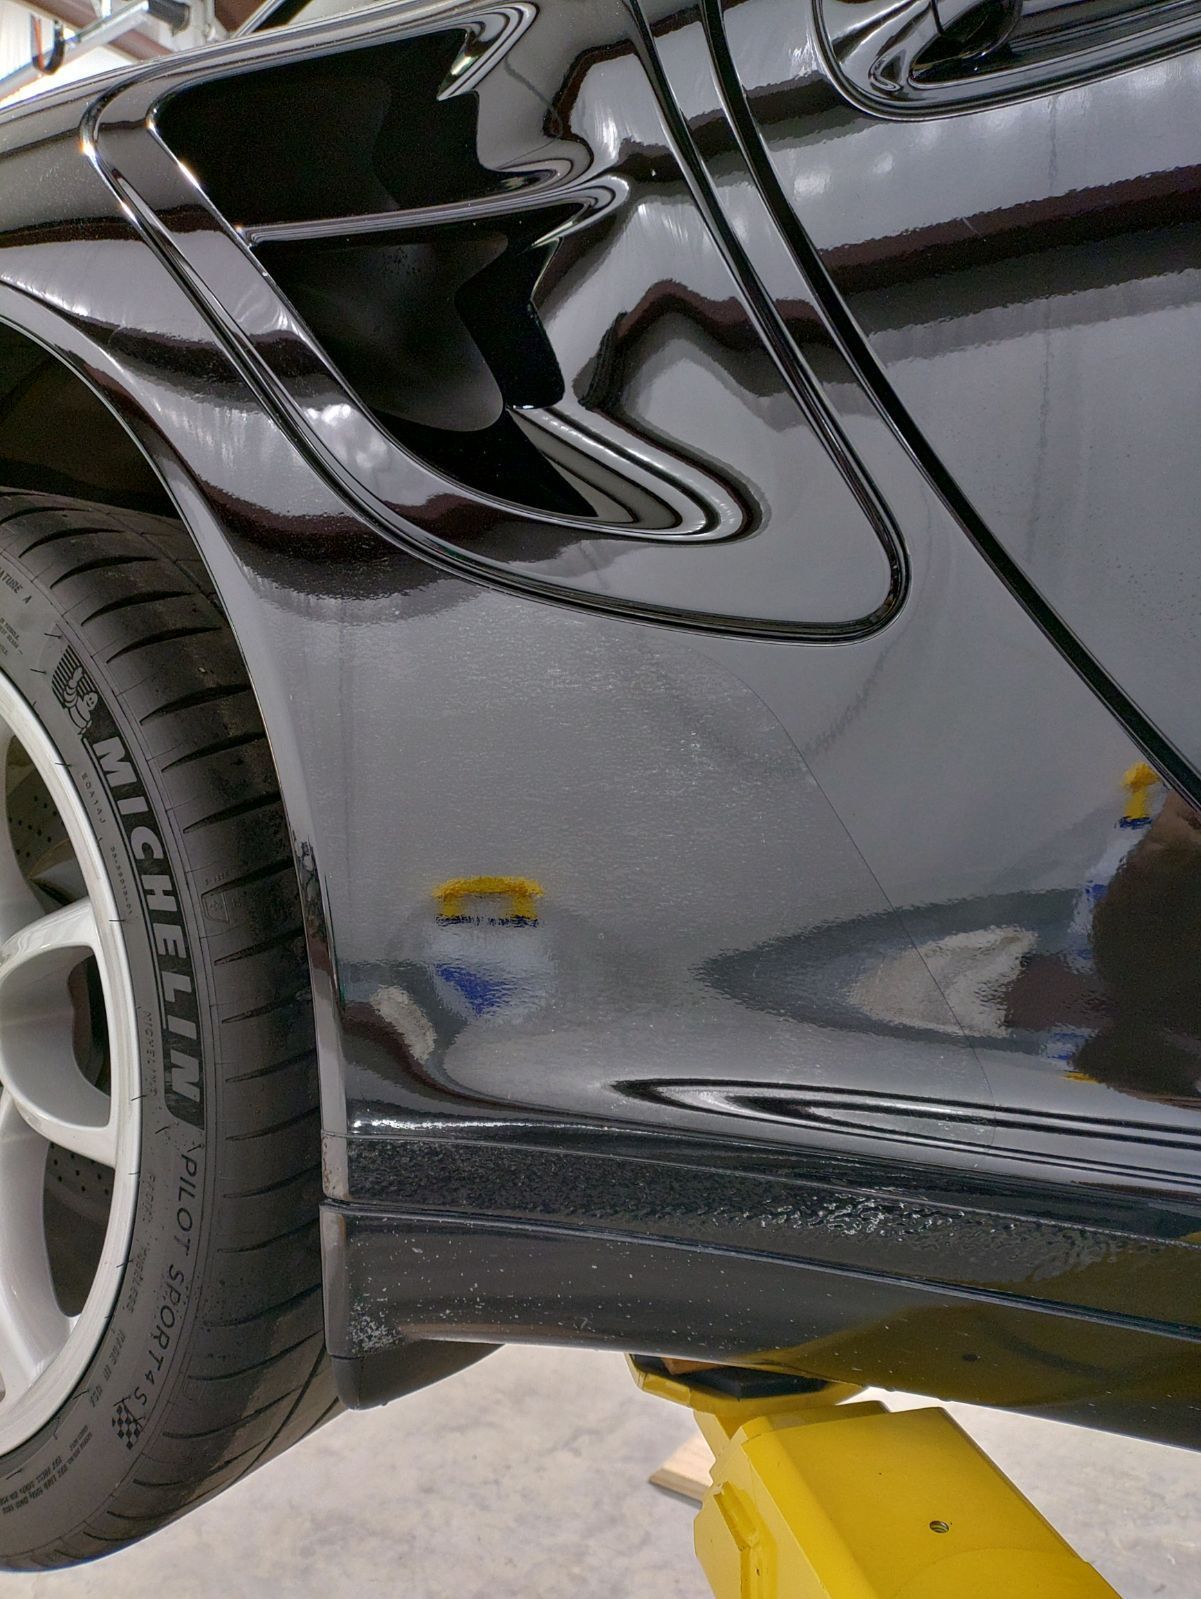
Replaced the rear quarter panel PPF. I was a little worried due to all the negative comments about paint being pulled up etc. After completing the job, I don’t know what all the fuss is about. It took a little time but never did I think I was damaging the paint throughout the entire removal process. I used a steamer from Harbor Freight, non-marring plastic razor blades (more like a scraper) and 3M adhesive remover. I’m sure my PPF was original to the car. It was yellowed heavily (and was not at all glossy), but you couldn’t tell because the car is black. To get it off I steamed from the top down and used the plastic razor blades to get the film off little by little, steaming as you go. The film was so brittle it would just come off in flakes. Once the film was off I was left with just the adhesive. Next, I re-steamed and scraped again this time scraping the bulk of the adhesive off. Finally I sprayed the remaining adhesive with the 3M adhesive removal and used a combination of a towel and the plastic razor blades until all was gone. From there it was what you would expect…clean, simple polish and then apply the new PPF. This is definitely a DIY project if you have a couple of hour to spare.
Here is the PPF before removal.
Steamer, plastic "razor" blades and 3M adhesive remover.
Steaming with the top part of the film already gone.
Scraping the film away.
Film removed, but adhesive remains.
All film and adhesive removed, no PPF yet.
PPF installed.
Last edited by Ryans Rebel; 09-26-2024 at 02:03 PM.

 09-08-2024, 04:33 AM