When you click on links to various merchants on this site and make a purchase, this can result in this site earning a commission. Affiliate programs and affiliations include, but are not limited to, the eBay Partner Network.
Did some more tear down today. Got all the stuff out of the way to remove the cam covers. I have been fretting over the R&R camshaft deal, but then I saw this video.Finding and watching it first thing this AM gave me the confidence boost to start getting serious about the cams. You can watch it here:
The cam part starts at about 12:45. He is assembling the entire head and this appears to be video #2, though I did not search for video 1.
I did find another one, but it wasn't as informative and when the guys said something like "I guess I shouldn't do this when I'm drunk" I started to doubt how helpful it would be, but it did give me another view of the cams.
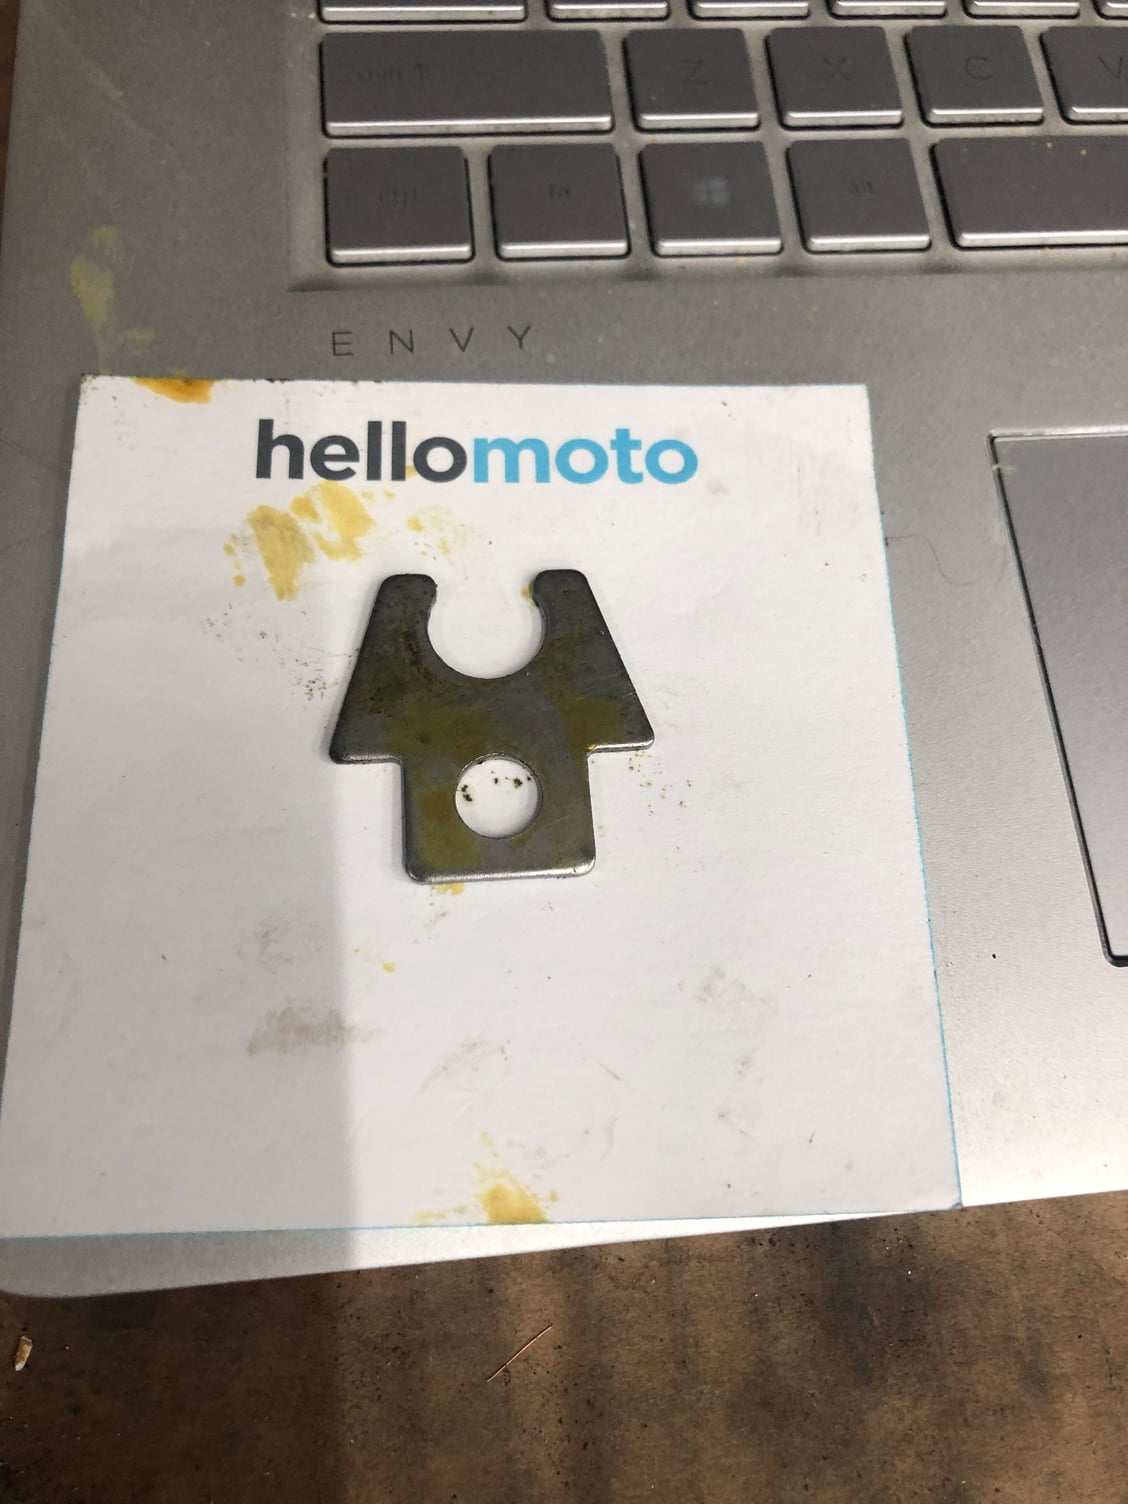
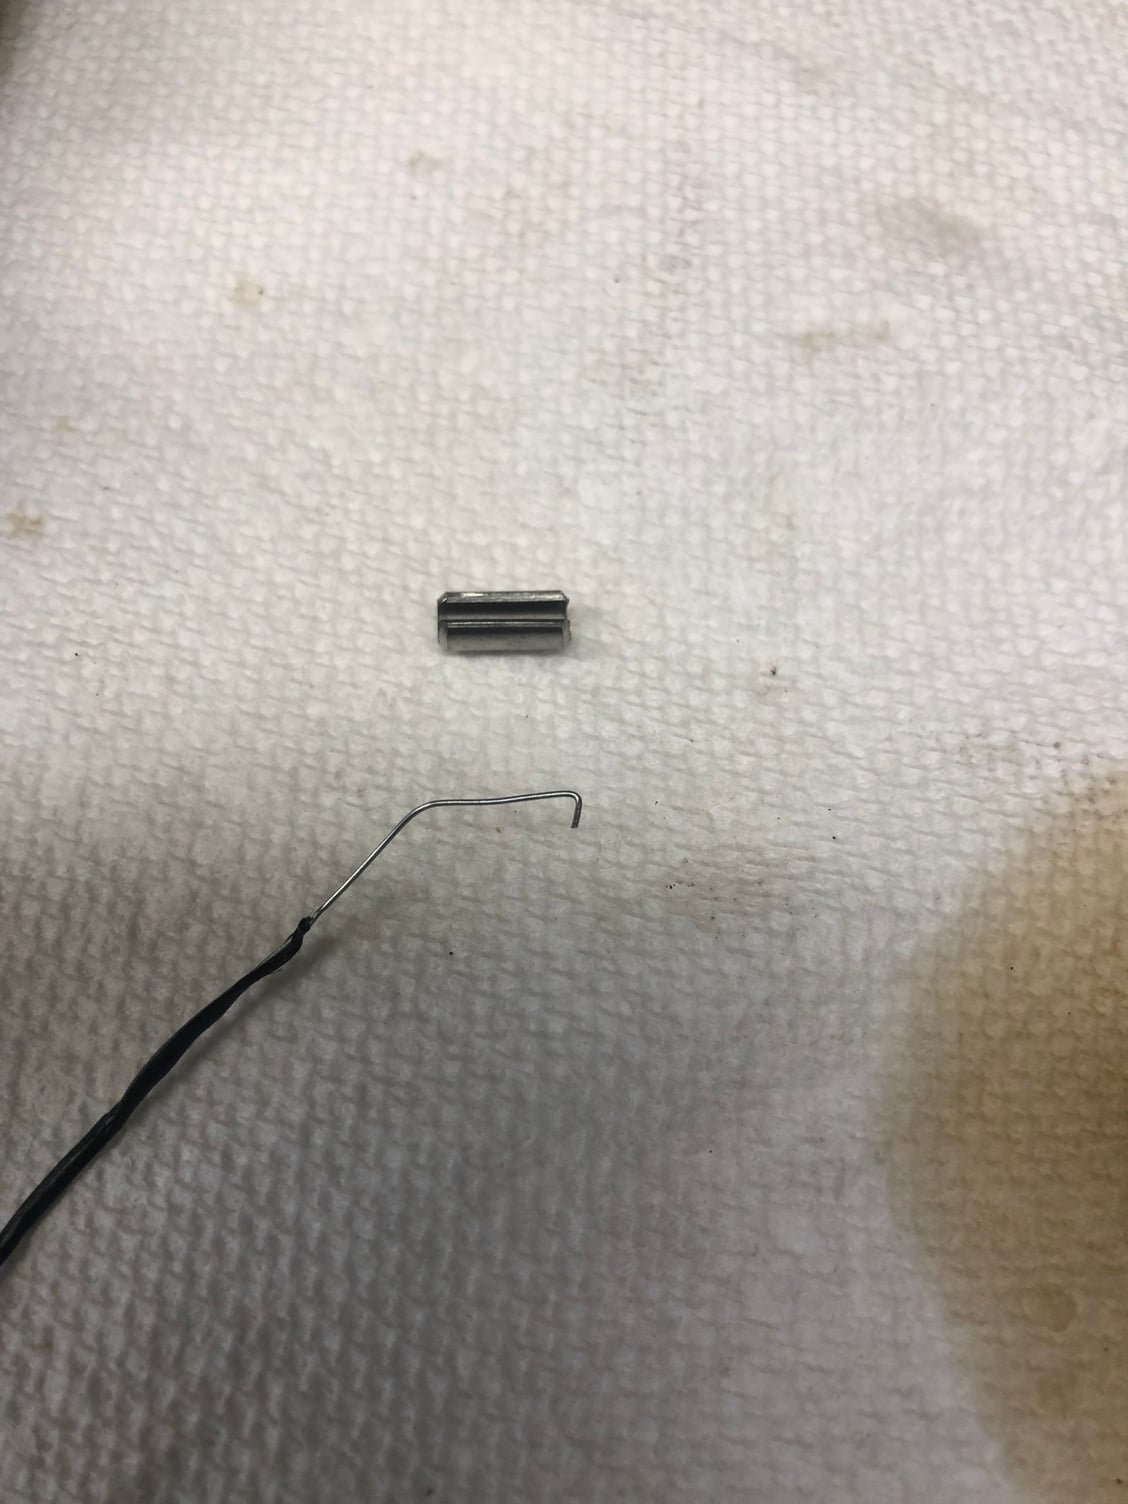
In the process I found this piece on the mat of the platform jack. I do not remember when it dropped or where it came from. It had a sheen of clean oil on it dropped near the passenger side very rear of the engine. If anyone knows what it is you will save me hours of pouring over PDF's looking for something similar. I am pretty careful and feel kind of dumb that I let this happen. Here is the part:
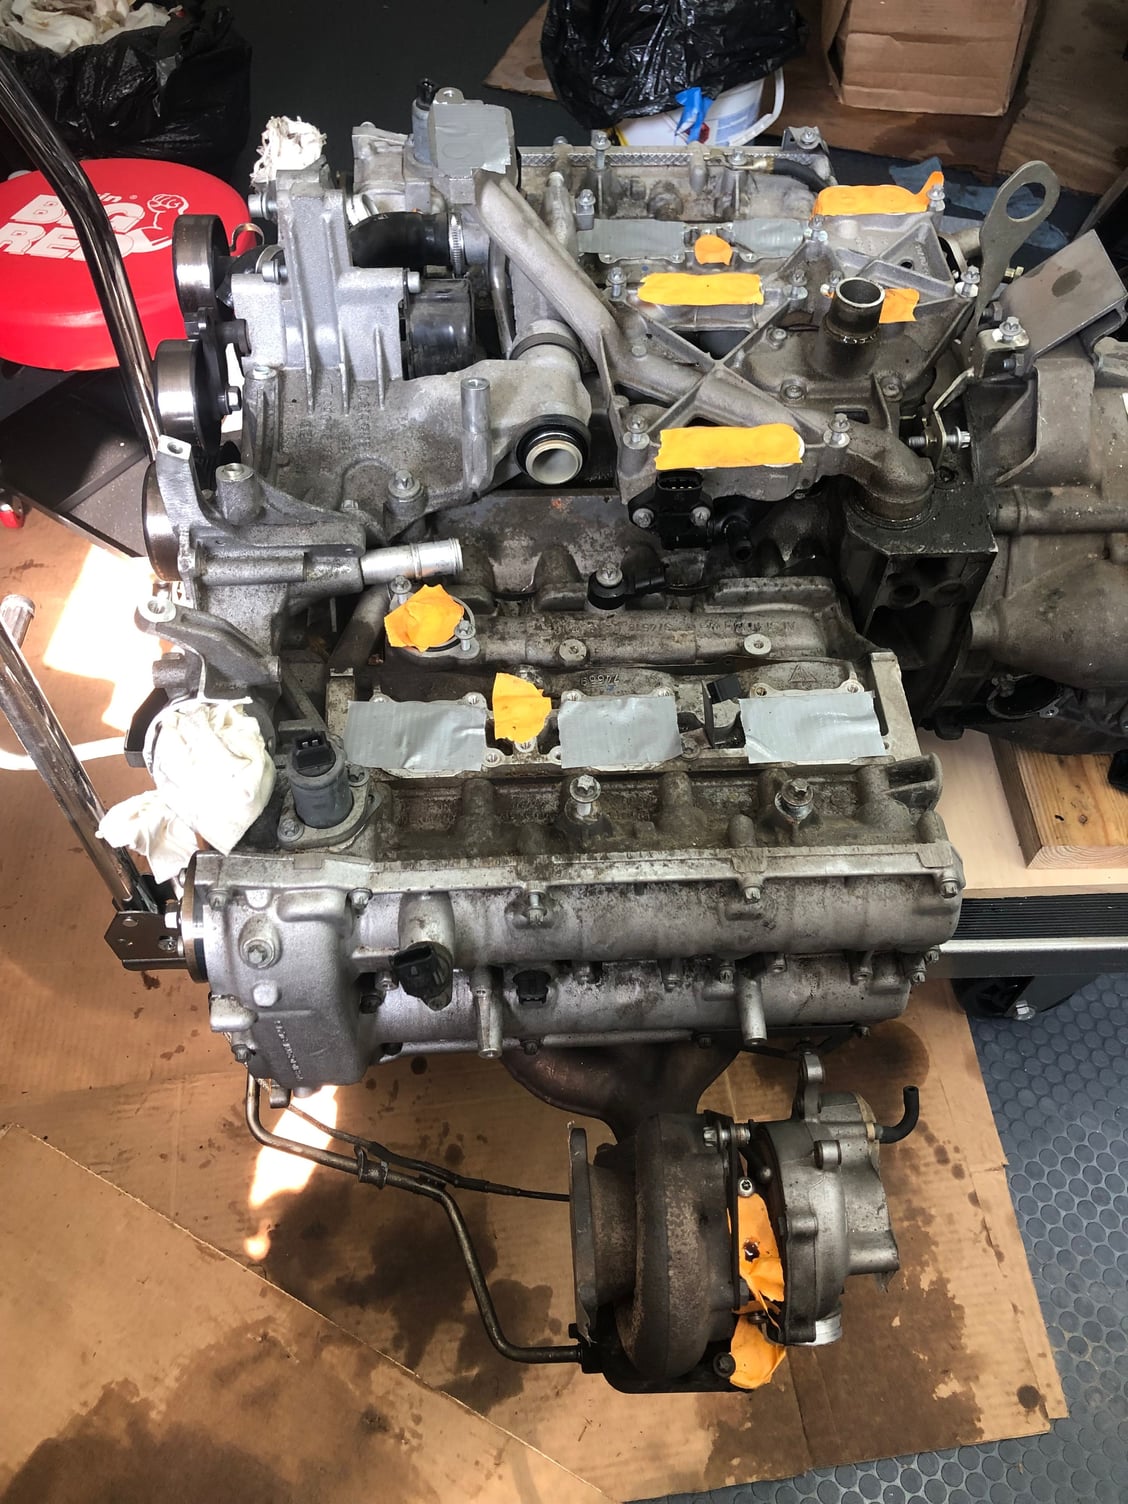
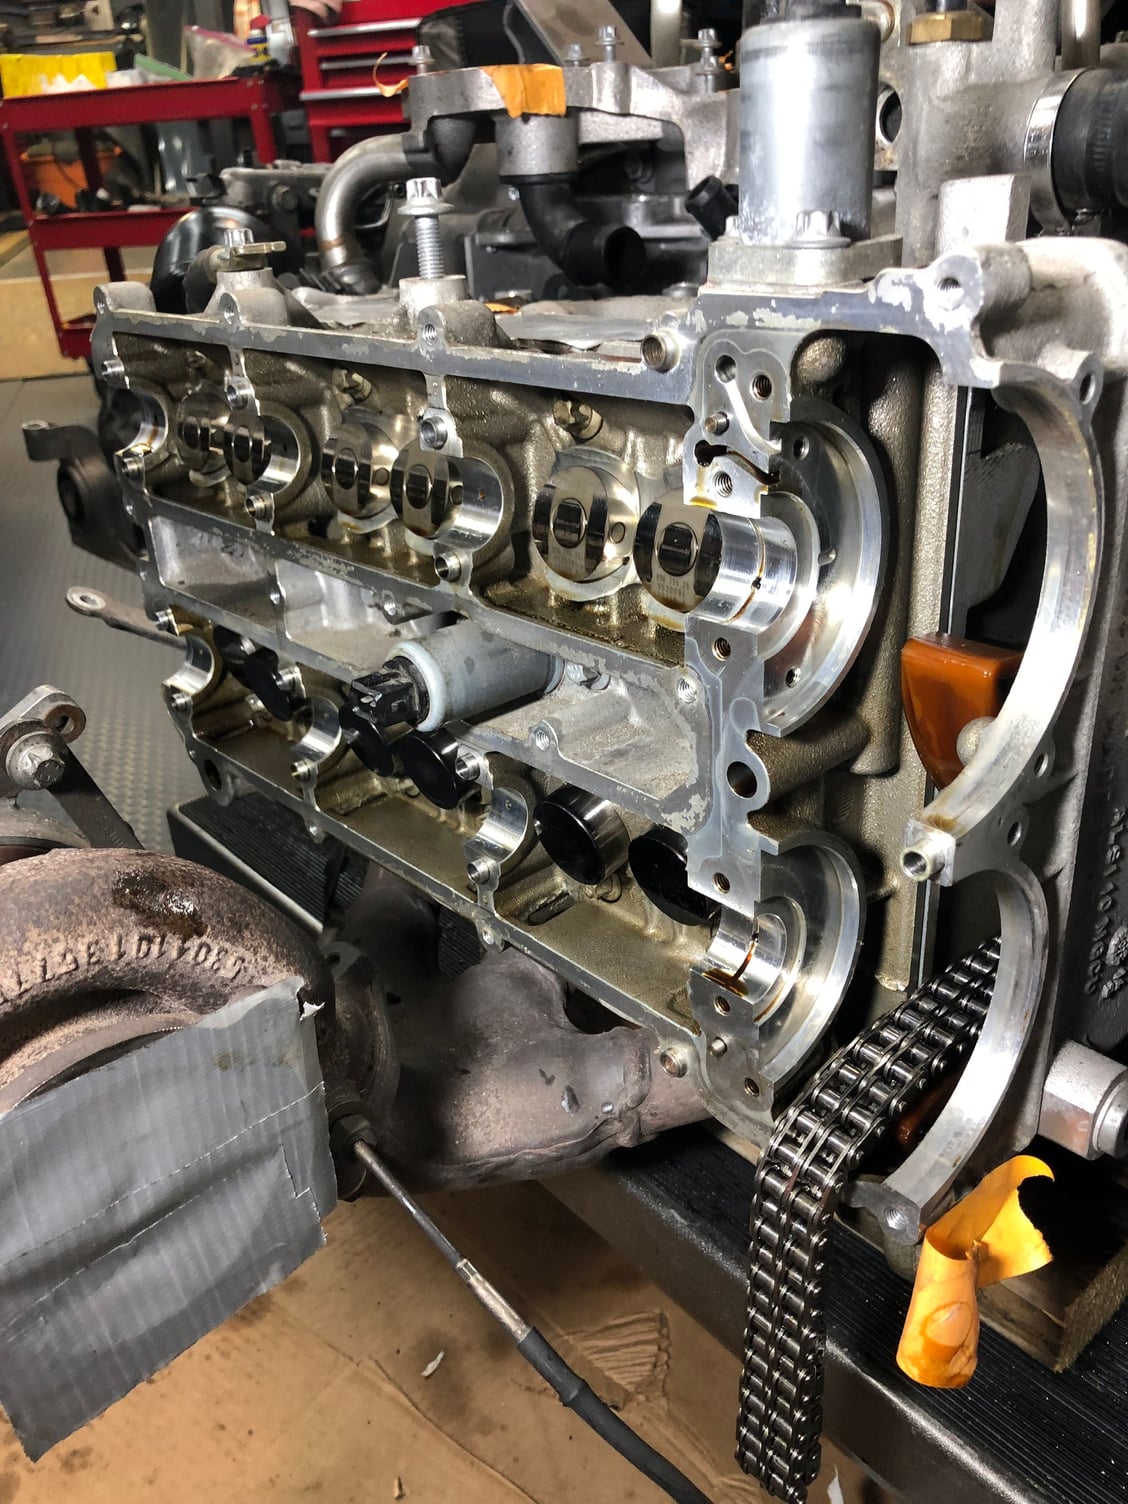
This is the current state of the engine from the passenger side with almost all of the piping out of the way (oil and coolant) on the engine and to the turbo (I think they used this engine on Apollo 13. There must be 10,000 points of failure moving oil and coolant around the engine):
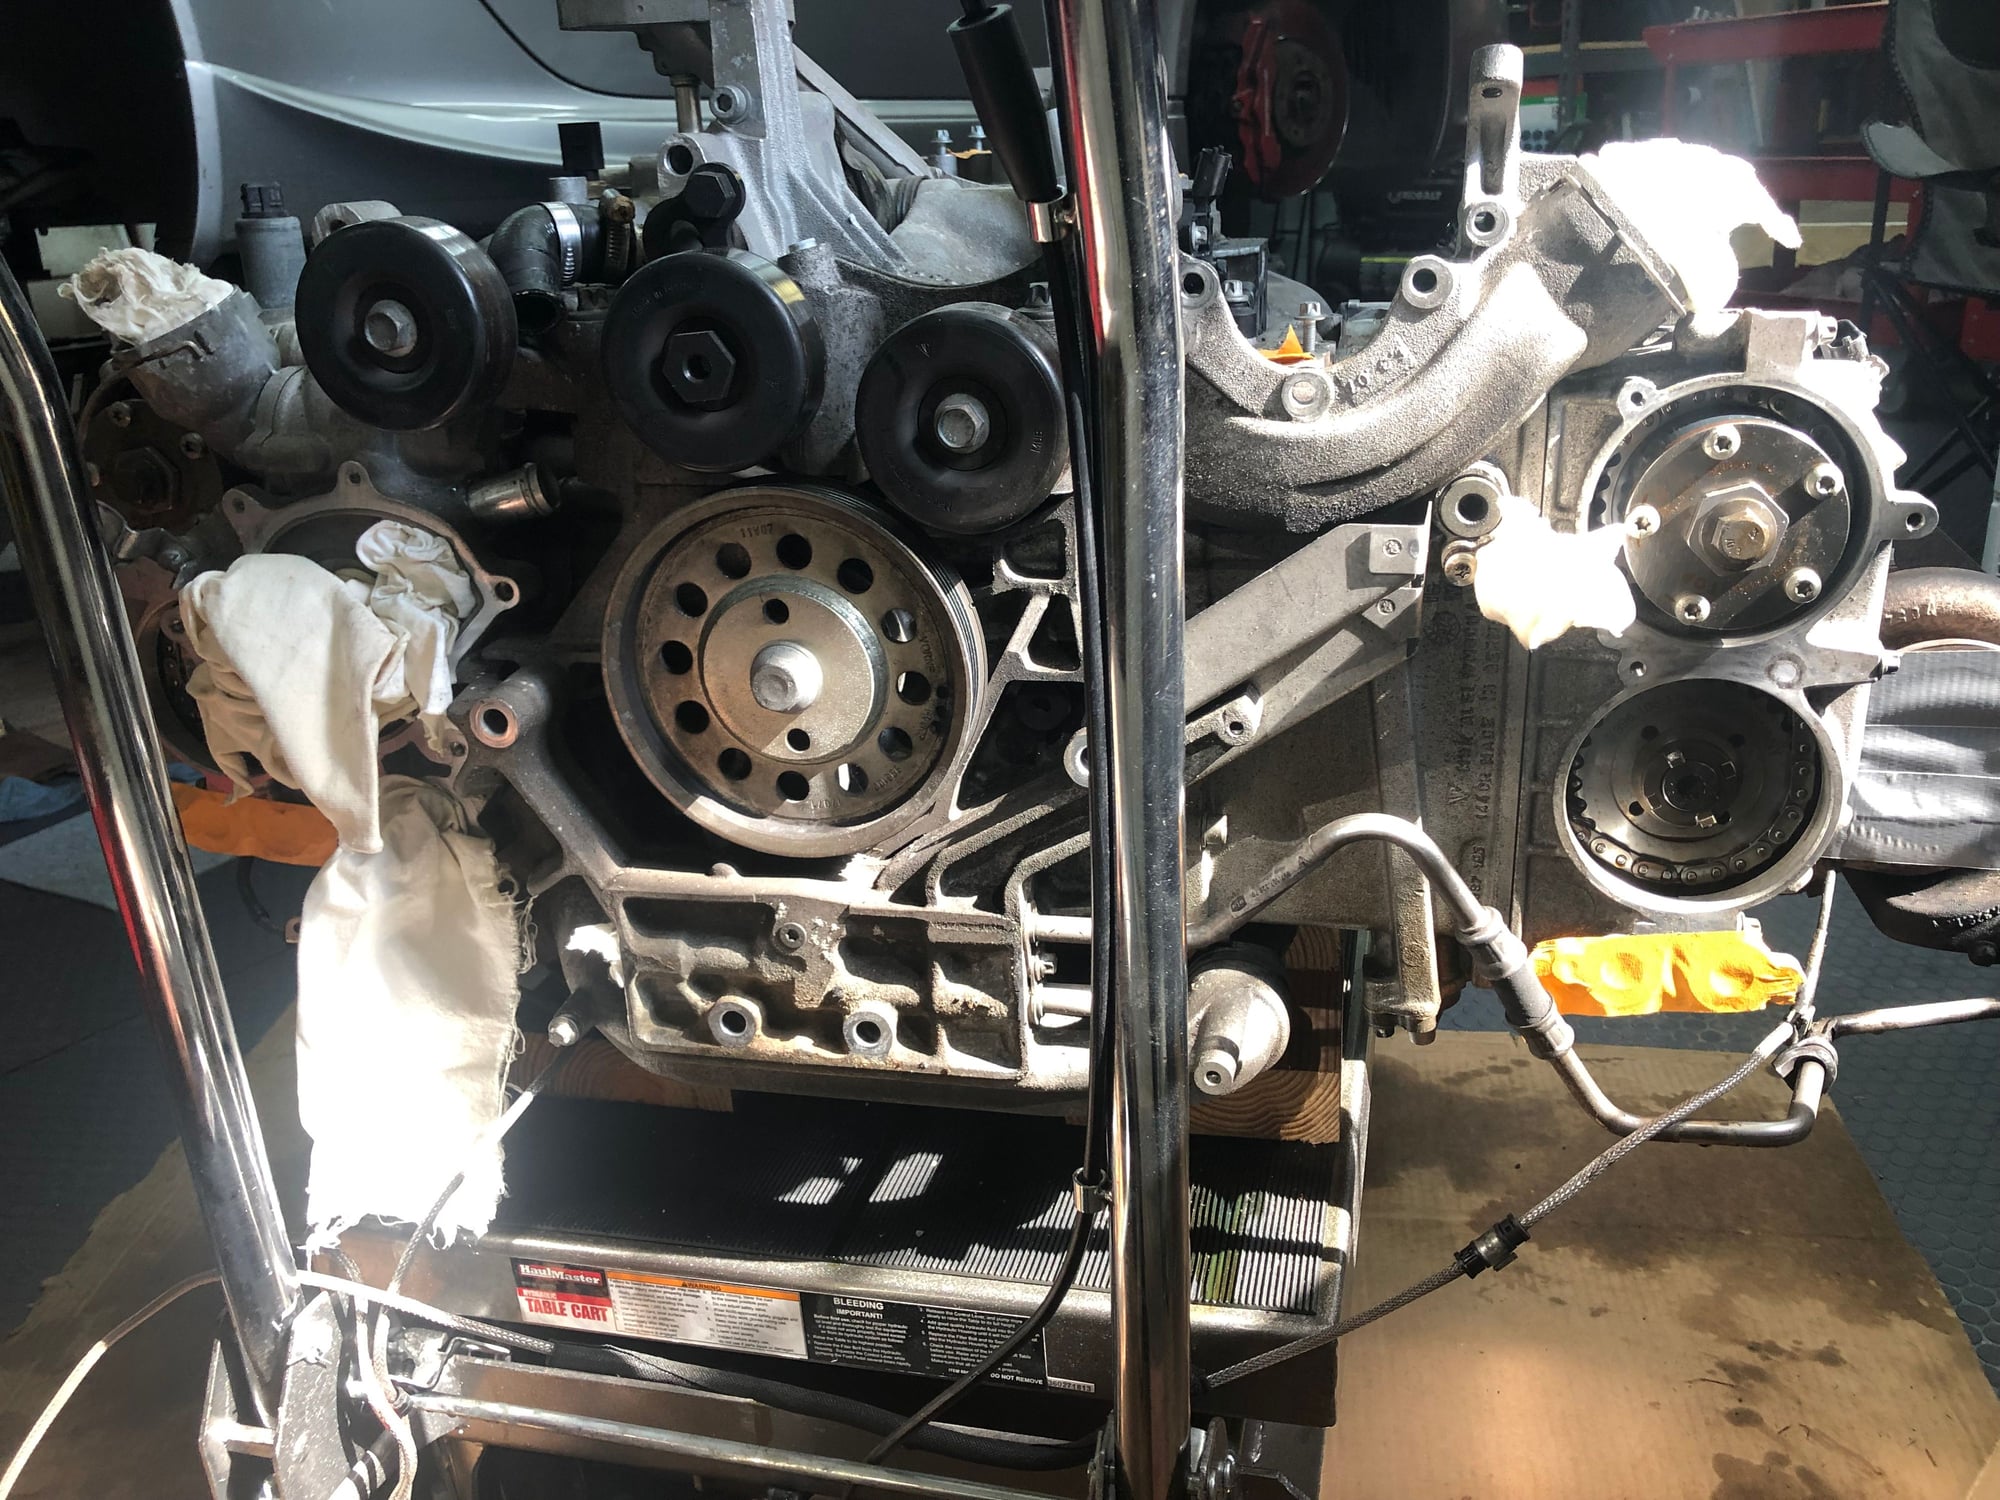
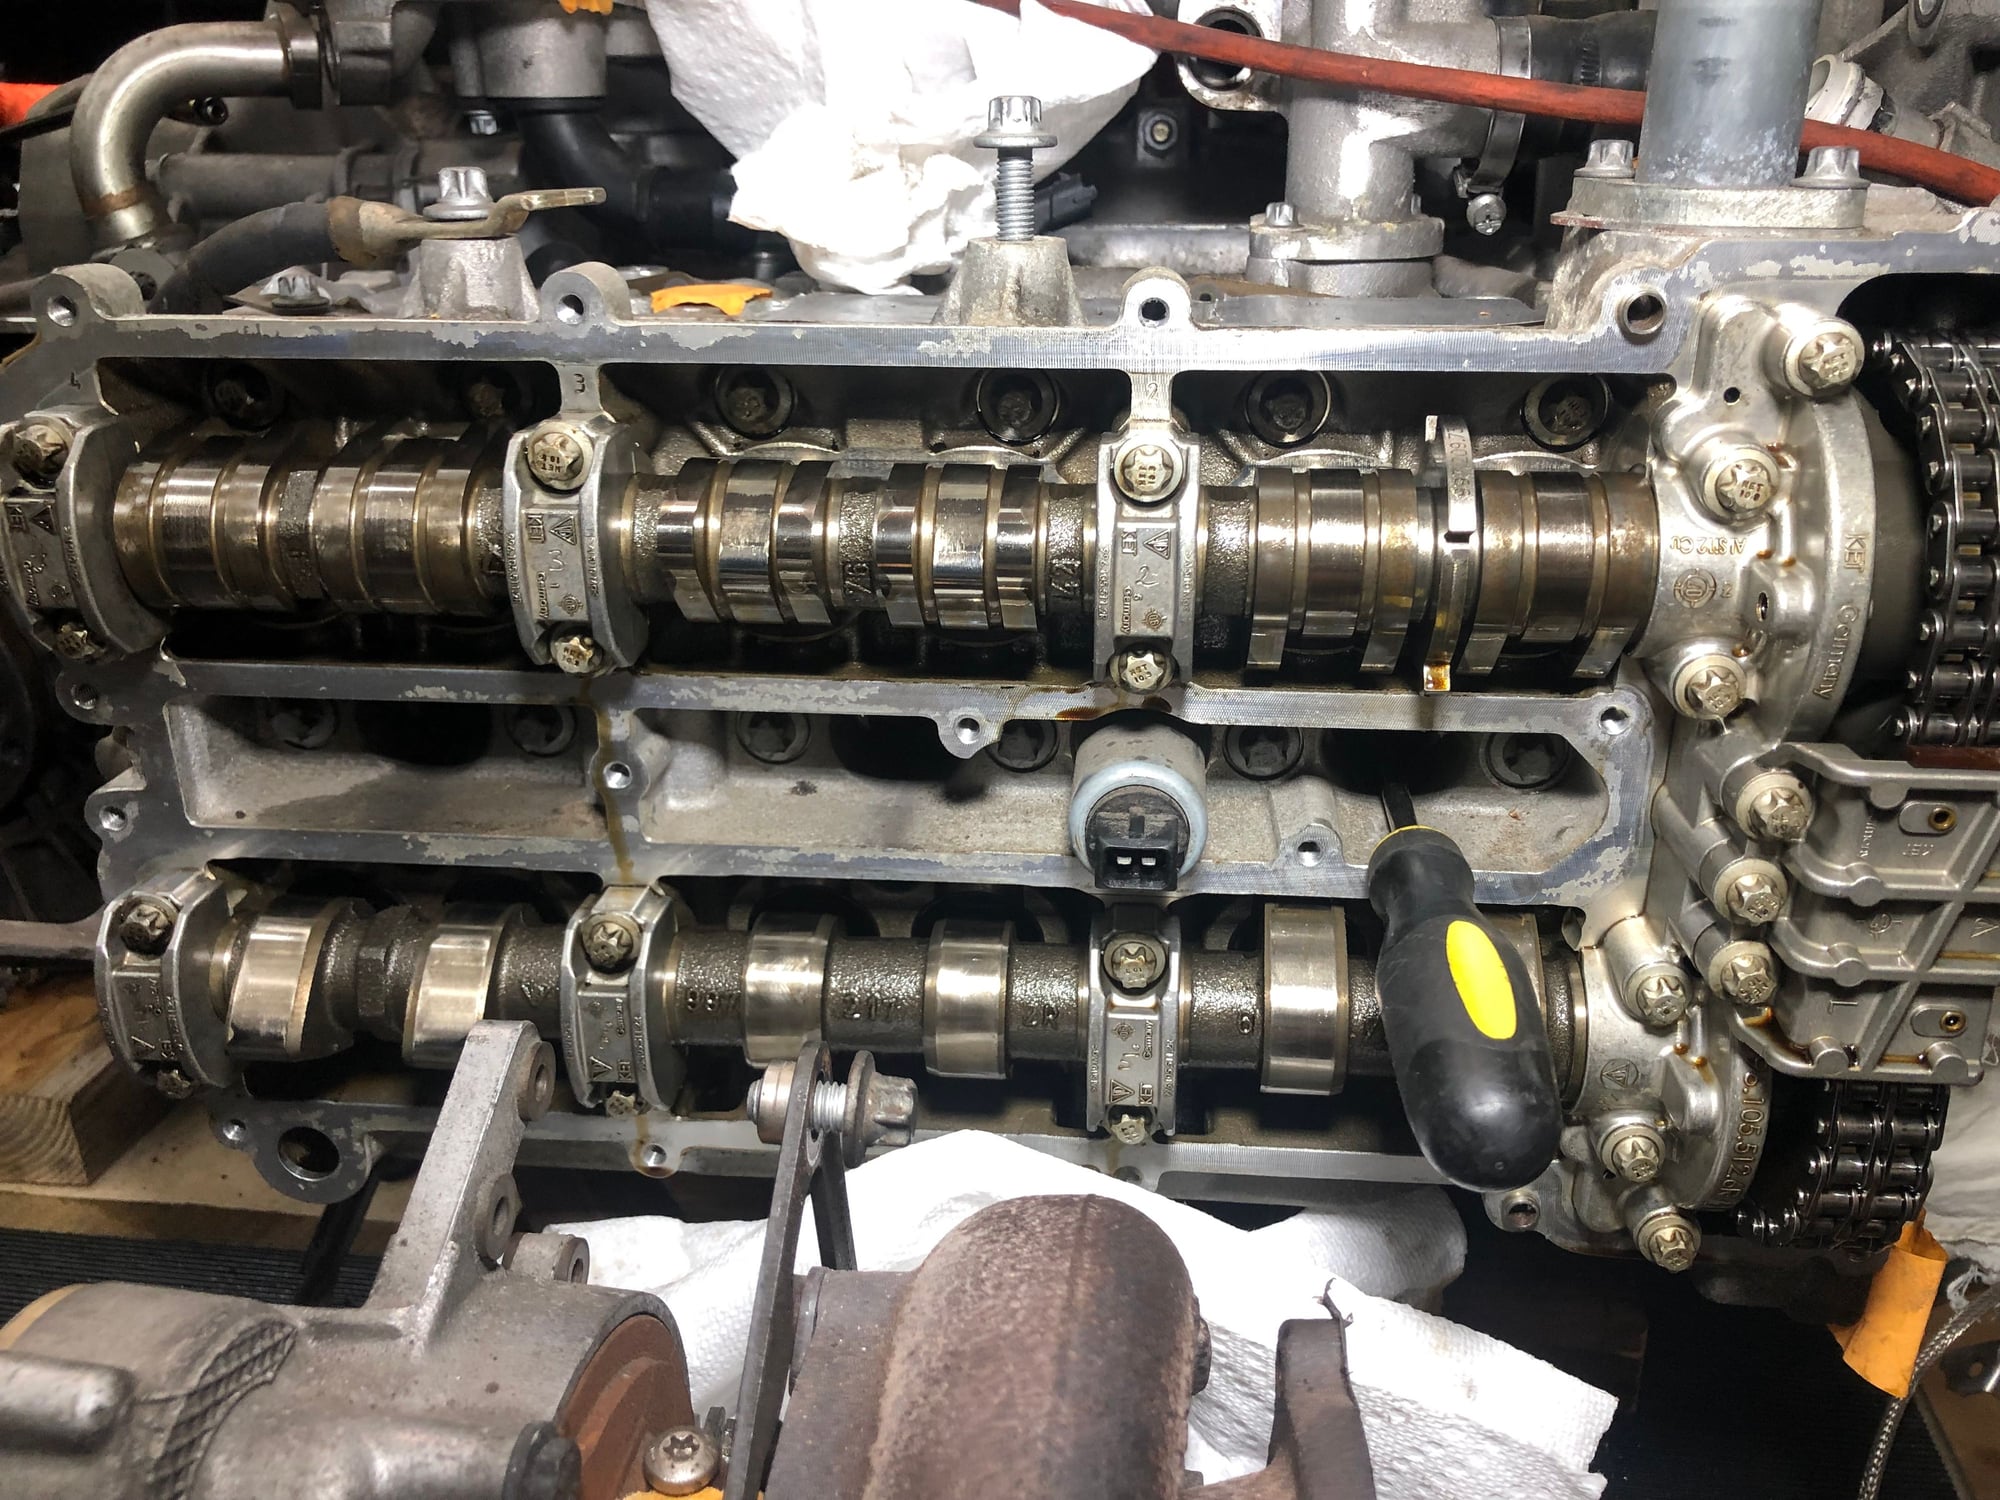
Front view with the water pump out and the tandem/oil pumps out and the cam sprocket covers off:
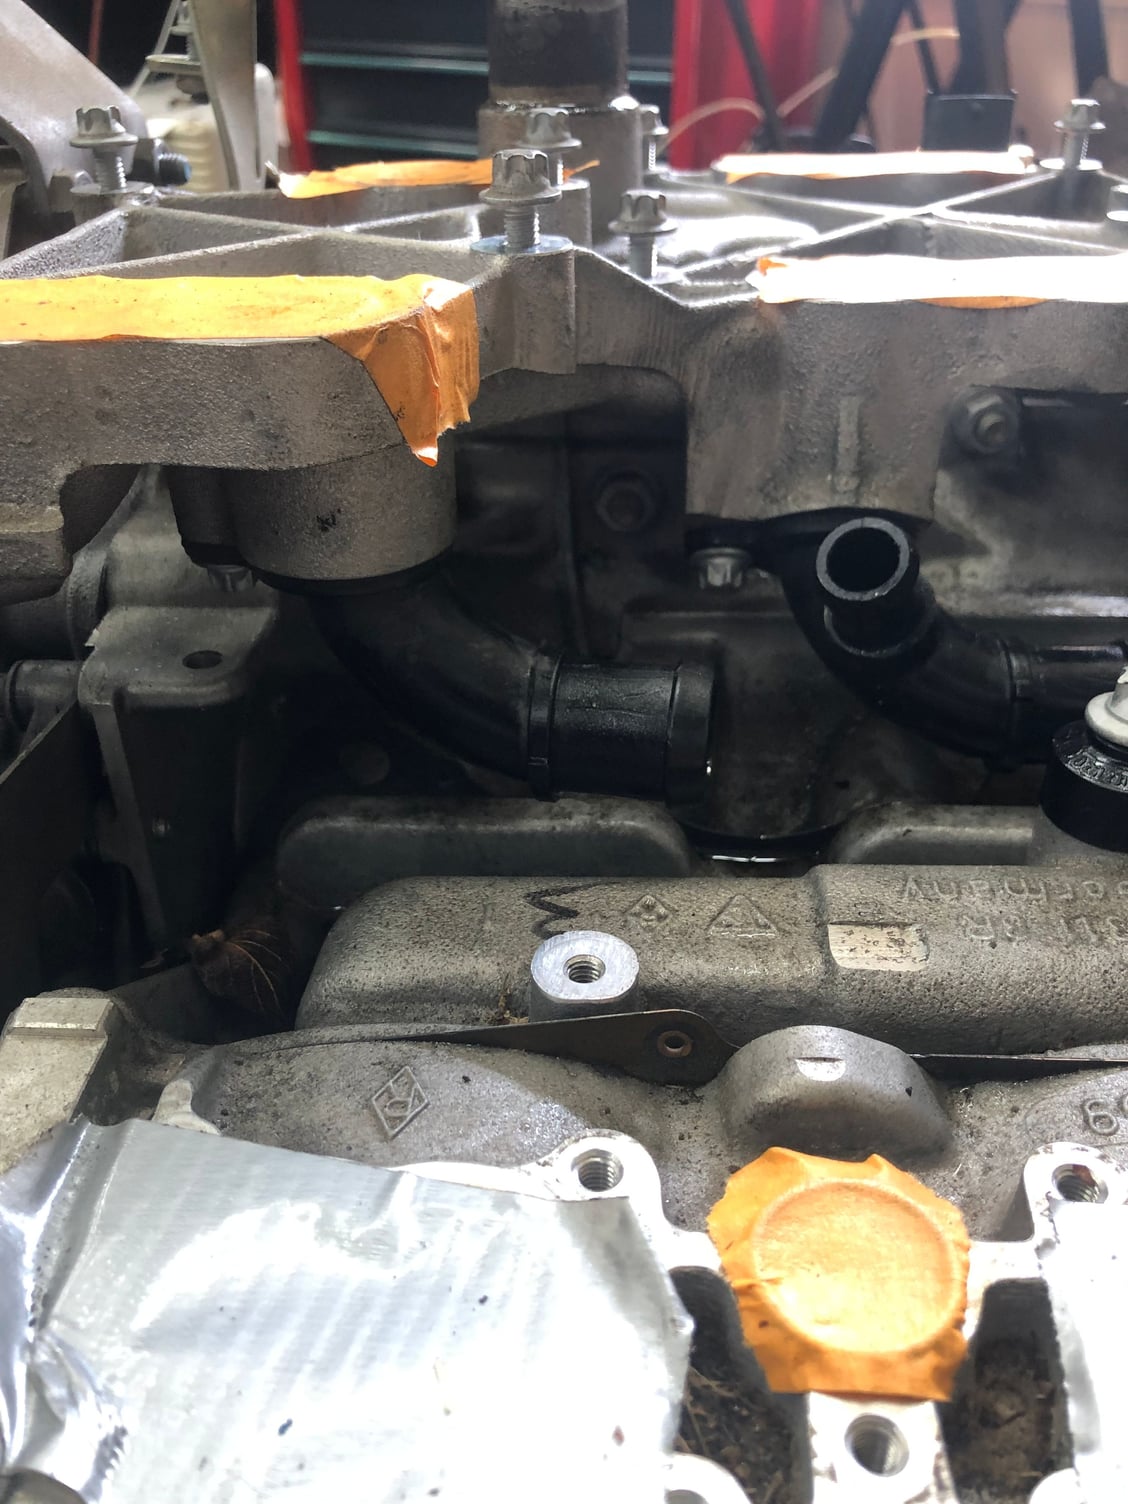
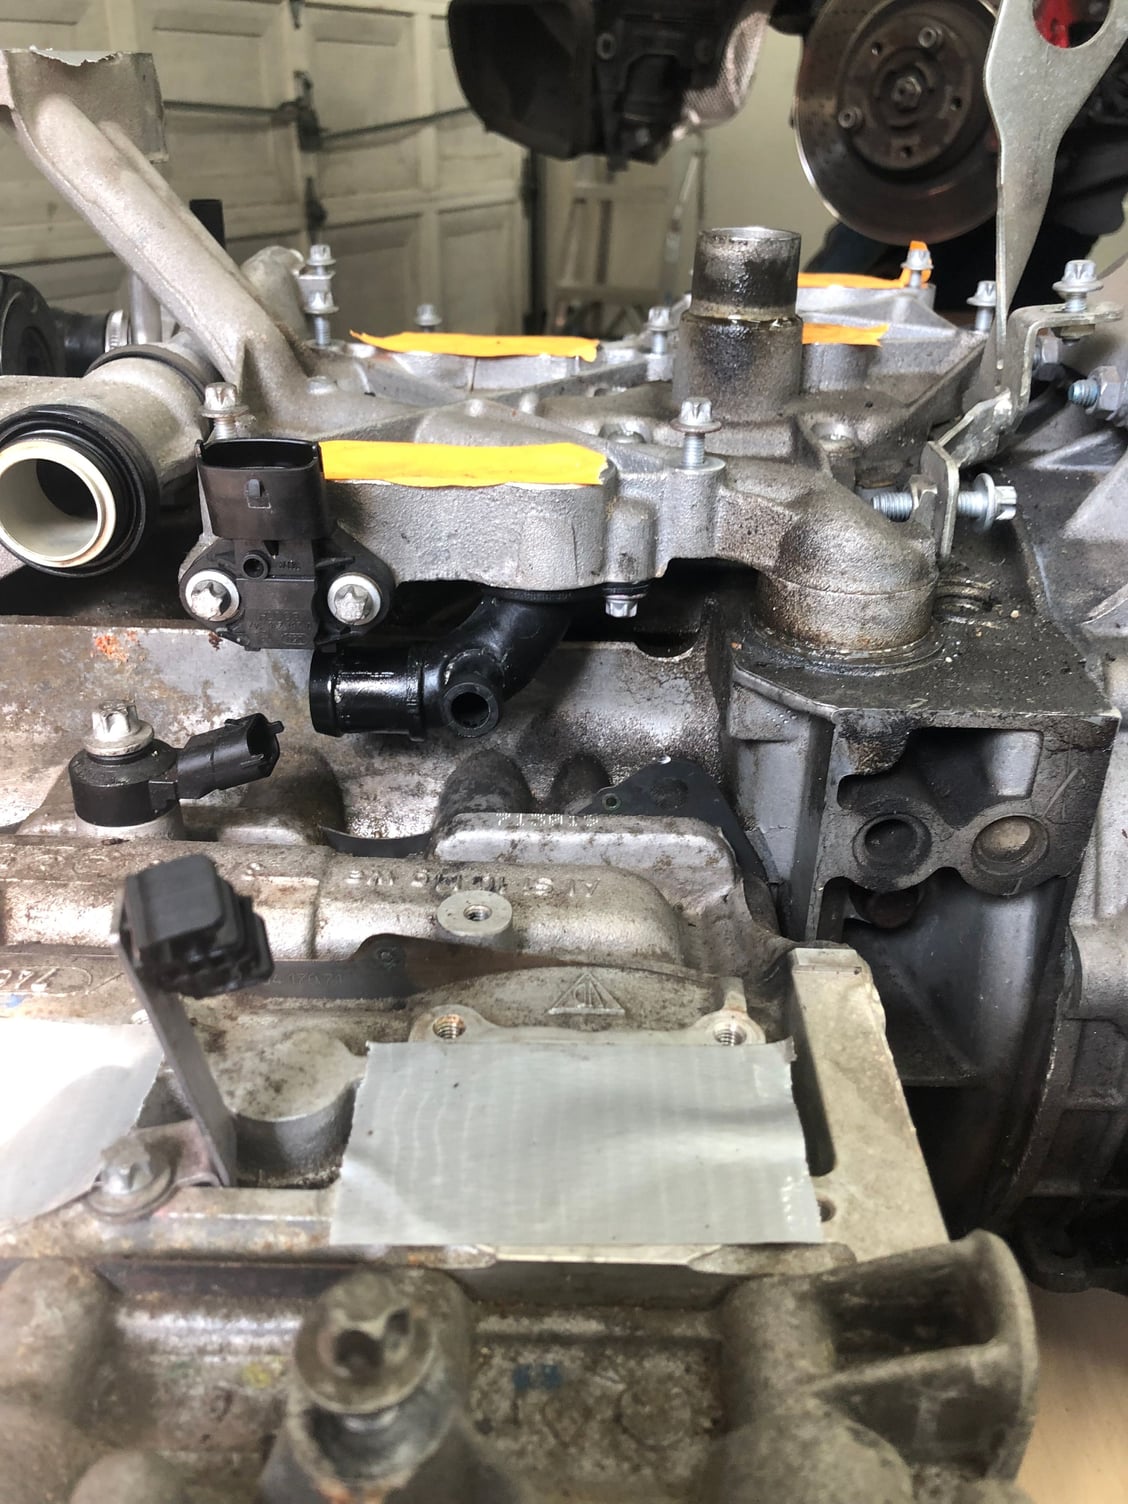
And the offending plastic elbows:
Driver side:
Passenger side:
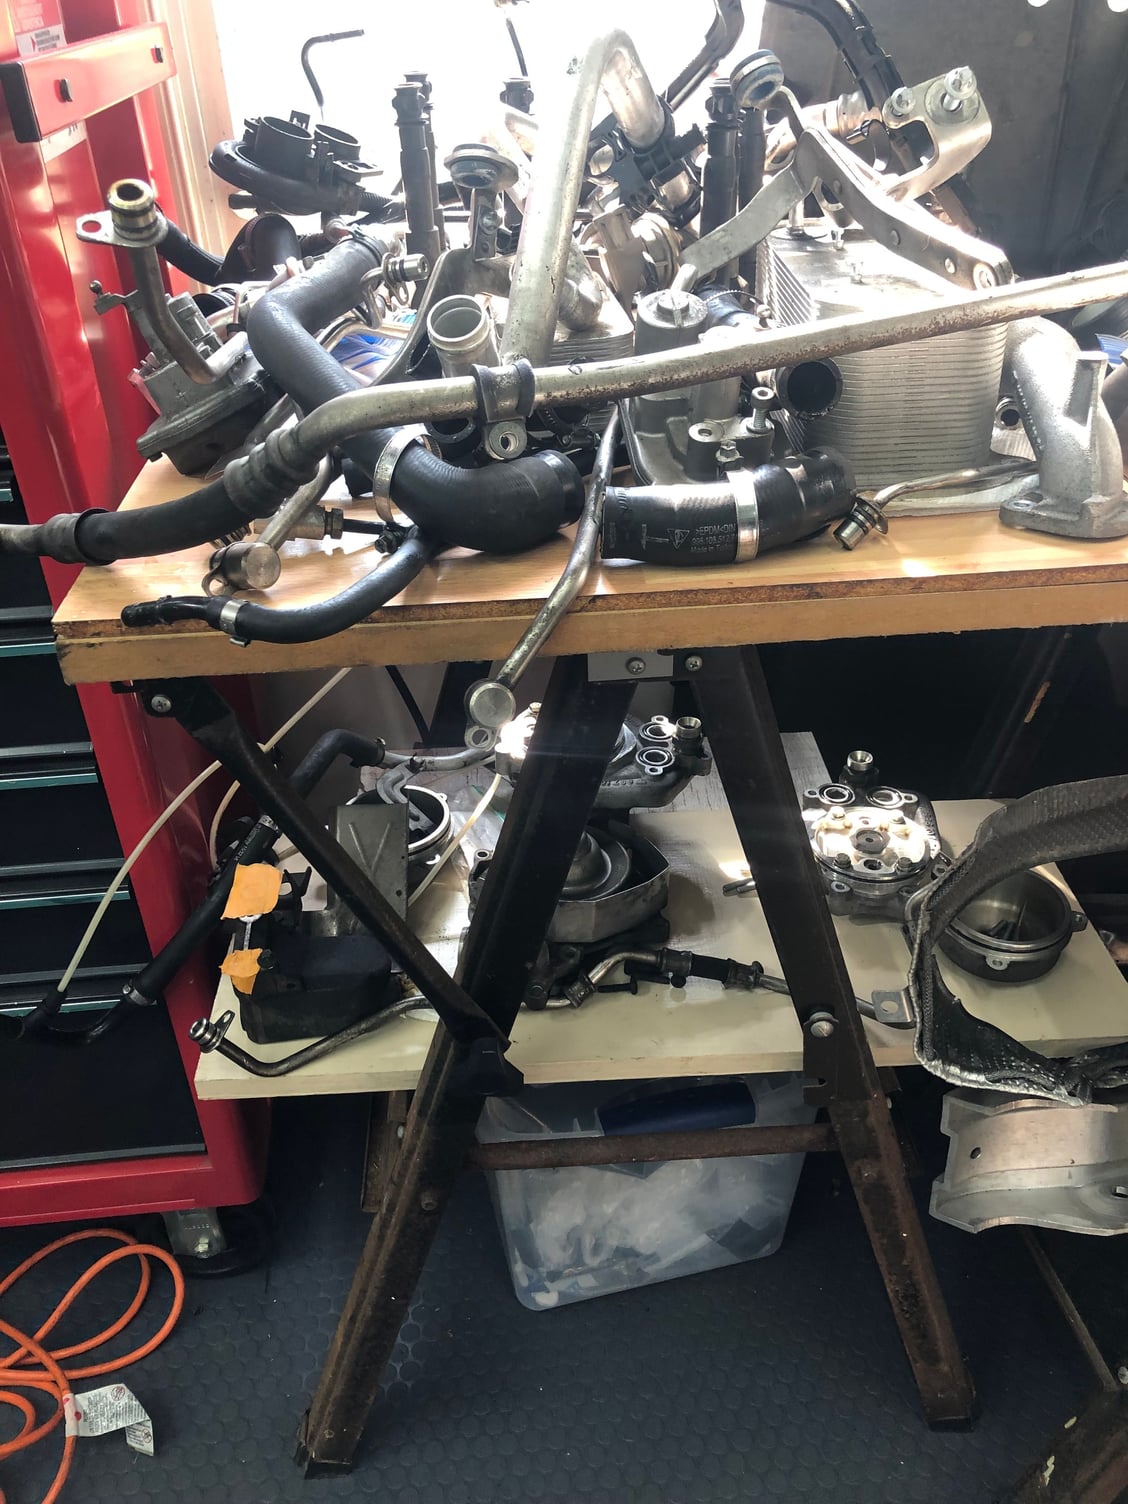
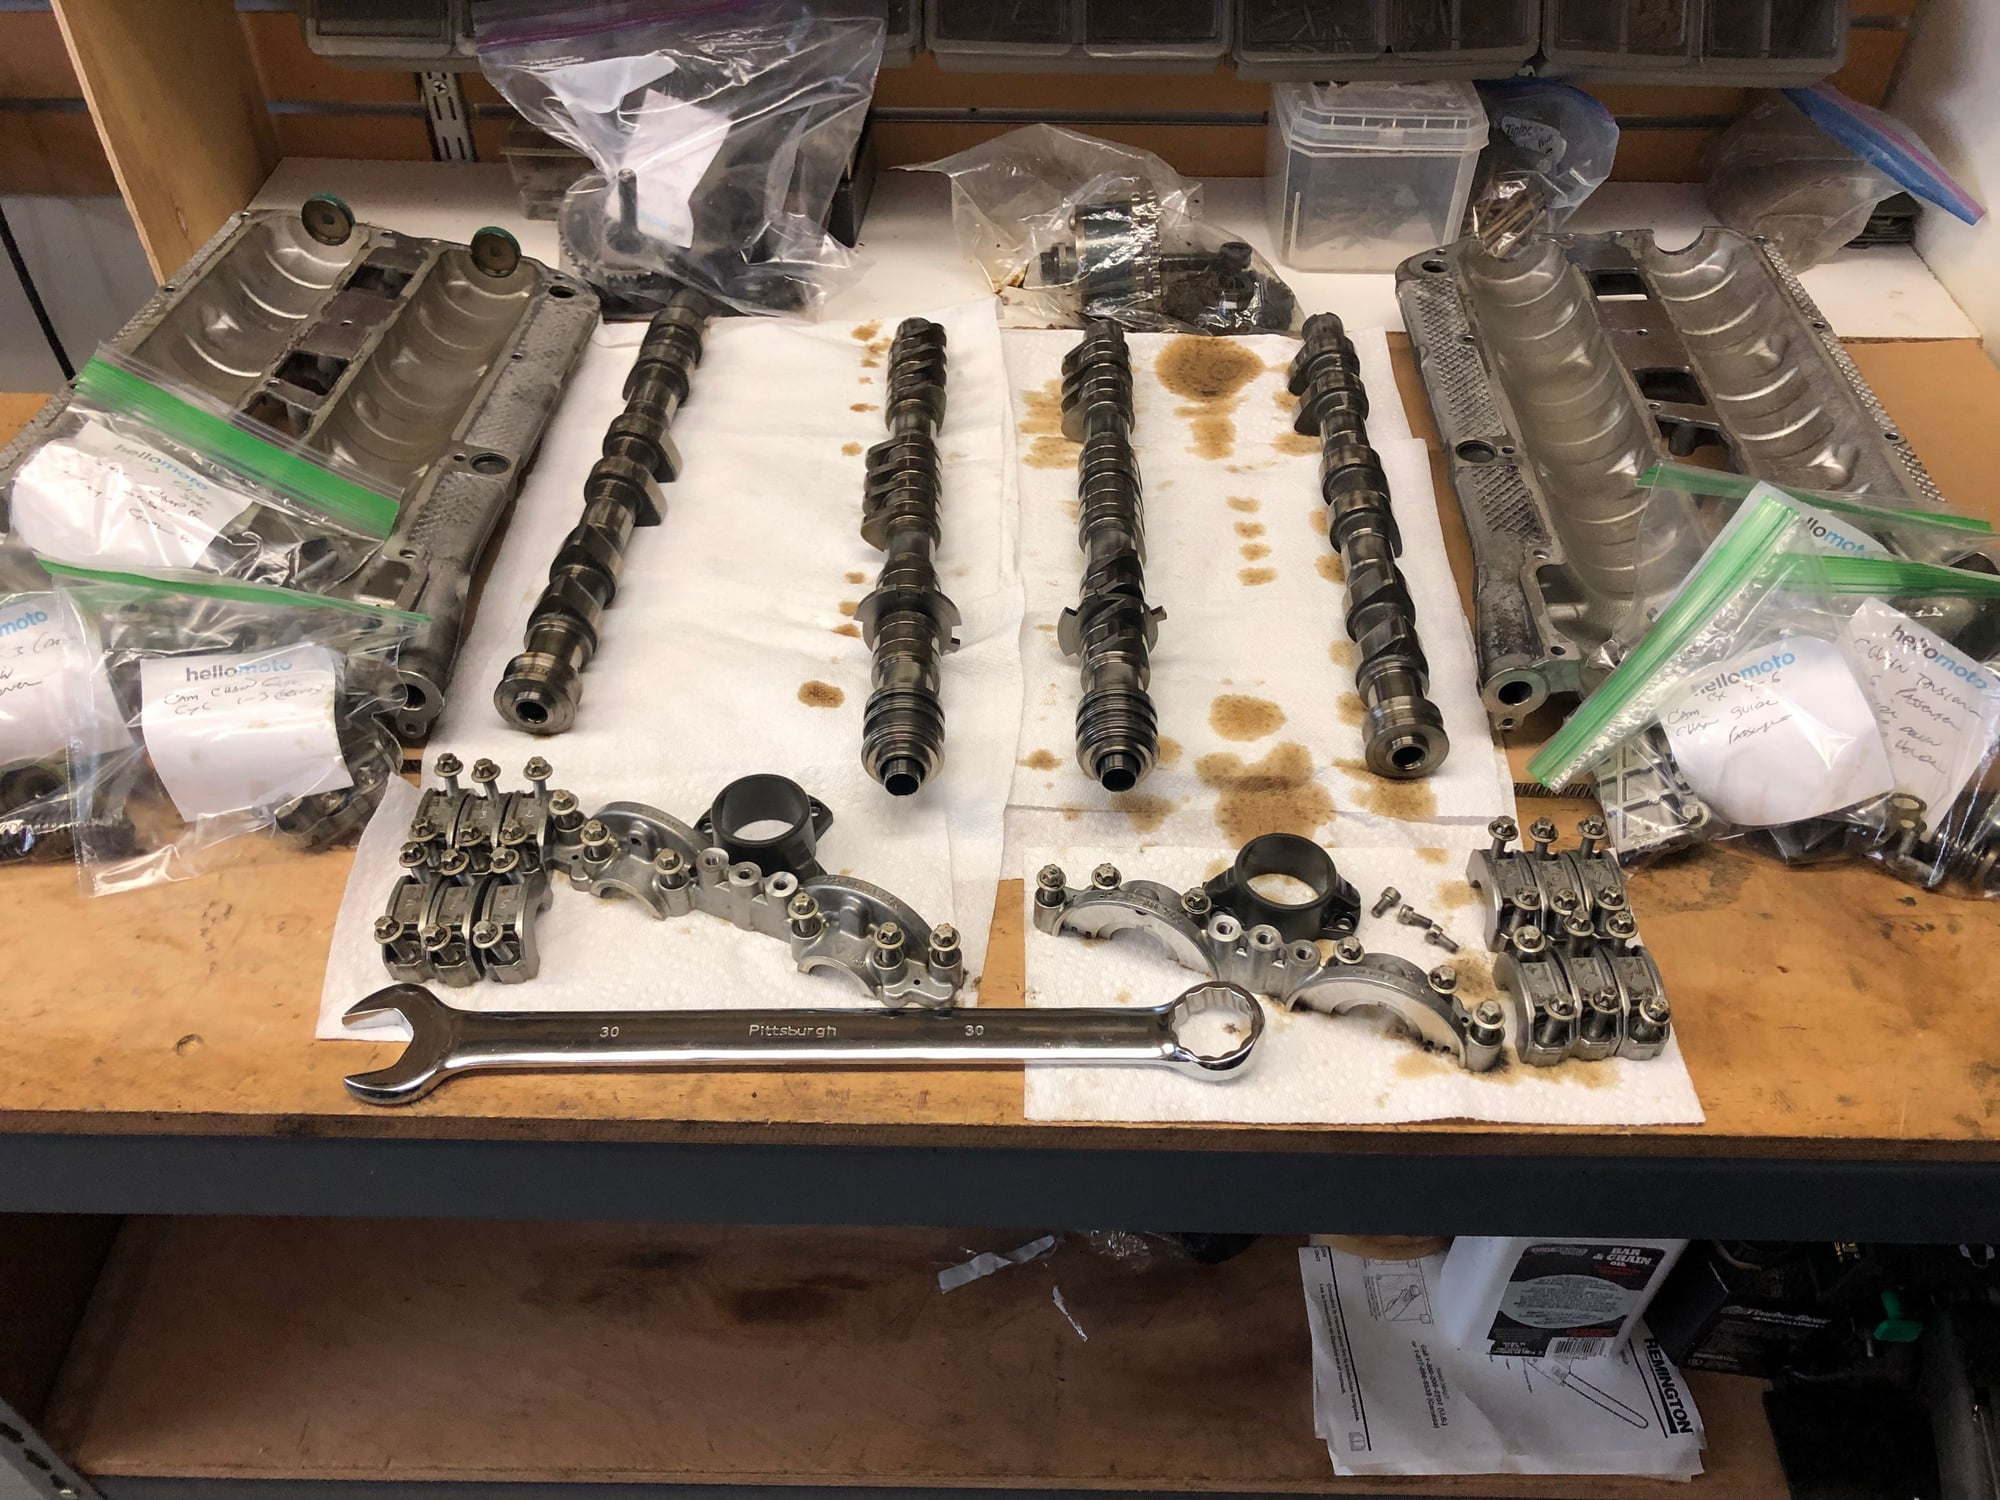
And the third table of parts removed to do the actual R&R work:
And as I mentioned last time, every connection I open something pours out, sometimes it's a dribble, sometimes a gush. Most of the time I anticipated it. One (when I pulled the oil tank) I did not and I spazzed and knocked the oil tank over while trying to get the oil spewing from the crank case and of course the oil tank dumped it's load too. Fortunately I keep a ton of cardboard and have it all over the place to help keep the oil and coolant under control.
I want to get the cams out next (or soon) so that when I begin putting all the pieces back to together I don't have to wait too long for the cam pinning to be done. I have had to remove a few more items which has added to my O ring / Seal list. Rather than bom,bard you with another spreadsheet I will wait until the end and give you my final when the project is over.
So far so good, not too many surprises, except why the hell did they put the 10mm hex bolt attaching the driver's turbo heat shield behind the turbo oil tank? I saw at least two other options the engineers could have take so I wouldn't have had to remove the thing. Of course who am I to question the German engineering.
Excellent work! Brings back memories for me. It�s been 4 years since I did mine. I did a new pressure plate, flywheel etc. I changed out both water pumps. The Aux pump which runs coolant thru the turbos during start up and at specific times and thermostat.
I spent some time looking over the cams and housing and decided to go for it. Everything went well, except as I was loosening the "Cheese Head" (I call them Triple Square) bolt on the exhaust cam of cylinders 4-6 the cam spun as the friction was eased. I used the hex shape cast into the cam at the end away from the sprocket to counter the bolt on the sprocket. I didn't expect the spinning but I only have inline cylinder experience so that may be normal. Is that OK?
I won't be touching the crank until I understand the install process 100%.
I got stopped at the intake cam because I need a 30 mm wrench. Not sure where I will find that but I will look tomorrow. Cleared off a space in the back of the garage for the cam stuff. This should be one of the last removals before I start putting things back together.
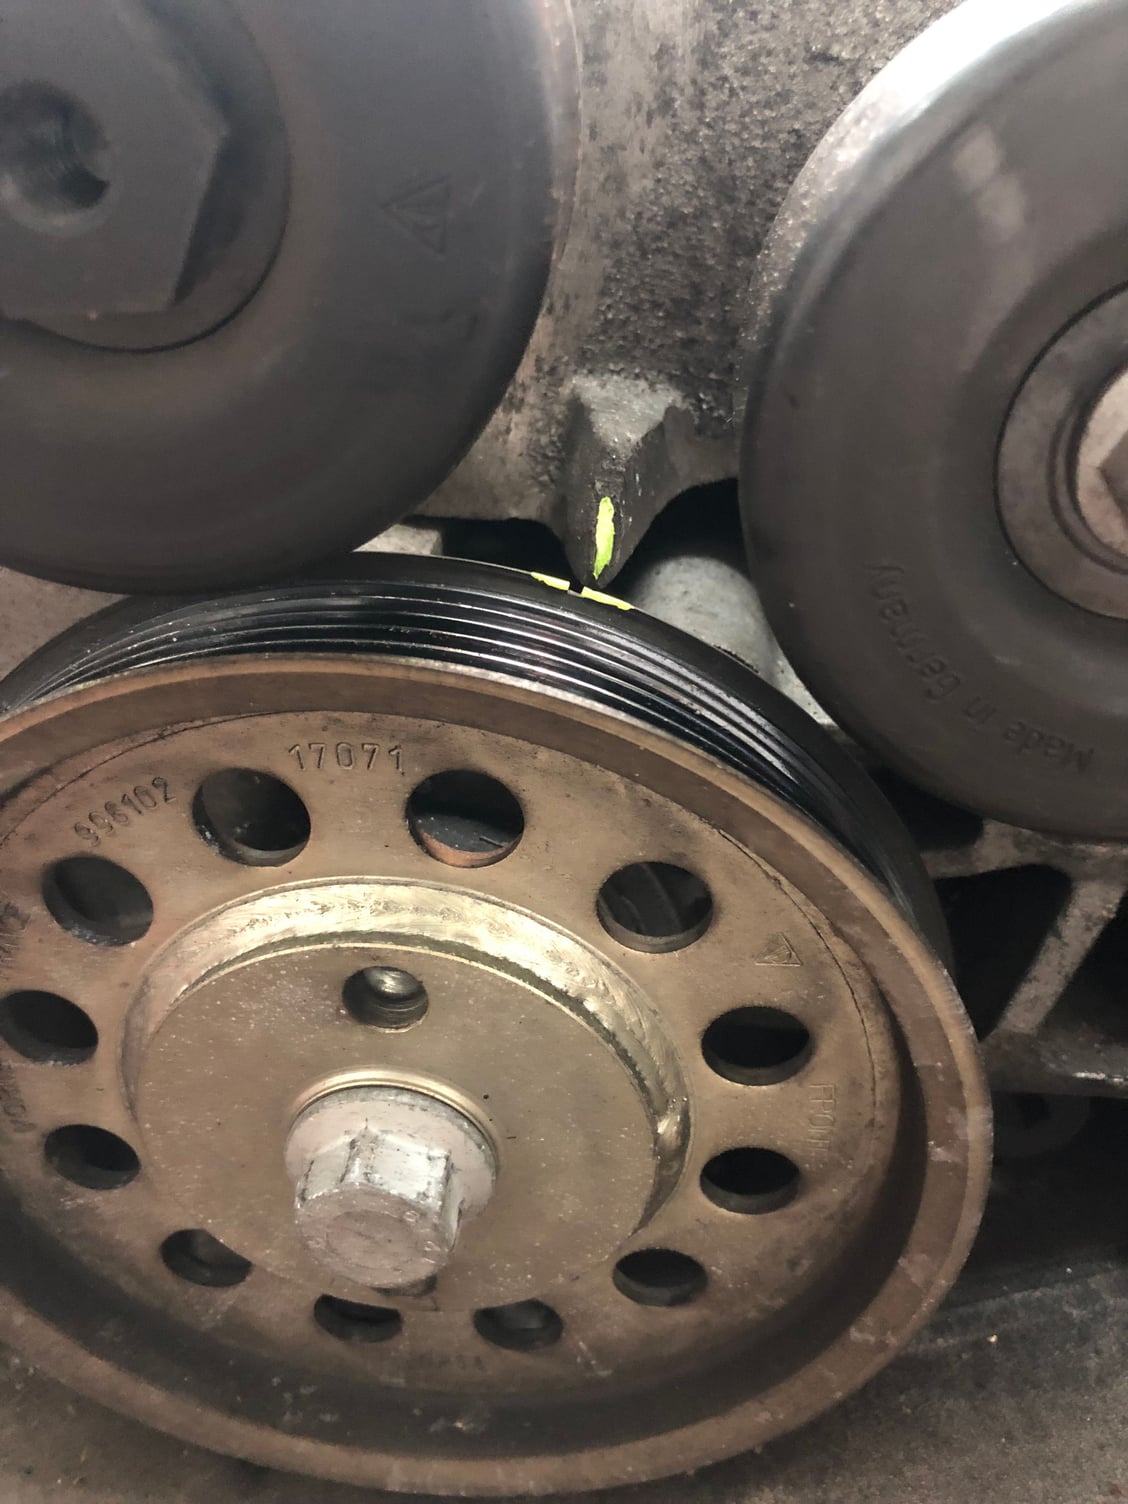
TDC (using the screwdriver method):
Marked the crank:
Oh and that piece I lost track of? It's a holder for the PS Pump and lines. Superseded part it looks like, but there was a part number obscured by some oil on the other side.
Hopefully I will find a 30 mm wrench tomorrow. Otherwise it's more cooling stuff next.
If anyone has any BTDT advice on cams and what to expect and what not to do, I am all ears. I just want to make sure I don't break anything either pulling it apart or putting it back together. My P Car place said they would lend me the timing tool when I was ready to install.The whole facing each other and facing away from each other positioning instructions while Cylinder 1 is a TDC just seems a bit imprecise. I liked the stamped dots on my Audi AAN engine's cams.
It doesn't mention the cams turning once you loosen the cam sprocket, but it makes sense since there will be pressure on the lobes from whatever springs they are engaging. In the video I watched he sets the cylinders so they are all "down" which I am sure is to prevent any contact with the valves, but the doc says go to TDC and place the cams in the overlap position (I really love that description) with 1-3 facing each other and 4-6 facing away from each other. Real precise guys.
Found a set of wrenches (will have some dupes but no one else has anything) with the 30MM I need at good old Harbor Freight. Not my first choice, but the Sears Hardware store closed down and no one has anything like that in stock.
Th cam popping out of position on it's own was unexpected, but should have been expected as I found out. Like everything with cars and the first time, the first cam side took me a day, the second a half hour. Knowledge is power, although in this case a quick trip to HF to purchase a set of big *** wrenches to get the 30mm I needed was also part of the process.
Cams came out relatively easy. Not my first cam experience (that would have been in 1984 on a 1977 Honda Accord Hatch) but certainly my most fearful, although I am only half way through.
Cam seats with no cams (4-6 Passenger side):
Cams out Cylinder 1 - 3 (Driver side):
Cam parts on my 4th (and final table area):
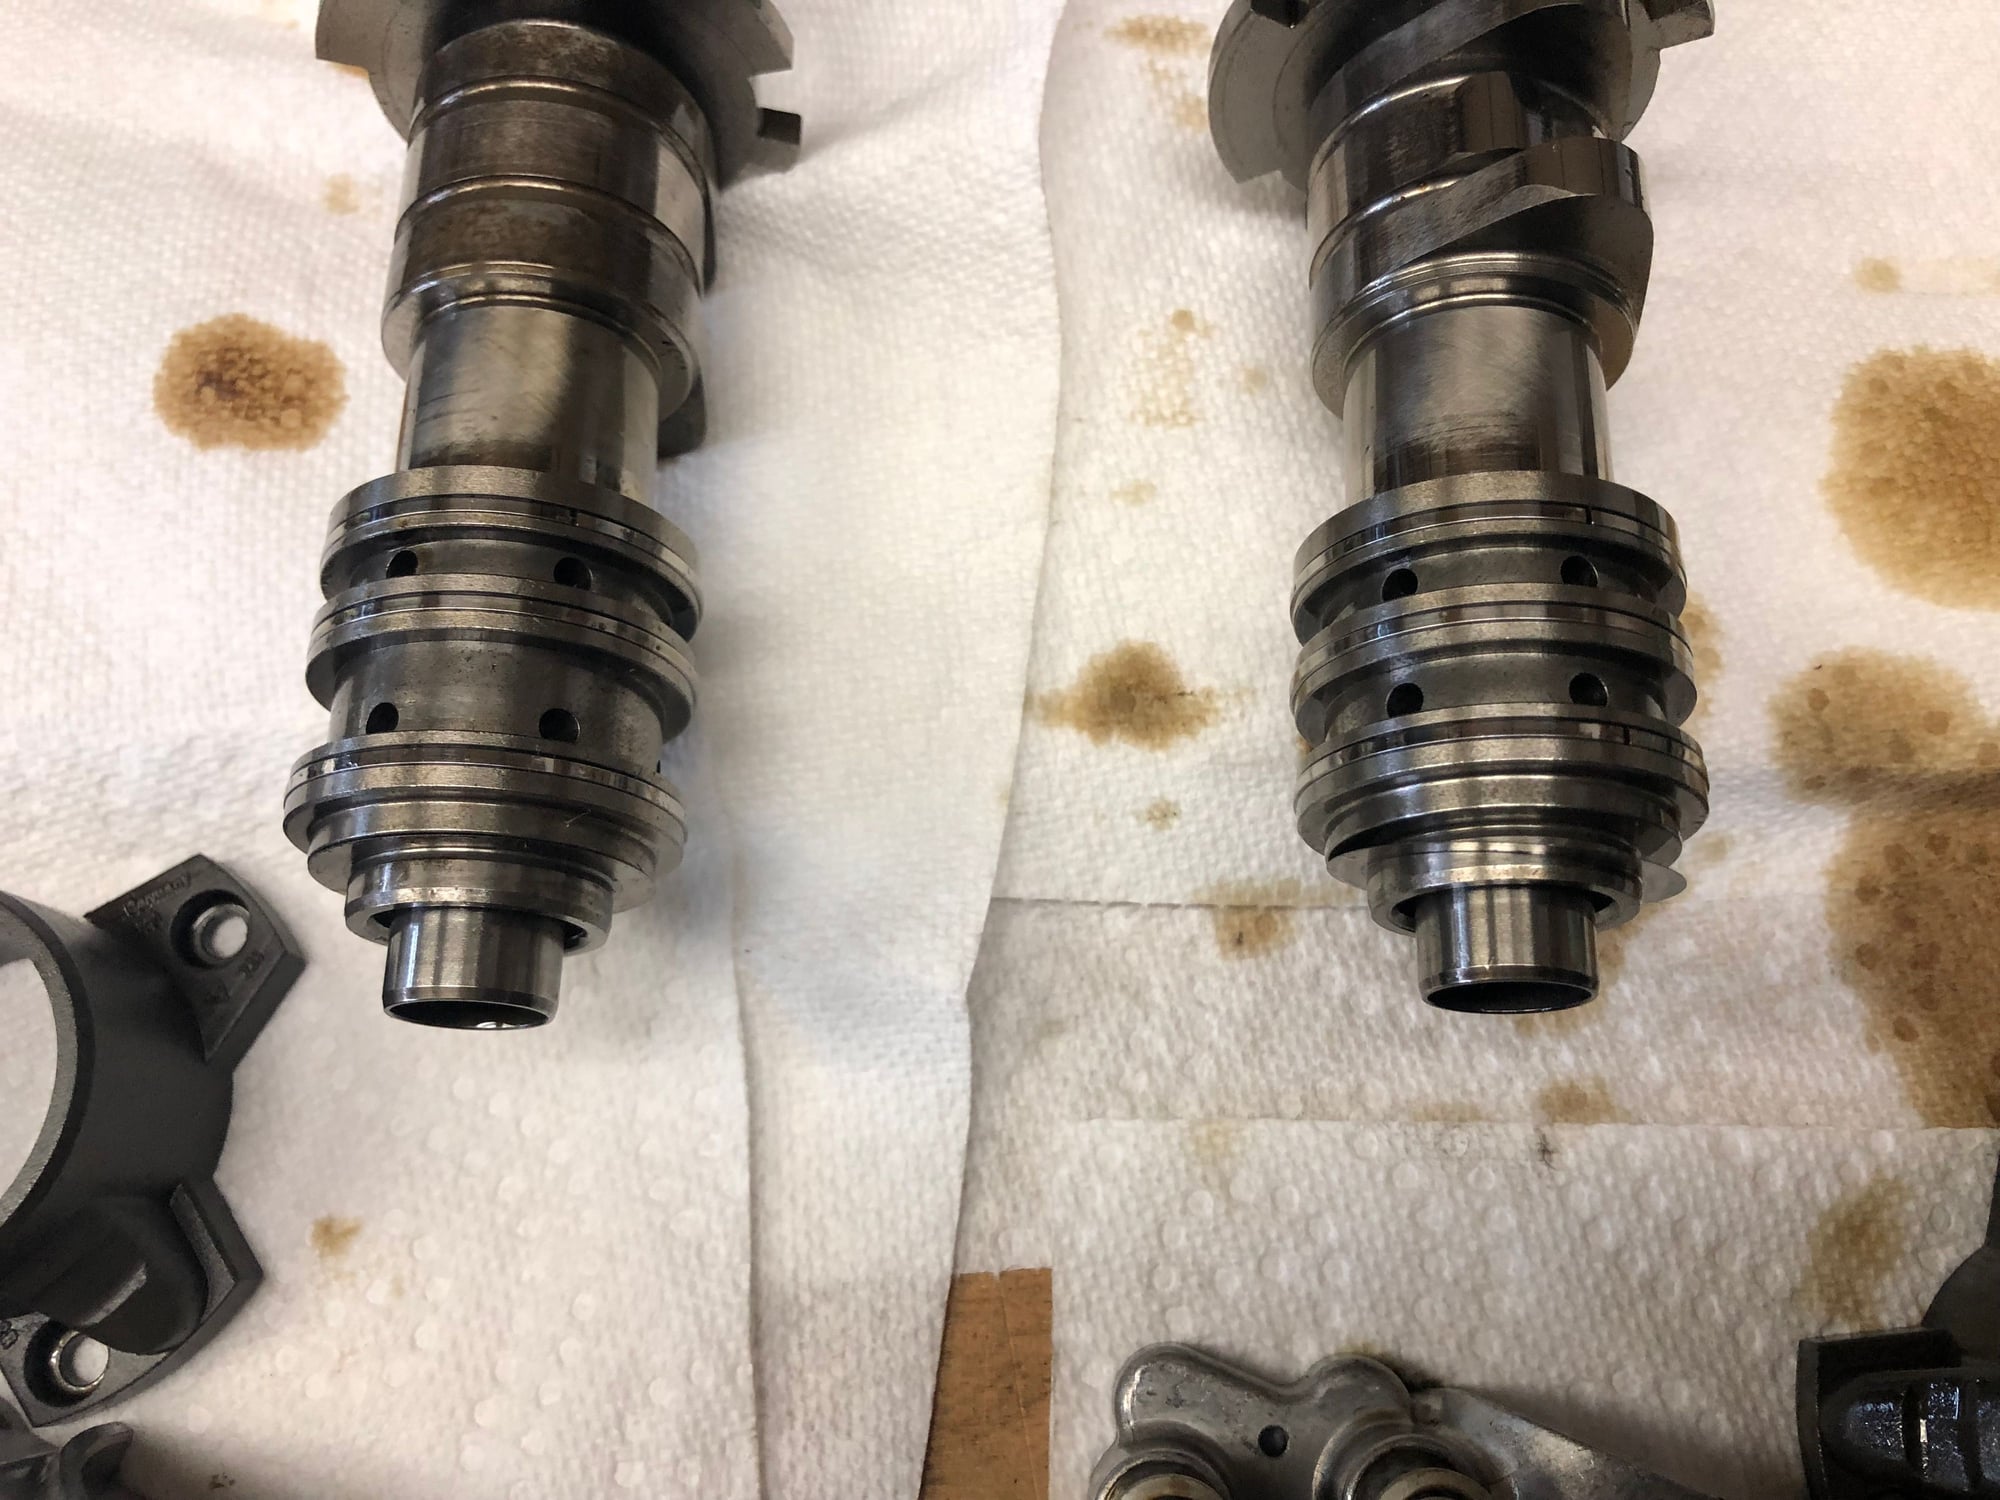
And the potentially offending cam's them selves:
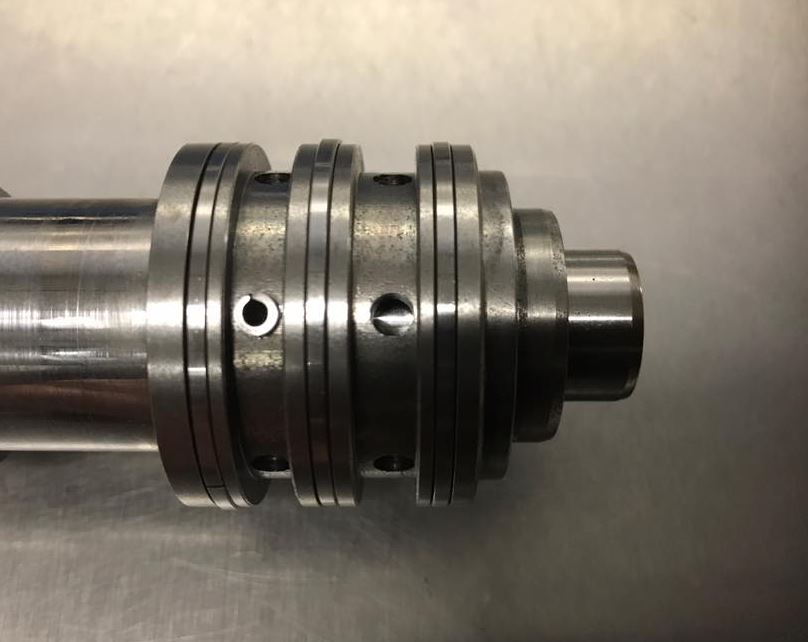
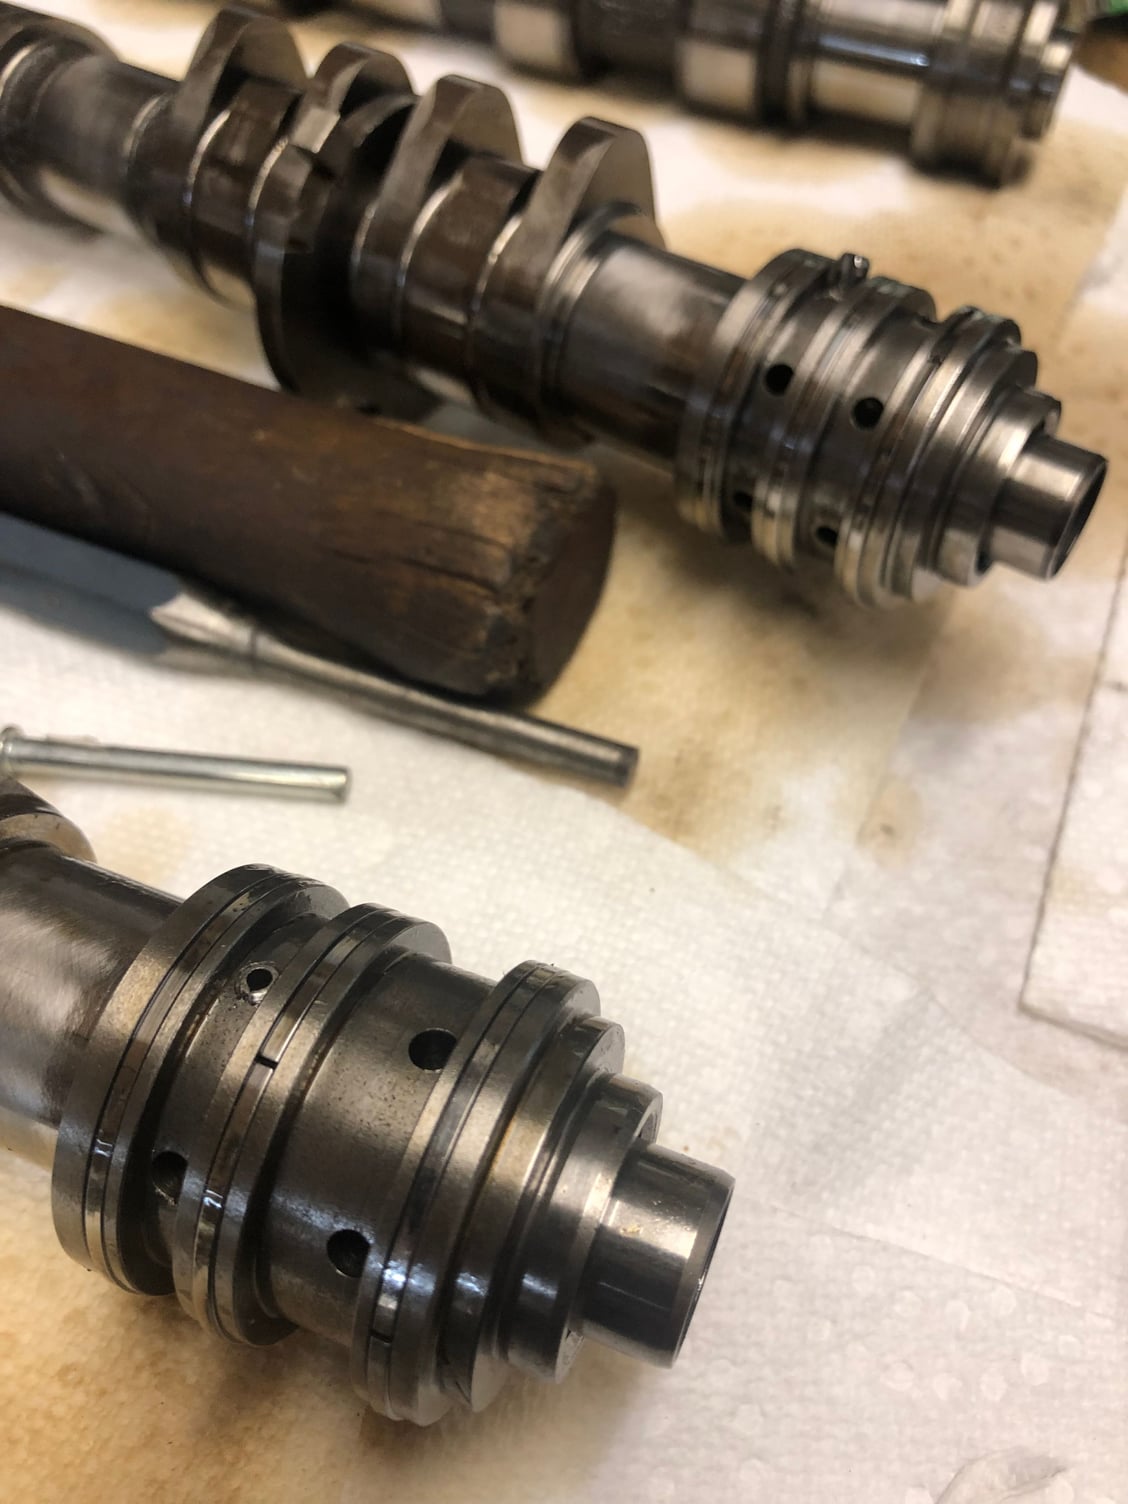
I will be fixing these in place by inserting slotted spring pins into 2 of the holes opposite each other and then trimming the excess flush. You can see that approach here:
I have been basically following the WM pieces all the way through with some checking here and there online and some bouncing back and forth with the PET to see what's what. All in all it has been pretty straightforward, but of course the truth lies in what happens when I put it all back together. Looking to get the cams pinned tomorrow depending on finding stainless slotted spring pins locally.
I did try and work on one of the glued fittings and decided to just pin it in place. Based on how it feels, I think I could pull the entire front water manifold off by pulling on it alone. I haven't gotten to the other one near it yet. If all goes well, I will attempt to get the cams in on Monday (if I can borrow the tool).
Oh, no FLAPS has a dial indicator to use for the cylinder height. I came across one googled on Rennline but did not check to see if it was a current product. I do want to be 100% sure of TDC when I put it back together since I did notice the slot in the crank was not exactly aligned with the mark on the block when 1 was TDC.
Does anyone have any opinions on the chain tensioning system? I will get new tensioners, but what about the guides and blades? 11 years old with 40K miles, do they get brittle and become a problem or is it just tensioners?
I'll update when I have the cams pinned and some more cooling removal done.
Well that was almost a let down. After the hours of work to get to the cams, the pinning was relatively simple. I was worried about dremeling the excess so I decided to use a thin wire to gauge depth and check against the kit of slotted spring pins I ordered. Fortunately I found a length that worked perfectly. After some trepidation on how to pound these things in, I used a medium hammer, a pair of thinner needle nose pliers to hold the pin and a quick sharp rap with the hammer to seat it. Most took a couple of whacks, but they seated relatively easy. I used a couple of different punches to drive them the rest of the way. I put two pins in each cam. The cams are now back in their home, waiting to be torqued down and timed. Just waiting on a call back from my SM at the P-car place and then I will be ripping along with the rest of the work.
Pins & home brewed depth gauge:
And the pins in the cam (one is part way in so you can see the driving process):
I'll start going through the cooling items now. I have to decide whether or not to pop the rear coolant manifold off or not (as well as the front - there is an oil line on top of another oil line that goes back under the engine very close to the block of wood I have holding the engine up, so I am not sure about that yet).
One upcoming task that I will need help on is the GT2 clutch slave conversion. Not so much with the conversion but with deciding how much clutch friction plate is left. Anyone know what the stock new dimension of a clutch friction plate friction surface is? Car has 40K so I know if the clutch is original it "should" be ready to be replaced.
Going to grab a beer and celebrate saving a few grand so far!
 07-05-2019, 06:16 PM