
DIY Coolant Fitting Fix with Motor In the Car
 11-05-2015, 10:26 PM
#106
 11-06-2015, 09:26 PM
#108
I apologize if this has been asked already, but is it possible to also replace the (2) plastic coolant elbows with the sharkwerks elbows with the engine still in the car?
http://www.sharkwerks.com/products.php?pid=386
http://www.sharkwerks.com/products.php?pid=386
11-06-2015, 09:37 PM
#109
Rennlist Member
I apologize if this has been asked already, but is it possible to also replace the (2) plastic coolant elbows with the sharkwerks elbows with the engine still in the car?
http://www.sharkwerks.com/products.php?pid=386
http://www.sharkwerks.com/products.php?pid=386
11-07-2015, 09:05 PM
#110
Racer
Thread Starter

 11-07-2015, 09:52 PM
#111
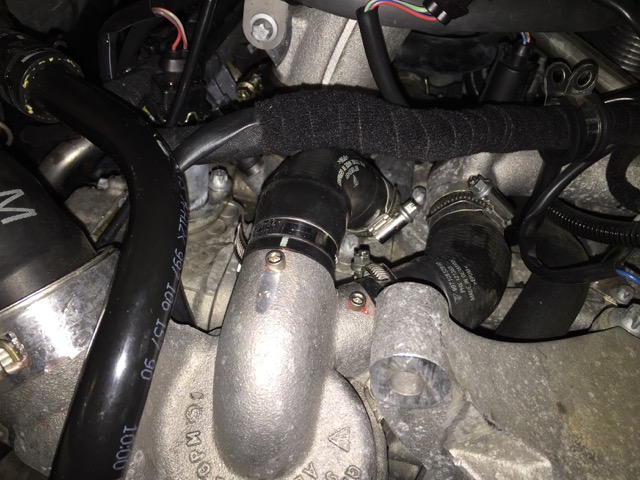
Unfortunately you can't get to those without dropping the motor. On the plus side, when those break, they allegedly crack where the O-ring is located and therefore seep coolant, rather than popping apart and dumping coolant if you don't pin or weld. I had mine changed out anyways since my motor was already out for a number of things, but if you're doing your own pinning I wouldn't fret about those pieces nearly as much as getting the pinning done versus not getting the pinning done.
 01-01-2016, 09:12 PM
#113
Rennlist Member


 03-13-2016, 01:12 AM
#116
OK, just did mine along with water pump and all idler pulies etc- took 9 hrs including a lot of cleaning.
Some tips- The power steering pump isn't obvious how to remove... Remove the PS pulley and then the three (3) Torx bolts left, right and just below the pulley flange (you can't see the bolt below the flange here) this will allow you to lift the pump and alloy header tank out of the way...
Some tips- The power steering pump isn't obvious how to remove... Remove the PS pulley and then the three (3) Torx bolts left, right and just below the pulley flange (you can't see the bolt below the flange here) this will allow you to lift the pump and alloy header tank out of the way...
03-13-2016, 01:20 AM
#117
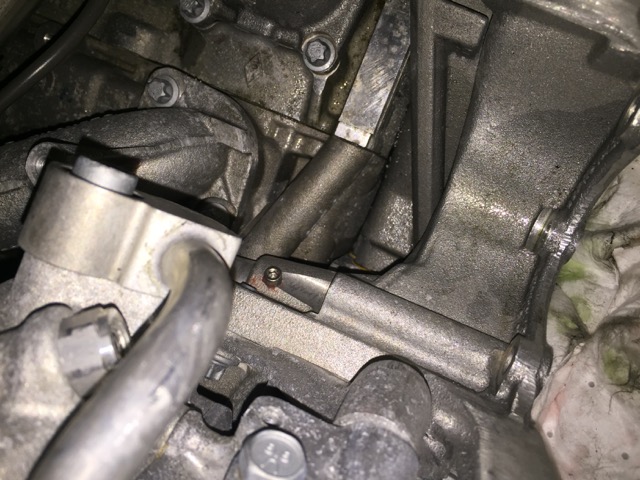
Cutting the drill bit down as Steve suggested certainly helps add room.
Important note- get a tap that has a hex drive, same as the screw driver bits - suitable for your 90' angle drive or rachet, I couldn't find one so used a small hex drive socket of a suitable size hammered onto the square drive of the tap
I used M6x 10mm stainless allen bolts and M5 fiber washers (the M5 are a tight fit on the M6 bolts thread and have a smaller head size that better matches!) as these were readly avaliable.
Because I was replacing all the pullies and water pump, I dropped my engine down slightly and removed the alloy mount plate so I could remove the waterpump housing so drilling these fittings was easy.