

Money2536's Grey Black 997.2 GT3 RS Journal
 12-31-2022 | 02:53 PM
#151

3rd Gear
Joined: Jun 2022
Posts: 3
Likes: 3
From: Orange County, CA
Are you still planning on working with Joey at E-Motion for the suspension? You mentioned in the original IG live and maybe the first impression video. Will be interesting to get his thoughts on how the car's setup suspension-wise, seems some of the parts were really meant to support the JRZ's.
Really fun to follow how this car is progressing!
Really fun to follow how this car is progressing!
The following users liked this post:
Money2536 (12-31-2022)
12-31-2022 | 05:36 PM
#152
Rennlist Member
Joined: Sep 2011
Posts: 609
Likes: 379
From: California
Not yet. That will be the first step after dry ice cleaning. I'm going to head over to Driver's Choice in Orlando to work on it.
 01-02-2023 | 12:45 PM
#153
Rennlist Member
Joined: Feb 2009
Posts: 1,271
Likes: 167
From: Tampa, FL
I�m really surprised to hear the transmission is having issues. I was experiencing some shaking in the driveline and along with replacing axles, shop recommended to have the transmission synchros replace and transmission taken apart. Copans did the service and I believe it was in late 2019. Car was never tracked by my after transmission repair. Shifter was a stock unit with with Function First kit to make the shifts more precise with less play.
Maybe other owner thrashed it and was sloppy with heel toe. 🤷🏻♂️
Maybe other owner thrashed it and was sloppy with heel toe. 🤷🏻♂️
The following users liked this post:
Money2536 (01-05-2023)
The following users liked this post:
Money2536 (01-05-2023)
01-03-2023 | 03:36 PM
#155
Rennlist Member
Joined: Dec 2013
Posts: 359
Likes: 45
From: North East
If it gets too low in voltage and over discharged and is truly dead the BMS would actually lock the battery out and it would no longer be usable. But the main point of the battery management system is to help protect against that aspect, when it initially shuts the battery down it does so where the battery is low but still in a good state of charge and not too low. One point of emphasis in regards to this is that we don't want to see the battery sit for too long of a duration (longer than a month) after the protections been triggered to avoid this. Hopefully that helps clarify.
01-03-2023 | 04:09 PM
#156
Rennlist Member
Joined: Jan 2017
Posts: 272
Likes: 158
From: OC
Enjoying this thread. This post raises a question about my own battery. I have a AG-H6-40-RS that I bought in July 21. If I park the car (997.1 GT3) for 3 weeks without a tender the battery goes completely flat so much so that the jump start feature doesn�t provide enough power to even open the hood. The battery functions perfectly again after a recharge on a charger. Is this normal?
01-03-2023 | 04:40 PM
#157
Premium Sponsor
Rennlist
Site Sponsor
Rennlist
Site Sponsor
Joined: Oct 2017
Posts: 2,166
Likes: 1,071
Enjoying this thread. This post raises a question about my own battery. I have a AG-H6-40-RS that I bought in July 21. If I park the car (997.1 GT3) for 3 weeks without a tender the battery goes completely flat so much so that the jump start feature doesn�t provide enough power to even open the hood. The battery functions perfectly again after a recharge on a charger. Is this normal?
Best regards,
Chad(chad@antigravitybatteries.com)
01-03-2023 | 06:12 PM
#158
Racer
Joined: May 2011
Posts: 478
Likes: 146
From: SoCal
@Money2536 I watched your drive video and your comments about the car being hard to handle. Did you check the tire date codes, I hadn't see that mentioned? I had a similar experience with my GT2 and new tires made it like a whole new car. The Michelins get hard so fast and it make it loose. New tires will make it so much better. Just a thought.
01-03-2023 | 07:32 PM
#159
Quit Smokin'
Rennlist Member
Rennlist Member
Joined: Dec 2003
Posts: 2,838
Likes: 319
From: Columbus, Ohio
I�m really surprised to hear the transmission is having issues. I was experiencing some shaking in the driveline and along with replacing axles, shop recommended to have the transmission synchros replace and transmission taken apart. Copans did the service and I believe it was in late 2019. Car was never tracked by my after transmission repair. Shifter was a stock unit with with Function First kit to make the shifts more precise with less play.
Maybe other owner thrashed it and was sloppy with heel toe. 🤷🏻♂️
Maybe other owner thrashed it and was sloppy with heel toe. 🤷🏻♂️
The following users liked this post:
Money2536 (01-05-2023)
01-04-2023 | 12:59 AM
#160
Rennlist Member
Joined: Dec 2013
Posts: 359
Likes: 45
From: North East
01-04-2023 | 01:01 AM
#161
Rennlist Member
Joined: Dec 2013
Posts: 359
Likes: 45
From: North East
3 weeks should normally be fine so this would be a little out of character..as Supra touched on, they can certainly go much longer...what this does depend to a degree on is the level of parasitic draw that exists in the duration when not being used. Normally if the protections have been triggered we don't want to see the battery sit in that state longer than a month as the natural discharge can bring it down to a level that's too flat. But what we'd likely want to get an idea of is where the voltage is sitting at on the car when it's parked before non use..and then what voltage we are seeing after initially hitting the restart after the protections have been triggered. Feel free to email me directly as well if we'd like to dig into this further.
Best regards,
Chad(chad@antigravitybatteries.com)
Best regards,
Chad(chad@antigravitybatteries.com)
The following users liked this post:
Antigravity (01-04-2023)
01-04-2023 | 03:15 PM
#162
Rennlist Member
Joined: Jan 2017
Posts: 272
Likes: 158
From: OC
01-05-2023 | 04:50 AM
#163
Instructor
Joined: May 2012
Posts: 175
Likes: 76
From: Bay Area
Lots of 997 RS owners I know experience notchiness 2nd to 3rd. Even extremely low mile cars.
After driving around a while it seems to get better as it heats up.
I do wish it shifted similar to my old S2000's where it felt super direct and accurate which inspired confidence.
After driving around a while it seems to get better as it heats up.
I do wish it shifted similar to my old S2000's where it felt super direct and accurate which inspired confidence.
The following users liked this post:
Money2536 (01-05-2023)
01-05-2023 | 12:40 PM
#164
Rennlist Member
Joined: Dec 2020
Posts: 1,863
Likes: 1,504
From: Franklin, TN. USA
Hi Matt,
I do follow you over on the OBSESSED GARAGE YouTube channel.
I watched your last video last night where you were polishing the front hood to get rid of the earlier installed stripes.
You stopped after the hood because you were waiting until after you do the Dry-Ice underside cleaning process.
Let's see how good your memory is
I reached out to you on your cellphone while you and your team were doing the Super-Exorbitant garage I think in.
Actually I think you were SURPRISED as well as myself because you actually answered your cellphone.
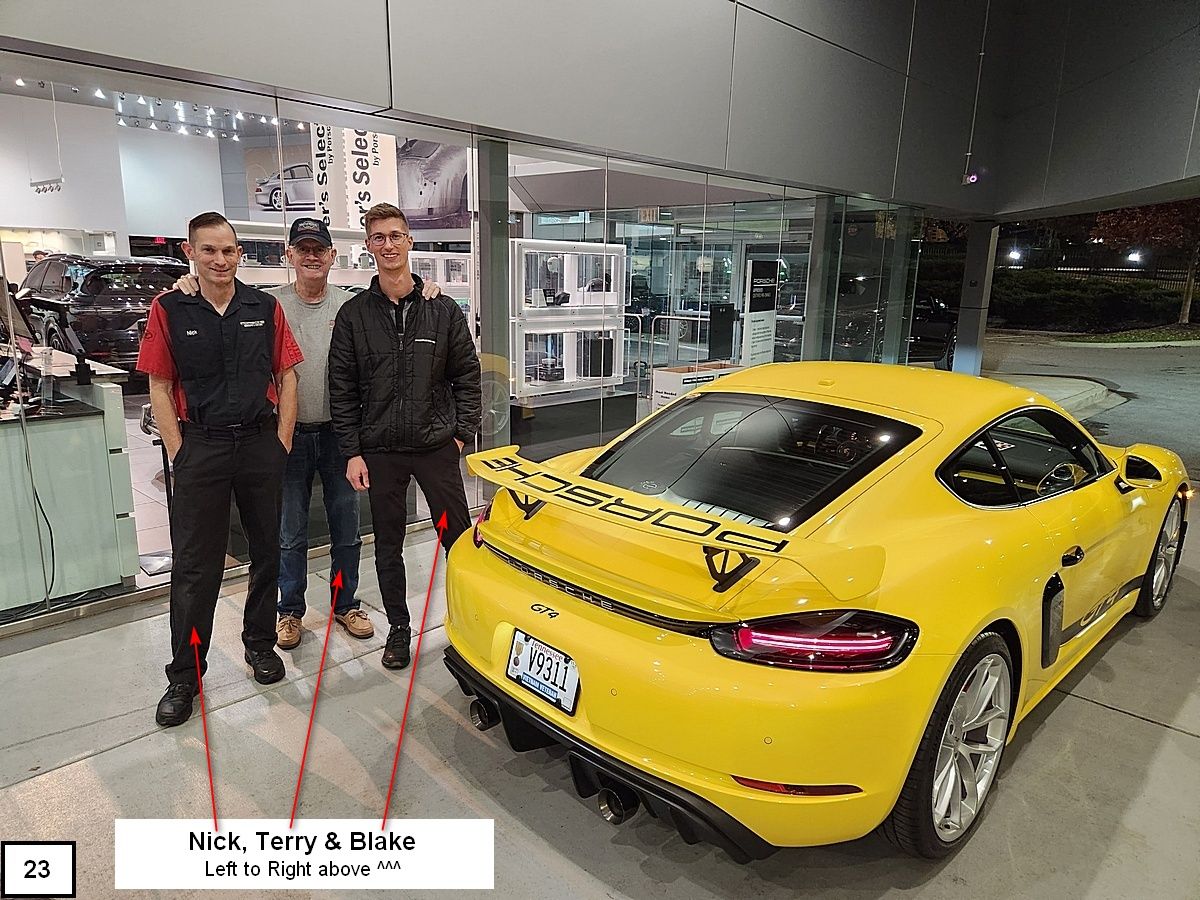
I'm the guy that is 77-year old Vietnam Veteran in Franklin, TN. that has the GT4 in Racing Yellow.
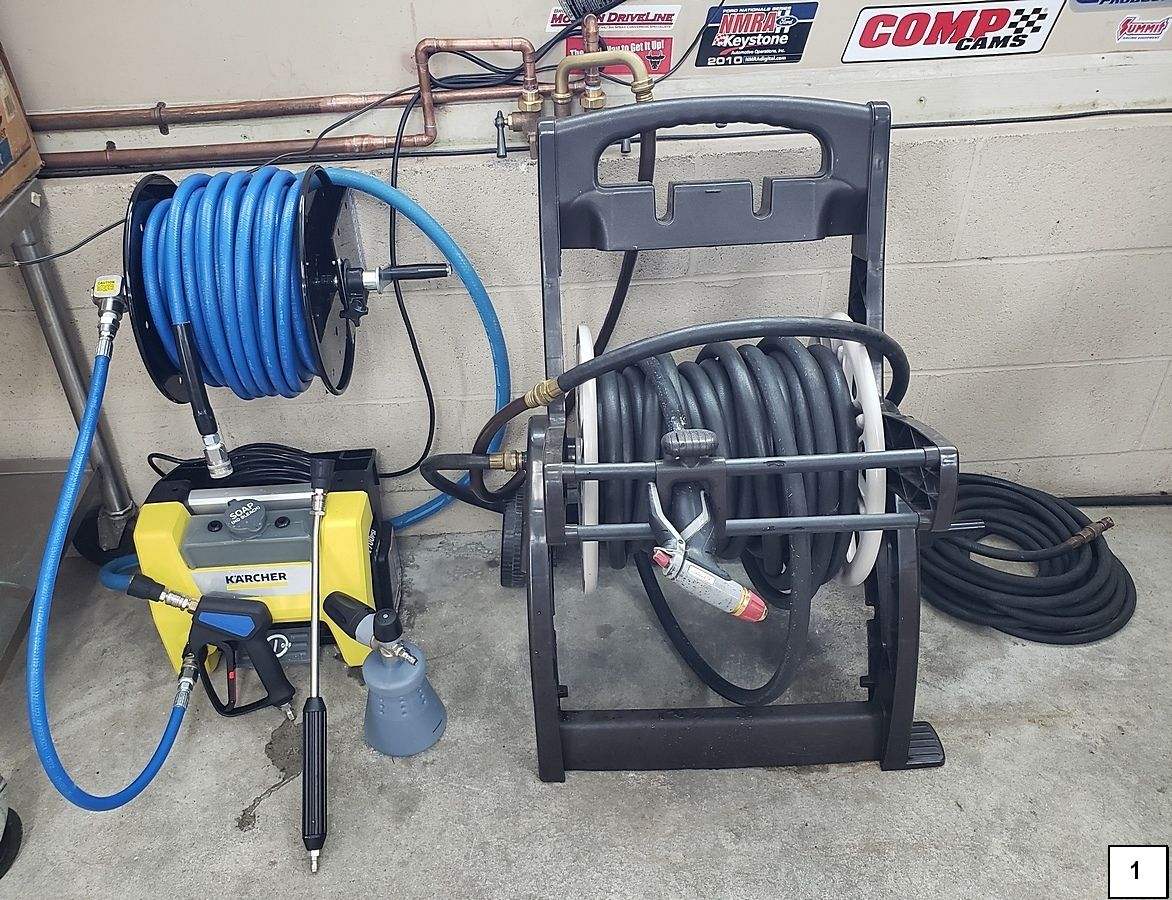
The reason I reached out to you was simply for clarification on exactly what washing system to order for home use ???
I had already watched your videos on that so all I needed to know was exactly which one ???
As a further reminder of our conversation I said to you I was surprised you were so Calm & Collective on the phone and NOT in an All-Fired HURRY to Hang-Up.
I did take your advice and placed my order as well as a few other times to OBSESSED GARAGE.
Recently as you were driving the Limited-Edition BMW that you said more than likely it was NOT staying.
You said you might once again go for a PDK GT4 which is what I have.
And a Major Pat-on-the-Back to you as I watched EVERY-FREAKING GT4 video you did on your Gentian Blue (Manual) GT4.
Especially all the exhaust changes.
I ended up going with the SOUL OAP, Valved Rear Muffler, and SOUL Sound-Symposer-Delete as well as the Cargraphics Valve Controller.
I hope you do get another GT4 and this time with the PDK as it's a Totally-Awesome transmission.
Below are some images for you and THANKS for being you, the Outspoken, Matter-of-Fact ... ADULT, that you are Sir.
.jpg?width=1920&height=1080&fit=bounds)
.jpg?width=1920&height=1080&fit=bounds)

Love the below OBSESSED GARAGE item ...........
.jpg?width=1920&height=1080&fit=bounds)
.jpg?width=1920&height=1080&fit=bounds)
Here mine is sitting in the drive for a Saturday Subdivision get-together.
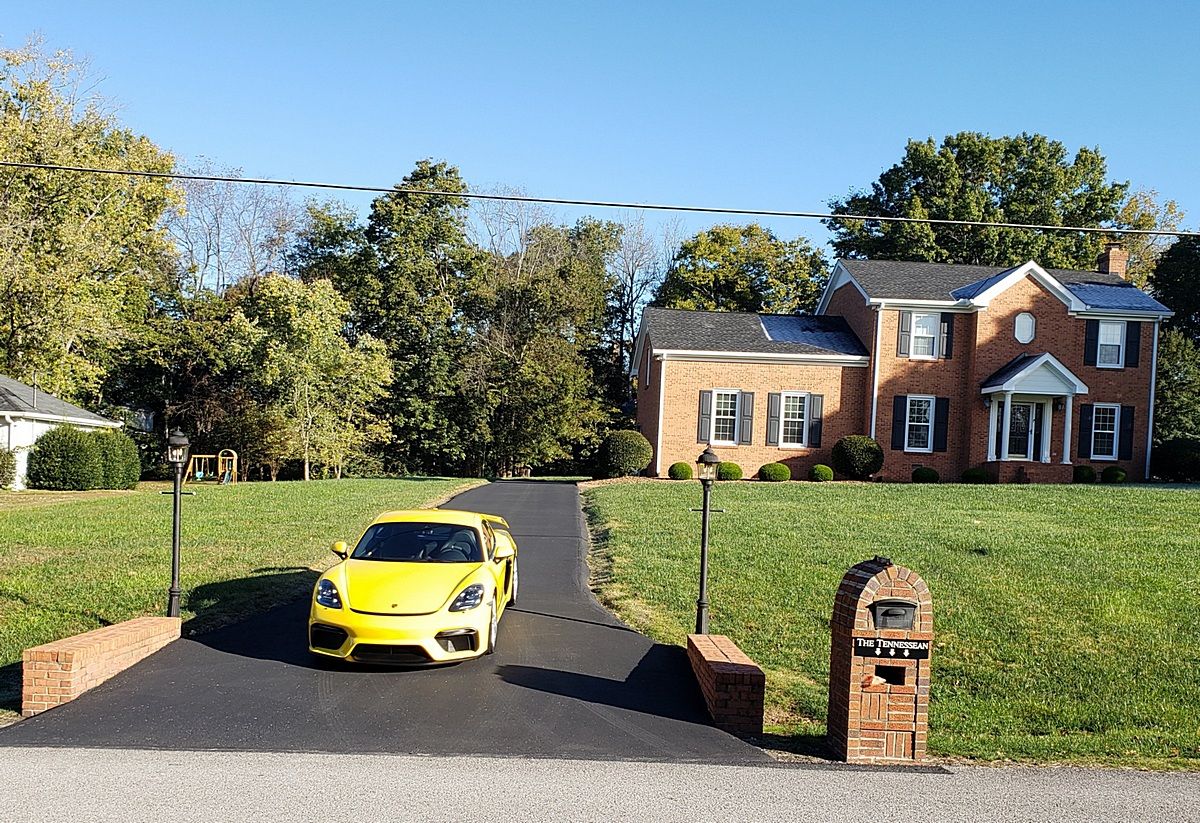
This after the SOUL changes were made and me doing a DEMO for them ..............
Matt thanks for all your excellent OBSESSED GARAGE and GT4 videos,

Terry Honaker
I do follow you over on the OBSESSED GARAGE YouTube channel.
I watched your last video last night where you were polishing the front hood to get rid of the earlier installed stripes.
You stopped after the hood because you were waiting until after you do the Dry-Ice underside cleaning process.
Let's see how good your memory is
I reached out to you on your cellphone while you and your team were doing the Super-Exorbitant garage I think in.
Actually I think you were SURPRISED as well as myself because you actually answered your cellphone.
I'm the guy that is 77-year old Vietnam Veteran in Franklin, TN. that has the GT4 in Racing Yellow.
The reason I reached out to you was simply for clarification on exactly what washing system to order for home use ???
I had already watched your videos on that so all I needed to know was exactly which one ???
As a further reminder of our conversation I said to you I was surprised you were so Calm & Collective on the phone and NOT in an All-Fired HURRY to Hang-Up.
I did take your advice and placed my order as well as a few other times to OBSESSED GARAGE.
Recently as you were driving the Limited-Edition BMW that you said more than likely it was NOT staying.
You said you might once again go for a PDK GT4 which is what I have.
And a Major Pat-on-the-Back to you as I watched EVERY-FREAKING GT4 video you did on your Gentian Blue (Manual) GT4.
Especially all the exhaust changes.
I ended up going with the SOUL OAP, Valved Rear Muffler, and SOUL Sound-Symposer-Delete as well as the Cargraphics Valve Controller.
I hope you do get another GT4 and this time with the PDK as it's a Totally-Awesome transmission.
Below are some images for you and THANKS for being you, the Outspoken, Matter-of-Fact ... ADULT, that you are Sir.
Love the below OBSESSED GARAGE item ...........
Here mine is sitting in the drive for a Saturday Subdivision get-together.
This after the SOUL changes were made and me doing a DEMO for them ..............
Matt thanks for all your excellent OBSESSED GARAGE and GT4 videos,
Terry Honaker
Last edited by tigerhonaker; 01-05-2023 at 01:40 PM.
The following 4 users liked this post by tigerhonaker:
01-09-2023 | 12:51 PM
#165
Thread Starter
Rennlist Member
Joined: Aug 2013
Posts: 3,770
Likes: 240
From: The Villages, FL
I couldn't find any of this information when I was doing this. If I would have known how big of a project this was, I would have given up how much I cared about the scratched up latch on the glovebox. There really isn't much info on how to do this, so I figured it makes sense to make one for the future me that may want to do it. Having done it now, it would probably take an hour to do. I think it took us about 3 including accidentally locking the box on the bench and having to pick the lock.

This is the part you need to do it. https://www.suncoastparts.com/product/9X7GLATCH.html


At first glance, it's hard to tell where to start. My guess is that you could leave the box intact in the car and you could simply take the felt screws out, but I think that would be much harder. We decided to take the box out.

I don't think I have the top red circle correct, but there are two screws you need to remove. You will need to pop the plastic cover off to expose them as seen in the photo. While you are here, you might as well pop the little alcantara piece off too.

You need to take the leather piece off that flanks the PCCM unit. There is a fabric piece in the passenger footwell you need to remove. I think it was a T27 screw that has long threads. Then you need to remove a few more screws and snap the leather piece out and up to expose the three screws you need to remove. There are 4 of them here. You only need to remove 3, but it won't hurt to remove them all if you aren't sure which ones.

There is another screw behind the alcantara piece that you popped off.

You need to remove the cup holders to get to the top two screws that are behind it. I think they were 5mm. You need an allen to get them out. The cupholder system comes out in one piece.


Down underneath the box I think there were 3 plastic screws and one more torx that you'll need to get. It will make sense once you get under there.


There are several molex connectors that you need to pull out now that the box is free. One wire is behind the felt that you'll need to cut. Be careful with the light sensor that has a detent. You don't want to lose the little metal piece.


Now that the box is on the bench, we can assess it. I can see something scraped all the way across the box and hit the latch. In order to get to the screws on the back side of the latch, you need to remove a bunch of felt T9 screws.


Once the felt screws are all out, there will be more than you think, the lid easily separates. If it doesn't, you missed a screw or two. You can now access the screws on the back side of the latch.


We now need to transfer the lock from old to new. I'm sure you could do it without messing up the old one, but I ended up just breaking the tabs on the old latch to get the lock out. The best thing to do is put the key into the lock to remove it. I didn't, and the little springs and retainers popped out. It's a miracle I didn't lose them. When the key is in, it stays together.


While I had the box on the bench, I decided to fix the alcantara. You can use a sanding pad to agitate the fibers and essentially take away the scratches. I didn't find it to be dirty, so I didn't need to clean it.
https://www.obsessedgarage.com/produ...46774811&_ss=r


This next part is really important. I messed this up. You need to make sure the latch tongue fits behind the spring loaded mechanism. If you don't, you'll lock the box and it won't open. The default is for it not to go into the correct position, so test it before you close the box. I had an hour detour trying to pick it back open.


Repeat the same procedure to reinstall. It took less than 20 minutes to put it all back together now that I knew how to do it. Apparently, I didn't take a photo of the finished job, but you get the idea. I hope this helps others in the future.
This is the part you need to do it. https://www.suncoastparts.com/product/9X7GLATCH.html
At first glance, it's hard to tell where to start. My guess is that you could leave the box intact in the car and you could simply take the felt screws out, but I think that would be much harder. We decided to take the box out.
I don't think I have the top red circle correct, but there are two screws you need to remove. You will need to pop the plastic cover off to expose them as seen in the photo. While you are here, you might as well pop the little alcantara piece off too.
You need to take the leather piece off that flanks the PCCM unit. There is a fabric piece in the passenger footwell you need to remove. I think it was a T27 screw that has long threads. Then you need to remove a few more screws and snap the leather piece out and up to expose the three screws you need to remove. There are 4 of them here. You only need to remove 3, but it won't hurt to remove them all if you aren't sure which ones.
There is another screw behind the alcantara piece that you popped off.
You need to remove the cup holders to get to the top two screws that are behind it. I think they were 5mm. You need an allen to get them out. The cupholder system comes out in one piece.
Down underneath the box I think there were 3 plastic screws and one more torx that you'll need to get. It will make sense once you get under there.
There are several molex connectors that you need to pull out now that the box is free. One wire is behind the felt that you'll need to cut. Be careful with the light sensor that has a detent. You don't want to lose the little metal piece.
Now that the box is on the bench, we can assess it. I can see something scraped all the way across the box and hit the latch. In order to get to the screws on the back side of the latch, you need to remove a bunch of felt T9 screws.
Once the felt screws are all out, there will be more than you think, the lid easily separates. If it doesn't, you missed a screw or two. You can now access the screws on the back side of the latch.
We now need to transfer the lock from old to new. I'm sure you could do it without messing up the old one, but I ended up just breaking the tabs on the old latch to get the lock out. The best thing to do is put the key into the lock to remove it. I didn't, and the little springs and retainers popped out. It's a miracle I didn't lose them. When the key is in, it stays together.
While I had the box on the bench, I decided to fix the alcantara. You can use a sanding pad to agitate the fibers and essentially take away the scratches. I didn't find it to be dirty, so I didn't need to clean it.
https://www.obsessedgarage.com/produ...46774811&_ss=r
This next part is really important. I messed this up. You need to make sure the latch tongue fits behind the spring loaded mechanism. If you don't, you'll lock the box and it won't open. The default is for it not to go into the correct position, so test it before you close the box. I had an hour detour trying to pick it back open.
Repeat the same procedure to reinstall. It took less than 20 minutes to put it all back together now that I knew how to do it. Apparently, I didn't take a photo of the finished job, but you get the idea. I hope this helps others in the future.
Last edited by Money2536; 01-09-2023 at 02:50 PM.