When you click on links to various merchants on this site and make a purchase, this can result in this site earning a commission. Affiliate programs and affiliations include, but are not limited to, the eBay Partner Network.
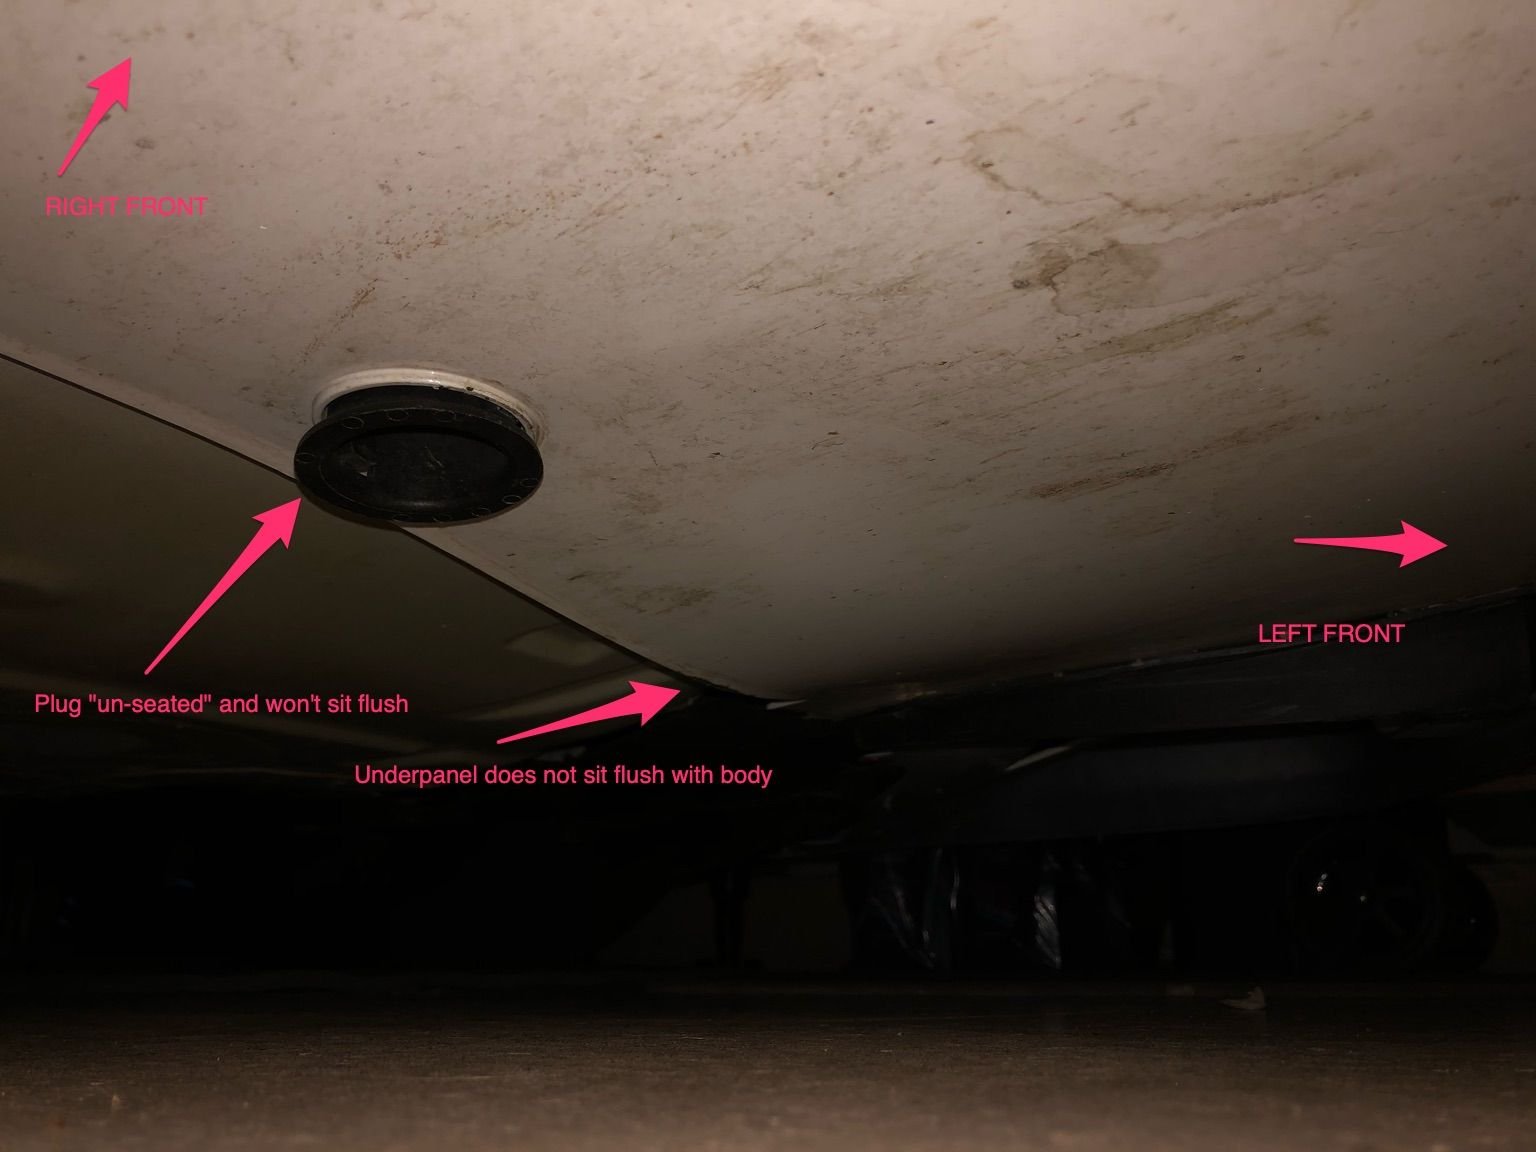
Can someone please post pictures of the proper fit for the front underpanel, behind the front air dam for a 997.1 (2007/2008) GT3RS. Noticed that on my car the panel has a slight bulge and doesn't sit completely flush with the outside of the trunk floor and the black plastic fastener won't sit flush nor engage with whatever it is supposed to engage. I do see the tabs on the side of the plug.
Much appreciated and pardon the dirty underside :-)
Your bumper has been removed and put back on incorrectly. Most likely your center grill frame to radiator duct is not seated. The black support should be rotated until it sits flat.
Thanks @FLT6SPD . Indeed the bumper was removed when I had mesh screens installed. Can you please point me to installation instructions for the bumper?
Thanks @FLT6SPD . Indeed the bumper was removed when I had mesh screens installed. Can you please point me to installation instructions for the bumper?
@FLT6SPD really appreciate you sending the Workshop manual instructions. Looks like a decent amount of work to remove and reinstall the bumper skin. I will have to set a quiet Sunday aside to do it. Any gotchas (from prior experience if you have done this job)?
1 - Jackup and put on stands
2 - Measure from floor to bottom of bumper, find three boxes that fit between floor and bumper and put them left, center, and right.
3 - Remove your headlights and turn signals, after removing the headlights it gives you access to two slide clips, pull those out half way, after removing the turn signals that gives you access to the torx
4 - Turn your wheels to one side and loosen the front half of the fender liner, do the same for the other side, remove the torx for the bumper, also some torx under plastic by hood latch
5 - Remove the bumper hardware under the car and prepare your boxes under the bumper.
6 - Completely remove the clips from by the headlight
7 - Slide bumper out.
8 - Work the center grill frame of the bumper to the center radiator duct, AND the left and right sides by the headlights as those have guides.
9 - Once you get it right it will feel it, now put the clips by the headlights in just a quarter of the way.
10 - Now center the parts of the bumper between the headlight and hood and make it lines up perfect, then finish sliding the clips all the way in.
11 - Reinstall all the hardware and done.
How good is this site and it�s members! FLT6SPD that�s awesome..

 03-02-2020, 12:08 PM