When you click on links to various merchants on this site and make a purchase, this can result in this site earning a commission. Affiliate programs and affiliations include, but are not limited to, the eBay Partner Network.
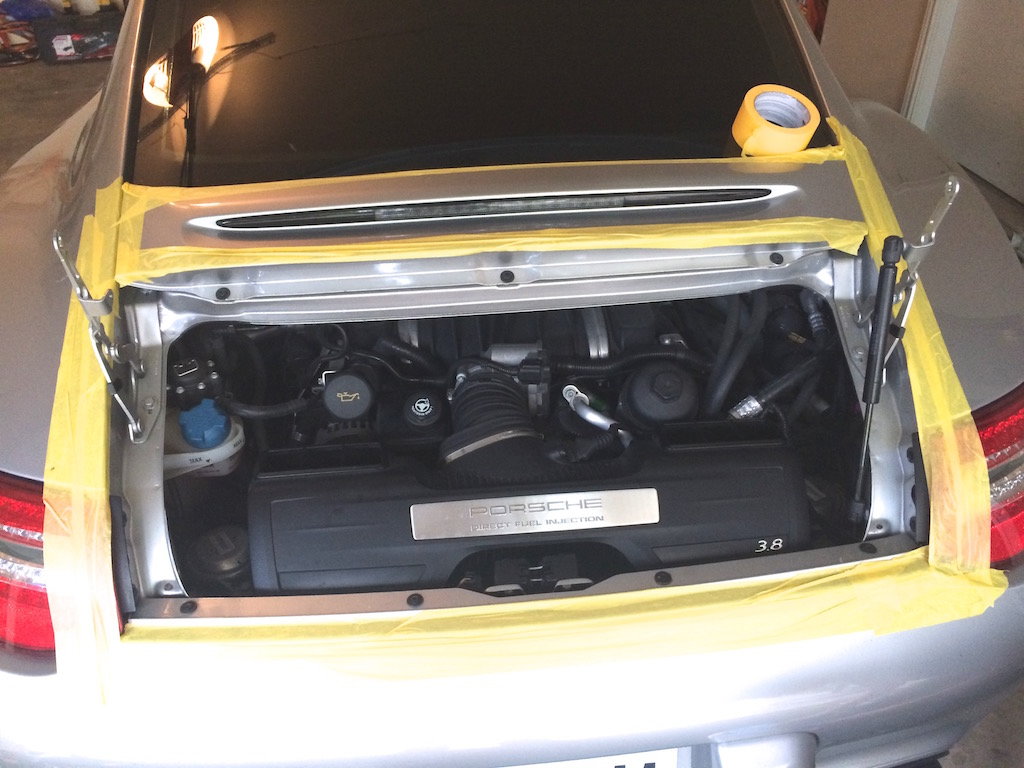
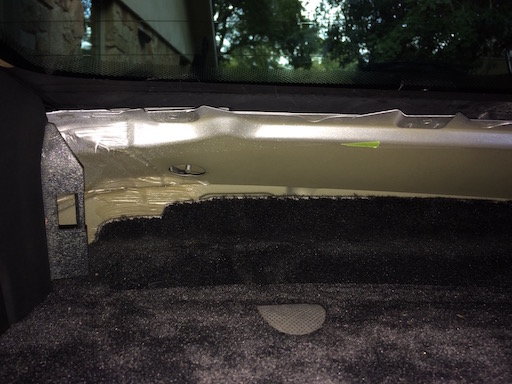
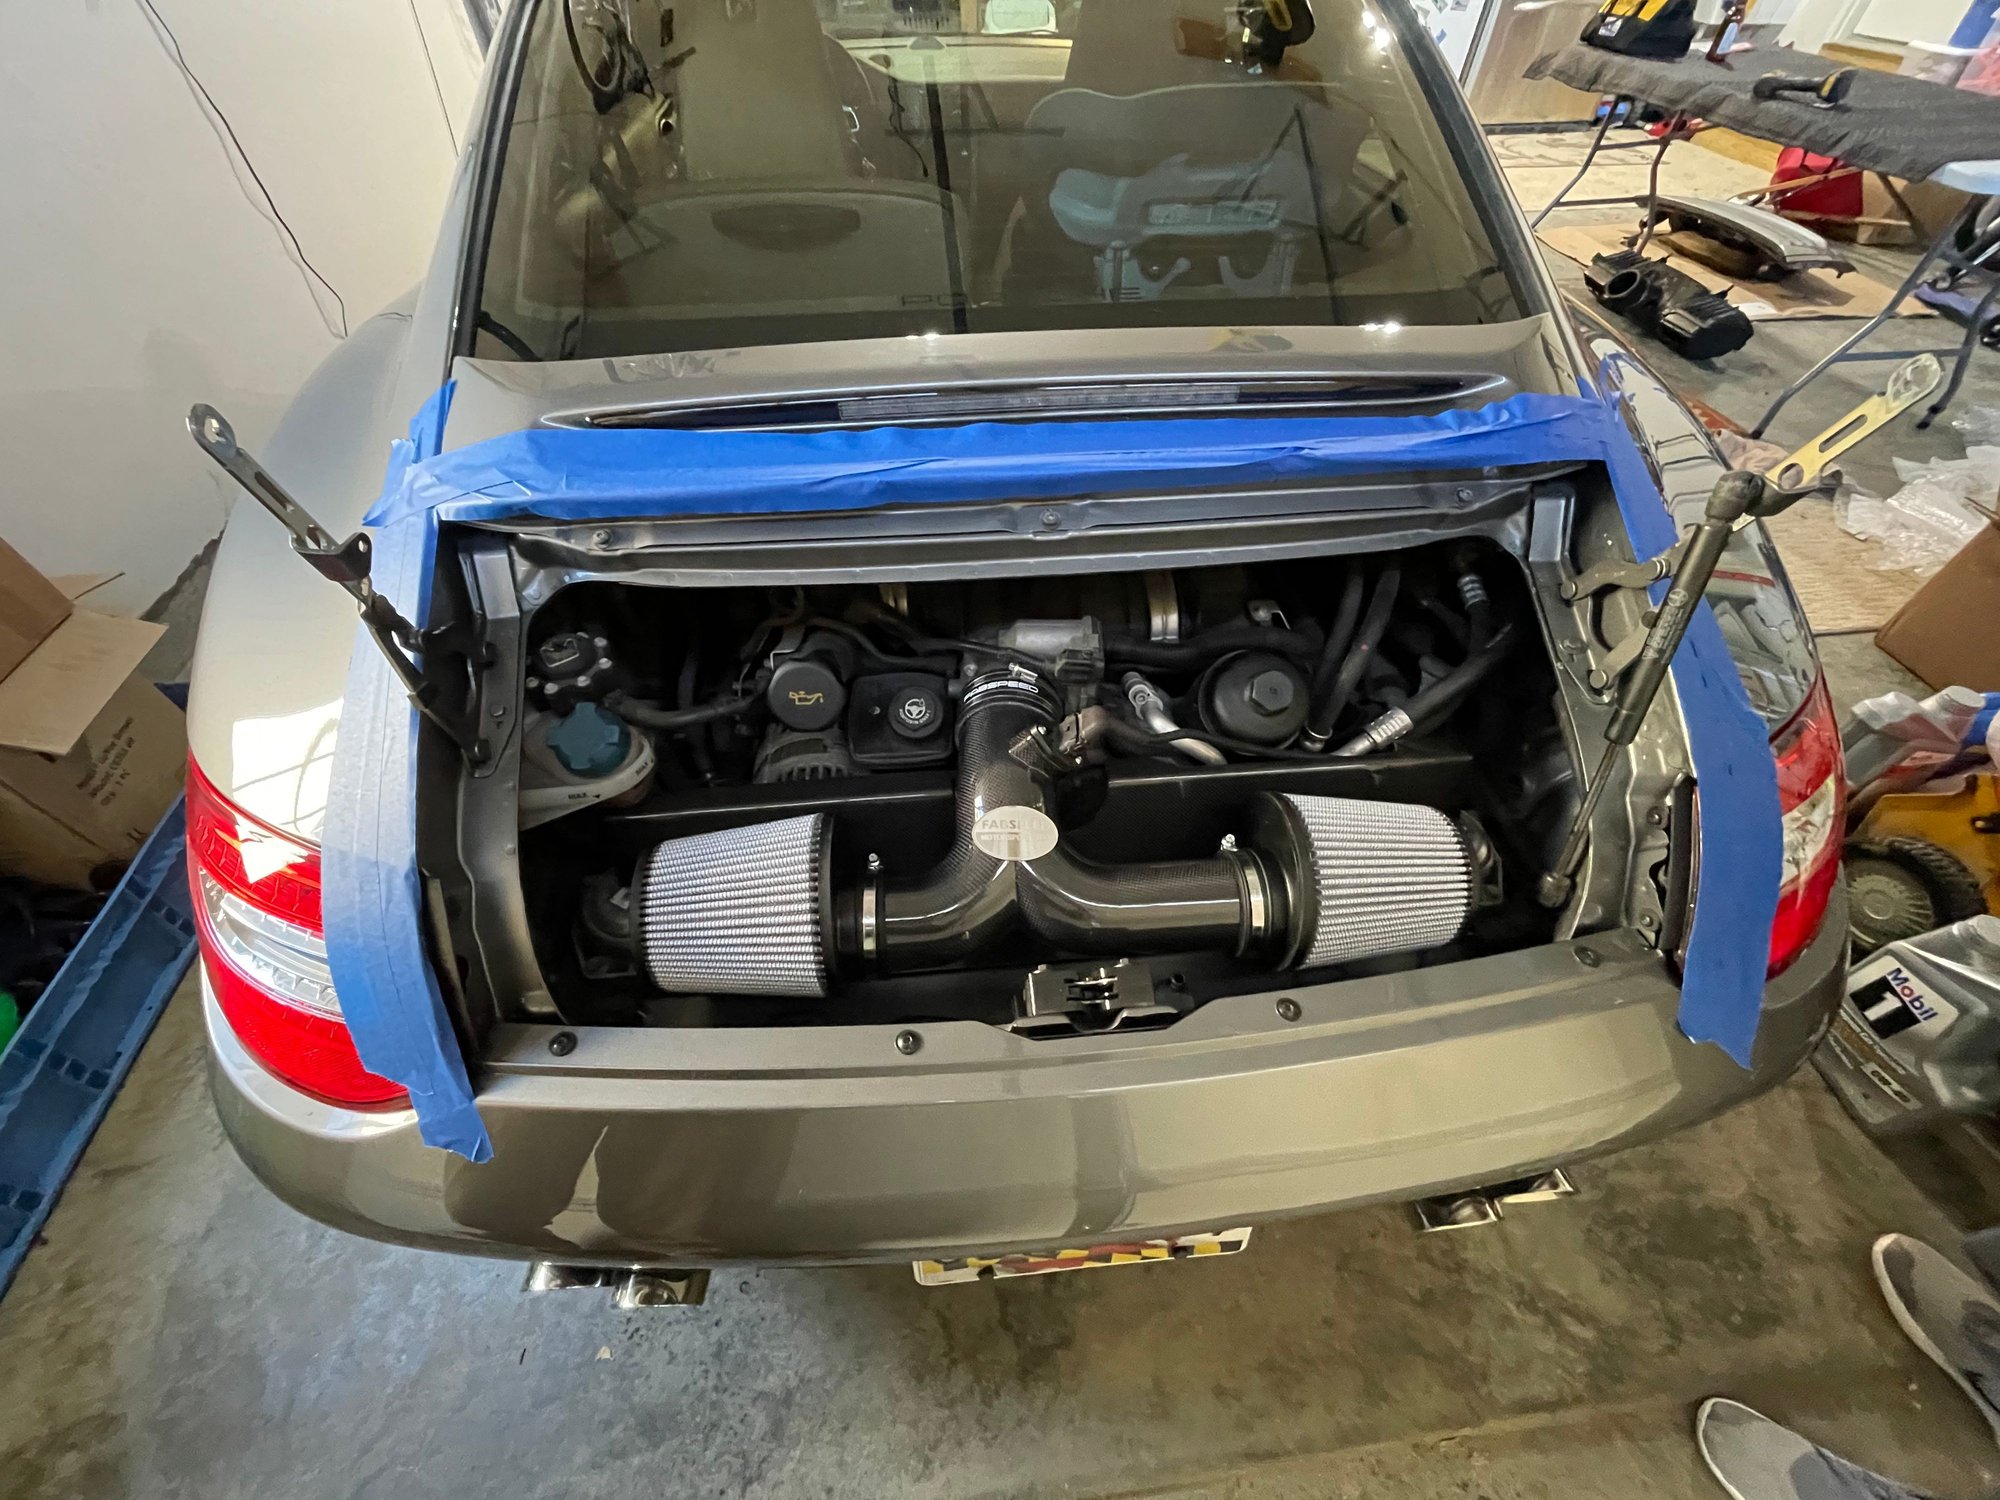
For those wondering about the stock air box question: I dug it out of storage and fitted it properly in place to take a picture of how it collided in my case. I didn't remove all of the materials I used to close up the intake for storage so that is the masking tape and bubble wrap you see.
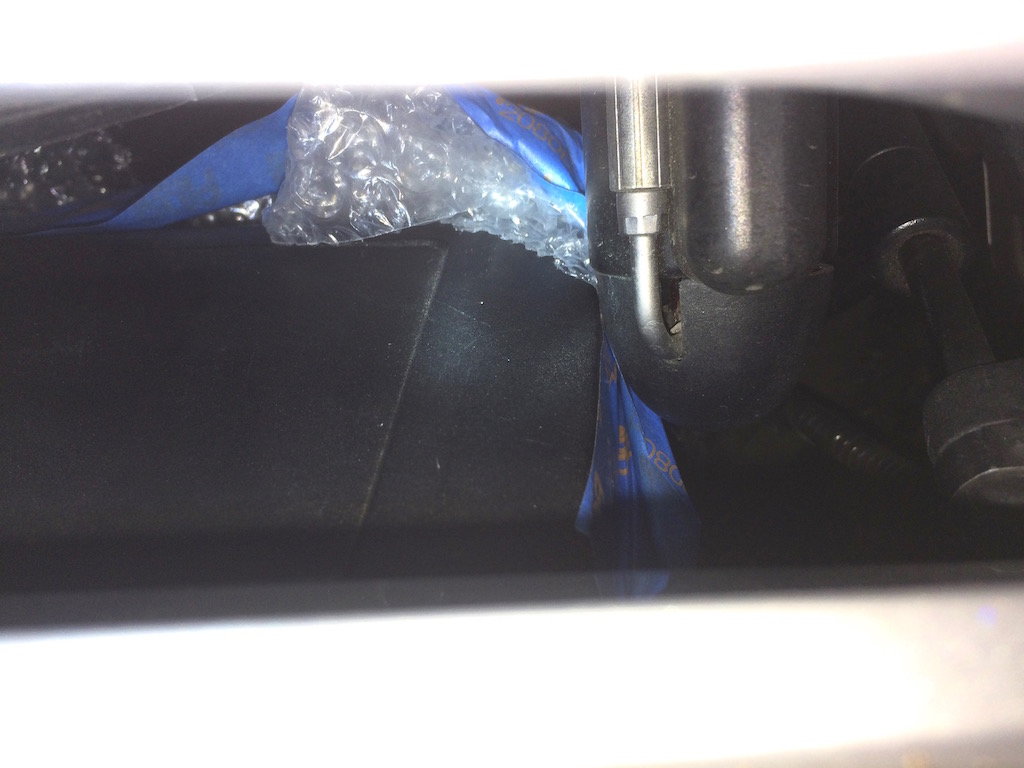
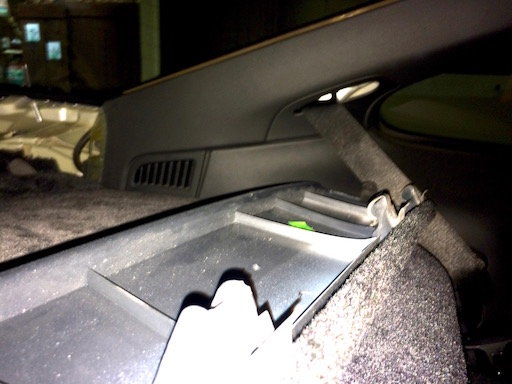
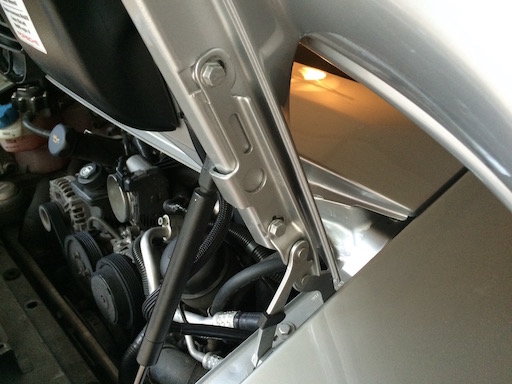
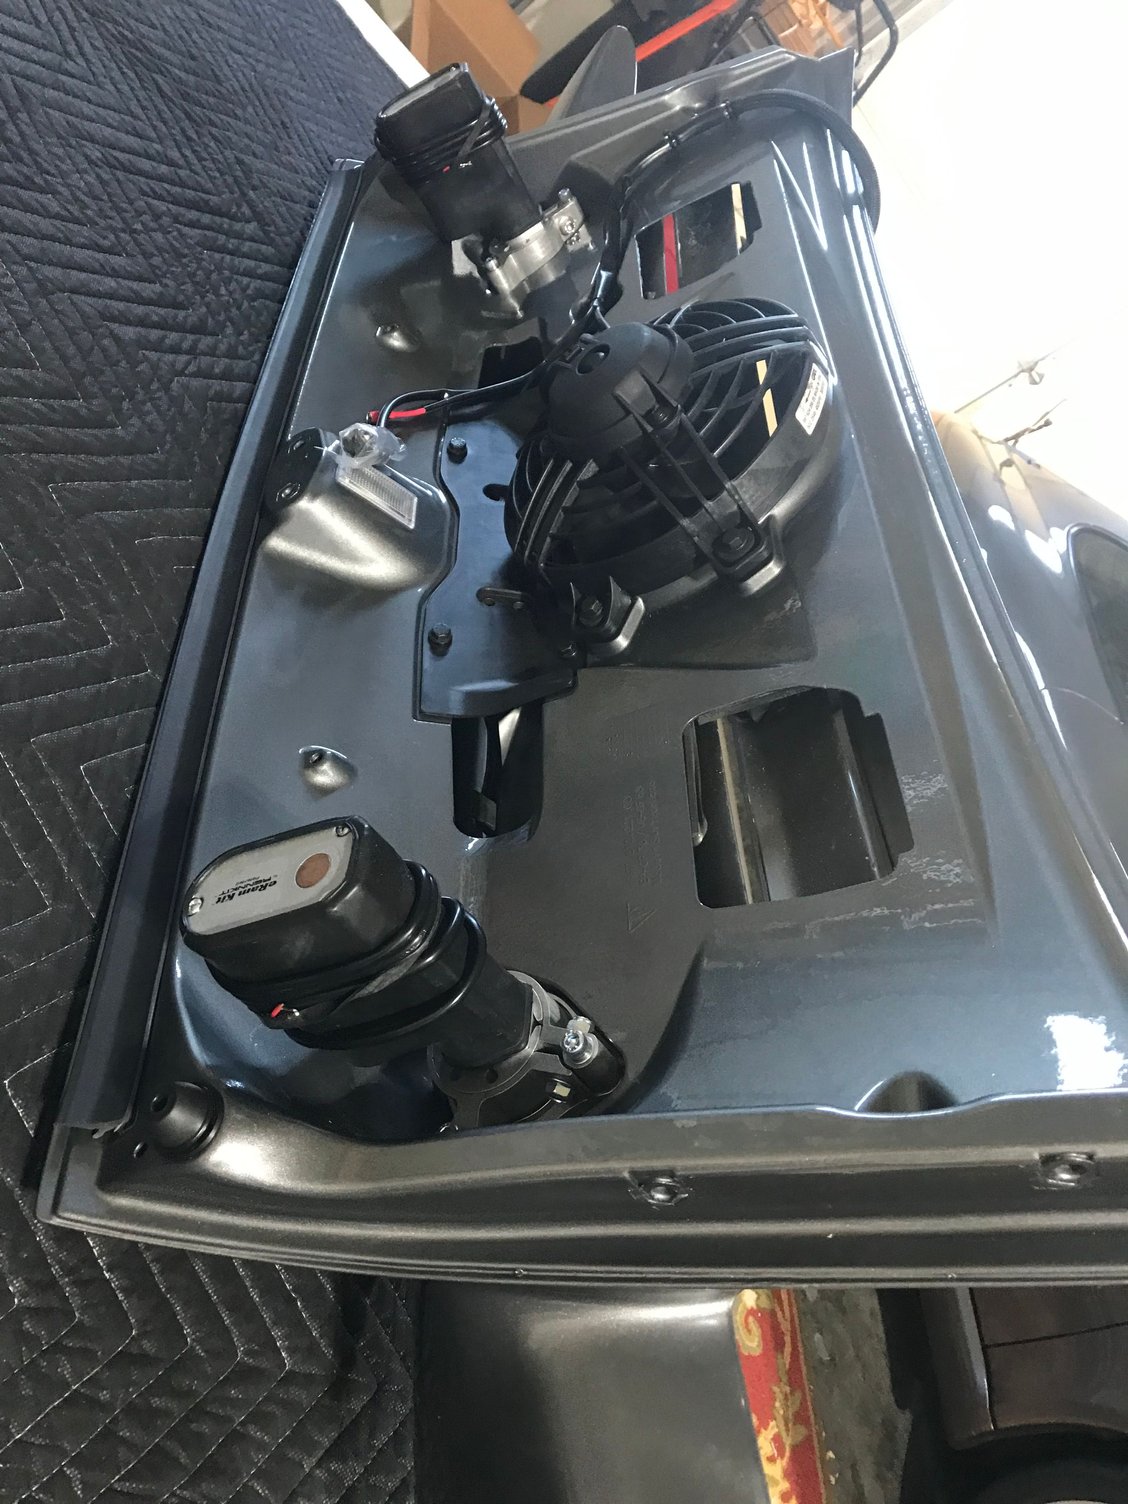
With the lid an inch and a half from latched, I was able to take this photo from the gap between the bumper and the deck lid. You can see the bottom of the hydraulic cylinder just beginning to touch the air box. If the air box was about a quarter inch more to the left the cylinder would lay right along its side. In my case closing any further starts putting a lot of side pressure on the cylinder and air box that worries me. You might be able to get by with it, but this was too risky for me.
As mentioned earlier, the air box here is the 3.8 liter S engine air box. Maybe the 3.6 liter non-S air box is narrower? I don't know, maybe some does?. Here is the photo when they begin to touch, you can see the air box touching the cone on the cylinder at this point. For reference, the photo is completely horizontal and the light streaks at the top and bottom are the bumper and deck lid:
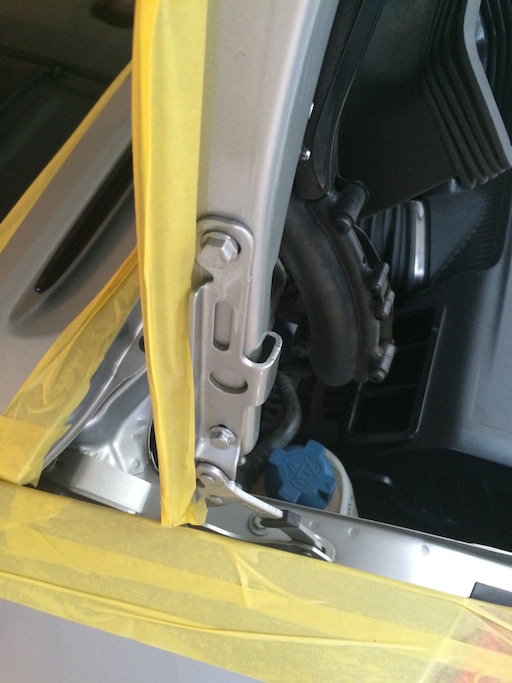
Proceeding with the removal of your existing deck lid. The first thing I'd recommend is using high quality delicate-surface masking tape to protect the edges and nearby surfaces of everything you are about to work on... just in case you lightly bump something together. I had both 3M delicate-surface (blue) and FrogTape delicate surface tapes (yellow) around so you'll see both in the various photos. These tapes are also safer to leave on a surface for a while that typical masking tape. Here's an example:
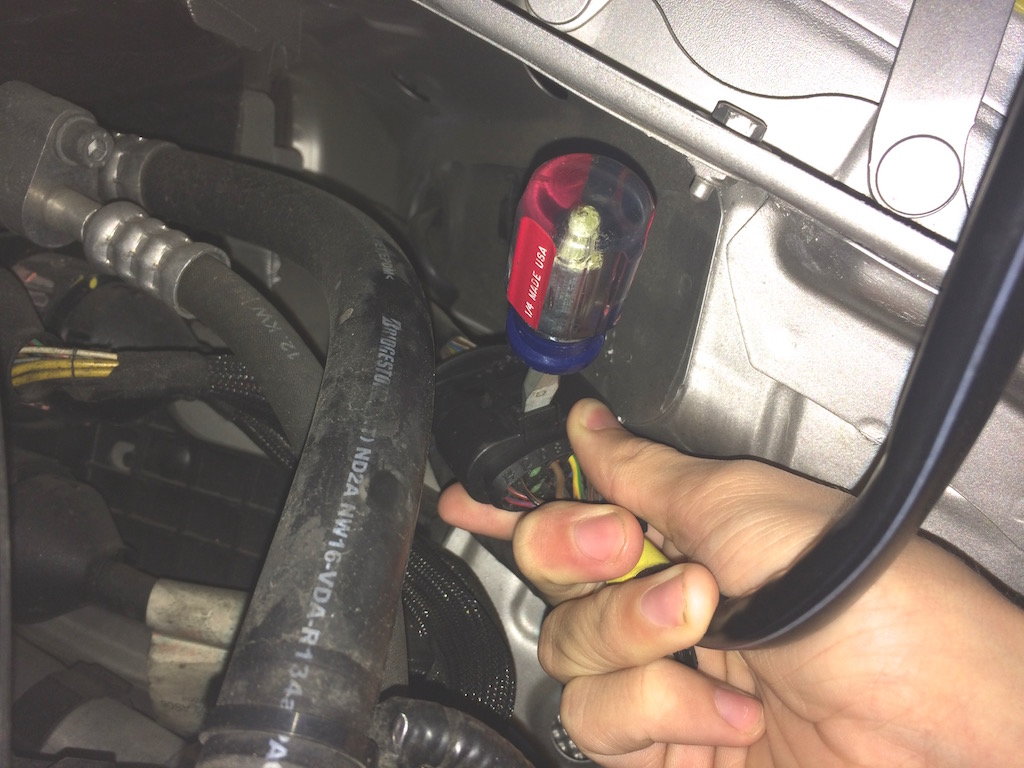
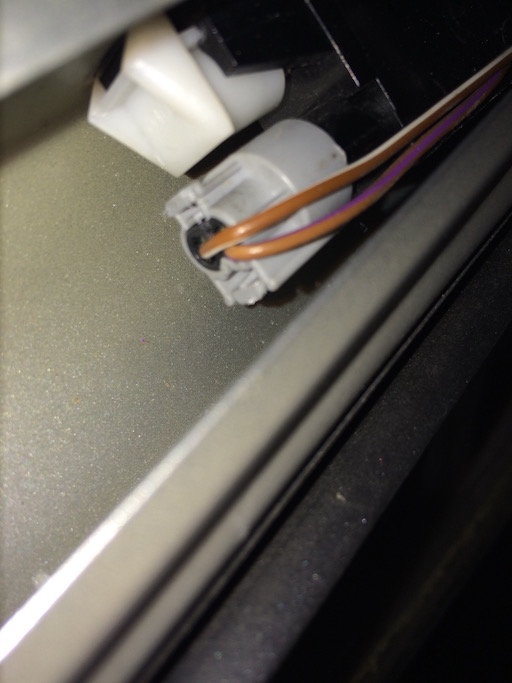
Before disconnecting the hinges, you'll want to disconnect the electrical connector. When doing this, be sure not to pull hard on individual wires. The connector is a bit tough to unplug, but if you can get the release pressed and pull mostly on the housing and on the bundle as a whole then it will come on off. Note that the guys I bought the wing assembly from destroyed the original connector doing this. If worse comes to worse and you blow it, you can buy a new one but that would be a waste of a hundred bucks or so.
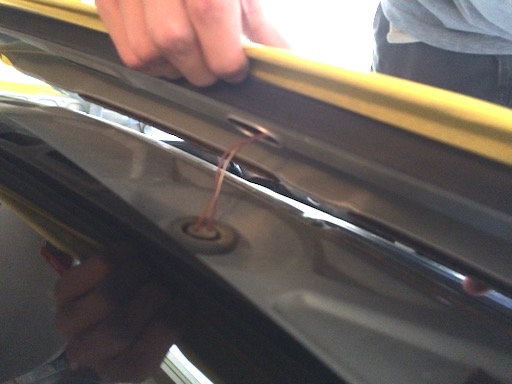
Here is a photo of my son preparing to release the connector. He found it easier to press down on the spring metal release using a stubby screw driver through the slot shown in the photo. It is a strong clip, but when firmly pressed it will release but it still requires a firm pull. The connector also has a sort of o-ring seal that makes it a little harder to pull off.
Once the connector is released, you can remove the two bolts on each side that hold the deck lid to the hinge, as seen on the left side in the first photo above. This is another case where one or two extra sets of hands is handy to make sure the deck lid removal is as clean as possible (there were two of us and it went fine, three would have been a breeze). Once removal you should have the two hinges sticking up like this; they are not removed for this effort.
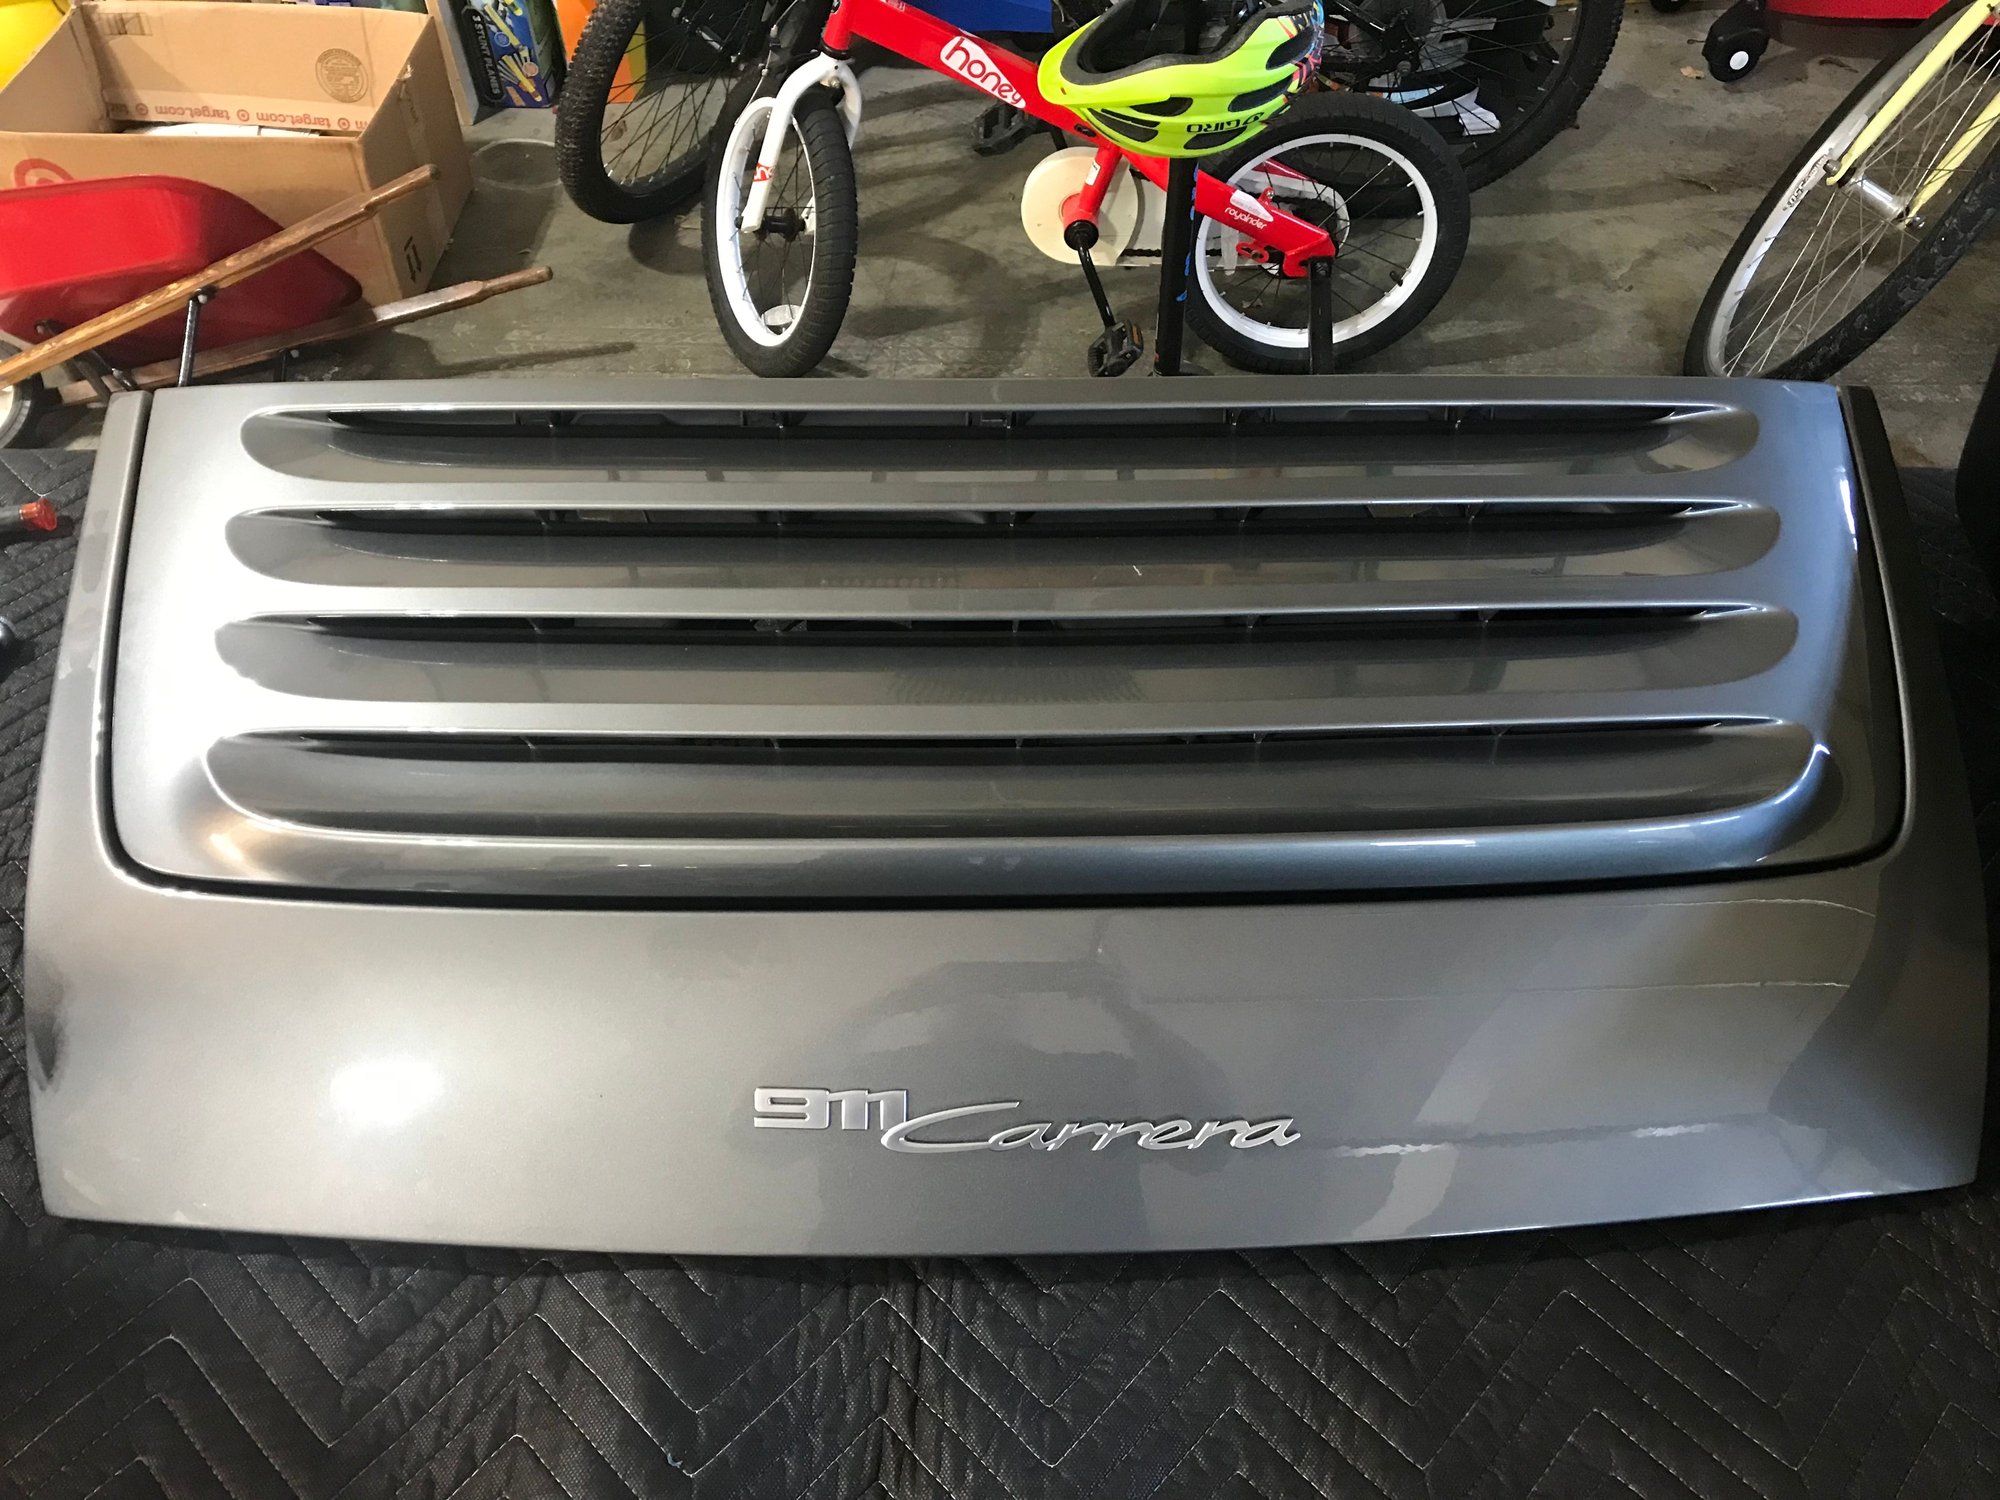
Be sure to have a nice soft landing pad for your old deck lid prior to removal.
Note: When storing your old parts, never leave masking tape attached regardless of the quality. It will eventually become difficult to remove and will likely damage the paint.
Next up, an optional step: How to change the upper brake light panel.
If you are changing the upper panel to get rid of the existing high-mounted brake light, now is a good time to do this since the deck lid is out of the way. In the photos in the prior post you can see the three dark Torx bolts at the bottom of the panel. Remove these. The other two nuts holding this in have to be accessed from inside the car.
First, remove the vertical carpeted panel just below the window. There are clips at the top holding it in. You should pull straight out on this panel, preferably with plastic trim removal tools to make sure you don't scratch your glass or tint. Insert the tool, or two if you have them along the top edge and pull straight out, it should unsnap with some effort.
Here you can see the clips along the top edge now that it is removed. You can help pull from the bottom, but if you pull the bottom too much first you will bend these clips (like I did, but they bent back easily).
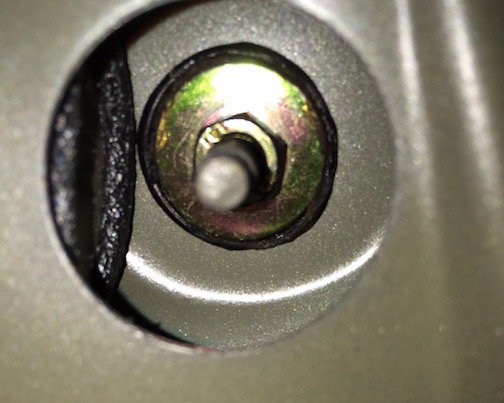
In these images you see one of the two recesses that house the nuts holding the outer panel on. To remove these, it is again helpful to have a second set of hands hold the panel steady from the outside while you remove these nuts. Be sure to keep the panel fully engaged against the car when removing each nut to keep the bolt as far downward as possible. This helps make sure the bolt is kept as close to the opening as possible so you don't drop the nut inside the recess. I doubt you could recover it and it might rattle.
With the bolts removed, you can carefully lift the panel and unplug the light connector before you lift very far. It is helpful to have some towels to rest the panel against at this point to make sure nothing gets scratched. Squeeze the releases on the connector. Note that removing the connector requires removing the light, so if you are having trouble getting to the connector and you'd rather remove the light first you can as described next.
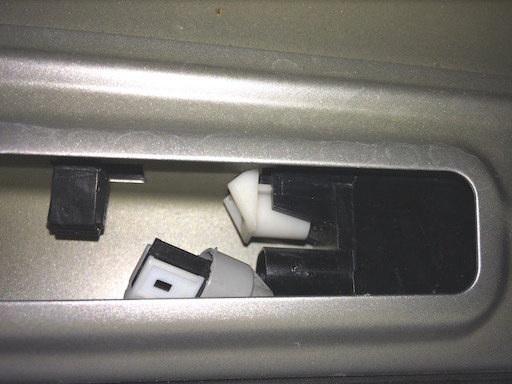
To slide the connector out, you have to unsnap the light. This isn't too hard but two hands help with all of the different snaps. There are several black snaps that have to be disengaged, then the white spring-loaded clips have to be released. The light will then slide out of the way; you can replace it as soon as the connector is removed. You can then remove the panel and put it safely away.
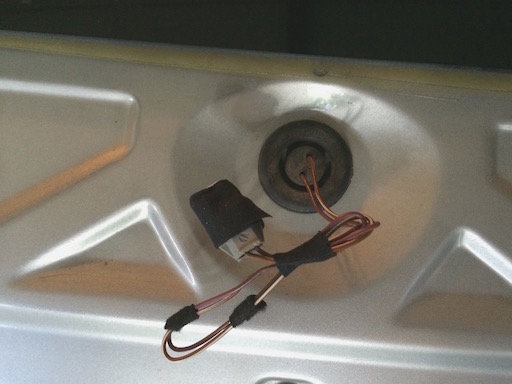
Once disconnected, I wrapped the connector and wire in some padded electrical tape to prevent rattling when I stowed it away in a recess under the new panel. Installation of the new panel with no light is the reverse process.
There is some wiggle room for adjustment of the gaps on the panel, both horizontally and vertically. Be sure for now to install it firmly enough to hold in place but as high as it will go so it doesn't risk colliding with your new deck lid when you install and attempt to close it. You can adjust the gaps later once you have the new deck lid mounted. Don't put the carpeted panel back until you are done installing the deck lid. The screws are harder to get to but are reachable. Be careful to protected the surrounding area when doing the final adjustment and tightening since there isn't a lot of room to get to the Torx bolts.
We're almost there! Next up, installing the new deck lid with wing!
To install the deck lid, I'll again recommend putting for delicate-surface masking tape suitable for new paint along the edges of the new deck lid and anything it comes close to. This is also another time when it is a good idea to have one or two extra sets of hands around to make sure everything goes smoothly. We did this with two of us.
The hinges should still be sticking up from the earlier deck lid removal. As recommended earlier, you should probably still have the air ducts off the lid to make it easier to manage... they are easy to put on afterwards if you are going to use them.
Carefully place the new deck lid into the slots in the hinges attempting to minimize sliding around. Try to align the bolt holes in the new deck lid with the marks left by the bolts from the other deck lid. Putting in back in exactly to same position is a good place to start. The hydraulic cylinder should still be connected since you never removed it, so it should be holding the right hinge firmly in place. I'd recommend putting the bolts in the right side first and running them until they are firm, but not really tight, in the exact same place the heads were in contact before.
While someone still holding the deck lid up, put the left side bolts in and and tighten until firm. Check that both sides are still properly in place and tighten enough that the deck lid won't move. Carefully test that the deck lid is firmly held on both sides, then gently lower it. DO NOT fully close the deck lid yet though.
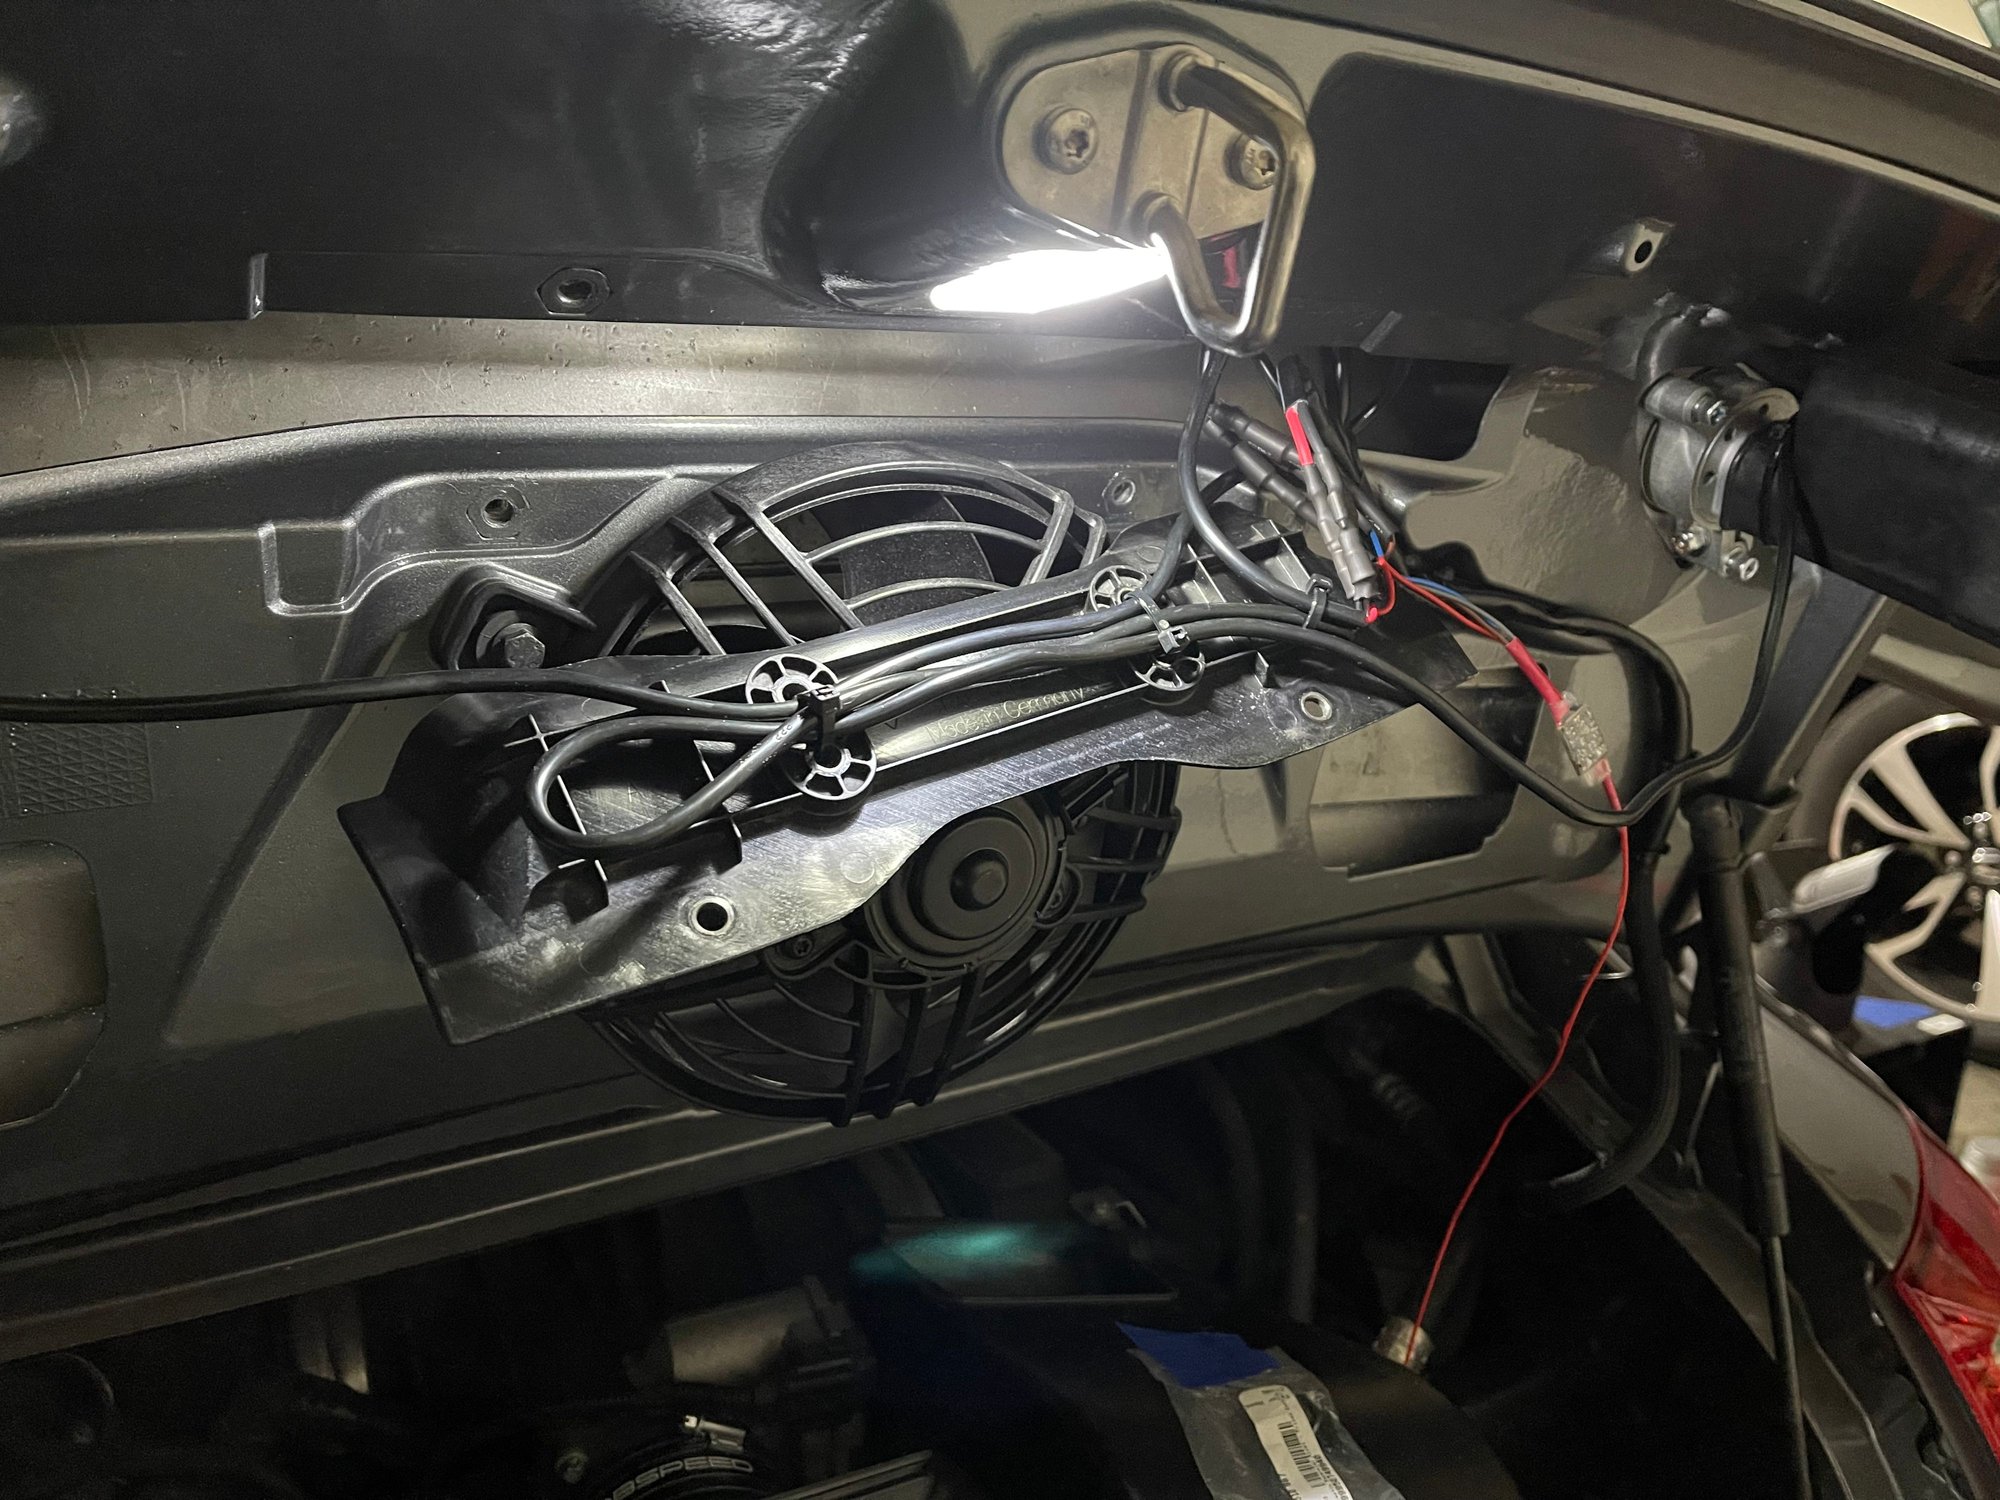
If you are trying to retain the original air intake box, now is the time to see if you are going to have a clearance problem. If you have a new intake, you put it on now if you haven't already. Even with an aftermarket box you'll also want to make sure the hydraulic cylinders for the wing are clearing for that as well. During the adjustment steps below, you'll want to make sure that any adjustments you make don't result in a collision even if your initial check seemed to show you are clear.
I don't have anything magic to tell you in the following other than you don't want to rush anything and accidentally have the deck lid collide with the fenders or upper panel. You should have installed the adjustable Turbo deck lid bumpers in an earlier step. Make sure they are in place in a mid-position before proceeding.
Sometimes the thin hydraulic cylinder holding the deck lid hinge weakens with age so you want to make sure you don't get an unexpected drop with the extra couple of pounds the Turbo assembly adds. Be gentle. You also want to look on all sides of the deck lid as you slowly lower it to make sure it is clearing on the top and the fenders on both sides.
When the deck lid nearly closed, you can see if you have any big misalignments in danger of collision. If you installed the upper panel in an earlier step too and left it sitting high as I suggested, you'll find a big gap up there but that is okay for now. I suggest getting the deck lid aligned first then move the upper panel down to match up.
Only loosen/adjust/tighten the minimum number of bolts you need each time and after a couple of tries everything should start lining up if it wasn't already. There is a lot of latitude for adjustment in all dimensions, left/right, up/down, forward/backward. I suggest gentle changes each time.
Once you are certain that your gaps are looking good and nothing is going to collide and the latch is lining up correctly, go ahead and gently shut the deck lid. You may need to adjust the bumpers at the bottom edge to get the closure gap roughly correct. With it closed you can take a look and see where you still have uneven gaps or vertical misalignments with the fenders and upper panel. You will have to reopen the deck lid each time you need to loosen/realign/retighten the bolts but it will only take a little patience to get it all nicely lined up. Yes, it is a bit tedious. If you've left the upper panel firmly in place but not fully tight you can also slide it down to create a correct gap once you have the deck lid looking well aligned.
Once all of your gaps and alignments are looking good, make sure all the deck lid bolts are tight (but don't strip!) and tighten the exterior Torx bolts and the interior nuts on the inner panel. Plug in your new deck lid and put on the air ducts.
Power up the car and press the wing button. Watch it go up and down! Press on the brakes and the center brake light should light up. There is no easy way to test the fan with a Durametric Pro, but you can open the deck lid to make sure the interior light (or lights depending upon the lid) illuminates.
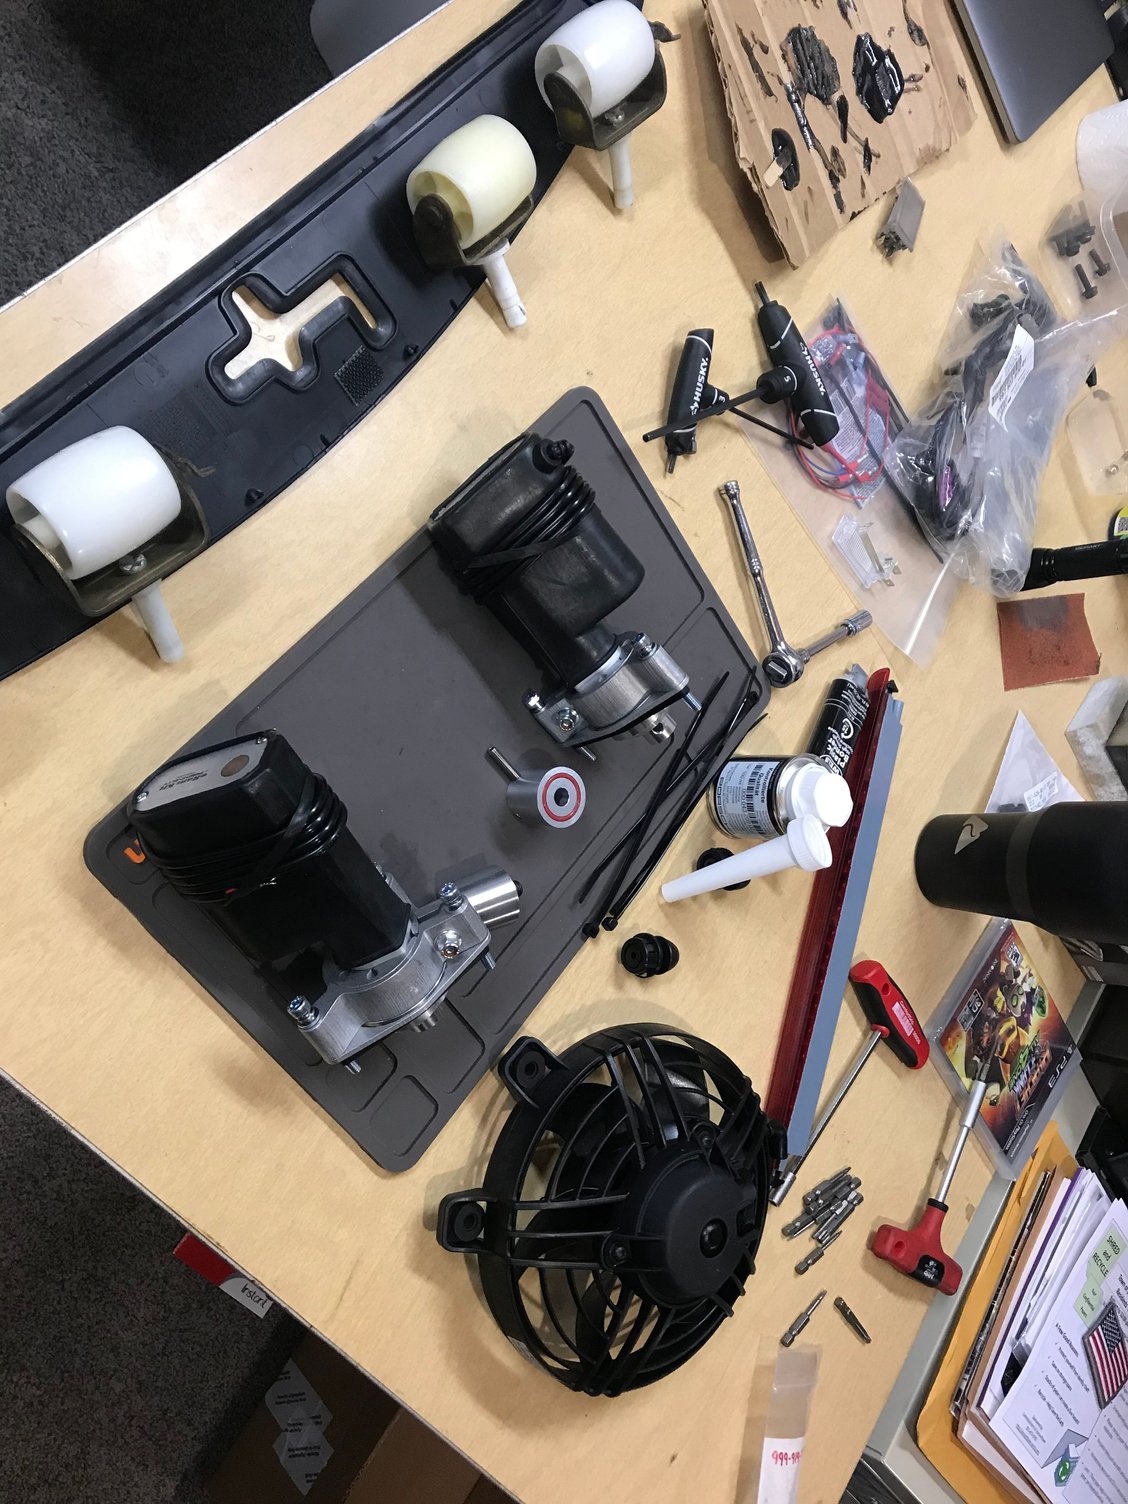
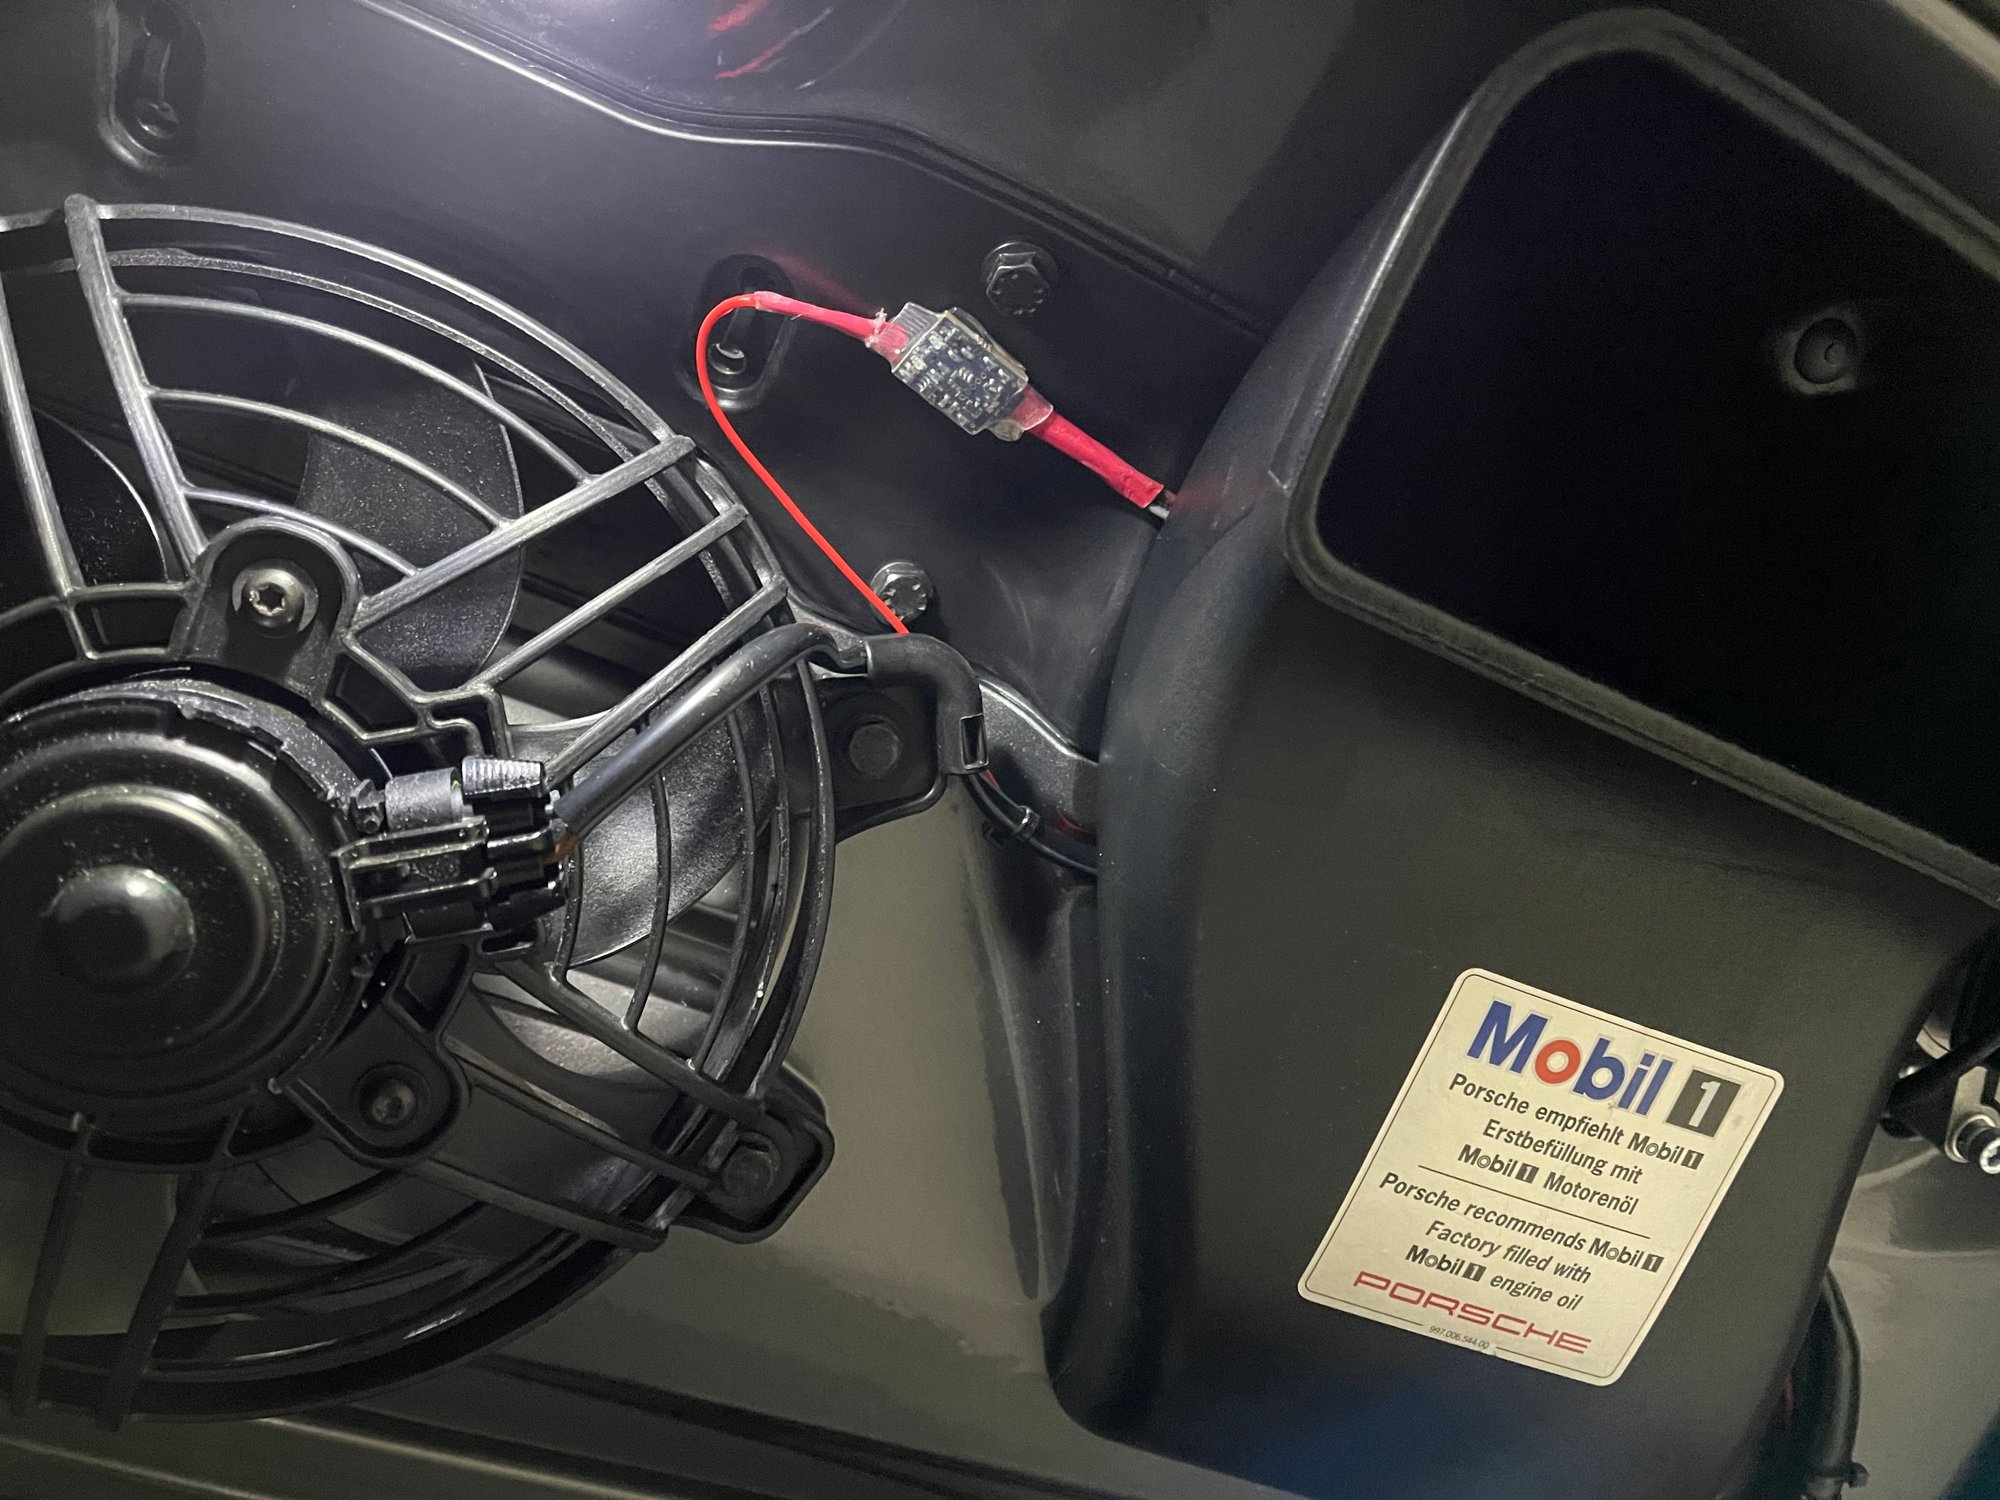
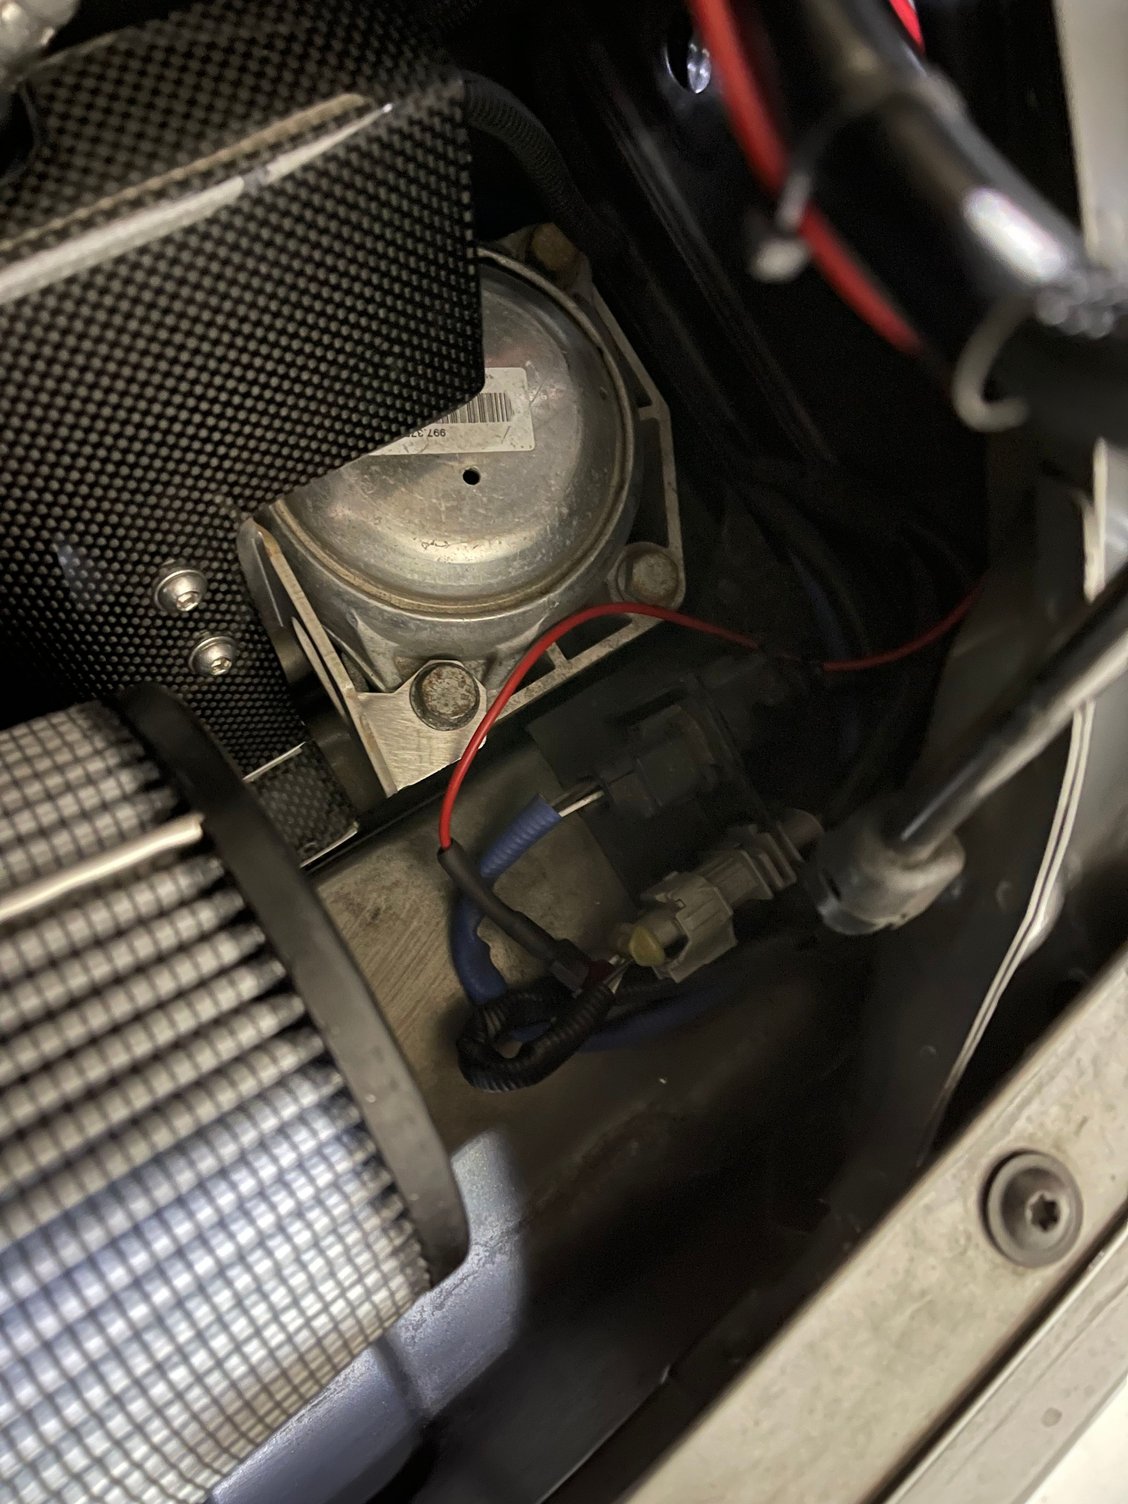
Once you are sure it is all working, put the interior panel back in place. You should probably also take a look to see if you have any clearance problems with the MAF on any aftermarket intake you may use and the back of the fan. As mentioned earlier, if you are using the proper Turbo fan you can remove the back shroud for extra clearance if needed.
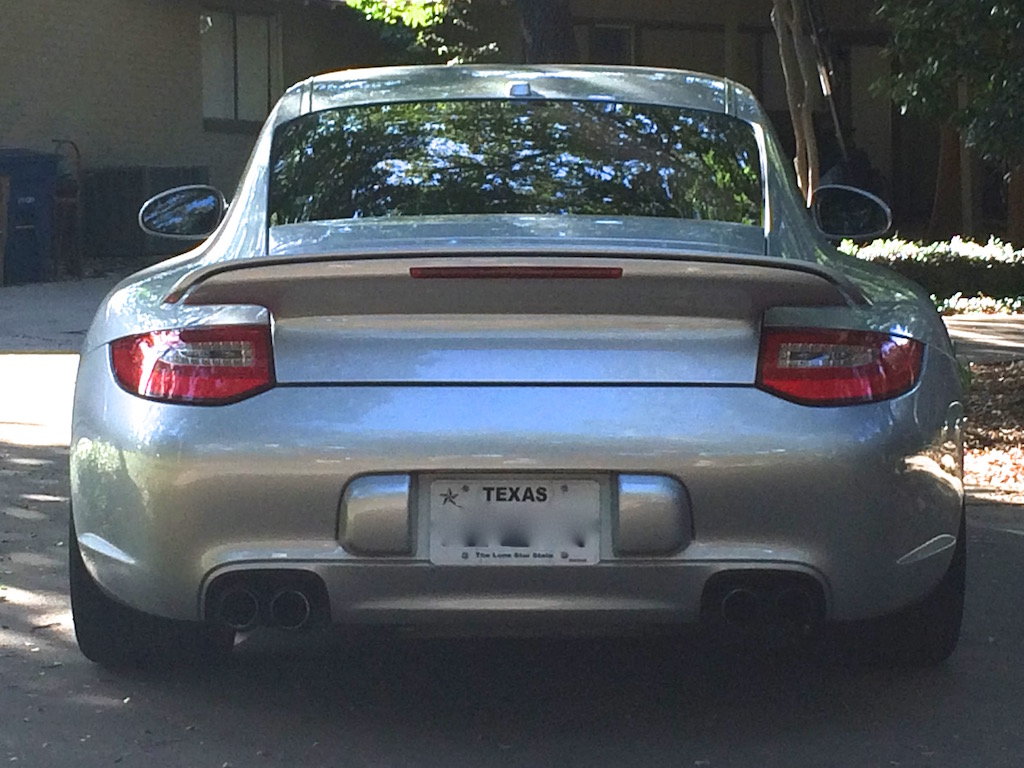
AND YOU ARE DONE! Enjoy and drive proudly. At least with this one you can see up go up and down in your mirrors.
Thanks for this write up, I am beginning the process to covert my 2009 C2 to have a turbo wing, very excited. Got a great deal from a member, but need to source a few parts, wiring harness, fan, brake light, and some other small parts, but very excited.
Thanks for this write up, I am beginning the process to covert my 2009 C2 to have a turbo wing, very excited. Got a great deal from a member, but need to source a few parts, wiring harness, fan, brake light, and some other small parts, but very excited.
I'm glad to see that this thread is being helpful. I have no doubt you'll really enjoy the look!
Please post photos when you are done. Good luck!
How do I remove the electrical connector from the hydraulic cylinder? My harness was cut, so I bought the replacement harness, but before I go pulling and prying, at what looks like a complicated connector, how does it come out? I got the cover off, and see the two connectors going into the cylinder. I suppose they really are position sensors, right.
How do I remove the electrical connector from the hydraulic cylinder? My harness was cut, so I bought the replacement harness, but before I go pulling and prying, at what looks like a complicated connector, how does it come out? I got the cover off, and see the two connectors going into the cylinder. I suppose they really are position sensors, right.
Yeah, those are the switches that allow the car to tell when the wing is either fully extended or fully retracted. I really don't recall any details, but I can see back in post 13 I showed a photo of the hydraulic cylinder insides and I don't see any electrical connector on the cylinder itself. I no longer have the car to look at for reference.
Did the harness come with new switches on the wires? If so, in the photos I can see screws holding the switches in place and maybe you just need to replace those as well? I really don't know.
If worse comes to worse, you might have to consider splicing the new harness ends to the wires coming out of the cylinders being sure to match wire colors.
Getting ready to do this on my 2009, my hydraulics are dead so going to eRams (RennKit), and a FabSpeed y-pipe, has anyone tested out this fitment on a 09-12 model? RennKit warns it may not fit, curious if anyone here has tried it with success (or failure)...?
Can�t believe I bumped into this thread. Really, really like your GT4 and I still have the 911 I bought from you back in July 2016. Been a great car with about zero issues but for a new battery a couple of years ago. Not quite to 60k miles yet. I do have one small issue just popped up. Seem to have lost com between the remote and PSE you installed. Thinking might just hardware so in parallel with Sport & Sport + toggle.
Excellent DIY w/great photos. I'm a boring stock guy but going to put a wing on just so I can follow along.
Really well done and so great to have such detailed photos telling the story
Can’t believe I bumped into this thread. Really, really like your GT4 and I still have the 911 I bought from you back in July 2016. Been a great car with about zero issues but for a new battery a couple of years ago. Not quite to 60k miles yet. I do have one small issue just popped up. Seem to have lost com between the remote and PSE you installed. Thinking might just hardware so in parallel with Sport & Sport + toggle.
Hey! It's wonderful to hear from you and I'm so glad you're still enjoying that beauty! I hope you get the exhaust switch sorted out soon and have many more fun miles.
Thanks for the compliments on the new car... I guess it's obvious I have a thing for wings
Originally Posted by groovzilla
Excellent DIY w/great photos. I'm a boring stock guy but going to put a wing on just so I can follow along.
Really well done and so great to have such detailed photos telling the story
Thanks! Please post any updates/improvement you discover along the way. It's been fun hearing from those that have done this. Keep it up!
Thanks for this, I finally did it to my car, overall the install was very smooth, and I had to covert to eRams from RennKit because my hydraulics were dead and their electric kit was a perfect solution.
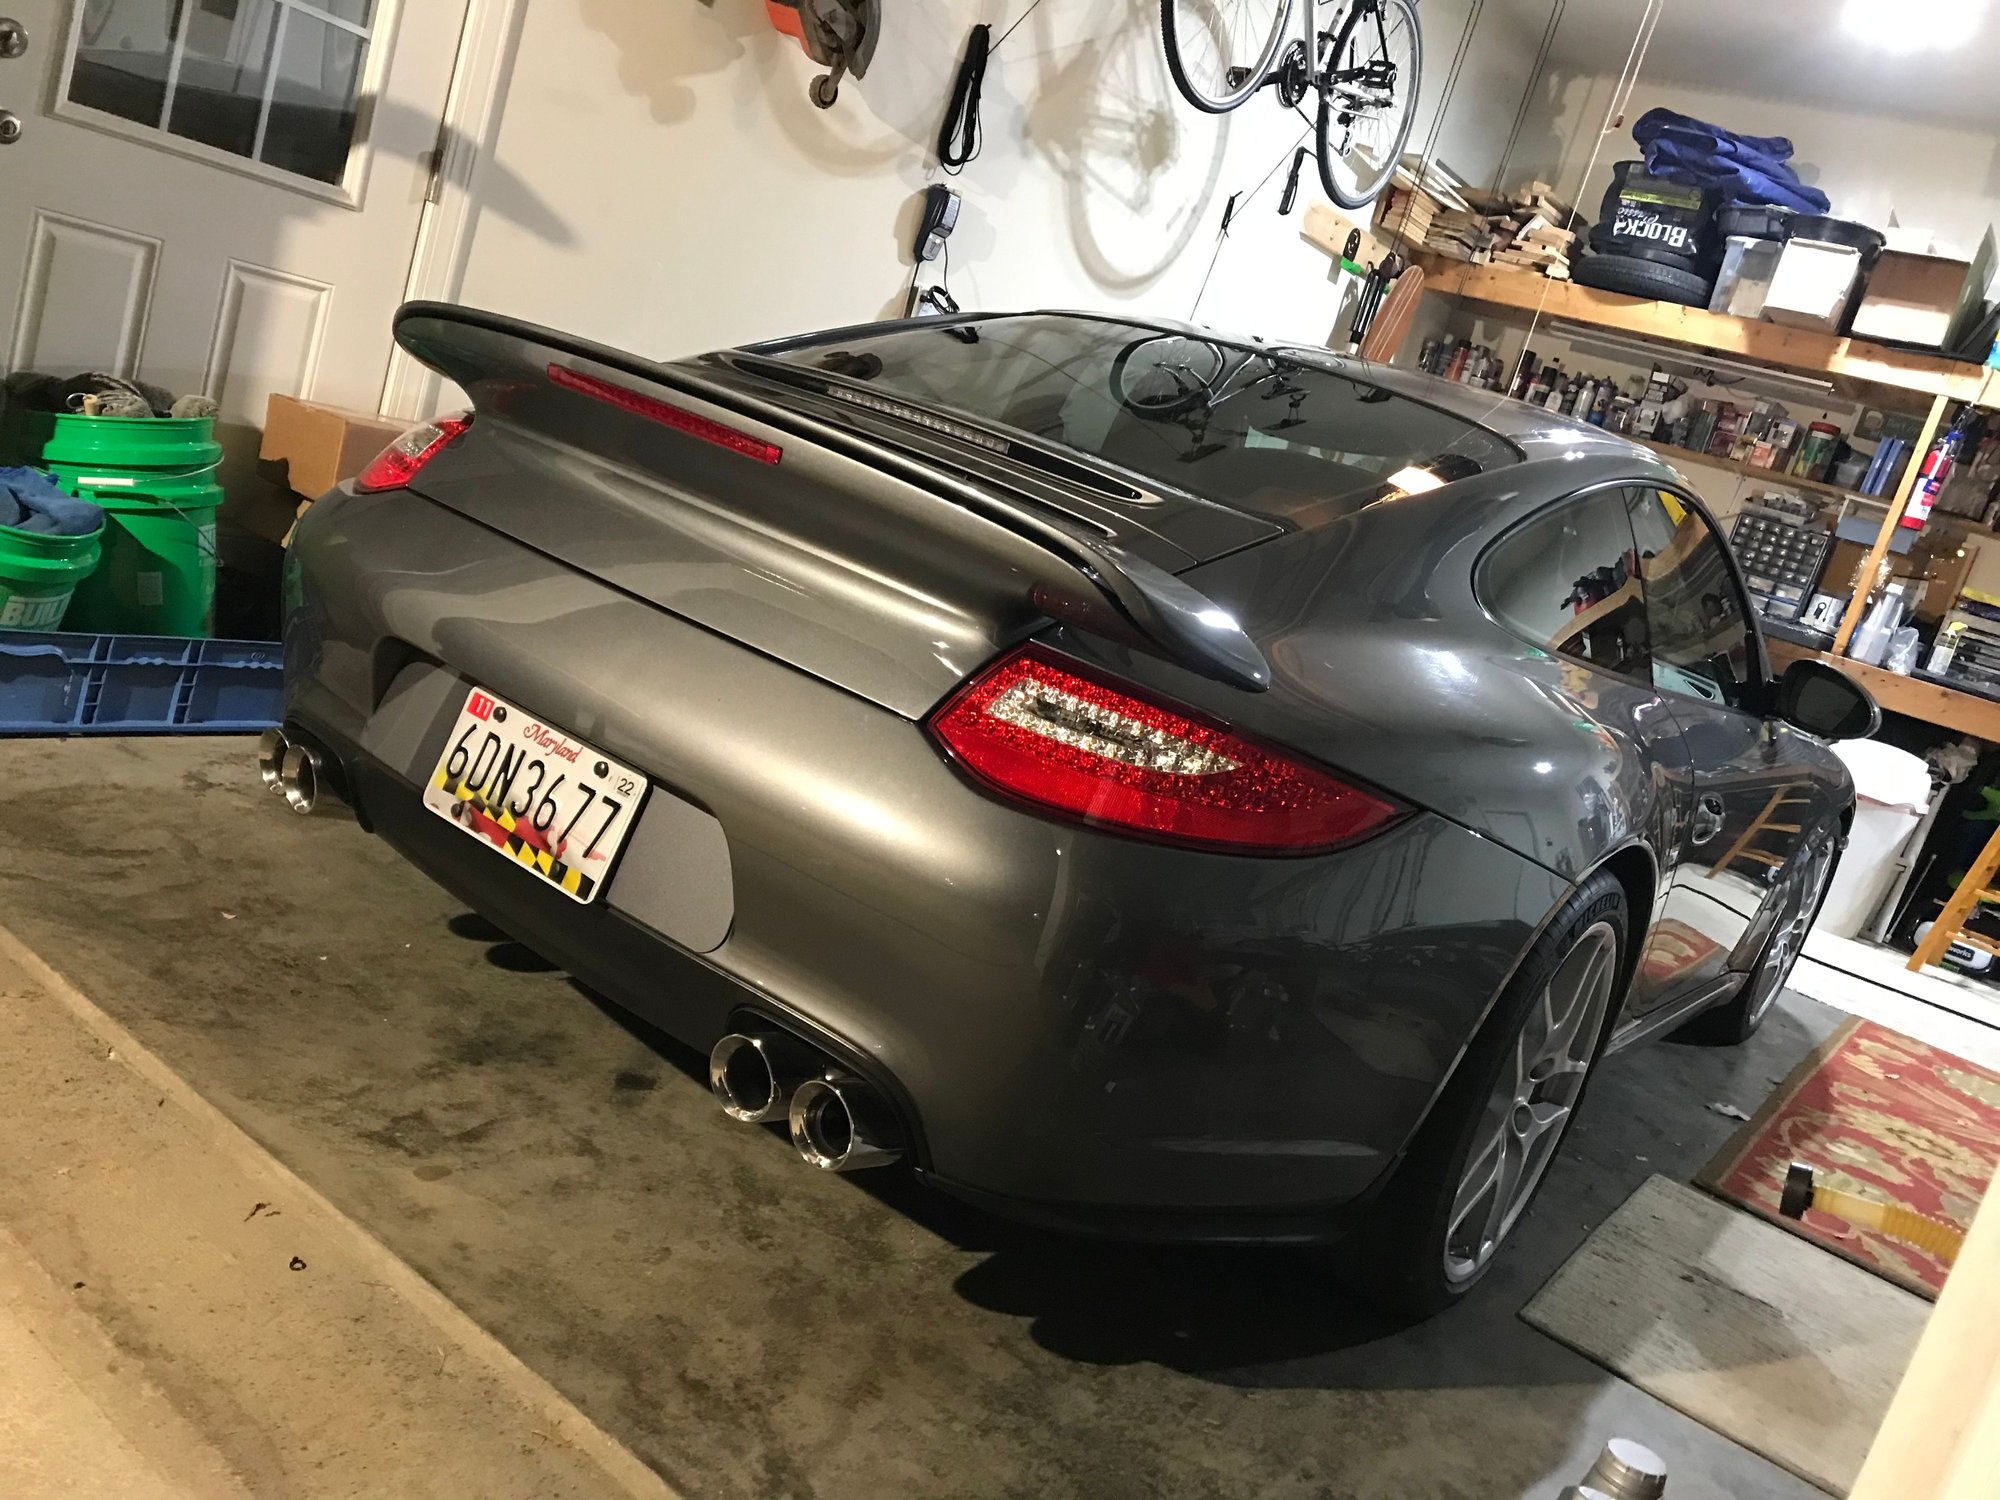
Love the look, adds a new presence to the car for sure, new emblem will go on soon, waiting for the paint to cure.
Honestly getting it painted was the most stressful part as I don�t have a lot of local places and repainting is never perfect. Anyway still love it.


 10-21-2015 | 10:31 AM