

Fister Exhaust Install
 02-23-2015, 09:58 AM
#16
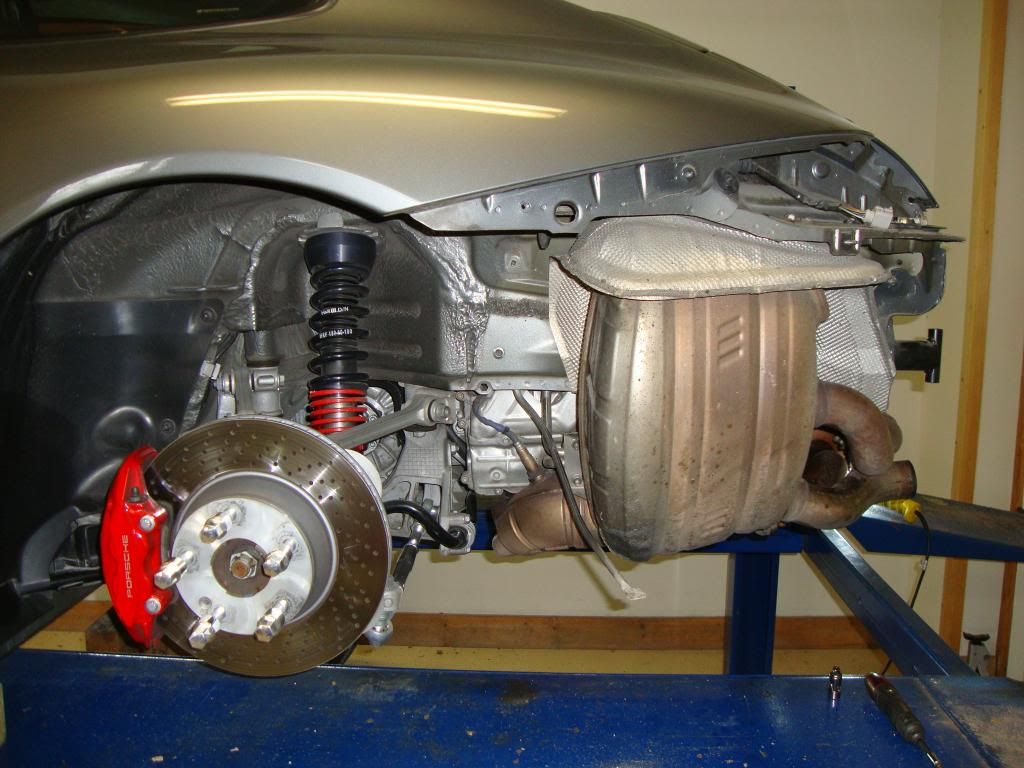
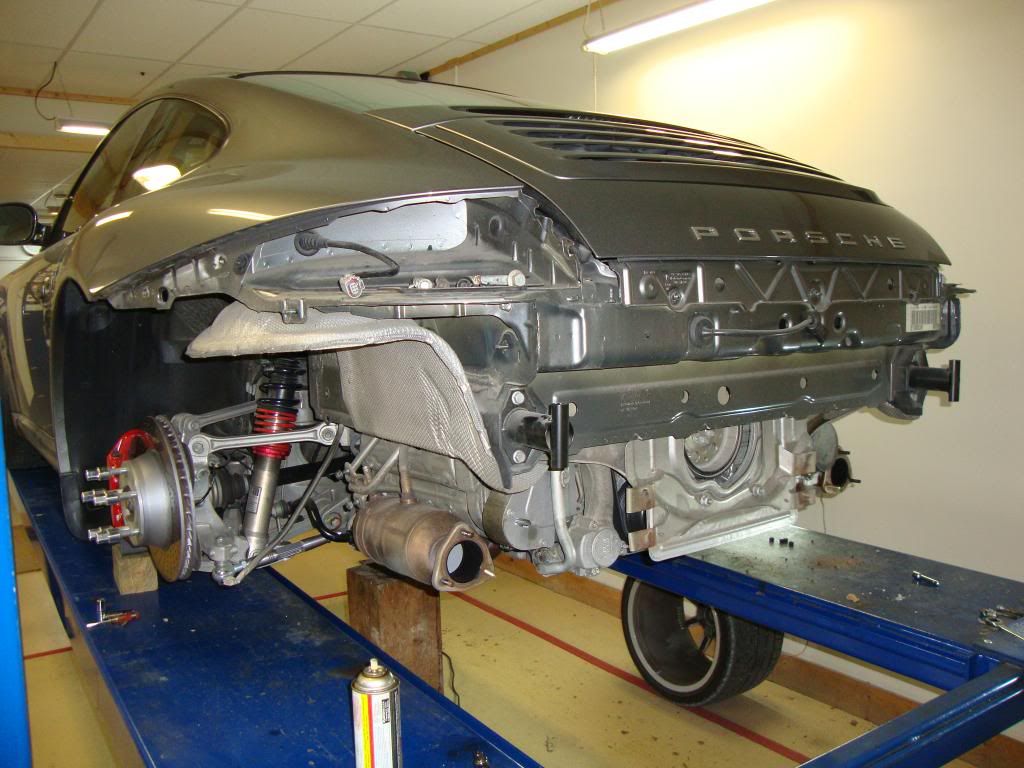
The rear bumper does not need to be removed at all. you are able to manipulate the side cans quite easily to get them out once the side brace for the bumper cover is removed. The side brace looks like an aluminum rod that supports the side of the bumper cover, just 2 screws to remove it.
 02-23-2015, 10:14 AM
#17
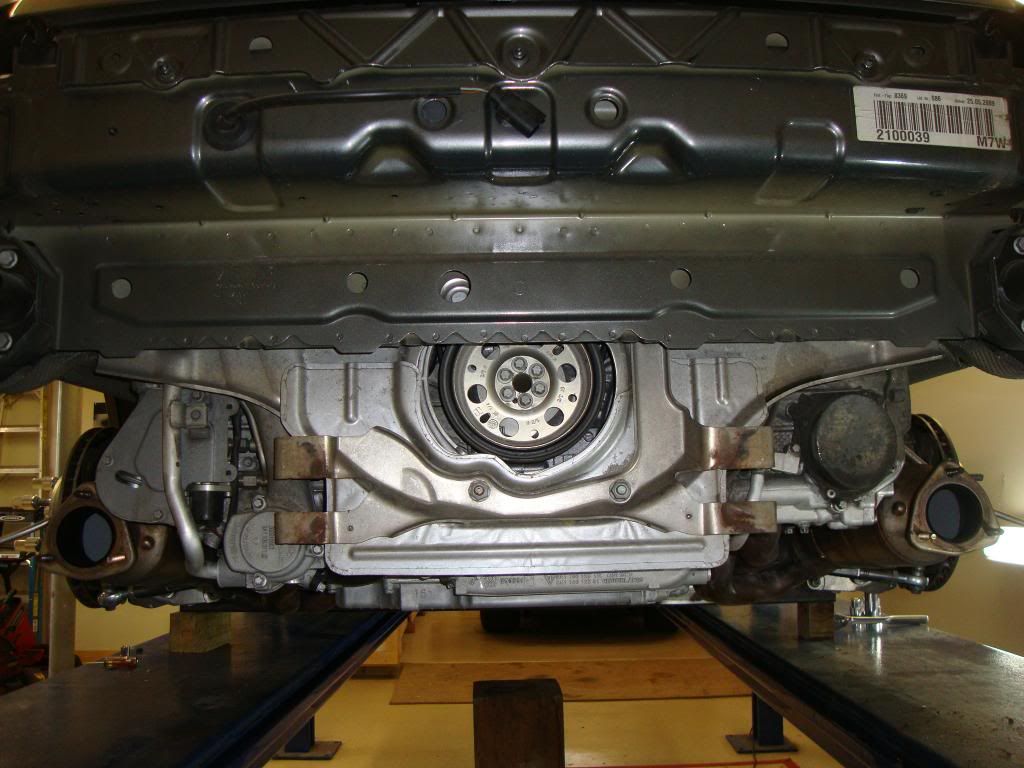
The rear bumper is so extremely easy to remove, just a handful of screws and a couple of electrical connections. Once removed the mufflers are right in front of your face, no contorting or special wrenches needed. Also, it is highly probable that you will twist and break a couple of the studs that hold the muffler to the cats. No big deal with the bumper off, just use a drift to hammer the broken studs out, replace with bolts.
Pictured is a 997.2, if your dealing with a 997.1, then the muffler/cat arrangement is totally different and I do not think you have to deal with studs, just clamps.
Pictured is a 997.2, if your dealing with a 997.1, then the muffler/cat arrangement is totally different and I do not think you have to deal with studs, just clamps.


 02-23-2015, 12:28 PM
#19
 02-23-2015, 07:45 PM
#20
The rear bumper is so extremely easy to remove, just a handful of screws and a couple of electrical connections. Once removed the mufflers are right in front of your face, no contorting or special wrenches needed. Also, it is highly probable that you will twist and break a couple of the studs that hold the muffler to the cats. No big deal with the bumper off, just use a drift to hammer the broken studs out, replace with bolts.
Pictured is a 997.2, if your dealing with a 997.1, then the muffler/cat arrangement is totally different and I do not think you have to deal with studs, just clamps.
Pictured is a 997.2, if your dealing with a 997.1, then the muffler/cat arrangement is totally different and I do not think you have to deal with studs, just clamps.
This, exactly. The bumper comes off very easily. Once you know how it's attached, it could take as little as five minutes to remove. (I've had to remove my bumpers a few times now, and it's really not a big deal; it gets easier each time.) For anyone who wishes to do the install themselves, just take off the bumper and everything else is super easy.
 02-23-2015, 08:18 PM
#21
Burning Brakes
You're right - the bumper came off in less than 10 minutes. It honestly took me longer to get the lights unplugged than anything else.
BUT FOR THE LOVE OF GAWD - how do you get to the 2 13mm nuts on the back of the bracket to release the muffler? I have a flex head extension and its going REALLY slowly - I mean...this is insane. Is a socket not the right answer?
BUT FOR THE LOVE OF GAWD - how do you get to the 2 13mm nuts on the back of the bracket to release the muffler? I have a flex head extension and its going REALLY slowly - I mean...this is insane. Is a socket not the right answer?
02-23-2015, 08:37 PM
#22
Rennlist Member
I just received back my Fister's back. Very cool sound. As others have said; best mod for the buck ever.
While removing the rear wheels and bumper does provide more room it is not necessary. If you have access to a lift pulling the wheels is easy and the bumper is 15 minutes tops.
While removing the rear wheels and bumper does provide more room it is not necessary. If you have access to a lift pulling the wheels is easy and the bumper is 15 minutes tops.
02-23-2015, 10:50 PM
#23
Burning Brakes
I think if I had the car on a lift - or at least on stands - and removing the wheels would give me the space I need. It's absurd trying to get in there to the back of the bracket.
02-24-2015, 12:09 AM
#24
Burning Brakes
Nope... just good ole fashion grunt work and having a QUALITY flex head on a ratchet works - and about a 12" extension. Takes some time and a bit of patience - but the second side came off in 1/3rd of the time that the first did. I can see how someone with some experience would do this rather quickly.
Of course - having not having to lay down under the car would help too.
Of course - having not having to lay down under the car would help too.
 02-26-2015, 02:43 AM
#26
Rennlist Member
I had to remove the bumper. I tried really hard to not have to, but there just wasn't the space (or I don't have the tools/skills)
Here is my thread with install notes and links to the instructions I used.
https://rennlist.com/forums/997-foru...all-notes.html
Here is my thread with install notes and links to the instructions I used.
https://rennlist.com/forums/997-foru...all-notes.html
02-26-2015, 11:04 AM
#28
Burning Brakes
I did not - simply because it added another week plus to the lead time and I'm impatient. I spoke with them about it. It definitely reduces heat and protects the cans. However - aside from the additional time - I don't drive the car in bad weather, and don't live in a place where rust is an issue (like the salted roads up north). I also figured that the stock cans didn't have ceramic coating - so there is no NEED for these to...
If they were on the shelf - I would have but I'm impatient and I have an autocross coming up that I wanted them for.
If they were on the shelf - I would have but I'm impatient and I have an autocross coming up that I wanted them for.
02-26-2015, 11:54 AM
#29
Three Wheelin'
 02-26-2015, 12:17 PM
#30
Same for mine, but I will confess only due to a lack of patience. Darin had a set in his shop that were coated and I drove over and did a swap for mine. I did not remove the bumper (wheels and bumper brace only) but I'll admit that the upper muffler nut was a trip on the driver's side. I picked up a ratchet handle from Harbor Freight that had a head that could be rotated around that worked wonders. Posted a picture of this on my 40K service, but can't find the picture in my phone right now. I'll take another picture and post it later.