When you click on links to various merchants on this site and make a purchase, this can result in this site earning a commission. Affiliate programs and affiliations include, but are not limited to, the eBay Partner Network.
I thought I'd share how I replaced my starter. My car was suffering from sluggish hot starts. New battery and new starter/alternator cable did not fix the problem. Only thing left was to replace the starter. Took about 2.5 hours start to finish. I was amazed at how quick the car starts now. Since I've owned the car it has never started this good and hot starts are no longer an issue.
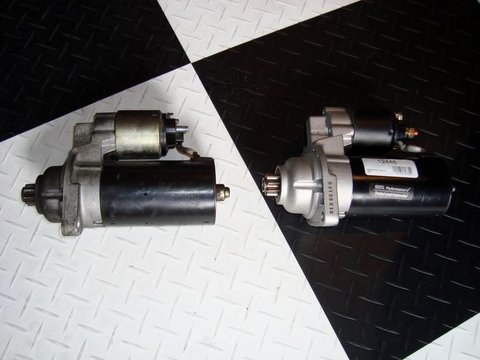
New starter. Part# 12446. This is a remanufactured starter that I purchased from O'Reilly's. Cost was $145.99 + $50 core charge.
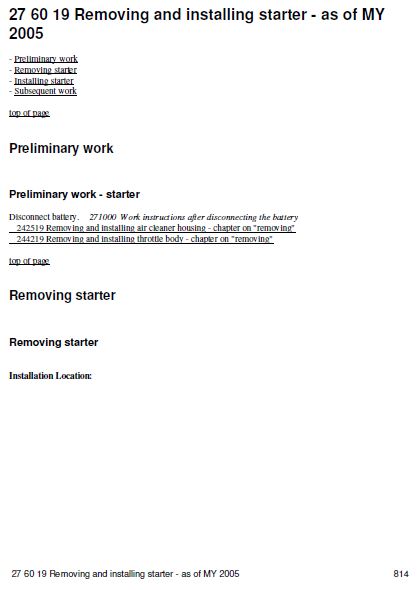
1. Disconnect battery. Protect yourself. No picture necessary.
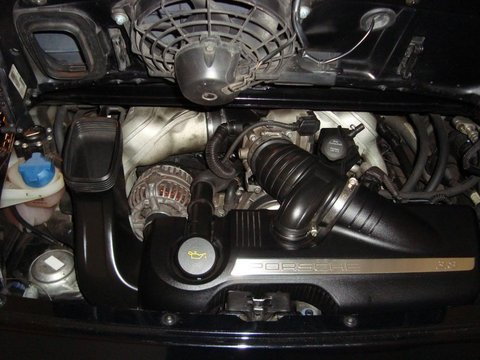
2. Remove air box. There are plenty of DIY instructions on how to do this. It should be second nature by now.
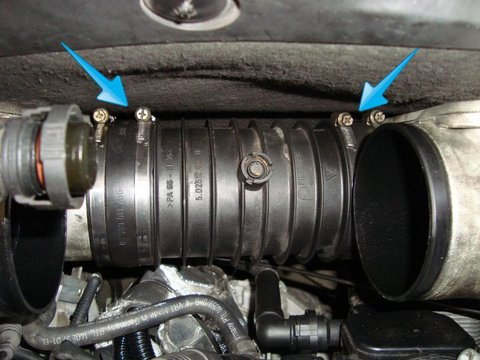
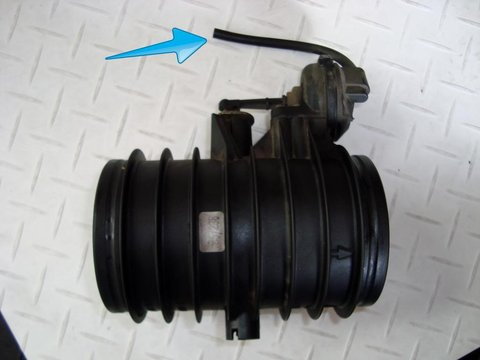
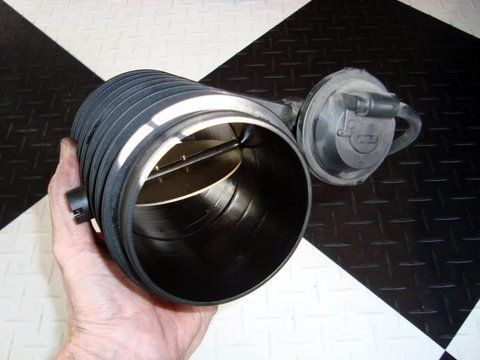
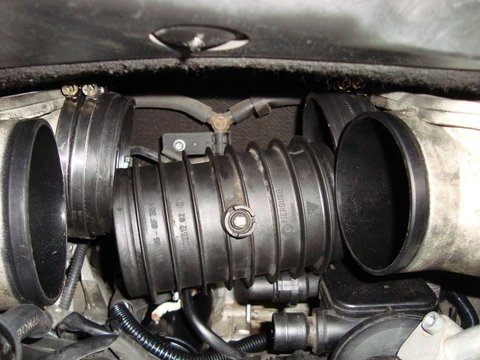
4. Remove intake plenum tube. Disconnect air hose. Loosen the metal clamps around the rubber tubes almost completely using a 7mm socket. Slide the rubber tubes off the plenum as far as they will go then pull the plenum out. Remove rubber tubes and clamps.
5. Remove tuning pipe. Again, loosen the metal clamps around the rubber tubes almost completely and slide the rubber hoses off the pipe as far as you can get them. I use a broad tip screwdriver to help me get them started. Before removing the tuning pipe completely, disconnect the small vacuum line on the back of the pipe. Remove rubber tubes and clamps.
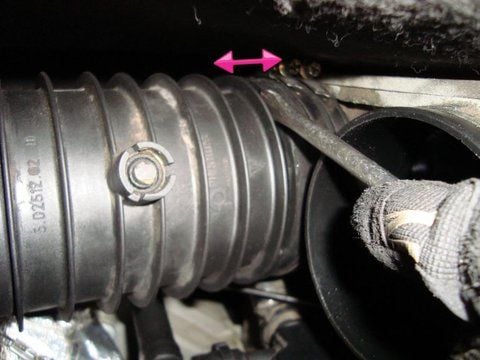
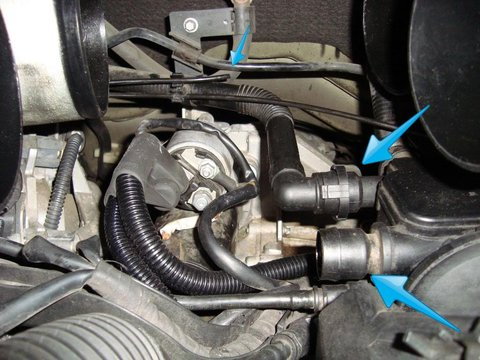
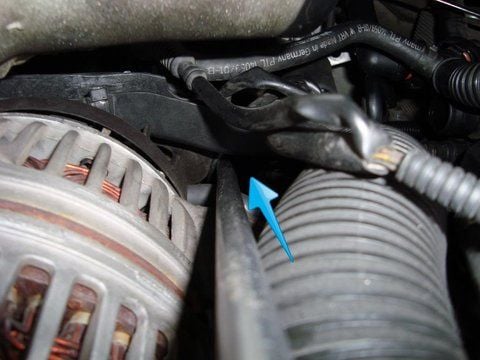
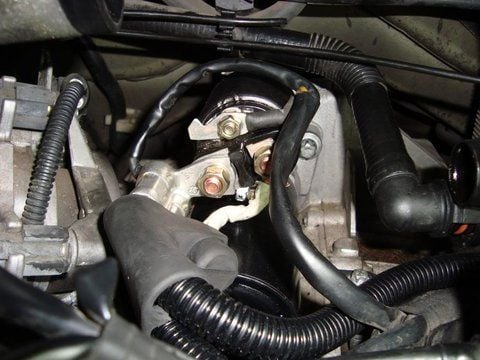
6. Disconnect AOS hoses and move them aside to make room for your hands and tools. In this picture you can also see the small vacuum line that connects to the tuning pipe.
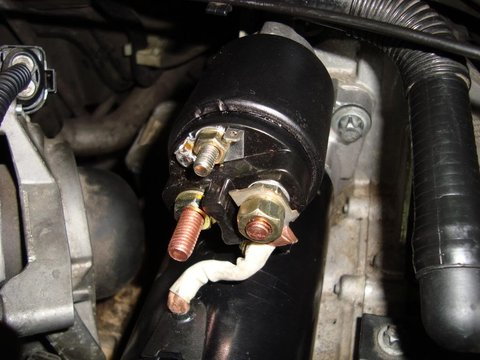
7. Disconnect starter electrical leads. 13mm and 10mm socket.
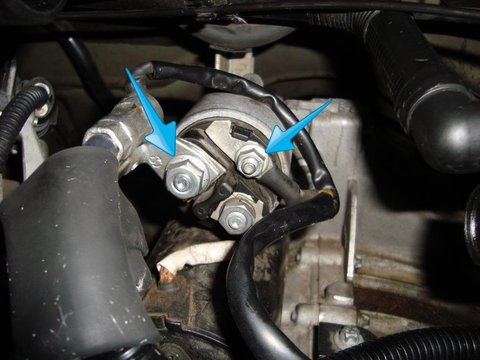
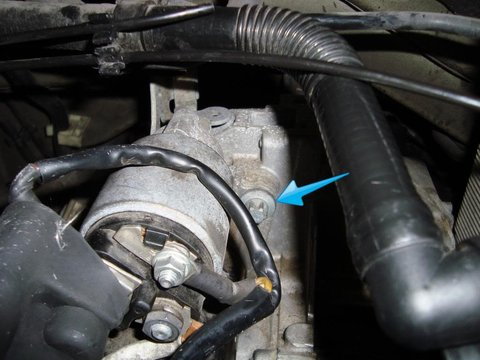
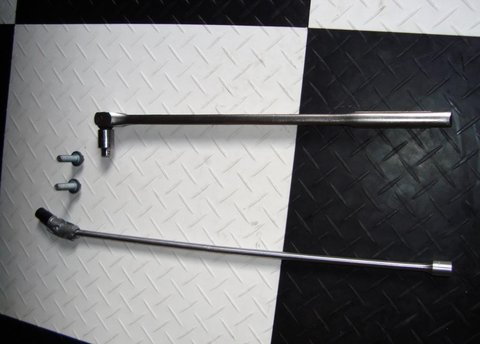
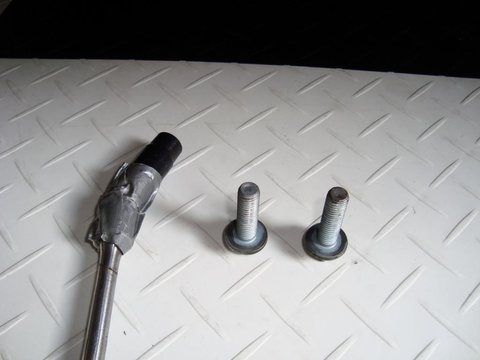
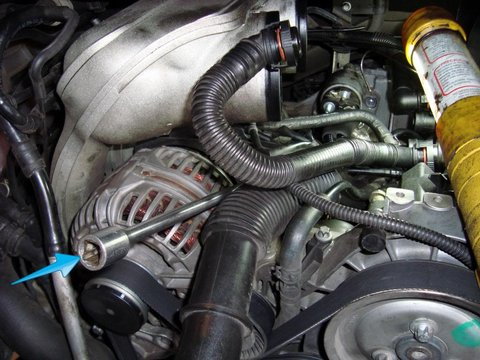
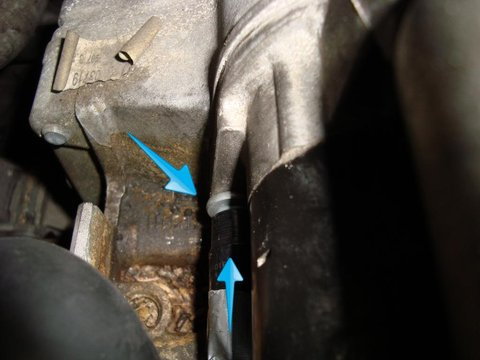
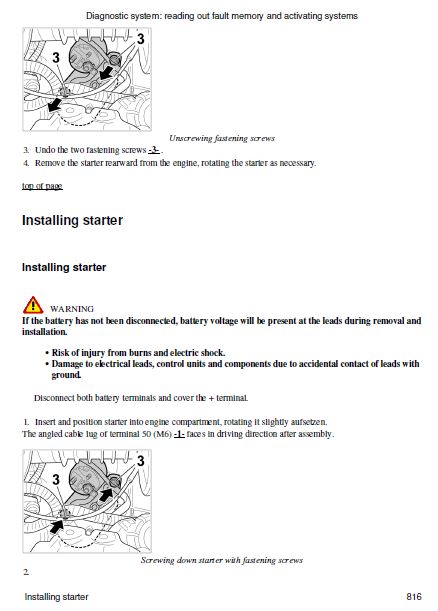
8. Remove starter mount bolts. There are (2) E-14 Torx bolts, one on top right and one on the bottom left. I used a 24-inch extension and a universal joint with some tape to position the socket the way I needed. I used a breaker bar to loosen the bolts because the initial break away torque was more than I could loosen with just a common ratchet. For the bottom mount bolt, I fed the extension through at a lower angle and it was just right to get on the bolt head and remove it. A little tape on the universal keeps it at the right angle you need.
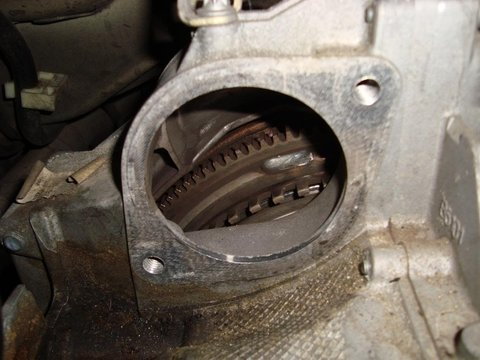
9. Remove starter.
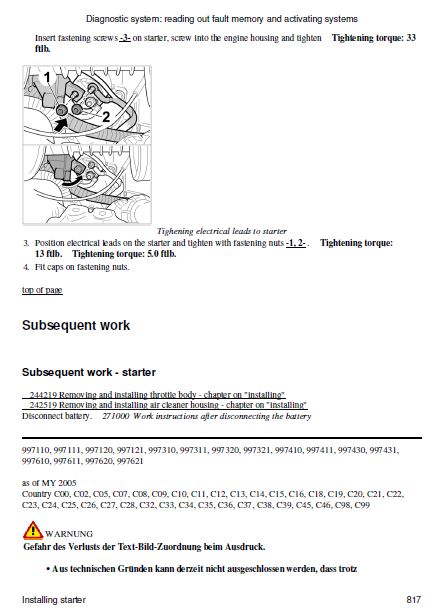
10. Install new starter and torque to 33 ft-lbs according to workshop manual.
11. Reconnect leads. Make sure they are clean and free of corrosion. I use a small wire brush to make them shiny and clean.
12. Reconnect AOS hoses.
13. Reinstall tuning pipe. Push rubber tubes onto intake manifold and push them as far as they will go. Loosely install metal clamps. I prefer the clamp hardware on top so that I can get my fingers and a socket on them easier. Put tuning pipe in place but don’t install it into position just yet. The vacuum diaphragm on the backside of the tuning pipe will be positioned on the right side. Reconnect small vacuum line behind tuning pipe. You can reach through and grab the vacuum lines with two hands over the top and behind the tube. I found it easier to grab if you unclip the plastic vacuum line from the engine and with both hands you can slide the plastic and rubber lines together. Verify that the yellow witness mark on the plastic line is covered to ensure a good connection. Now fit the tuning pipe into place. Slide rubber tubes over tuning pipe. Verify that you can see and feel the location tabs on the intake manifold and the tuning pipe to ensure the tubes are centered properly. Tighten the metal clamps with a 7mm socket.
14. Reinstall air intake plenum. As with the tuning tube, push the rubber tubes onto the intake manifold and loosely install the metal clamps. Install the plenum. Ensure the rubber tubes mate with the plenum and that you can see and feel the location tabs to verify they are centered properly. Tighten clamps partially enough that the plenum can rotate up and down.
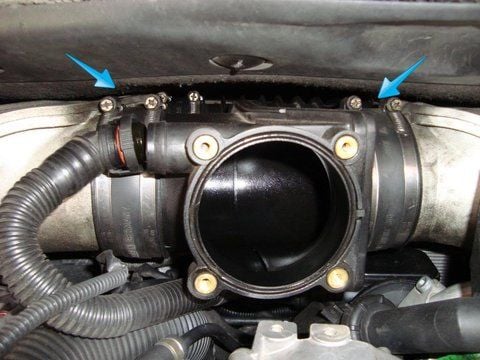
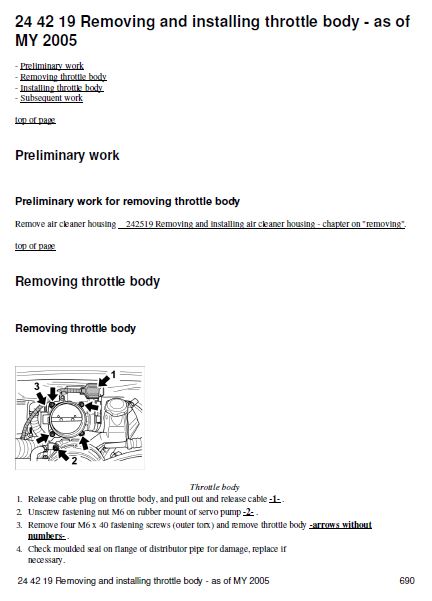
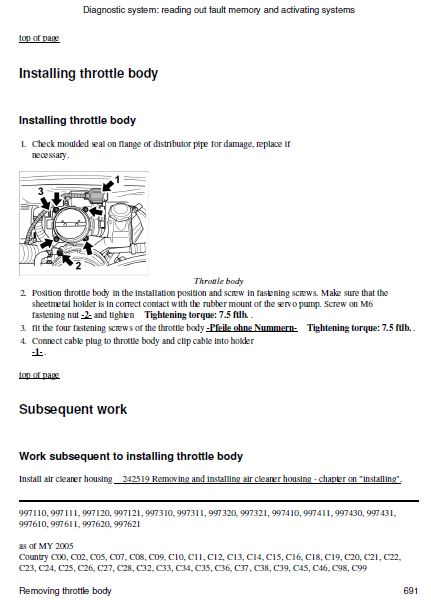
15. Reinstall throttle body. Line up the lower left mounting tab with the rubber bumper. When the throttle body is in the correct position and all four mount bolts are tightened, tighten the intake plenum rubber tubes metal clamps. Reconnect air hose and electrical connector.
16. Reinstall air box.
17. Reconnect battery.
Last edited by Devil Boy; Jul 26, 2017 at 04:46 PM.
Reason: Photobucket sucks
Thanks a bunch for taking the time to write up such a thorough DIY. This should definitely be posted in the DIY sticky.
I am shocked that you were able to find a replacement starter for a Porsche 997 at O'Reilly's. Never would have even considered it. Makes me wonder what other parts are available there.
I was surprised too. If you go to their website and enter your car info they do have a selection of OEM replacement parts. The starter I had to order online (free shipping UPS) and I can take the old one back to any of their stores for the core charge return. They even have filters and certain fluids like Pentosin but you have to ask the counter because they typically don't have those items on the shelf and the website will let you know what stores in your area carry what you need in stock.
It really isn't that hard if you have the right tools. I've gotten a lot of tips and information from this forum so I wanted to pay it forward with something that hadn't been written up yet. Hope it helps others.


