When you click on links to various merchants on this site and make a purchase, this can result in this site earning a commission. Affiliate programs and affiliations include, but are not limited to, the eBay Partner Network.
Thanks for the response Kmetros. I poked around in that area and believe I found what I needed it looks like it's a change over valve and it's close to where you pointed out. I was able to plug the line into that tube but my brakes still seem stiff. If I rest my foot on the pedal it will very slowly start to loosen up, then upon use it will stiffen again. Brakes seem to work sometime while driving too. Maybe it's still a vacuum leak?
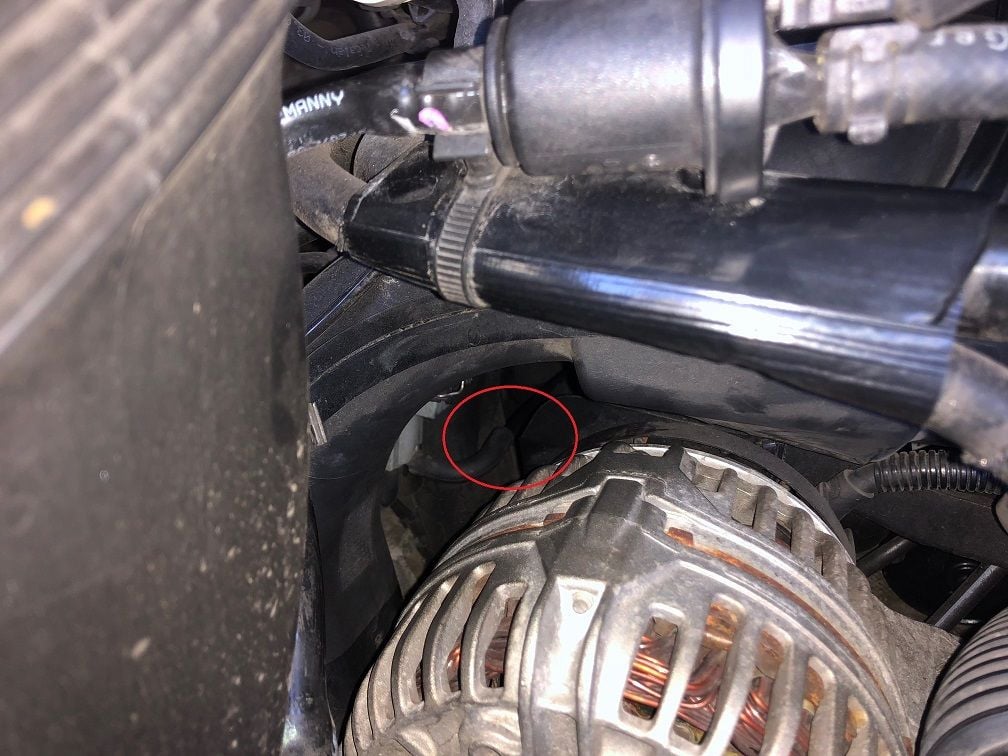
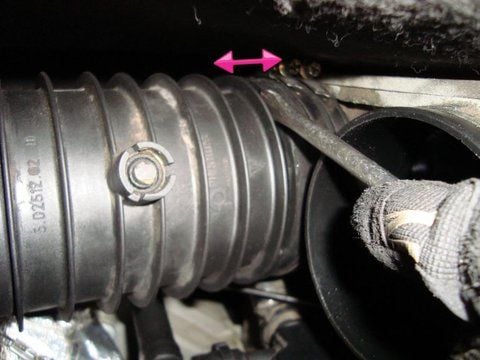
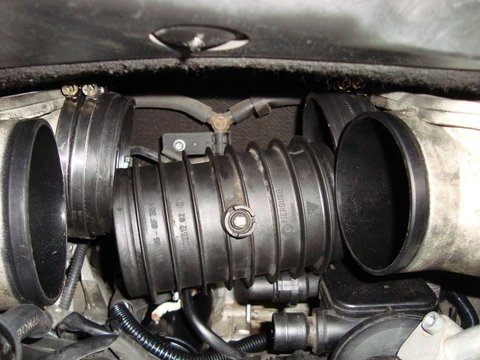
I plugged the line into the red circle pictured below. The big thing blocking the left side of the pic is the air box snorkel.
Thanks for the response Kmetros. I poked around in that area and believe I found what I needed it looks like it's a change over valve and it's close to where you pointed out. I was able to plug the line into that tube but my brakes still seem stiff. If I rest my foot on the pedal it will very slowly start to loosen up, then upon use it will stiffen again. Brakes seem to work sometime while driving too. Maybe it's still a vacuum leak?
I plugged the line into the red circle pictured below. The big thing blocking the left side of the pic is the air box snorkel.
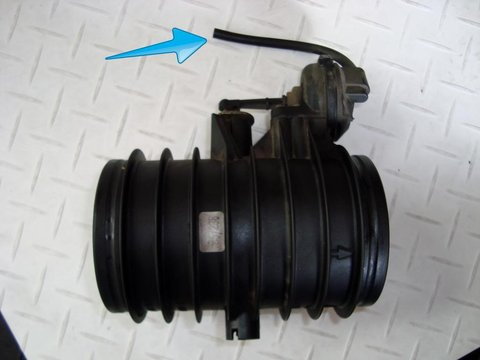
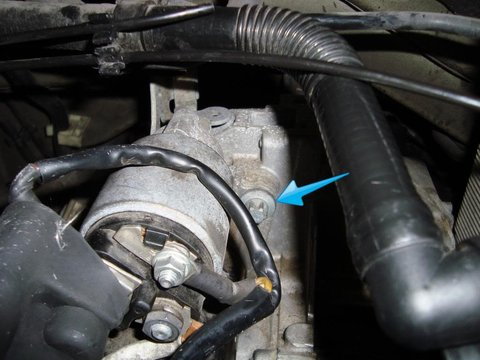
I think you plugged it into the right place, but I was expecting to see it routed as it is in the picture below (where the red arrow is pointing) - again, on the outside of the intake manifold. It looks like you're connector has been turned around and the vacuum tube is run from the inside. Can you tell if the Y on the other side is connected? Do you know if the butterfly in the resonance tube works fine now.? I'm still struggling to understand the purpose of the change over valve, but from what I can tell it has nothing to do with brakes?
I'd research the routing of the vacuum tubes for the brakes next to see where else something may have come loose.
I did the starter replacement a couple days ago, never in my cars life have I seen it start so quickly. This diy was a big help my only deviation was I removed my alternator to get easy access to the bottom starter bolt. Also, there was no way I could get my hand back there to plug the resonator tube vacuum line back in. Being as when I was removing things I found it unplugged I’m assuming no harm no foul. I’ve had the car for over 6 years so I’m pretty sure I have no clue how the engine behaves with that vacuum line plugged in
Problem solved. One of my vacuum lines for the brake was damaged, maybe from me rummaging around with the tuning pipe. My local shop just replaced the hose and only billed me an hour of work plus $18 for the part. Lucked out that one.
Like Kmetros mentioned, that line has nothing to do with the brakes and I'm pretty sure that line was disconnected before on my car as well like frederickcook87 experienced. But now it's in the correct spot!
I also just replaced my starter due to slow starts most of the time (got even worse when hot). My Indy also recommended the starter replacement over any other cause and he is yet to steer me wrong.
I did follow the advice of Yves on the other thread and unbolted and moved the alternator up about an inch to get more access to the lower starter bolt. I also realized that you can just see the lower bolt but more importantly you can get your right hand in there to make sure the socket is aligned as well as retrieving and replacing both bolts.
One other point - the vacuum line was very tight on the back of the resonance tube so I just left it connected and set the resonance tube off to the driver's side of the engine bay. There was plenty of slack to do this.
I went back with a new Bosch OEM starter as I did read about a few failures with aftermarket, rebuilt units. The starter was $197 on Amazon with PRIME shipping.
And yes, it completely resolved the slow start issue !!!
Ordered a new Bosch starter from eBay and followed this thread and my 997 starts like it never has before!!!!, so stoked. Thank you!
just a few tips on the hot start issue
if you power distribution pin is not corroded, it�s probably not the problem. If the boot on the alternator cable isn�t melted/deteriorated then that�s probably not it either. The car practically starts before I finish turning the key lol
if you power distribution pin is not corroded, it�s probably not the problem.
And neither is the cable running from the junction joint at the transmission to the alternator and starter if they are not corroded. I wasted my time installing one of them since it was the "fix" often written about.
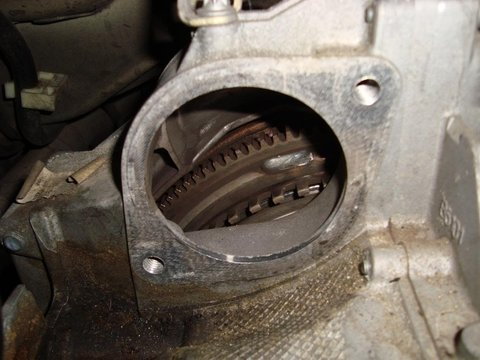
The issue is likely the starter and not due to wear but due to dirt and grease.
When the commutator looks like this, little wonder it won't start, especially when hot...
The starter works like new when the commutator looks like this and the starter is totally cleaned up...
A big thanks for making this post as just helped me complete the replacement! As mentioned above I also did not remove the vacuum line on the tuning pipe as you can get enough slack to have it well out the way on the left side of the engine bay. Also was able to reach my right hand down to the bottom starter bolt to help guide and remove with the aid of the long extension. One issue I had is when I was done I started the car and it immediately died, if I gave it gas it ran like crap and then died. after re-doing my work a couple of times (fun stuff) I must of had a gap on the tuning pipe letting air in so take your time and make sure it is completely sealed, I thought I did but must of been just a fraction off. Good news is I can now do all that work in about a third that time that it took me first go around - lesson learned.
Great write up and thank you! Just replaced my starter.... took about 2 hours. I too did not remove the vac line off the back of the tuning pipe, I tried, but it wouldn�t come loose.... my biggest issue was getting the throttle body pipe back on... I have no idea why.
Anyway, car fired up strong and the turnover sounded much better. Good job to do.
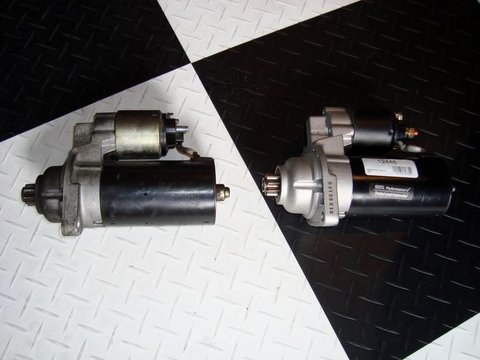
I thought I'd share how I replaced my starter. My car was suffering from sluggish hot starts. New battery and new starter/alternator cable did not fix the problem. Only thing left was to replace the starter. Took about 2.5 hours start to finish. I was amazed at how quick the car starts now. Since I've owned the car it has never started this good and hot starts are no longer an issue.
New starter. Part# 12446. This is a remanufactured starter that I purchased from O'Reilly's. Cost was $145.99 + $50 core charge.
1. Disconnect battery. Protect yourself. No picture necessary.
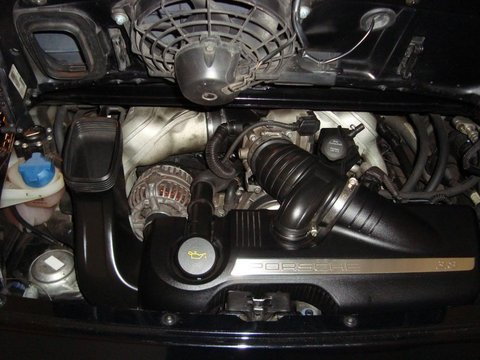
2. Remove air box. There are plenty of DIY instructions on how to do this. It should be second nature by now.
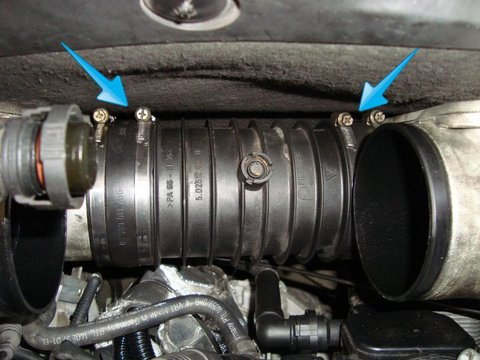
4. Remove intake plenum tube. Disconnect air hose. Loosen the metal clamps around the rubber tubes almost completely using a 7mm socket. Slide the rubber tubes off the plenum as far as they will go then pull the plenum out. Remove rubber tubes and clamps.
5. Remove tuning pipe. Again, loosen the metal clamps around the rubber tubes almost completely and slide the rubber hoses off the pipe as far as you can get them. I use a broad tip screwdriver to help me get them started. Before removing the tuning pipe completely, disconnect the small vacuum line on the back of the pipe. Remove rubber tubes and clamps.
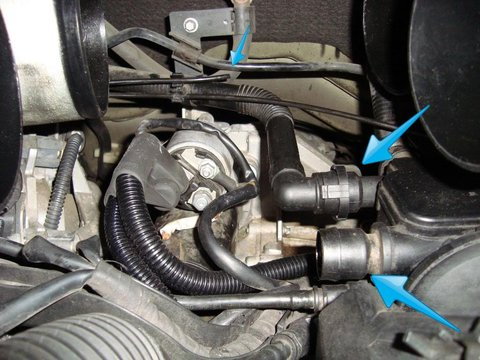
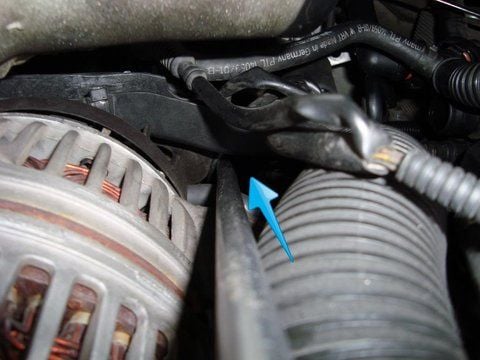
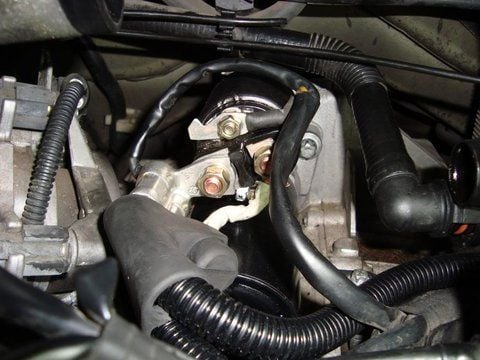
6. Disconnect AOS hoses and move them aside to make room for your hands and tools. In this picture you can also see the small vacuum line that connects to the tuning pipe.
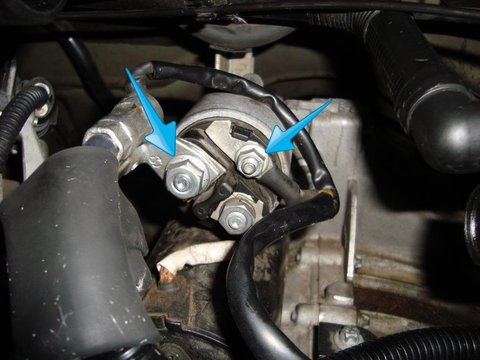
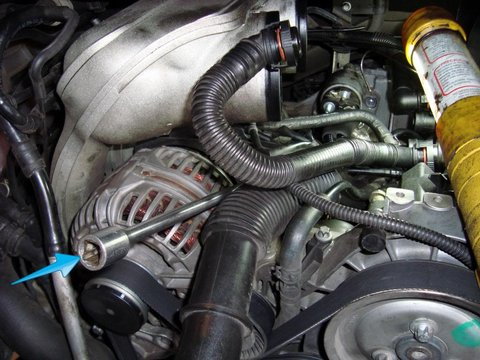
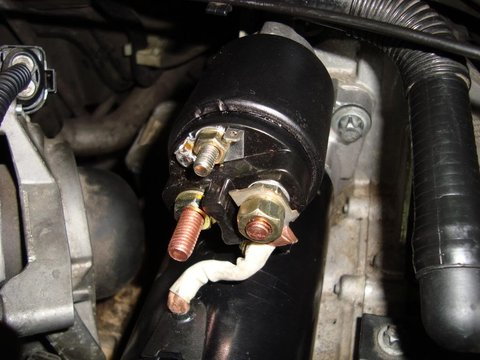
7. Disconnect starter electrical leads. 13mm and 10mm socket.
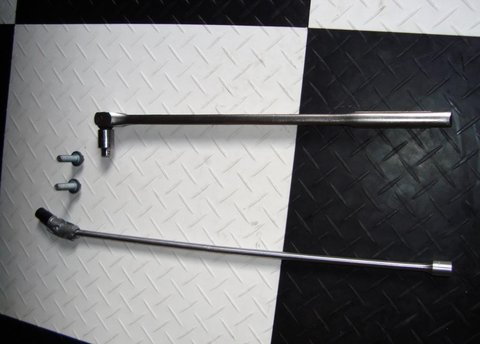
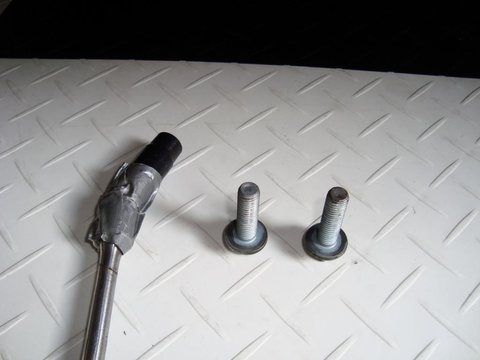
8. Remove starter mount bolts. There are (2) E-14 Torx bolts, one on top right and one on the bottom left. I used a 24-inch extension and a universal joint with some tape to position the socket the way I needed. I used a breaker bar to loosen the bolts because the initial break away torque was more than I could loosen with just a common ratchet. For the bottom mount bolt, I fed the extension through at a lower angle and it was just right to get on the bolt head and remove it. A little tape on the universal keeps it at the right angle you need.
9. Remove starter.
10. Install new starter and torque to 33 ft-lbs according to workshop manual.
11. Reconnect leads. Make sure they are clean and free of corrosion. I use a small wire brush to make them shiny and clean.
12. Reconnect AOS hoses.
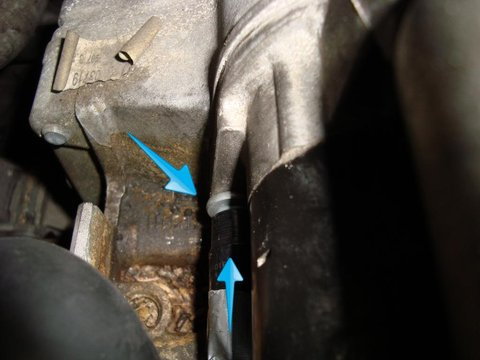
13. Reinstall tuning pipe. Push rubber tubes onto intake manifold and push them as far as they will go. Loosely install metal clamps. I prefer the clamp hardware on top so that I can get my fingers and a socket on them easier. Put tuning pipe in place but don�t install it into position just yet. The vacuum diaphragm on the backside of the tuning pipe will be positioned on the right side. Reconnect small vacuum line behind tuning pipe. You can reach through and grab the vacuum lines with two hands over the top and behind the tube. I found it easier to grab if you unclip the plastic vacuum line from the engine and with both hands you can slide the plastic and rubber lines together. Verify that the yellow witness mark on the plastic line is covered to ensure a good connection. Now fit the tuning pipe into place. Slide rubber tubes over tuning pipe. Verify that you can see and feel the location tabs on the intake manifold and the tuning pipe to ensure the tubes are centered properly. Tighten the metal clamps with a 7mm socket.
14. Reinstall air intake plenum. As with the tuning tube, push the rubber tubes onto the intake manifold and loosely install the metal clamps. Install the plenum. Ensure the rubber tubes mate with the plenum and that you can see and feel the location tabs to verify they are centered properly. Tighten clamps partially enough that the plenum can rotate up and down.
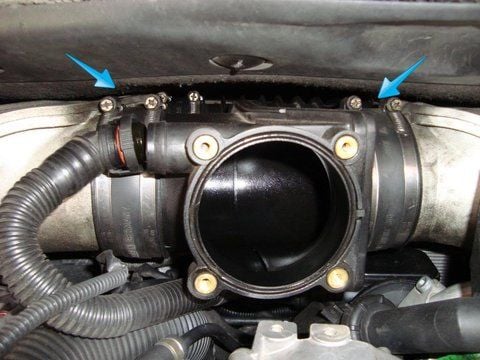
15. Reinstall throttle body. Line up the lower left mounting tab with the rubber bumper. When the throttle body is in the correct position and all four mount bolts are tightened, tighten the intake plenum rubber tubes metal clamps. Reconnect air hose and electrical connector.
16. Reinstall air box.
17. Reconnect battery.
Hi, thanks for taking the time to write the process down. Incredibly useful and clearly documented. I did make a discovery when struggling with access to the lower starter torx screw. I removed the belt idler pulley which allowed easy access to the second bolt with a straight extension. What a difference the new starter makes though!
Hi, thanks for taking the time to write the process down. Incredibly useful and clearly documented. I did make a discovery when struggling with access to the lower starter torx screw. I removed the belt idler pulley which allowed easy access to the second bolt with a straight extension. What a difference the new starter makes though!
Good tip. Just goes to show there�s more than one way to do it.
Thank you for the excellent write up. I just replaced my starter using this DIY in my 2008 997S and it has solved my hot start problems. In the six years that I have owned this car it has never started so well. As other folks have commeneted, I had to move the alternator to access the access the bottom bolt holding the starter on to the bell housing. I spent an hour trying every which way to access it before realizing this was a better approach. It's a straight shot to the bolt from under the alternator once it's moved about an inch. For reference I bought the Bosch starter from Amazon for under $200.


 09-09-2018 | 12:50 PM