When you click on links to various merchants on this site and make a purchase, this can result in this site earning a commission. Affiliate programs and affiliations include, but are not limited to, the eBay Partner Network.
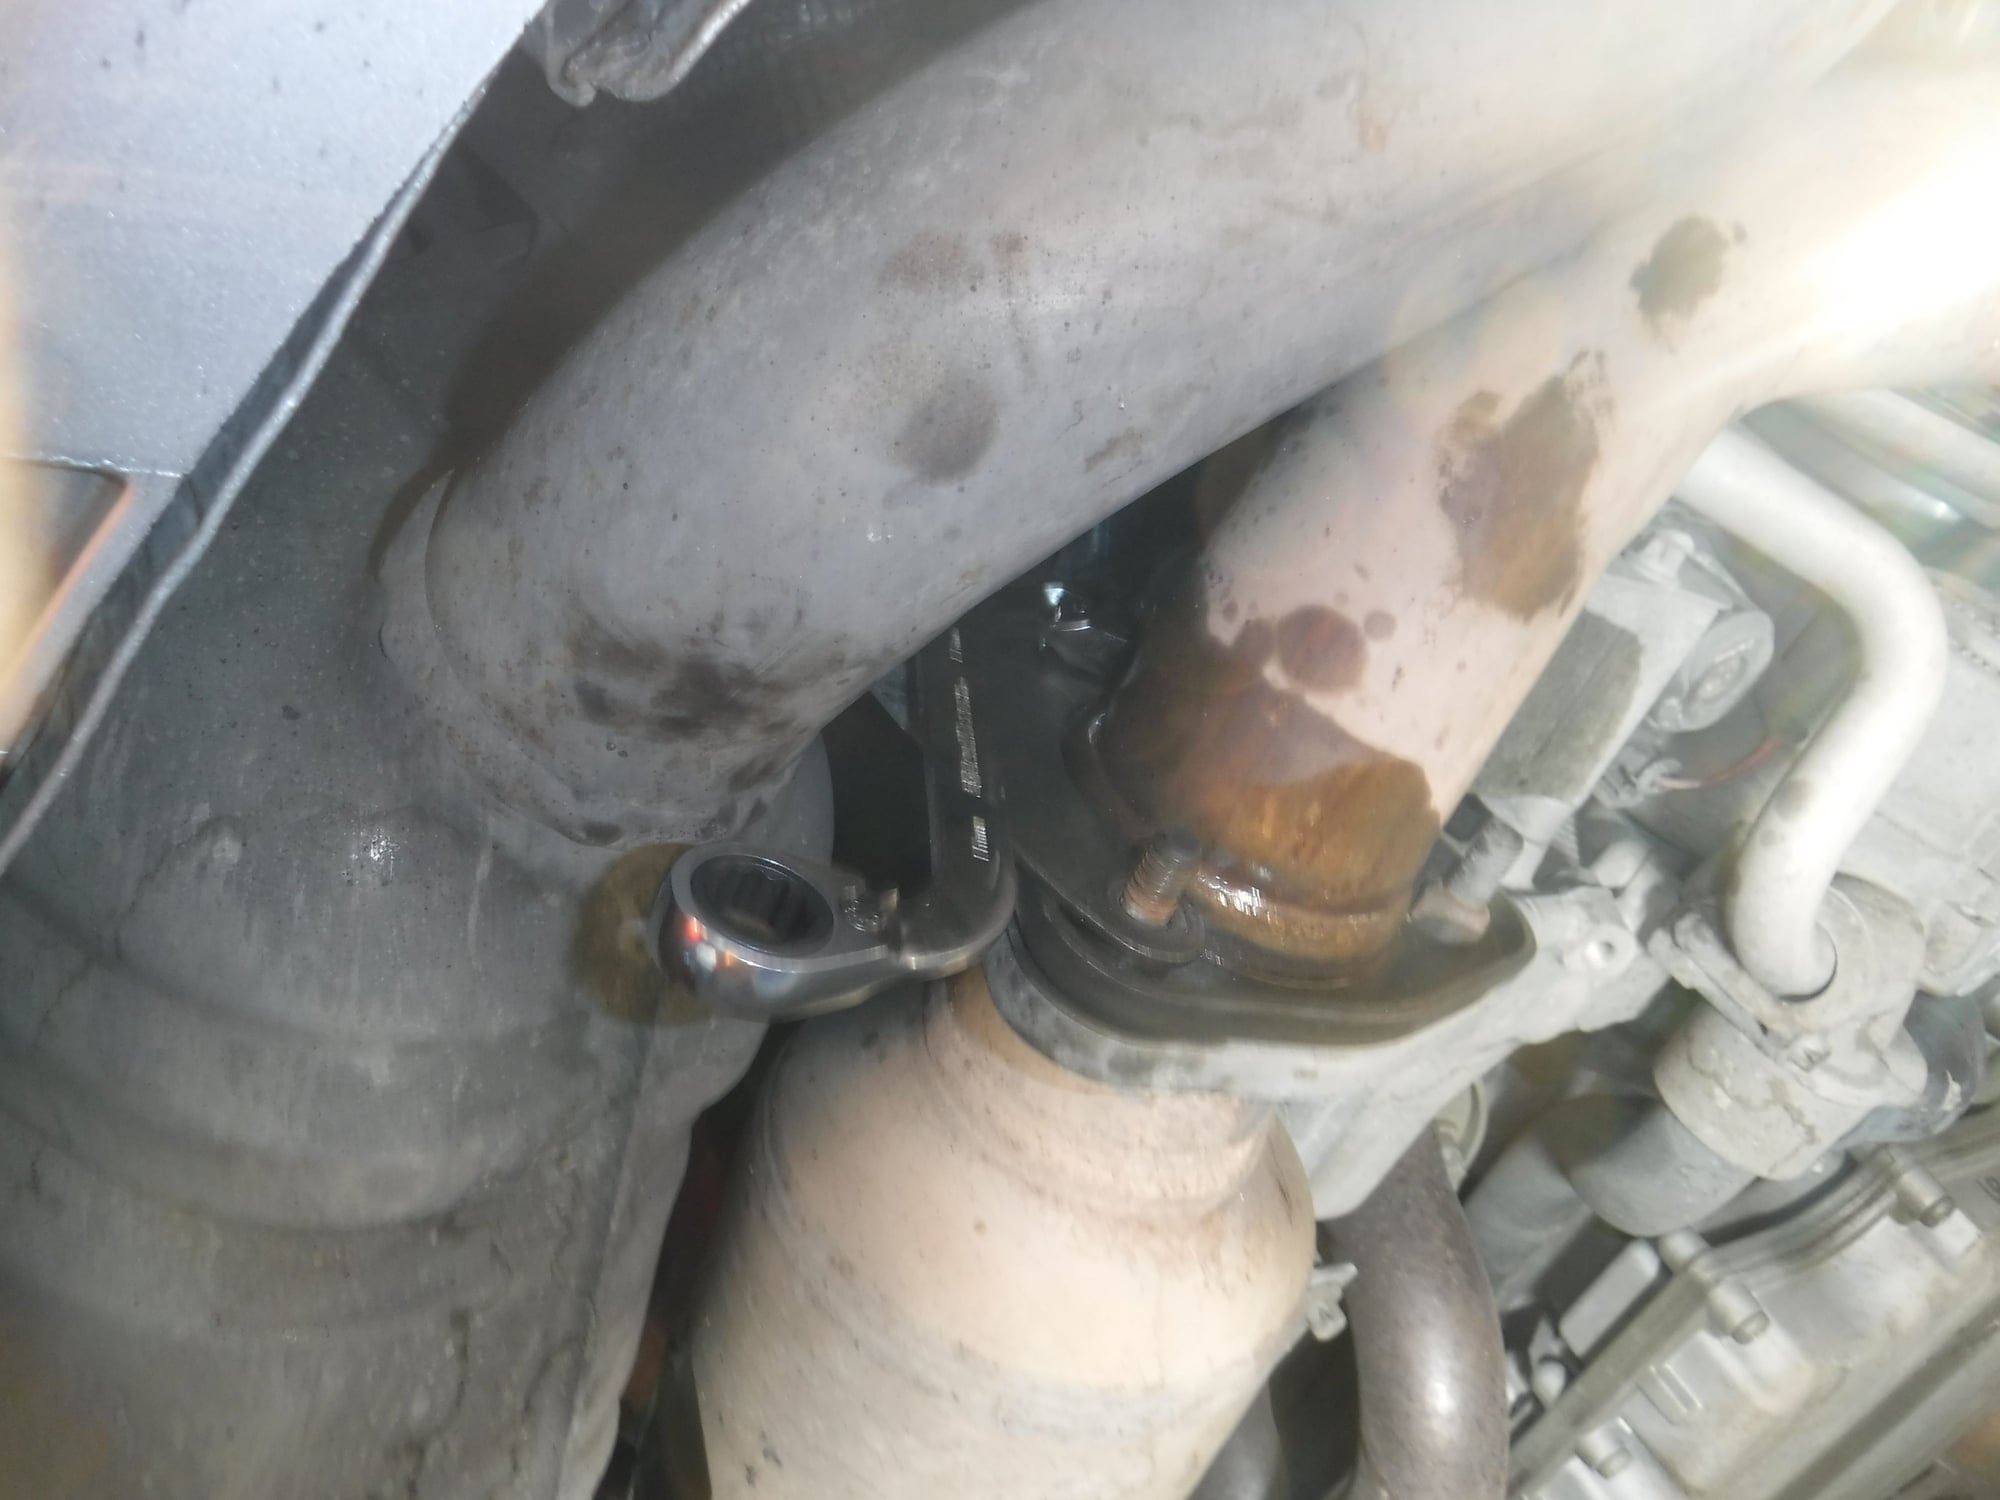
What is the purpose of removing the nuts connecting the catalytic converter to the center muffler? Does it enable movement of the hangar later? The first bolt I tried (bottom one of the 3) already snapped off, even after several soakings with penetrant, and now I can't even hammer out the broken - off stud. This is already a complete PITA, and I know my way around most DIY jobs. I think I'm done and taking it to indy.
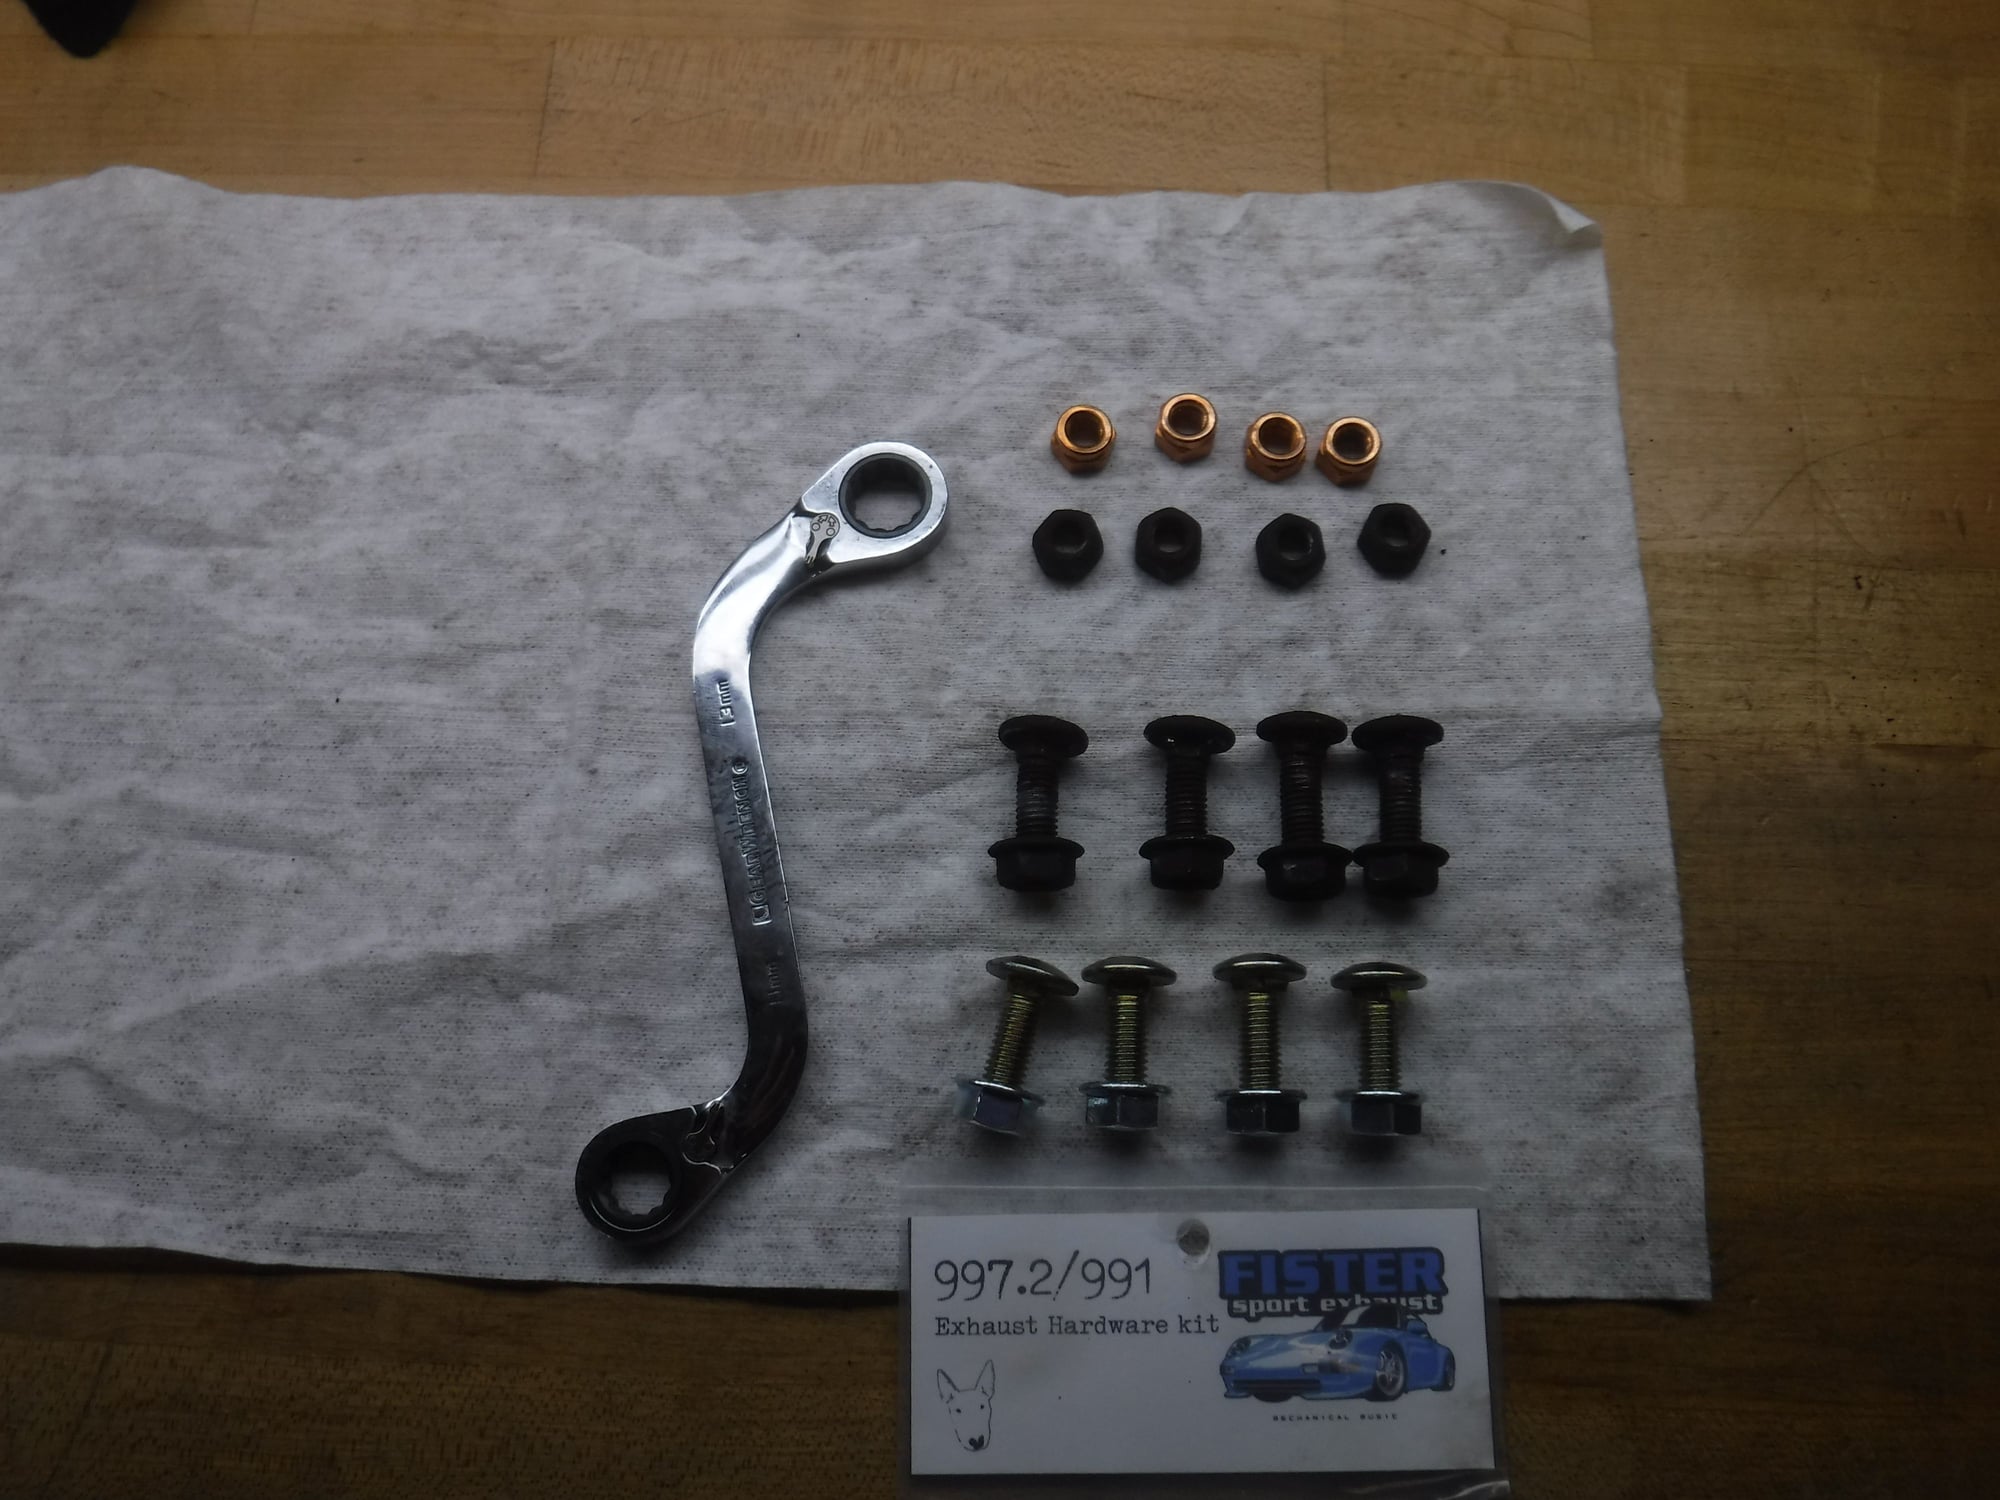
That broken stud should come out with a punch and hammer. I replaced the one I broke with a bolt and copper nut from my spares. Thread size is M8 x 1.25. L side cat top nut. Ratcheting S wrench (13mm) and old/new fasteners.
Last edited by swingwing; 11-24-2018 at 01:15 PM.
Reason: Added pictures.
I know...it's horrible every time I see something I "gotta have." This is a nice set though, and made short work of those pesky cat nuts (esp top one) when I was doing the Fister install.
What is the purpose of removing the nuts connecting the catalytic converter to the center muffler? Does it enable movement of the hangar later? The first bolt I tried (bottom one of the 3) already snapped off, even after several soakings with penetrant, and now I can't even hammer out the broken - off stud. This is already a complete PITA, and I know my way around most DIY jobs. I think I'm done and taking it to indy.
Heat the flange where the stud is and give it a hammer
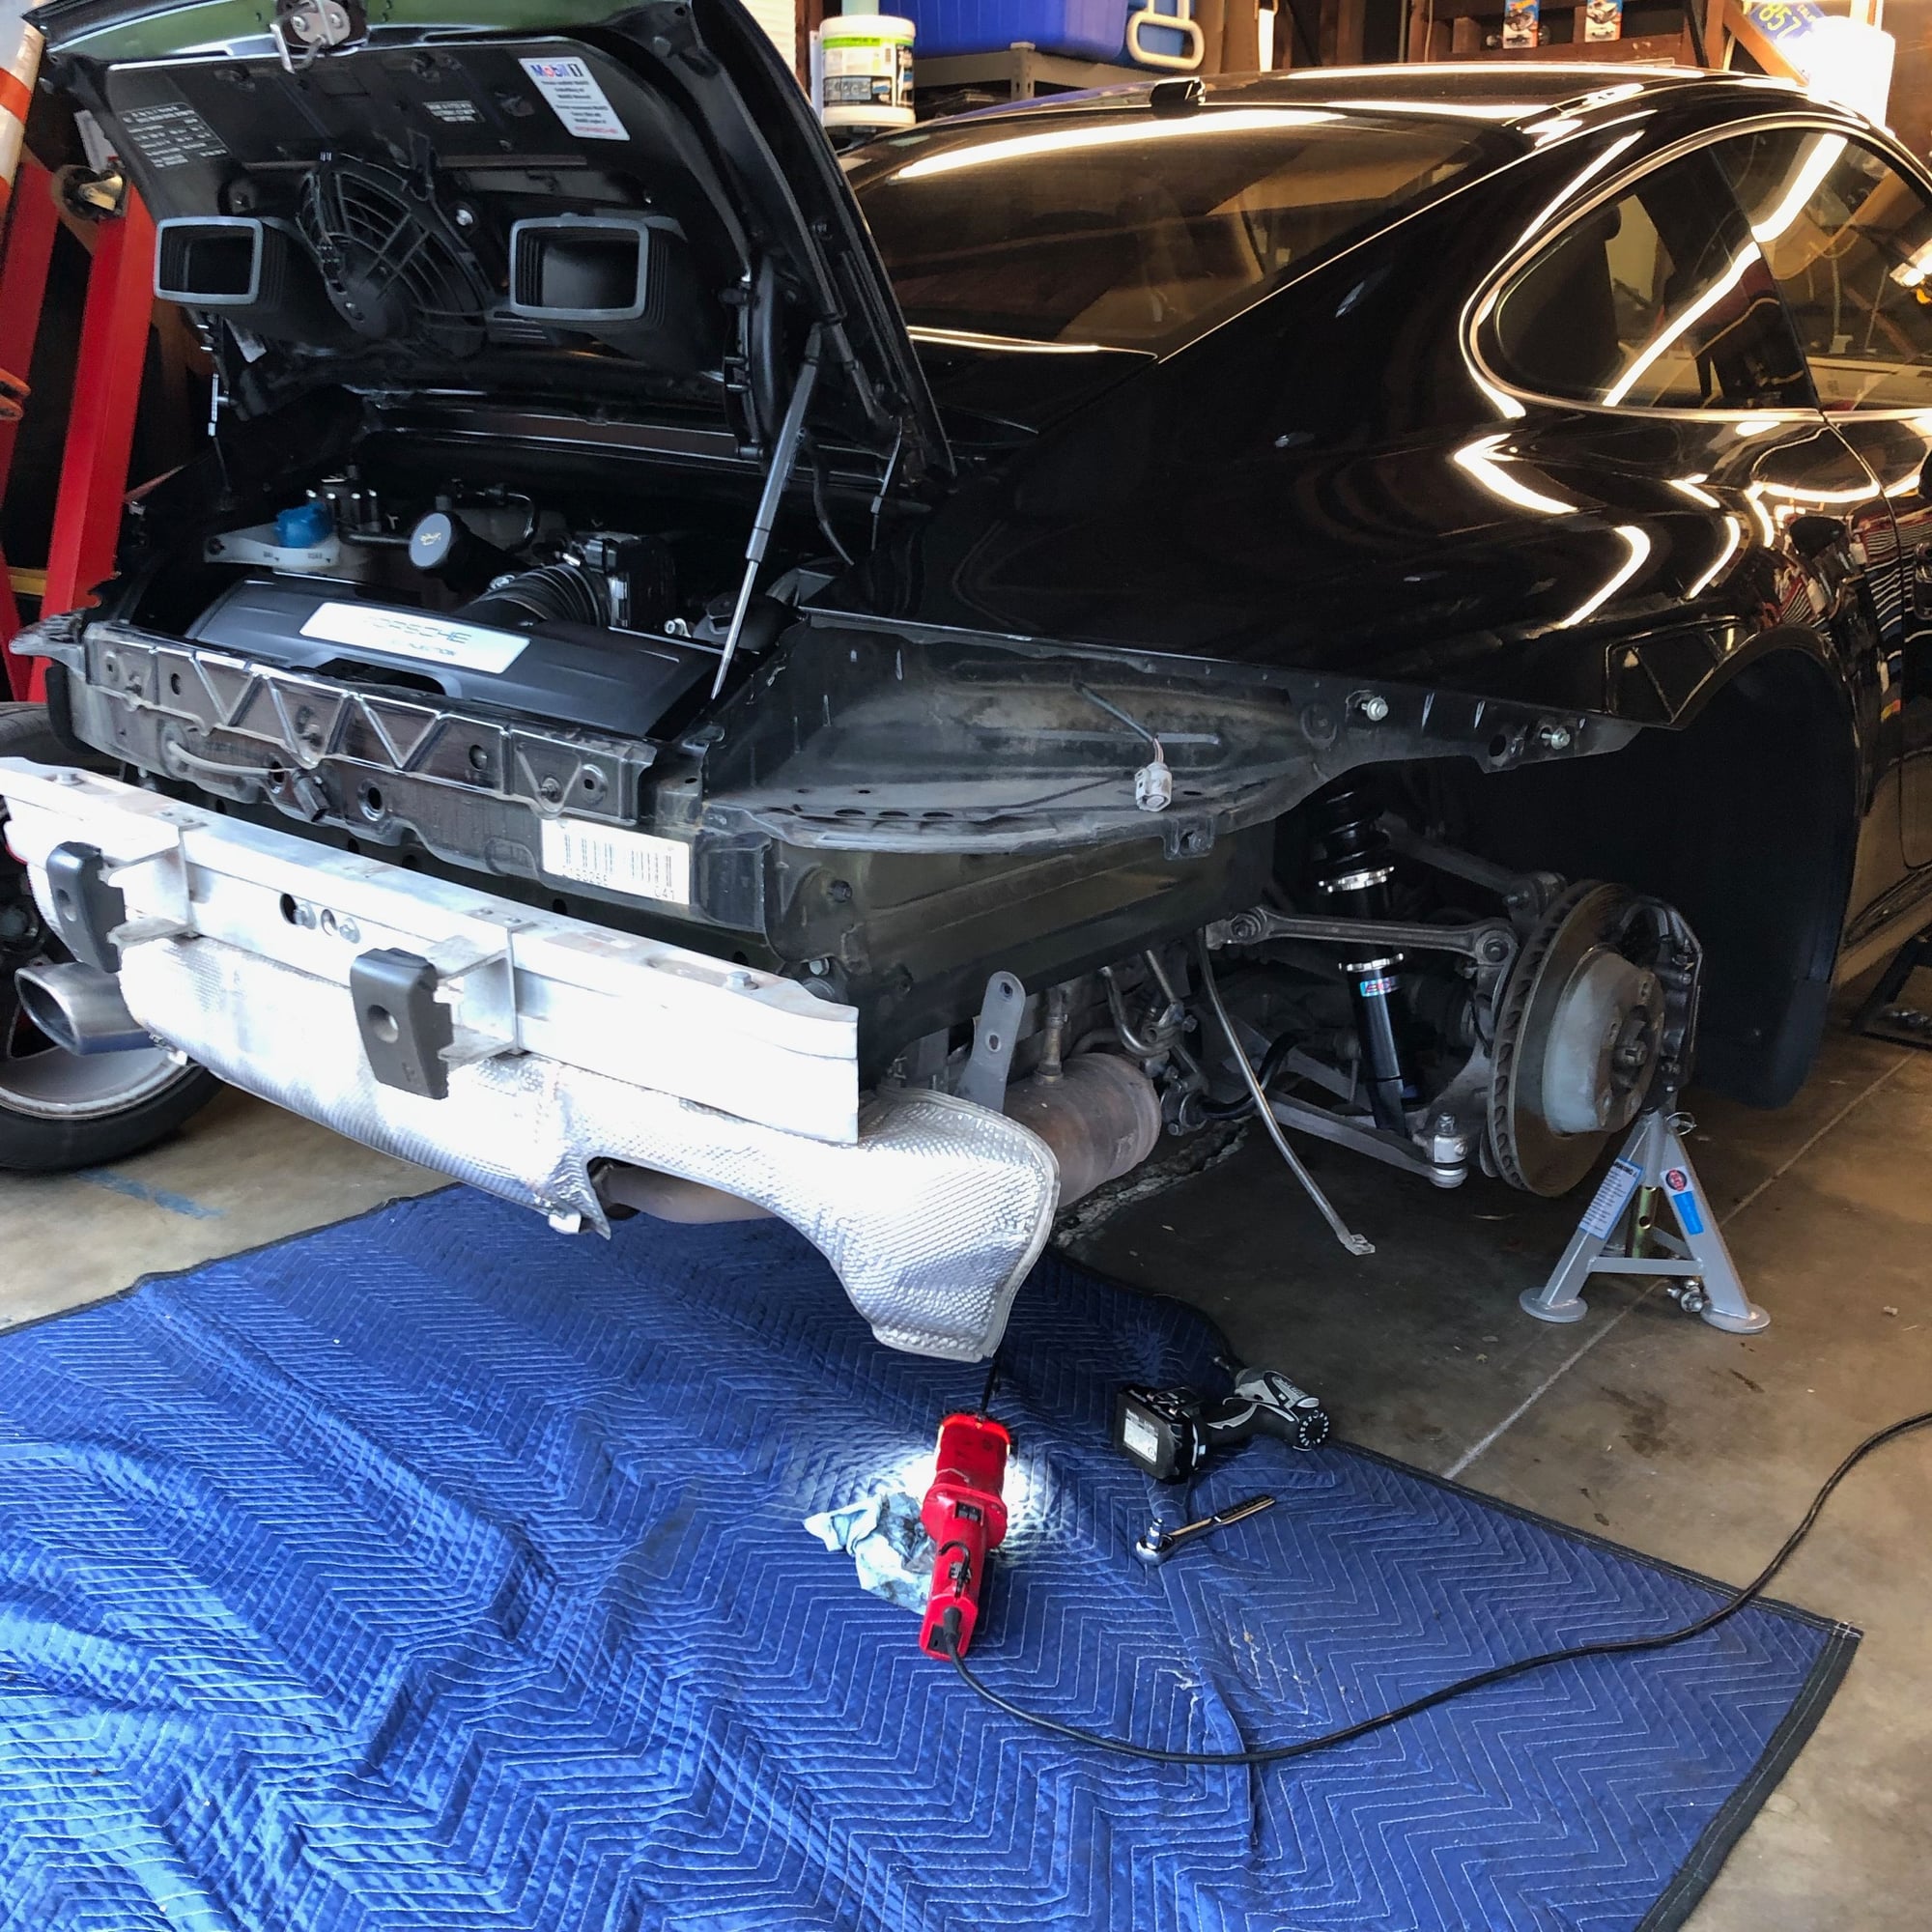
I replaced my spark plugs and coils this weekend. More because of time (10 years) than mileage -less than 19K. I decided to remove the bumper, once it's off and the side panels removed the mufflers are easy to remove since all you need to do is loosen the sleeve and remove the 4 easy to access bolts. I found the screws for the coils were in tight, I had a torx socket, I could not do it with just a torx screwdriver. Otherwise, thanks to everyone who contributed. I did learn the hard way that because of that one screw at the edge of the bumper to the rear panel it's easier if the wheels are off but it can be done on the ground.
+1 for removing bumper, I watched few youtube videos beforehand and it got me close enough to figure it out. It's really easy to do. It also gives you a chance to clean out all the voids that collect dirt and dust, if that keeps you up at night.
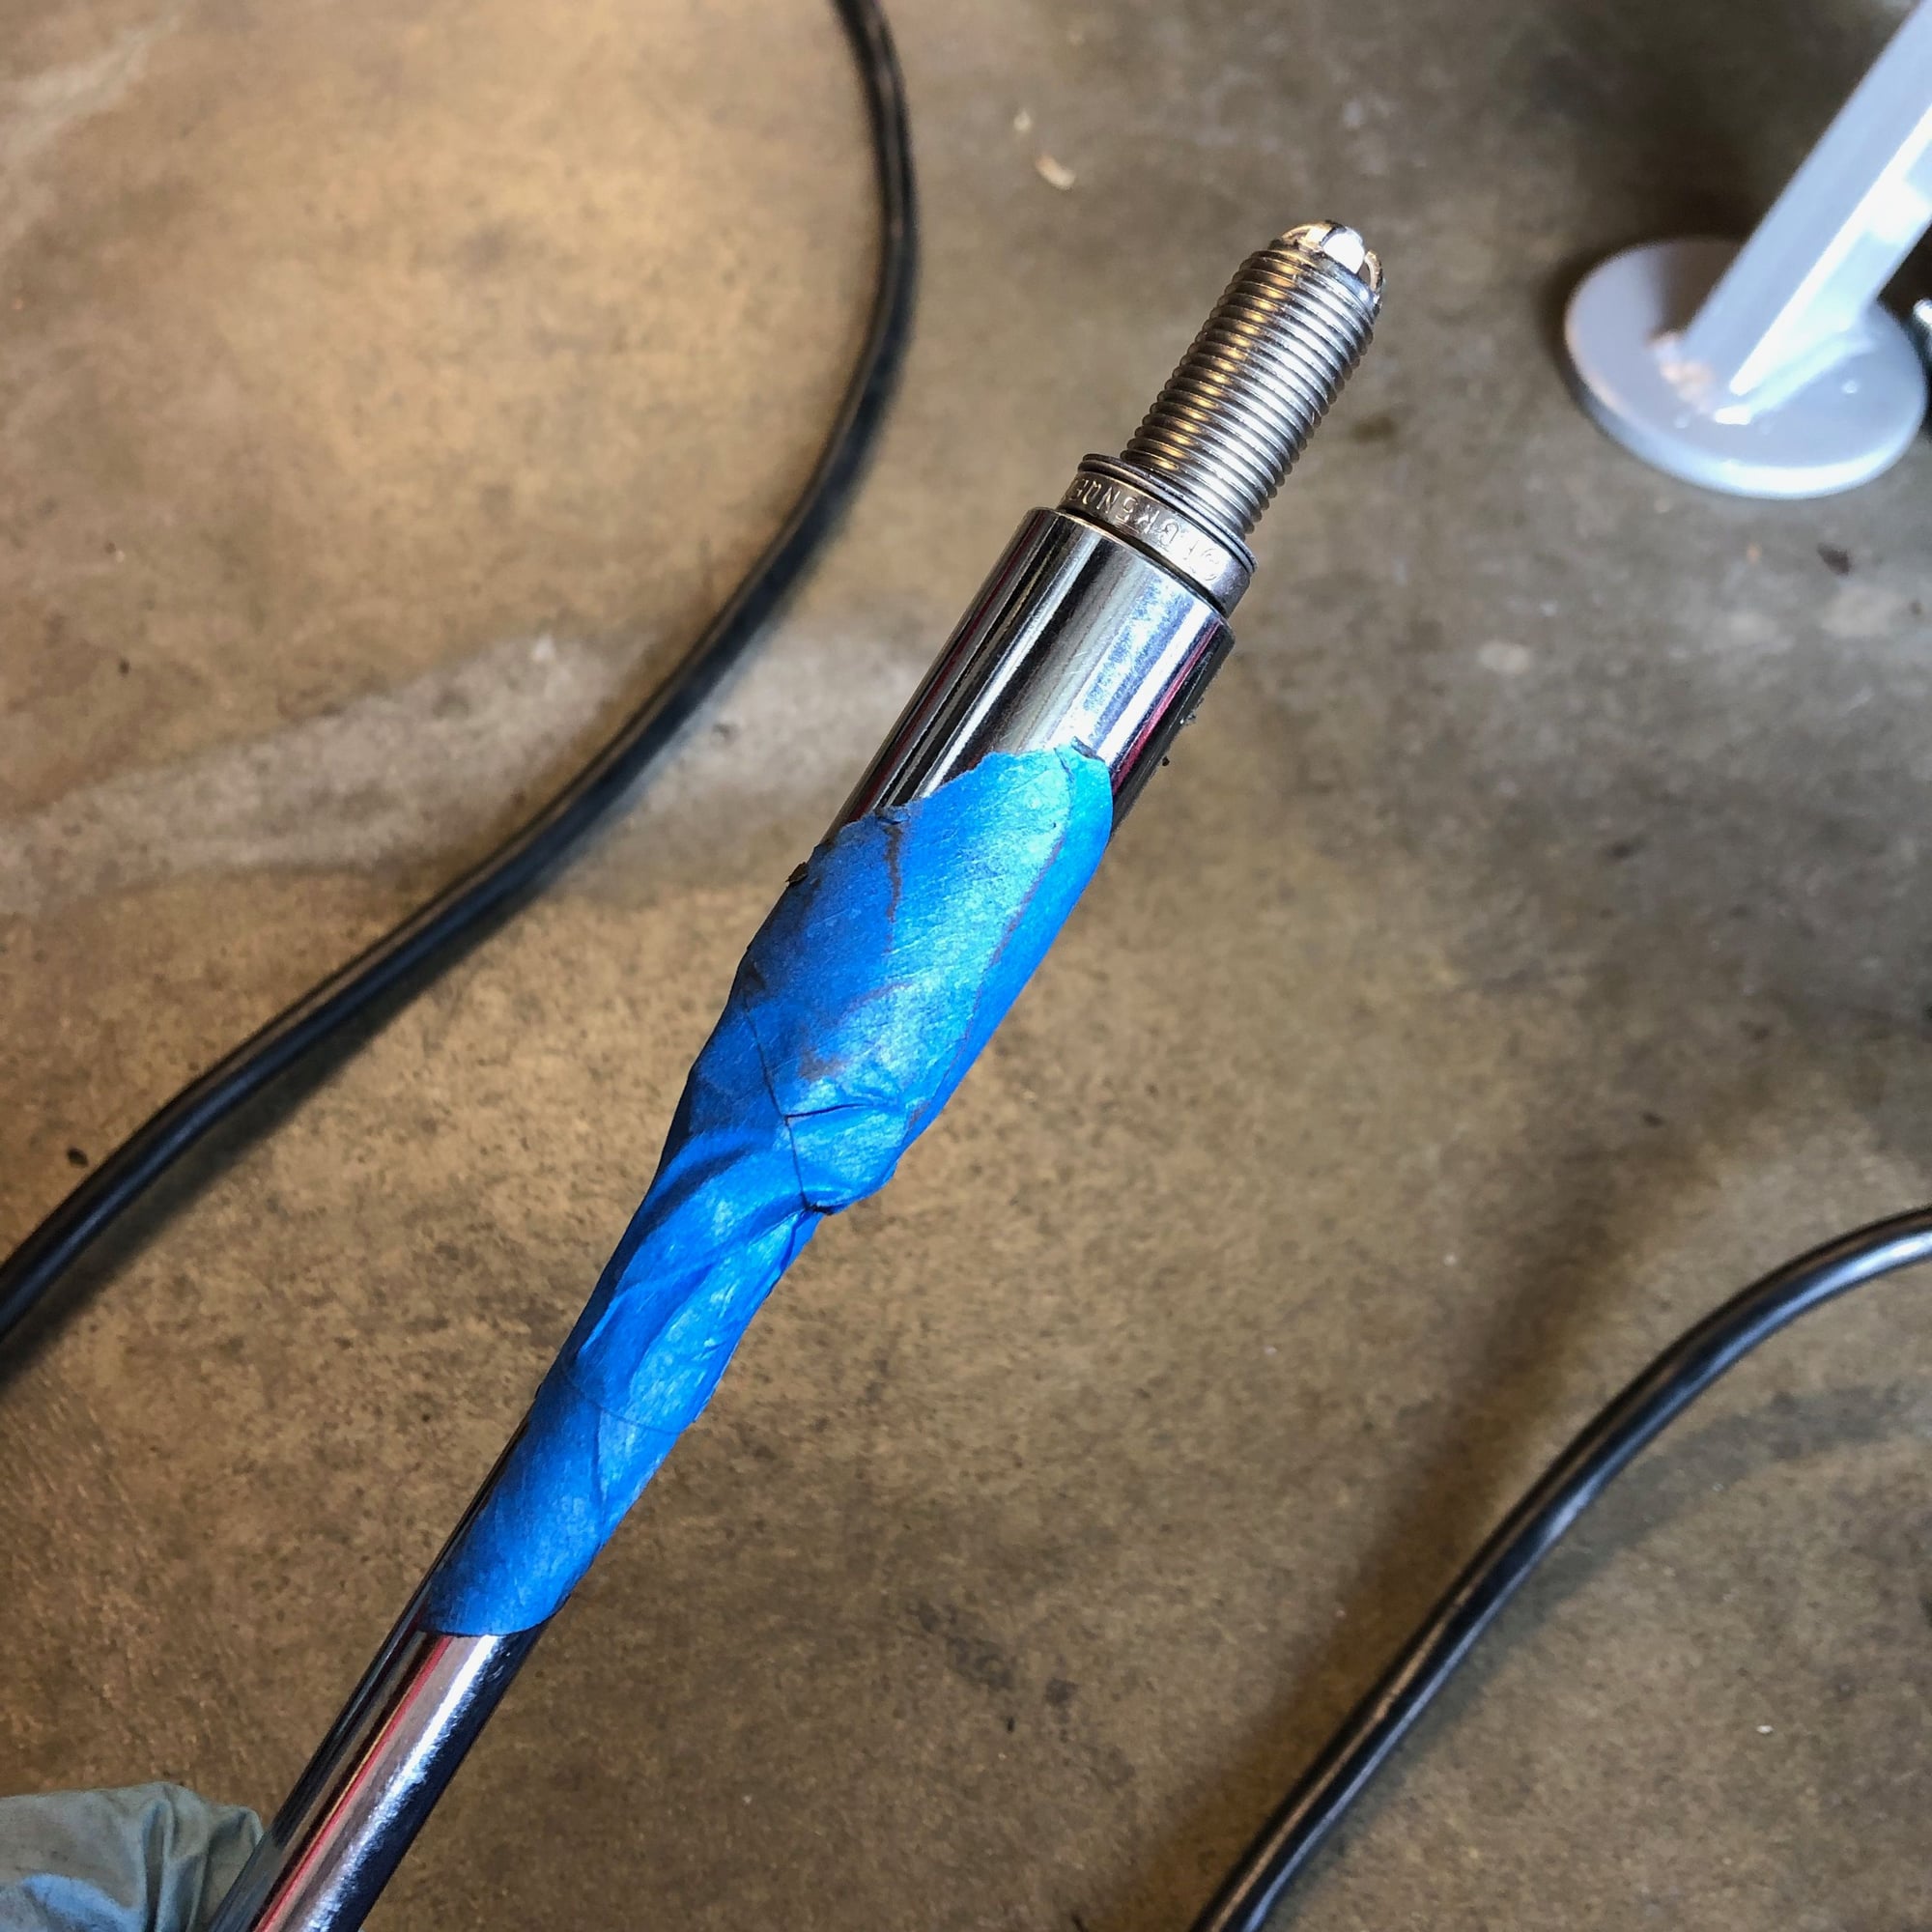
Pro tip: Depending on the brand/ age of tools you use, the rubber insert inside the spark plug socket may grip the spark plug with more force than that of the ball-detent on the end of the extension. So, when you try to pull the socket out after torquing in the new plug, the extension comes off and the socket stays stuck on the spark plug. Taping the spark plug socket to the extension avoids such things.
Luckily I didn't have any flare nut issues and I reused the old coils (no issues with them as of yet). Unluckily, I forgot to order new flange gaskets in advance, so I'm on jack stands until those come in.
I'm running non-Porsche branded Bosch plugs as replacements.
The factory plugs I pulled all looked good (2009 C2 w 57k miles). The ceramic was uniformly tanned all the way around, and the plug bottoms (where the 4 electrodes attach) had a "tanned side" and a slightly "carbonized side". I'm guessing this is due to the DFI "washing" one side of the plug, or perhaps indicative of how the flame front propagates?
All hear say, but I have heard of people having issues (misfire, rough idle, etc) deviating from Bosch or Porsche plugs. Report back and let us know! We can always use more data points.
I have 1000 miles on the Denso plugs and the car�s running great. No issues at all.
All hear say, but I have heard of people having issues (misfire, rough idle, etc) deviating from Bosch or Porsche plugs. Report back and let us know! We can always use more data points.
I�ve got a 1000 miles on the Denso plugs and car runs great. No issues at all.
I have a 2009 C4S, 6spd MT, and just completed the ignition coil and spark plug change. It took me quite a while, but only because its 100 deg out here in texas and I was sweating like a pig in my garage. Plus every part i removed I took outside and scrubbed it and washed it. Even the parts no one will ever see. I ordered spark plugs and beru borg warner coils from Suncoast porsche. I did make a DIY youtube video for those that want to see the process, I'm not a good YouTuber at all so you'll see the before then you'll see the after of each step and not me actively doing the process. I stopped filming once the coils and plugs were in since its just the same thing in reverse. I'm a new shade tree mechanic, I just started wrenching on my own cars earlier this year and have since done all sorts of work, mostly thanks to the pioneers who posted DIY videos.
So far I've swapped the coils, spark plugs, serpentine belt, trans fluid, differential fluid, AWD controller fluid, brake fluid, brake rotors, brake pads, coolant, pollen/cabin filter, air filters, oil and oil filter, and have done some interior changes as well. This is my first porsche and I just got it about 2 weeks ago and have been having fun taking it apart and putting it back together.
I bought it off an auction with 60k miles, but service history is completely unknown so I decided to do all the 60k maintenance and more. I will say this...from the first time driving her then driving it after the spark plugs/ignition coils...its a completely different car. Night and day.
Anyway, my video is uploading right now, feel free to make fun of me and tell me I did something wrong or the hard way lol, i'm happy to learn. I really enjoy working on the car. I have a couple classics as well, a 62 vette and 67 camaro and work on those quite a bit too.
Thanks for all the DIY's, I use this forum extensively.
Heres the video link...i'm a noob. dont laugh. Just trying to add a little video to help people out.
Video Link:
I wish there was a DIY out there for doing the full coolant flush. Getting all of the old coolant out of the lines and radiators appears to be a challenge.
I did this job last weekend myself and this thread was such a great help. My thanks to all who conributed - especially the recommendation to remove the bumper. Made it so much easier.
Also, for those with PSE, remember to pull the lines off prior to removing the mufflers.


 11-24-2018, 12:49 PM