

DIY: added 3rd Radiator, flush coolant, bled brakes, and changed oil+filter
 04-23-2012, 02:38 AM
#1
Drifting
Thread Starter
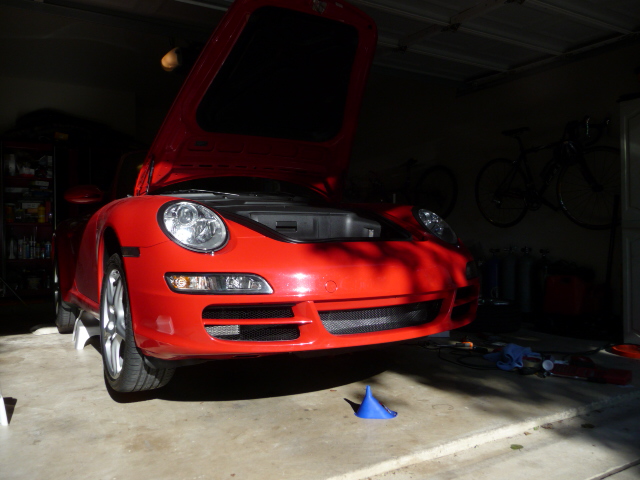
Hit 51K miles recently on my 08 C2S. Before it really gets hot again here in TX I decided to add a 3rd radiator to help her get thru the upcoming summer heat. While I had her up on jack stands I also took the opportunity to perform some maintenance - partially flushed my coolant, inspected and bleed the brakes, and change the oil and filter. There are plenty of excellent write ups on these DIY's so I'll just reference them and provide some of the nuances I discovered along the project.
The 3rd Radiator DIY by Carrera Mike was excellent and got me thru my own install: https://rennlist.com/forums/997-foru...carrera-s.html
While the front fascia was off I took the opportunity to also clean out my two radiators. It's interesting the type of crud you find tucked up in there.
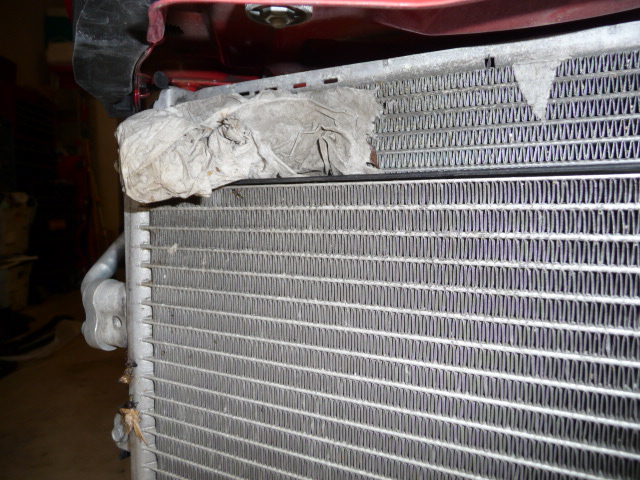
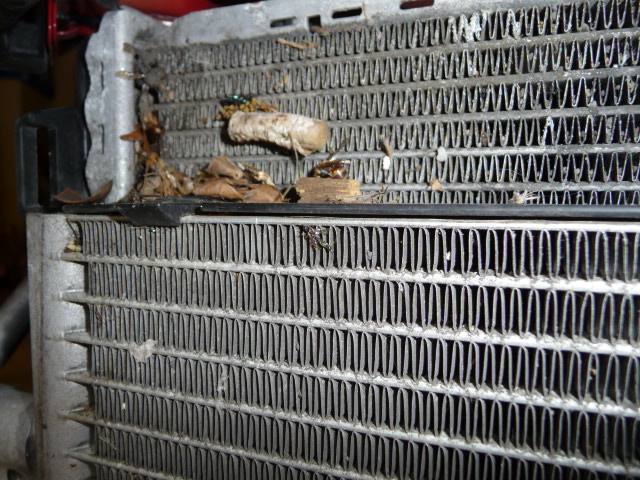
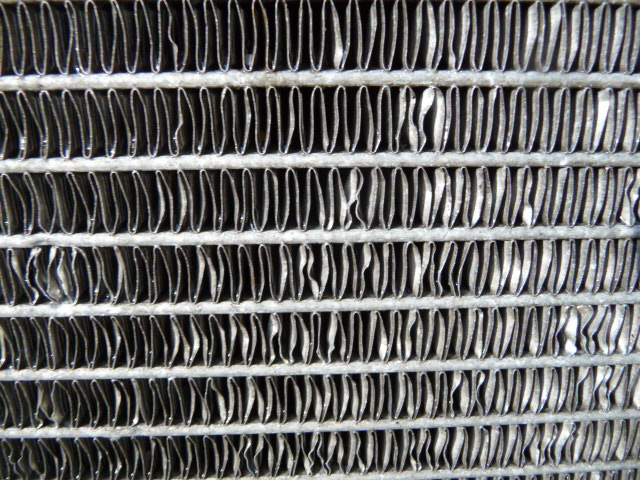
After removing all this stuff with a paint brush and washing to clean I then worked to straighten out some of the bent in radiator fins. I found that a few wooden toothpicks worked best for getting in between the bent fins.
Cleaned and applied 303 to all rubber and plastic parts for good measure while I had everything disassembled.
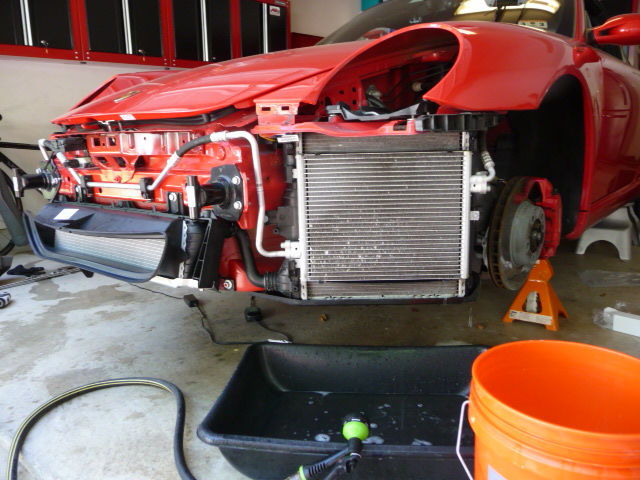
I cut the appropriate vent slots into the bottom of the front fascia for the 3rd radiator airflow. And fabricated some grills to protect these slots from any debris getting up into the 3rd radiator from underneath.
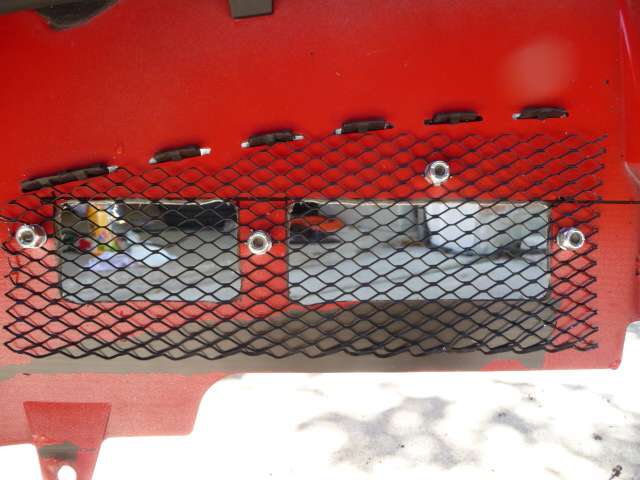
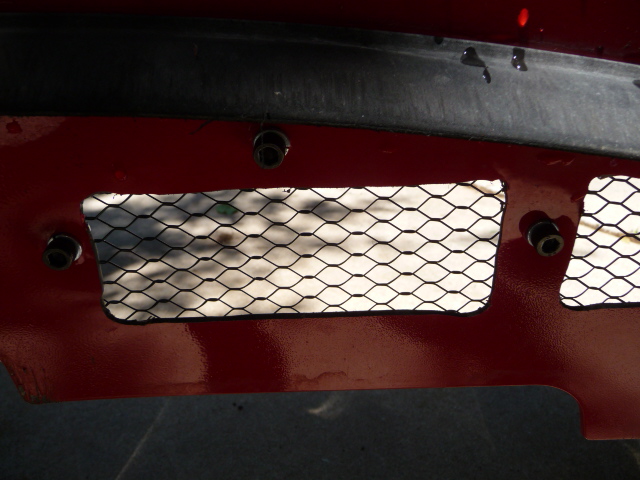

The final product is a 3rd radiator right above the vents with protective grills.
Button her back up and you're good to go. Well until I powered her up... make sure you check the wiring connection for the lighting before you seal her up. Found out the hard way that the wiring bundle connector needs to be pushed together much harder than I thought. You should hear a click when it's seated properly. Otherwise the car will throw error codes re the side markers even though the headlights work. I also replaced the amber side markers with white ones which meant a bit of troubleshooting to get to root cause between the new side markers and wire connector.

Instead of just filling up the 3rd radiator with coolant I took this opportunity to flush some of the car's coolant. I got 3.5 gallons out by draining the coolant from both ends - the coolant plug under the engine and the plugs at the front where the 3rd radiator connects to. Note that the entire system should hold slightly over 8 gallons but the only way to get it all out requires taking all the panels under the car off and disconnecting all the numerous radiator related hoses so 3.5 gallons was good for now. Plus I plan on replacing the water pump soon which will be another opportunity to flush/cycle some more out.
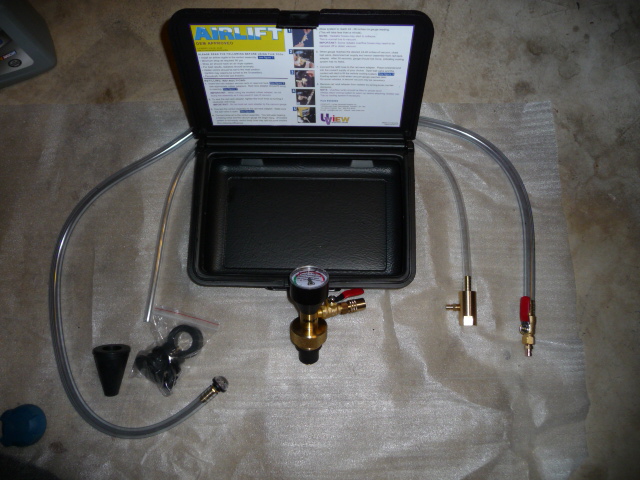
To refill the system I used an Airlift 550000 and the following DIY from Pedro's Garage http://pedrosgarage.com/Site_3/Flush...nt_System.html The airlift suctioned 4 gallons of 50/50 mix of the new Porsche coolant into the car. The additional radiator took up another .5 gallons beyond the original 3.5 gallons that drained from the car originally. I did several test drives since with the burp value open, however, the system seems to be full as I have not had to add anymore coolant.
Observations: I've done a few spirited drives thru the Hill Country near me and here are some of my findings so far. It was 91deg today. Starting out the car takes an additional mile of warm up driving before it reaches 200deg(operating) oil temp. In the pass the 1st 2 miles was enough to get her to operating temp. And instead of the typical 225deg oil temp once I got her on the roads for a bit it stays right at ~210/215ish deg. After some higher rev. runs, 4K-6K rpm, up and down some hills I started seeing the oil temp get as high as 250deg. In the pass the car was hitting 275deg+ after these types of hill country runs. Finally, cooling back down to 210-225 was fairly quick. This Porsche mod seems to have some legs to it and I'm looking forward to driving her during our hot TX summers this year.
The 3rd Radiator DIY by Carrera Mike was excellent and got me thru my own install: https://rennlist.com/forums/997-foru...carrera-s.html
While the front fascia was off I took the opportunity to also clean out my two radiators. It's interesting the type of crud you find tucked up in there.
After removing all this stuff with a paint brush and washing to clean I then worked to straighten out some of the bent in radiator fins. I found that a few wooden toothpicks worked best for getting in between the bent fins.
Cleaned and applied 303 to all rubber and plastic parts for good measure while I had everything disassembled.
I cut the appropriate vent slots into the bottom of the front fascia for the 3rd radiator airflow. And fabricated some grills to protect these slots from any debris getting up into the 3rd radiator from underneath.
The final product is a 3rd radiator right above the vents with protective grills.
Button her back up and you're good to go. Well until I powered her up... make sure you check the wiring connection for the lighting before you seal her up. Found out the hard way that the wiring bundle connector needs to be pushed together much harder than I thought. You should hear a click when it's seated properly. Otherwise the car will throw error codes re the side markers even though the headlights work. I also replaced the amber side markers with white ones which meant a bit of troubleshooting to get to root cause between the new side markers and wire connector.
Instead of just filling up the 3rd radiator with coolant I took this opportunity to flush some of the car's coolant. I got 3.5 gallons out by draining the coolant from both ends - the coolant plug under the engine and the plugs at the front where the 3rd radiator connects to. Note that the entire system should hold slightly over 8 gallons but the only way to get it all out requires taking all the panels under the car off and disconnecting all the numerous radiator related hoses so 3.5 gallons was good for now. Plus I plan on replacing the water pump soon which will be another opportunity to flush/cycle some more out.
To refill the system I used an Airlift 550000 and the following DIY from Pedro's Garage http://pedrosgarage.com/Site_3/Flush...nt_System.html The airlift suctioned 4 gallons of 50/50 mix of the new Porsche coolant into the car. The additional radiator took up another .5 gallons beyond the original 3.5 gallons that drained from the car originally. I did several test drives since with the burp value open, however, the system seems to be full as I have not had to add anymore coolant.
Observations: I've done a few spirited drives thru the Hill Country near me and here are some of my findings so far. It was 91deg today. Starting out the car takes an additional mile of warm up driving before it reaches 200deg(operating) oil temp. In the pass the 1st 2 miles was enough to get her to operating temp. And instead of the typical 225deg oil temp once I got her on the roads for a bit it stays right at ~210/215ish deg. After some higher rev. runs, 4K-6K rpm, up and down some hills I started seeing the oil temp get as high as 250deg. In the pass the car was hitting 275deg+ after these types of hill country runs. Finally, cooling back down to 210-225 was fairly quick. This Porsche mod seems to have some legs to it and I'm looking forward to driving her during our hot TX summers this year.
 04-23-2012, 12:02 PM
#3
Drifting
Thread Starter
Thanks and nice avaitar. BTW, the UView Airlift tool makes a coolant flush almost a no brainer except this is a Porsche so it's a little more complicated as a result. And I would not consider doing this on these cars without one. In hindsight, I wish I had come across this tool 20 yrs ago. Would have made this type of vehicle service so much easier across all my cars/trucks. I believe it was $100 from Amazon and well worth every penny. I intend to use it for my son's Tacoma and my wife's GX-470 next.
05-08-2012, 12:11 PM
#5
Drifting
Thread Starter
A few observations after the install. I did a 220 mile round trip drive from Austin to College station this past weekend. Speed limits were between 60- 80mph on the hwy with ambient up to 99F. Cruising at 75mph in 6th gear the engine oil temp stayed at 210F all day long. In 4th gear @ 75mph my temps started approaching 225F. I'll update as we get into the heat of summer and temps here climb into the triple digits for 120 days.
On a separate note. The protective grills are working well. I installed them mainly to protect against radiator damage from large road debris but also works as a decent bug catch. Small lady bugs, however, do make it thru so after a few years it would likely make sense to remove the front fascia and clean all the radiators again for the small stuff but at least I'm protected from large potentially damaging debris.
I removed all the bugs from the grill and body paint immediately after the trip then washed and wax her. The acidic dead bugs will eat away at paint if left too do it's work. I found that a shop vac worked best to remove them from the grills.
05-08-2012, 12:16 PM
#6
Drifting
Thread Starter
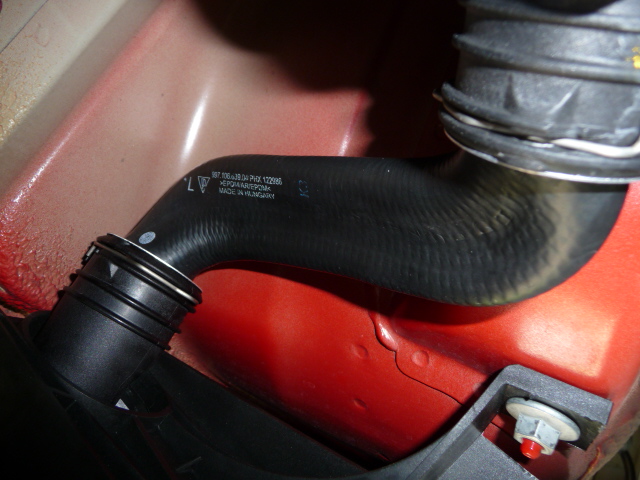
FYI, the hoses are very simple to service and they are keyed and marked so it's really a no brainer to detach/attach properly. Even the clips are keyed. Access to all off them is the real challenge but I plan on dropping all the panels at some point just to figure out what's behind them.
10-21-2012, 10:19 PM
#7
Banned

Join Date: Feb 2012
Location: Nashville, TN
Posts: 1,260
Likes: 0
Received 0 Likes
on
0 Posts
I'm just going to add a few photo's to add some insight to this thread for DIY reference.
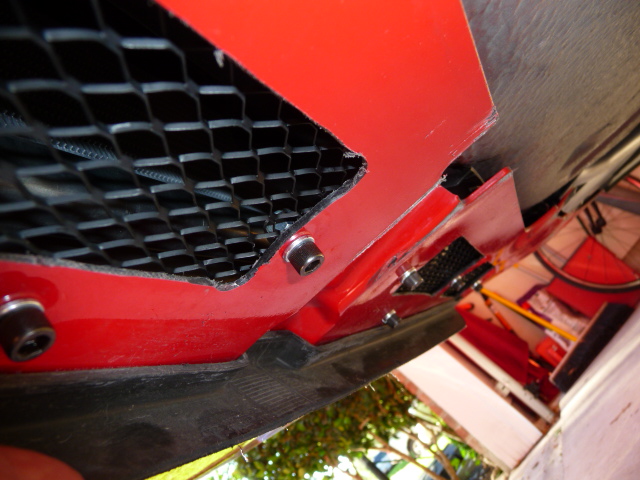
The instructions are very good and if you follow these you'll have a successful install. The only thing I question is adding the vents (cut-outs) to the bottom of the bumper. I believe the 1" of gap between the frunk bottom and the fascia are adequate for proper air flow; it's almost as if the 2008 C2S Fascia was designed with the 3rd radiator in mind. I'm not planning to add any holes. If you look at USMC's picture of the vent you'll see the gap. I'll try it the way it is and get back to you.
I get my Airlift tomorrow so I'll finish the job by adding coolant and checking for leaks.
1" Gap below:

Had to rewire my Laser Defuser and Radar Unit:

Took time to throughly clean radiators and wheel wells:

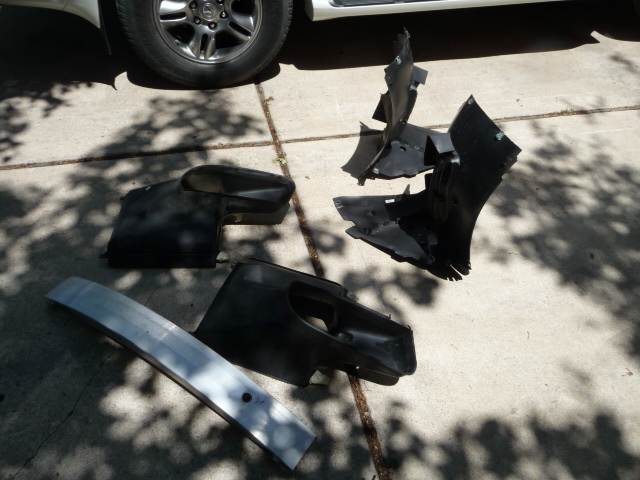
Had my fan replaced under warranty and notice that they broke a mounting bracket. Nashville Porsche Techs are Butchers:

Rather than wait a week for a new part I fashioned one from aluminum:

The instructions are very good and if you follow these you'll have a successful install. The only thing I question is adding the vents (cut-outs) to the bottom of the bumper. I believe the 1" of gap between the frunk bottom and the fascia are adequate for proper air flow; it's almost as if the 2008 C2S Fascia was designed with the 3rd radiator in mind. I'm not planning to add any holes. If you look at USMC's picture of the vent you'll see the gap. I'll try it the way it is and get back to you.
I get my Airlift tomorrow so I'll finish the job by adding coolant and checking for leaks.
1" Gap below:
Had to rewire my Laser Defuser and Radar Unit:
Took time to throughly clean radiators and wheel wells:
Had my fan replaced under warranty and notice that they broke a mounting bracket. Nashville Porsche Techs are Butchers:
Rather than wait a week for a new part I fashioned one from aluminum:
Last edited by Spokane5150; 10-21-2012 at 10:41 PM.
Trending Topics
07-26-2014, 03:04 PM
#10
I cut the appropriate vent slots into the bottom of the front fascia for the 3rd radiator airflow. And fabricated some grills to protect these slots from any debris getting up into the 3rd radiator from underneath.
Attachment 626370Attachment 626371Attachment 626372
Attachment 626370Attachment 626371Attachment 626372
Quick question...my bumper looks more like yours than Carrerra Mikes bumper...specifically that raised groove in your bumper in the center versus that black "puck" on his bumper. However, the bigger issue is that i do not have any pre-etched templates for the holes. Did you? if not, did you find/make a template? Or do you think Spokane5150 is correct that they aren't needed?
07-26-2014, 04:42 PM
#11
Drifting
Thread Starter
Quick question...my bumper looks more like yours than Carrerra Mikes bumper...specifically that raised groove in your bumper in the center versus that black "puck" on his bumper. However, the bigger issue is that i do not have any pre-etched templates for the holes. Did you? if not, did you find/make a template? Or do you think Spokane5150 is correct that they aren't needed?
Last edited by USMC_DS1; 07-27-2014 at 11:12 AM.
07-27-2014, 11:08 AM
#12
Rennlist Member
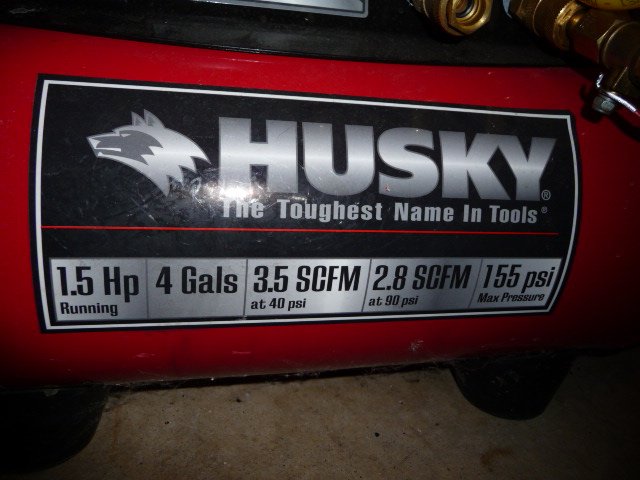
Question on using the Airlift tool. How large a compressor is needed? My compressor has a max of 150 PSI, provides 2.6 SCFM @ 90 PSI and has a 6 gallon holding tank. Does anyone know if that's powerful enough?
07-27-2014, 11:21 AM
#13
Drifting
Thread Starter
 12-15-2015, 02:18 AM
#14

great tutorials. I am new to Porsche (2009 c2 bought 12/7/15} would like to at least partially drain/refill coolant (2 gal Porsche antifreeze 110 bucks)!
it isn't mandatory to use the suction tools is it?
hoping to put the brakes on all my incidental expenditures as of late!
already did oil/filter, bled brakes. would like to drain ps fluid and refill too.
there is a pipe joint under a front panel, looks like it requires a special tool?
any help appreciated!
12-15-2015, 02:35 AM
#15
Drifting
Thread Starter
great tutorials. I am new to Porsche (2009 c2 bought 12/7/15} would like to at least partially drain/refill coolant (2 gal Porsche antifreeze 110 bucks)!
it isn't mandatory to use the suction tools is it?
hoping to put the brakes on all my incidental expenditures as of late!
already did oil/filter, bled brakes. would like to drain ps fluid and refill too.
there is a pipe joint under a front panel, looks like it requires a special tool?
any help appreciated!
it isn't mandatory to use the suction tools is it?
hoping to put the brakes on all my incidental expenditures as of late!
already did oil/filter, bled brakes. would like to drain ps fluid and refill too.
there is a pipe joint under a front panel, looks like it requires a special tool?
any help appreciated!
The airlift tool makes the job painless compared to bleeding the system via the breather valve... plus the risk of an improperly bleed coolant system could be disastrous.
GL with the projects
