

997 Cab SmartTOP Install Directions (pics included)
 06-23-2006, 01:58 AM
#1
Three Wheelin'
Thread Starter
I installed my SmartTOP today and took lots of pictures to help those who are like me who want to see pics of others who have done it before they really feel comfortable doing it themselves!
You should use these as a complement, NOT A REPLACEMENT, for the real directions. USE AT YOUR OWN RISK!!!!
1080iAddict has some helpful hints here too:
https://rennlist.com/forums/showpost...1&postcount=70
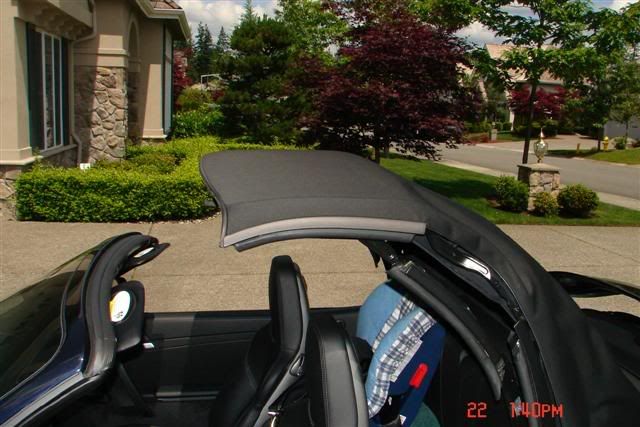
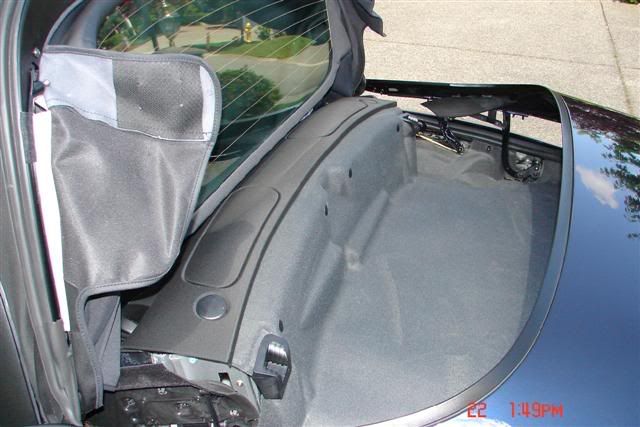
In the directions they tell you to open the top to service position. Well, the key here is to have the back window just touching the carpet area as shown here:
If it is a little too low then the window won't stay up on its on when you
undo the cables, and if it is too high then you can't do the cables. It must be exact.
Adam (1080iAddict) has directions on another post mentioned earlier but in his case he didn't hit it exact and it is dangerous to adjust the top later.
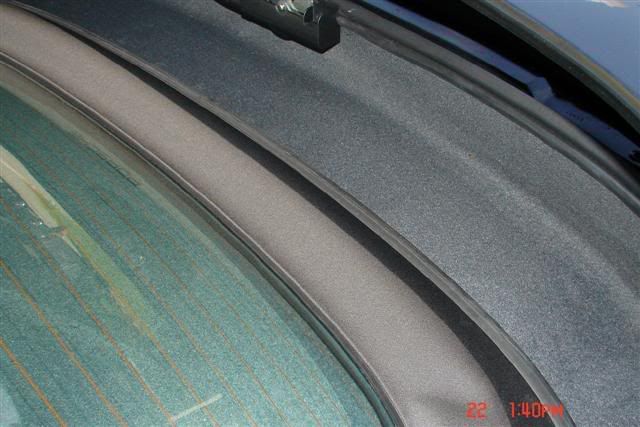
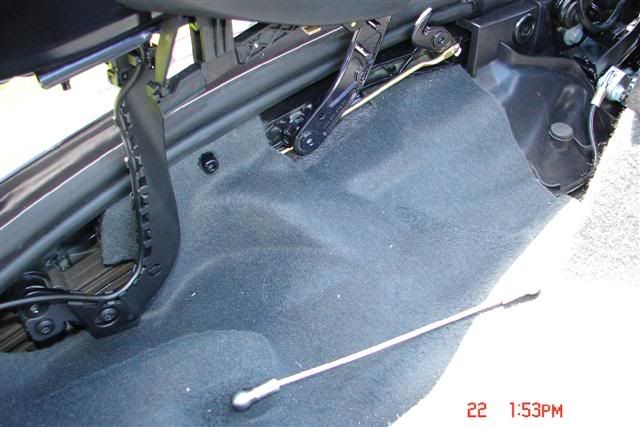
Here's what the other parts of the top look like when you have it right:
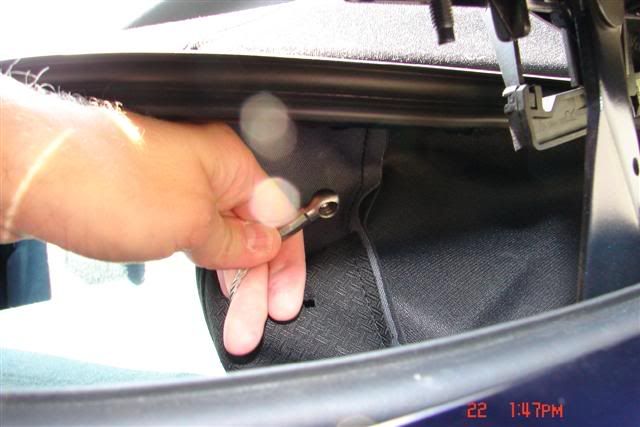
Next, you are looking for a ball and socket joint which looks like this:

You get to it by lifting your window area (it won't budge much) and sneaking your arm though.
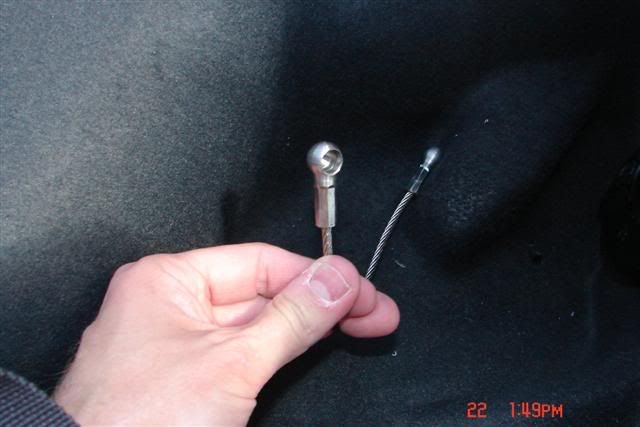
You just rock and tug and it will come off (don't worry, it is easier to get back on). Here's what it looks like once you've detached it:
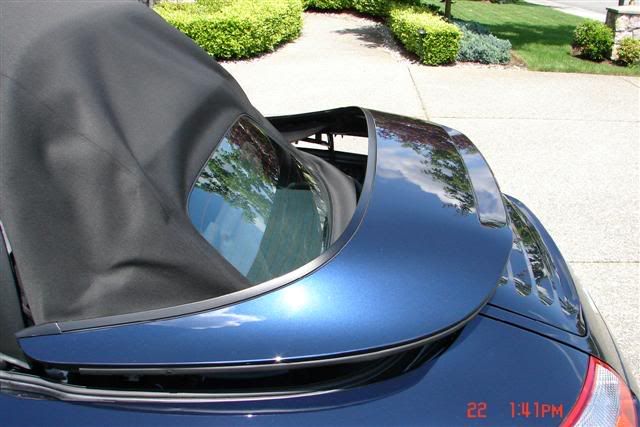
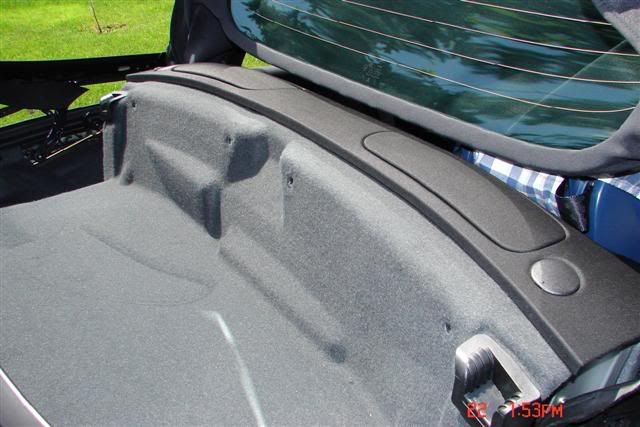
The instructions don't say it, but there are two of these (one on each side), so you have to do both. Once you are done you are ready to raise the window so that it looks like this:
Next, you need to remove the 4 plastic plugs. They are easy to remove, just be gentle. You can use a dull screwdriver, butter knife, long fingernail, whatever to remove them. It is easy and they go back easy too.Here is one partially uplugged:
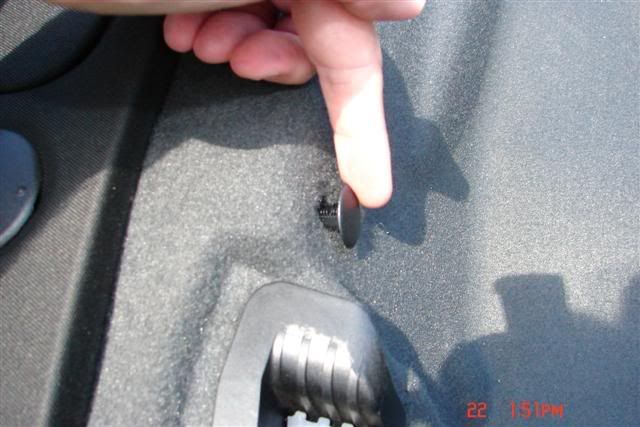
Here's a picture of all 4 unplugged:
Now you need to pull the grey carpet back from under the black part behind the seats. However, it is hooked on both corners by the coin holder looking things shown here:

Just take your time and be gentle and it comes off very easily. Do this on both sides. Here's what it looks like once you've got it out:
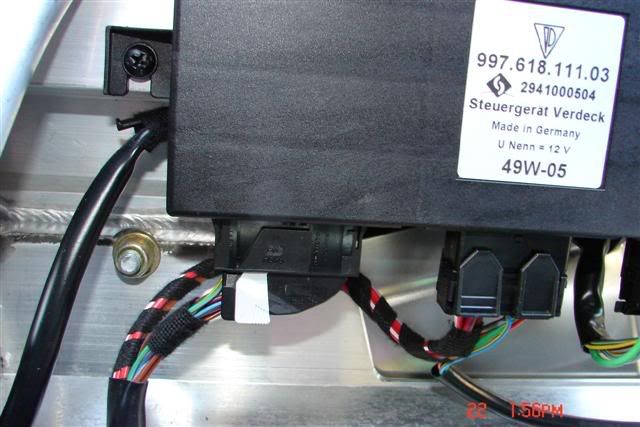
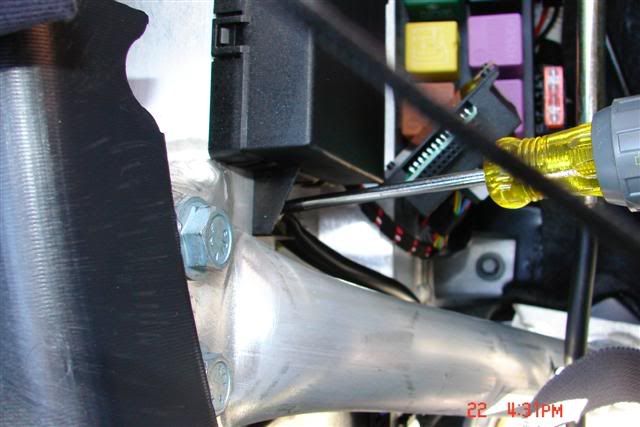
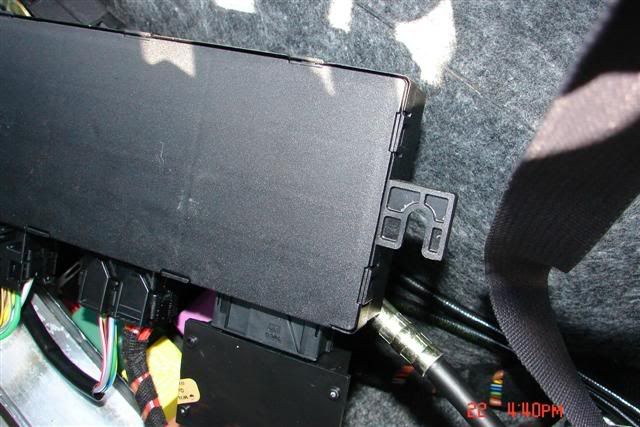
Once you have done BOTH sides, you are ready to get to the controller. Here it is on the left side of the car:
and you are looking to unplug the connector on the bottom left hand side shown here with the grey tab (more on that in a minute):
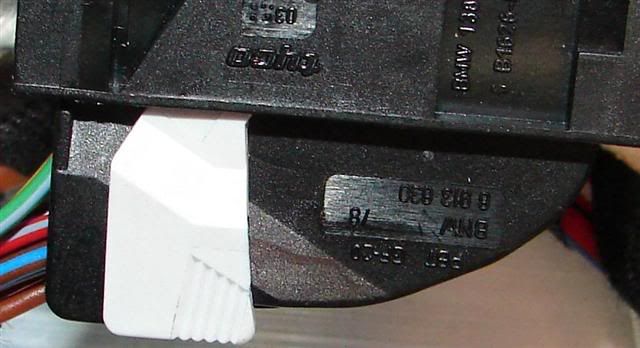
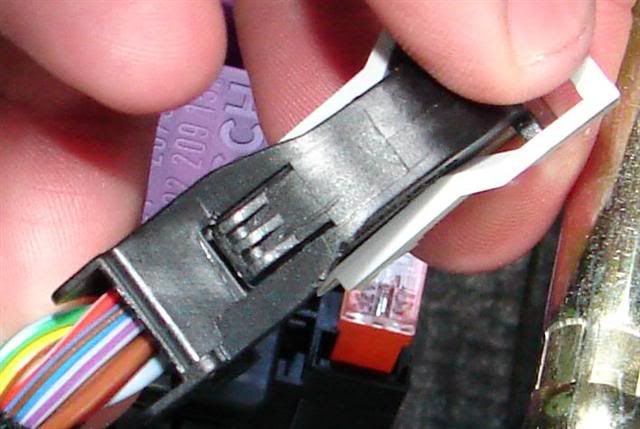
Now the instructions and most people make it sound easy to remove this, but it took me about 5 minutes. First of all here's what this thing looks like up close (you won't get a view this good while you are working):
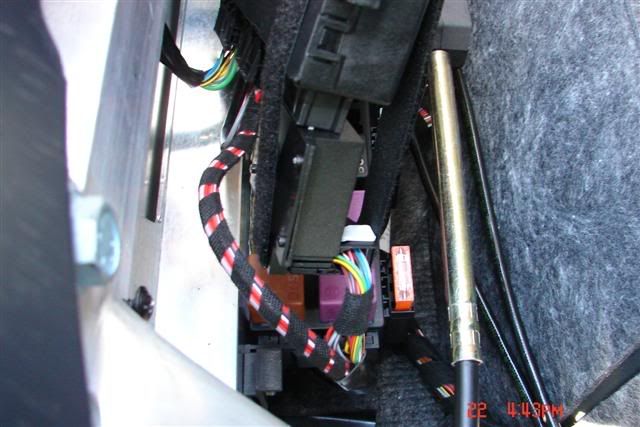
On the underside of this there is a black tab holding the grey thing that keeps it from moving. Here's what it looks like:
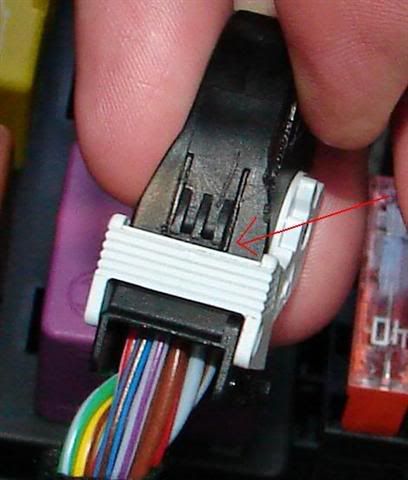
You need to pinch the black part pointed to by the arrow above and at the same time slide the grey thing to the right side of the car. It is hard at first, but just keep trying. You'll eventually get it to slide and look like this:
Once you do, you are good to go. You plug your unit into this cable and then your unit back into the controller. However, it isn't easy to do as the smarttop unit is smaller so the pins don't align well. You are better off doing the optional step and taking the controller off to put it on so you can see what you are doing. Here's the pins you are trying to plug into:
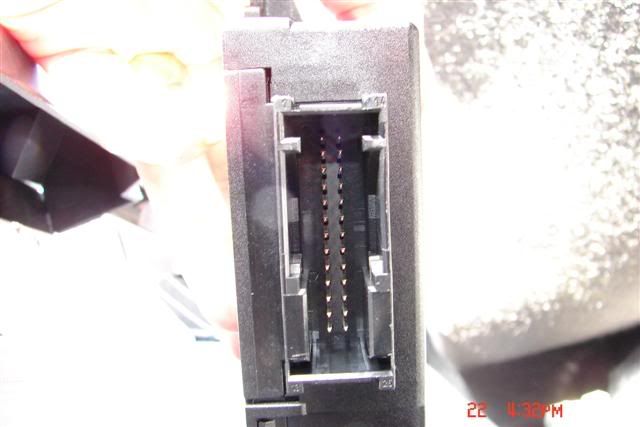
*** DO NOT PUSH HARD *** It will slide in with about as much force as you need to snap a cap on a pen. You have to just keep trying until it goes, but your better off taking the controller off so you can see what the hell you are doing.
Once you have it plugged in properly on both sides my horn beeped.
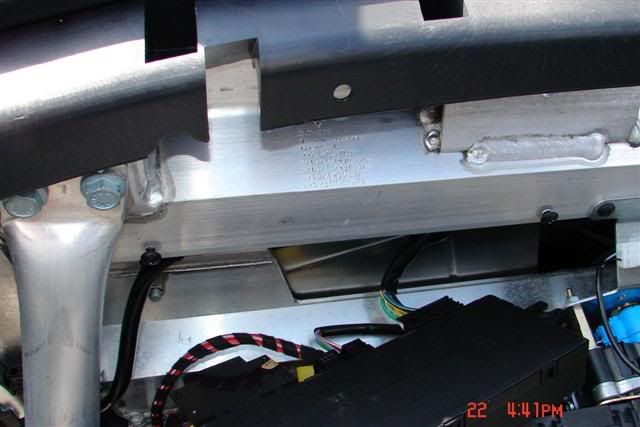
Taking the controller off is brain dead simple. You just unscrew the screws about 2 turns and lift the left side and slide out the right. Here's some pics of how it is mounted and how the hooks look on the controller:

If you do this, then you may as well attach the velcro strap (velcro on the OUTSIDE) like this:
and then screw it all back together. Now the fun part, putting everything back.
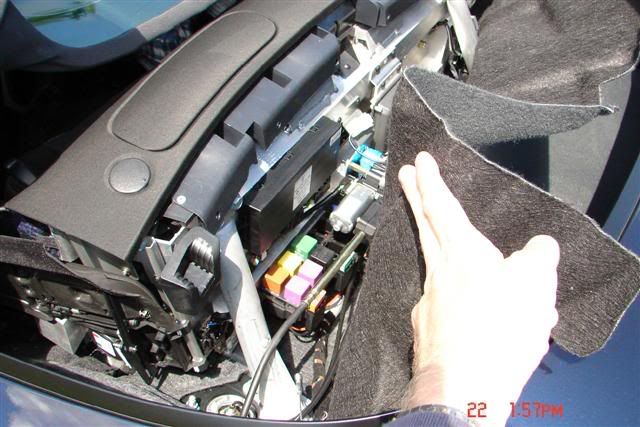
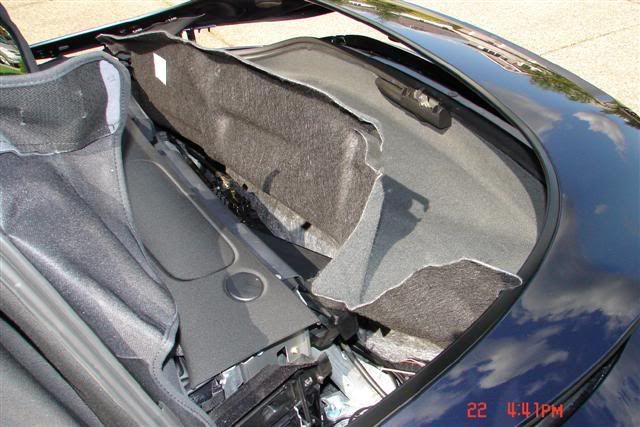
Well for starters, I never pulled the carpet way back. i just had it like this the whole time and worked around it without an assistant:
*** WARNING ***
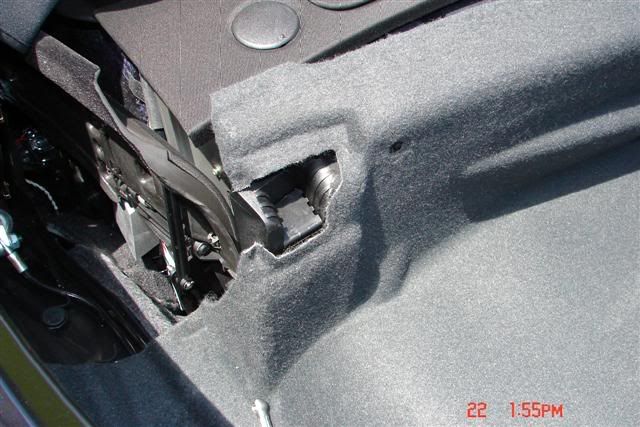
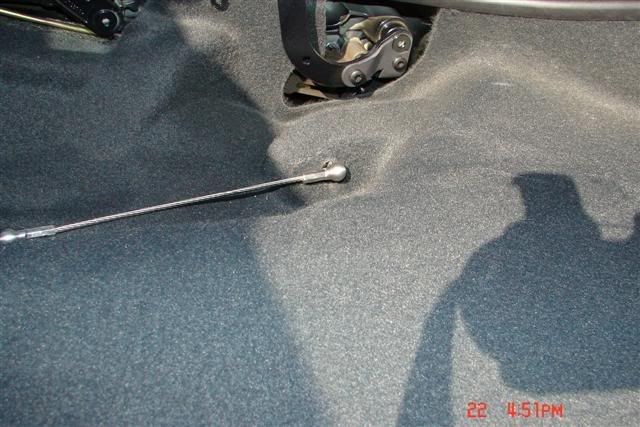
Before you start putting everything back make sure your ball and socket joint cable hasn't been pulled through the carpet on the left side of the car like I accidentally let happen. If you did, it will look like this (instead of a cable coming through):
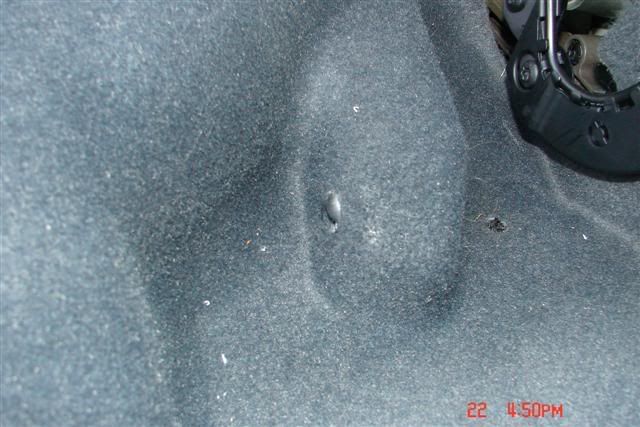
Just pull it through from the bottom so that it looks like this:
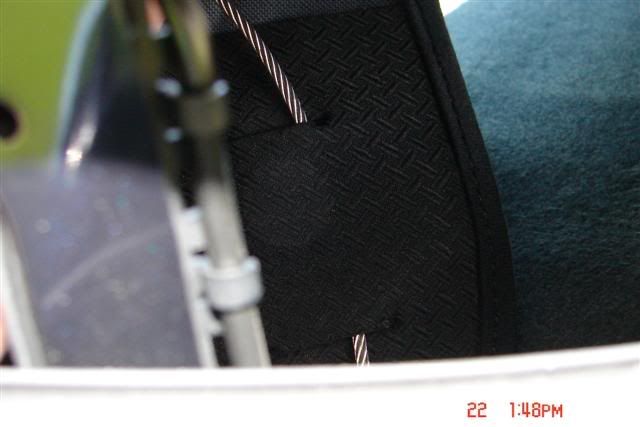
Now tuck your capet back on the sides so that it looks like this:
Notice how the paint colored metal thing sticks through, the carpet is under the rubber and under the small gold colored metal bar!!!!
Now tuck it all the way around so that it looks like this again:
You now need to grab that hook and ball cable shown here:
and thread it through the cover like this:
on the flaps on the sides shown here from farther back:
Now it is a little tricky, but you just slide your arm through and push it back on. It isn't too difficult.
Once you've done all that you are good to go. Close your top and read the directions about how to enable the device (and boy that was a bit tricky too).
NOTE: You'll notice times on the pics. I had to stop at 1:57 to wait for UPS to show up with my SmartTOP so that is why there is a HUGE time break.
You should use these as a complement, NOT A REPLACEMENT, for the real directions. USE AT YOUR OWN RISK!!!!
1080iAddict has some helpful hints here too:
https://rennlist.com/forums/showpost...1&postcount=70
In the directions they tell you to open the top to service position. Well, the key here is to have the back window just touching the carpet area as shown here:
If it is a little too low then the window won't stay up on its on when you
undo the cables, and if it is too high then you can't do the cables. It must be exact.
Adam (1080iAddict) has directions on another post mentioned earlier but in his case he didn't hit it exact and it is dangerous to adjust the top later.
Here's what the other parts of the top look like when you have it right:
Next, you are looking for a ball and socket joint which looks like this:
You get to it by lifting your window area (it won't budge much) and sneaking your arm though.
You just rock and tug and it will come off (don't worry, it is easier to get back on). Here's what it looks like once you've detached it:
The instructions don't say it, but there are two of these (one on each side), so you have to do both. Once you are done you are ready to raise the window so that it looks like this:
Next, you need to remove the 4 plastic plugs. They are easy to remove, just be gentle. You can use a dull screwdriver, butter knife, long fingernail, whatever to remove them. It is easy and they go back easy too.Here is one partially uplugged:
Here's a picture of all 4 unplugged:
Now you need to pull the grey carpet back from under the black part behind the seats. However, it is hooked on both corners by the coin holder looking things shown here:
Just take your time and be gentle and it comes off very easily. Do this on both sides. Here's what it looks like once you've got it out:
Once you have done BOTH sides, you are ready to get to the controller. Here it is on the left side of the car:
and you are looking to unplug the connector on the bottom left hand side shown here with the grey tab (more on that in a minute):
Now the instructions and most people make it sound easy to remove this, but it took me about 5 minutes. First of all here's what this thing looks like up close (you won't get a view this good while you are working):
On the underside of this there is a black tab holding the grey thing that keeps it from moving. Here's what it looks like:
You need to pinch the black part pointed to by the arrow above and at the same time slide the grey thing to the right side of the car. It is hard at first, but just keep trying. You'll eventually get it to slide and look like this:
Once you do, you are good to go. You plug your unit into this cable and then your unit back into the controller. However, it isn't easy to do as the smarttop unit is smaller so the pins don't align well. You are better off doing the optional step and taking the controller off to put it on so you can see what you are doing. Here's the pins you are trying to plug into:
*** DO NOT PUSH HARD *** It will slide in with about as much force as you need to snap a cap on a pen. You have to just keep trying until it goes, but your better off taking the controller off so you can see what the hell you are doing.
Once you have it plugged in properly on both sides my horn beeped.
Taking the controller off is brain dead simple. You just unscrew the screws about 2 turns and lift the left side and slide out the right. Here's some pics of how it is mounted and how the hooks look on the controller:
If you do this, then you may as well attach the velcro strap (velcro on the OUTSIDE) like this:
and then screw it all back together. Now the fun part, putting everything back.
Well for starters, I never pulled the carpet way back. i just had it like this the whole time and worked around it without an assistant:
*** WARNING ***
Before you start putting everything back make sure your ball and socket joint cable hasn't been pulled through the carpet on the left side of the car like I accidentally let happen. If you did, it will look like this (instead of a cable coming through):
Just pull it through from the bottom so that it looks like this:
Now tuck your capet back on the sides so that it looks like this:
Notice how the paint colored metal thing sticks through, the carpet is under the rubber and under the small gold colored metal bar!!!!
Now tuck it all the way around so that it looks like this again:
You now need to grab that hook and ball cable shown here:
and thread it through the cover like this:
on the flaps on the sides shown here from farther back:
Now it is a little tricky, but you just slide your arm through and push it back on. It isn't too difficult.
Once you've done all that you are good to go. Close your top and read the directions about how to enable the device (and boy that was a bit tricky too).
NOTE: You'll notice times on the pics. I had to stop at 1:57 to wait for UPS to show up with my SmartTOP so that is why there is a HUGE time break.
Last edited by ronmart; 06-23-2006 at 02:28 AM.
 06-23-2006, 03:51 AM
#2
Pro
As usual, very nice job with the pictoral discription. UPS 'reschedulled' the delivery till Monday, so damm, I will not get to install it this weekend. Anyways, I assume all the functions are working as advertised?
06-23-2006, 05:43 AM
#4
Three Wheelin'
Thread Starter
Originally Posted by Deven
As usual, very nice job with the pictoral discription. UPS 'reschedulled' the delivery till Monday, so damm, I will not get to install it this weekend. Anyways, I assume all the functions are working as advertised?
Yes, it works great. It is a bitch programming the thing because it uses turn signal morse code so that's pretty bizzare. You MUST enable the unit after plugging it in (at least in my case) so it won't do jack until you program it to be on.
06-23-2006, 07:57 AM
#5
Burning Brakes
GREAT job Ron. A few post scripts to your excellent thread:
1. Mine worked with all features enabled out of the box. Bizarre that yours needed to have all features enabled by programming it first, but so long as end result the same I guess its all good.
2. Looks like you unhooked the sockets from the ***** on the flap instead of the ***** on the carpet? I unhooked the cable from the ***** on the carpet. Again, I guess it can be done wither way but I did not need to do any re-threading through the flap sleeves.
3. I agree that its better not to move the roof like I did if you can help it.
Great job on your pictures. That will be a tremendous help for folks.
Adam
 06-23-2006, 02:23 PM
#7
If anyone could post a detailed description of how to program this thing, I'd greatly appreciate it. I cannot figure out this morse code for the life of me. It's frustrating as hell. Thx for the pics ron. I wish I looked at the pics of that black tab before I installed. Took me 15 minutes to figure that one out.
Trending Topics
06-23-2006, 07:01 PM
#8
Three Wheelin'
Hey Ron, just got in from LA and saw your pics. Nice, real nice. I'm heading into the garage to get to work. I'll refer to your directions as necessary. Thanks for taking the time to take the pictures and share with me and everyone else the small steps I would have surely screwed up. I'll let you know how I do. If you don't hear back, send the fire department.
06-23-2006, 07:45 PM
#11
Three Wheelin'
All done. I stopped to clean the back area as it was dirty and that's just not acceptable. I also took time to clean the glass. All went as described. Thanks for the notes. Now for the programing?!
06-23-2006, 07:54 PM
#12
Instructor
Join Date: Jan 2006
Location: East Bay, CA
Posts: 211
Likes: 0
Received 0 Likes
on
0 Posts
Thank Ron and Adam both for the pic and the instructions.
THPorsche, you are not the only one. I have not received mine either.
Can't wait for the morse code programming part.....
Thanks again for posting all the help
THPorsche, you are not the only one. I have not received mine either.
Can't wait for the morse code programming part.....
Thanks again for posting all the help
06-23-2006, 09:30 PM
#13
Three Wheelin'
The programming is not that difficult.
The Left blinker determines function (increment one blink to move to the next function, eg; Enable-one blink, One-Touch-two blinks, Remote Operation-three blinks, Lock-in-4 blinks, Comfort Windows-5 blinks, Lock Chirp-6 blinks, Trunk Button-7 blinks).
The right blinker (depending on the number of blinks) determines which option will be utilized within that function group. One blink, the first option, two the second option, three the third option (depending how many options available in a group).
After 10 seconds it shuts itself off so you can start over through the menu again to review your changes. Keep your instruction book with you in the car as you review the options. Yeah it's a little strange but effective.
06-23-2006, 09:44 PM
#14
Burning Brakes
I am curious.... what are you guys shutting off in terms of available features? Or are you enabling everything?
I was tempted to shut off the alarm beeps because, while the quiet was strange at first, after a year I got used to it. But you can't totally shut off the beeps (without enabling stealth mode) - you can only shut off the 'arm' beep and the 'disarm beep' always stays on.
I was tempted to shut off the alarm beeps because, while the quiet was strange at first, after a year I got used to it. But you can't totally shut off the beeps (without enabling stealth mode) - you can only shut off the 'arm' beep and the 'disarm beep' always stays on.
06-23-2006, 11:00 PM
#15
Three Wheelin'
I went throught the instructions and hi-lighted the features I activated and de-activated. The list as follows:
Function 1 (Product Enabled) ON
Function 2 (One touch Top) ON
Function 3 (Remote Operation Windows-onetouch) ON
Function 4 (Lock-in) OFF (I have Chrono)
Function 5 (Comfort window) OFF
Function 6 (Chirp-lock) ON
Function 7 (Trunk) ON
I'll play with it. I did notice my car locks automatically and chirps, which I don't care for so I'll be tinkering with it.