

Preventing Fine Micro Scratches and Keeping Your New Car Looking New
 03-28-2008 | 10:27 AM
#106
Three Wheelin'
Joined: Dec 2005
Posts: 1,853
Likes: 0
From: Norwalk,CT
Great job in wetsanding that orange peel off. Looks like a mirror now with now "peel".
I've used papers as fine as 12,000 grit for fine finish wetsanding a poorly applied clearcoat on one MB I did years ago. As long as you take your time and check the work. The next big step is polishing out all the wetsanding marks to a high gloss. Another reason I use the extremely fine sandpaper is to limit the polishing time and steps.
If you looked at a post over at Autopia on a beautiful black Z06 Vette with Zaino sealant on it, the several shots have so much orange peel in them you could kill whomever painted this at the factory. I know, it's a GM, but still, once in a blue moon they get some finishes right. If I took delivery of that car it would have had to be fully sanded.
Ben, that's one hell of a finish and I know first hand how tuff it is to maintain to keep it in really good shape as Porsche paint is so damn soft. Another reason I tell all to go easy on the polish, go lightest as possible first, you'd be surprized.
Bottom line on these finishes. You HAVE to be as cautious as possible when washing, wiping due to the softness of the paint. Always test in a non-visible area first on anything you may use/do or you may end up marring the whole finish. 100% USA cotton works well, DF towels too, but MF's are not equal in type, mfg, quality so always use a bit more caution on MF towels as good as they seem to be, some can marr-up a finish very quickly. I found out the hard way
Regards,
Deanski
 03-28-2008 | 11:14 AM
#108

Thread Starter
Banned
Joined: Feb 2005
Posts: 15,022
Likes: 12
From: Back in the OC
Probably looks like crap now. 
I sold that Boxster in '05 right before I took delivery of my 997. The guy who bought it was clueless, I mean totally clueless, when it came to paint care and detailing. It hurt a little bit to sell it to someone like that, after all the hard work I put into it. Took me about two weeks to colorsand and polish out every square inch, including the tough flexcoat finish on the bumper covers.
Yep, these p-cars have very, very, very soft paint finishes. Hopefully most people in this forum have gotten the point, after constant harping by us, that you need to be extremely careful when washing and drying your car if you want to avoid the dreaded fine scratches.
03-30-2008 | 09:20 PM
#109
Rennlist Member
Joined: Jan 2005
Posts: 2,406
Likes: 88
From: Connecticut
Beautiful picture of your wife Ben. As you know I love details, and she is one great looking detail. Where can I find instruction on color wet sanding? Not that I would try it but love to learn more about it.
Jay
Jay
03-30-2008 | 09:29 PM
#110
Three Wheelin'
Joined: Dec 2005
Posts: 1,853
Likes: 0
From: Norwalk,CT
DJ:
What are you going to wetsand? Do you have orange peel on a finish?
Wetsanding takes a bit of technique as well as basic skills, but can be done by some. It's then how to polish out the wetsanding that also gets some people into trouble with failed clearcoat since they cut too much and too fast.
It's best to also obtain a paint meter before you wetsand. W/O the meter and w/o the experience, you can cut too much, not enough etc.
I'm sure both Meguiars and 3M have Webinars on this as well.
Deanski
03-30-2008 | 09:32 PM
#111
Rennlist Member
Joined: Jan 2005
Posts: 2,406
Likes: 88
From: Connecticut
Jim, I don't think I would do it. The photos looked so impressive I just thought I might be able to pick up something in the polishing technique that I could utilize. I agree with you that it appears very comprehensive. I'm just impressed on the result Ben was able to get. See you at the meeting in Danbury.
Jay
Jay
 03-31-2008 | 12:57 PM
#114
Thread Starter
Banned
Joined: Feb 2005
Posts: 15,022
Likes: 12
From: Back in the OC
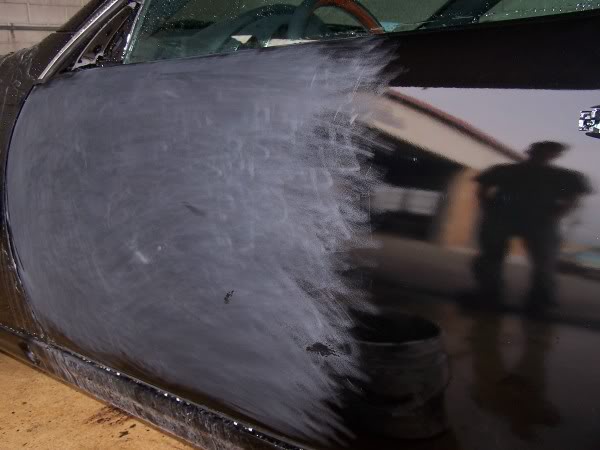
As for more information on colorsanding/wetsanding you might want to search among body shop trade journals. I read this one very informative article in a car collector magazine that probably goes by that very name, Car Collector. The process can be best described this way. The orange peel effect on a painted surface results in peaks and valleys of paint material on the body panel. It is usually worse on the side panels where gravity has a way of making the fresh paint sag, resulting in the little hills and valleys, or tiny bumps, throughout the surface that gives rise to the condition known by its similarity to the outside surface of an orange.
The best way to detect is to hold up a sign with lettering or something that has straight lines or cross-hatching and see its reflection off your just washed car's body panels. If it looks like you have a bad case of astigmatism, that's your orange peel at work.
How to remove it? In a nutshell you sand down the peaks until they are level with the valleys, and then polish away the sandpaper marks to arrive at your mirror-like finish. That's an oversimplification, of course. But essentially that's what it boils down to, those two main steps. But you can easily destroy your paint finish if you don't know what you're doing, requiring a costly new paint job.
It took me two solid weeks to do, about 10 hrs a day. I was in no hurry and certainly didn't want to rush things. I was doing it for the first time and learning as I was going. I did have the advantage of having a good grasp of material science, in particular the elastic properties of materials and how they behave when being worked, under heat, which helped me be extra careful.
Would I do it again? No frickin' way, man. That was my pat answer whenever anyone at my local PCA club asked me that when they saw my new 997. No way Jose. Once was enough. Besides, another good thing about a lighter colored car is that orange peel is not that visible. In fact, I hardly see it on the sides of my car. https://rennlist.com/forums/showpost...95&postcount=7
03-31-2008 | 03:32 PM
#116
Thread Starter
Banned
Joined: Feb 2005
Posts: 15,022
Likes: 12
From: Back in the OC
I must be a smooth talker, that's all I can say. 
https://rennlist.com/forums/showpost...9&postcount=10
https://rennlist.com/forums/showpost...9&postcount=10
09-13-2008 | 06:06 PM
#120
Thread Starter
Banned
Joined: Feb 2005
Posts: 15,022
Likes: 12
From: Back in the OC
Was washing cars this morning and thought I'd add this tip I picked up.
When you dip your woolskin wash mitt in your bucket it will naturally fill up with soapy water inside. Here's a tip. Don't allow this soapy water to spill out. Use it as a supply source to allow you to wash more surface area as the soapy water gradually seeps through the sheepskin (rotating to use the other side of course) before needing to deep in your bucket. You'll make your bucket of soapy water last longer this way and speed up your washing process.
Or if you don't want to take advantage of this trick, just make sure to empty your wash mitt of soapy water into the bucket so you don't waste it by spilling it as you wash. But I like being able to wash more surface area at a time with each dip - saves me time.
Lastly, as a constant reminder, never apply pressure with your soap applicator of choice whenever you wash your car. Always just move it gently and let it glide over the surface. Never scrub with it - you'll only be asking for scratches. Your paint is soft and delicate. Any surface contaminants you see that you're tempted to scrub out with your applicator can be safely removed with a clay bar afterward.
Remember: pressure + soft paint => micro-scratches