When you click on links to various merchants on this site and make a purchase, this can result in this site earning a commission. Affiliate programs and affiliations include, but are not limited to, the eBay Partner Network.
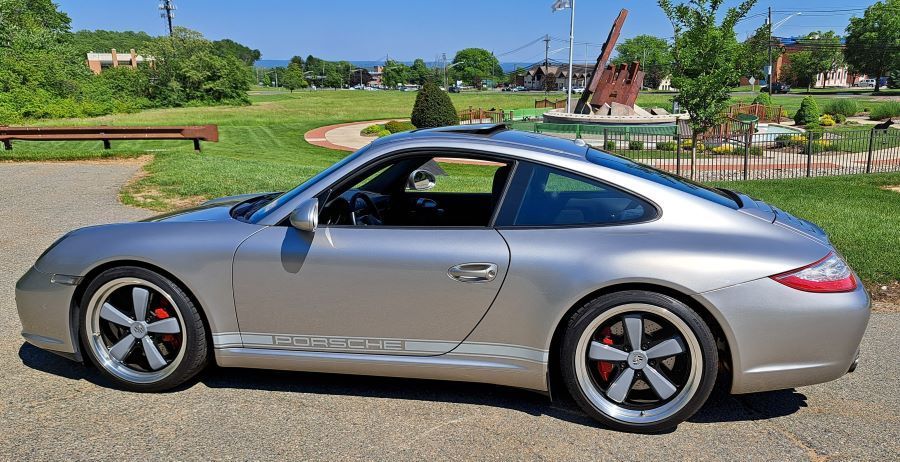
Mounted my new Apex VS-5RS Forged Wheels. Front 19x9" ET50. Rear 19x12" ET46. Anthracite. Tires are Goodyear Eagle F1 Supercar 3, 245/35-19 & 305/30-19.
Nicely done!
Gorgeous wheels and crazy light at F 18.8 and R 21.7 lbs!!
Especially for $3500. What a value.
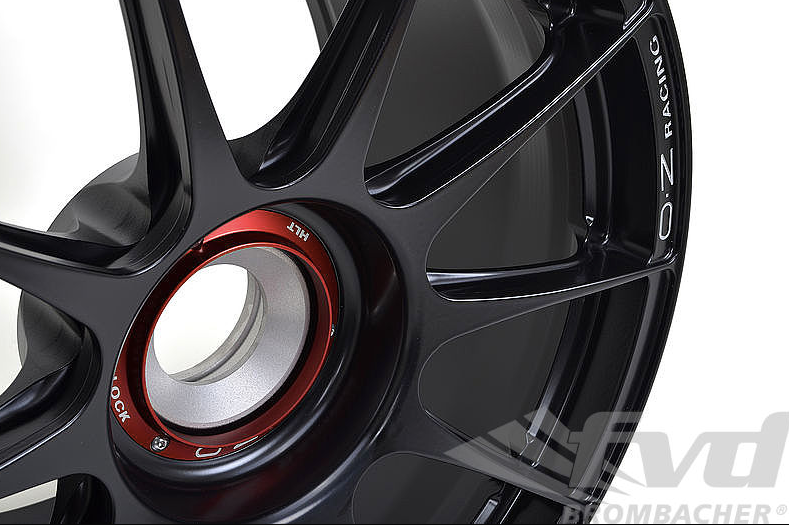
One has to go to magnesium to better those weights in a BBS RS-164, and price is well over $15K. (F 16 R 22 lbs)
Those BBS wheels as OEM Porsche "Weissach Package" mags in 20"/21" are $20K new, $22K if other than silver and MSRP is $26K. https://www.suncoastparts.com/produc...MAGNESIUM.html
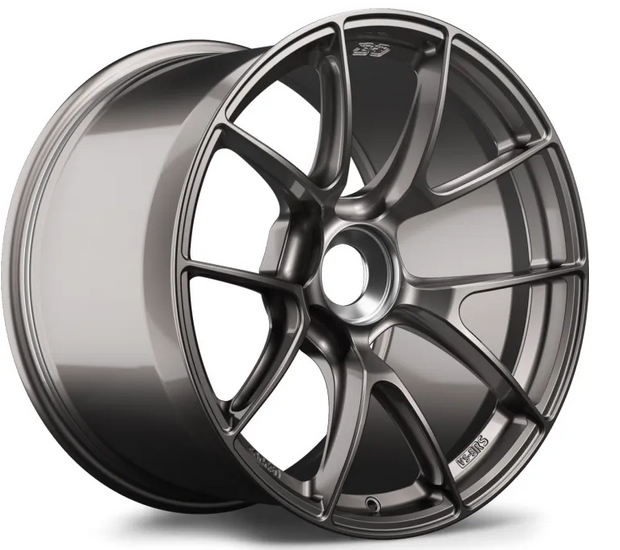
My OZ Superforgiata set in the same sizes weigh 17.6 and 21.8 lbs, but cost me $6500.
They were special order as the factory stopped forging 19" (but have some extremely limited New Old Stock sitting unfinished) via TireRack.
I especially like the scalloped I-Beam spokes on both of our wheels. Real F1 tech/design for the street.
I have et47/et48 on my WB centerlock GTS.
The OZ SF were advertised as 997.2 GT2 RS OEM fitment.
On a GTS, fronts are about 1/4- 1/2 inch proud (no front fender extensions like the 7.2 GT2/3 RS).
The OEM tire fitment was 245/35 and 325/30.
Why did you go with the 305 in rear?
Is the Goodyear F1SC3 narrower than the MPS4S and SC2 (which fit perfectly on the 12" wheel)?
Please post some pics showing the fitment from front and rear view.
Last edited by Liste-Renn; 05-27-2024 at 06:50 PM.
Nicely done!
Gorgeous wheels and crazy light at F 18.8 and 21.7 lbs!!
Especially for $3500. What a value.
One has to go to magnesium wheels to get those weights in a BBS, and price is well over $10K.
OEM Porsche Weissach mags in 20/21" are $20K new, $22K if other than silver and MSRP is $26K.
My OZ Superforgiata set in the same sizes weigh 17.6 and 21.8 lbs, but cost me $6500.
I especially like the scalloped I-Beam spokes on both of our wheels. Real F1 tech/design for the street.
Why did you go with the 305 in rear?
Please post some pics showing the fitment from front and rear view.
Thank you! I also like the scalloped beams on both our wheels. It's a cool design feature.
There's no way I'd spend $20K on wheels. As it is, the $3K on these was on the high end for what I'm willing to pay for wheels. (Black Friday sale from November).
For tire sizes, I just went with Apex's recommendations for "Performance Street and Track" use for my 4S. I figured they knew better than I would about what would work well: https://apexwheels.com/fitment-guide...reet-and-track
I didn't think to take photos from other angles. I'll do that and post soon.
Got the car back from front ppf/coating today and installed some zunsport grilles afterwards to finish off the front end. New wheels are en route from JP, which I'm hoping will arrive by the end of the week. The weak yen saved me quite a lot!
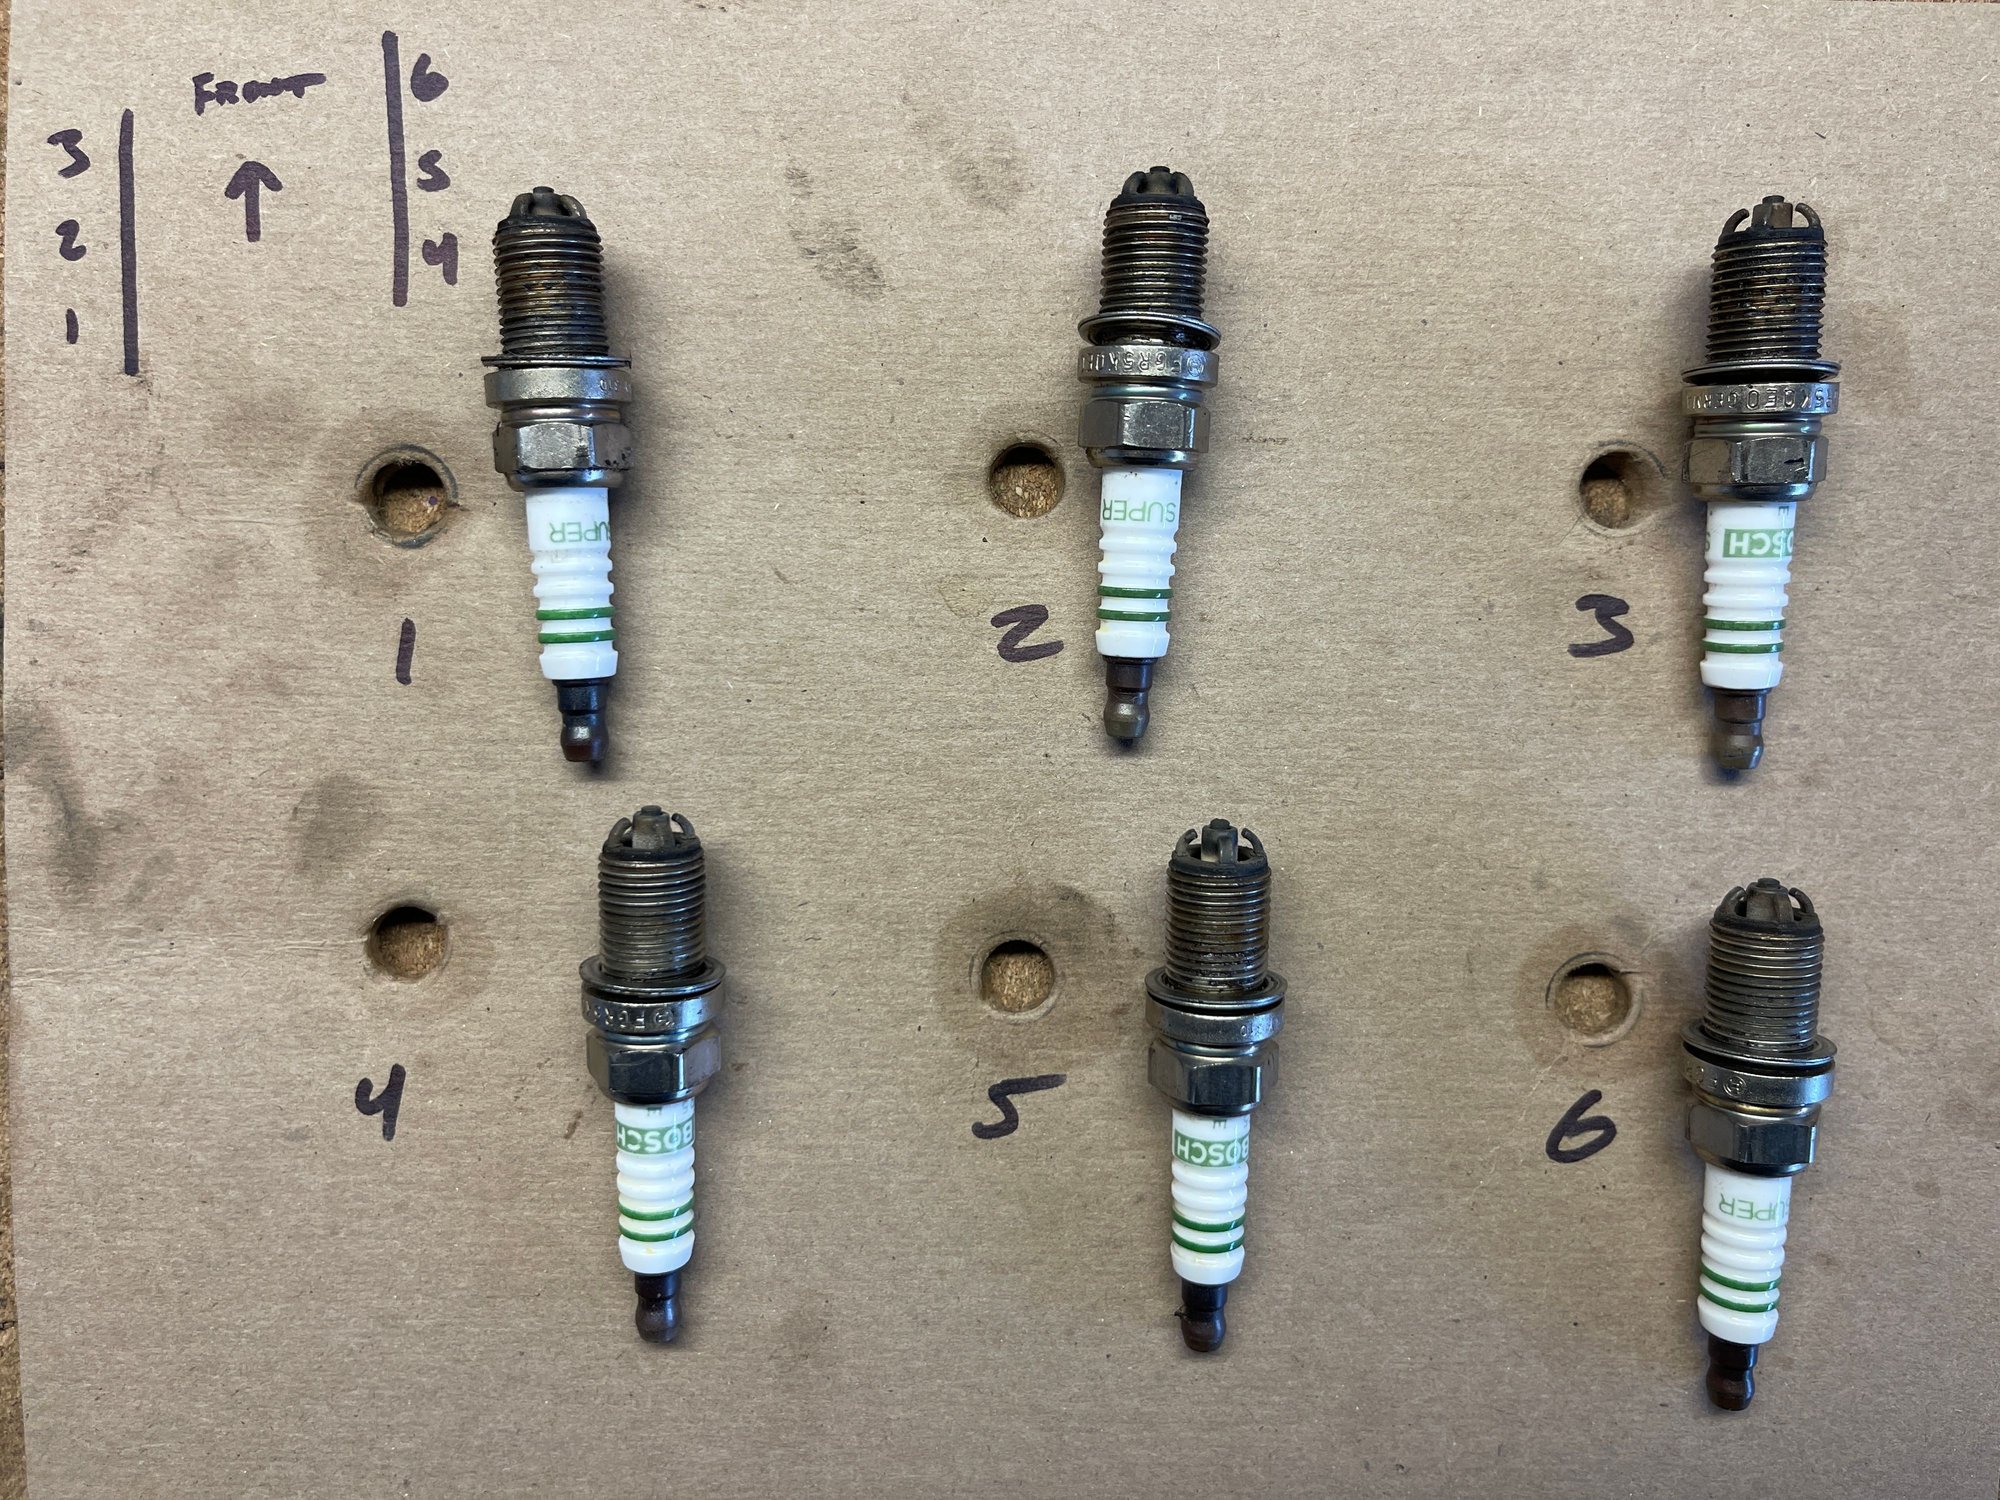
Well, a big one for me. Having learned how to do this from YouTube, the factory technical manual, and all of the wisdom and experience here on RL, I went into changing my spark plugs and ignition coils with some trepidation.
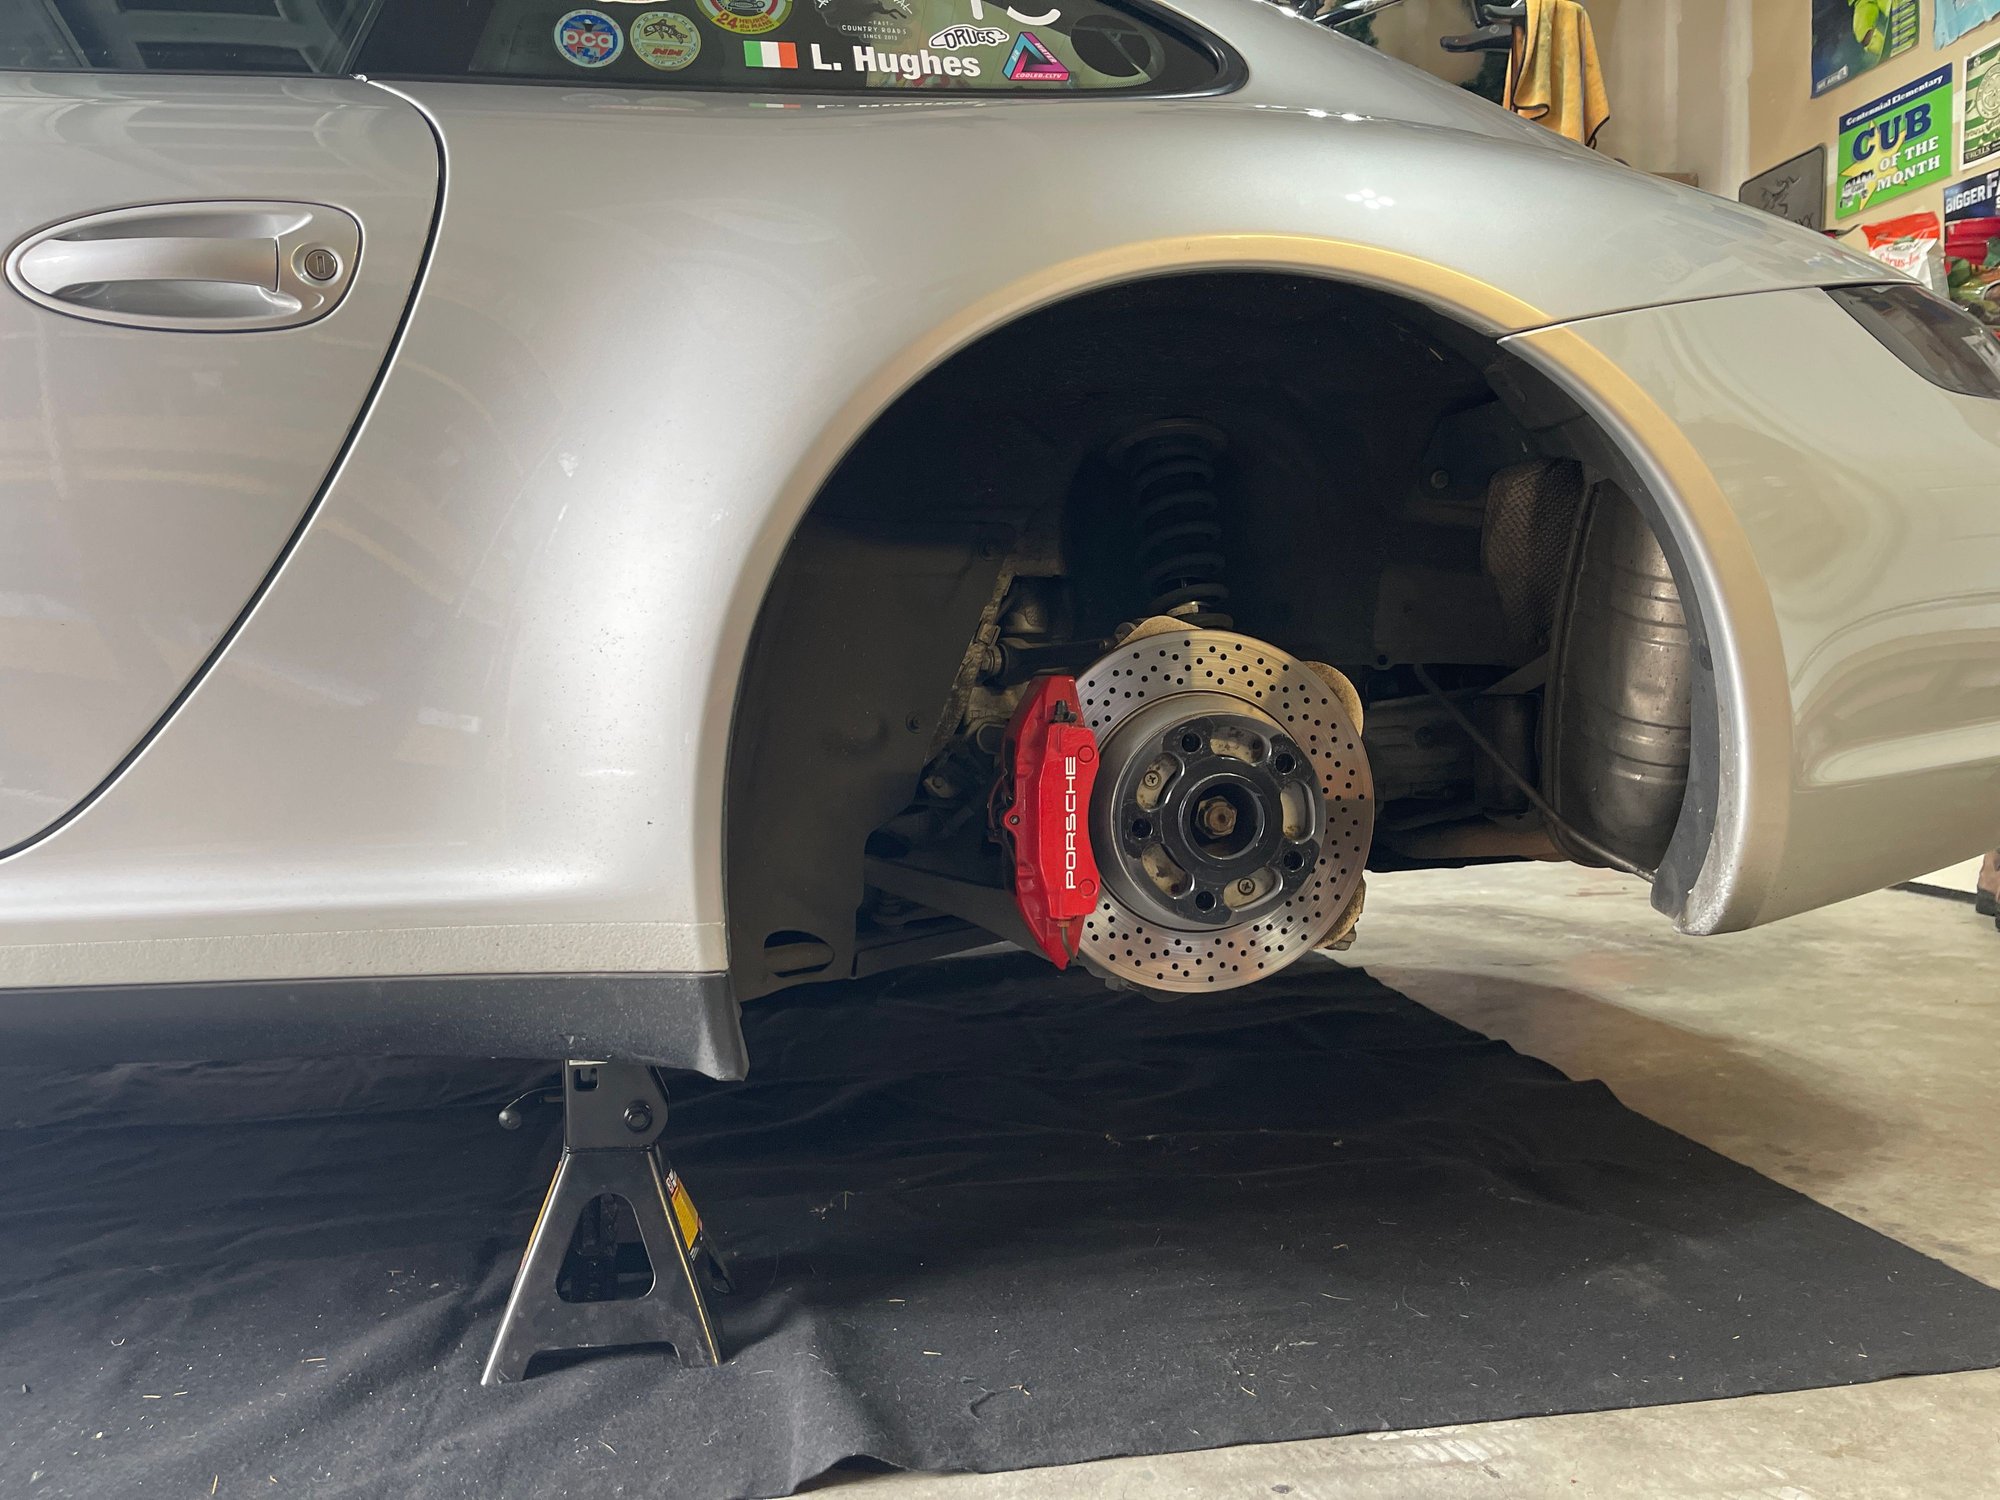
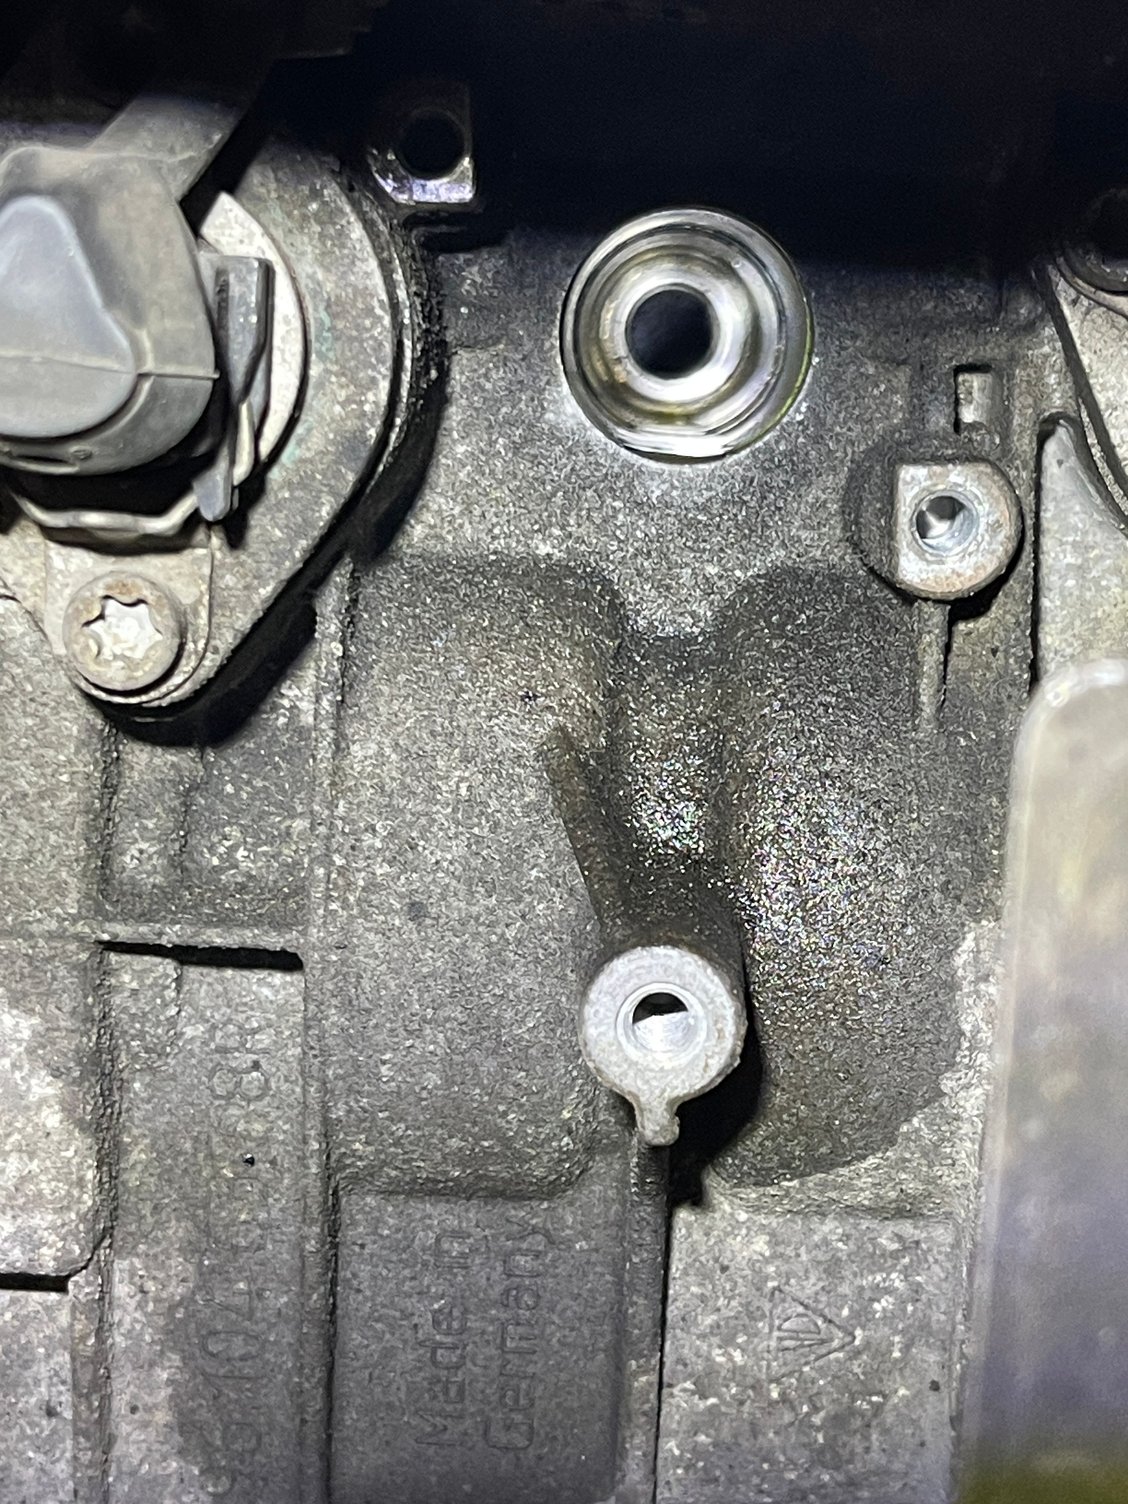
I studied the DIY from @Dave R. as well as the one from @USMC_DS1, watched the tutorials online, memorized the sequence and committed myself to removing the minimum of parts. This meant I left the rear bumper cover in place and left the mufflers alone. I was able to access all six plugs removing only the rear wheels. The mounting studs on my muffler brackets look a little frozen, same with the mounting bolts on my exhaust manifolds so these were staying on for now, that�s a project for another day.
For those contemplating this project it isn�t particularly complex, it�s just demanding of a lot of patience. Porsche�s engineers really did us no favors when they designed heat shields that mirror each other instead of bank 1 and bank 2 specific parts. Being able to remove the shield entirely to access bank 2 had me cursing bank 1 where the shield can move but only enough (barely) to get my hands and tools on cylinder 1.
Tips & tricks?
1. Light, something bright that can reach into tight spaces. I used a combination of headlamps, shop lights, and a magnetic LED torch
2. Duct tape your plug socket to your u-joint/extension, if it magnetizes to the plug and comes loose from your extension you�re gonna have a bad time getting the socket out of the plug hole
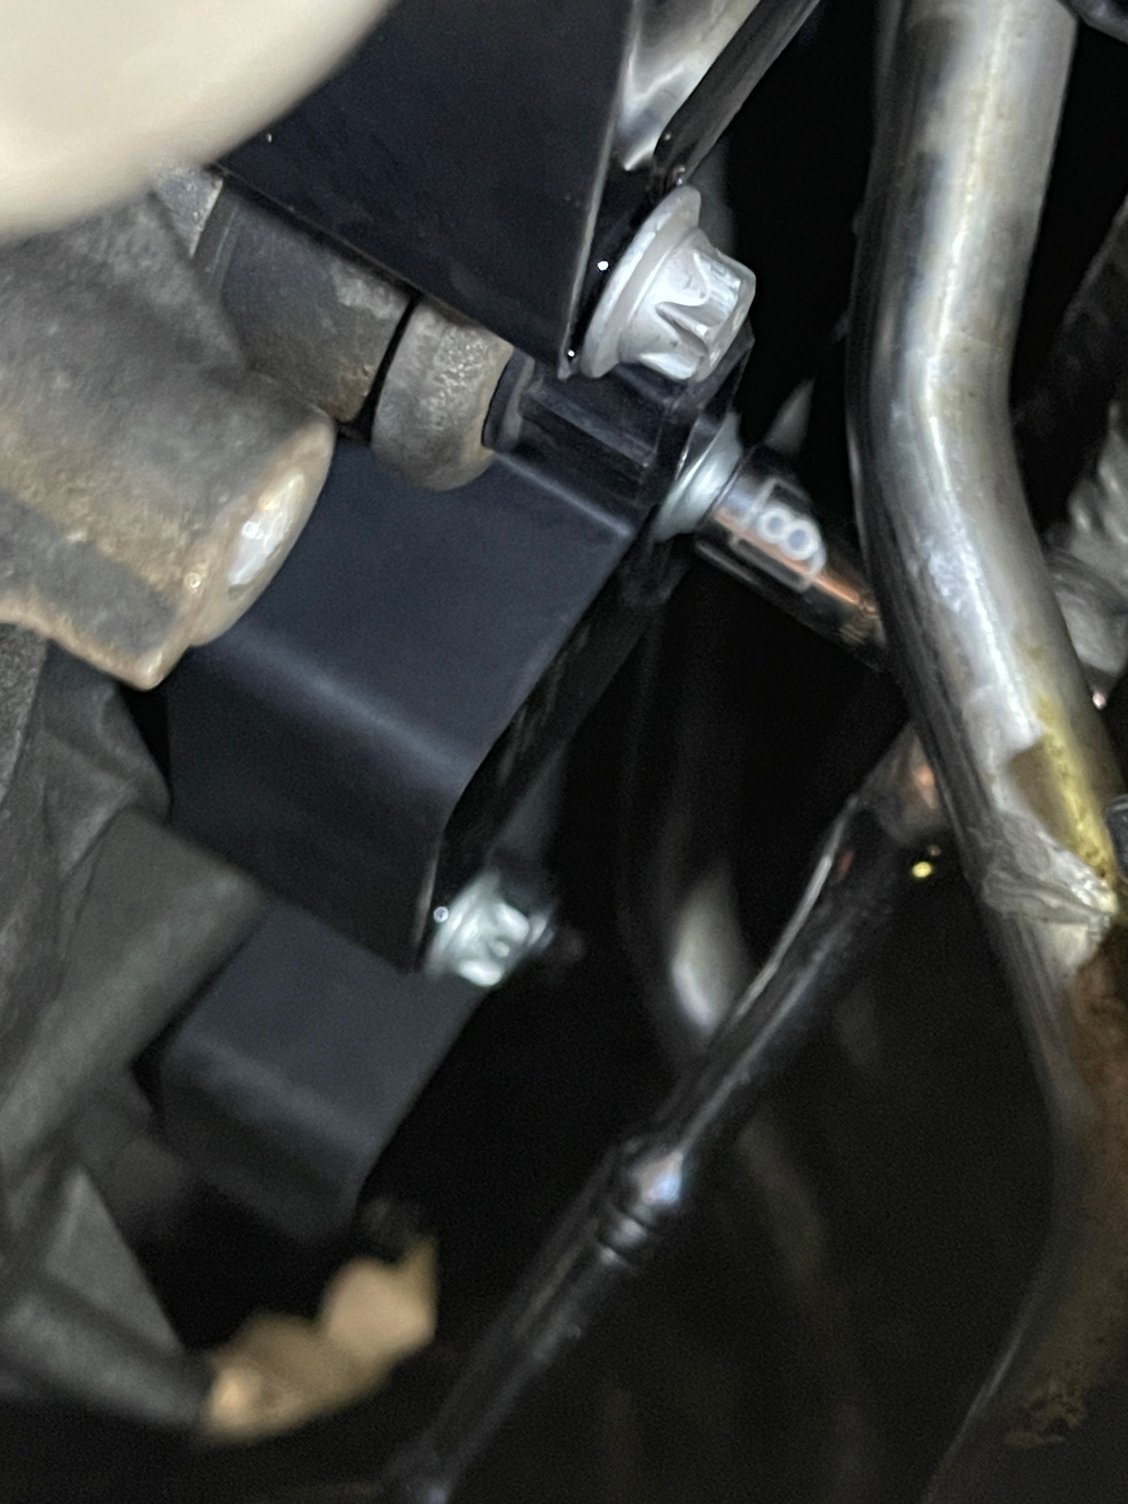
3. Disconnecting the cam solenoids helps open some space, don�t forget to re-connect. Same thing with the ground strap on bank 2
4. The new-style Beru coil packs use an E10 torx bolt. For cylinders 1 and 4 there just isn�t sufficient room to get the torx socket on the head, especially since the bolts in the coil packs now sit flush and have no recess. Use an 8mm socket, in a pinch it will work just fine
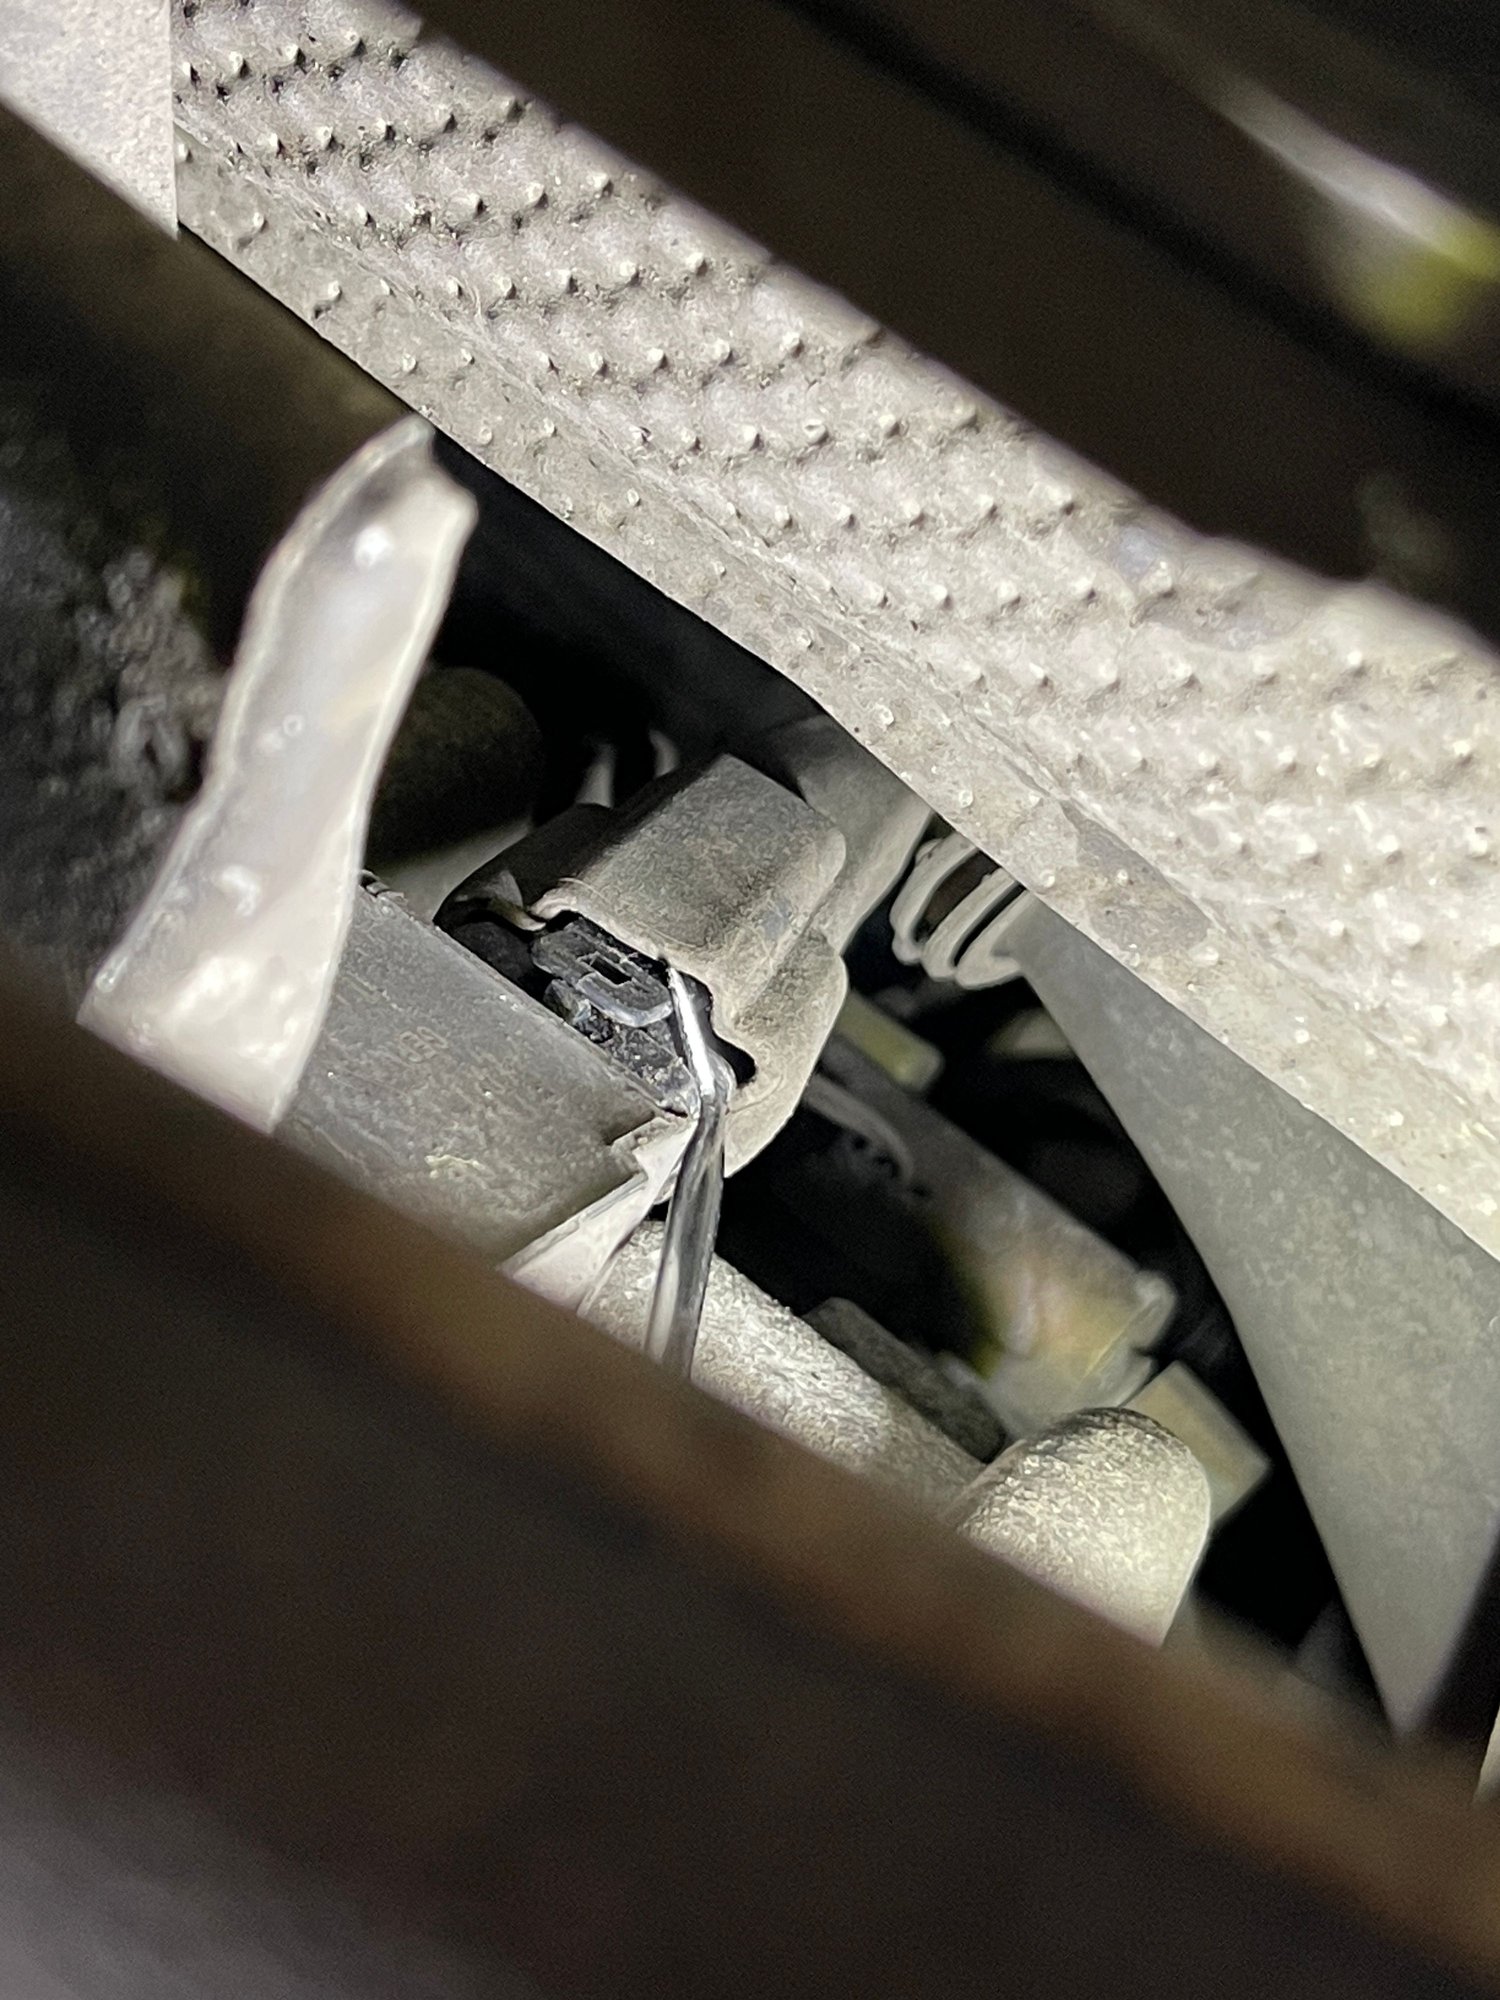
5. You can�t have enough variety in your tool selection, even some oddballs come in handy. I used a dental tool I found in the bottom of one of my dad�s tool boxes to lift the dust boot from the wiring connectors and I used uterine forceps (don�t ask) to reach through the headers to grasp and position the dust boots on re-installation. A 3/8� ratcheting wrench with a pivoting head was another lifesaver
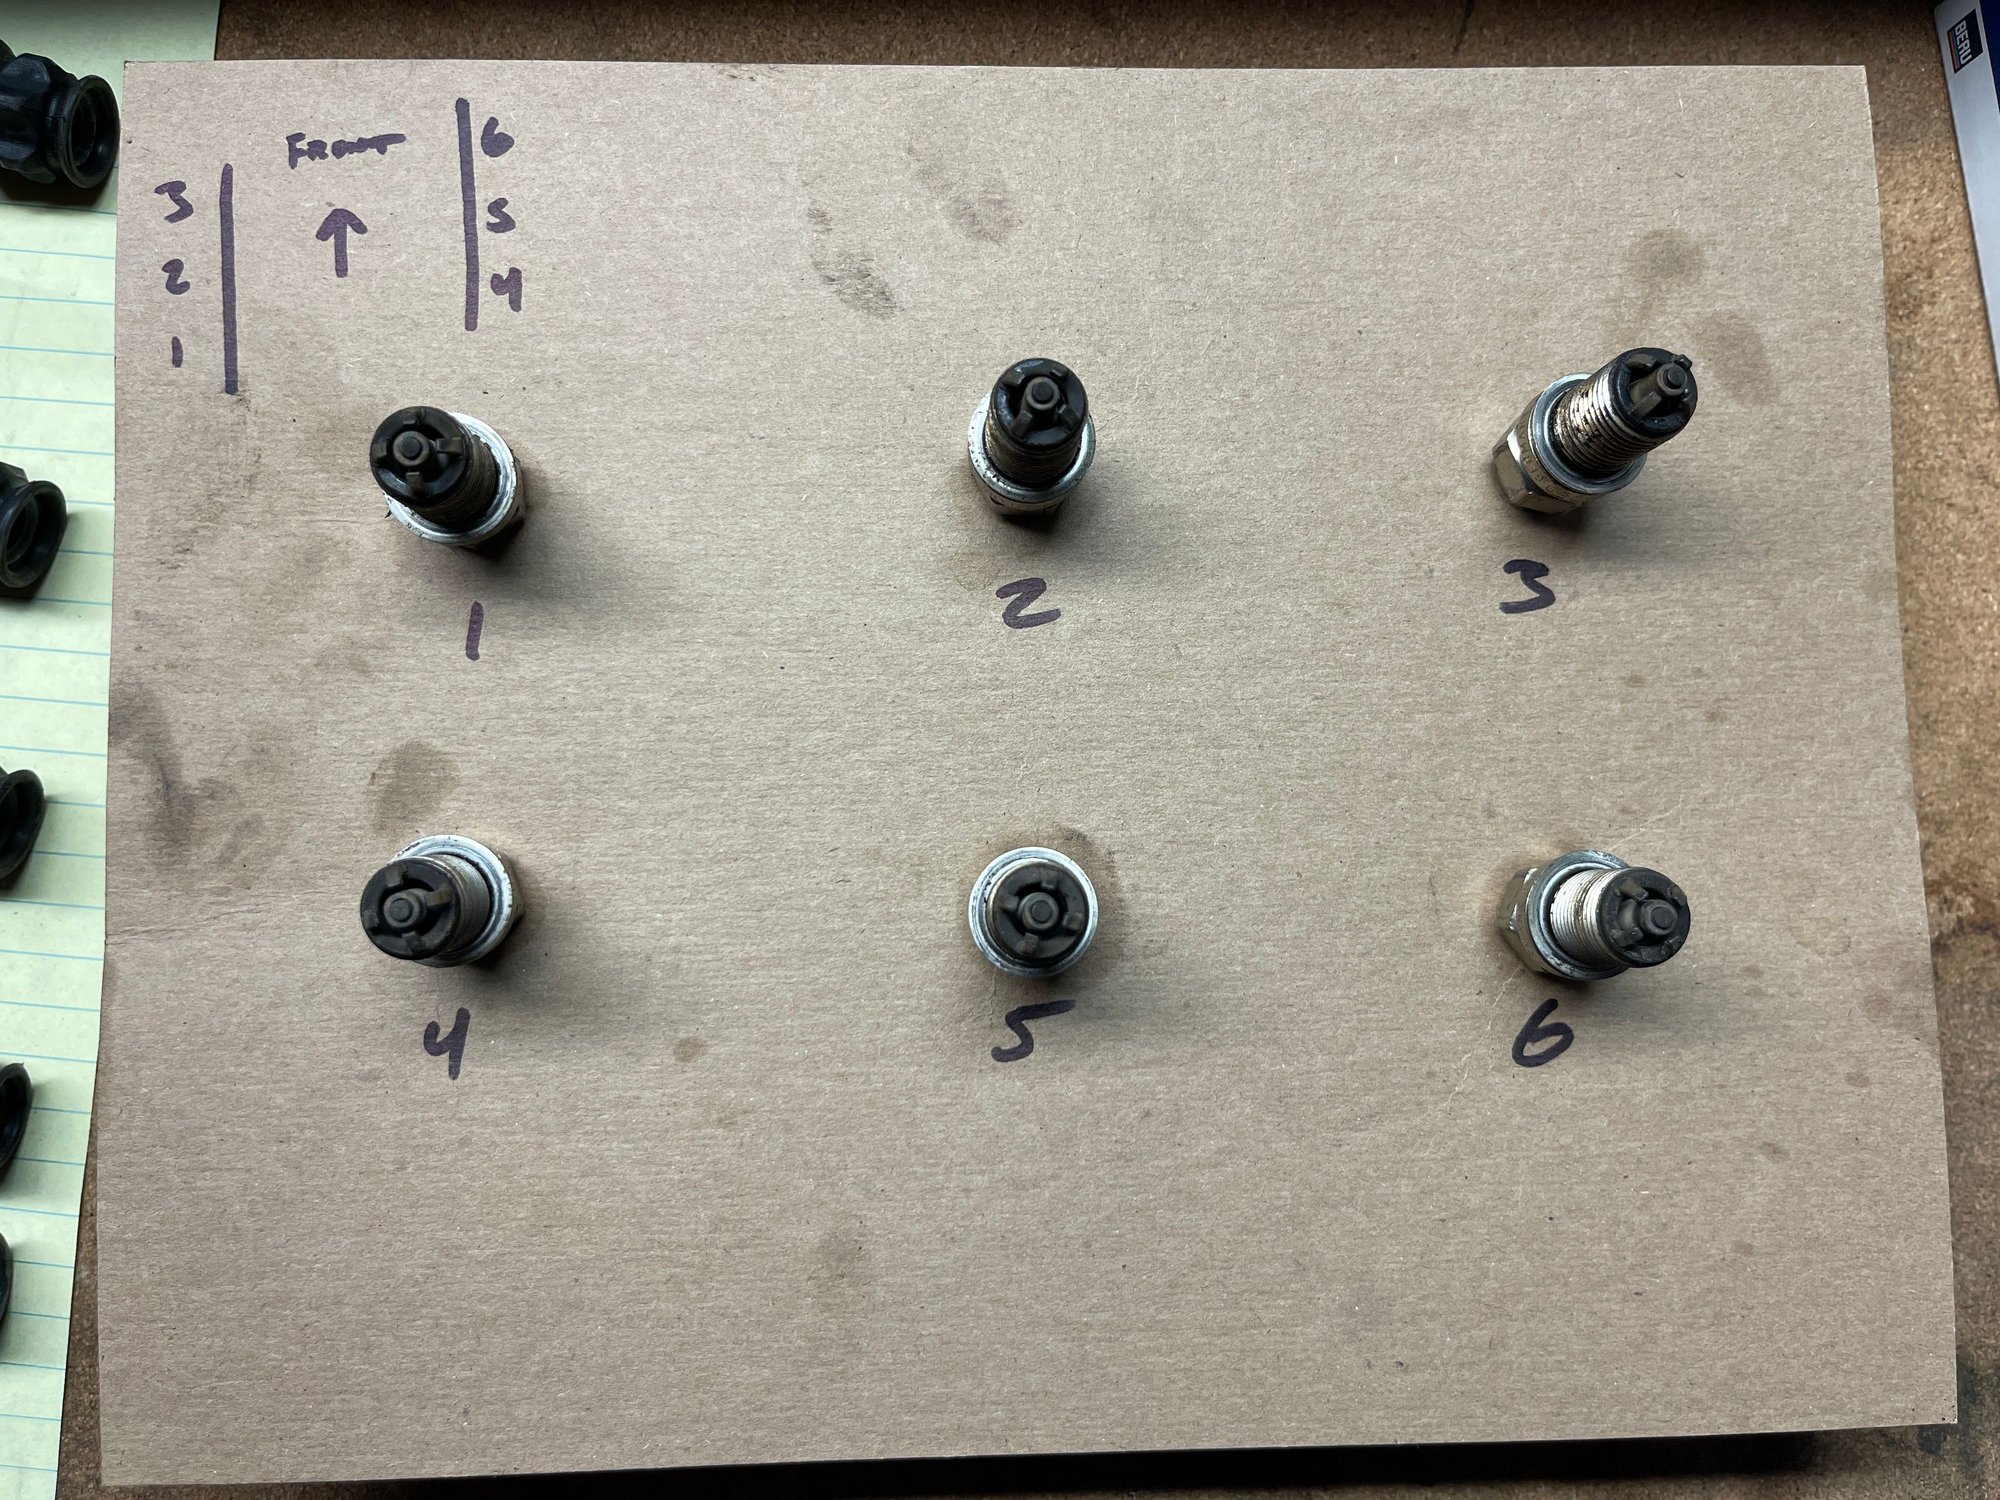
My car is at 119xxx miles and the plugs had been changed by the original dealer at her 60k service but the coils were factory originals.
All-in I spent $306 in parts and 6 hours of my own labor on a Sunday. I�m glad I won�t have to do this again for another 60k miles but when I do I�ll go in confident and you should too! I�ve read some saying you can do this without removing the rear wheels and I have no idea how that can be possible Cylinder 3, the easiest to access and photograph Cylinder 3 buttoned up Bank 2, looking aft. The cam solenoid is visible between cylinders 4 and 5 Bank 1, 8mm socket on a small 1/4� drive ratchet was the only way I could fasten the E10 bolts Dental pick (dunno if that�s what it�s called) lifting the dust boot from the electrical connector on cylinder 1 Old spark plugs, nearly 60k miles on them, looking more or less like you�d expect To my eye the plugs look fine The FCP Euro plug/coil kit comes with identical Bosch spark plugs Factory original ignition coils, no cracks or damage
@Hootsama .1 - 2006 C4. I was having anxiety about it too. I surprised myself with how I managed to keep my frustration in check. Give yourself time when you do it, take a break for lunch after you finish bank 1, thread the new plugs in slowly and carefully, make sure the connectors are up and out of the way so you don't crush them under the new coil packs, you'll be fine!


 05-24-2024, 08:58 PM