

Tales of Sierra - A 997.1 Story
 06-15-2022, 08:43 AM
#46
Three Wheelin'
Goo Gone would have shifted, if left to soak?
It seems to remove stuff for me if I just place the bottle near something after a few days...
I like the black stone guards!
It seems to remove stuff for me if I just place the bottle near something after a few days...
I like the black stone guards!
 06-15-2022, 11:03 AM
#47
Nordschleife Master
Excellent thread! It shows these cars can be owner maintained in many areas and the OP did an excellent job.
The following users liked this post:
kiznarsh (06-15-2022)
06-15-2022, 01:23 PM
#48
Rennlist Member
Thread Starter
And yeah, I'm really digging the black stone guards. Makes me consider going with black wheels but pretty sure I'll stick with silver once I upgrade later this year.
06-15-2022, 02:29 PM
#49
Nordschleife Master
06-15-2022, 02:49 PM
#50
Rennlist Member
Thread Starter
Negative. I looked into those but didn't appear to be available these days. Here's what I got:
https://www.suncoastparts.com/product/55903500.html
https://www.suncoastparts.com/product/55903500.html
 06-15-2022, 03:42 PM
#52
Nordschleife Master
Negative. I looked into those but didn't appear to be available these days. Here's what I got:
https://www.suncoastparts.com/product/55903500.html
https://www.suncoastparts.com/product/55903500.html
06-15-2022, 07:01 PM
#53
Rennlist Member
Thread Starter
Hardest part was getting the film to attach to the body over the "ridge" near the bottom but after several attempts, it finally stuck. I'm also pretty OCD about stuff so I went over it many times with the squeegee to make sure all the soapy solution came out, and then went around the perimeter a couple times too.
07-26-2022, 12:21 AM
#54
Rennlist Member
Thread Starter
I recently completed a 1,500 mile road trip up to Northern California. Here are a few pics:
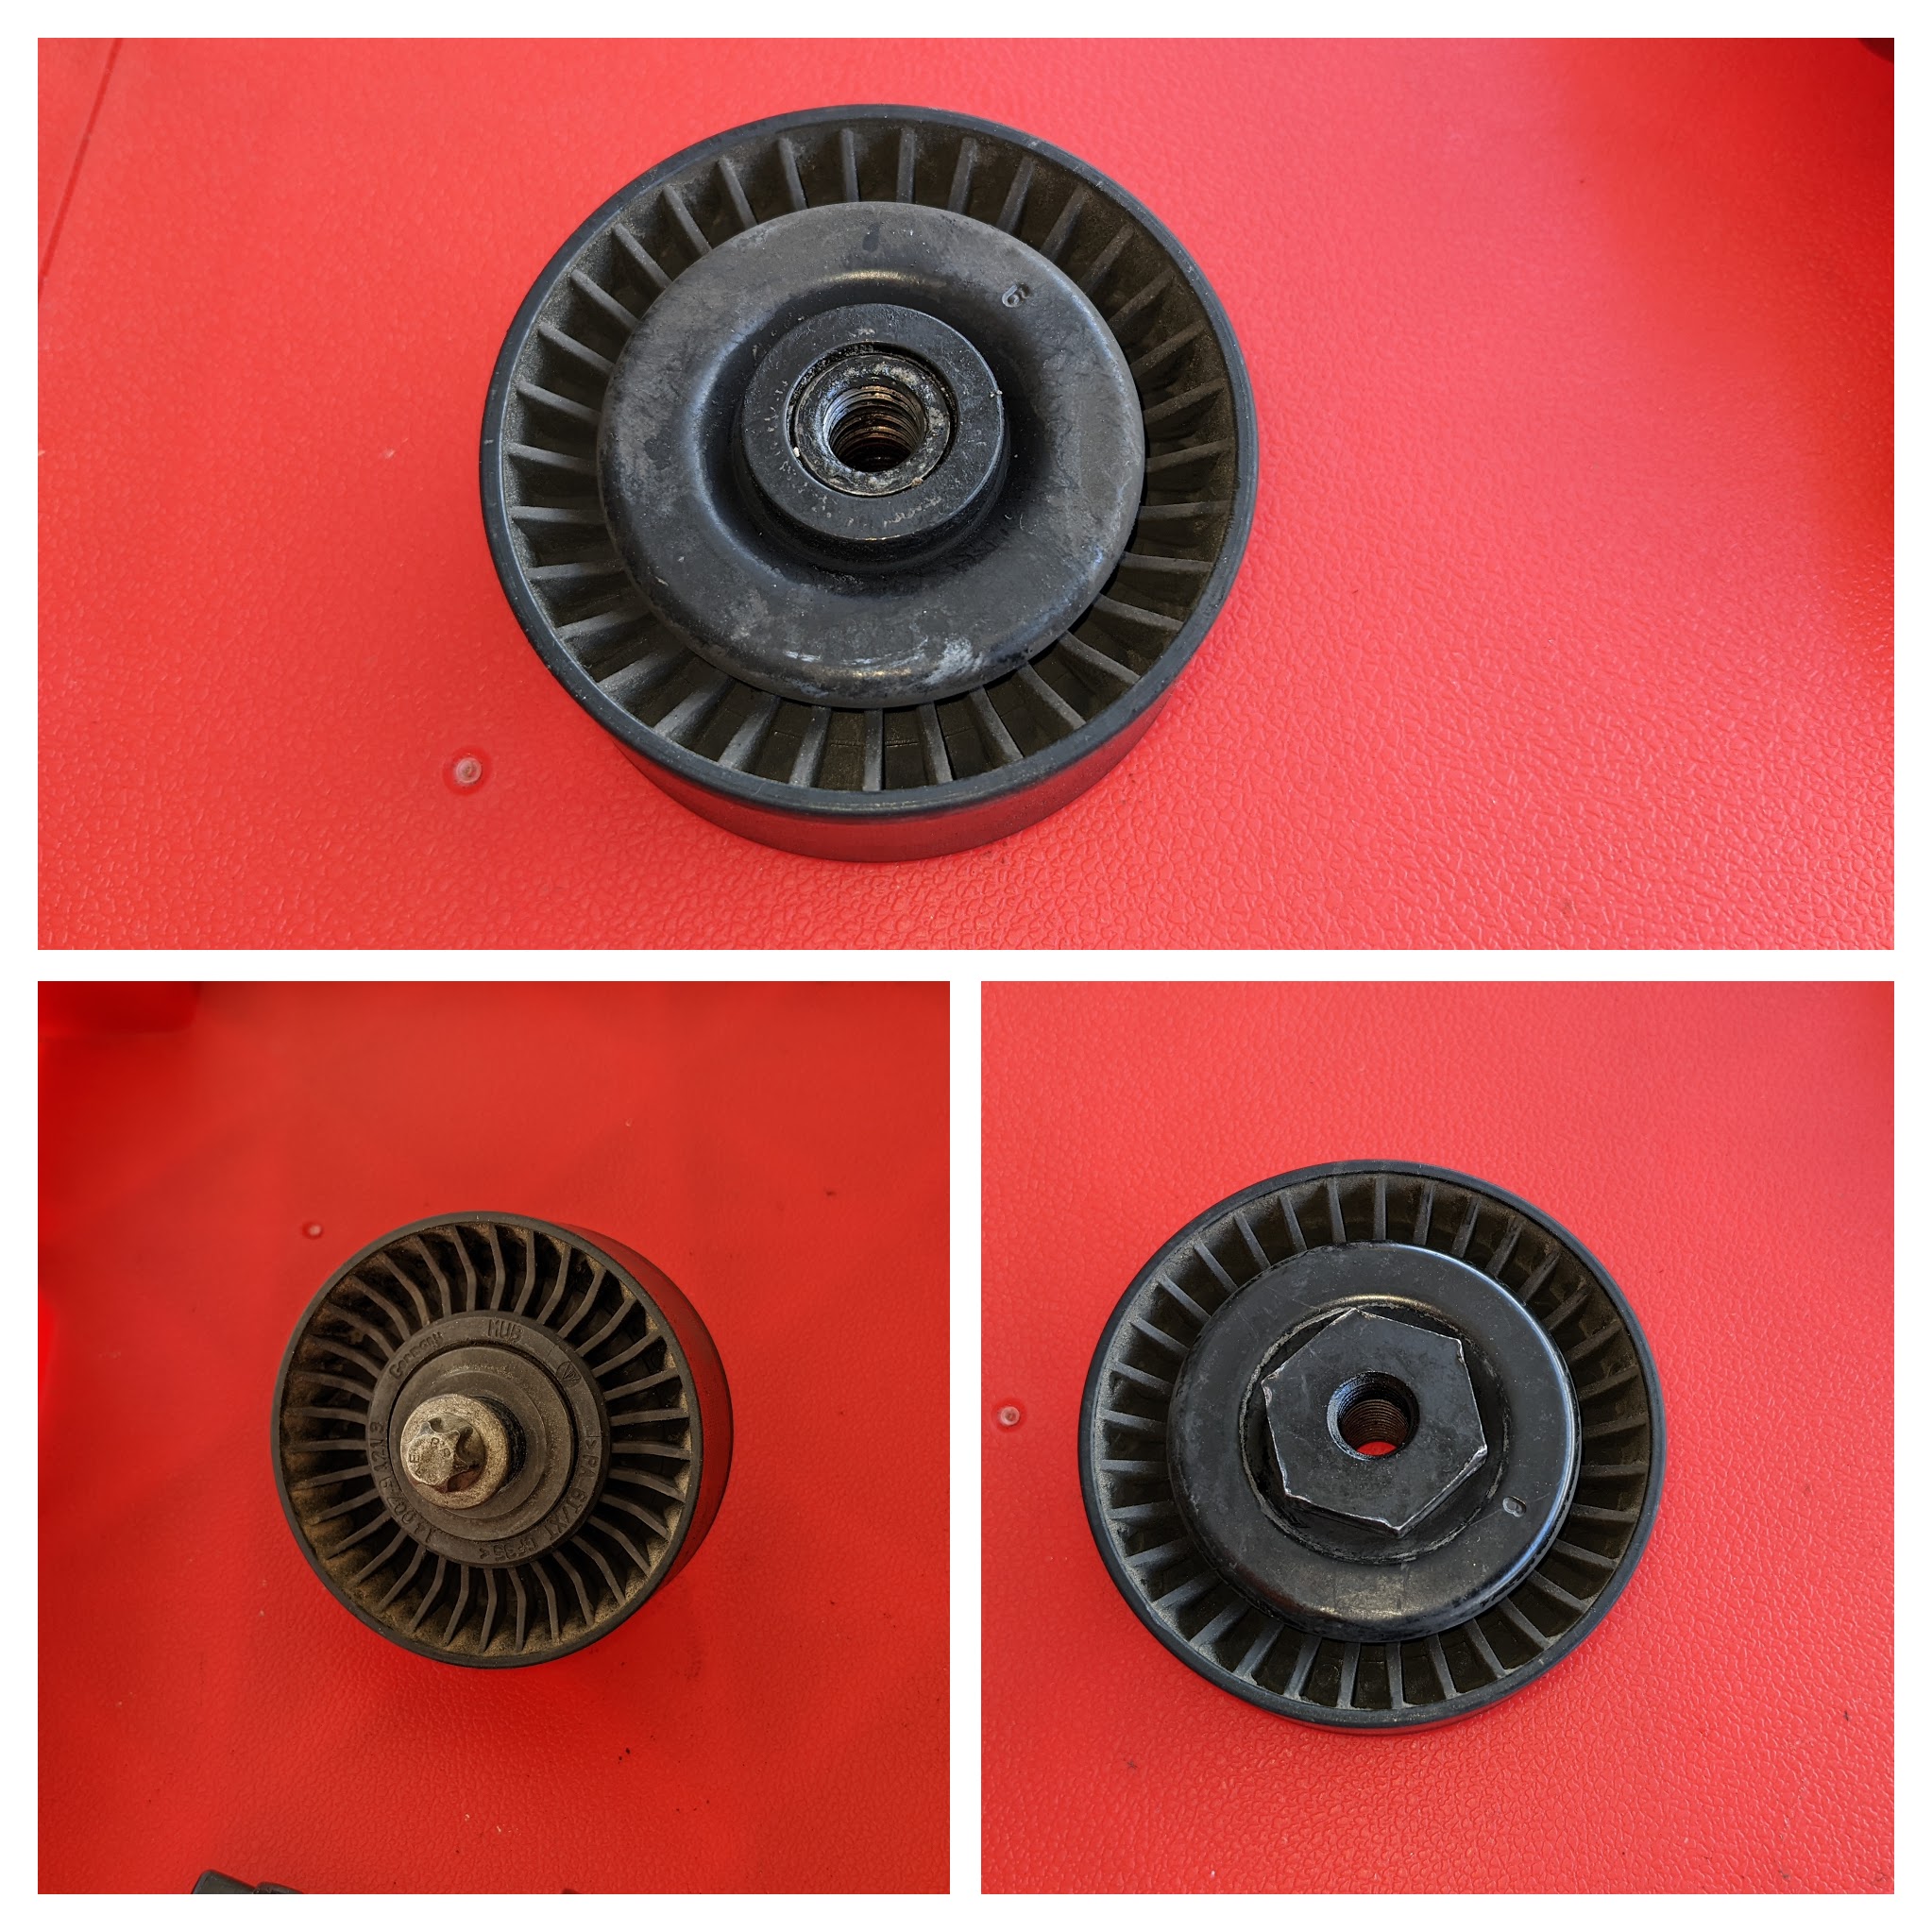
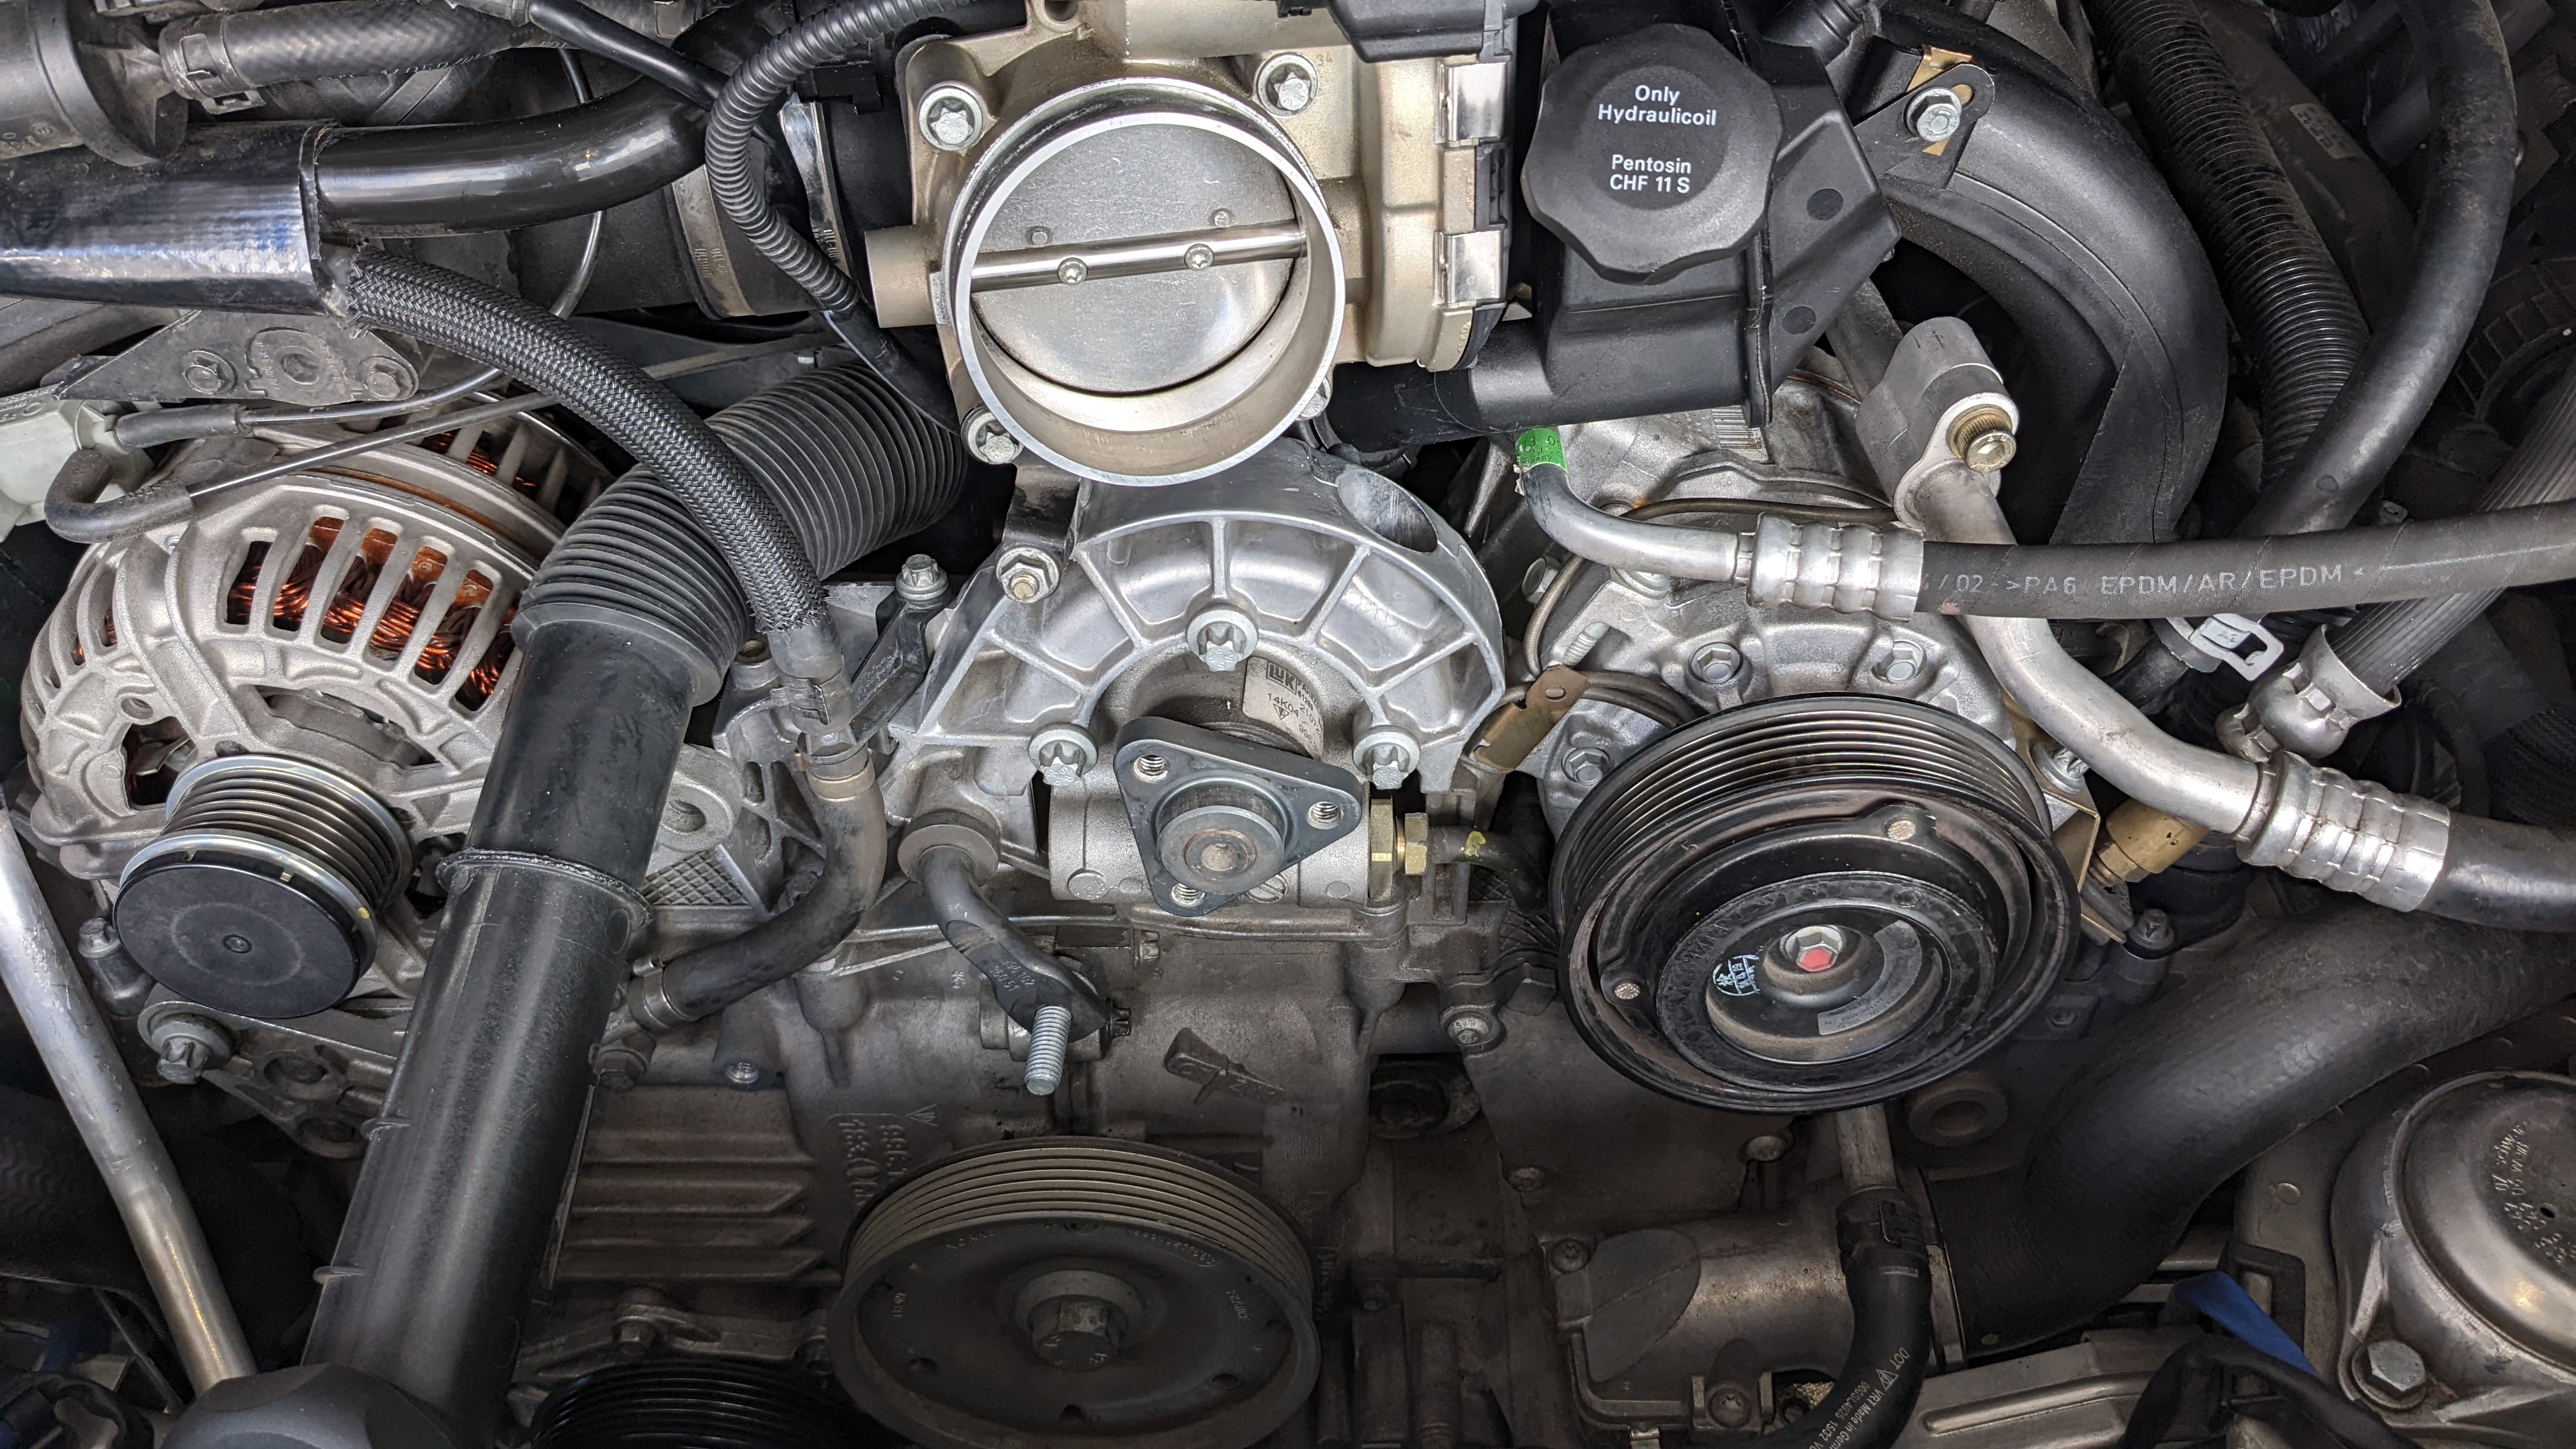
Took a look inside the engine bay after washing the car back home and noticed the idler pulley is starting to deteriorate. Should've swapped them all when I installed the new belt.
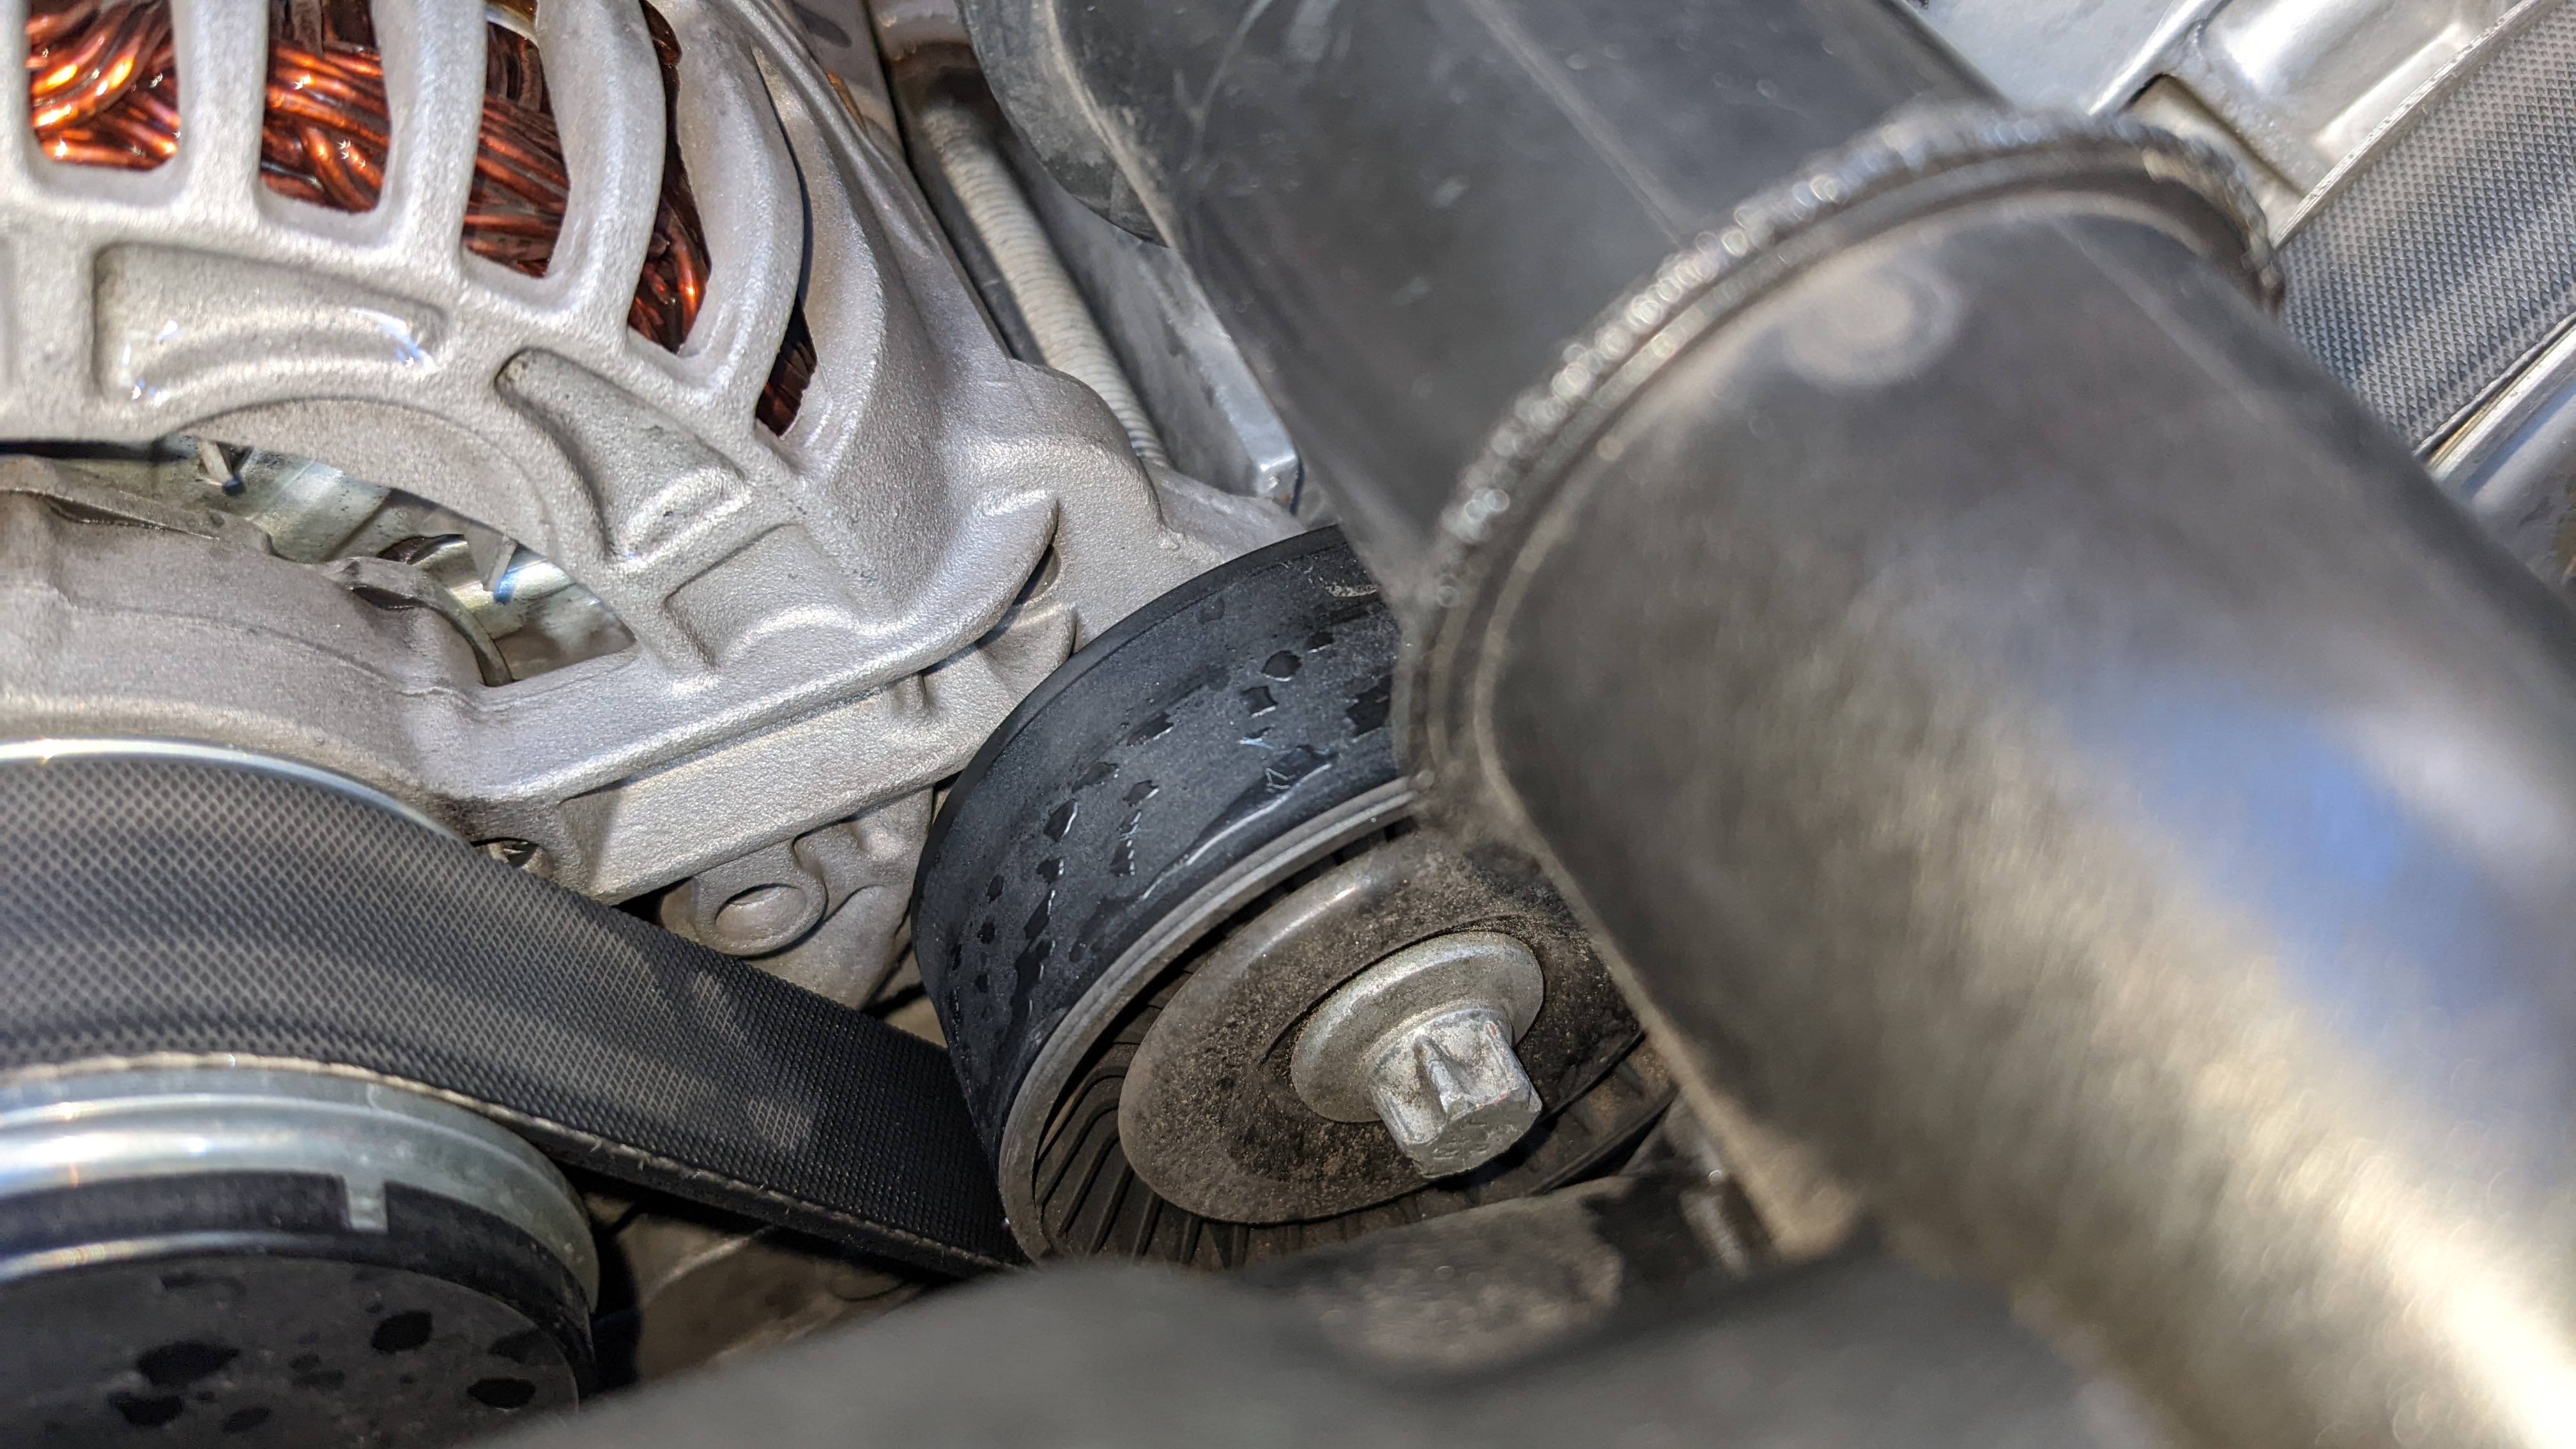
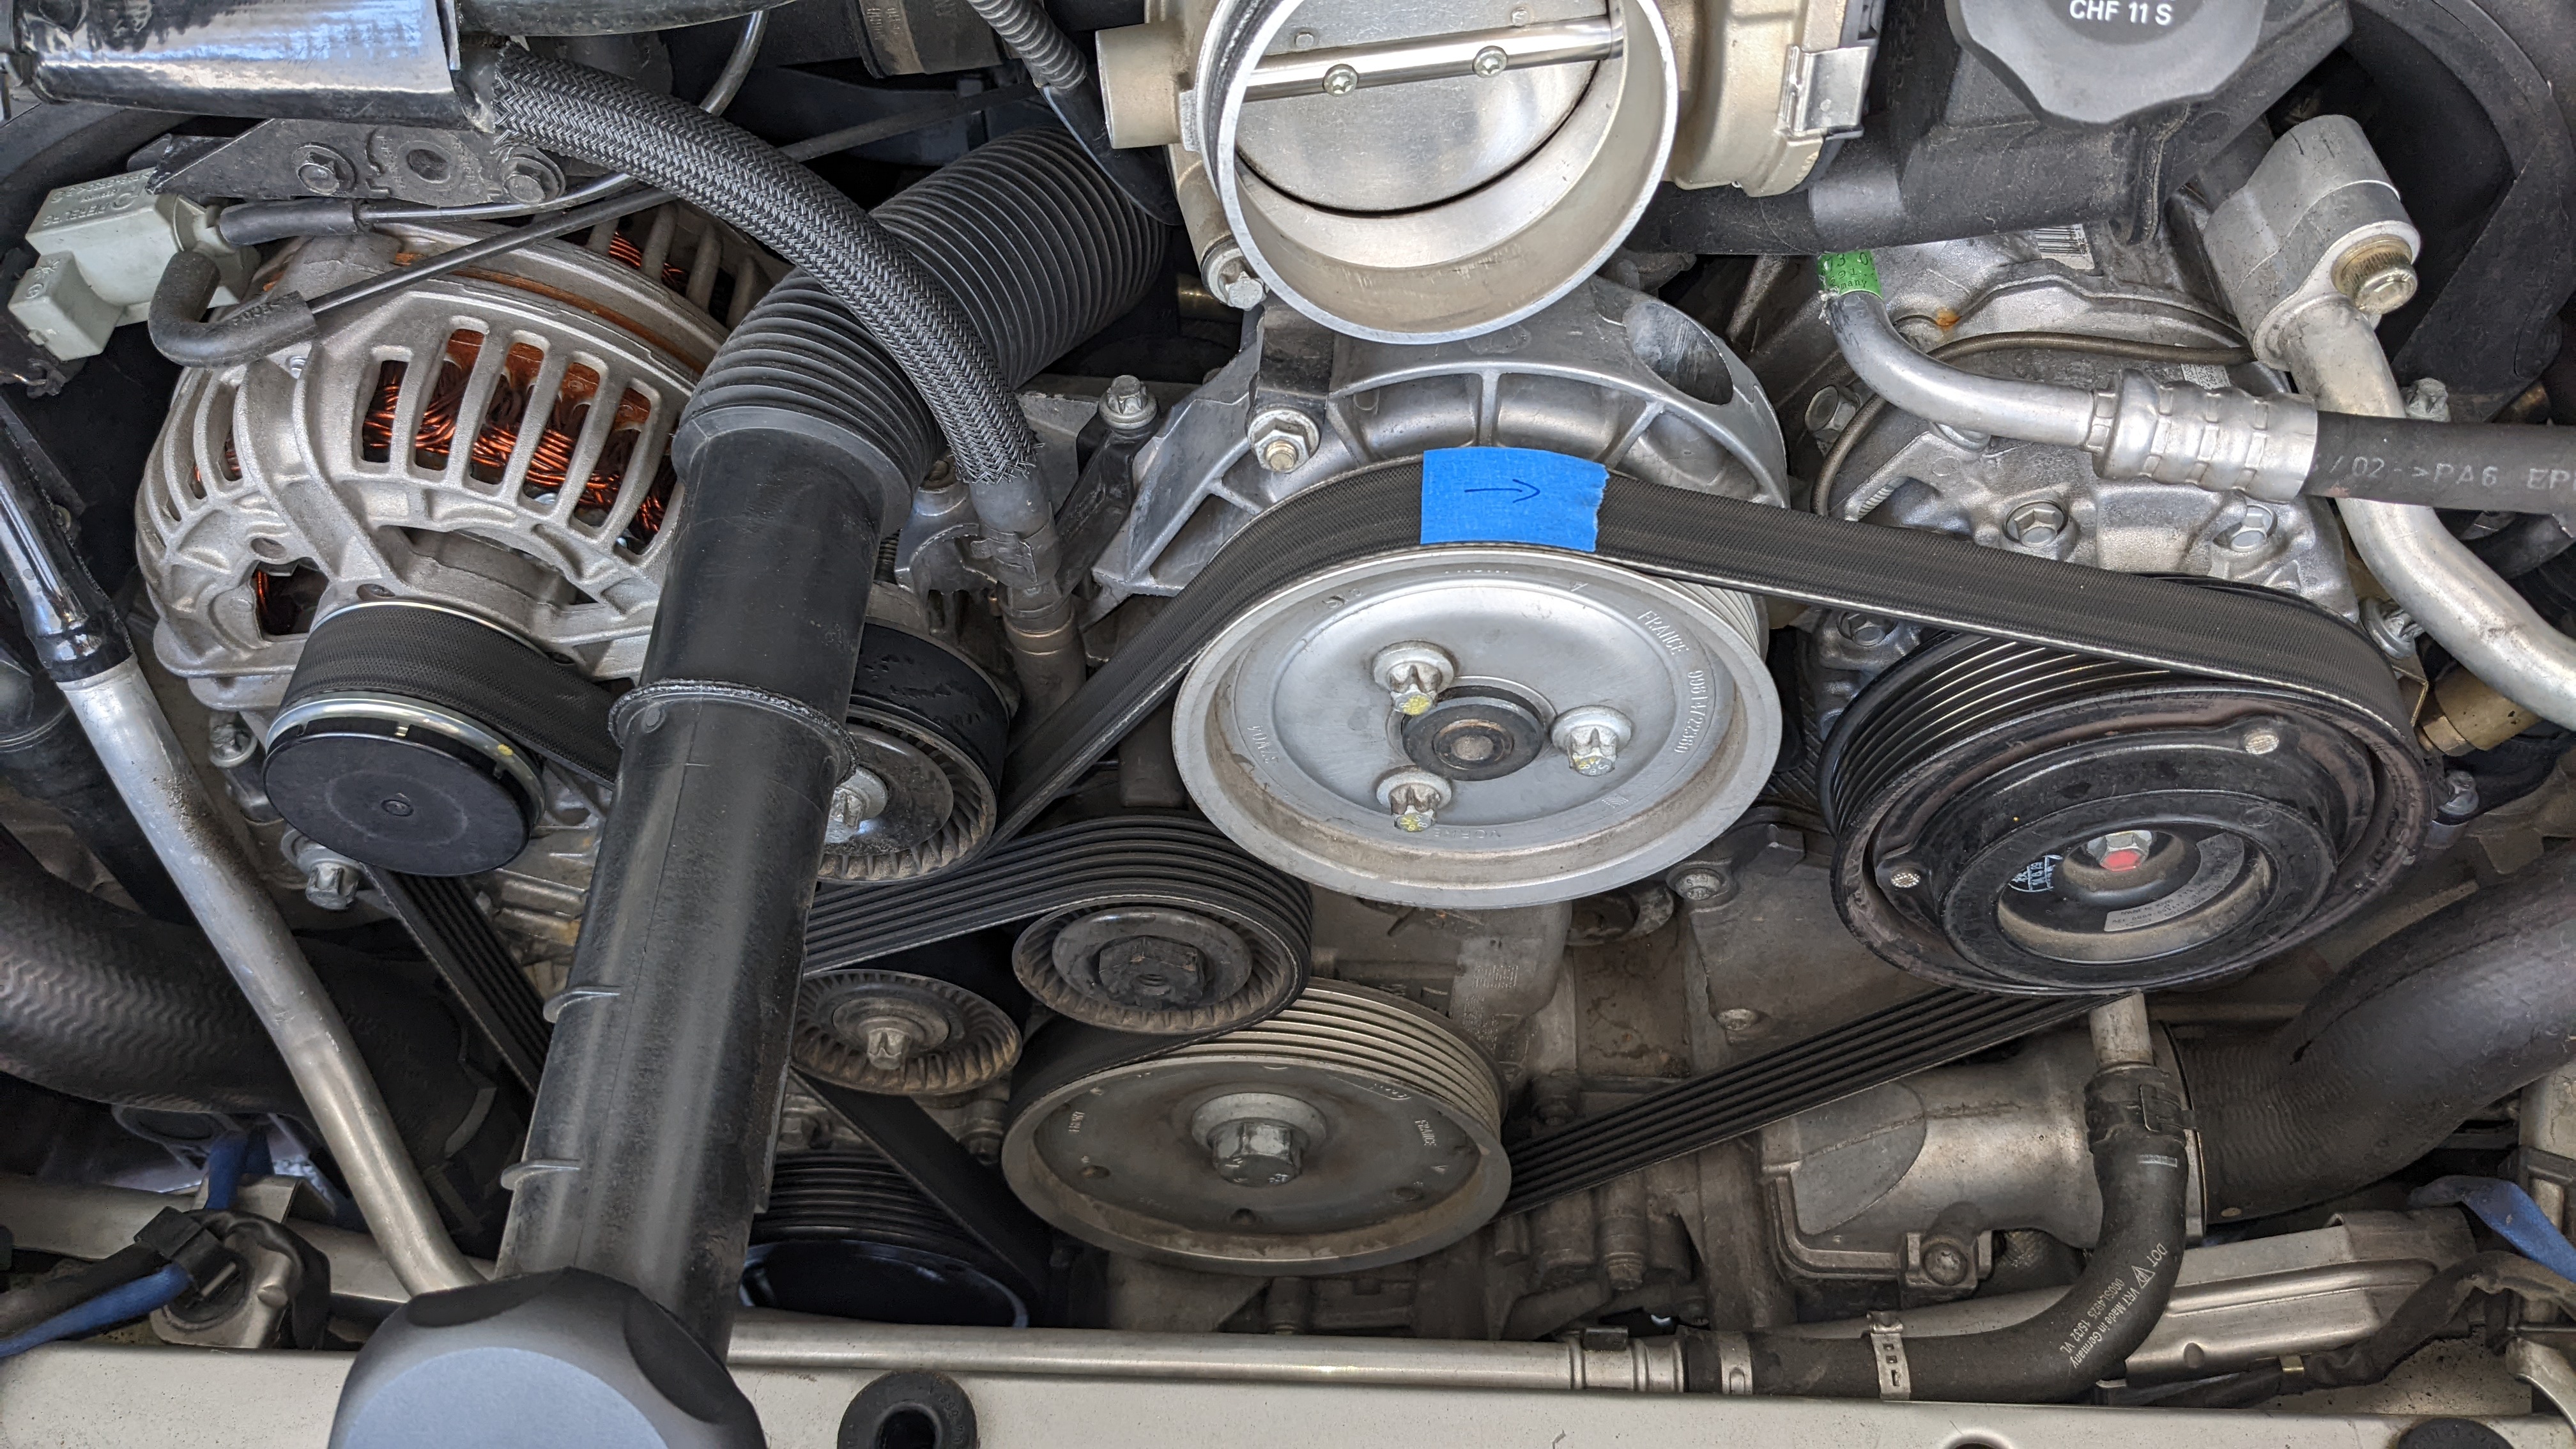
Marked the belt before removing.
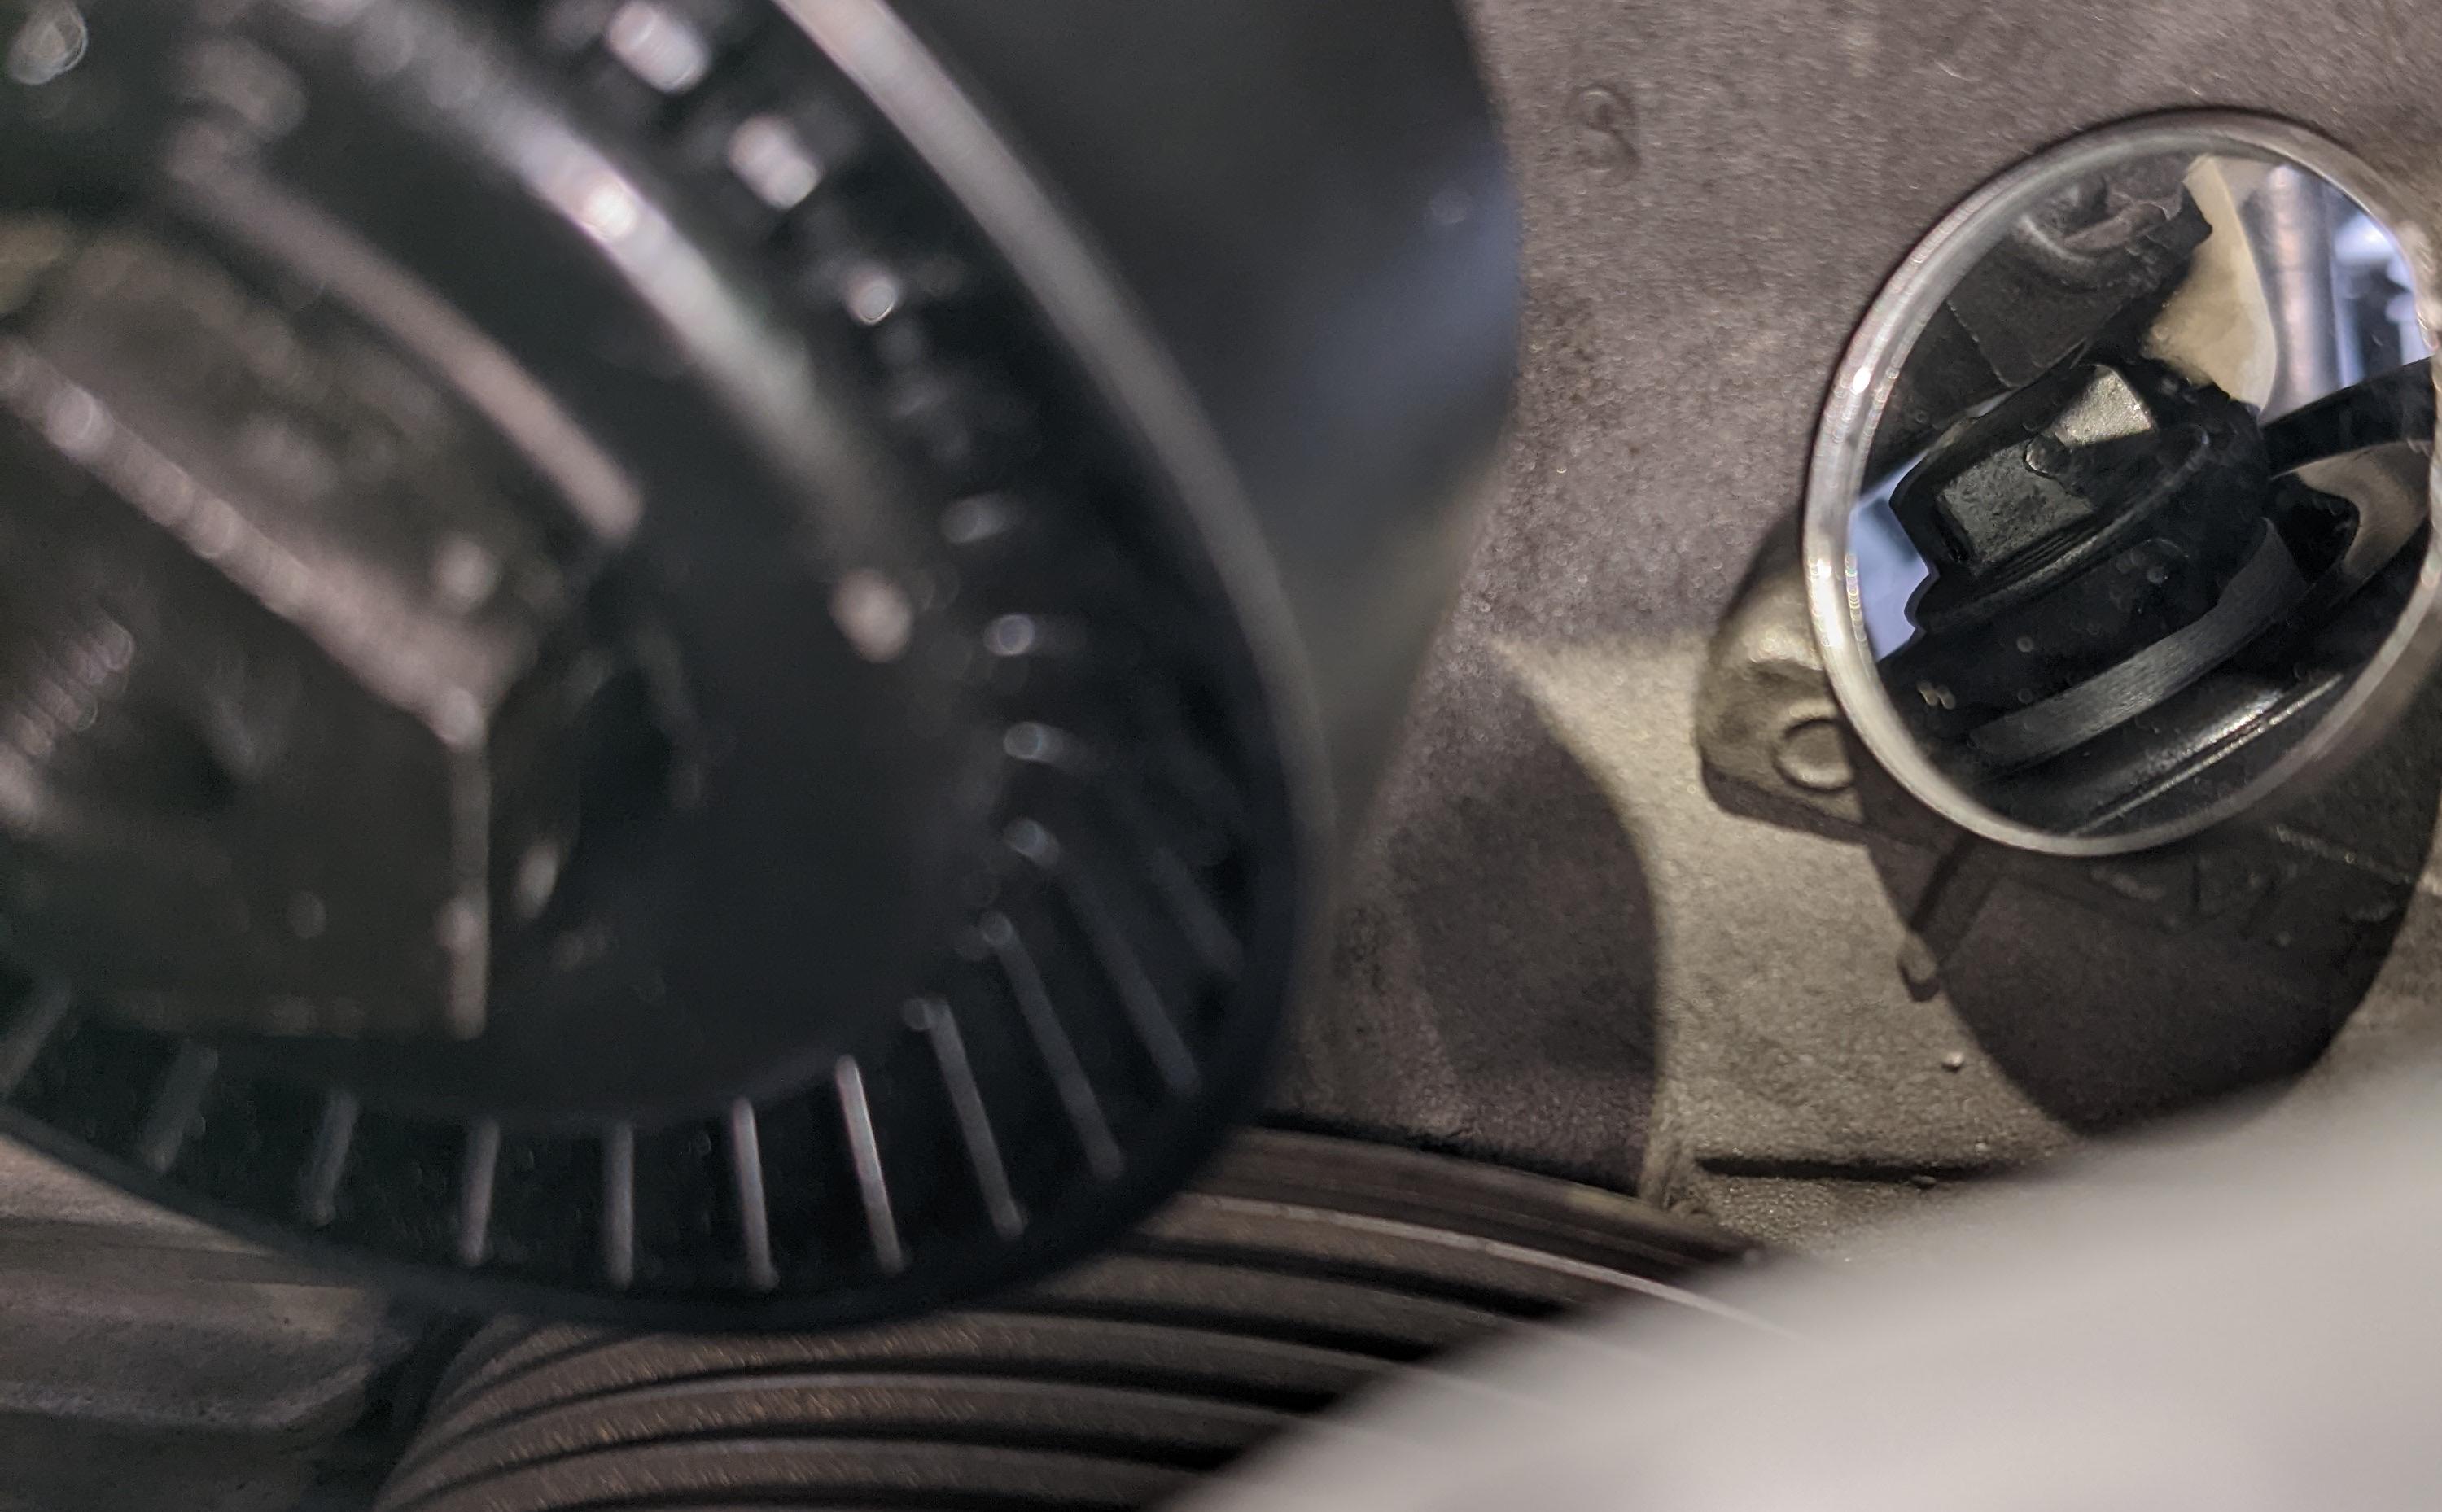
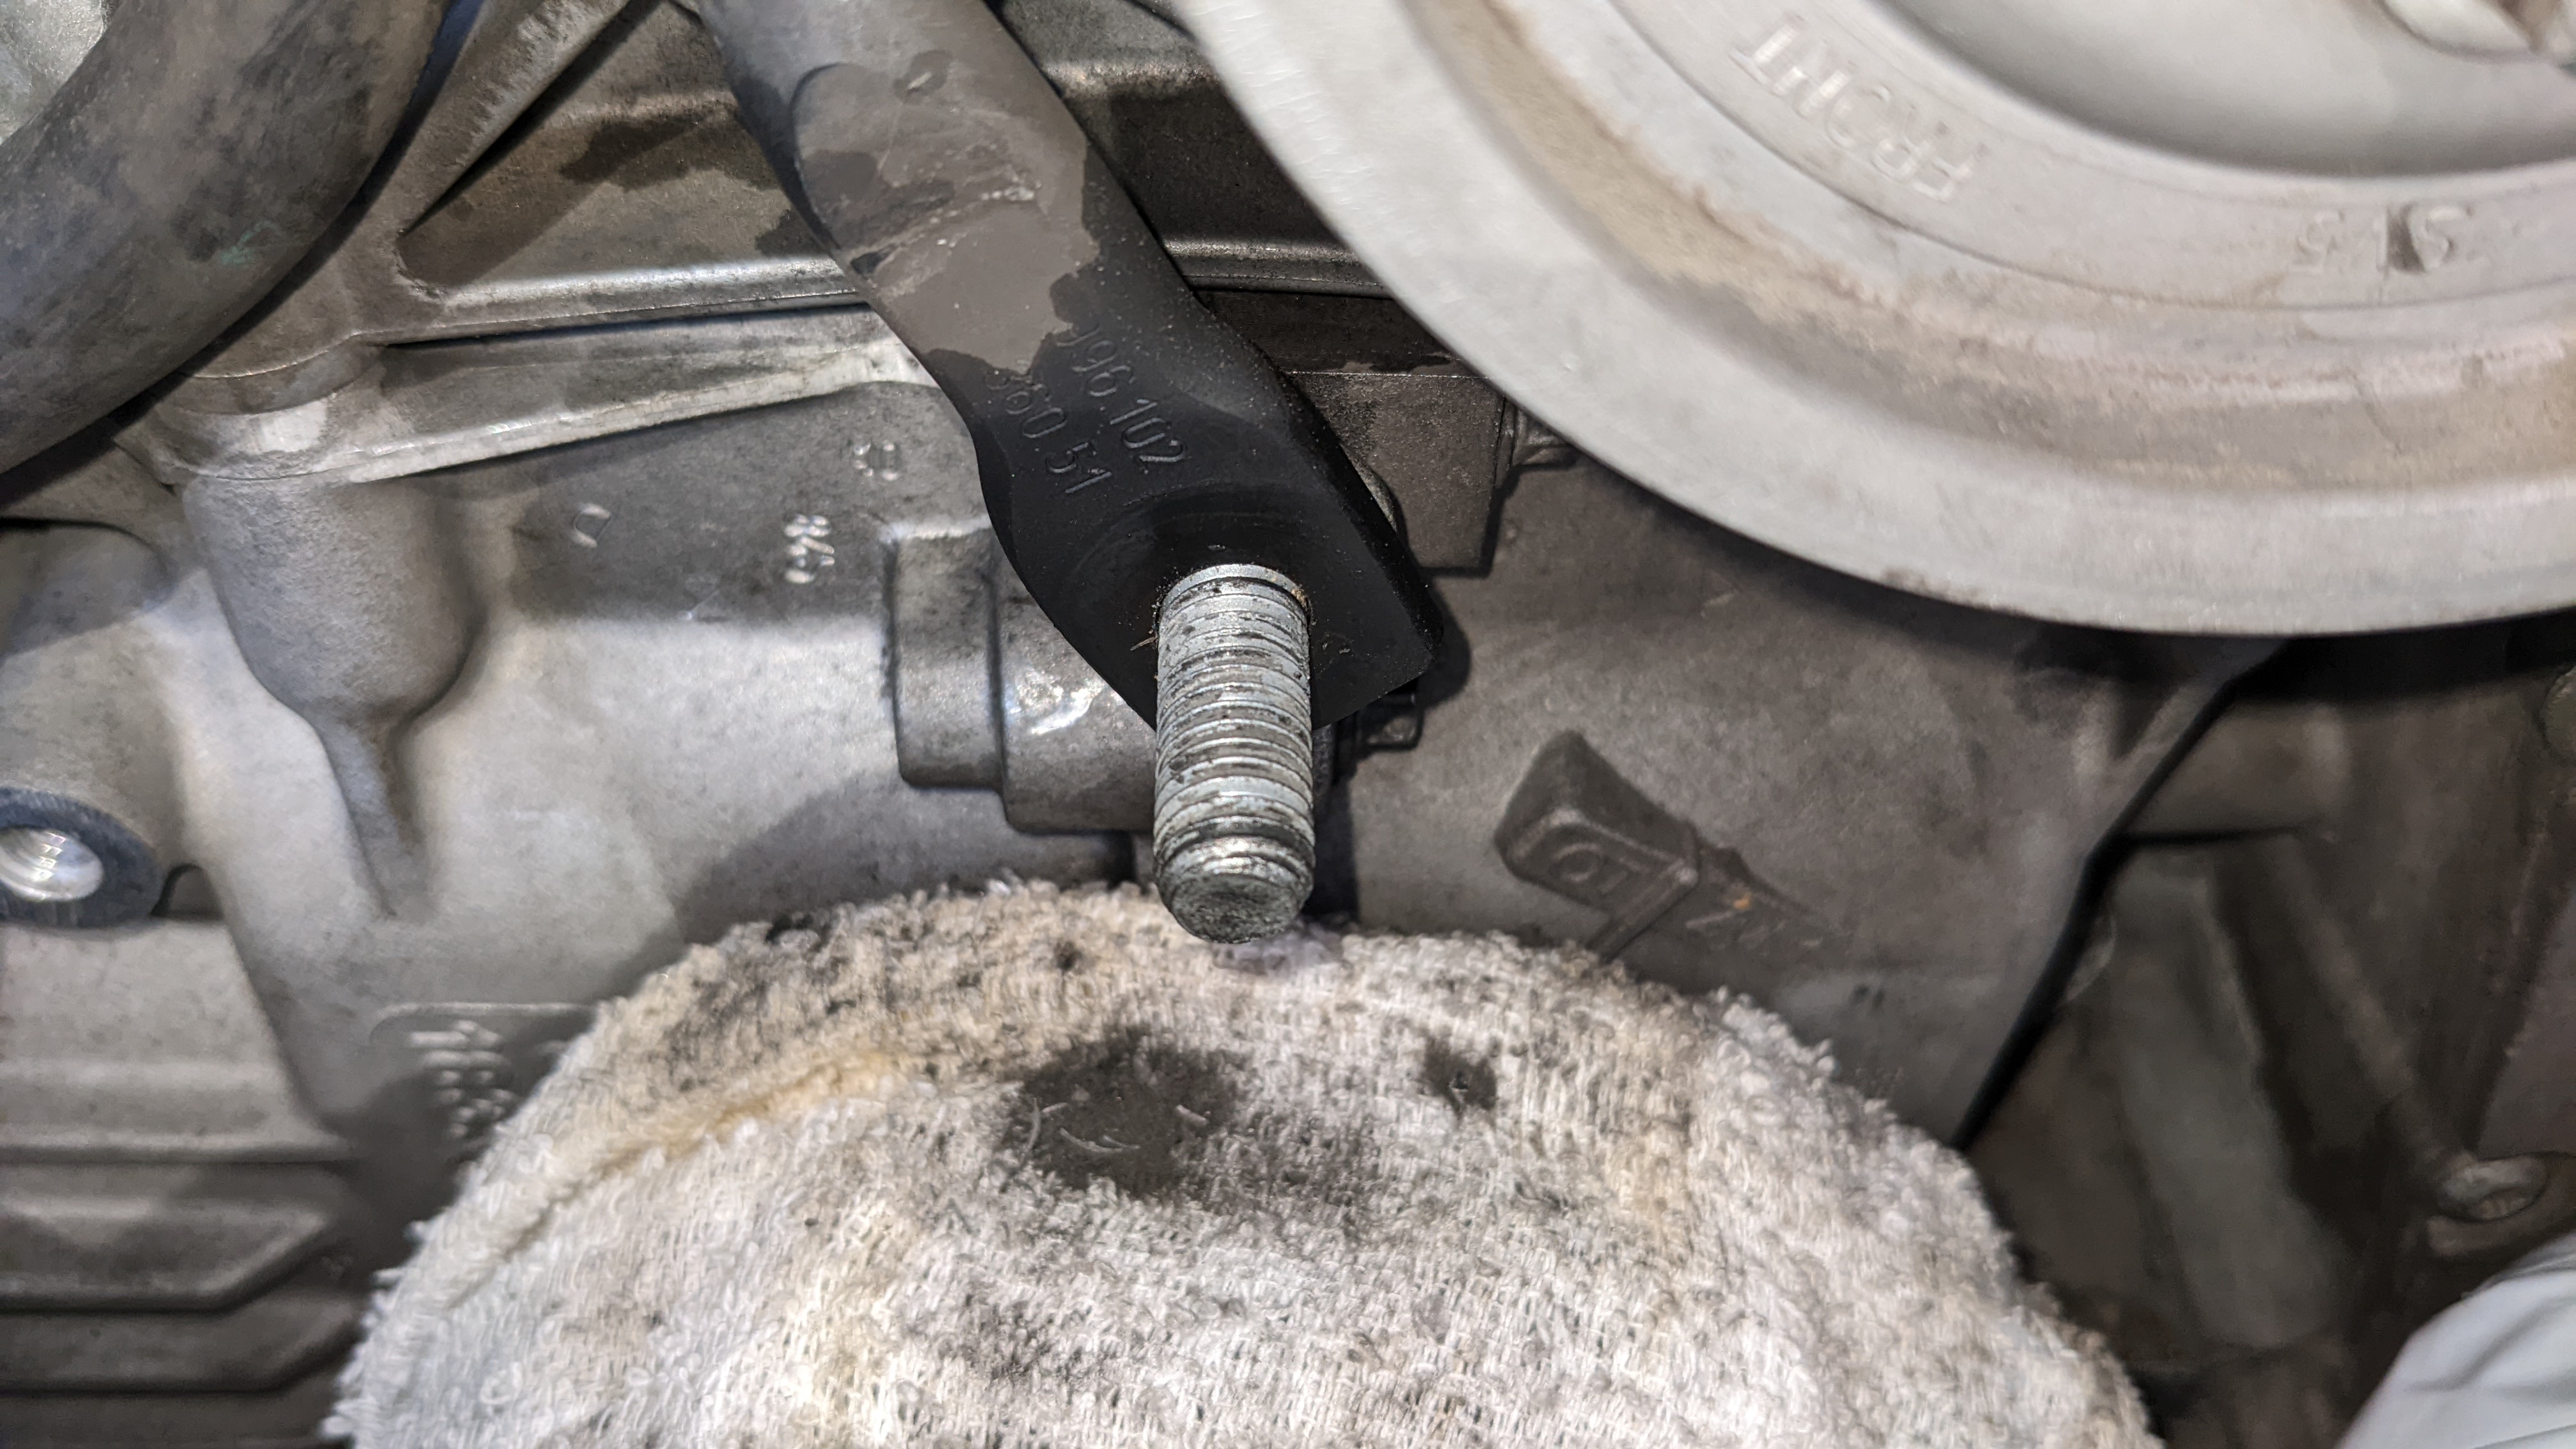
The idler and roller pulleys are easy enough to remove, but the tensioner pulley is a kind of a pain with its poor access. There's a bolt with a 15mm head that you need to counter-hold while removing the 24mm nut on the front. The fact that it comes with red threadlocker from the factory doesn't make its removal any easier.
Victory is mine.
New pulleys and hardware. There's no space to back out the tensioner bolt; that requires removing the entire tensioner assembly which means removing the alternator, plenum boots, and probably a couple other items. It's something I could've done while I was replacing the battery cable but I left it alone given the mileage.
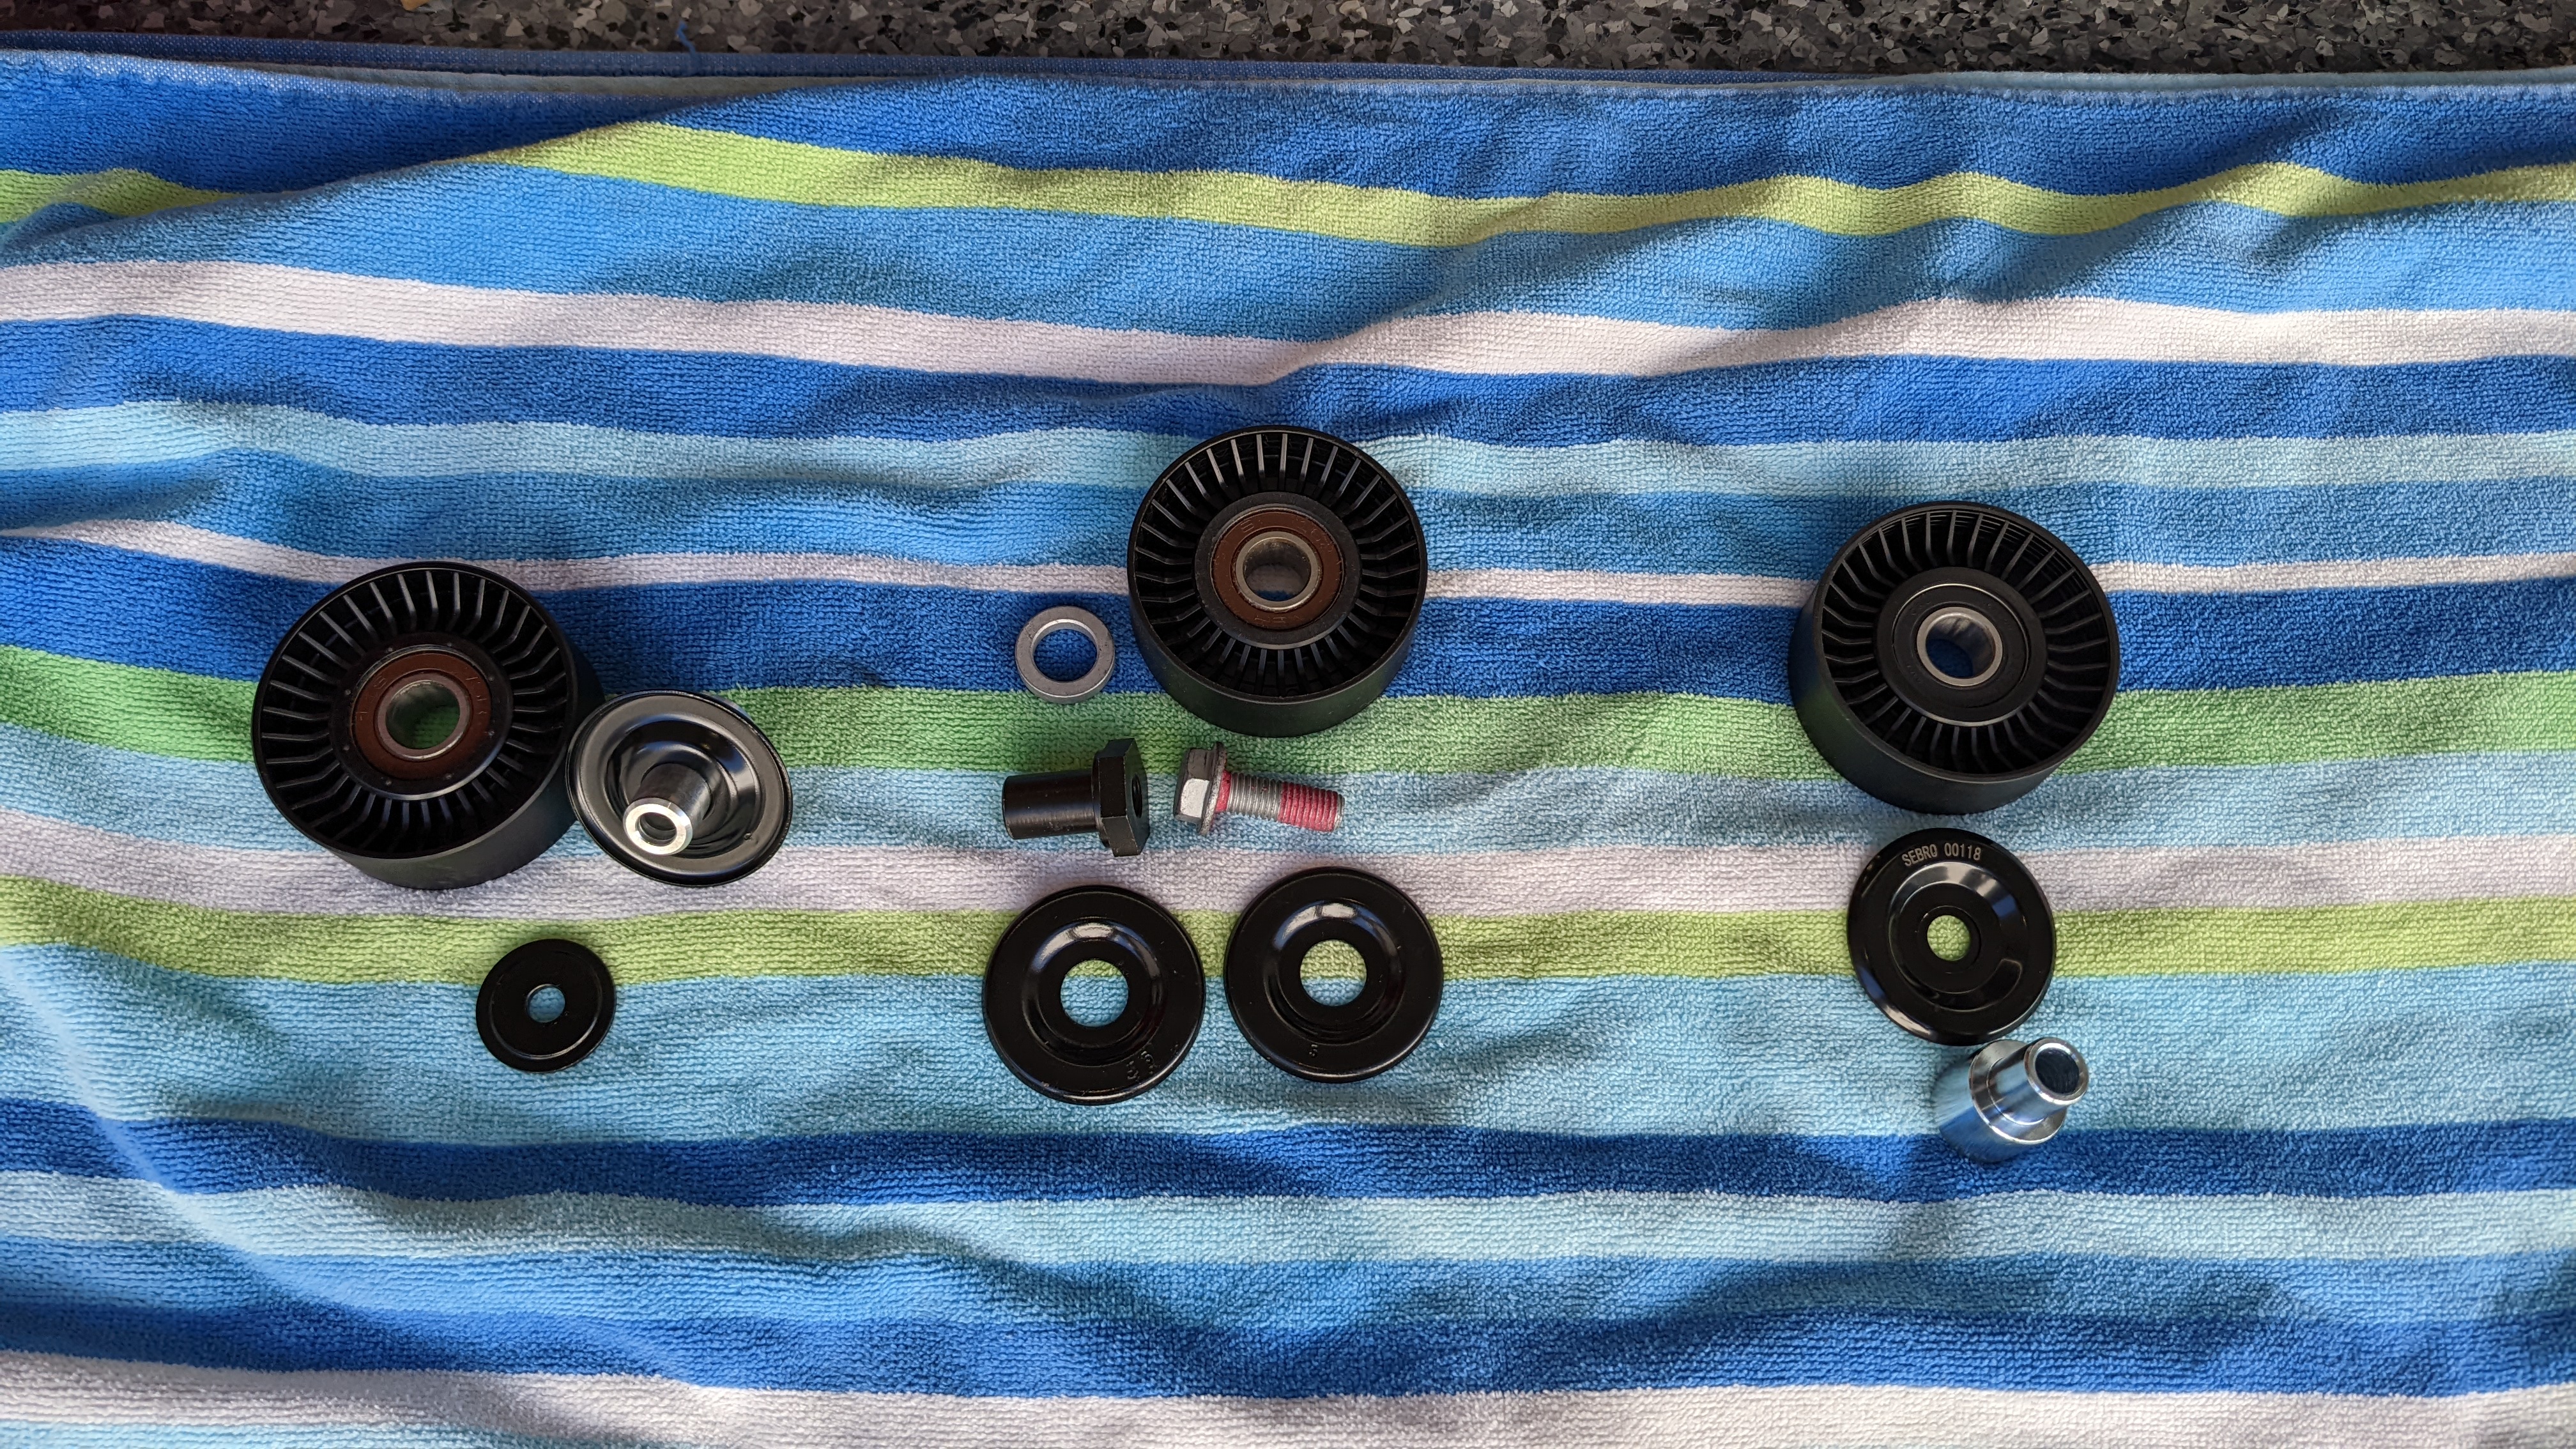
So I just cleaned the bolt and re-used it.
"Permanent"
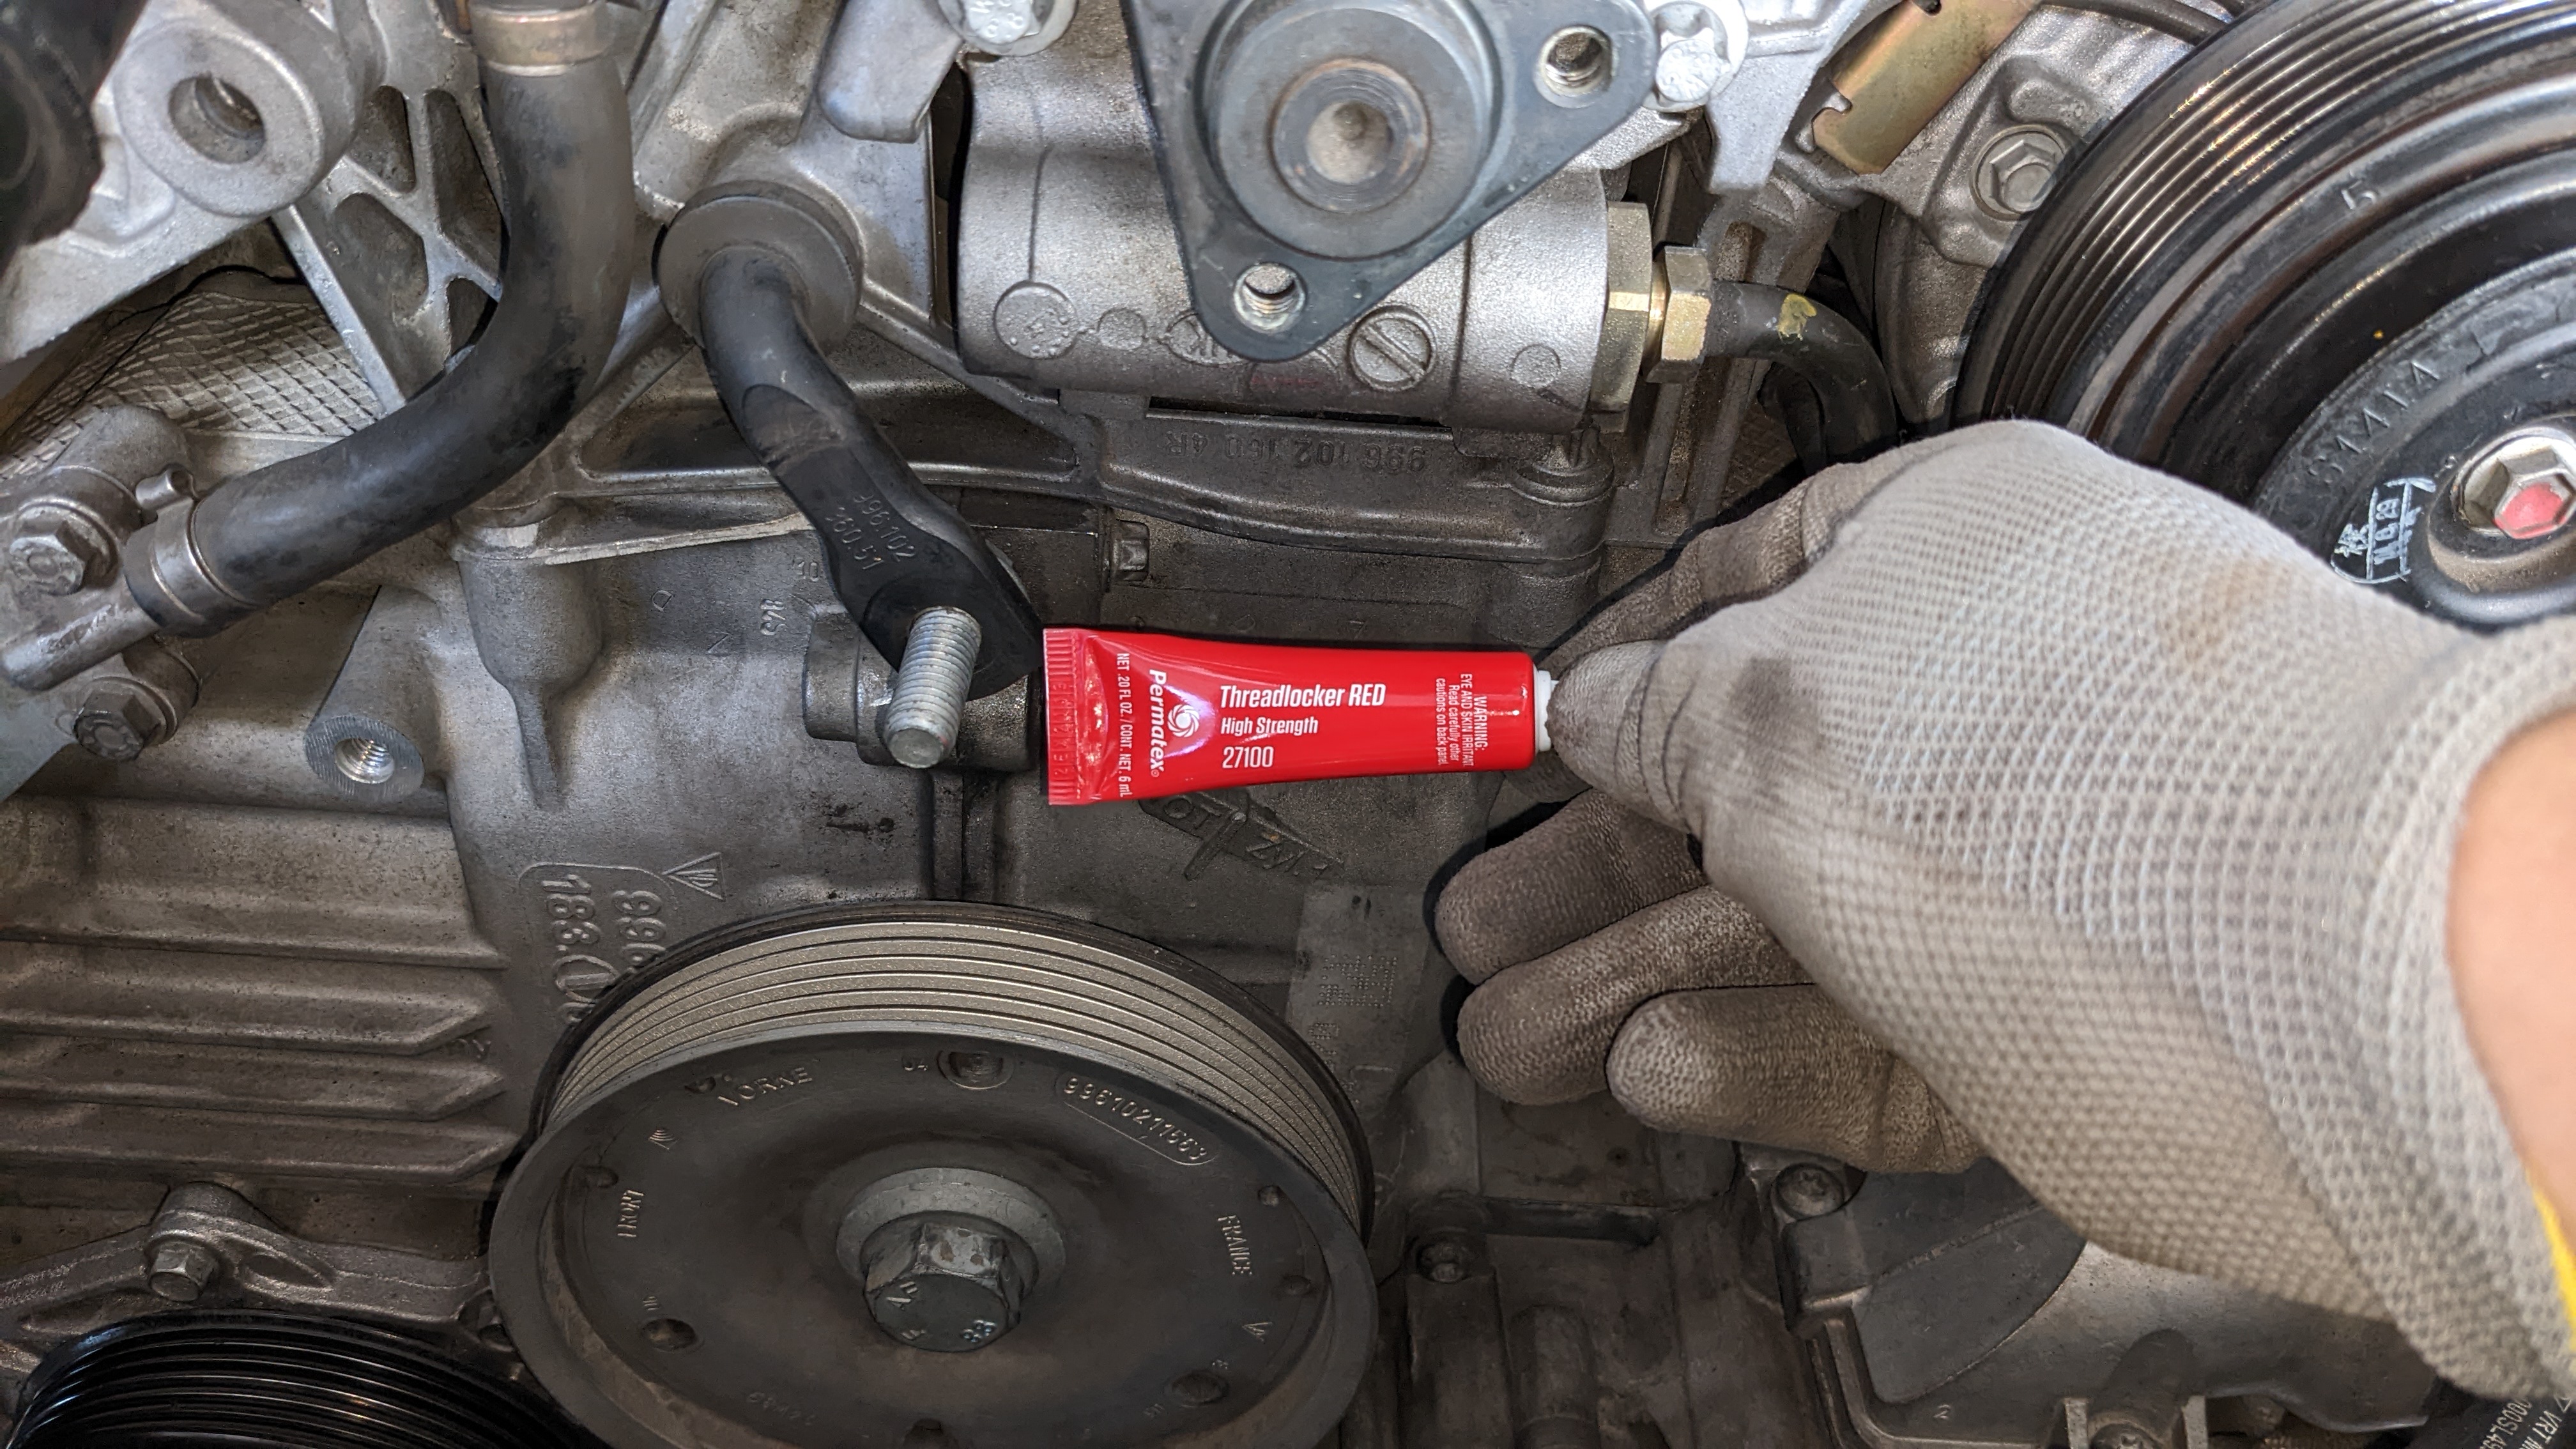
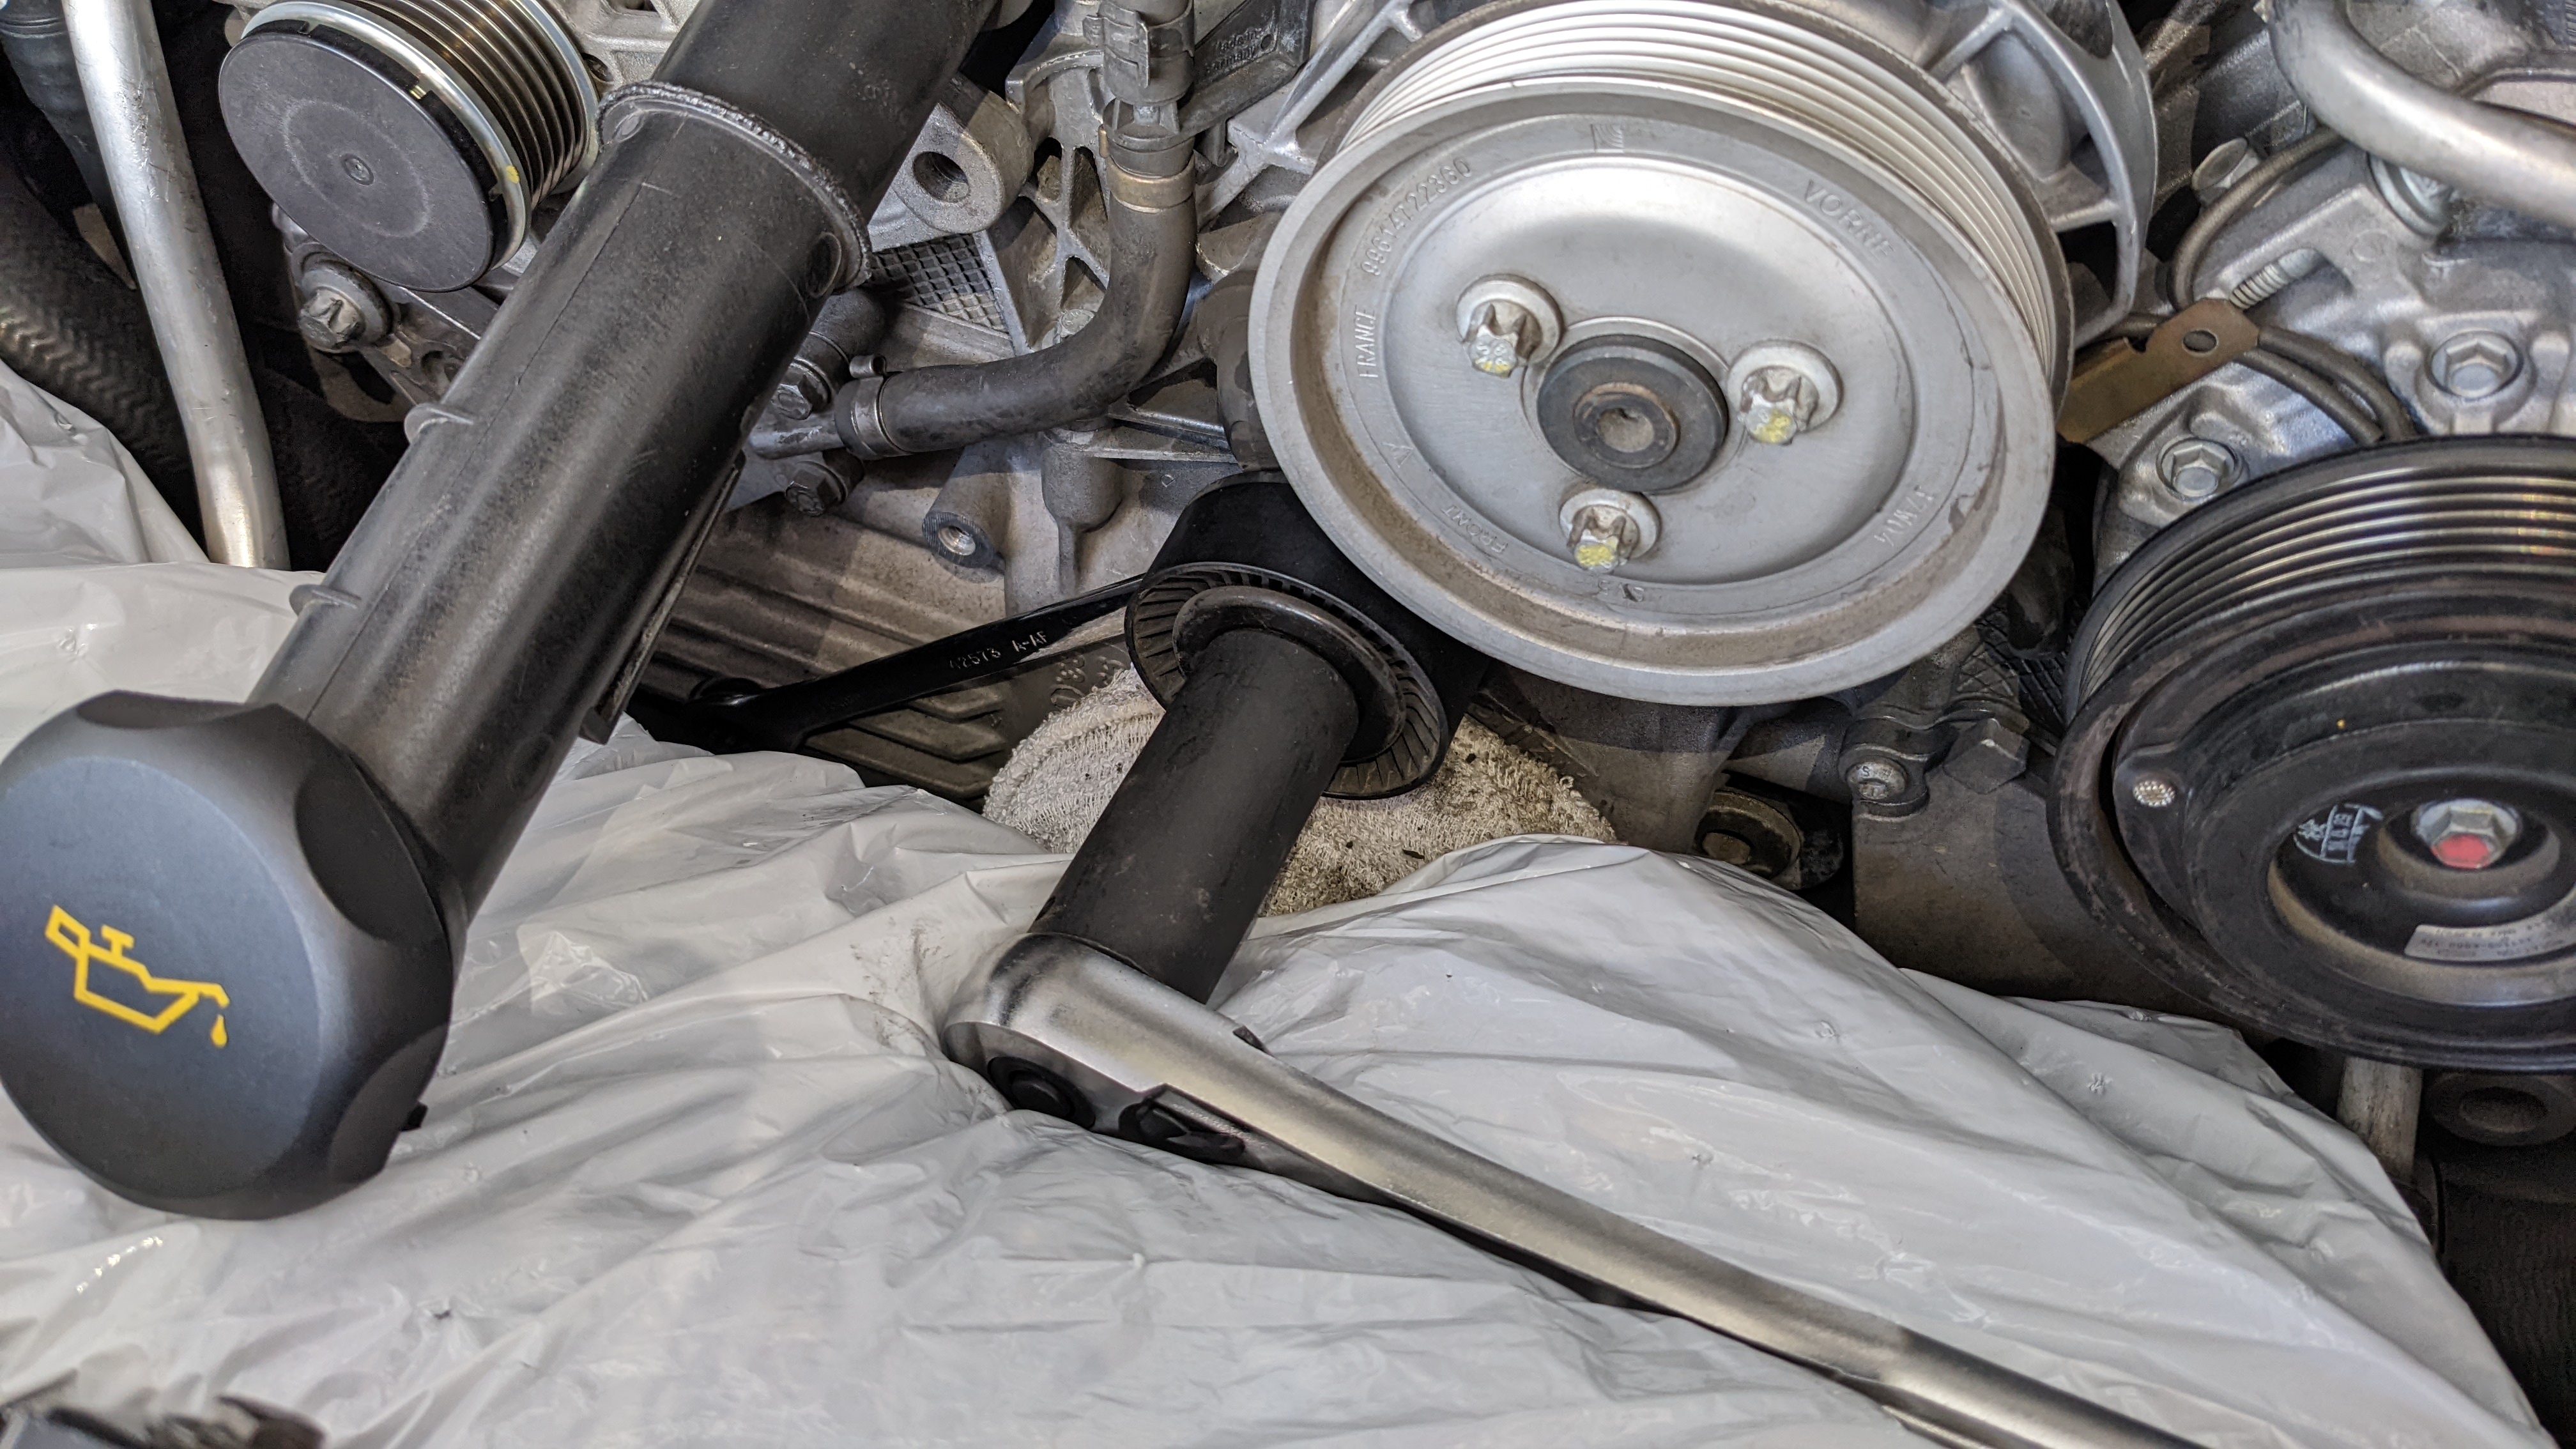
Now when it came to put the tensioner pulley back on, I became smarter and removed the damn PS pump pulley. Duh.
This made getting the wrench on the nut easier when it came time to torque the nut. Not being able to counter-hold 44 ft-lbs with my fingertips because there's absolutely no room, I used a section of the engine block after protecting it with thick and heavy rubber. No issues.
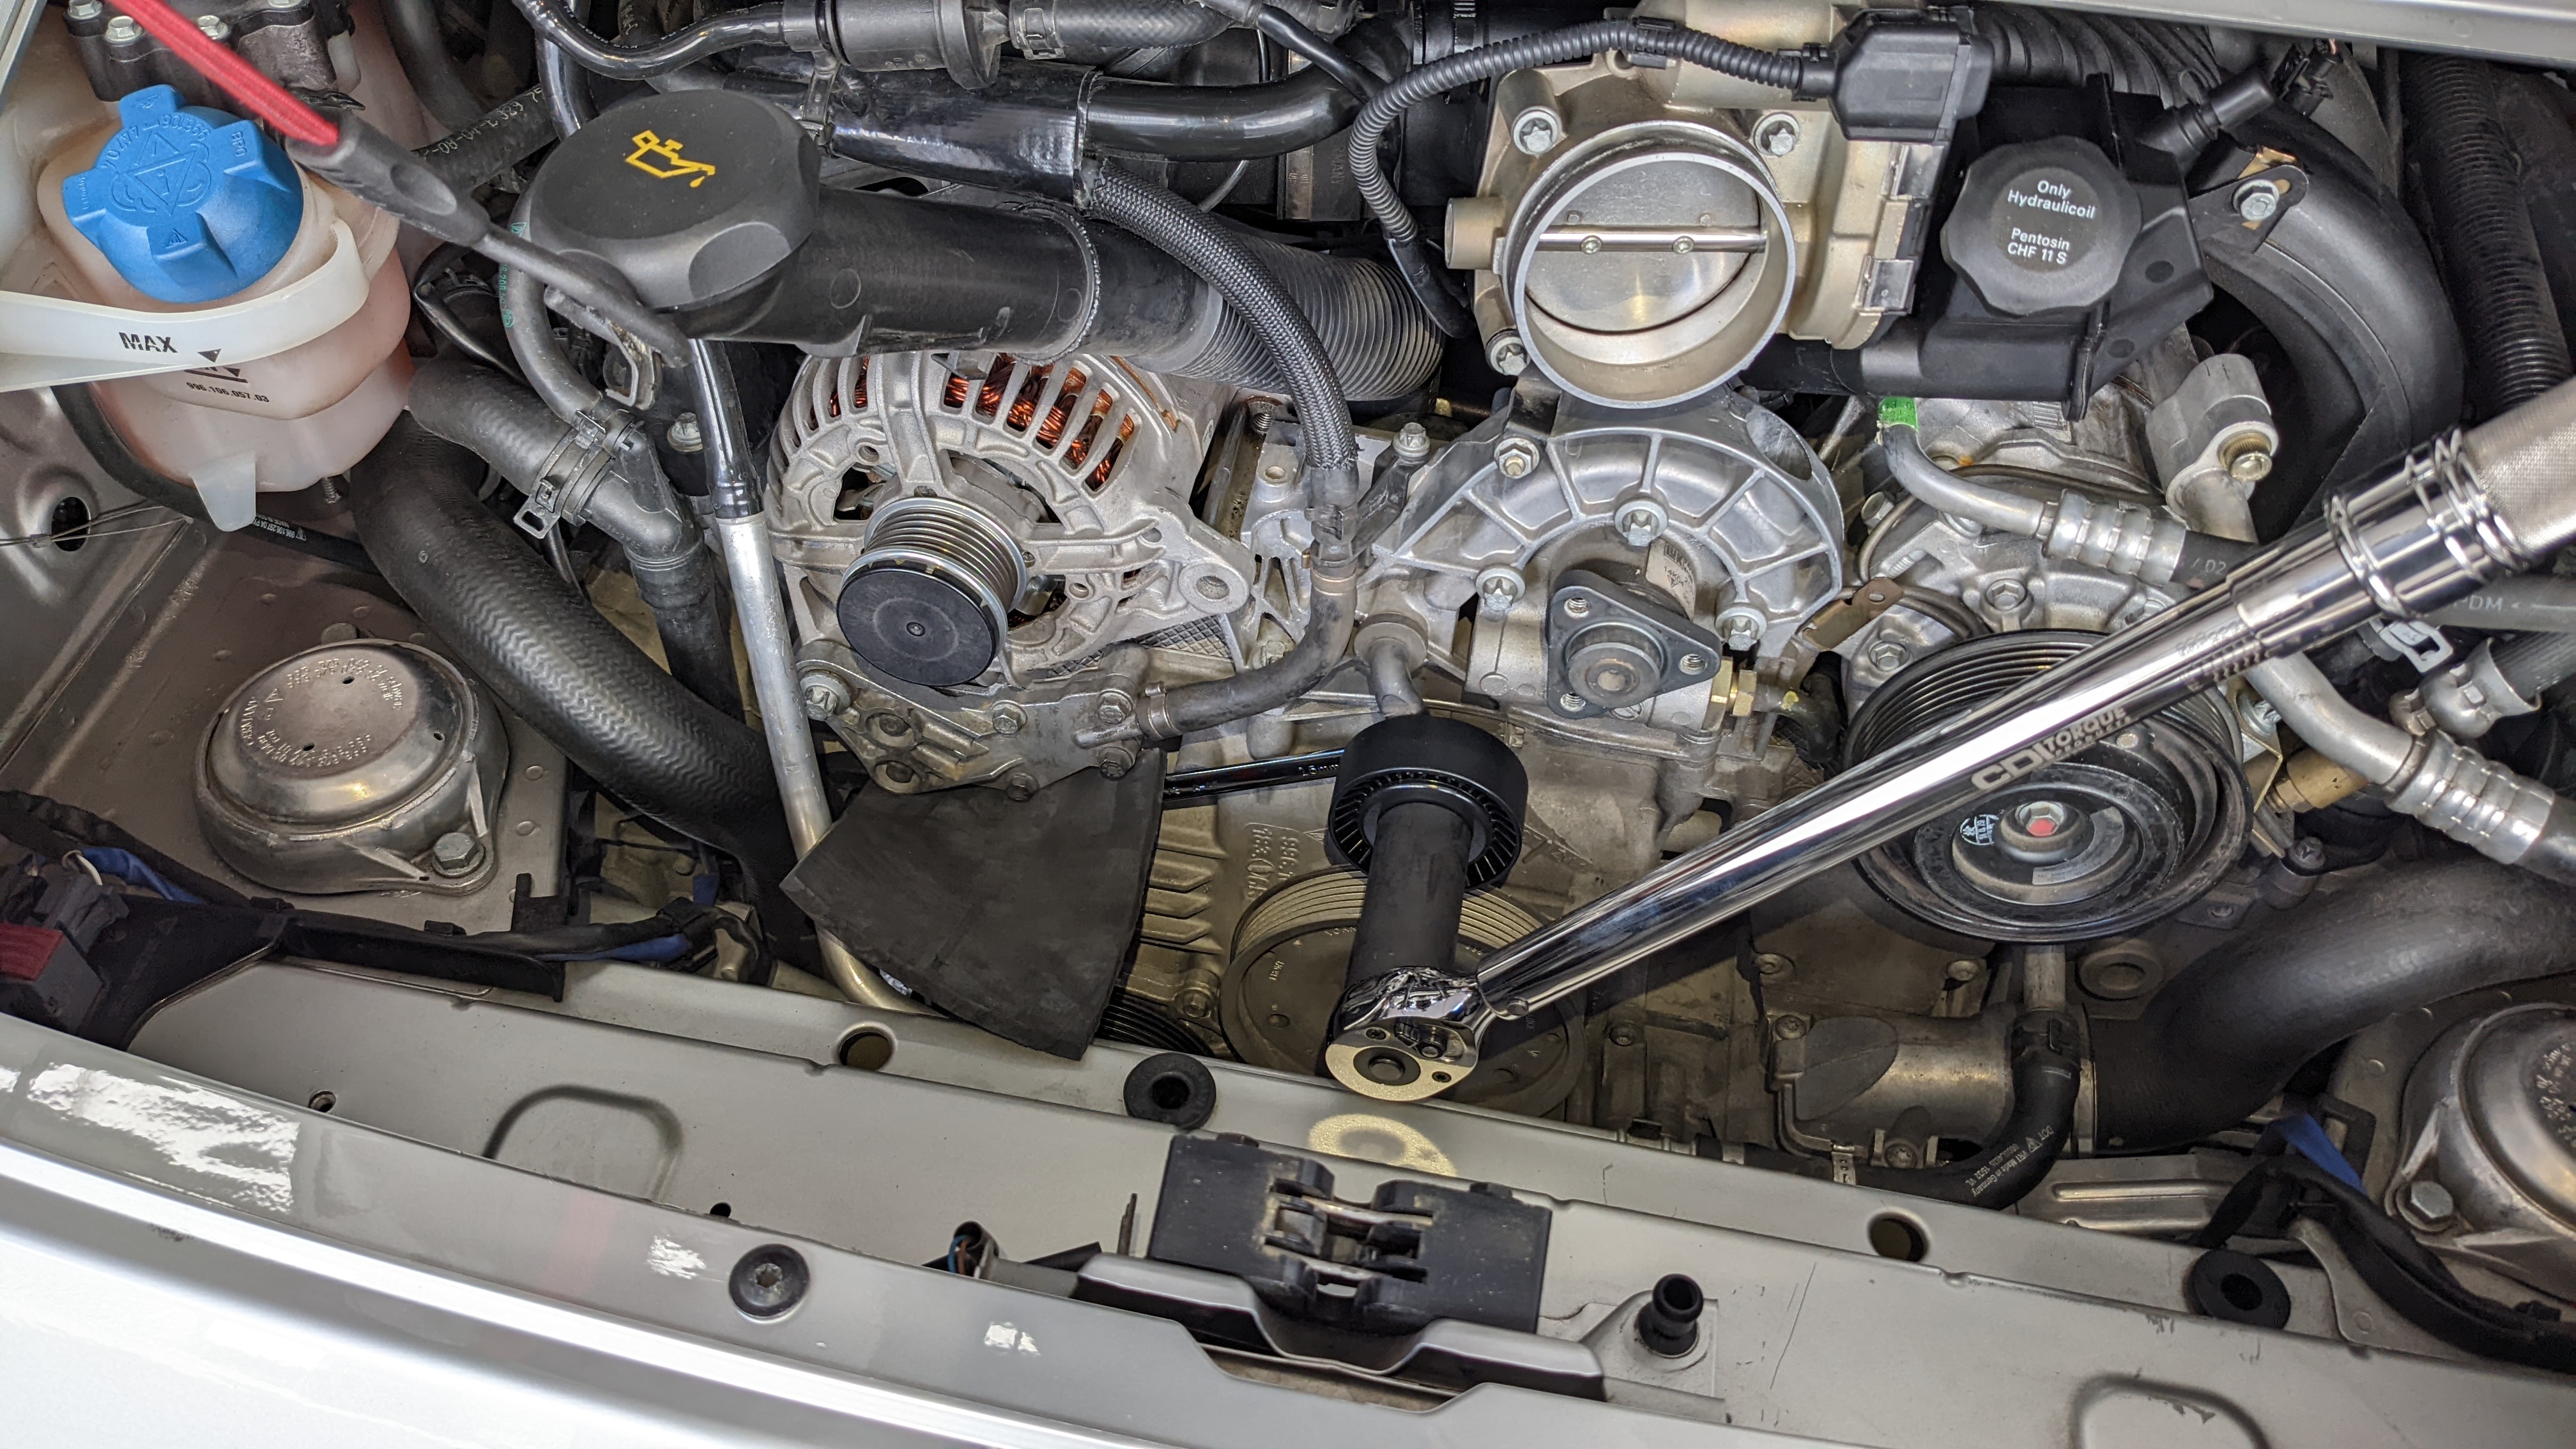
There's probably some special Porsche tool for $4k to do this by the book. Here are the torque values I used:
Tensioner pulley bolt: 44 ft-lbs
Idler pulley bolt for alternator: 34 ft-lbs
Roller pulley bolt: 17 ft-lbs
PS pump pulley bolts: 17 ft-lbs
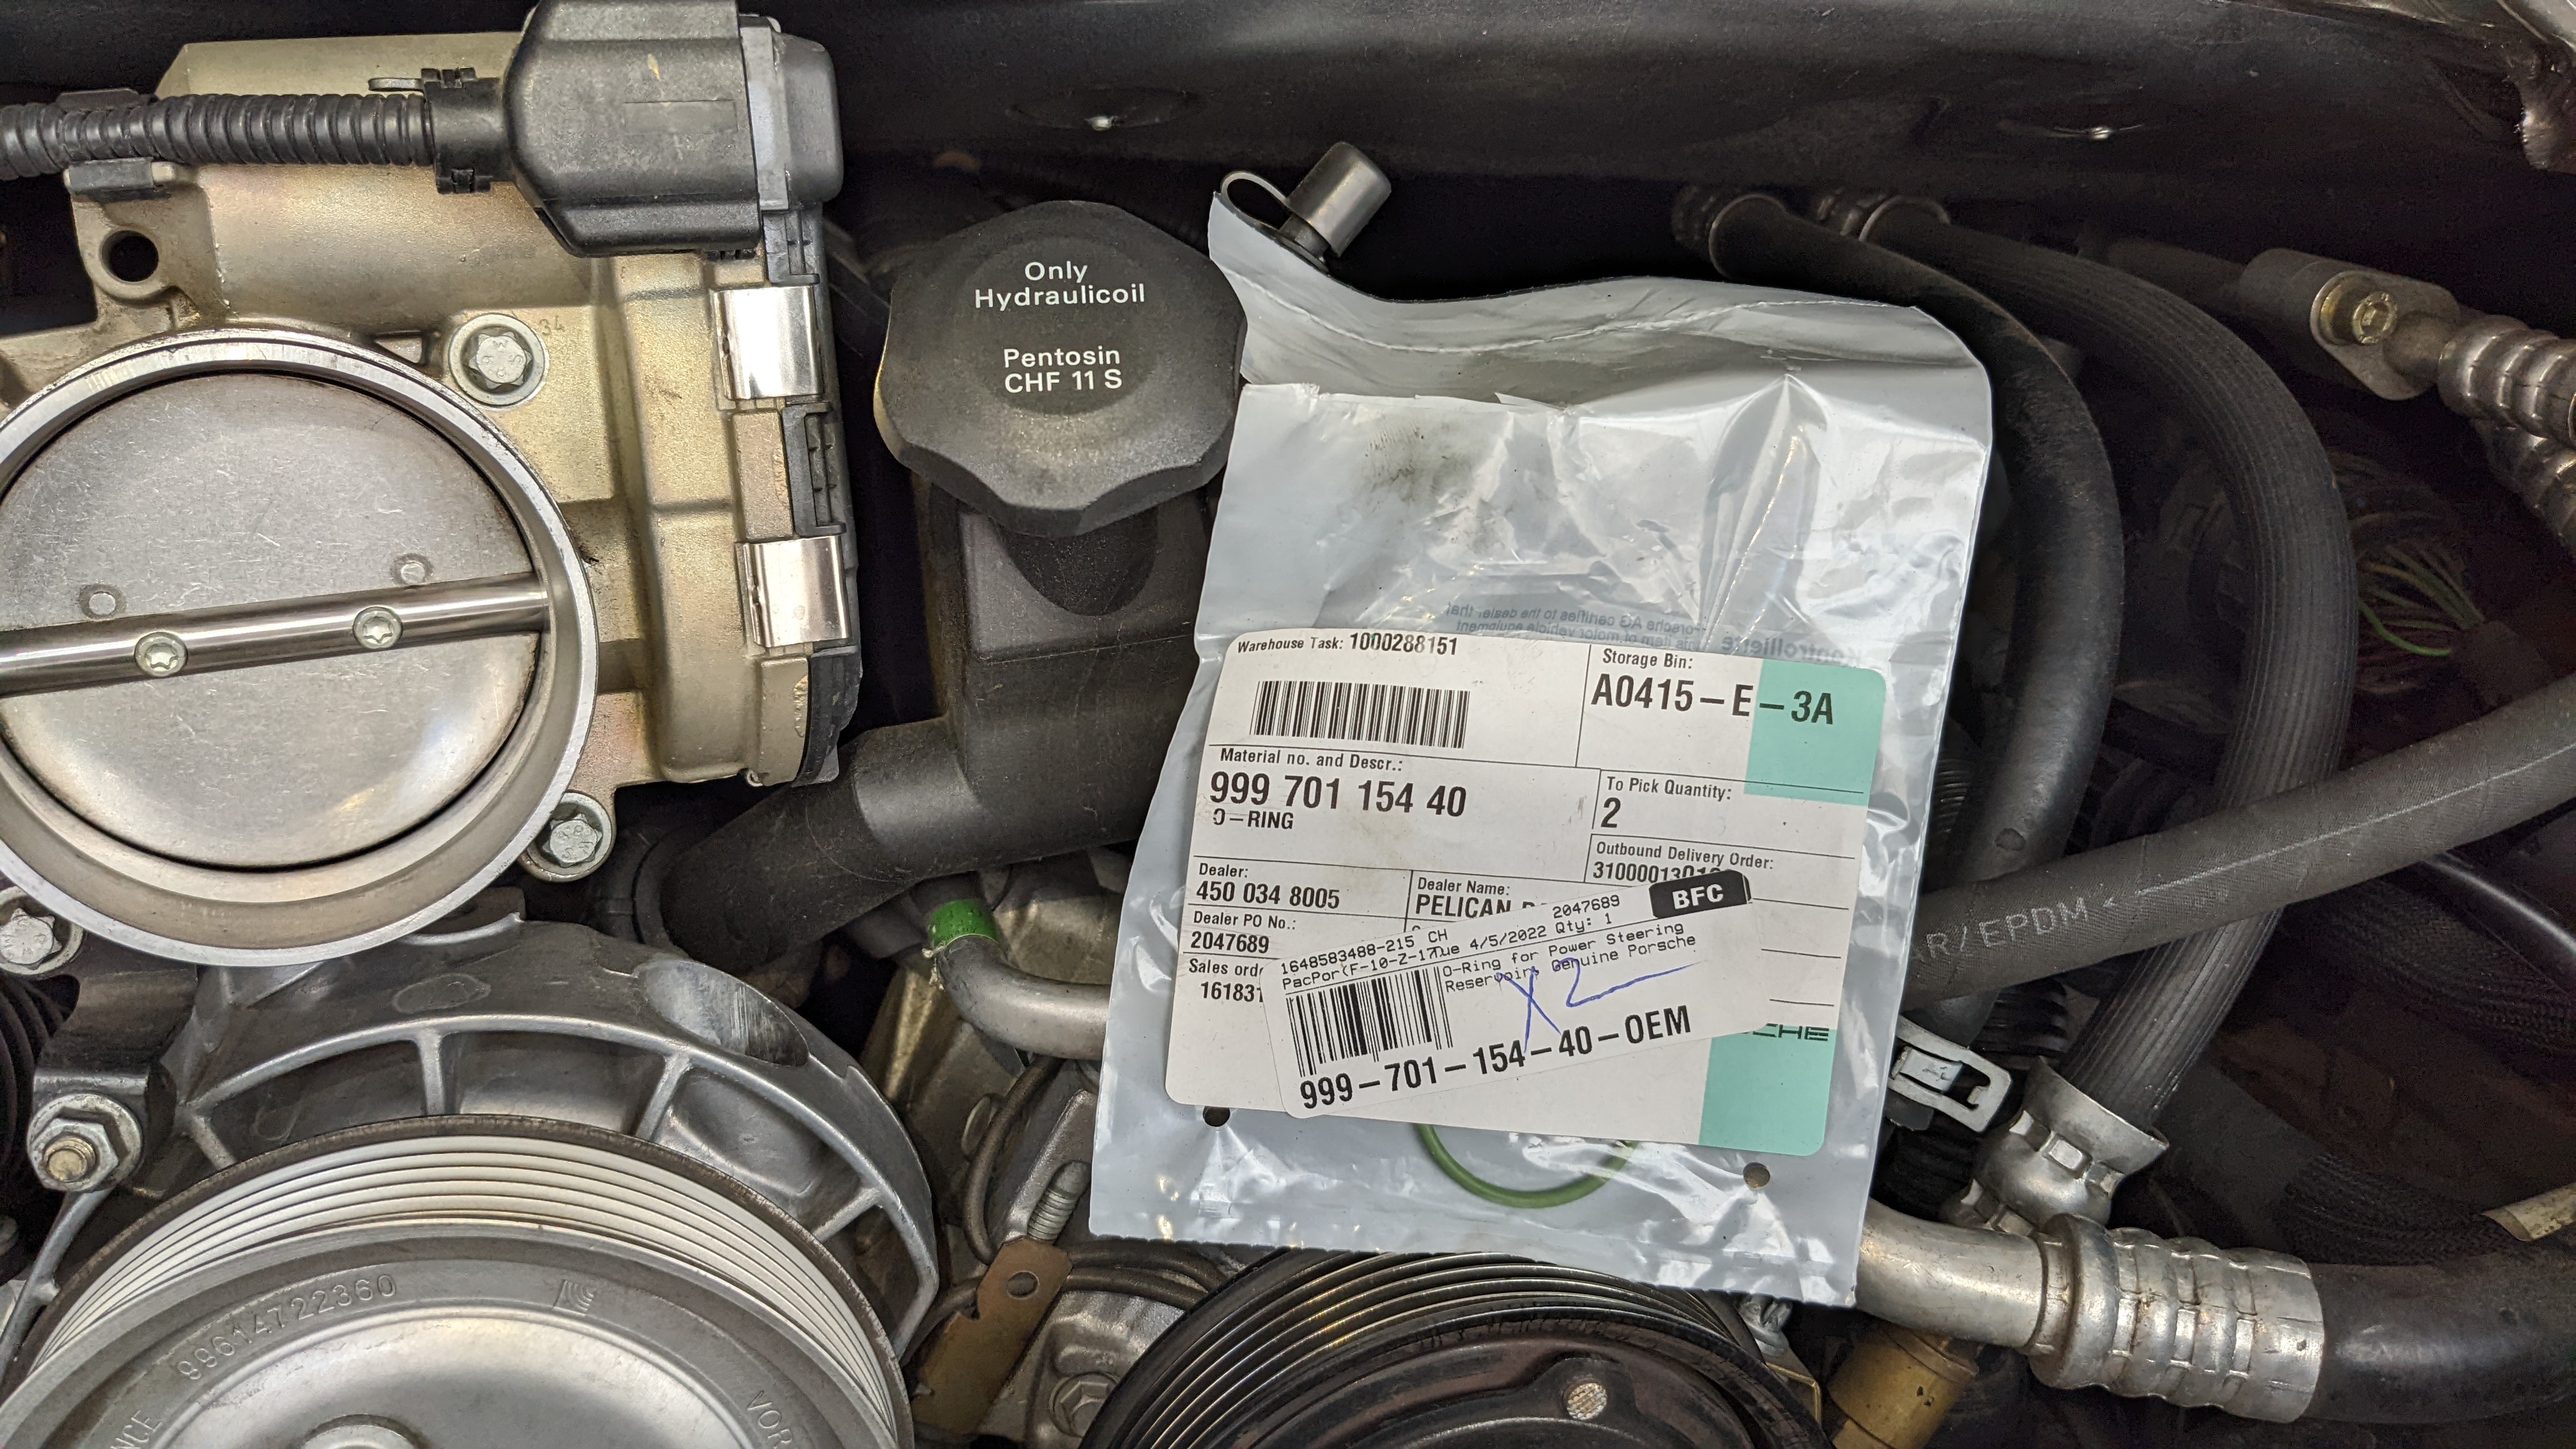
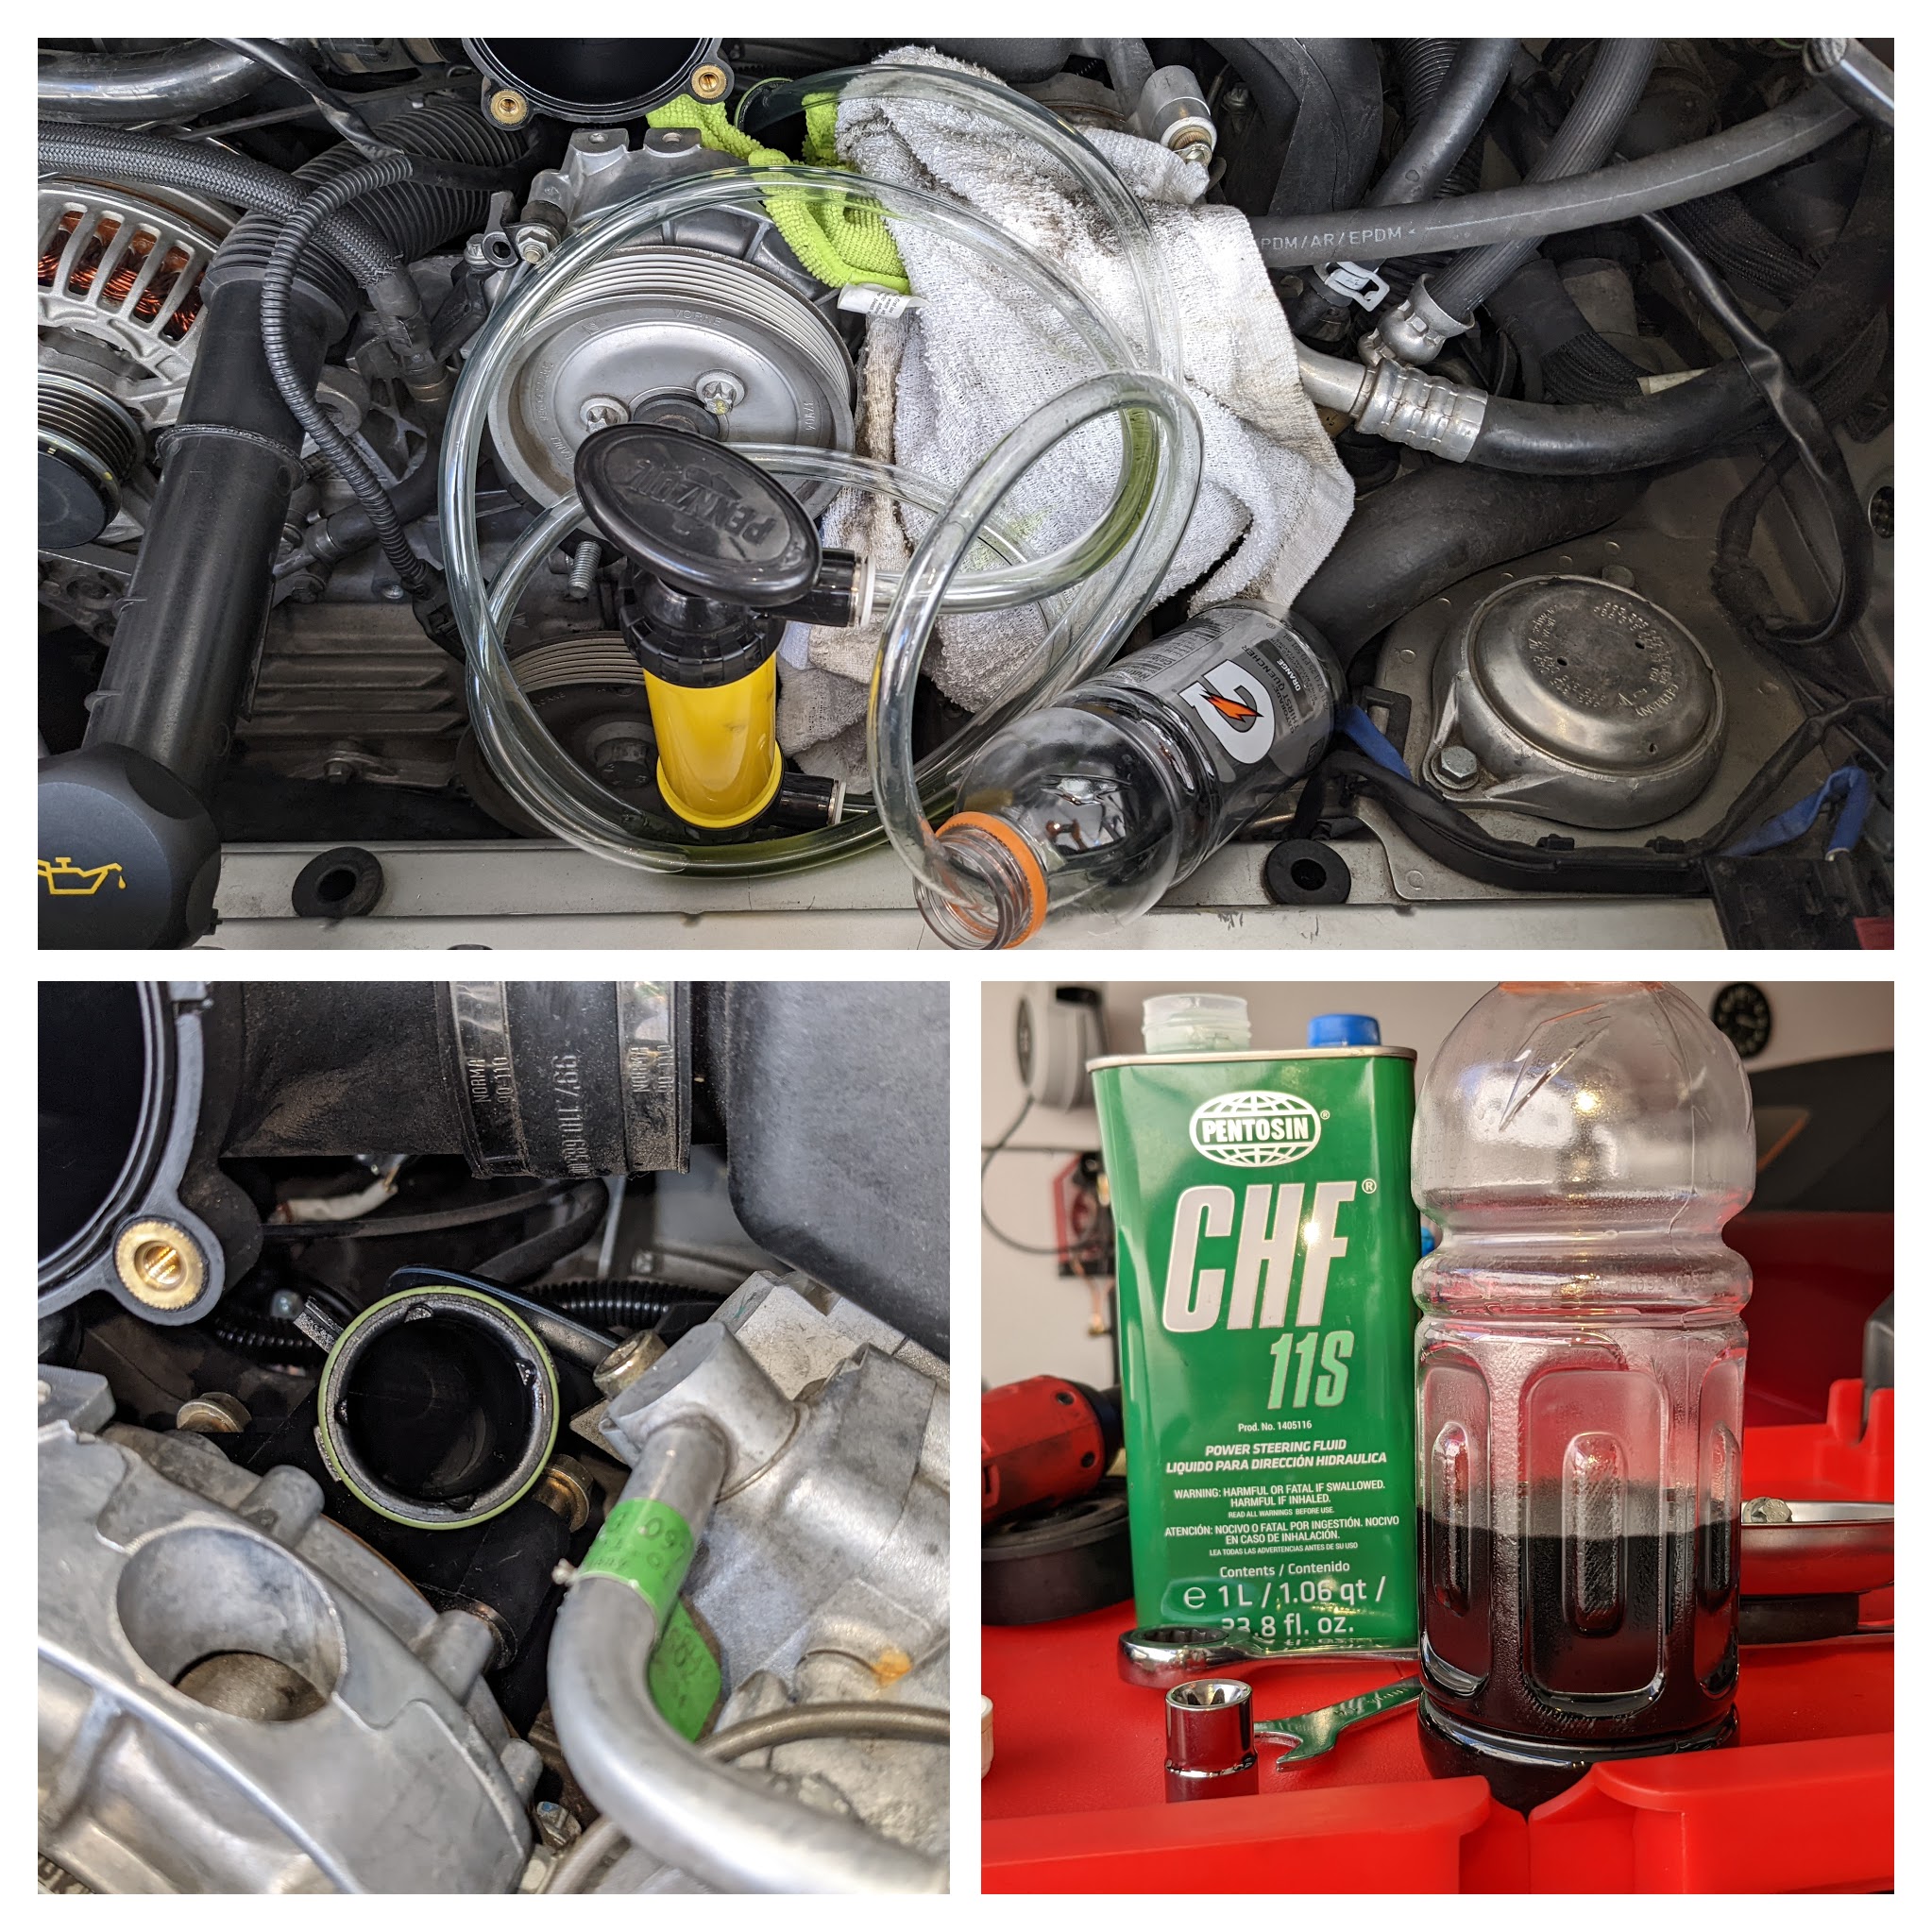
Also took this opportunity to replace the last O-ring on the PS fluid reservoir (it was backordered when I did the others).
Siphoned out as much of the old fluid as I could before replacing it. I did this once a couple months ago so I've now cycled about a liter of fresh fluid in there.
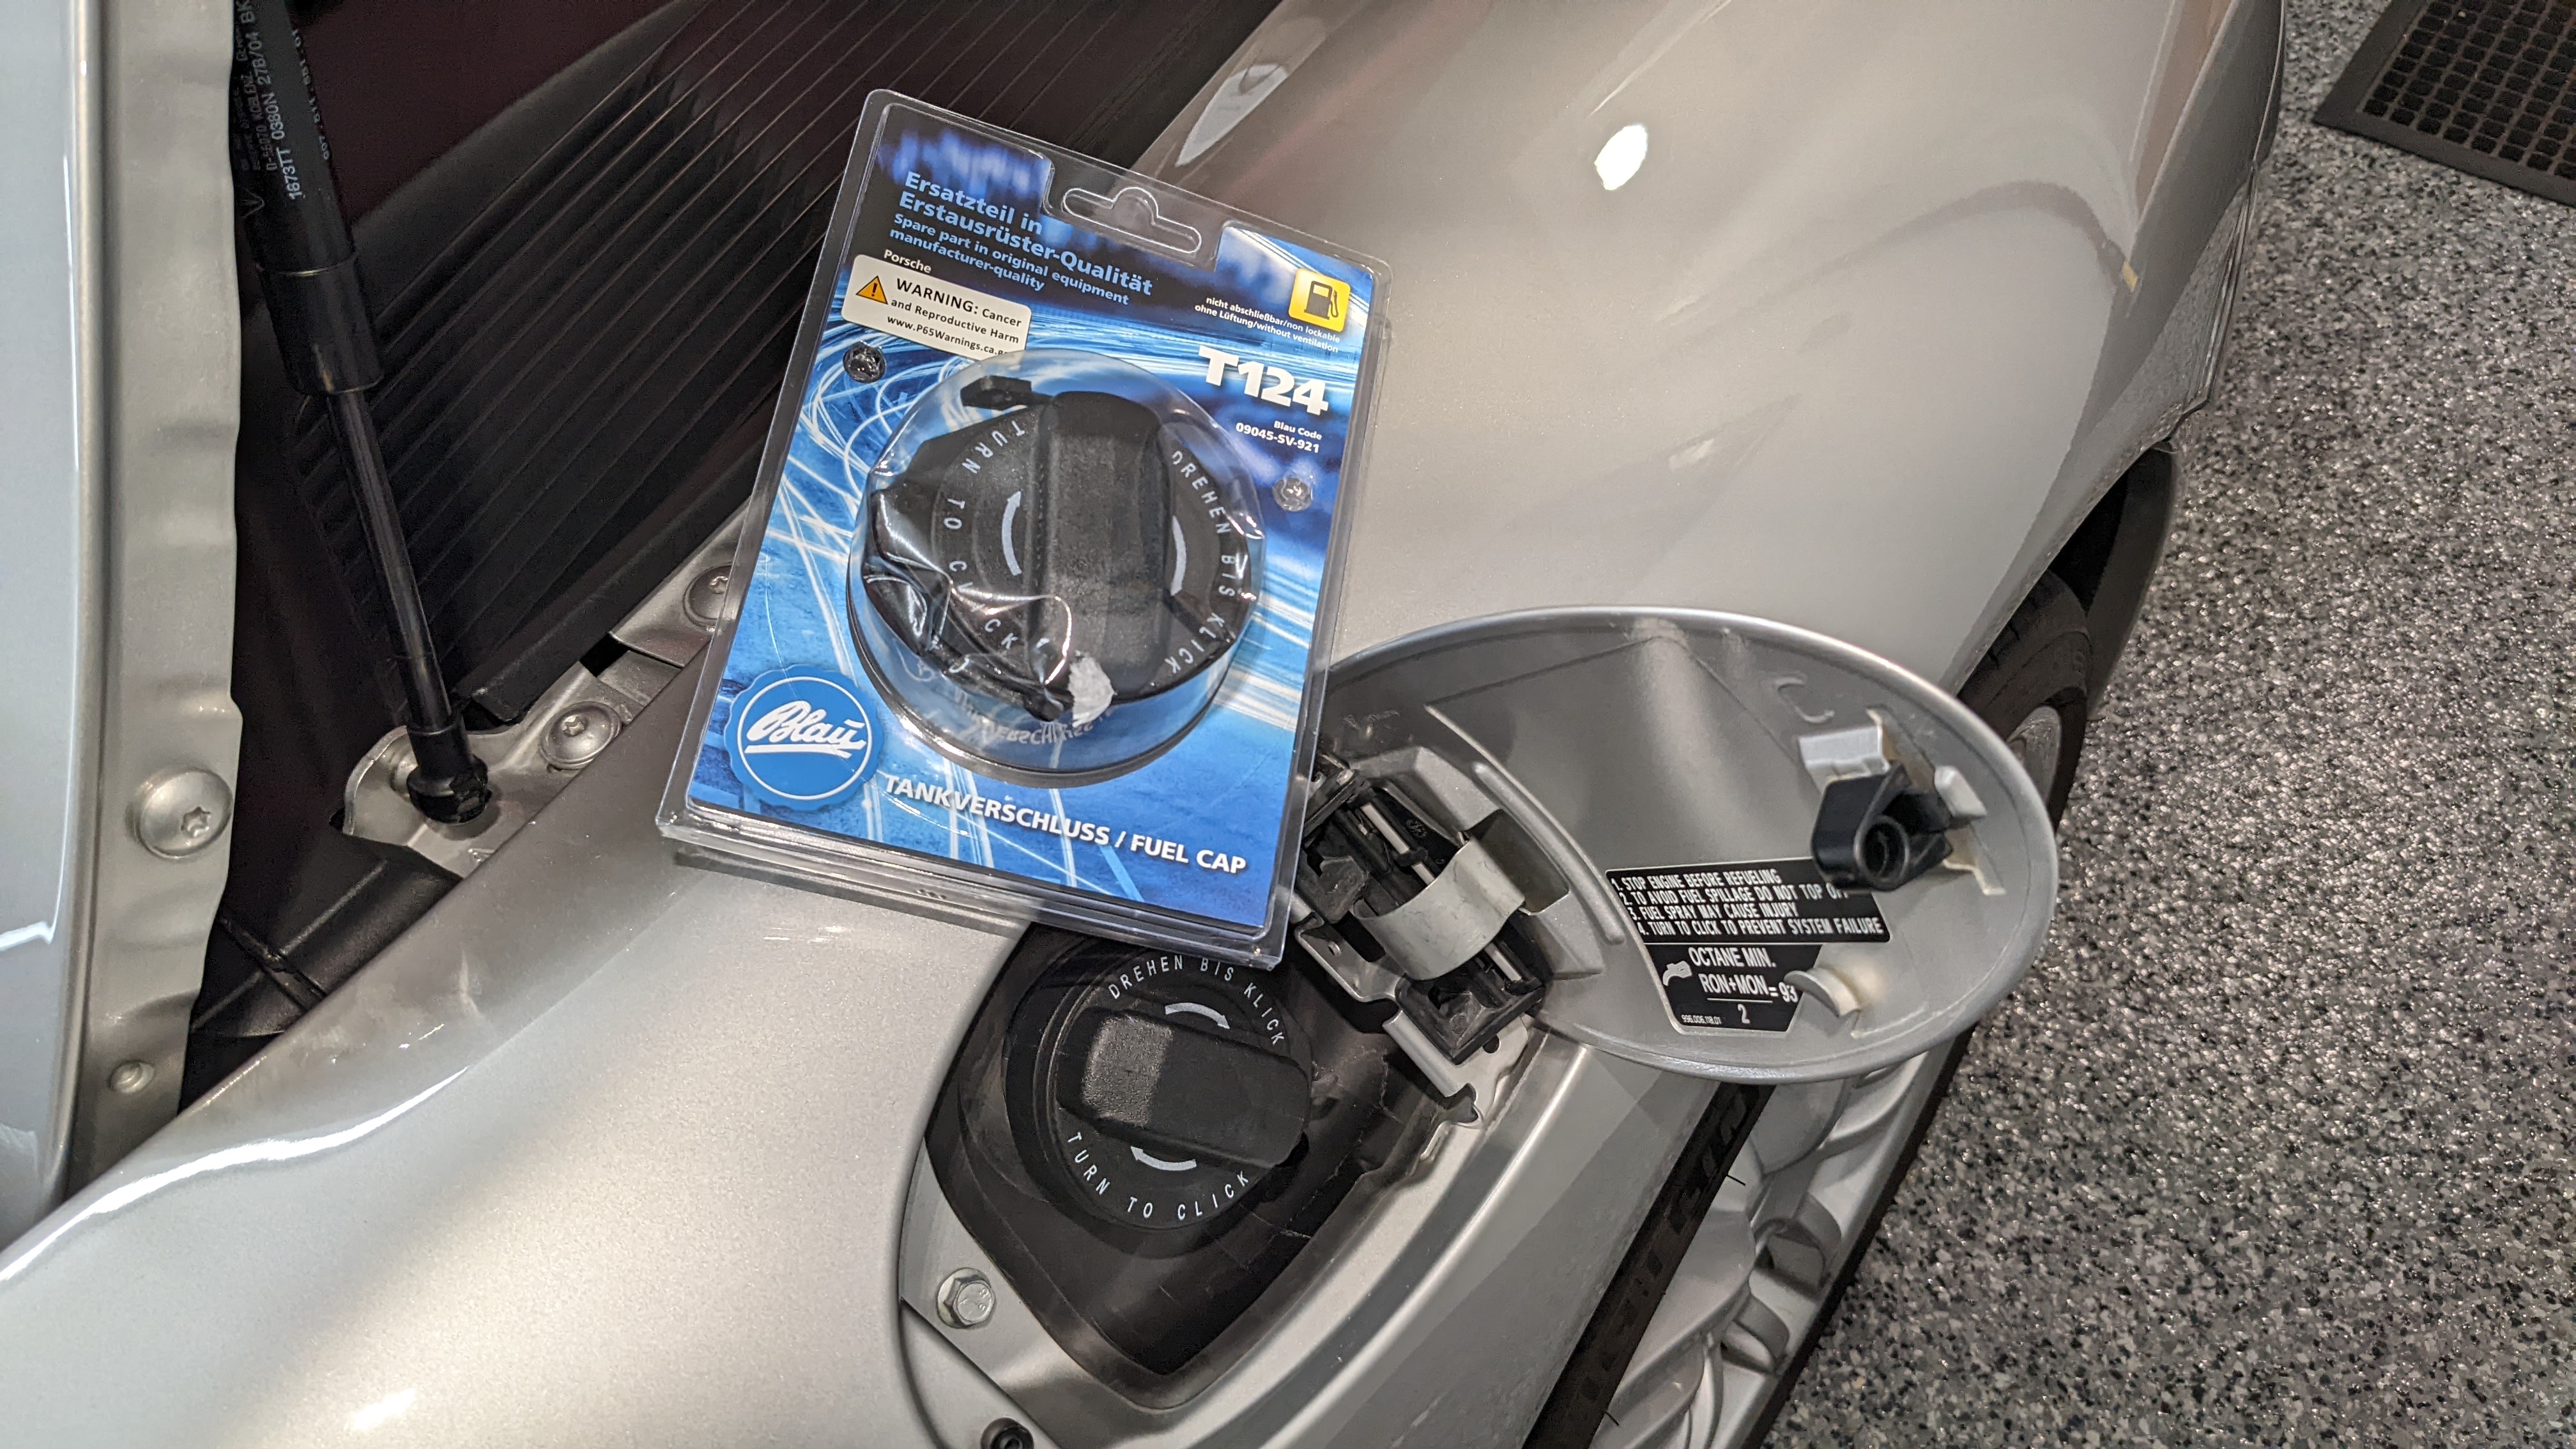
With that sorted, replaced the gas cap as it broke off in the middle of my trip and I had to place it on the ground like the bourgeoisie.
Terrific.


Took a look inside the engine bay after washing the car back home and noticed the idler pulley is starting to deteriorate. Should've swapped them all when I installed the new belt.
Marked the belt before removing.
The idler and roller pulleys are easy enough to remove, but the tensioner pulley is a kind of a pain with its poor access. There's a bolt with a 15mm head that you need to counter-hold while removing the 24mm nut on the front. The fact that it comes with red threadlocker from the factory doesn't make its removal any easier.
Victory is mine.
New pulleys and hardware. There's no space to back out the tensioner bolt; that requires removing the entire tensioner assembly which means removing the alternator, plenum boots, and probably a couple other items. It's something I could've done while I was replacing the battery cable but I left it alone given the mileage.
So I just cleaned the bolt and re-used it.
"Permanent"
Now when it came to put the tensioner pulley back on, I became smarter and removed the damn PS pump pulley. Duh.
This made getting the wrench on the nut easier when it came time to torque the nut. Not being able to counter-hold 44 ft-lbs with my fingertips because there's absolutely no room, I used a section of the engine block after protecting it with thick and heavy rubber. No issues.
There's probably some special Porsche tool for $4k to do this by the book. Here are the torque values I used:
Tensioner pulley bolt: 44 ft-lbs
Idler pulley bolt for alternator: 34 ft-lbs
Roller pulley bolt: 17 ft-lbs
PS pump pulley bolts: 17 ft-lbs
Also took this opportunity to replace the last O-ring on the PS fluid reservoir (it was backordered when I did the others).
Siphoned out as much of the old fluid as I could before replacing it. I did this once a couple months ago so I've now cycled about a liter of fresh fluid in there.
With that sorted, replaced the gas cap as it broke off in the middle of my trip and I had to place it on the ground like the bourgeoisie.
Terrific.
07-26-2022, 12:40 AM
#55
Rennlist Member
Thread Starter
Over the weekend I swapped the suspension with the Bilstein B12 kit (got it from FCP Euro). Also replaced the front and rear strut mounts, bearings, spring pads, etc. My car came with the 6.5mm spring pad (part no. 996-343-511-01) but there's also the 3 mm one (996-343-511-00). It's called "balancing plate" in the parts catalog. Not sure which cars come with the thinner one as they're not VIN-specific.
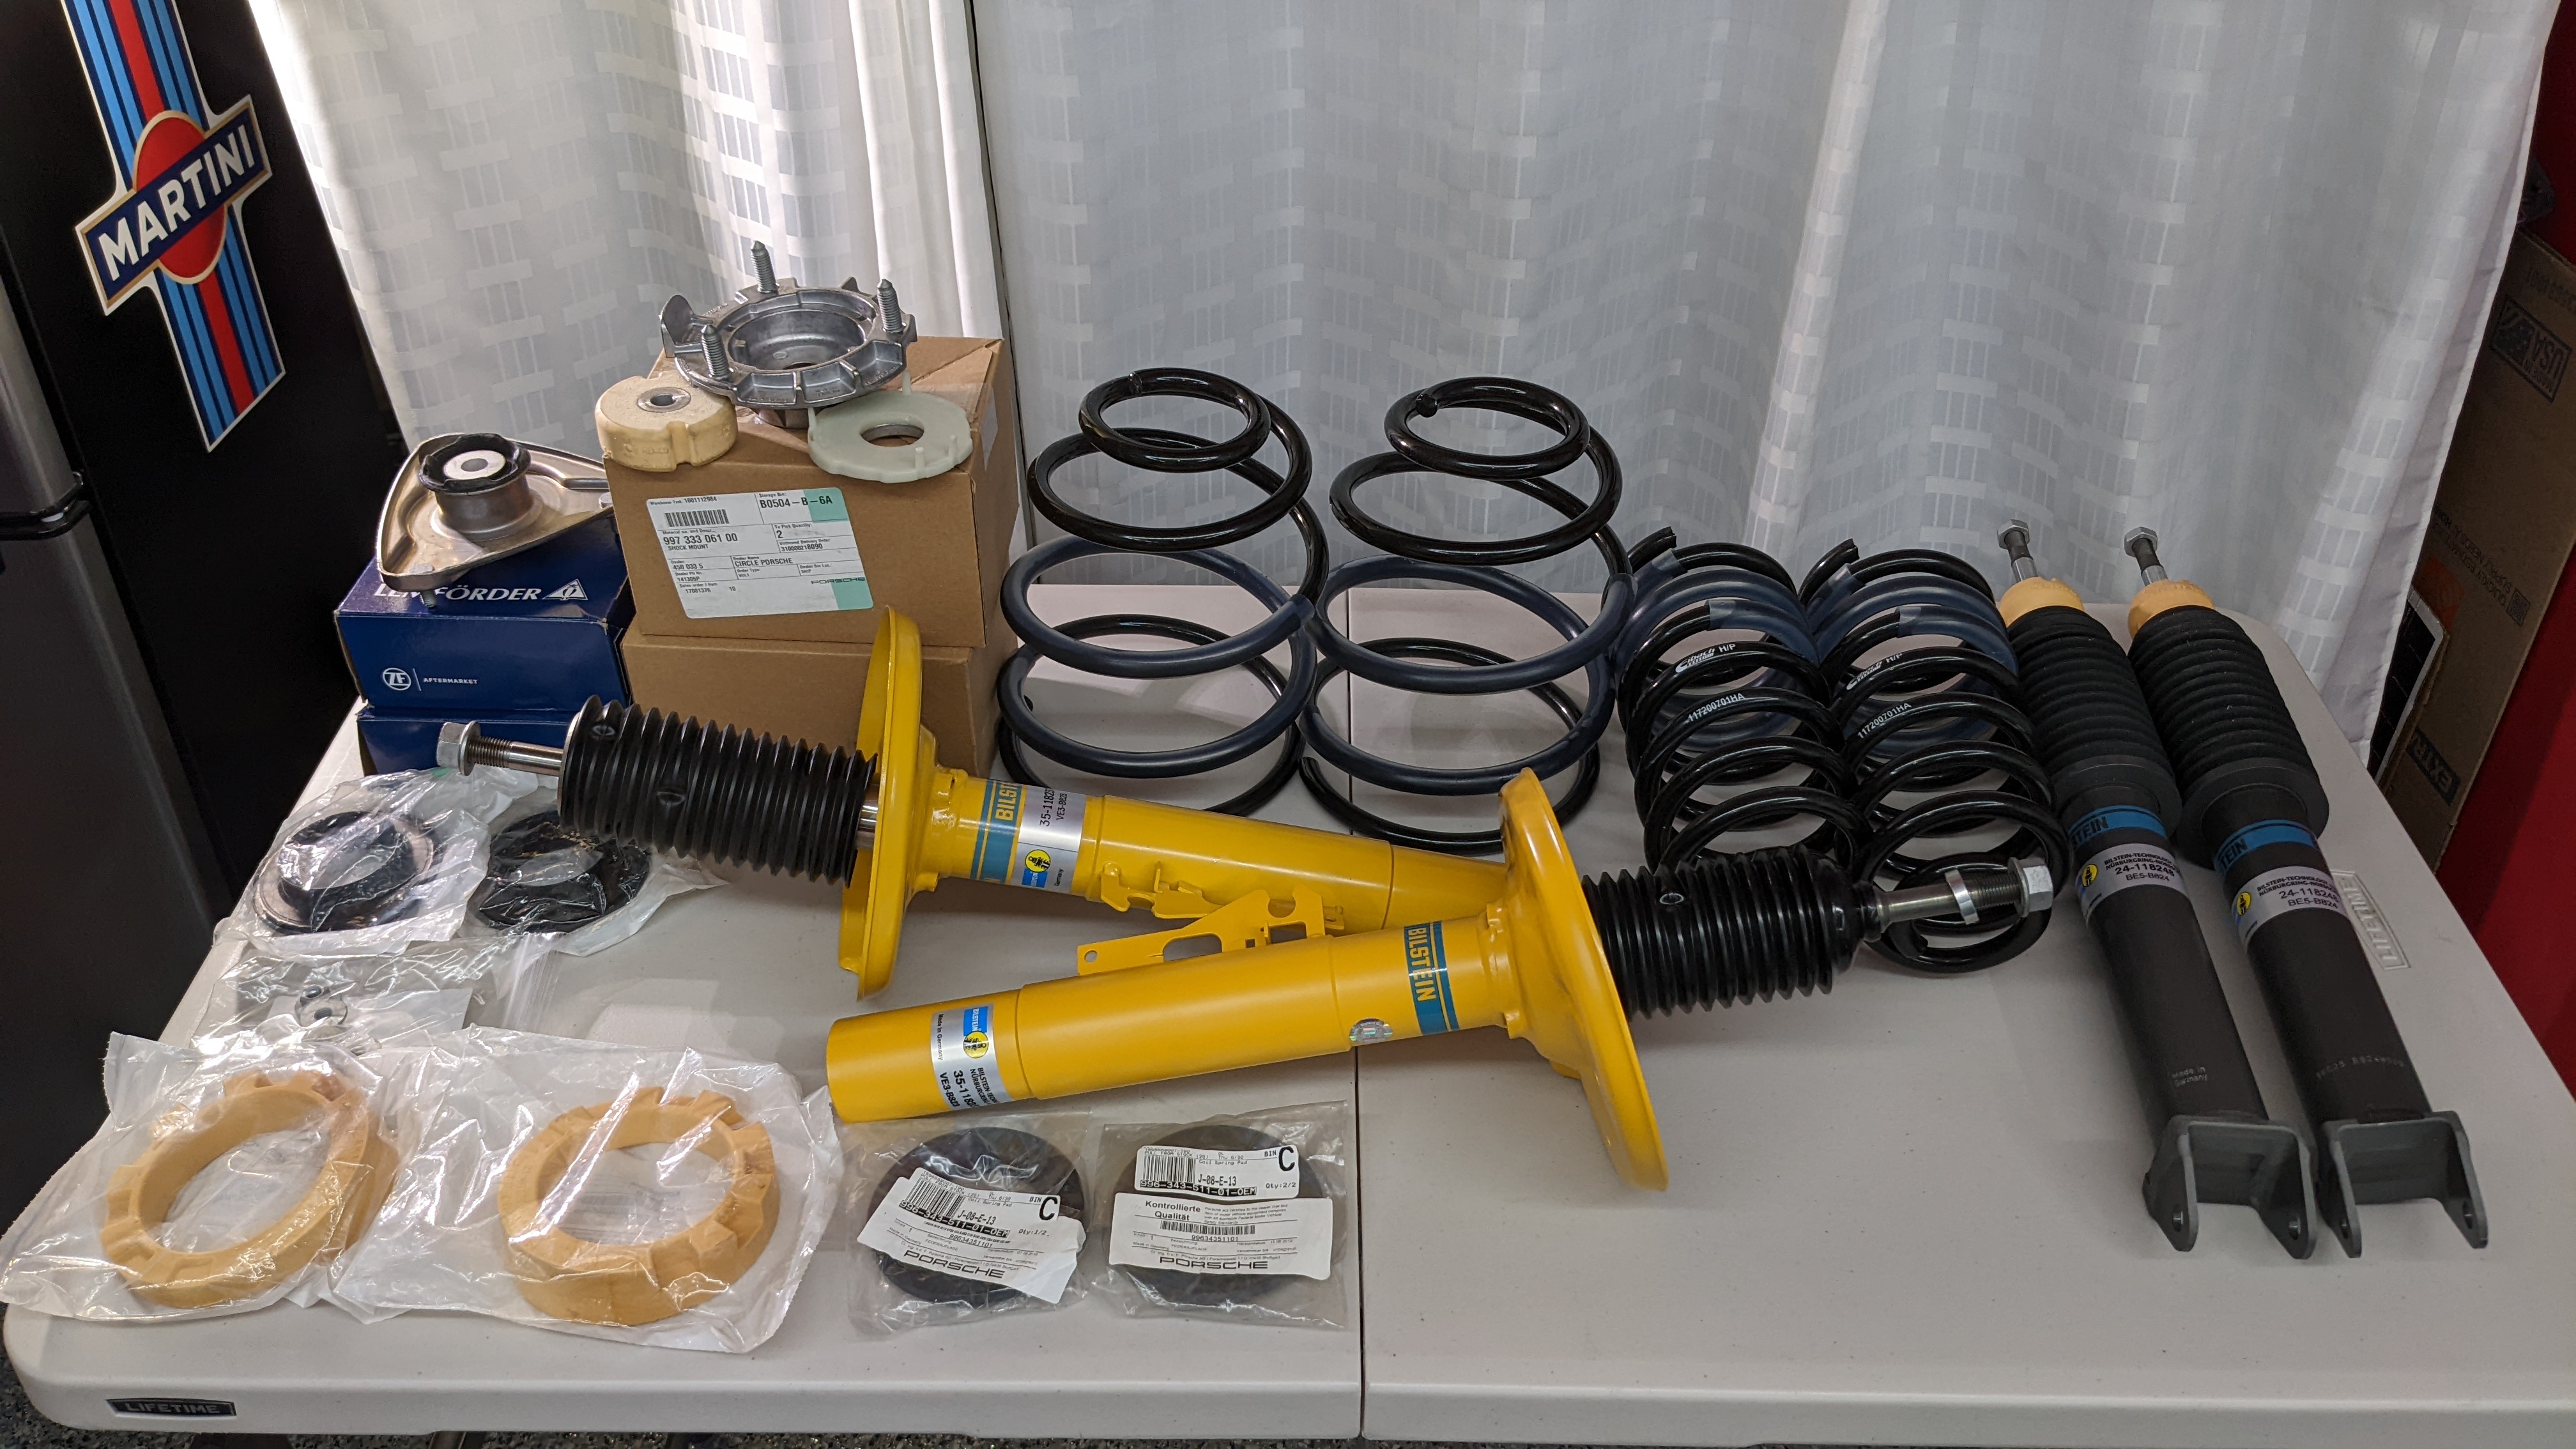
I was originally planning on doing the swap myself but wanted it done and aligned in a single day, so I had a shop knock it out.
Suspension hasn't settled yet but took some pics last night. The car feels tighter and more responsive, but I haven't done any canyon runs yet. It's just a bit more bumpy but not annoying. The Cayman R setup on my 987.2 was much more of a transformation but that suspension was also much more tired.


The plastic extension on the fender liner that extends down now scrapes on everything, lol. Ground clearance for the tip is like 2".


I'll do another set of comparison shots in the sun after a couple of months. Enjoying the car more and more with each little upgrade.
I was originally planning on doing the swap myself but wanted it done and aligned in a single day, so I had a shop knock it out.
Suspension hasn't settled yet but took some pics last night. The car feels tighter and more responsive, but I haven't done any canyon runs yet. It's just a bit more bumpy but not annoying. The Cayman R setup on my 987.2 was much more of a transformation but that suspension was also much more tired.
The plastic extension on the fender liner that extends down now scrapes on everything, lol. Ground clearance for the tip is like 2".
I'll do another set of comparison shots in the sun after a couple of months. Enjoying the car more and more with each little upgrade.
The following users liked this post:
Hootsama (07-26-2022)
07-26-2022, 12:08 PM
#57

And you even have the wheel crests correctly oriented.
Well done sir. Mine's identical but a Tip. So many of those little details are on my list, so the steps are much appreciated.
Well done sir. Mine's identical but a Tip. So many of those little details are on my list, so the steps are much appreciated.
07-26-2022, 01:19 PM
#59
Rennlist Member
Thread Starter
Appreciate the kind words!
Thanks! Yeah, so many of the repairs/upgrades seem to be standard tasks that so many end up doing.
Thank you!
Very nice work and excellent photography, @kiznarsh. Thank you for sharing the detailed events, actions, observations, etc. Very informative! And your car is looking fantastic these days.
07-28-2022, 05:04 AM
#60
Three Wheelin'
Not sure what I enjoyed most; the open road photographs, or the technical stuff.