When you click on links to various merchants on this site and make a purchase, this can result in this site earning a commission. Affiliate programs and affiliations include, but are not limited to, the eBay Partner Network.
Thanks for instructions , it was helpful. I was able to do it with just removing the muffler! Took about 5hrs as my muffler hardware needed to be torched off !
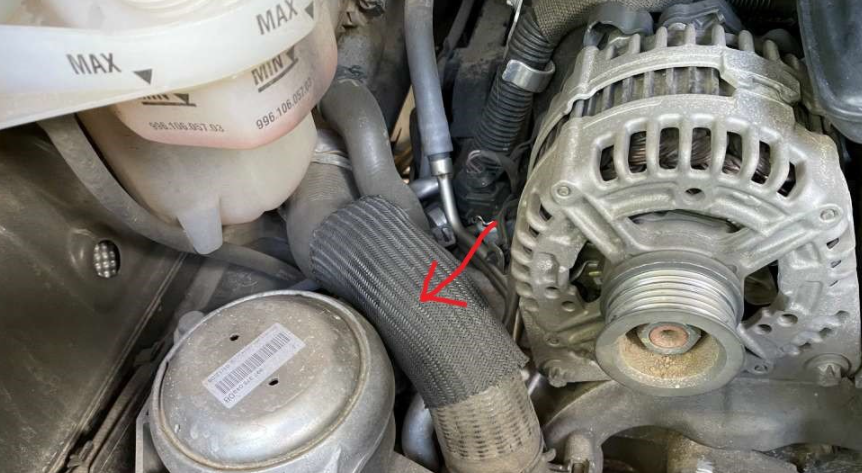
Pump is done, but after driving for an hour, seems like the upper hose that comes off the thermostat housing split so got a little coolant leak. You've mentioned a part number: 997-106-832-32
Is that correct ?
What is the part number for this?
Yes, the 997-106-832-32 is the right number for that big hose. The other part number I list is for the smaller hose you can see just behind that one. As cheap as they are, I just replaced both.
Hi Guys,
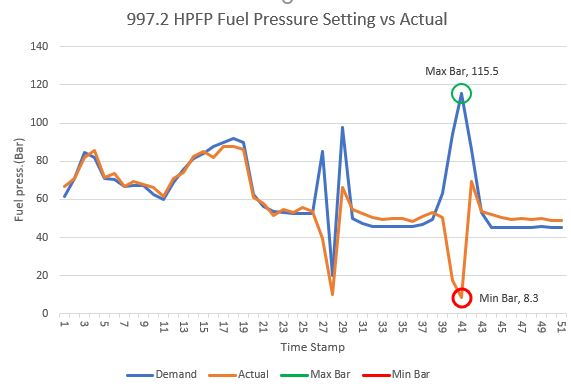
Below, is the graphical representation of the data that confirmed my HPFP was failing. I used a Foxwell NT530's recording feature to track two values simultaneously. HPFP fuel pressure setting and actual fuel rail pressure.
The Car:
MY2009 C2S 6MT with about 93K kM. I think the HPFP has already been changed out whilst with the PO. The pump I removed was an "05" suffix, dated 10/11/12.
The scenario:
Overnight, the fuel rail pressure would leak off to less than 4 bar.
In the morning, the car was very difficult to start e.g 5-6 attempts to get a clean idle and a driveable vehicle after a night's layover, including some "Low Power" warnings on digital dash readout and error codes in the Foxwell. "Fuel pressure too low when starting", "Fuel pressure implausible" etc.
Once warmed up, the car was quite useable and I could easily do responsible urban and highway driving.
Attempted "Spirited acceleration" uncovered the true nature of the issue, the car could run up over 4000 rpm without missing, because there was enough supply for sustained level operation, but when the fuel demand was not met by fuel supply, the engine would miss, timing would be pulled and no real go was available. I procrastinated for months and months, wringing my hands and worrying.
The data:
See chart, the fuel setting (blue trace) and HP actual (orange trace) values track reasonably well whilst exercising a certain amount of throttle restraint. During heavy acceleration, the damaged HPFP could not supply enough HP volume to the injectors, hence the dramatic actual pressure drop in the rail as the fuel demand shoots up. I had known there was a slowly deteriorating HPFP, and I had actually bought a replacement HPFP well in advance.
The fix:
The short story is, I replaced the HPFP and the starting and idle was instantly back to "as new" from the factory. Perfect.
The driving was a revelation, she's back. Wow.
Thanks: @Hindsight2010 for his excellent write up, and the Rennlist for being such an excellent resource.. Foxwell to record data, transferred to Excel and made chart.
Thanks for contributing to the knowledge base BLU997. That Foxwell data you provided is great for those who are trying to diagnose a failing, but not yet fully failed pump.
I'm right in the middle (fairly early in the procedure) of doing my HPFP replacement and I'm stuck at a probably stupid step.
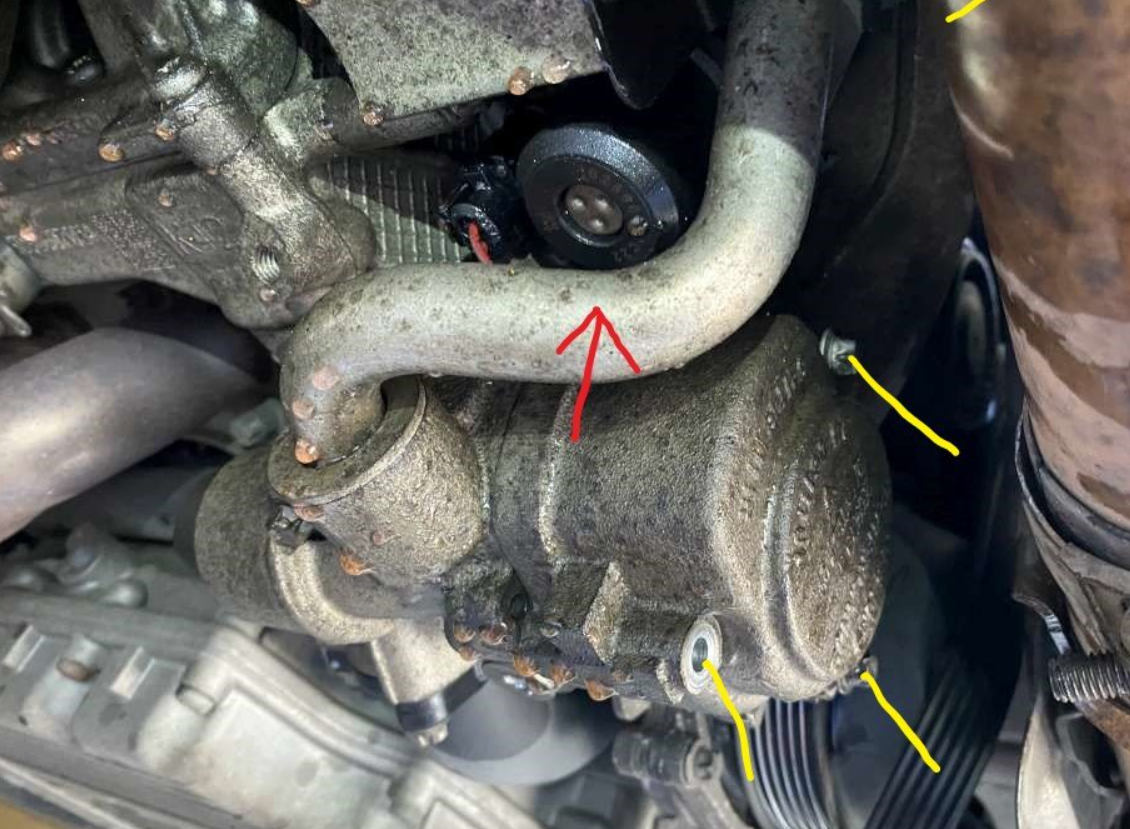
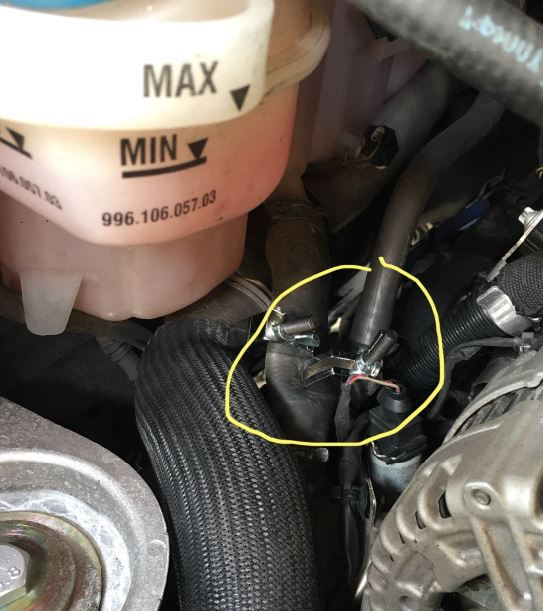
"Remove the metal coolant pipe that is bolted to the left side of the thermostat housing (red arrow) by removing the two torx screws holding it in place (one right next to the end of the pipe and one further up on its support bracket)"
so I have all the bolts out of everything - the little metal flap that covers the pipe going into the thermostat is off - the front of the thermostat housing is just hanging there - but I can't get the metal coolant pipe out! I've tried wiggling it around - it does move a little. I've tried prying on it a bit - but I don't want to crush the thin metal pipe - I've tried some gentle hits with a hammer - Any suggestions?
I'm right in the middle (fairly early in the procedure) of doing my HPFP replacement and I'm stuck at a probably stupid step.
"Remove the metal coolant pipe that is bolted to the left side of the thermostat housing (red arrow) by removing the two torx screws holding it in place (one right next to the end of the pipe and one further up on its support bracket)"
so I have all the bolts out of everything - the little metal flap that covers the pipe going into the thermostat is off - the front of the thermostat housing is just hanging there - but I can't get the metal coolant pipe out! I've tried wiggling it around - it does move a little. I've tried prying on it a bit - but I don't want to crush the thin metal pipe - I've tried some gentle hits with a hammer - Any suggestions?
Maybe screw thermostat back in and pry between the housing and the coolant pipe to pry it out?
I'm assuming the pipe comes out toward left side of your pic?
Maybe screw thermostat back in and pry between the housing and the coolant pipe to pry it out?
I'm assuming the pipe comes out toward left side of your pic?
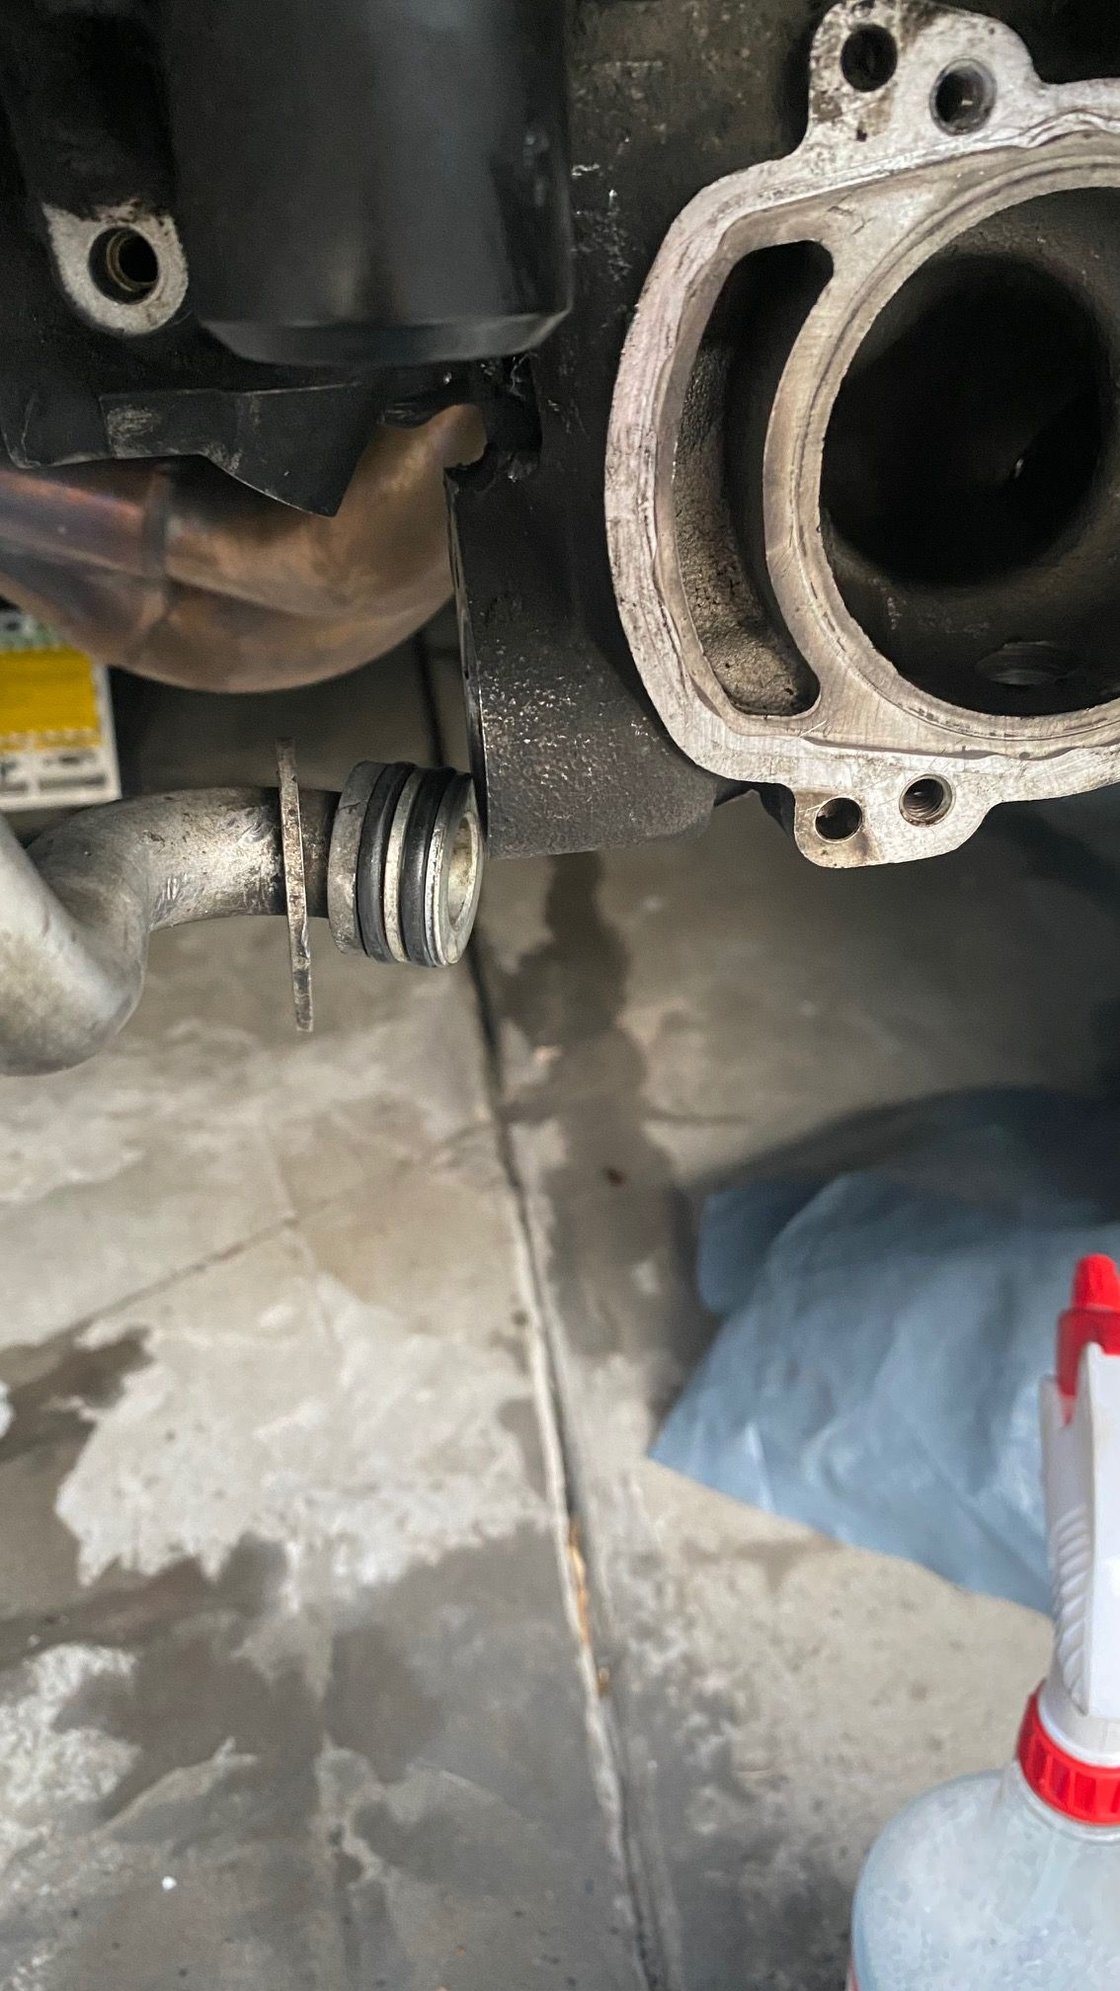
thanks for the suggestion. I have plenty to pry against but I don�t want to pry too hard and collapse pipe. It just wiggles in there like it is held in with a snap ring or something.
It's been a while since I did it and I'm having a tough time recalling, but I think mine was difficult to come out too. There is an o-ring inside of it that seals it and that may be the hang-up. I would just wiggle and pry. More wiggle, less pry. But I do think I just put a very large flat head screwdriver behind it and pried as I wiggled it and it finally came out.
It's been a while since I did it and I'm having a tough time recalling, but I think mine was difficult to come out too. There is an o-ring inside of it that seals it and that may be the hang-up. I would just wiggle and pry. More wiggle, less pry. But I do think I just put a very large flat head screwdriver behind it and pried as I wiggled it and it finally came out.
That was it! Thanks for the help folks.
Prying alone wasn't moving. Pulling and wiggling wasn't working. Persuading it with a dead blow hammer was doing nothing.
I used the big flat head screwdriver, applied consistent pressure and wiggled - that did work!
The pipe has two O-rings that provided a good seal.
Last edited by voidopolis; 09-18-2021 at 09:34 PM.
Prying alone wasn't moving. Pulling and wiggling wasn't working. Persuading it with a dead blow hammer was doing nothing.
I used the big flat head screwdriver, applied consistent pressure and wiggled - that did work!
The pipe has two O-rings that provided a good seal.
Had the exact same concern and got stuck at that exact point, though I did this in the beginning of these going out, out of warranty. I just could not understand that it was only sealed with o-rings, but I guess that's how shark bit fittings are designed...
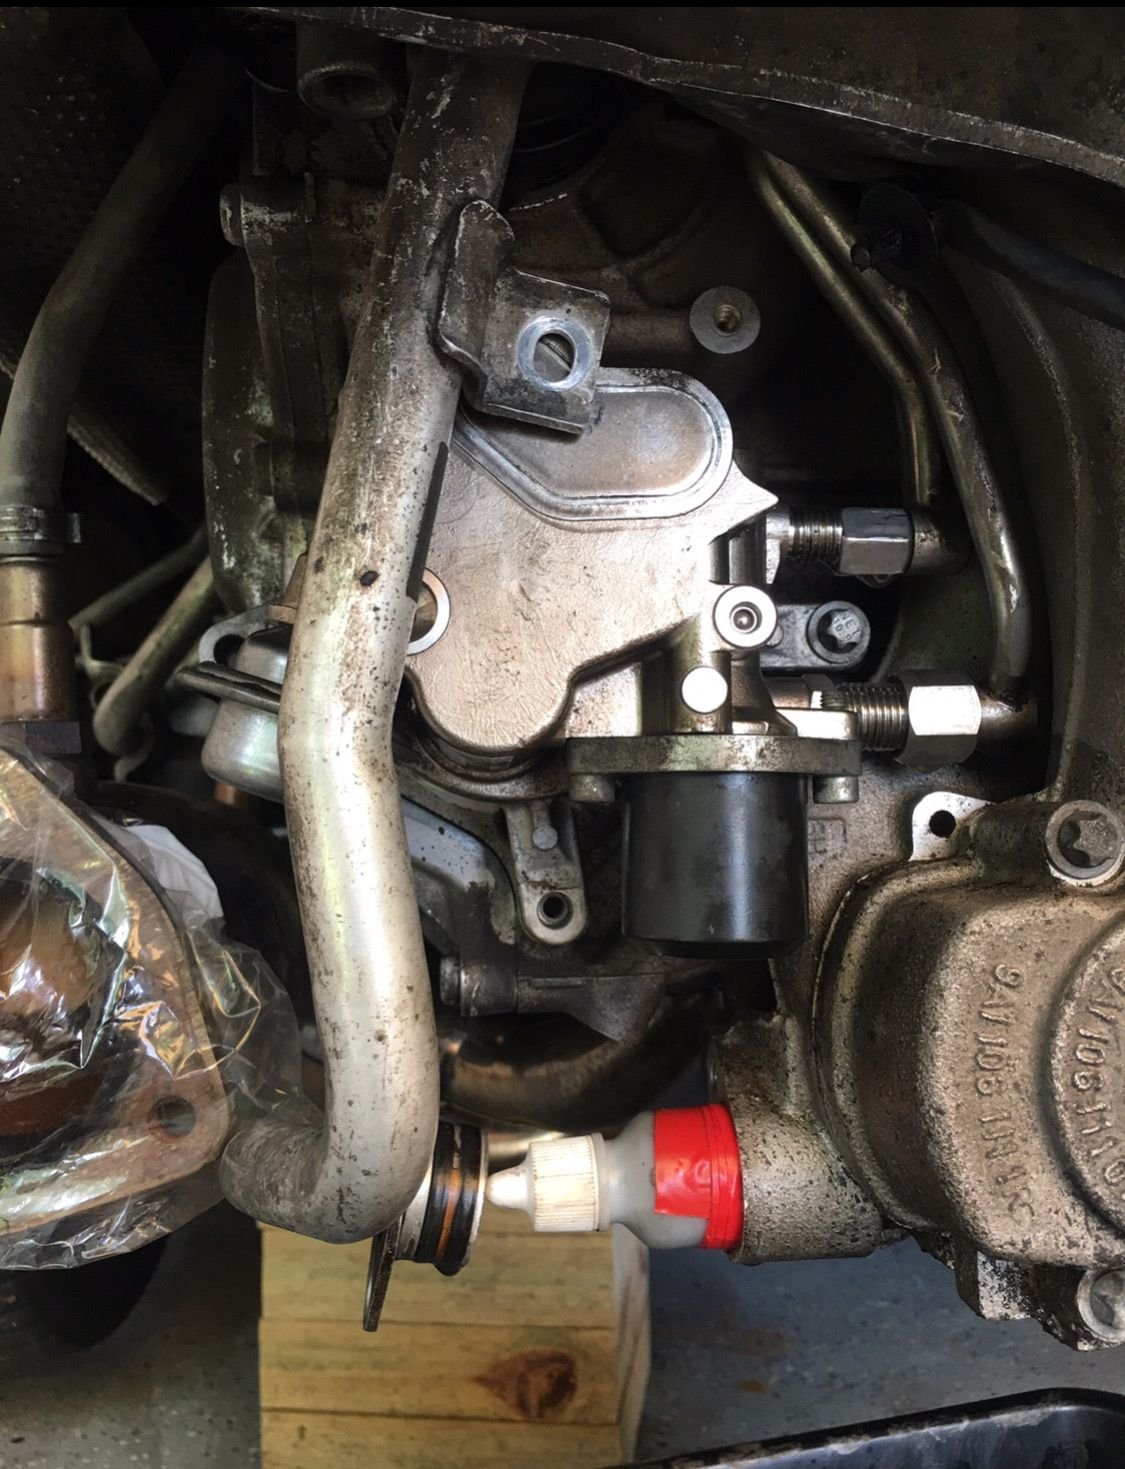
Change the HPFP without dumping the coolant.
If you don't want to drain all the engine coolant, you don't have to.
1. crimp the smaller hose that goes back to the expansion tank.
2. prepare a suitable bung for where the aluminium coolant pipe comes out from, I can't remember the exact diameter, electrical tape works to adjust the diameter.
3. leave the blue cap on, or even pull a slight vacuum with your coolant vac. wiggle out aluminium coolant pipe and quickly jamb in your bung.
4. maneuver the alum pipe out of the way.
5. undo the fuel lines, they are connected by flex hoses further up and just come away easy as you pull out the pump.
6. Change out the HPFP. remember to loose fit the fuel lines before pushing new pump back into it's home.
7 test motor and top up coolant, <1qrt needed usually.
I used 2 small line crimpers, I'm sure there are better ones available
I forget exactly what size my dropper bottle bung was, but it worked perfectly.
Last edited by BLU997; 09-24-2021 at 02:12 PM.
Reason: picture & words
Yes it could, but at that point I would be surprised if you didn't have some fuel pressure codes - maybe not enough to make the CEL come on but if you scan the ECU, they would probably be in there.

 01-23-2021, 08:13 PM