When you click on links to various merchants on this site and make a purchase, this can result in this site earning a commission. Affiliate programs and affiliations include, but are not limited to, the eBay Partner Network.
I have been very pleased with the Ferodo DS2500 pads that I purchase from essex. Depending on your driving style and what sort of driving you do will lend to what is the best pads for you. If you are looking for track performance on the street and some track days as well, the DS2500 is the best I've found for that. I do like them over the Pagid street pads. The Pagid track pads are simply amazing, but their street/track pads fail at both IMHO. Ideally you would use track only pads for track days, but when looking for a pad that can cover both they really do perform well in each segment.
No matter what brakes you select, be sure to bed-in your new brakes! This is very important and often overlooked.
Since we are talking brakes I'll throw two more items out there. Should you do any tracking, titanium shims are well worth the investment.
Additionally if you have a sticking caliper, or if they have aged (seals do wear out) or discolored, I highly recommend Hayworth Racing Brakes. John certainly knows his brakes, he has been specializing in them for 30 years (very impressive background). He has done a fantastic job on my calipers over the years and everyone I know that has used him has been extremely satisfied.
I have been very pleased with the Ferodo DS2500 pads that I purchase from essex. Depending on your driving style and what sort of driving you do will lend to what is the best pads for you. If you are looking for track performance on the street and some track days as well, the DS2500 is the best I've found for that. I do like them over the Pagid street pads. The Pagid track pads are simply amazing, but their street/track pads fail at both IMHO. Ideally you would use track only pads for track days, but when looking for a pad that can cover both they really do perform well in each segment.
I have used the DS2500 in previous cars, agree they were great. What rotors are you using with them?
I have been very pleased with the Ferodo DS2500 pads that I purchase from essex. Depending on your driving style and what sort of driving you do will lend to what is the best pads for you. If you are looking for track performance on the street and some track days as well, the DS2500 is the best I've found for that. I do like them over the Pagid street pads. The Pagid track pads are simply amazing, but their street/track pads fail at both IMHO. Ideally you would use track only pads for track days, but when looking for a pad that can cover both they really do perform well in each segment.
I also really liked DS2500s on previous cars for street and my first track experiences. Essex was great when I needed some DS3000s in an AP Racing fitment that wasn't normally available in the US but I think that when I needed a normal pad shape Raceshopper.com was cheaper. It's been ~15 years since I bought from them and it looks like design wise they haven't updated their website since then but the service and prices were good at that time.
I have in the past used Zimmermann or ATE rotors, but prefer to stay away from drilled and only use slotted rotors. Presently I am using slotted rotors that have been cryogenically-treated by Frozen Rotors, this definitely has extended both the rotor and pad life in my experience. I do plan on upgrading my rotors to the 2-piece GiroDisc's in the future though and will continue to have them cyro-treated too. For those that have a StopTech slotted rotor model option available, that is an excellent choice too.
Ironically just got an email from Essex today titled Track and Racing Brake Pad Owner's Guide. I have linked it here in case anyone is interested in reading more about pads.
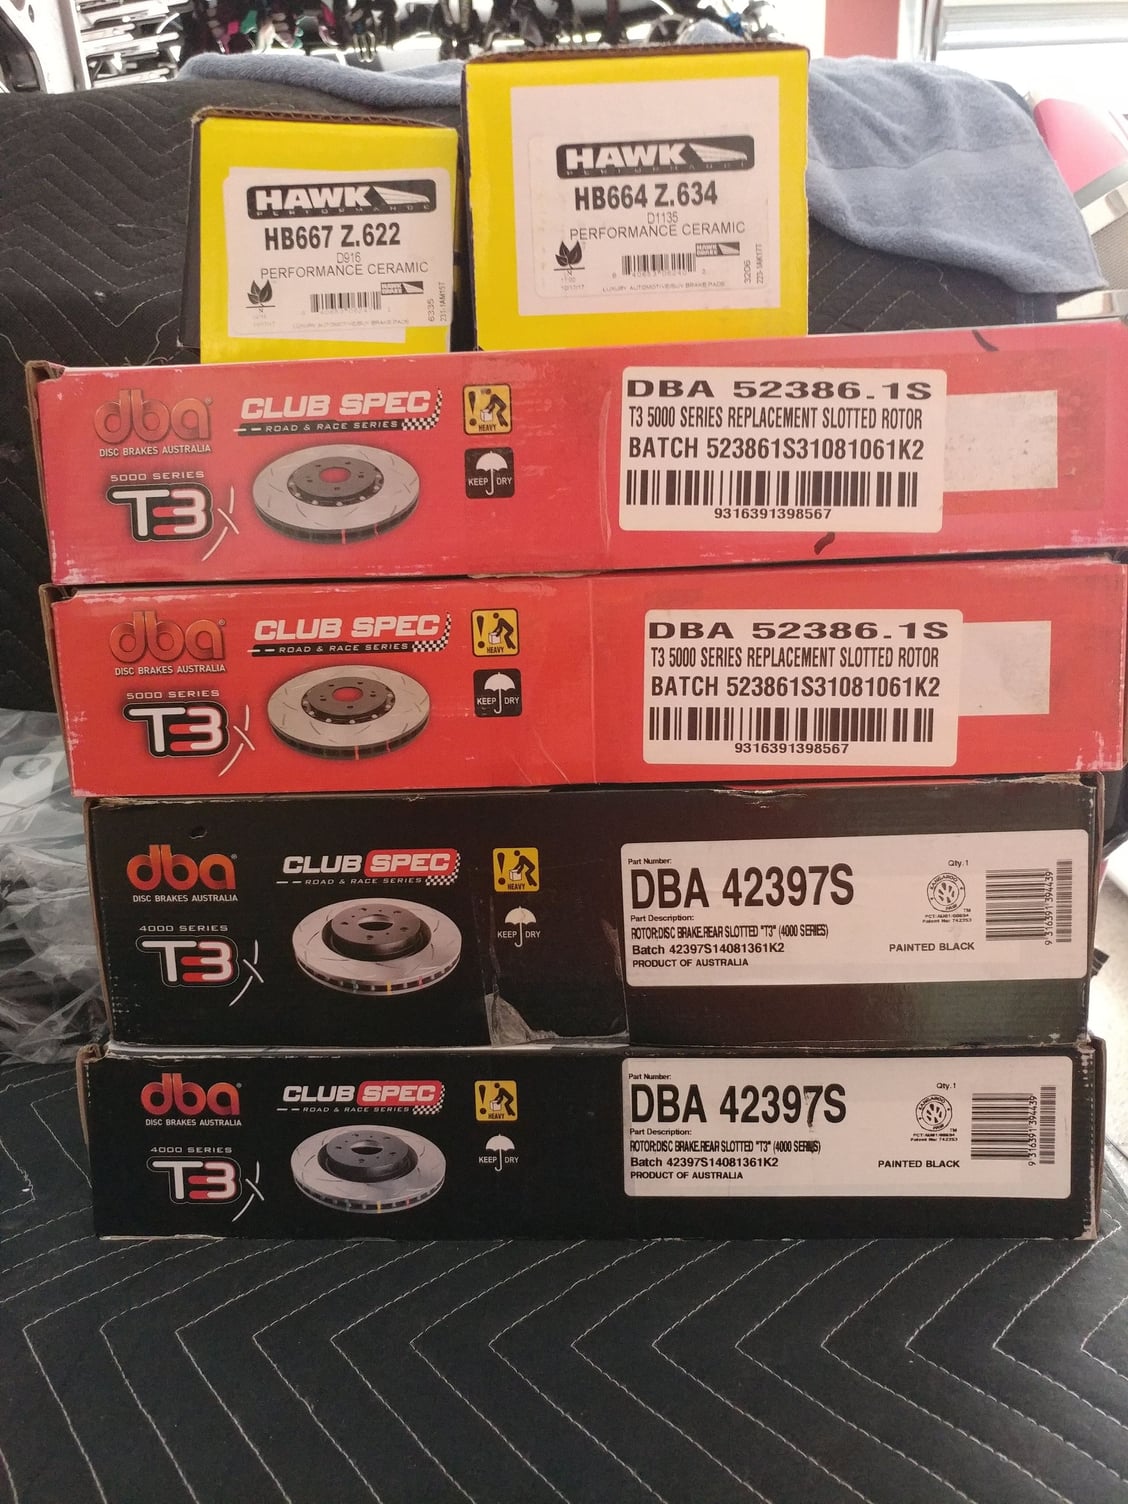
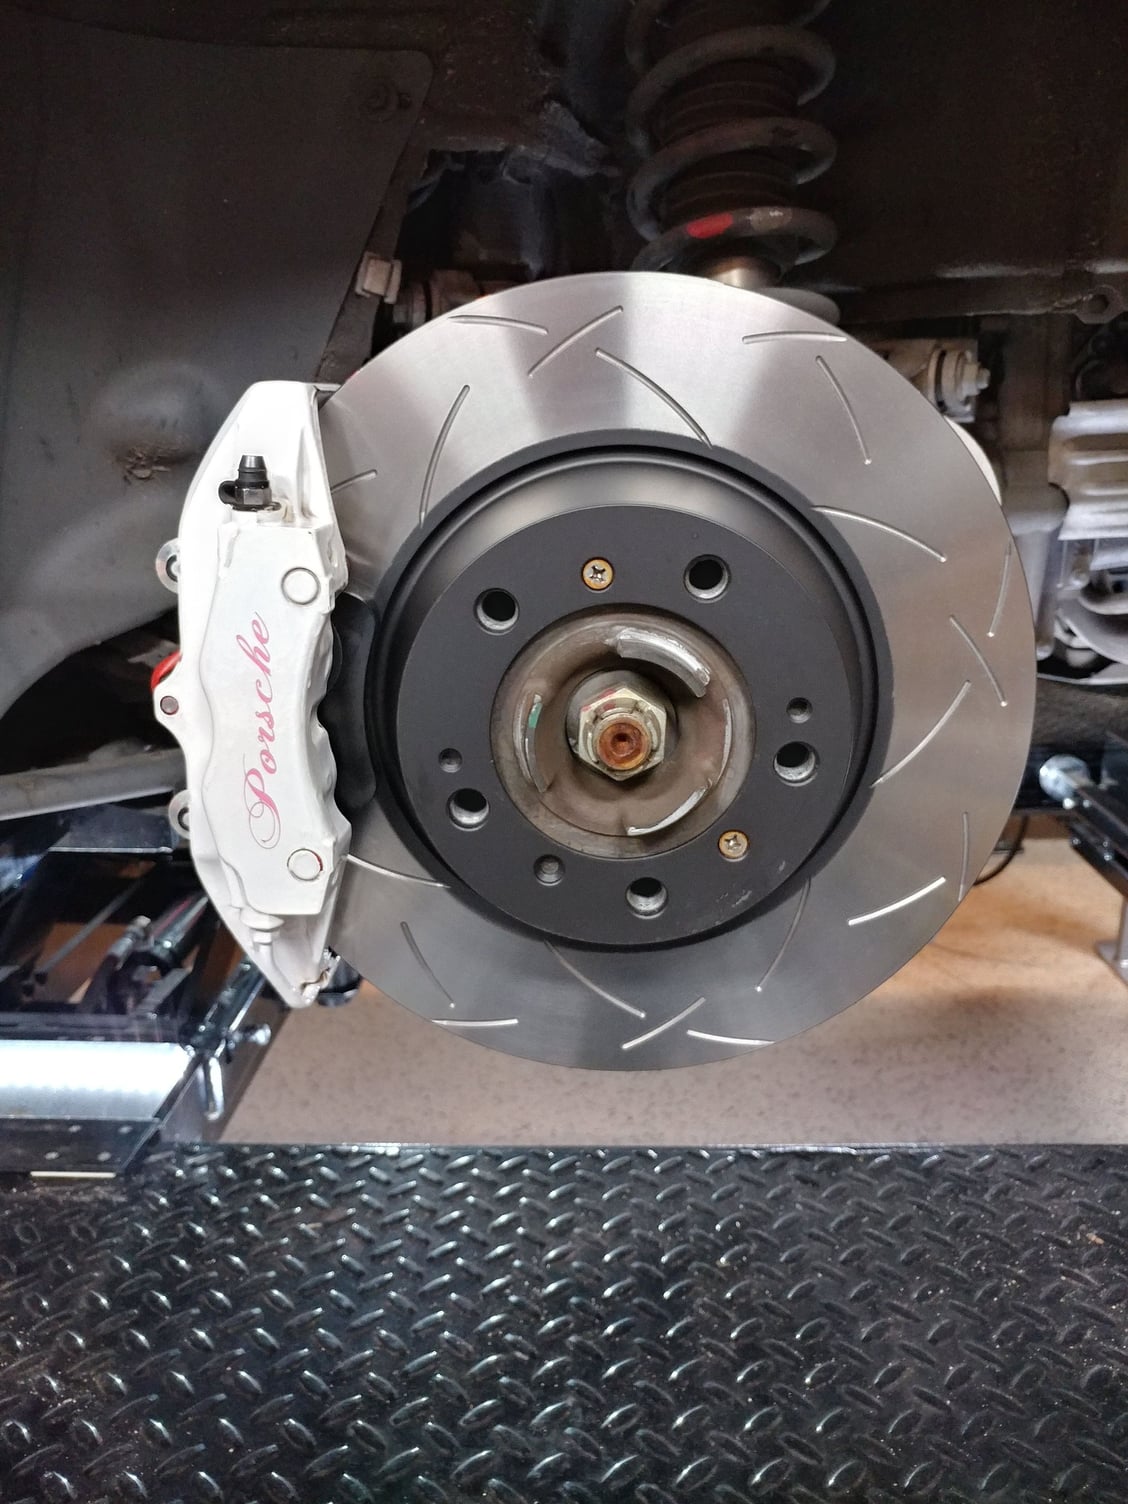
dba (disc brakes Australia) slotted rotors with Hawk Ceramic pads. Rotors from KNS Brakes and pads from Amazon.
These are the part numbers for my wife's 997.1 C2S. I would guess that rears are the same, but fronts different on a non-S car. These fronts were also for just the rings as I already had the hats from the last set.
Rotors and pads
Front 2-piece
Rear 1-piece
Yes, replace the pad dampeners - Suncoast sells them in correctly mixed kits by axle (front or rear) for your application.
Brakes work more effectively and don't have any squeal with clear side markers too.
j
i have this exact setup based on recommendation here.
After about 5k miles, I�m now experiencing major wiggle when brakes are lightly pressed which i assume rotors are warped or perhaps improper bedding.
How can I tell whether they are still salvagable or if I need new rotors.
I replaced all the dampeners as part of swap too.
It would be very unusual for a rotor to actually be warped in anything other than track use with really heavy braking zones. I bet you have a bedding issue where the material transfer isn't even or consistent so it give a grab, release, grab, release, effect that feels like warpage. If it's on the front rotors, the steering wheel will wiggle back and forth and if it's the rear, the whole car will kind of do this. If it's the rear, it's also possible that the parking brake wasn't adjusted correctly during installation and was dragging a little, over heating the rear rotors, and then it actually is possible that they're warped. After I do a brake job, I do the bedding procedure and while I'm out there, I find a safe, flat place to stop and using my infra-red thermometer take readings of the rotor temps. Both fronts should be within a few degrees of each other as should both rears, but the fronts and rears may be quite a bit apart, temperature wise.
If it's a warpage, issue, you need to measure the runout in the rotor as it turns. Jack up the car and ideally, use a run out gauge. This is a device that mounts in a fixed position and as the rotor turns, is like a caliper that will move the needle around the dial. You want to position at the lowest point and measure the distance from that point to the maximum needle movement position. There's a spec for acceptable runout. Without a runout gauge, you can still do this, but less scientifically. with the wheels off the ground, rotoate one by hand and listen and feel for an area on the rotor where the pad is touching or scraping and then where it goes away. If the rotor isn't running true, it will do that scraping in the same place for each revolution of the wheel.
If the rotors are running true, yet you have this grab, release sensation, you need to clean both sides of the rotor really well with brake cleaner - I spray some onto a roloc pad that's on a drill and give it a good cleaning. Ideally, you'd want to rough up the contact surface of the pads to just in case they somehow became glazed, but you can try it without doing this first and see if it works before deciding to pull the pads out of the calipers to sand or file the surface of them. Once all cleaned up, rebed the brakes with the process discussed here with a series of more progressive braking events without coming to a complete stop, and then a cool-down distance without any braking. Also best to not set the parking brake when you finally stop this time as that can stick the rear pads to the rotors and create an uneven transfer spot or build up heat in the pad area and actually warp the rotor.
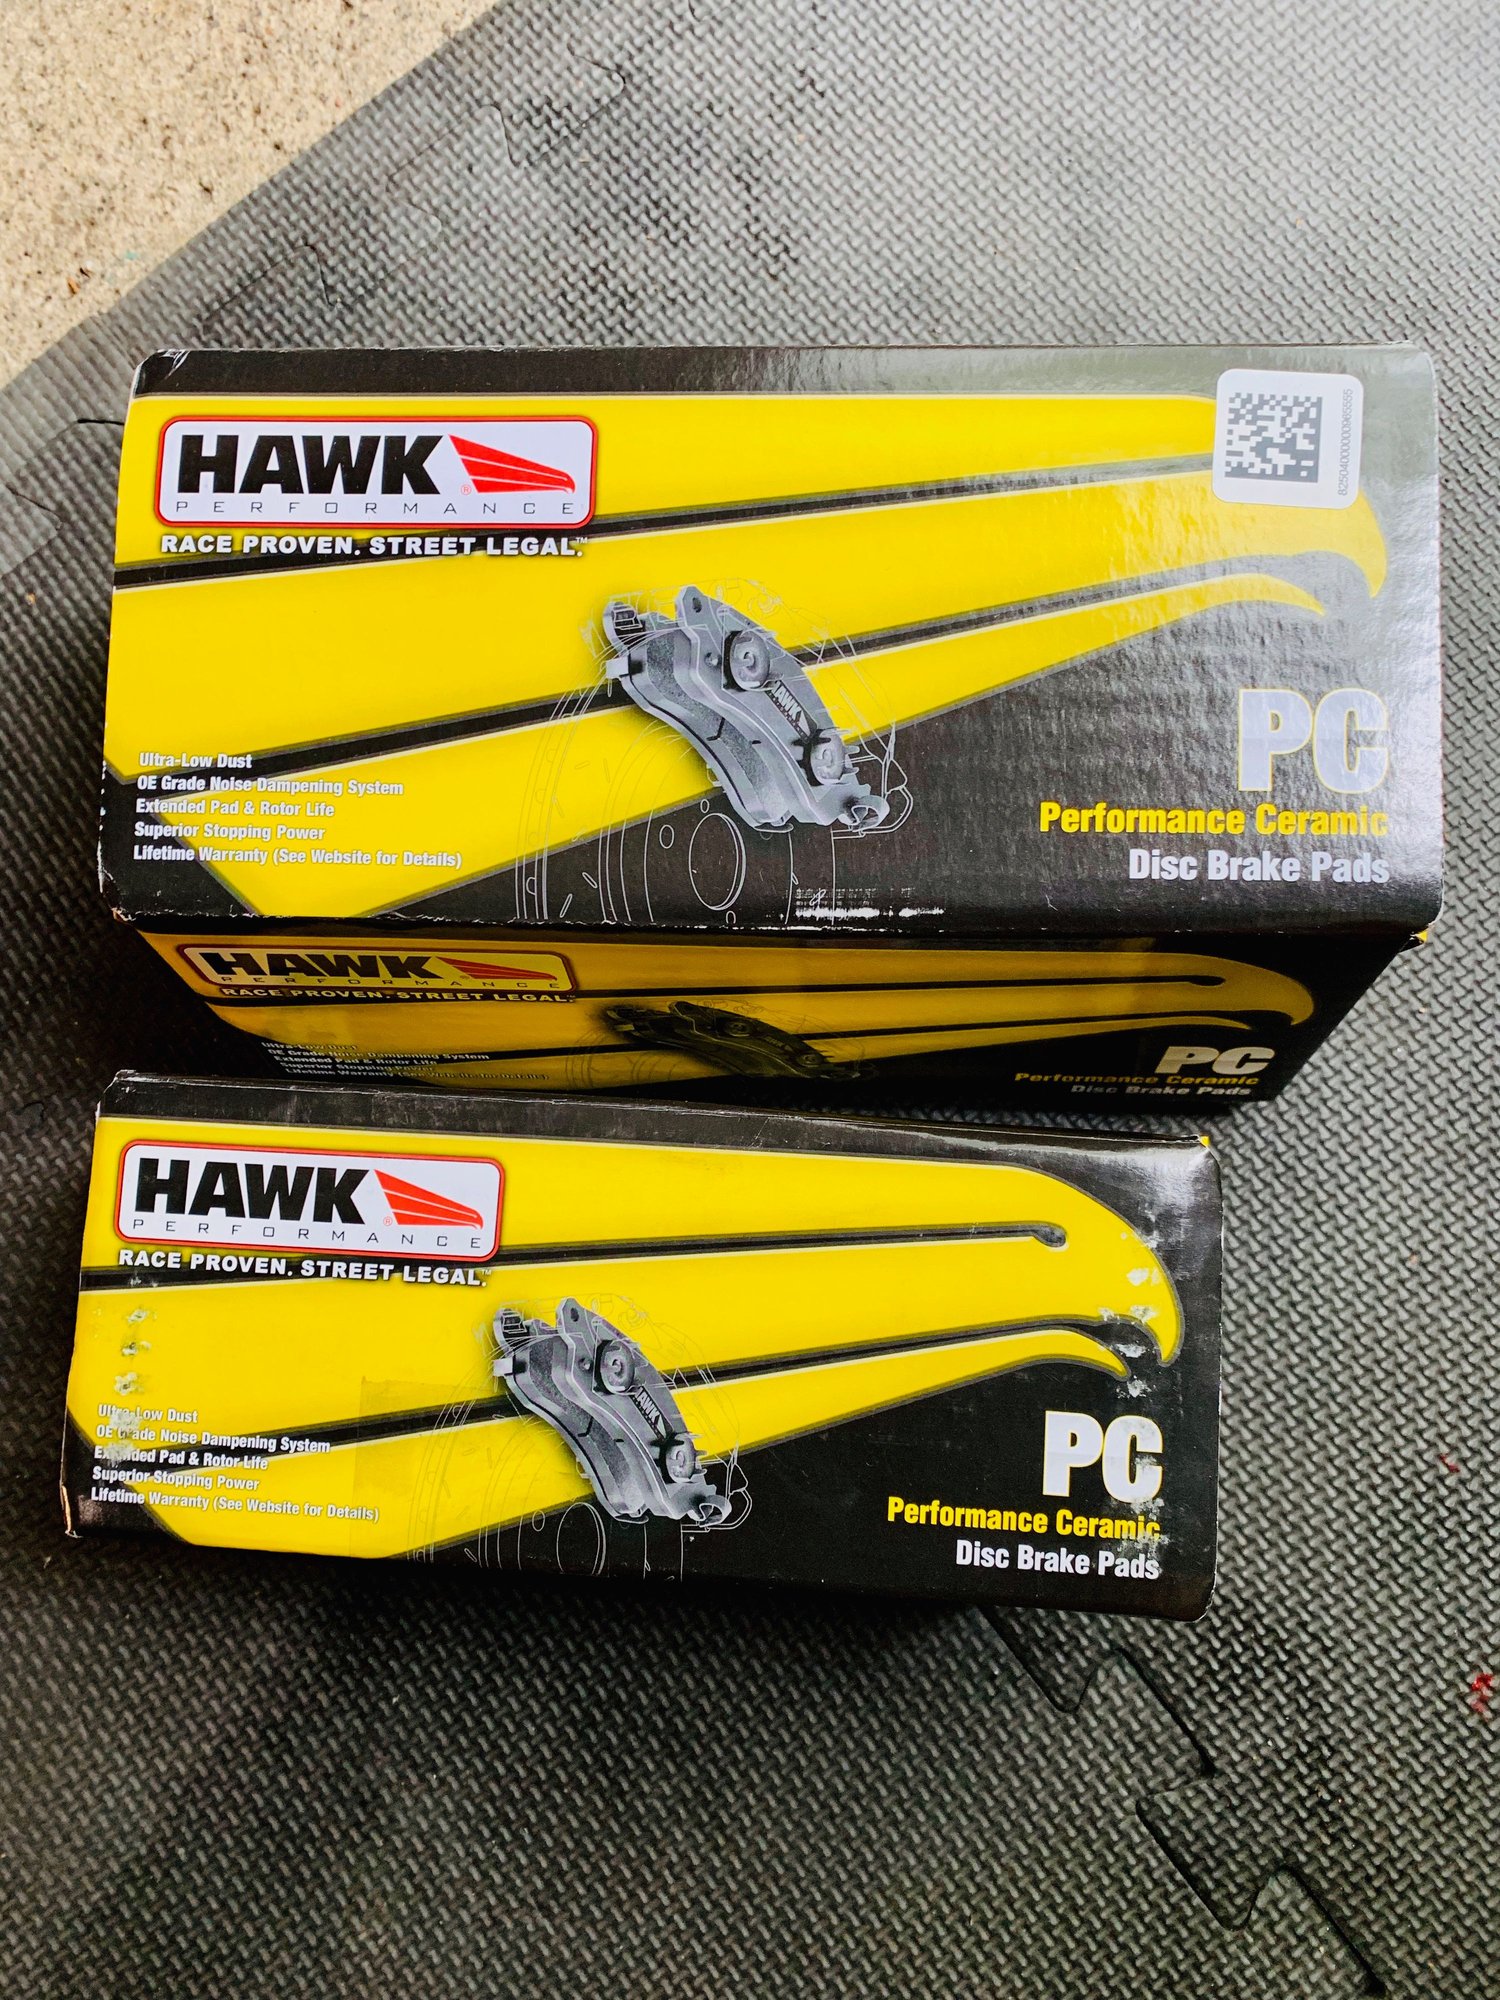
Hi guys - thanks for the recommendations. I installed the Hawk Ceramics. I held off on the rotors as I had 1mm left on fronts/rears (28 max / 26 min on fronts; 24 max / 22 min on rears). Note: the base model rotors don't have a wear indicator and its hard to find where the thickness is stamped. Its very lightly stamped on the rim of the hat. You need to chalk it to read.
Couple questions:
1. The service advisor at my local dealer said they always recommend to change the rotors and pads at the the same time. He said even if you have life on the rotors you will go through pads faster because "the thinner rotors can't dissipate as much heat". Any truth to this? I always take what those front office guys say with a grain of salt. Their job is just to upsell Macan moms.
2. After installing the pads I could hear them lightly rubbing along the rotors when I drove down the street at low speed. I pulled over and pumped the brakes a couple times and can't hear it anymore. I was worried I had installed them incorrectly but think this is likely "normal" until they get settled. Can you guys confirm.
3. Is it really necessary to remove brake fluid from the reservoir? I had the cap off to look at the level while I was spreading the pads and it was never in danger of overflowing.
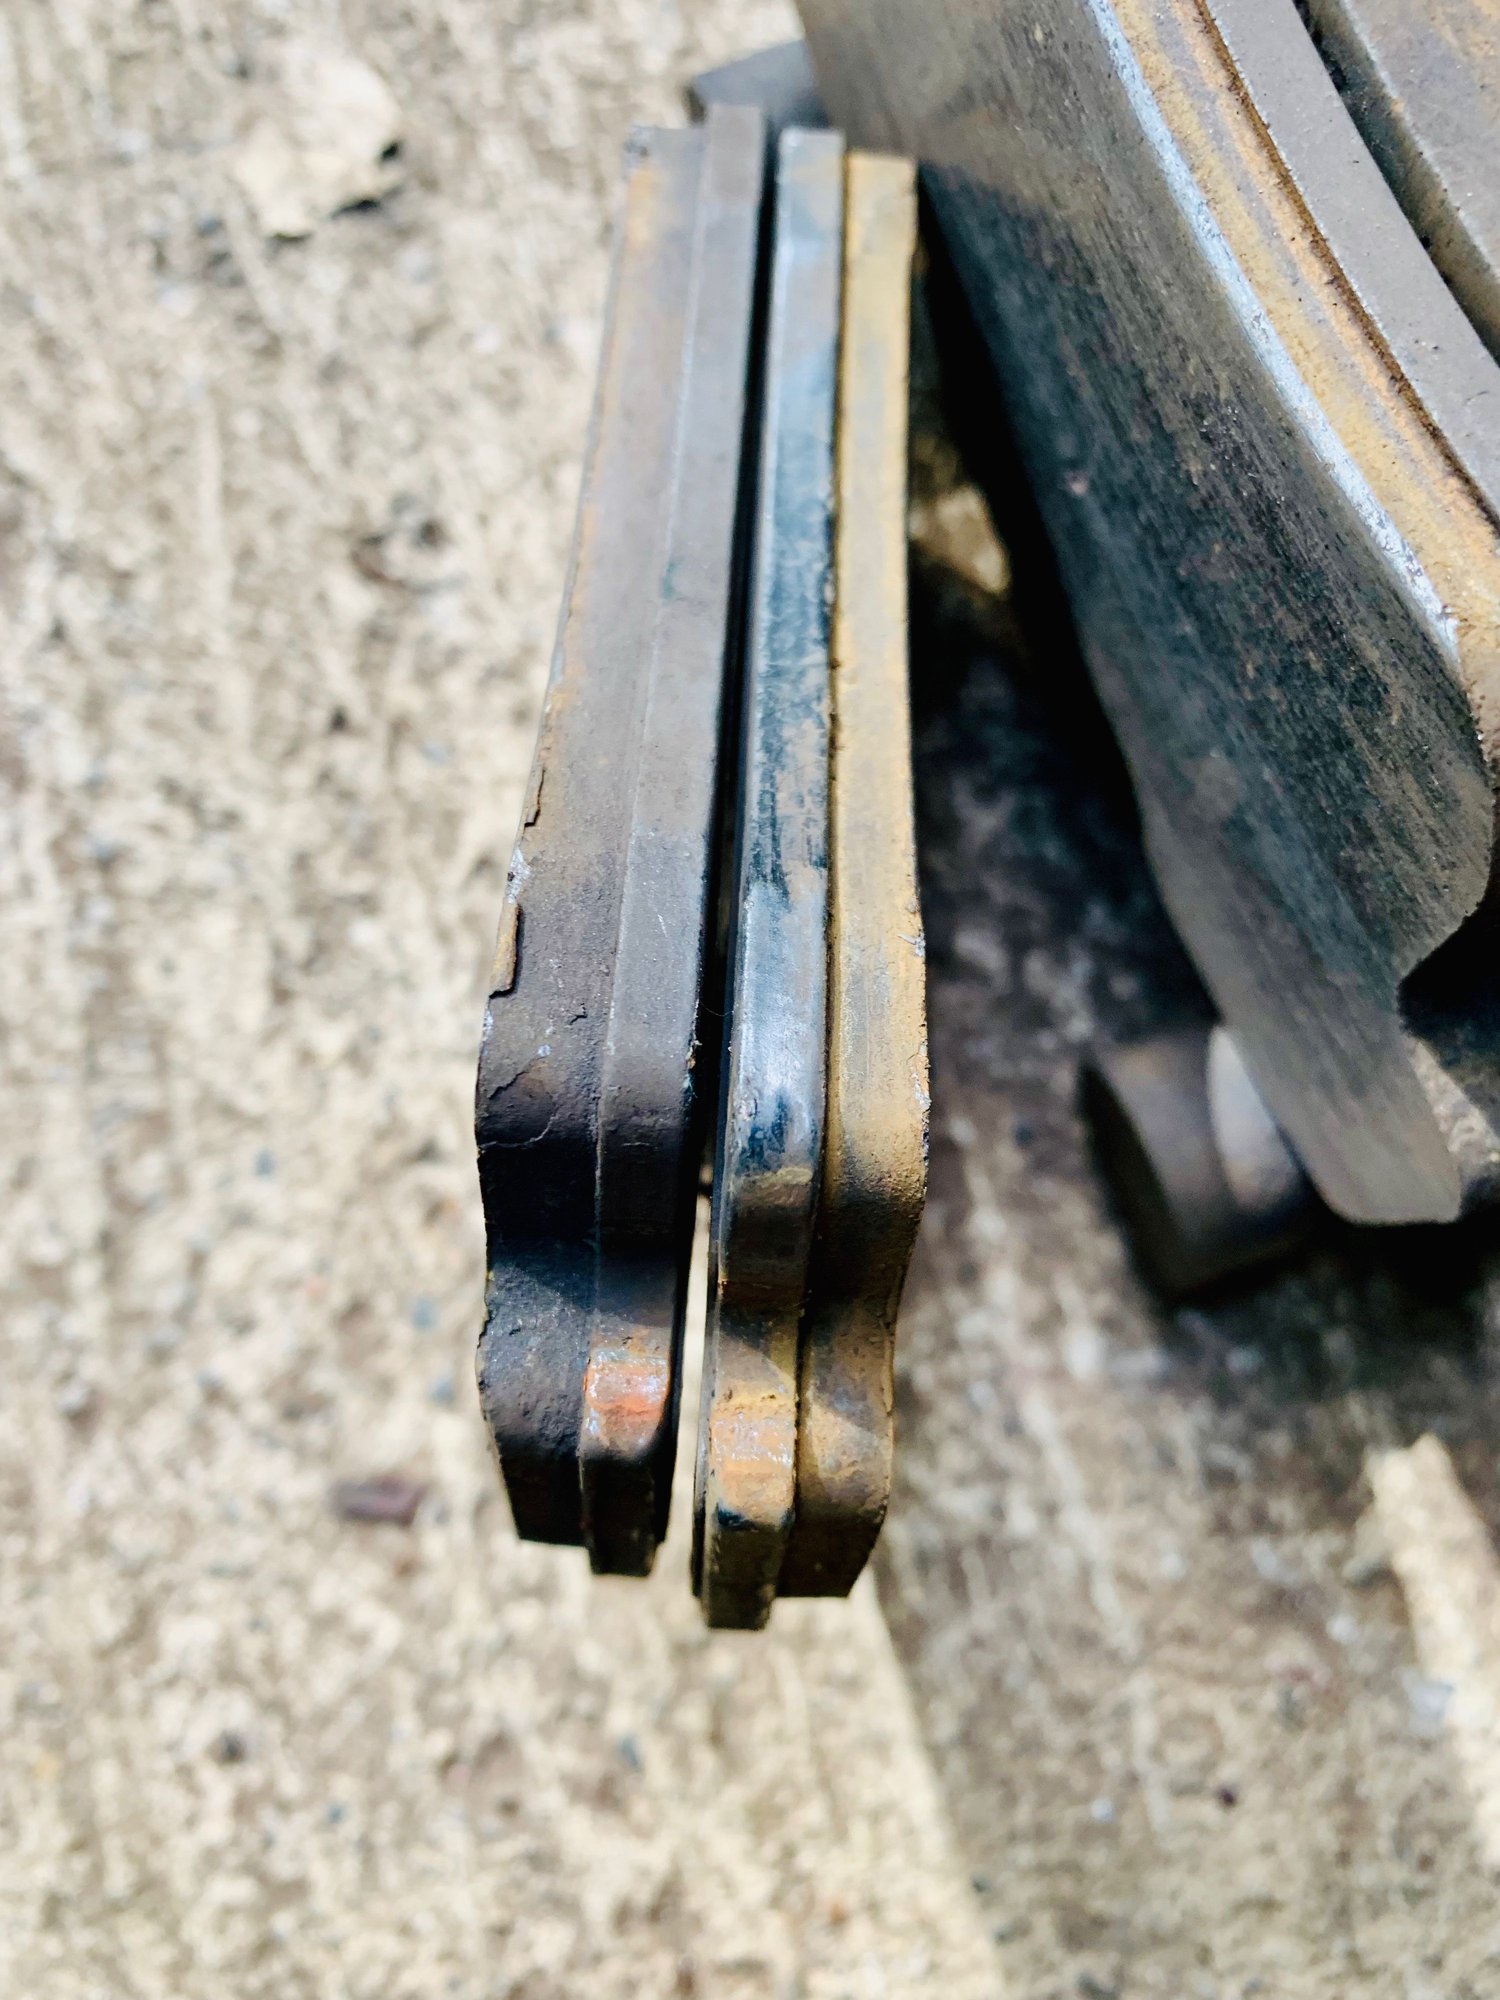
4. I noticed some uneven wear on my pads. One side was typically a little more worn than the other. Is this normal?
Will report back how the Hawks perform and what I see from brake dust. I haaaate cleaning those Sport Design Wheels.
Ps - I would have done one of my overly detailed DIY write-ups but its such an easy job and there are plenty of write-ups already on it.
Hi guys - thanks for the recommendations. I installed the Hawk Ceramics. I held off on the rotors as I had 1mm left on fronts/rears (28 max / 26 min on fronts; 24 max / 22 min on rears). Note: the base model rotors don't have a wear indicator and its hard to find where the thickness is stamped. Its very lightly stamped on the rim of the hat. You need to chalk it to read.
Couple questions:
1. The service advisor at my local dealer said they always recommend to change the rotors and pads at the the same time. He said even if you have life on the rotors you will go through pads faster because "the thinner rotors can't dissipate as much heat". Any truth to this? I always take what those front office guys say with a grain of salt. Their job is just to upsell Macan moms.
2. After installing the pads I could hear them lightly rubbing along the rotors when I drove down the street at low speed. I pulled over and pumped the brakes a couple times and can't hear it anymore. I was worried I had installed them incorrectly but think this is likely "normal" until they get settled. Can you guys confirm.
3. Is it really necessary to remove brake fluid from the reservoir? I had the cap off to look at the level while I was spreading the pads and it was never in danger of overflowing.
4. I noticed some uneven wear on my pads. One side was typically a little more worn than the other. Is this normal?
Will report back how the Hawks perform and what I see from brake dust. I haaaate cleaning those Sport Design Wheels.
Ps - I would have done one of my overly detailed DIY write-ups but its such an easy job and there are plenty of write-ups already on it.
1. The service advisor at my local dealer said they always recommend to change the rotors and pads at the the same time. He said even if you have life on the rotors you will go through pads faster because "the thinner rotors can't dissipate as much heat". Any truth to this? I always take what those front office guys say with a grain of salt. Their job is just to upsell Macan moms.
The part about the thinner rotors not dissipating as much heat isn't quite correct. The problem with the thinner rotor is that it can't absorb as much heat since it's the mass of metal that determines the size of the heat sink, so under borderline overheating conditions, the thinner rotor will have a greater tendency to warp than the full thickness rotor. Unless you're really killing your brakes, it shouldn't be a problem. If your stock rotors are drilled though, keep an eye on the holes for cracks - little hairline spider cracks starting at the holes are normal, but any crack that connects two holes means the rotor needs to be replaced. If the discs are solid surfaces, but vented, then no worries.
2. After installing the pads I could hear them lightly rubbing along the rotors when I drove down the street at low speed. I pulled over and pumped the brakes a couple times and can't hear it anymore. I was worried I had installed them incorrectly but think this is likely "normal" until they get settled. Can you guys confirm.
Totally normal. Disc brakes don't have a way to actually retract - releasing the brake pedal just means they're no longer being forced against the rotor surface - so they're always right there next to the rotor and you can sometimes hear that little bit of sound. You may hear it a little more or a little less when turning in one direction as the load on a wheel changes and deflects the rubber suspension bushings.
3. Is it really necessary to remove brake fluid from the reservoir? I had the cap off to look at the level while I was spreading the pads and it was never in danger of overflowing.
If you never topped up the brake fluid while you were wearing out the previous set of pads, then no, it's not. If you start with new pads and the reservoir at the fill mark, and never top it off, it will go back to that same full mark when you install new pads. The only little bit of risk there is that if you push the caliper pistons all the way back into their bores, that's actually a little further in than they will be in normal driving use, and you could overflow the reservoir. I use a stainless turkey baster to pull out a couple basters full since I'm going to empty the reservoir with it when I'm done anyway and bleed the brakes with new fluid.
4. I noticed some uneven wear on my pads. One side was typically a little more worn than the other. Is this normal?
That's fairly normal. Were both sides the same way or do you have one corner that had this uneven wear with the other 3 more even? If you combine this slightly uneven wear with the light dragging sound in #2 above, then you could have a caliper starting to hang up creating both issues. If you have one of those infrared thermometer guns, after the next drive, shoot the rotors - both rears should be within a few degrees of each other and both fronts should be within a few degrees of each other, but the fronts compared to the rears could be very far apart. If one rotor is reading higher by a good bit than the other and it's the wheel that had the uneven pad wear, then that caliper may need a rebuild. This can happen from moisture in the system if the PO didn't flush the brake fluid every year or 2.
Good job on the repair though - check another one of your list.
You probably won't notice a reduction in brake dust until the old brake dust works its way out of the rotors/fins. Once that happens you'll really see an improvement in dust, I did with the same pads.
Yea rotors looked solid. They are stock drilled with no spider cracks, etc. I didn't see any one set of pads that had more wear than the others. They were all evenly uneven.
1. Did you change your dampeners? I'd read that most guys were reusing them.
2. I put some high temp brake grease (came with the pads) on the edge of the backing plate where they rub on the pins. I also put it on the backing plate of the rear pads (not the fronts since those have adhesive). I had seen this in Car Fanatics video where he recommenced it to reduce squeal.
You probably won't notice a reduction in brake dust until the old brake dust works its way out of the rotors/fins. Once that happens you'll really see an improvement in dust, I did with the same pads.
Same here. Took almost 5000 miles before the dust from the old pads was cleared out of the stock drilled rotors. If I had changed both together, I have no doubt that the reddish brown dust would have been gone much sooner. The rotors only had 2-3,000 miles on them with new factory pads before I switched to the Hawk pads.
Yea rotors looked solid. They are stock drilled with no spider cracks, etc. I didn't see any one set of pads that had more wear than the others. They were all evenly uneven.
1. Did you change your dampeners? I'd read that most guys were reusing them.
2. I put some high temp brake grease (came with the pads) on the edge of the backing plate where they rub on the pins. I also put it on the backing plate of the rear pads (not the fronts since those have adhesive). I had seen this in Car Fanatics video where he recommenced it to reduce squeal. https://www.youtube.com/watch?v=UOkigCj9Gns&t=378s
Thx again guys. I'm helping another 997 buddy change his rear pads and rotors over the weekend.
I grease the pin and let it transfer the grease to the area it contacts.
The Hawk pads come with new front dampeners (the cylindrical type, at least on an S) and the rears use the adhesive pad with the metal prongs that lock into the caliper pistons.
On the fronts, I put a little Permatex anti squeal on the cylinder to stick it in the piston which prevents a harmonic from developing (which is the cause of squeal) and in the rears use new dampener pads each time as I've not been able to get them off and have the adhesive remain sticky enough.
For brake jobs that don't have supplied or available dampeners, I put the Permatex on the rear of the pad carrier just before assembly, then press the brake pedal to stick the piston to the pad. This only works if you do one corner at a time as having a caliper off and pushing the brake pedal will force the pistons out of the caliper and then you have a mess on your hands.
I've used both of these. Think maybe the blue Permatex substance in the pouch is a little better then the red CRC in the bottle.

 03-27-2019, 03:41 AM