When you click on links to various merchants on this site and make a purchase, this can result in this site earning a commission. Affiliate programs and affiliations include, but are not limited to, the eBay Partner Network.
The Bruce's (Overly) Detailed Guide to Replacing Your 997.1 Water Pump
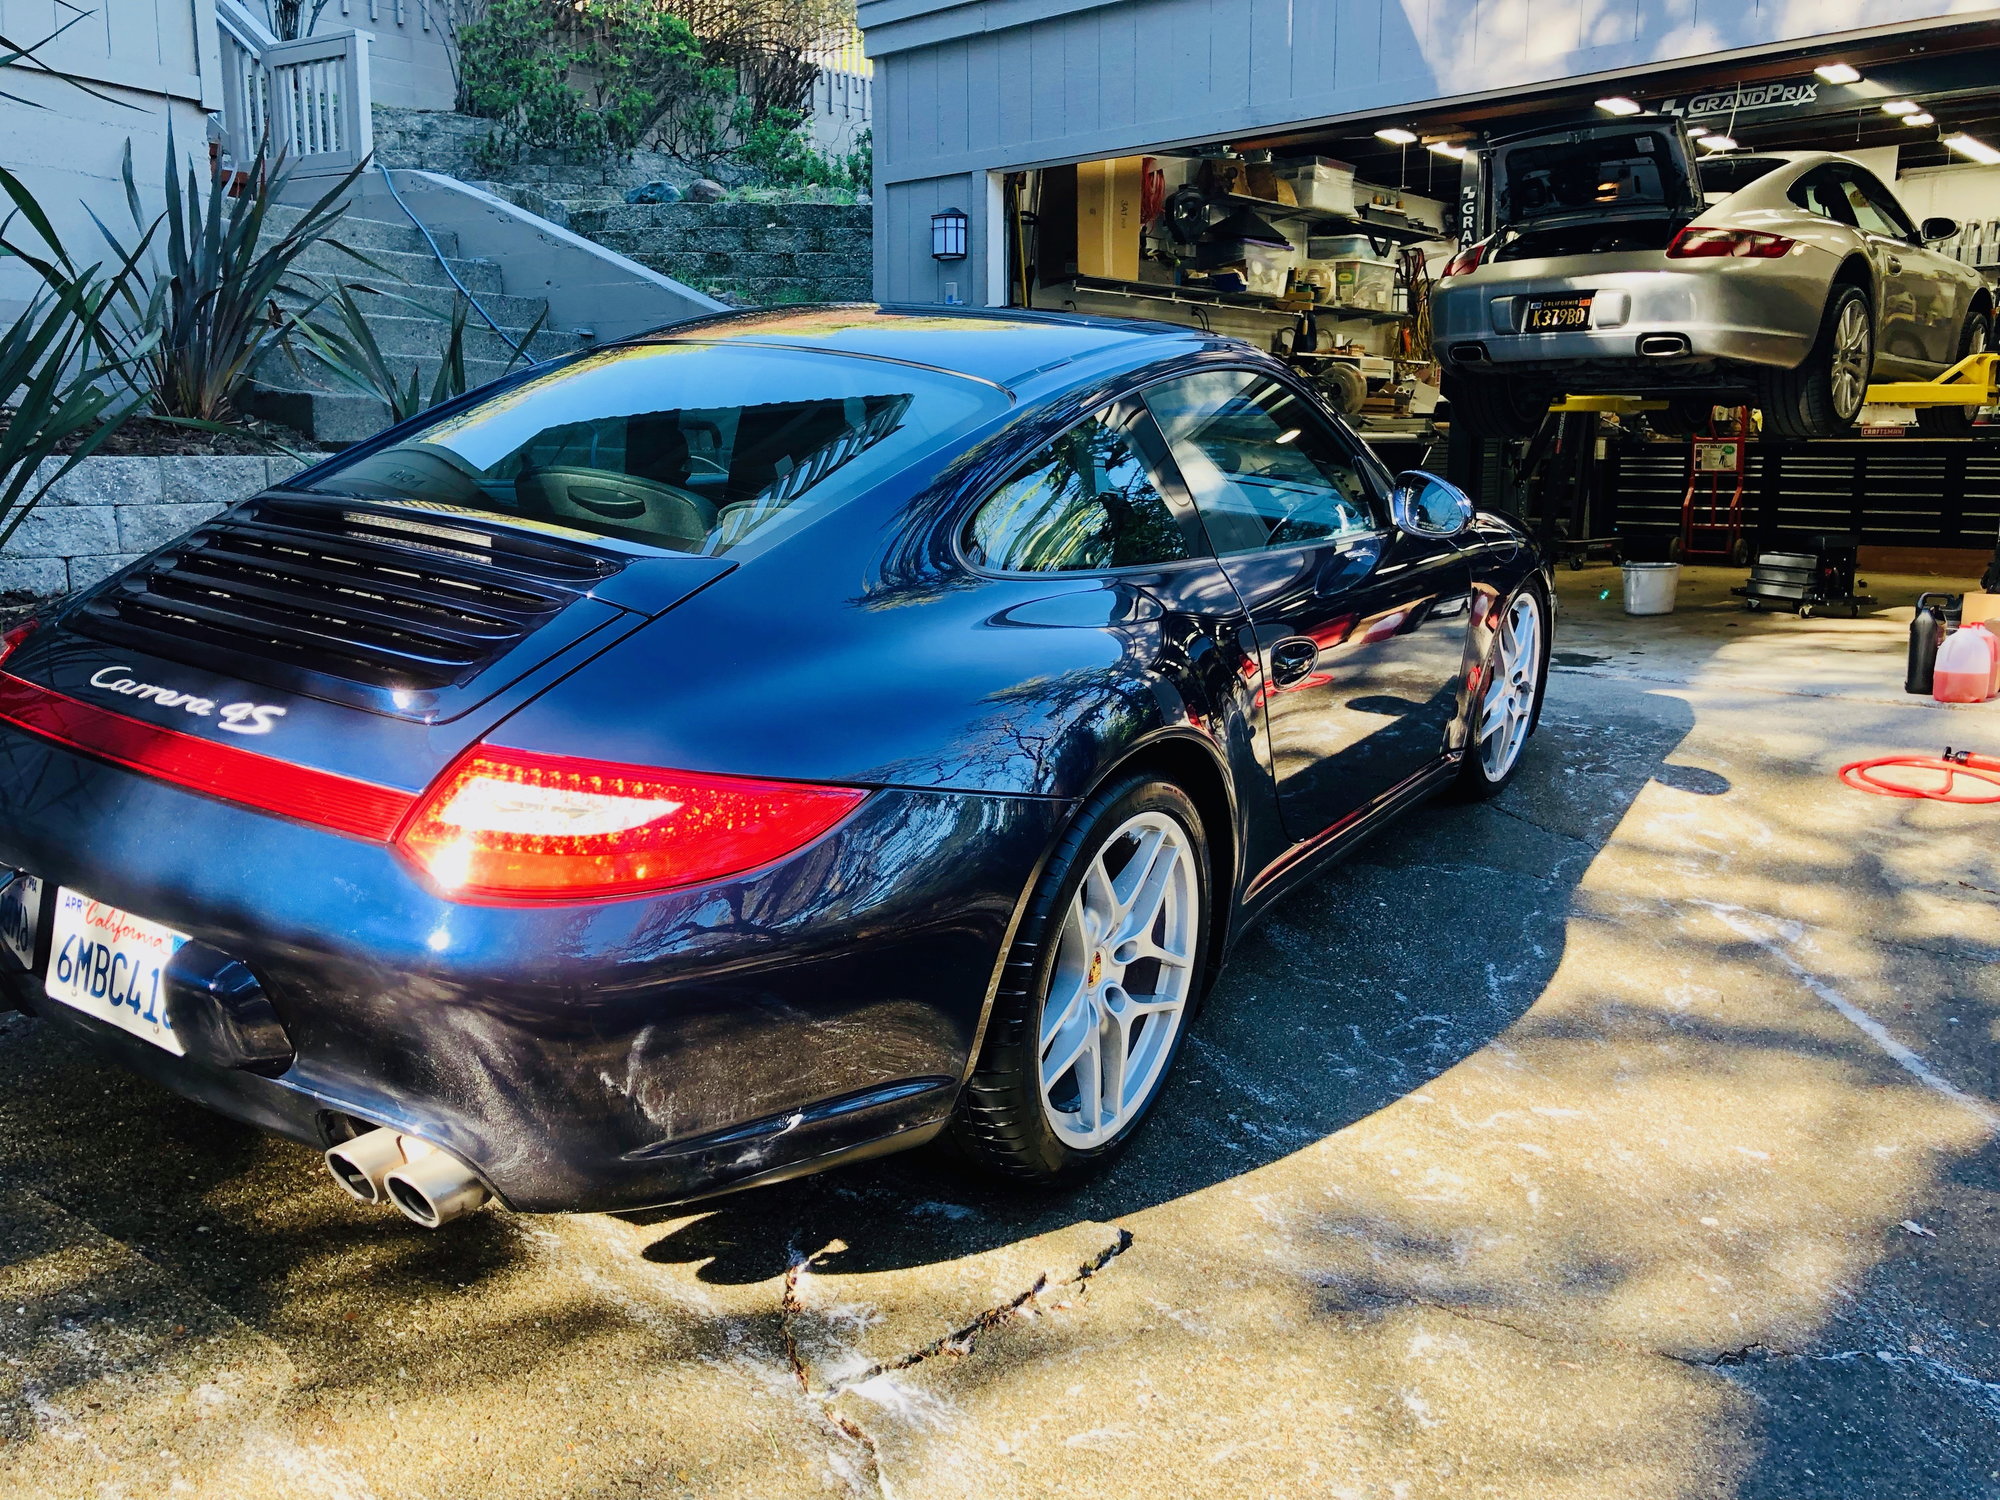
I replaced my water pump yesterday and wanted to share some learnings. Special thanks to @Wayne for letting me use his lift while he was out of town.
Background
The water pump on the 997.1 is a weak point. It typically has a life of 50k miles and most experts recommend replacing it every 5 years for good measure. Mine had been replaced ~30k miles ago by the prior owner so I figured I had a few years left on it. Unfortunately I started hearing some intermittent noise from it so decided to swap it out. After removal I found they had used an aftermarket Laso brand. I suspect this contributed to its early demise.
Note: The 997.2 has a different water pump design and model number so these instructions will not apply. I believe the new design has eliminated the weakness.
Symptoms
In the early stage of failure you will hear an intermitted bearing rattle in the pump. I heard a faint noise a few months ago and then it went away until I heard it again twice in the past week. It would only last for a minute or two then dissipate.
In the intermediate stage of failure it will sound like this all the time
In the final stage of failure it will dump coolant, shred the belt, or shatter the impeller blades in your coolant system. Don't be that guy.
Diagnosis
If you suspect its going but the noise is intermittent or faint, take the belt off and try to wobble the pulley. If you get some play its bad.
Gasket $10. The old gaskets were sized for the pump and a water jacket next to it so required you cut off that section when replacing the pump. The new gaskets dont require this.
2 Gallons of Porsche Coolant $25/gallon
2 Gallons of Distilled Water
Optional: You can replace your thermostat while you are in there. I didnt.
Hand Pump
Bucket to catch the coolant
Lots of shop towels
A floor jack or transmission jack to support the engine
10mm and 15mm ratcheting box wrench is a must have. (There isn't enough space to get a socket on the carrier bolts so you need to use a box wrench. Without a ratcheting box wrench it will take you forever).
The Workshop manual spec's an E15 External Torx Socket to remove the cat bracket. Unfortunately NOBODY sells an E15 - at all. They are sold as 10, 12, 14, 16, 18, etc. I even went to my local dealer and they didnt have one. My indy mechanic said he used a 10mm 12pt box wrench instead. This will do the trick but be very careful you dont round the nut. Spray some PB-Blaster on it beforehand.
You will also need a very small 1/4" ratchet and socket set. This is a must have to get the bolts off the pump. Luckily I had just picked up this Craftsman set on sale at ACE for $10.
Flexible hose clamp pliers
Lots of patience.
Time Required
This took me a legit 6hrs. The Pelican manual says 2hrs. Thats crazy. I would also add this was probably one of my least enjoyable projects. Lots of tight spaces and the mess of draining and refilling the coolant.
Methods
There are a few methods people recommend to replace the pump:
Method 1 "full monty" - The Workshop Manual states you should remove the cats and engine carrier to give yourself plenty of room.
Method 2 - The "shortcut" method is to just loosen the engine carrier bolts enough to pull it out 1-2", which gives you enough clearance to drop the water pump out of the bottom. Note: this doesn't give you enough clearance to torque the water pump bolts but the head tech at my local dealer said you didnt need to. They are spec'd a 7.5lbs so its fine hand tightening them.
Method 3 - combine method 2 with removing the thermostat housing. This gives you more clearance to get the pump out. If you plan to replace it anyway this will give you the best ROI. However I would not do this just for clearance sake as you need to replace the thermostat gasket and the top bolt is tricky to get to.
Method 4 - ive seen some posts recommending removing the driver exhaust manifold. I think that's overkill and not required or recommend.
My indy and the head technician at my local dealer said they use method 2. I went this route but in hindsight I think it would have been easier if I had gone full monty and removed the cats and engine carrier. It gives you room to work with dignity, as well as complete access to the backside of the engine (and im sure new parts to clean :-). In reality its not much more work. You've already got the engine supported so you only have 6 more bolts to remove and unplug the O2 sensors.
I didnt go this route is because I couldn't figure out how to remove the 3rd (top) bolt where the cat connects to the exhaust manifold. I probably could have got it with a wobble socket on an extension but I had heard horror stories of those studs breaking.
If you have experience taking the cats off, I would definitely recommend using method 1.
Method 2 - "The Shortcut" (But Not Really)
Here is what I did:
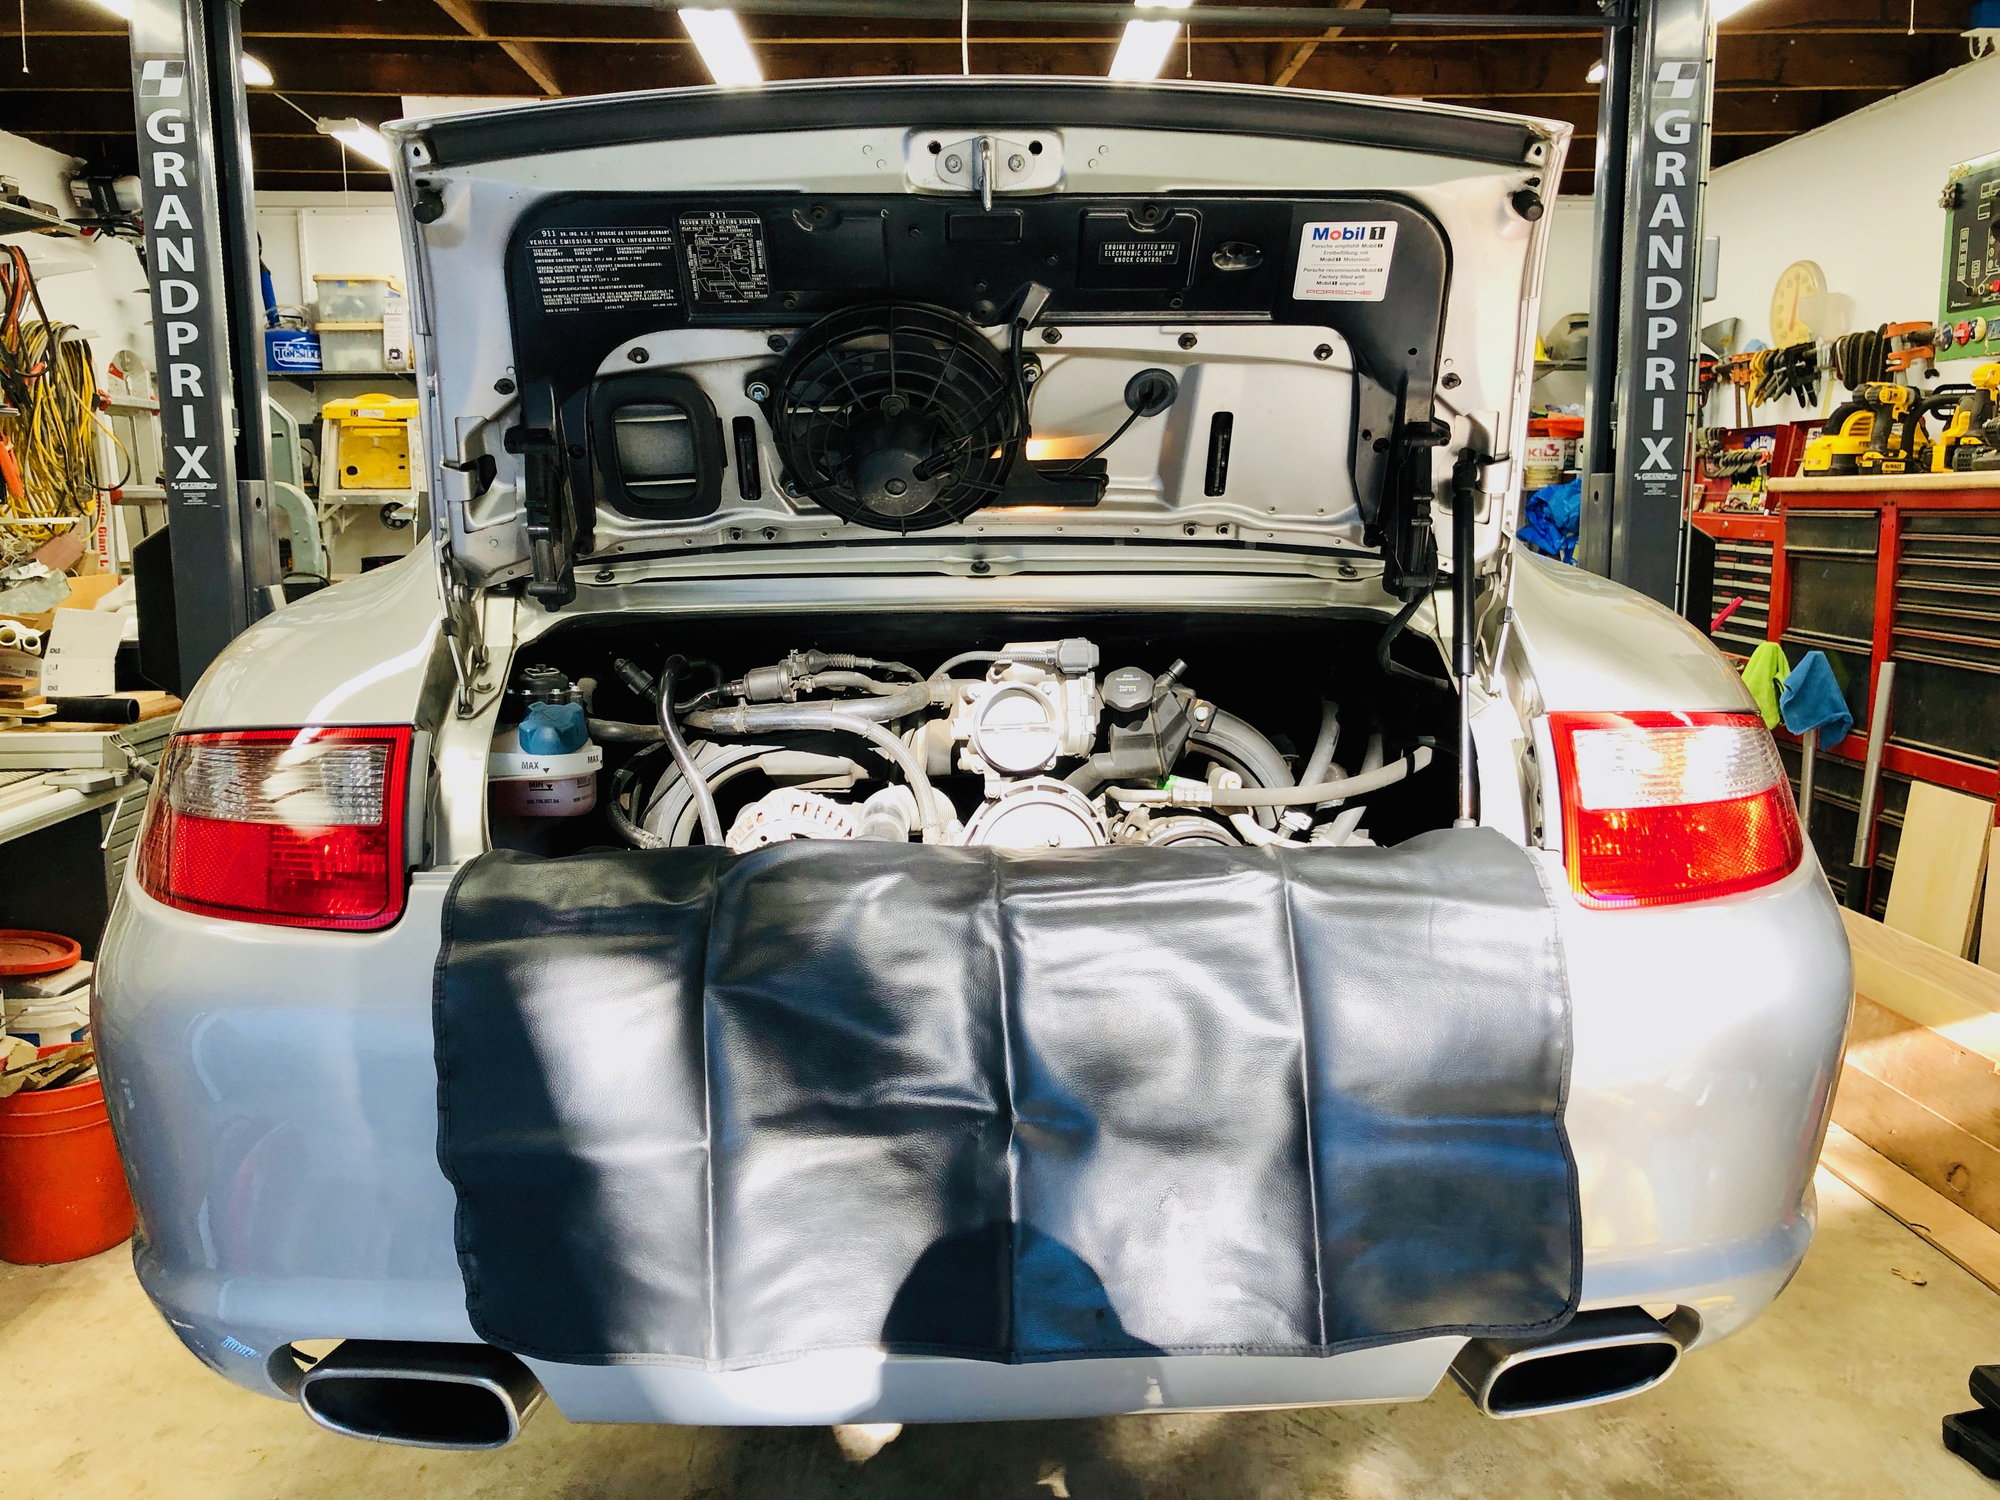
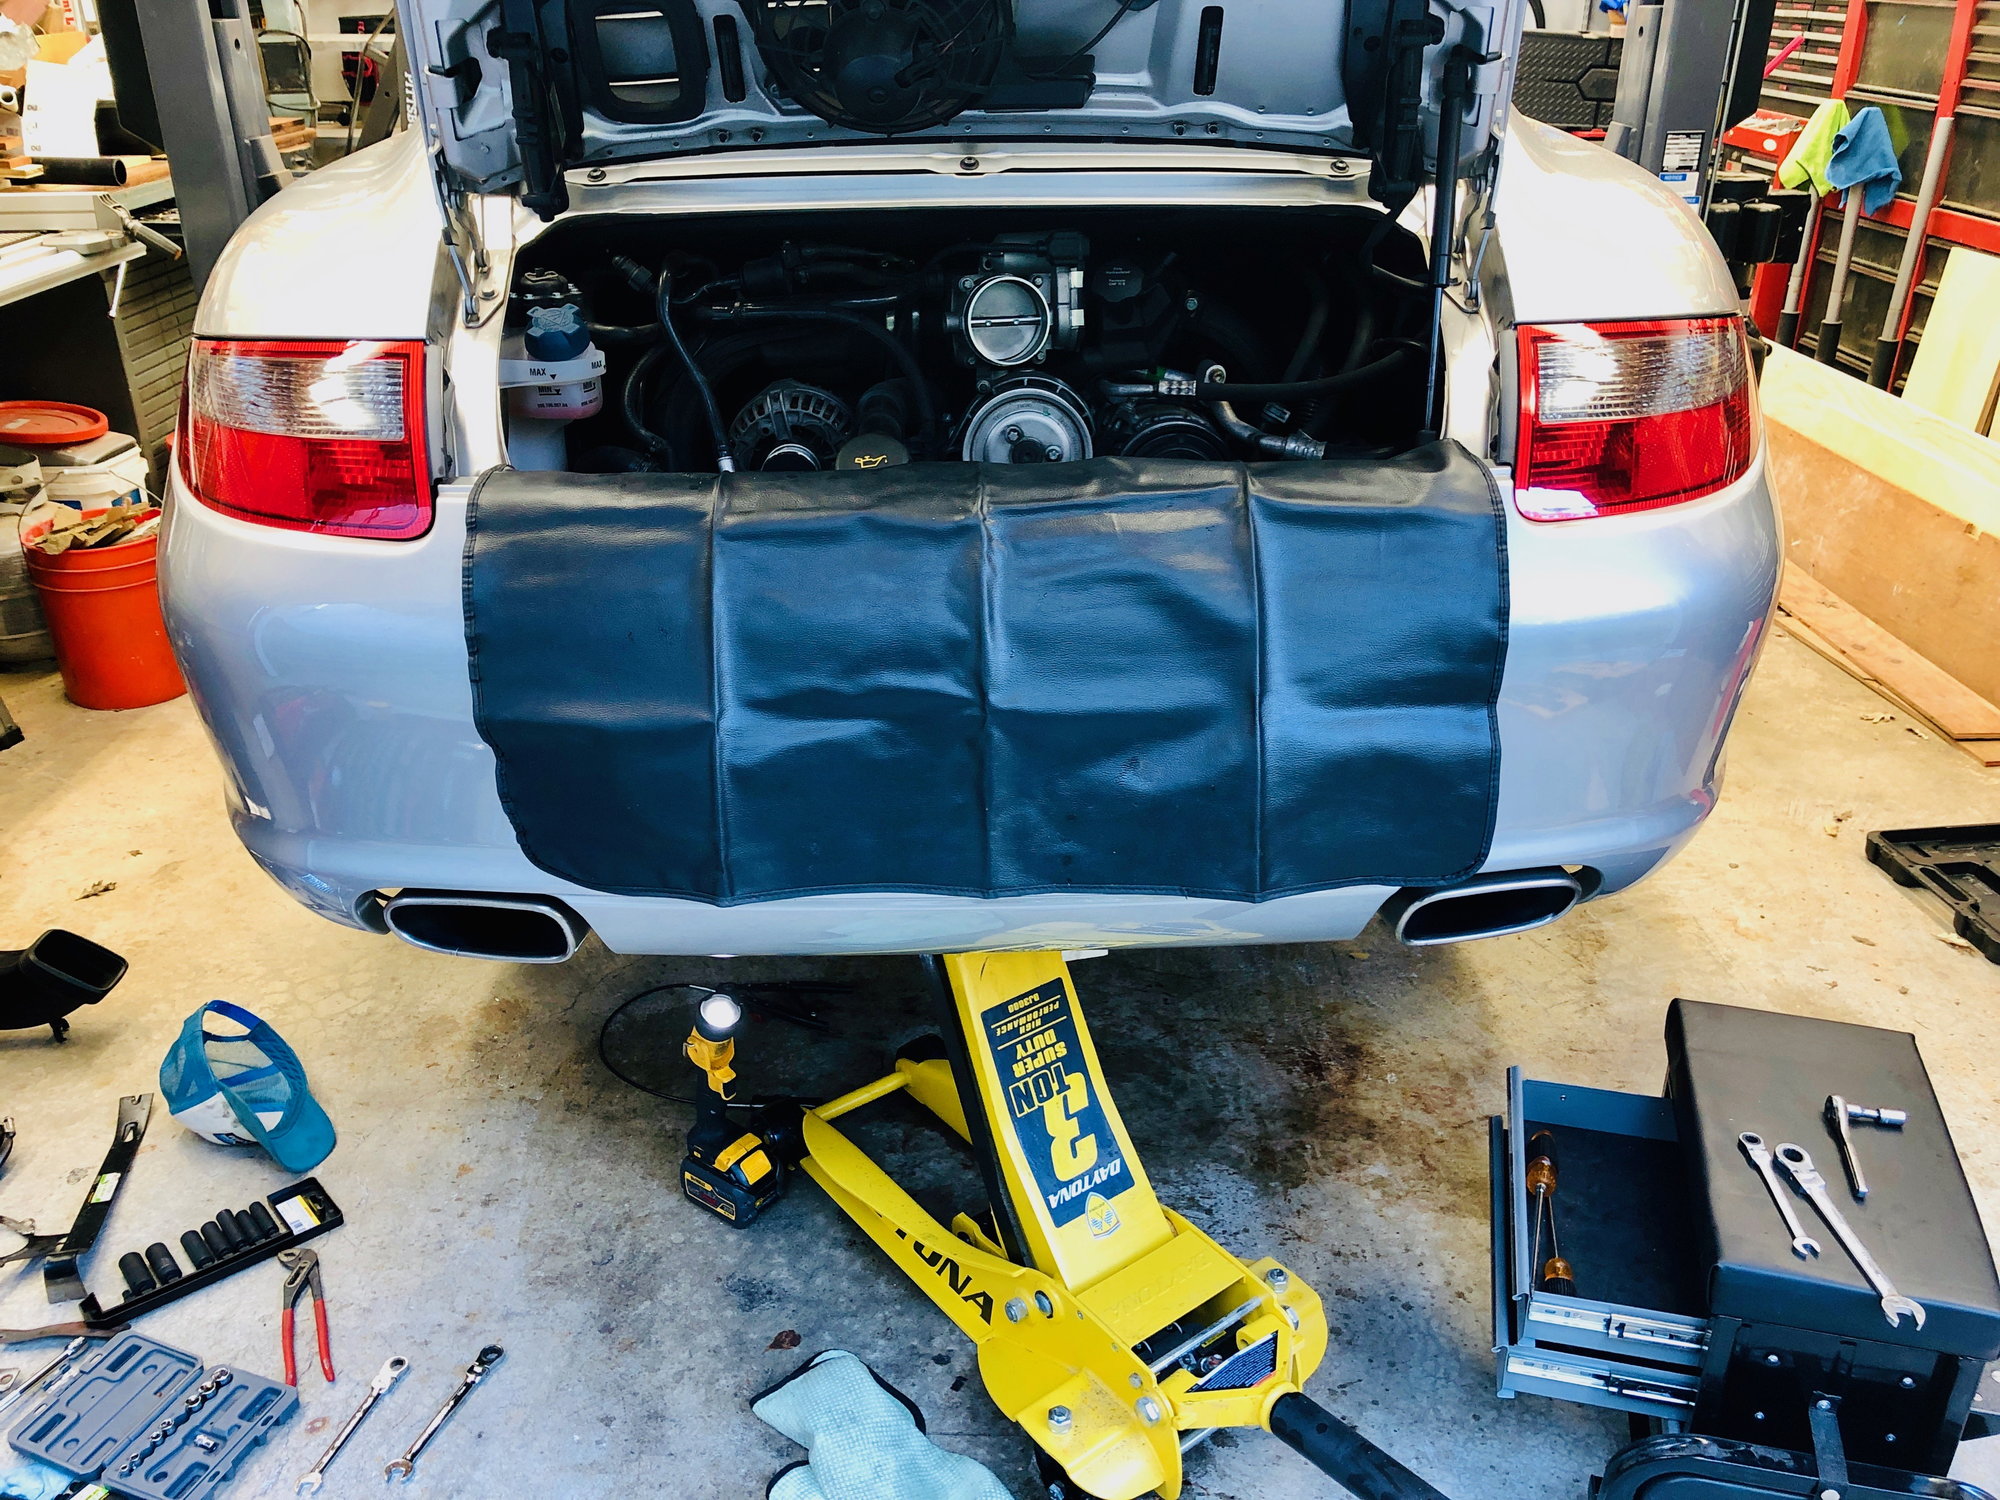
1. Jack up the car - On jackstands you need to jack up the rear of the car. On a lift get it about waste height as you will need to get access from above and below at the same time.
2. Remove the air cleaner
3. Remove the belt - remember to take a picture on how it's routed.
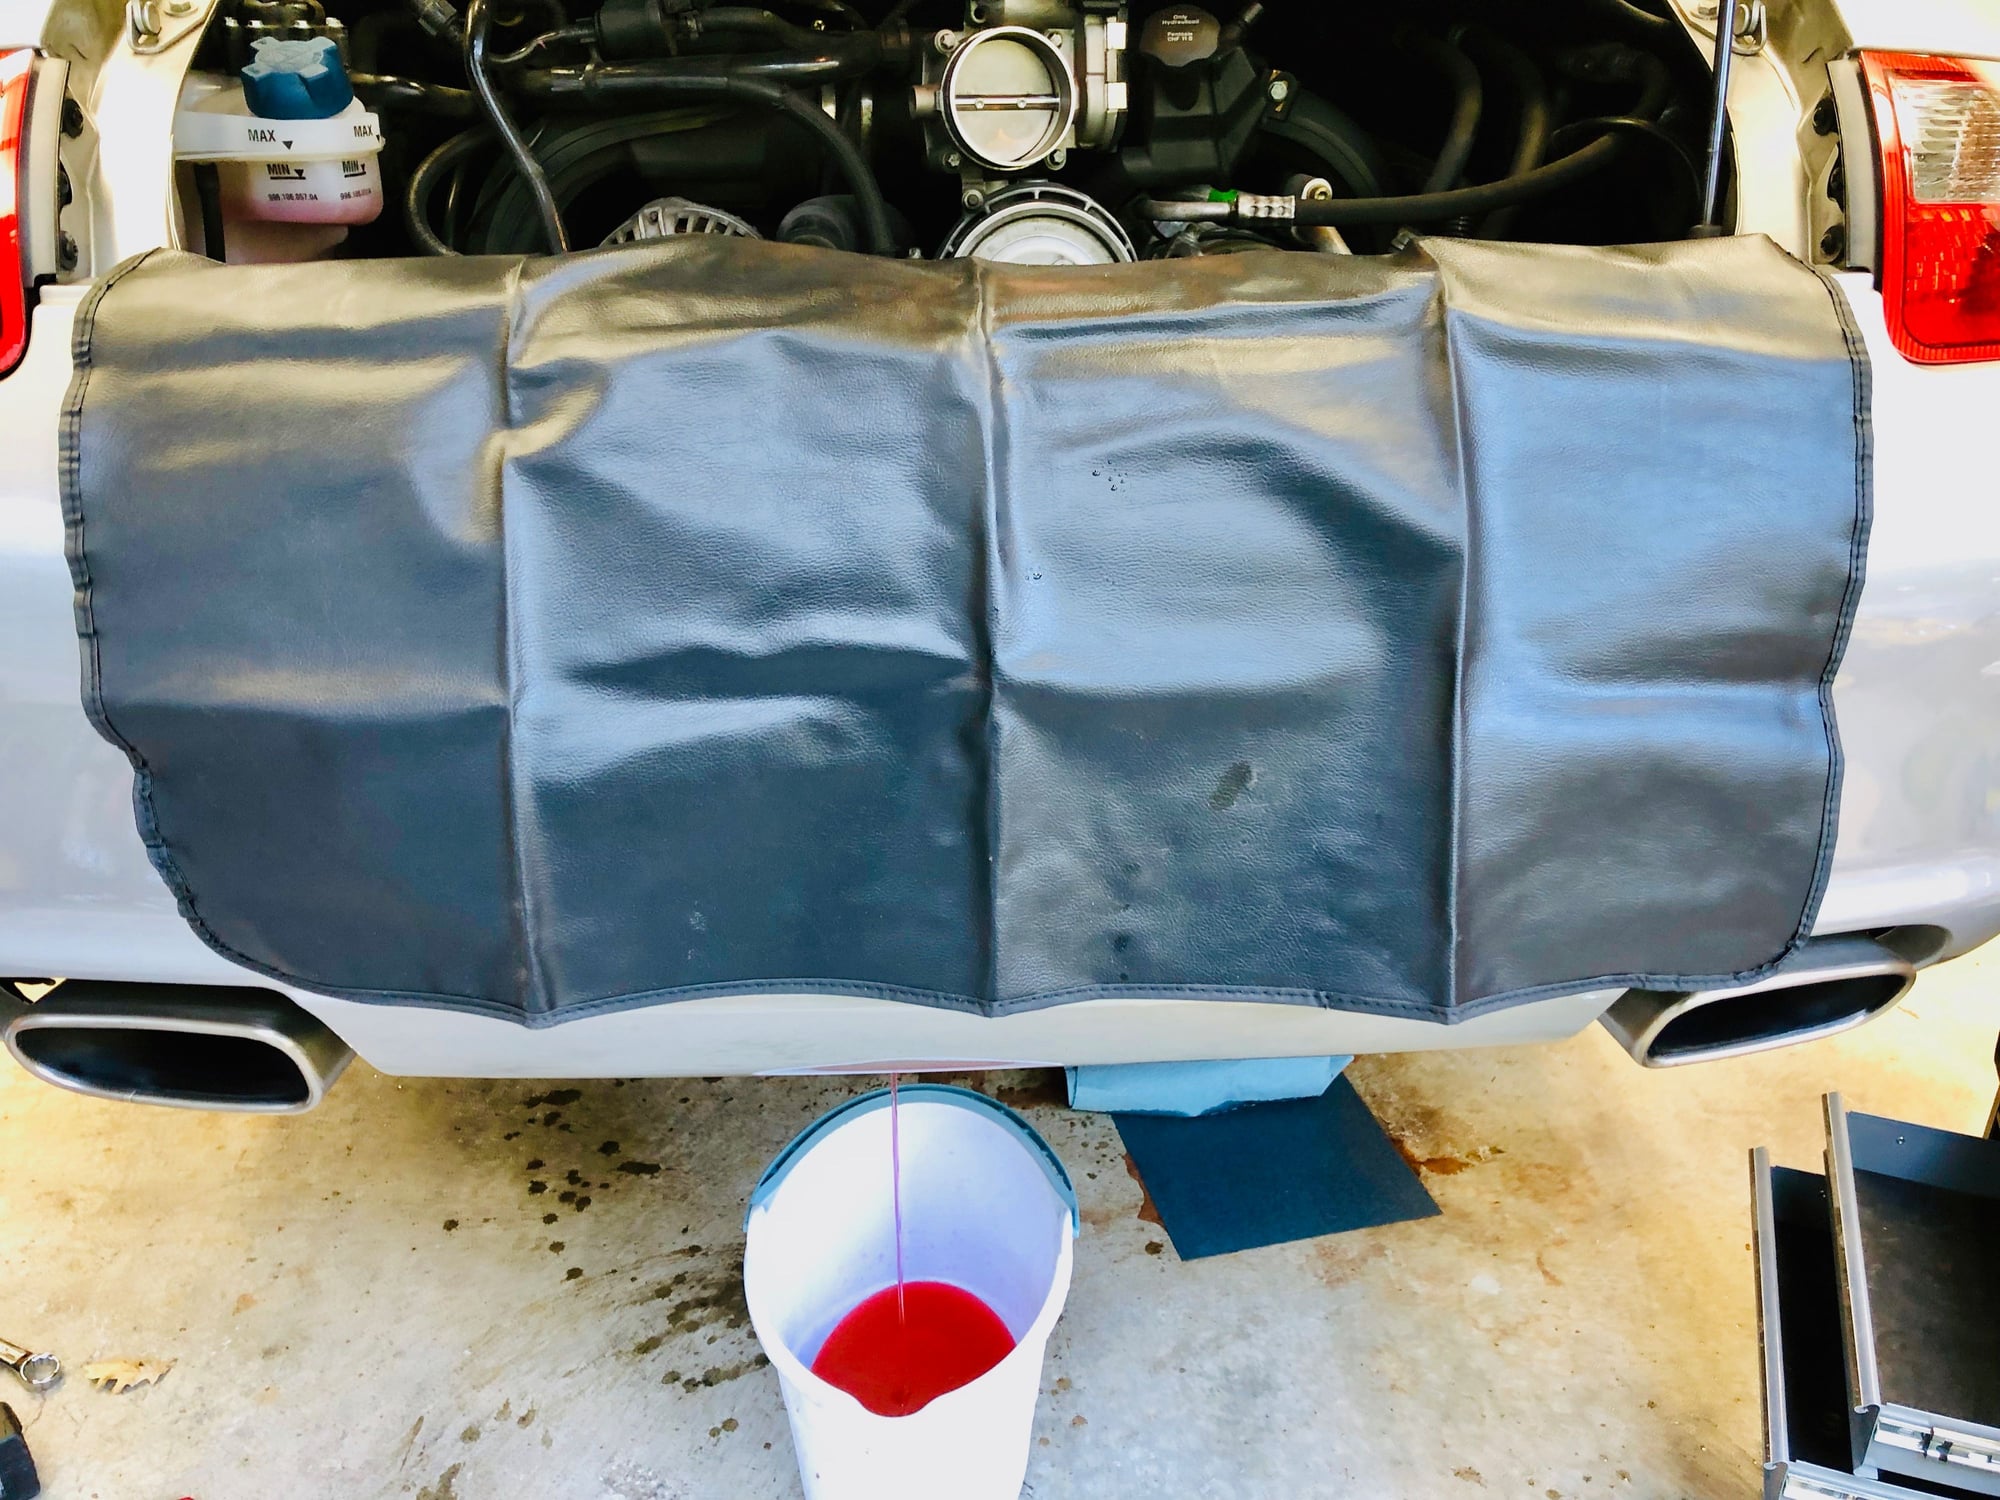
4. Drain the coolant - If you have driven the car let it sit for 30-45 minutes doing prep work before you drain it, as its hot. To drain open the cap on the reservoir and then go under the car and unscrew the hex bolt next to the water pump. Be careful to catch the crush washer. You will need a 4-5 gallon bucket. Let it drain for a few minutes.
Once drained screw the hex back in and torque it to spec at 7.5lbs. (You can do later but its very small and you dont want to forget about it).
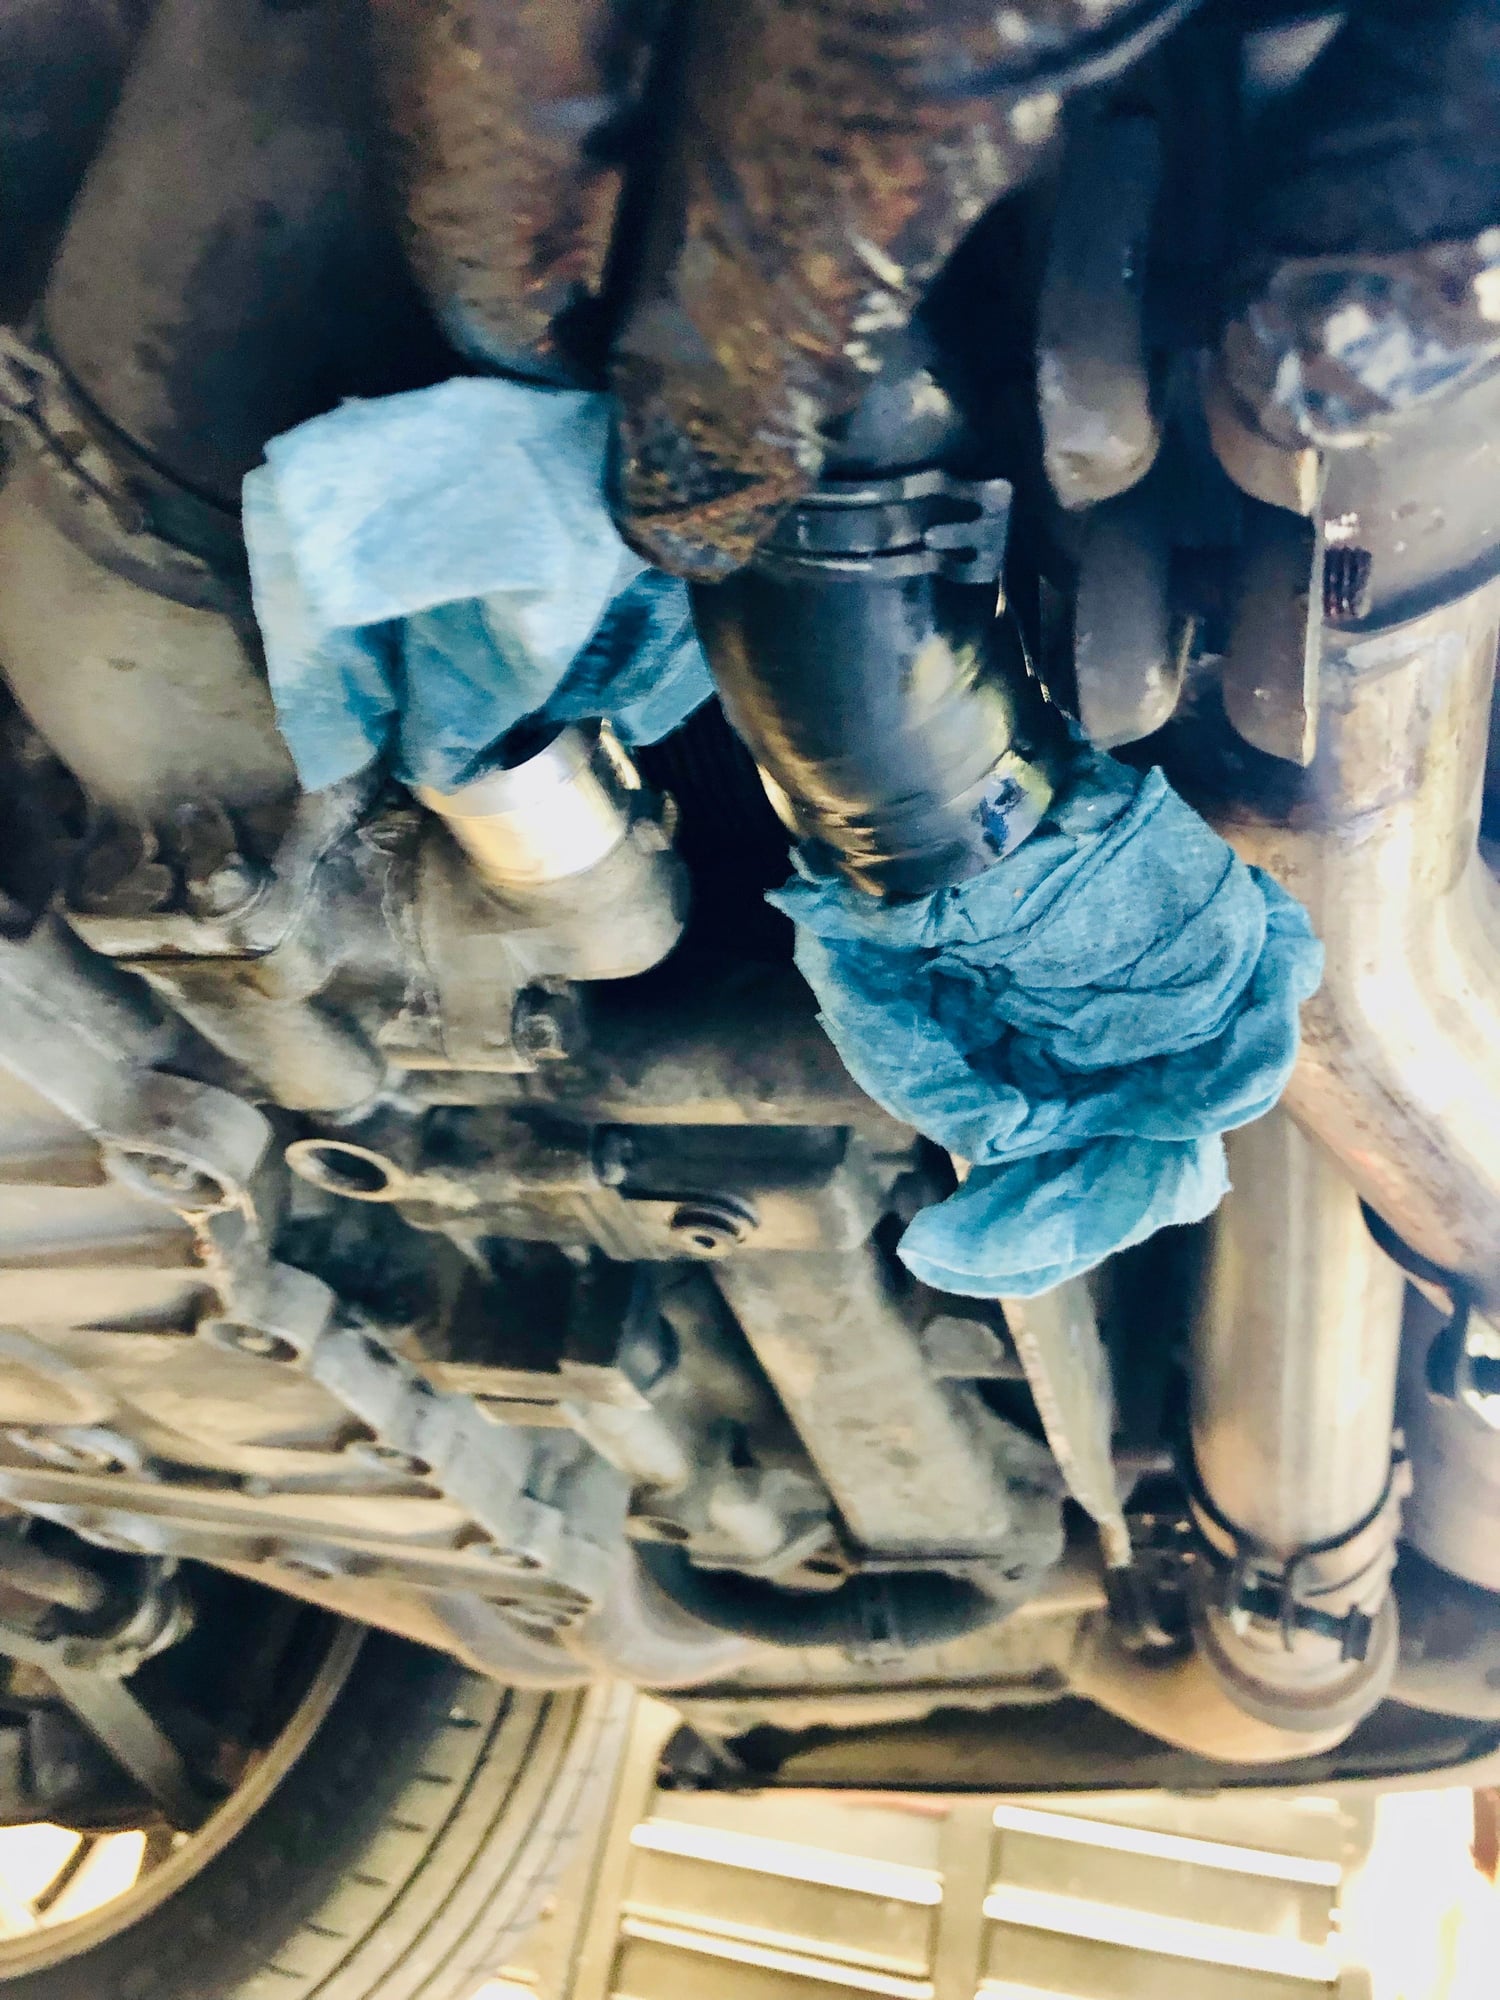
5. Remove the coolant hoses - Now go under the car and remove the hose clamps on the water pump and thermostat hose. Be ready to catch these as a bunch of coolant will dump out. Once drained stuff a shop towel in each so they dont leak.
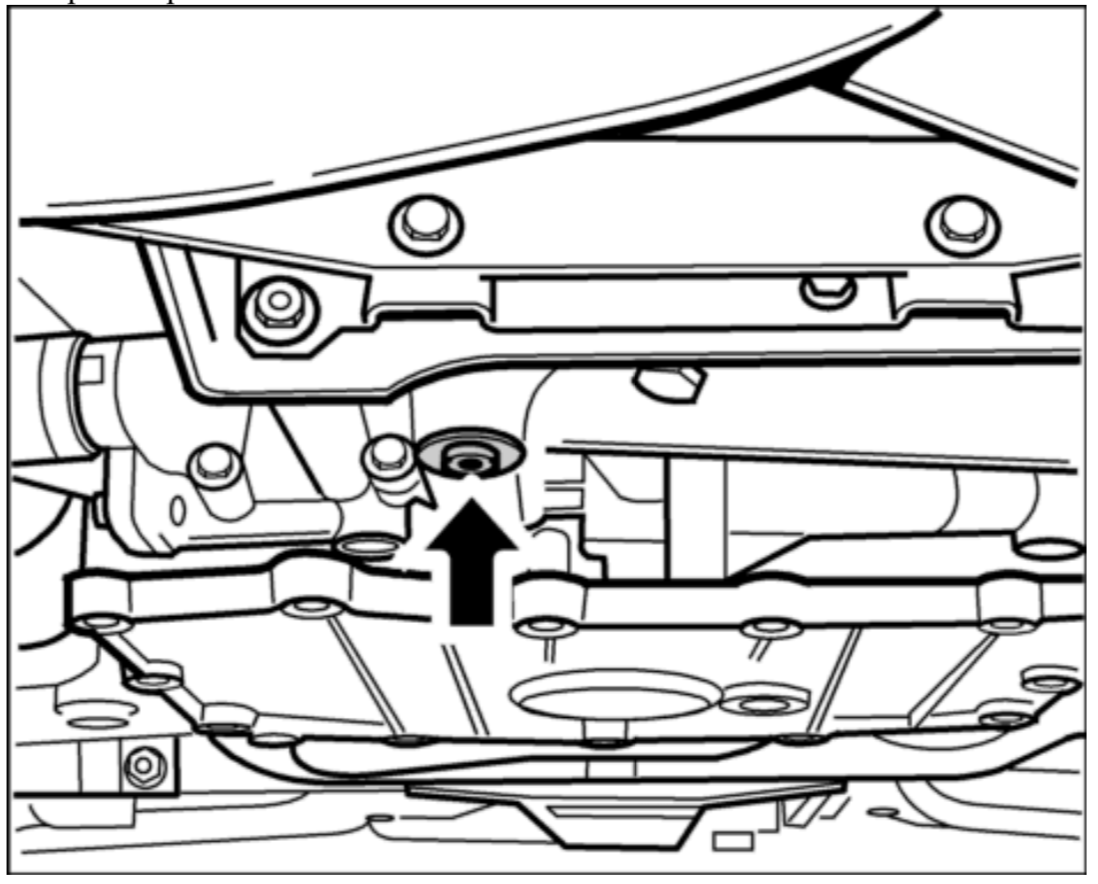
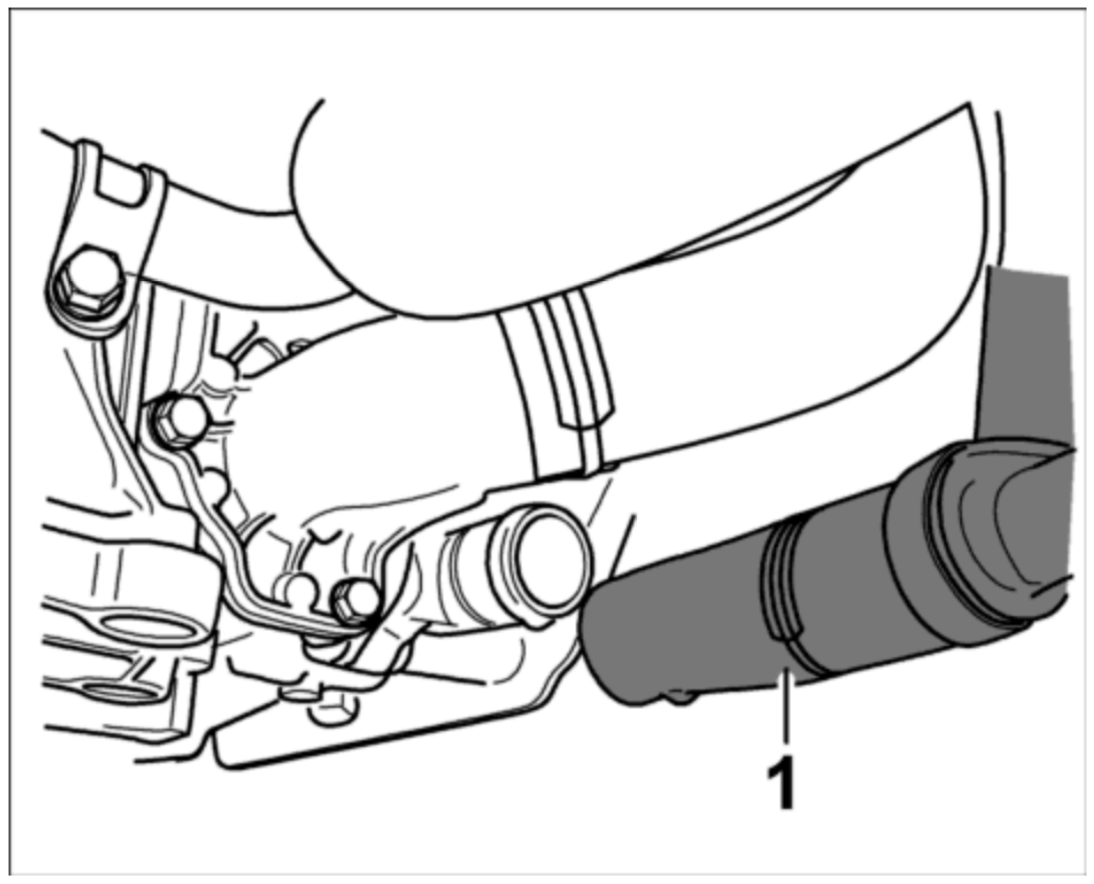
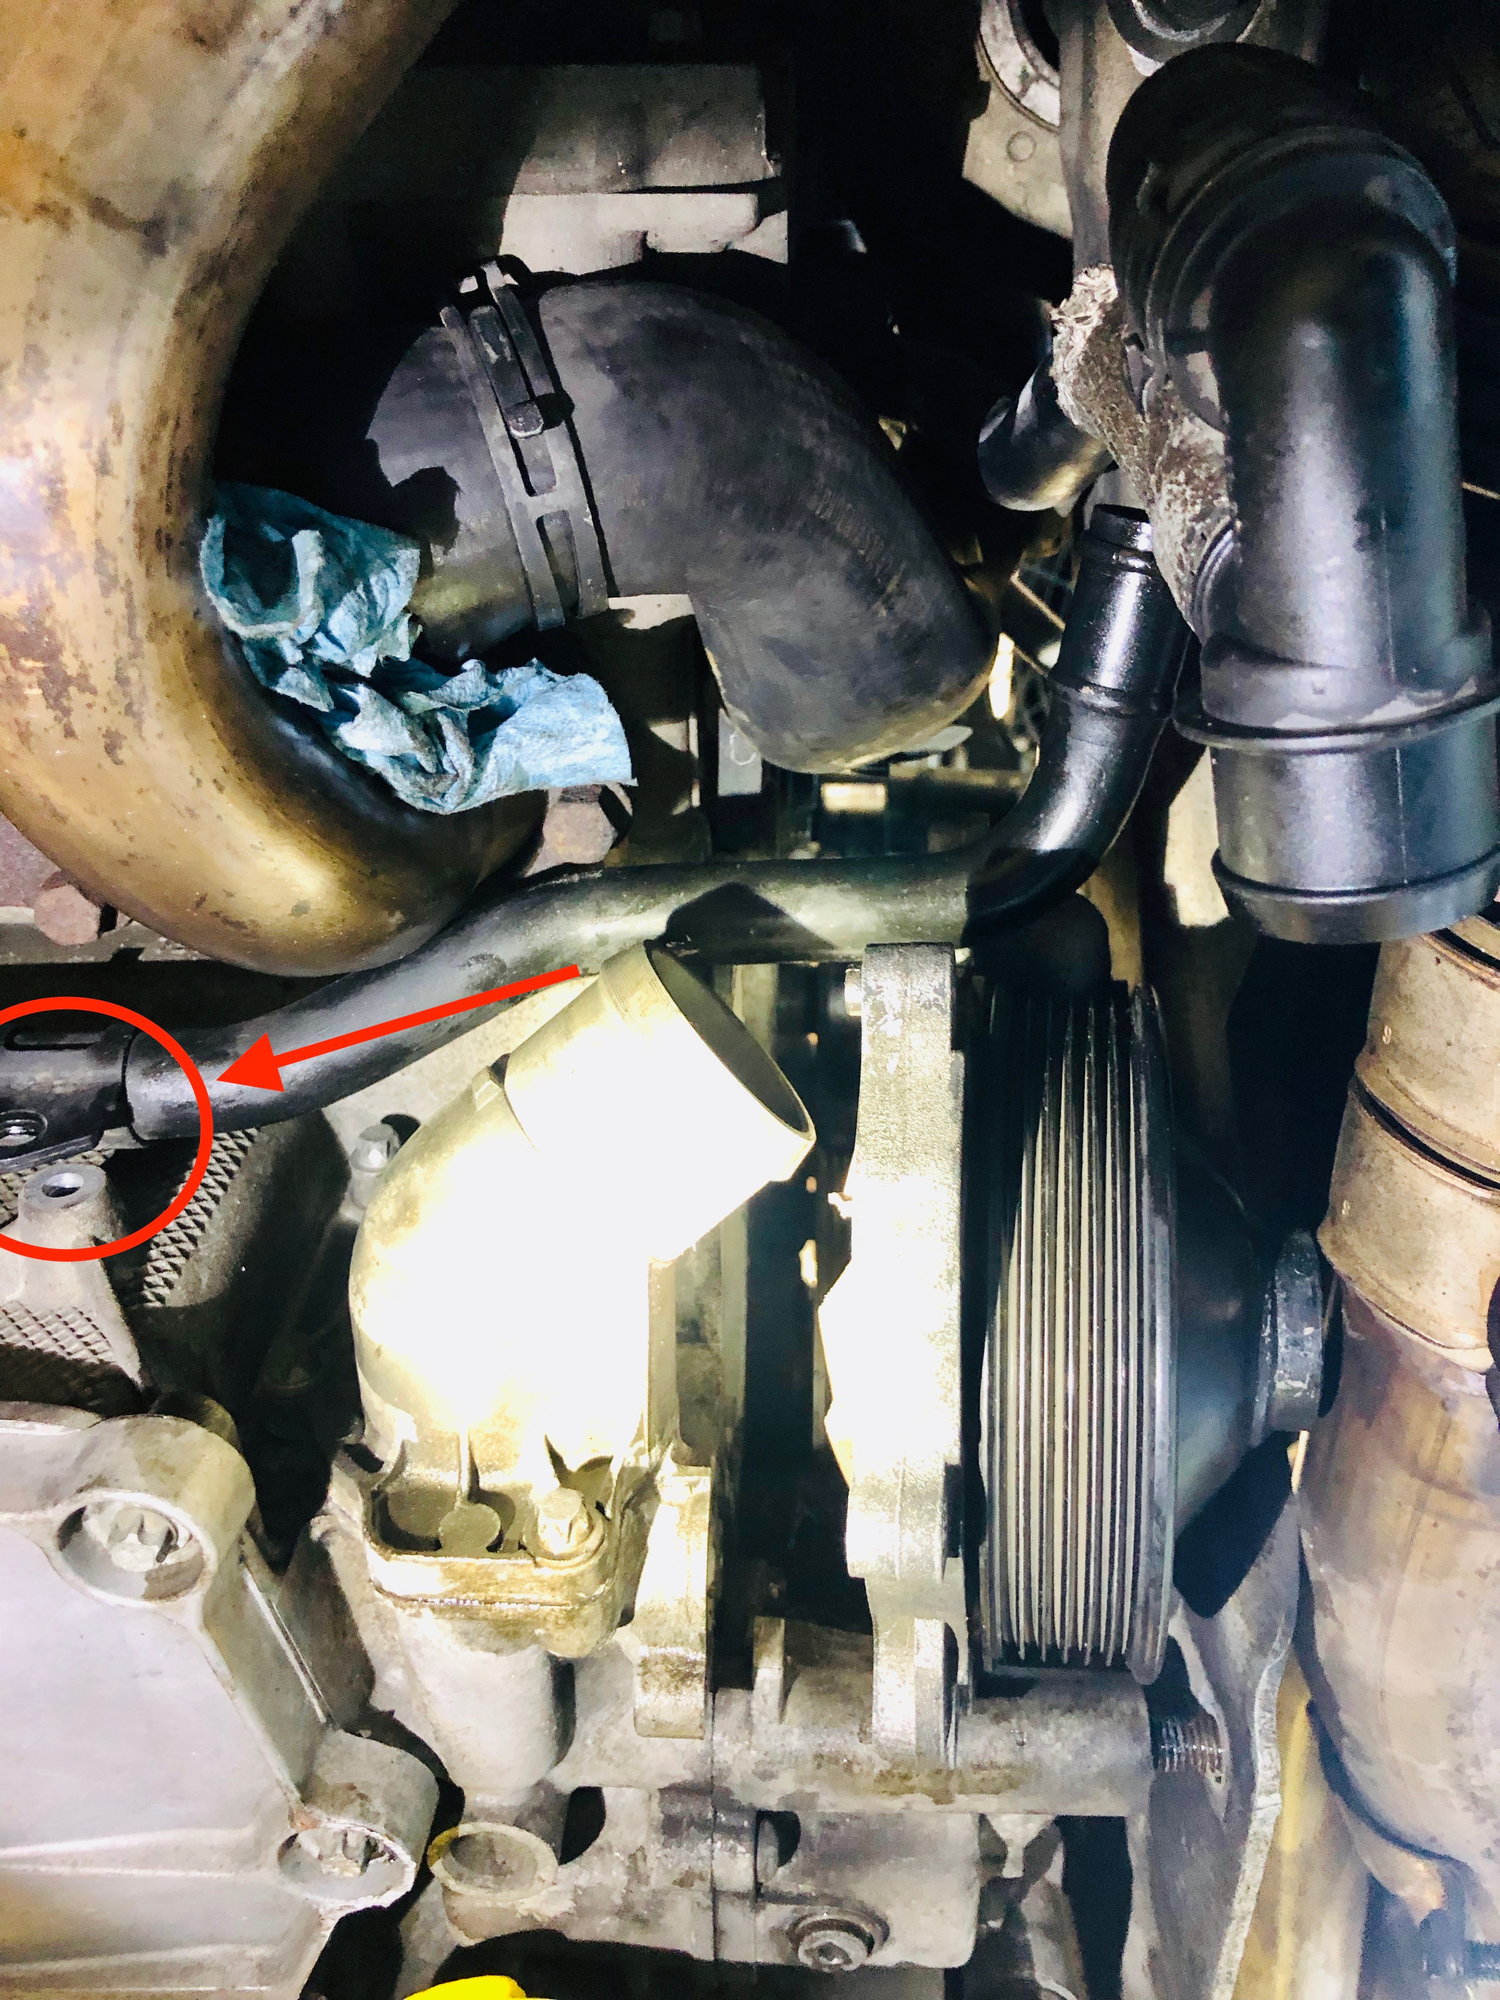
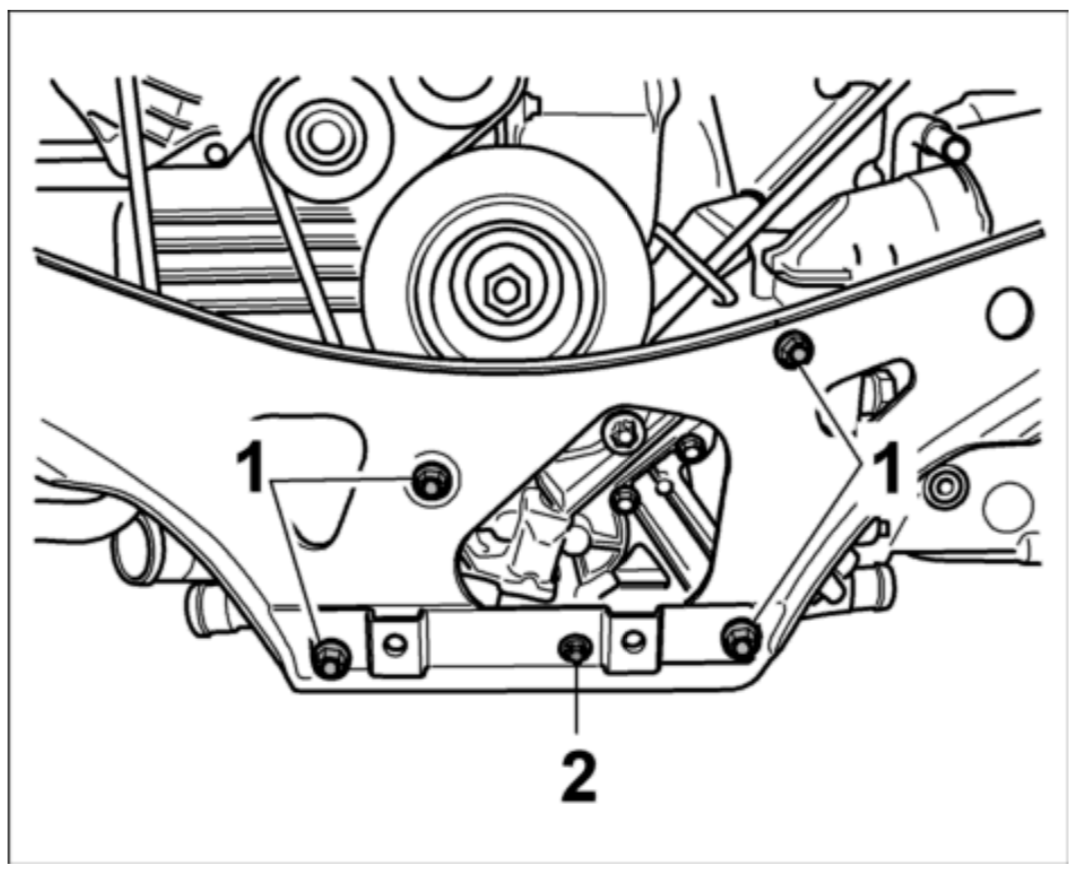
6. Unbolt the coolant hard line brackets along the oil pan - there is a hard plastic coolant line that runs along the the oil pan. This line blocks removing the water pump so by removing the E10 screws on the 3 mounting brackets you will give yourself another 1-2" of play.
I don't have a good picture of these. but there are 3 brackets that bolt around the sump. See one below.
7. Support the engine at the rear jack point - you need to do this because you will be unbolting part of the engine carrier. You need to remove pressure on the engine carrier so you can wiggle it out a bit.
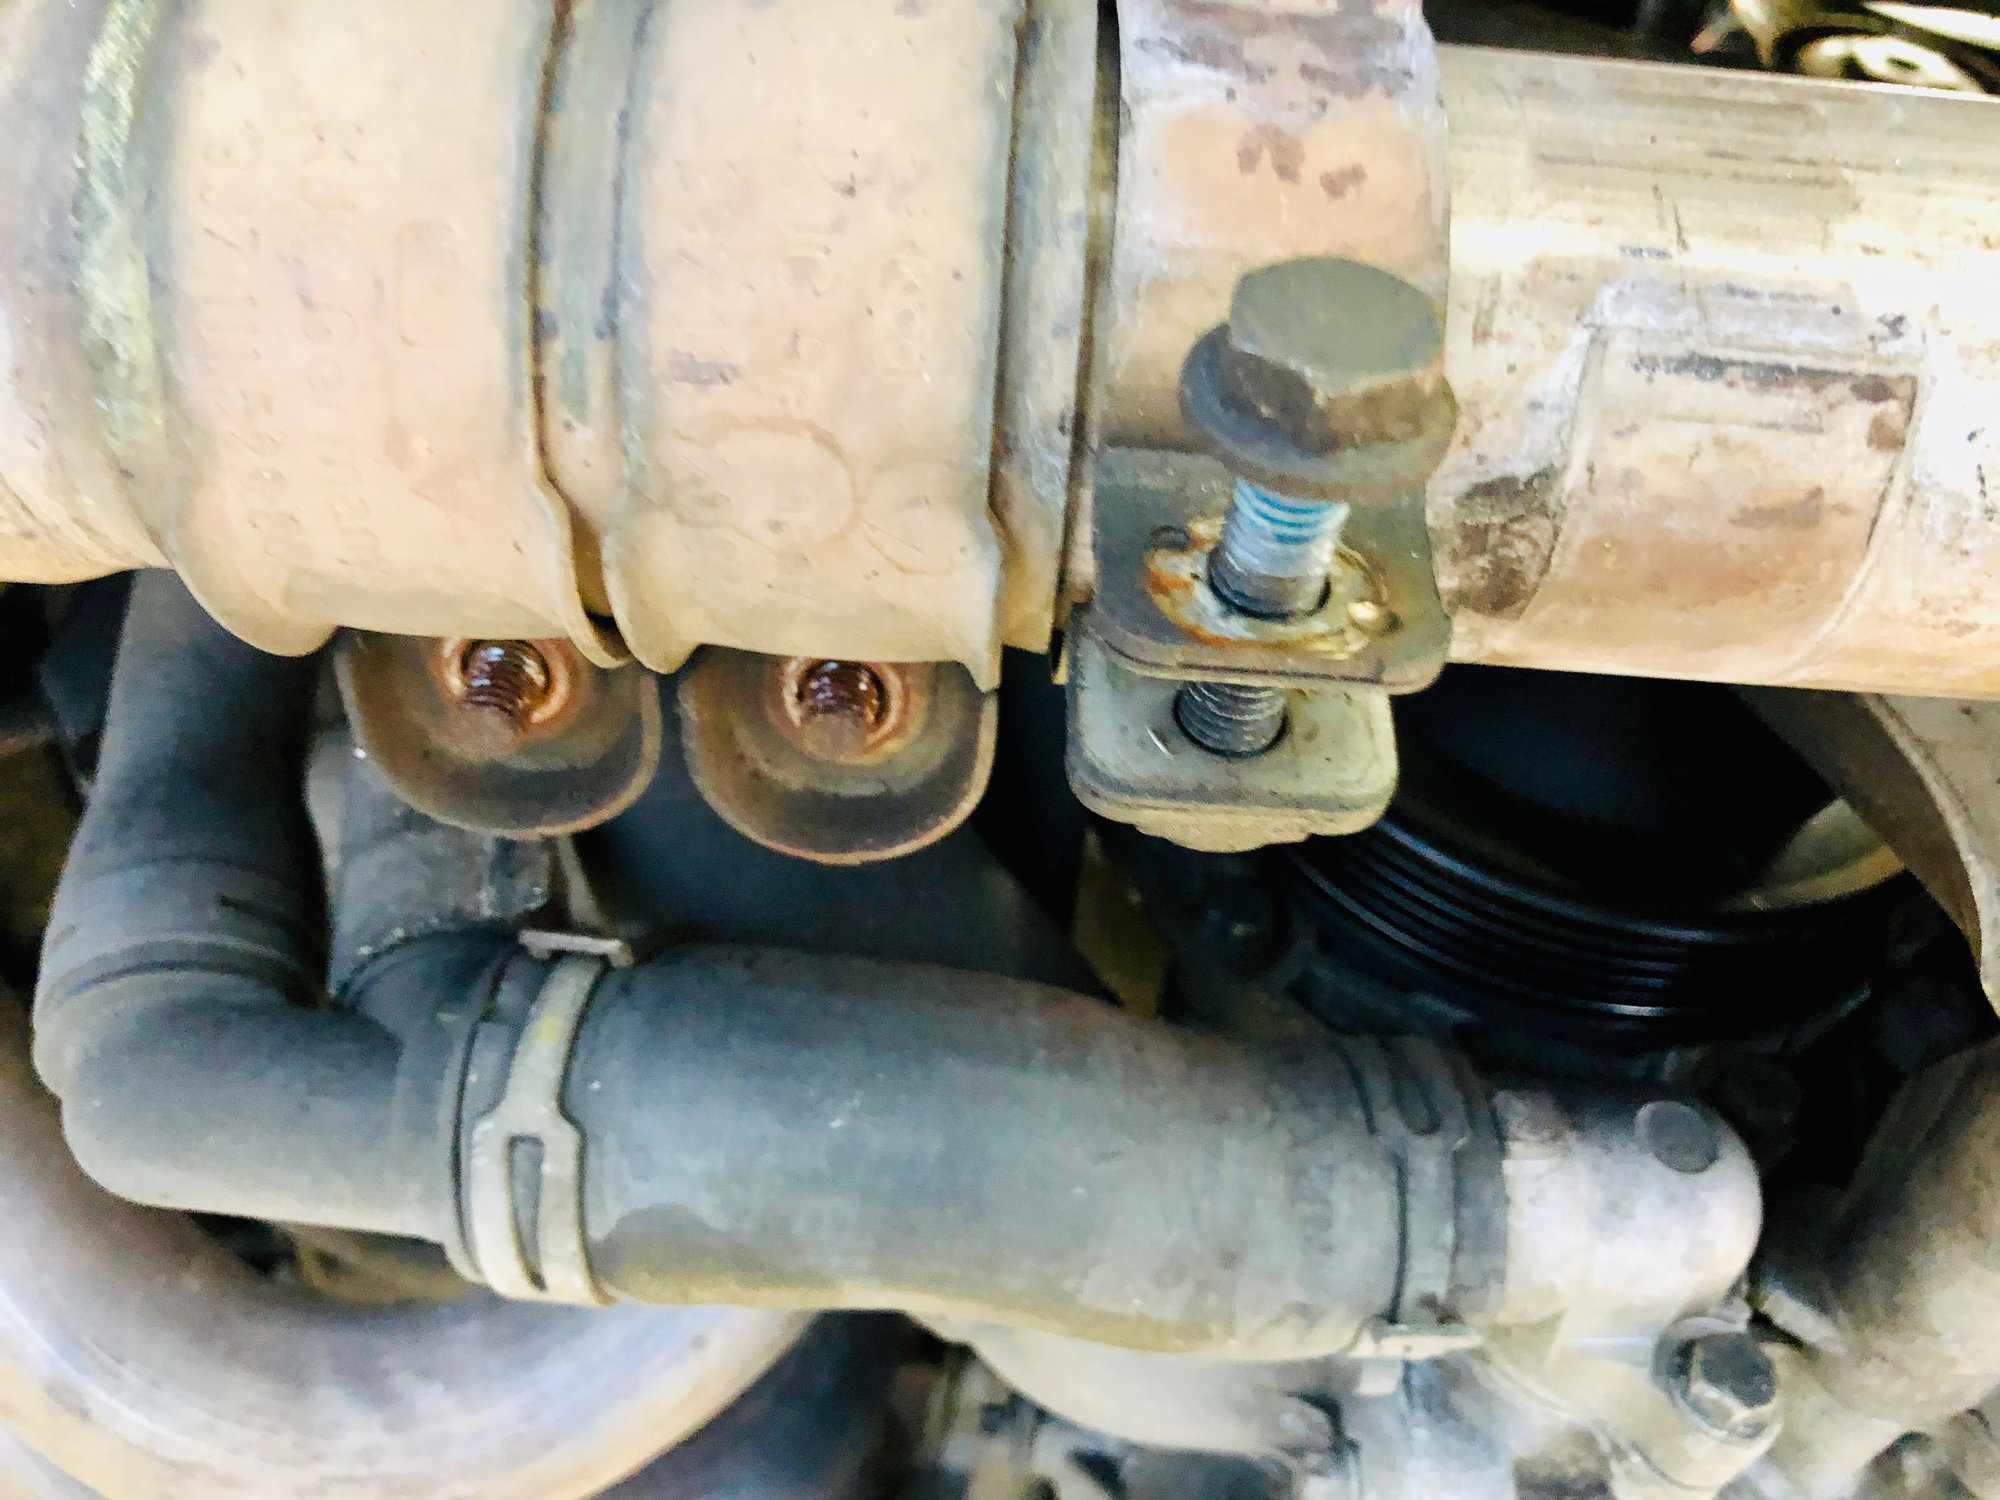
8. Unbolt the cat bracket and clamps - unscrew the 12mm nut on each clamp that holds the cat to the cat bracket. Slide the brackets off the end of the cat bracket. Now remove the 2 mythical E15 torx holding the cat bracket to the engine carrier. Since nobody has an E15, you can use a 12pt 10mm box wrench for this but spray with PB-blaster first and be gentle so you dont strip them. Once these are out you then need to remove one E10 holding the inner bracket to the carrier.
Optional - I also unbolted the 2 12mm bolts on cat clamping sleeves and slide them back. This will enable you to wiggle the cat pipe a little to give you some extra room. Its probably not required.
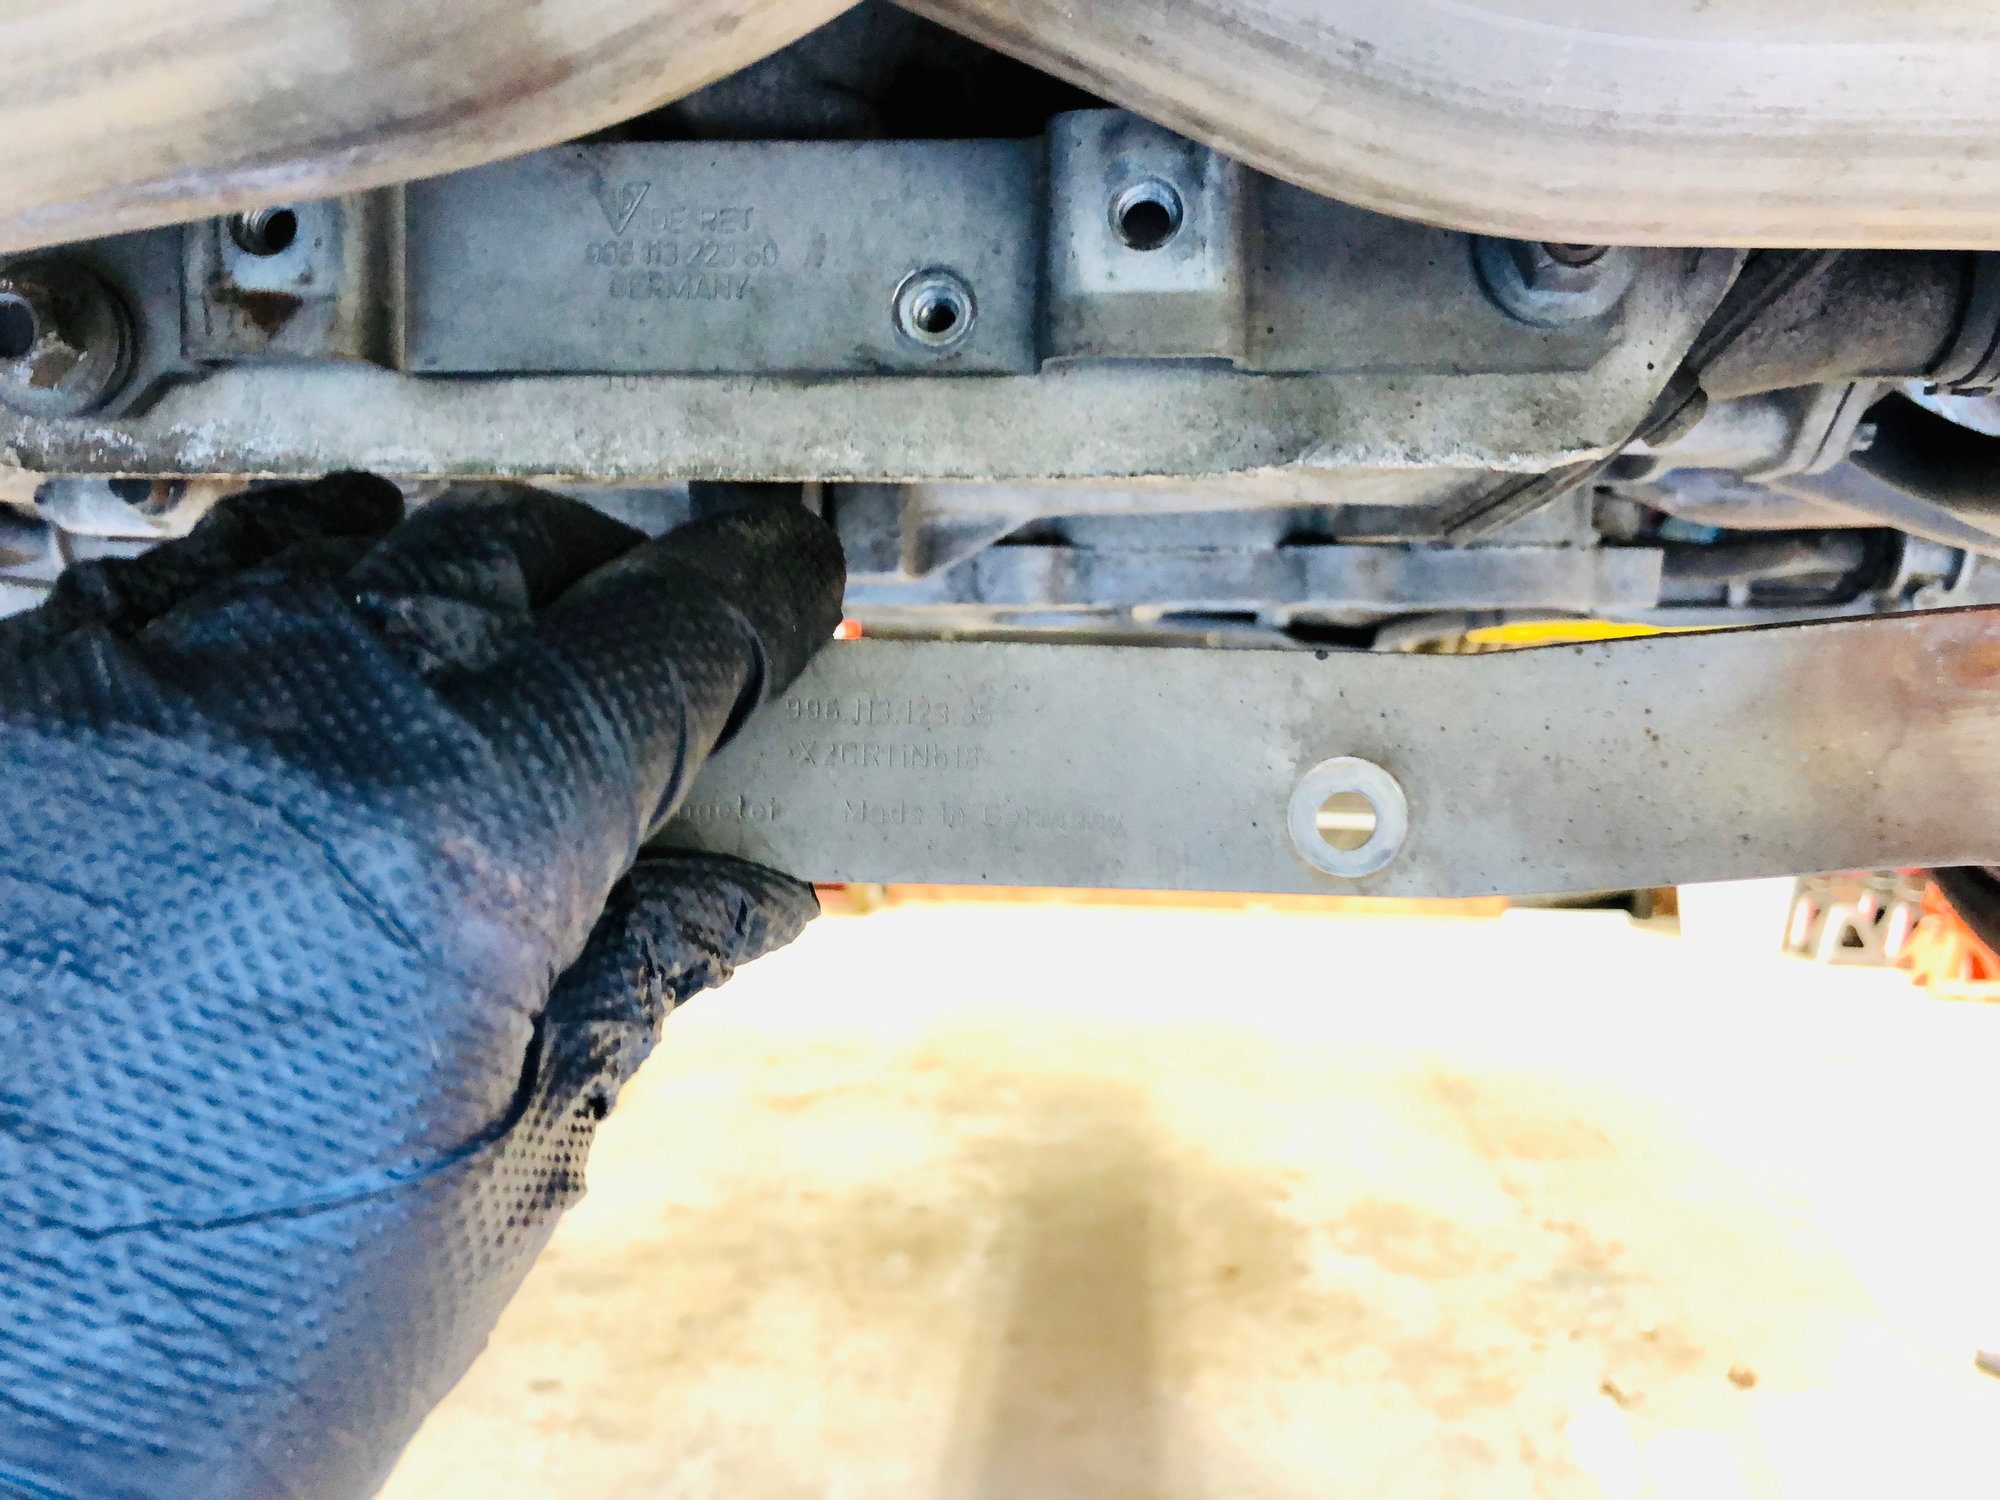
9. Unbolt the engine carrier - There are 4 15mm nuts holding the face of the carrier to the back of the engine and the 2 collar nuts holding it vertically to engine mounts. You will need to remove the 4 15mm nuts but not the 2 collar nuts on the engine mount. You can remove the 2 nuts on the bottom completely and the 2 higher up can be loosened but dont need to be removed. Its tight in there and this will just save you trying to put it back on later. You can only fit a box wrench to get these and it you have a ratcheting box wrench it will save you a lot of time and frustration.
10. Wiggle the engine carrier out 1-2" - with those nuts removed you can now pull the carrier out a little to increase the clearance. The tech at the dealer said he used a pry bar and then stuffed a piece of wooden between it. However if you jack up the engine a bit it will loosen the pressure and enable you to pull it out a bit pretty easily.
Note: Now is where the suck begins...
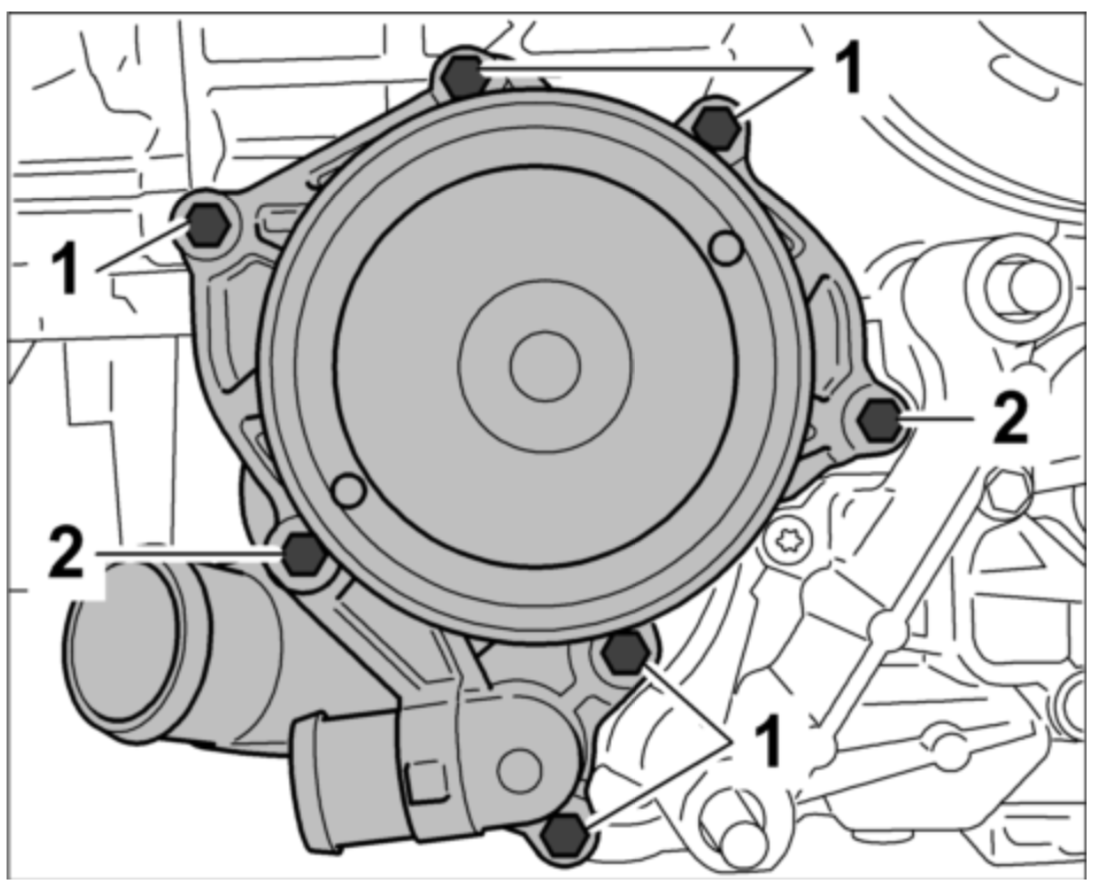
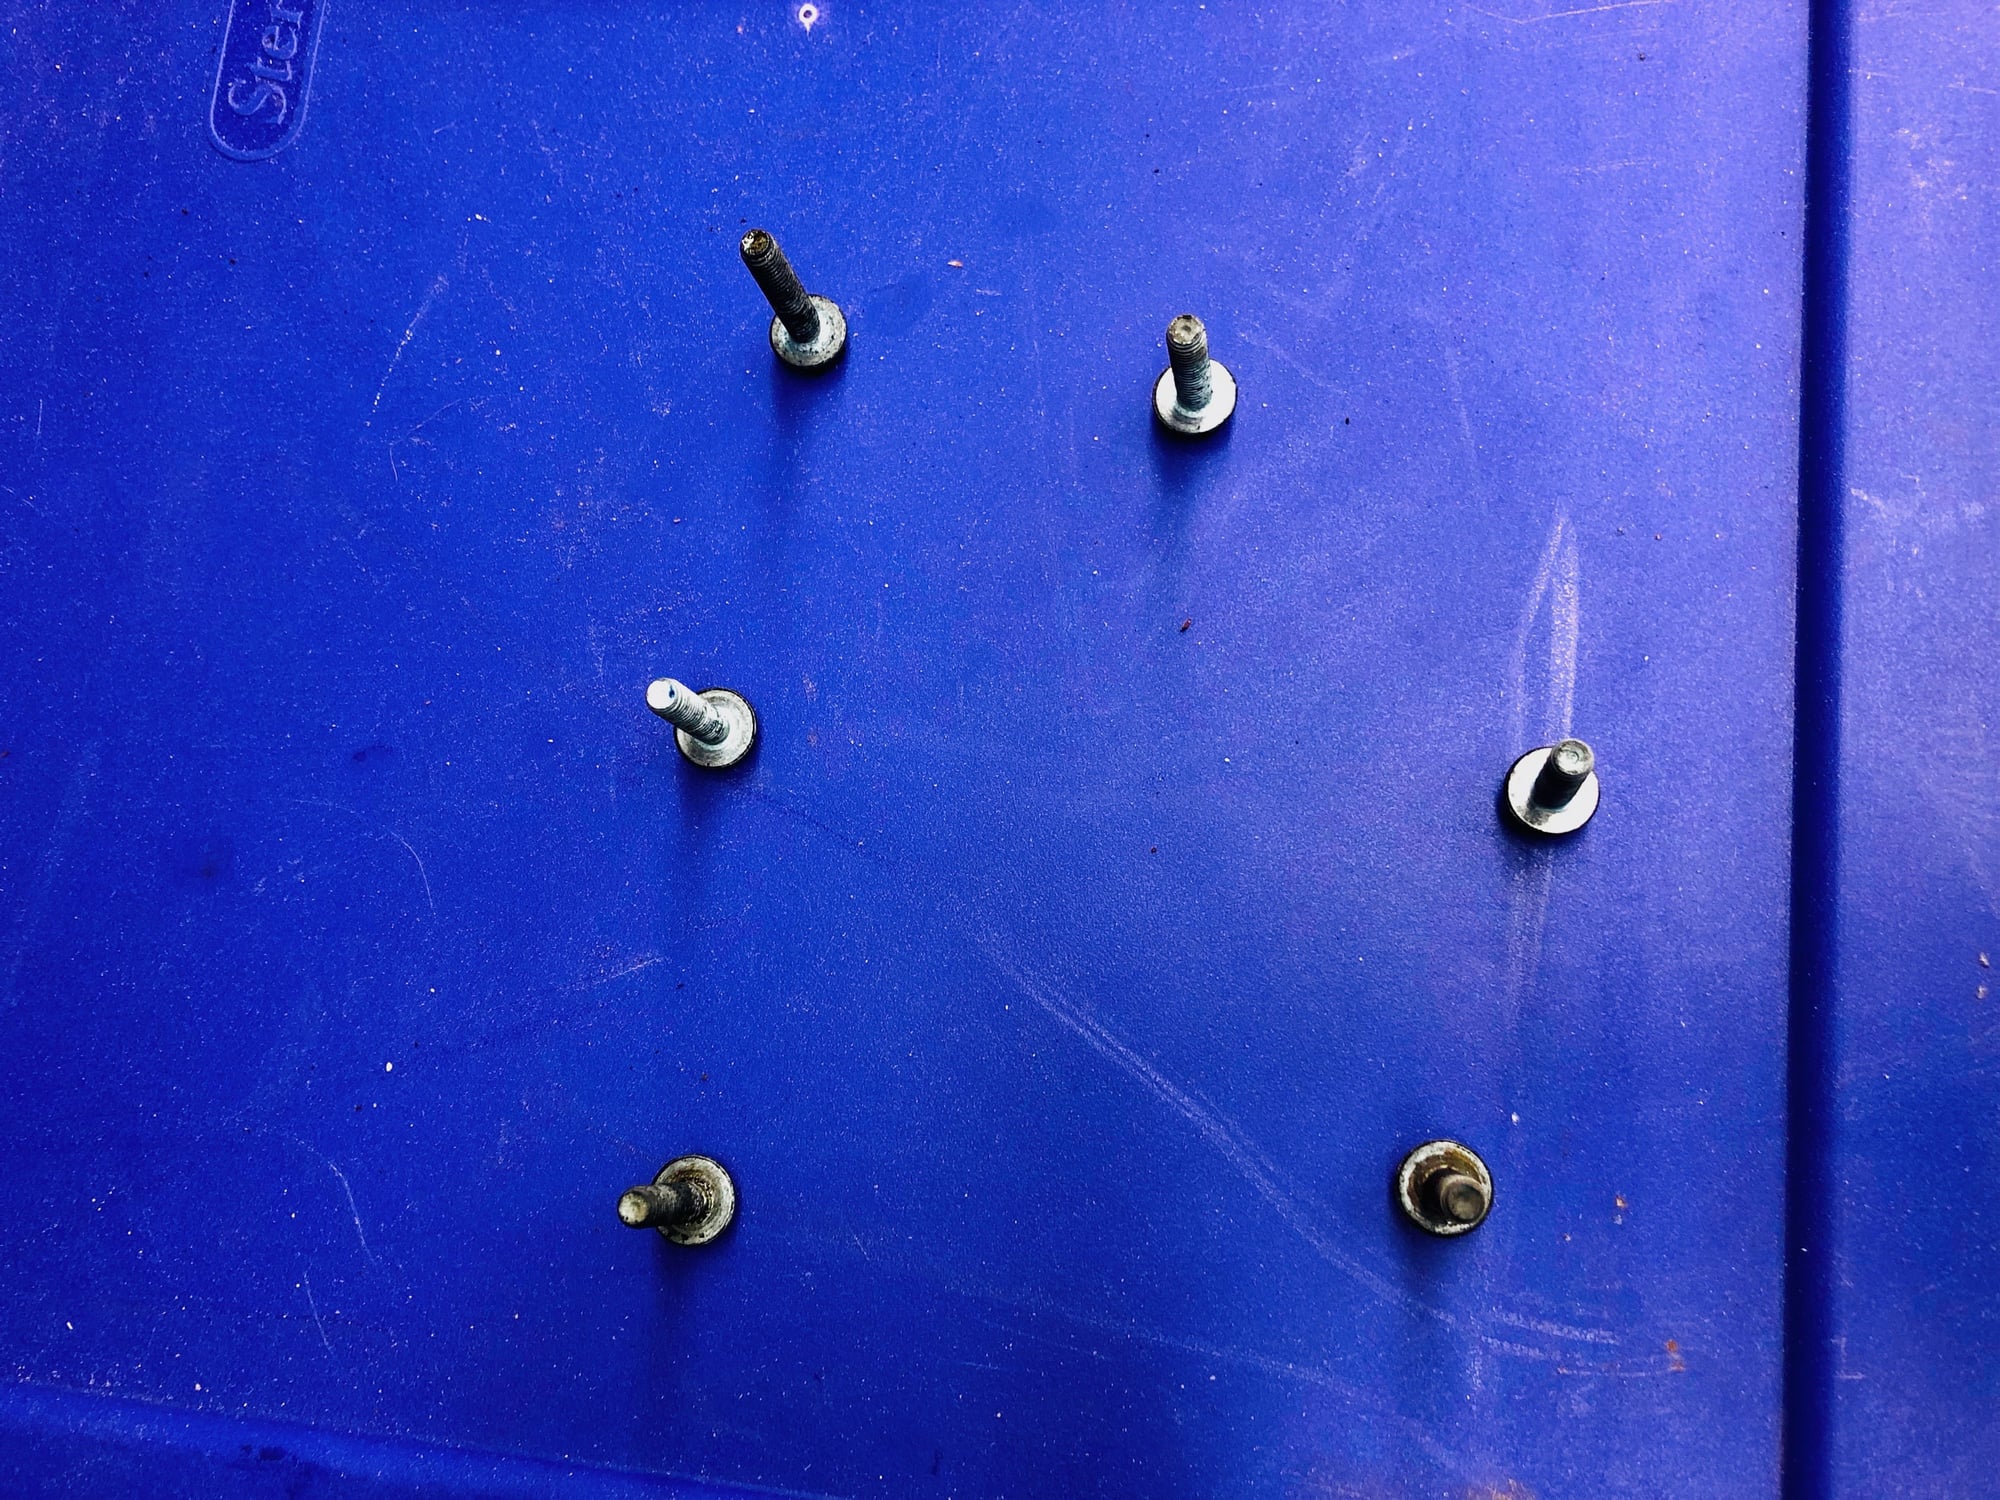
11. Remove the 7 10mm bolts holding the water pump - there isn't much room to work so you need to remove the top 3 from above and the bottom 3 from below. **Important: Make sure you mark where each bolt came from and you put them back in the same order. Some bolts are different lengths. **
The 3rd bolt from the top is the hardest but you can get it with some persistence. I used a small craftsman ratchet with 1" extension for all 6. Once these are out use a wire brush to clean them up a bit.
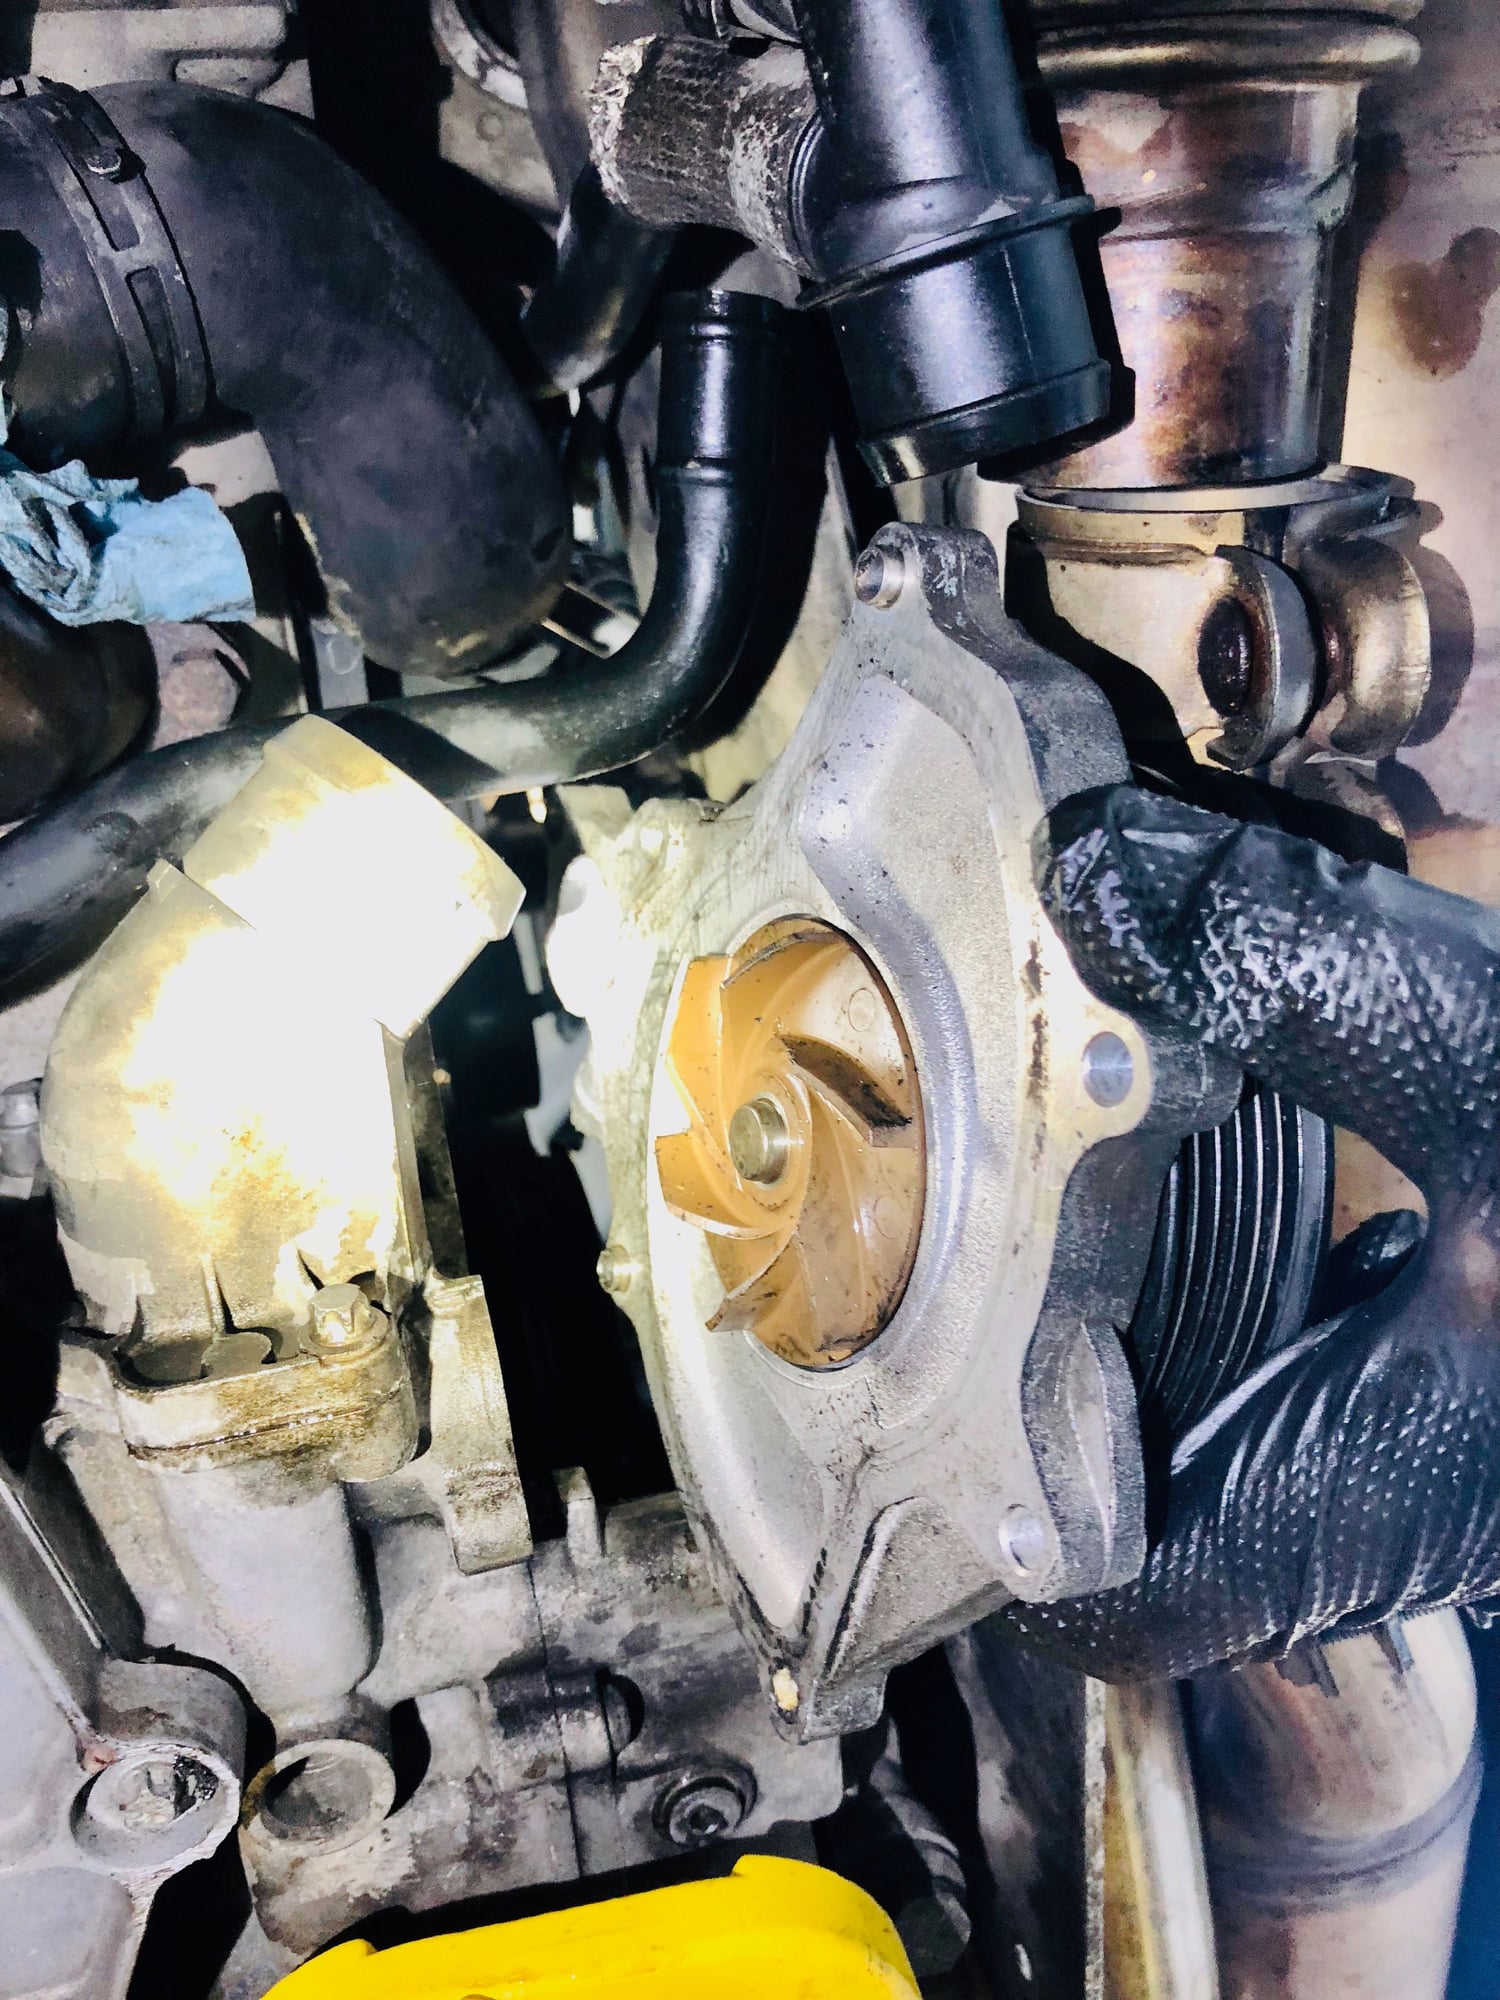
12. Loosen the water pump - once all the bolts are out just gently tap on the pump and it should come loose. Have a rag handy to catch the excess coolant. Note: dont use a screwdriver to pry it or hit it hard. There are 2 small dowels on the pump that fit into the block and you could damage these and/or the scratch the face.
Get a beer - before you start trying to yank it out, take a break and get a beer. You need a clear head for the next step.
13. Remove the gasket - remove the gasket before you pull the pump out. This will give you one less thing to get tangled. I was able to remove the gasket from the top. Note: there are two dowels in the pump the gasket holds onto so you need to pull it off these.
14. Rotate the water pump 90 degrees to remove - ok so removing the water pump sucks. Its as frustrating to remove as removing the coolant expansion tank. First, be gentle. Brute force will not work and could scratch the mating surface on the block. Second, be gentle! You can knock a lot of engine grime into the coolant passages if you aren't careful. Third, dont try to pull it straight down. There is a technique to remove with relative ease: rotate it 90 degrees. The elbow at the bottom of the pump needs to be rotated up 90 degreesto give you more clearance. If you have it situated correctly it will literally just fall out.
Get another beer.
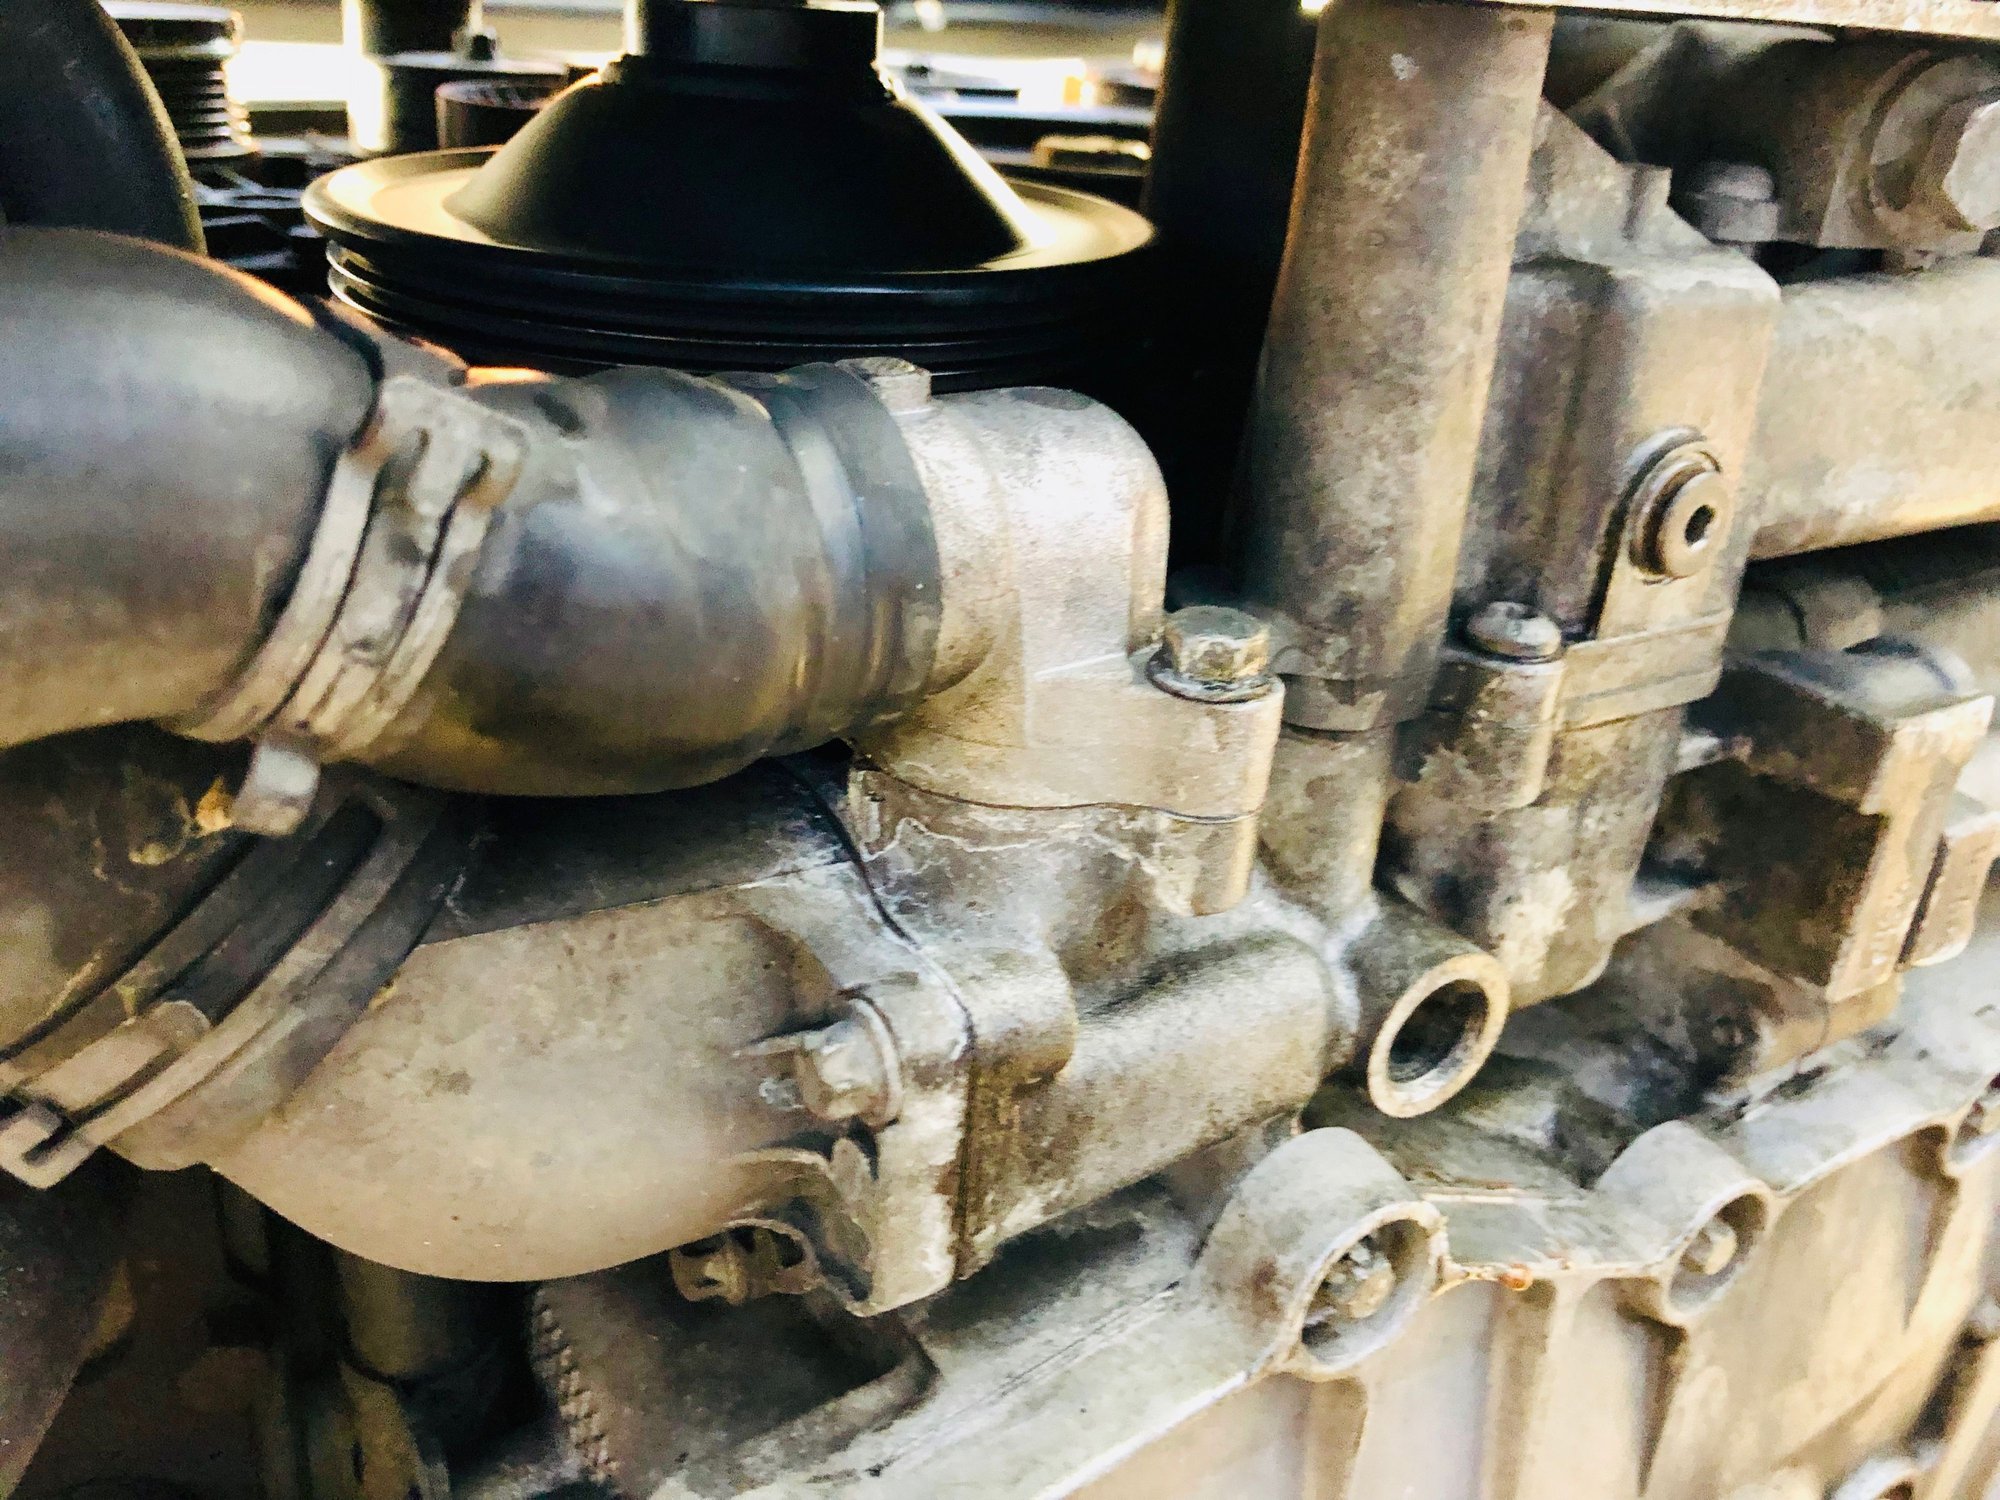
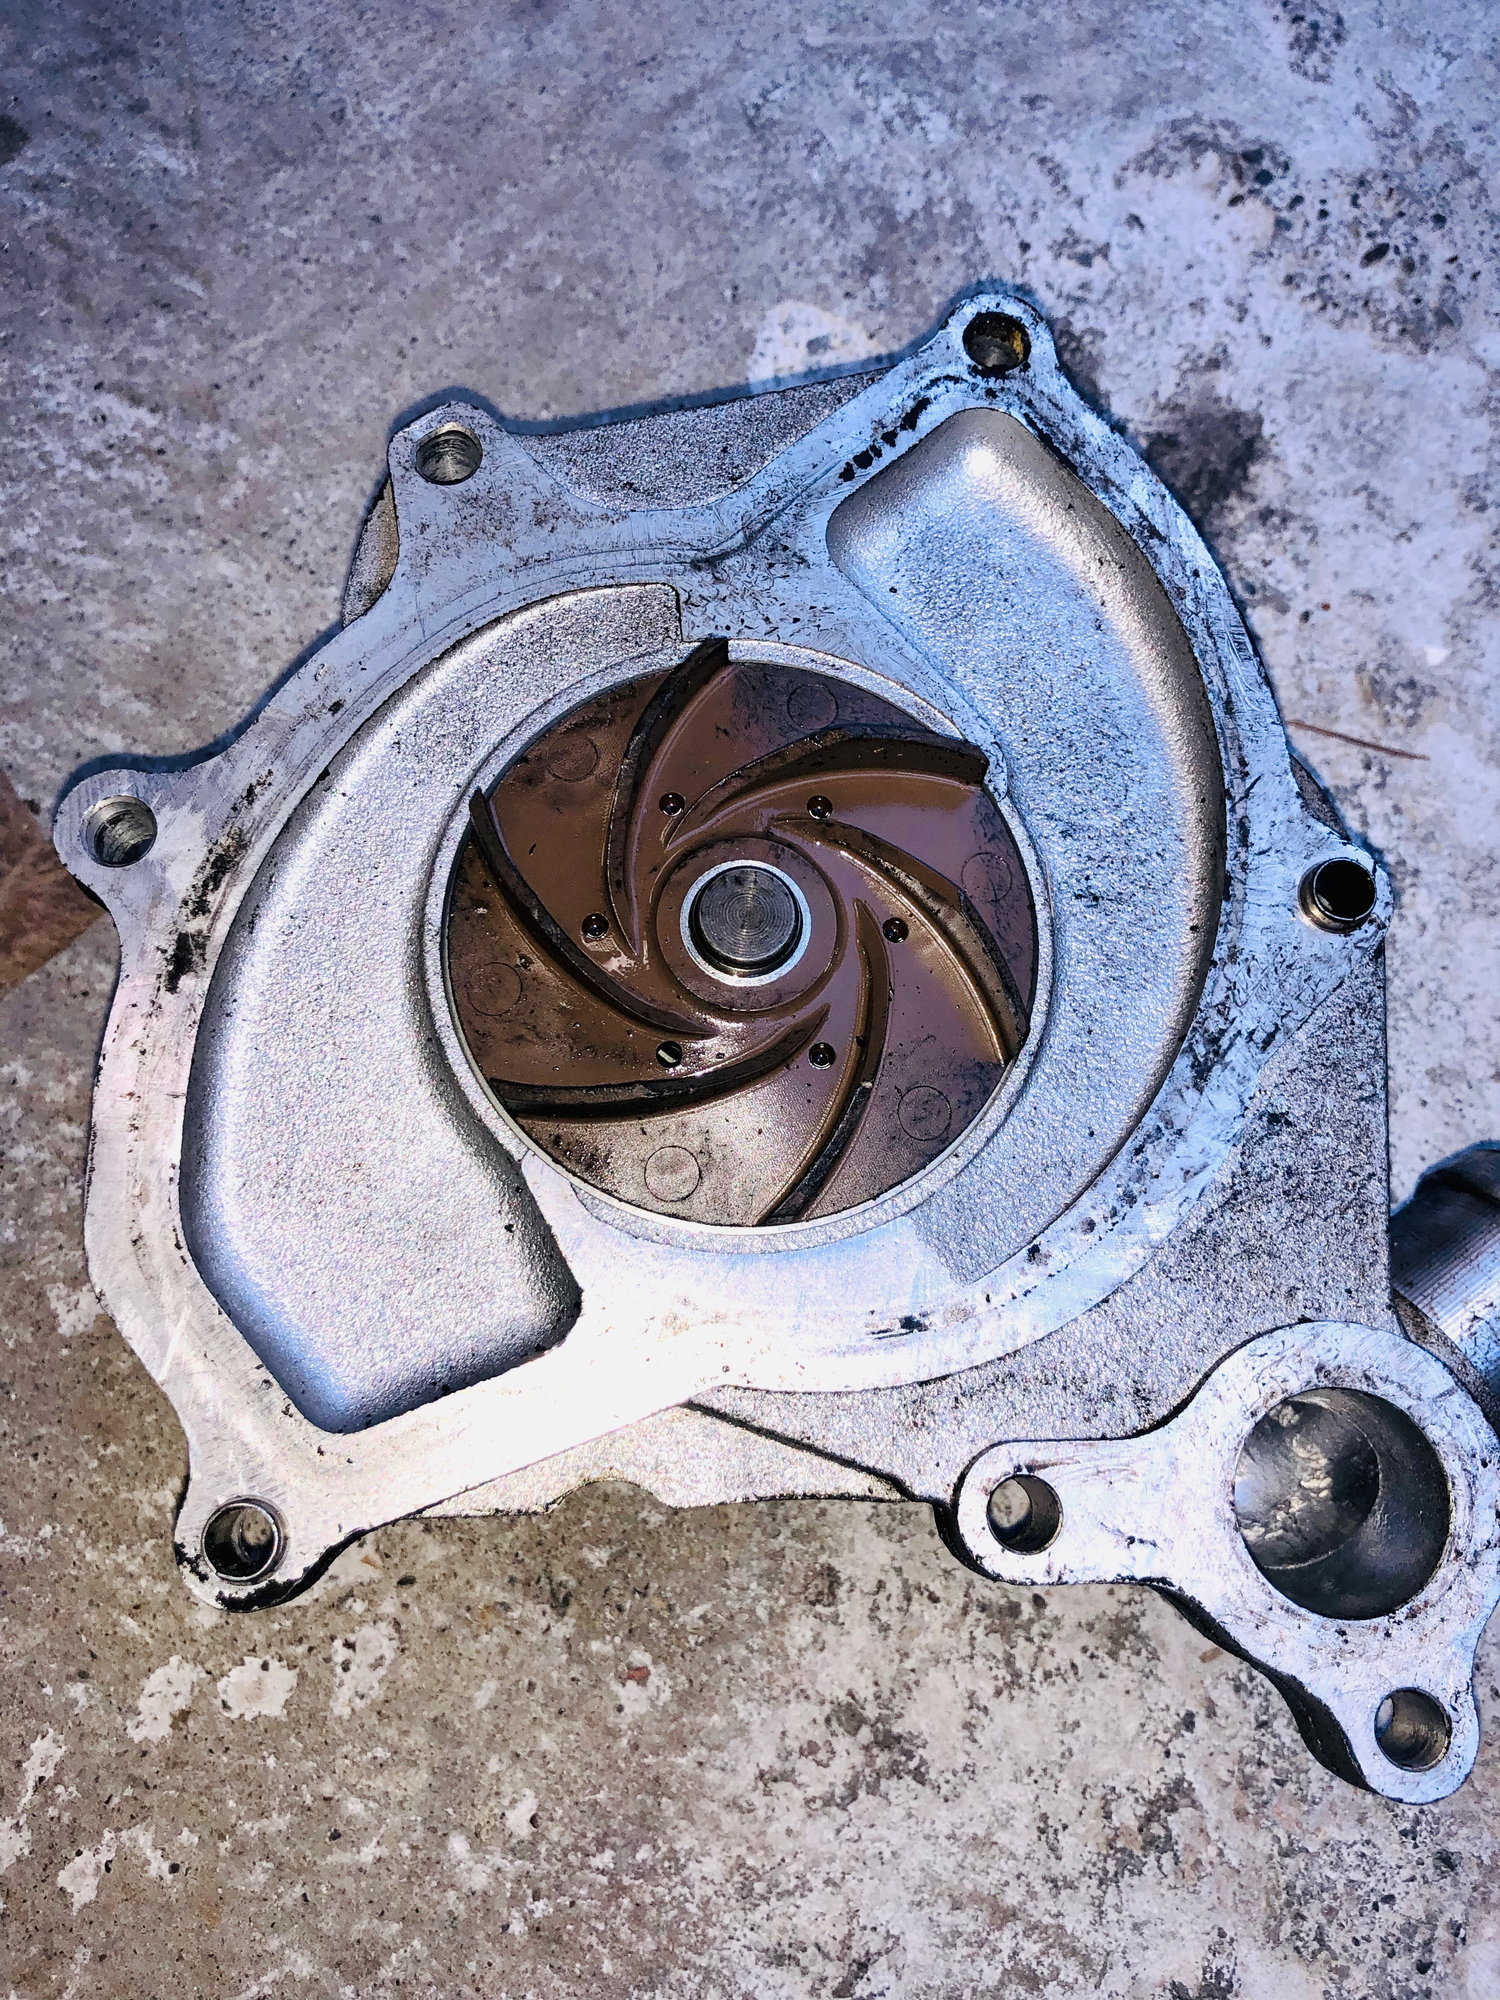
15. Clean the mating surface with a plastic scraper and inspect the old pump - get all the residue off the mating surface and dab out any dirt that got into the coolant passage during removal. If any blades are broken you need to try to find them by removing the thermostat housing. Mine were fine.
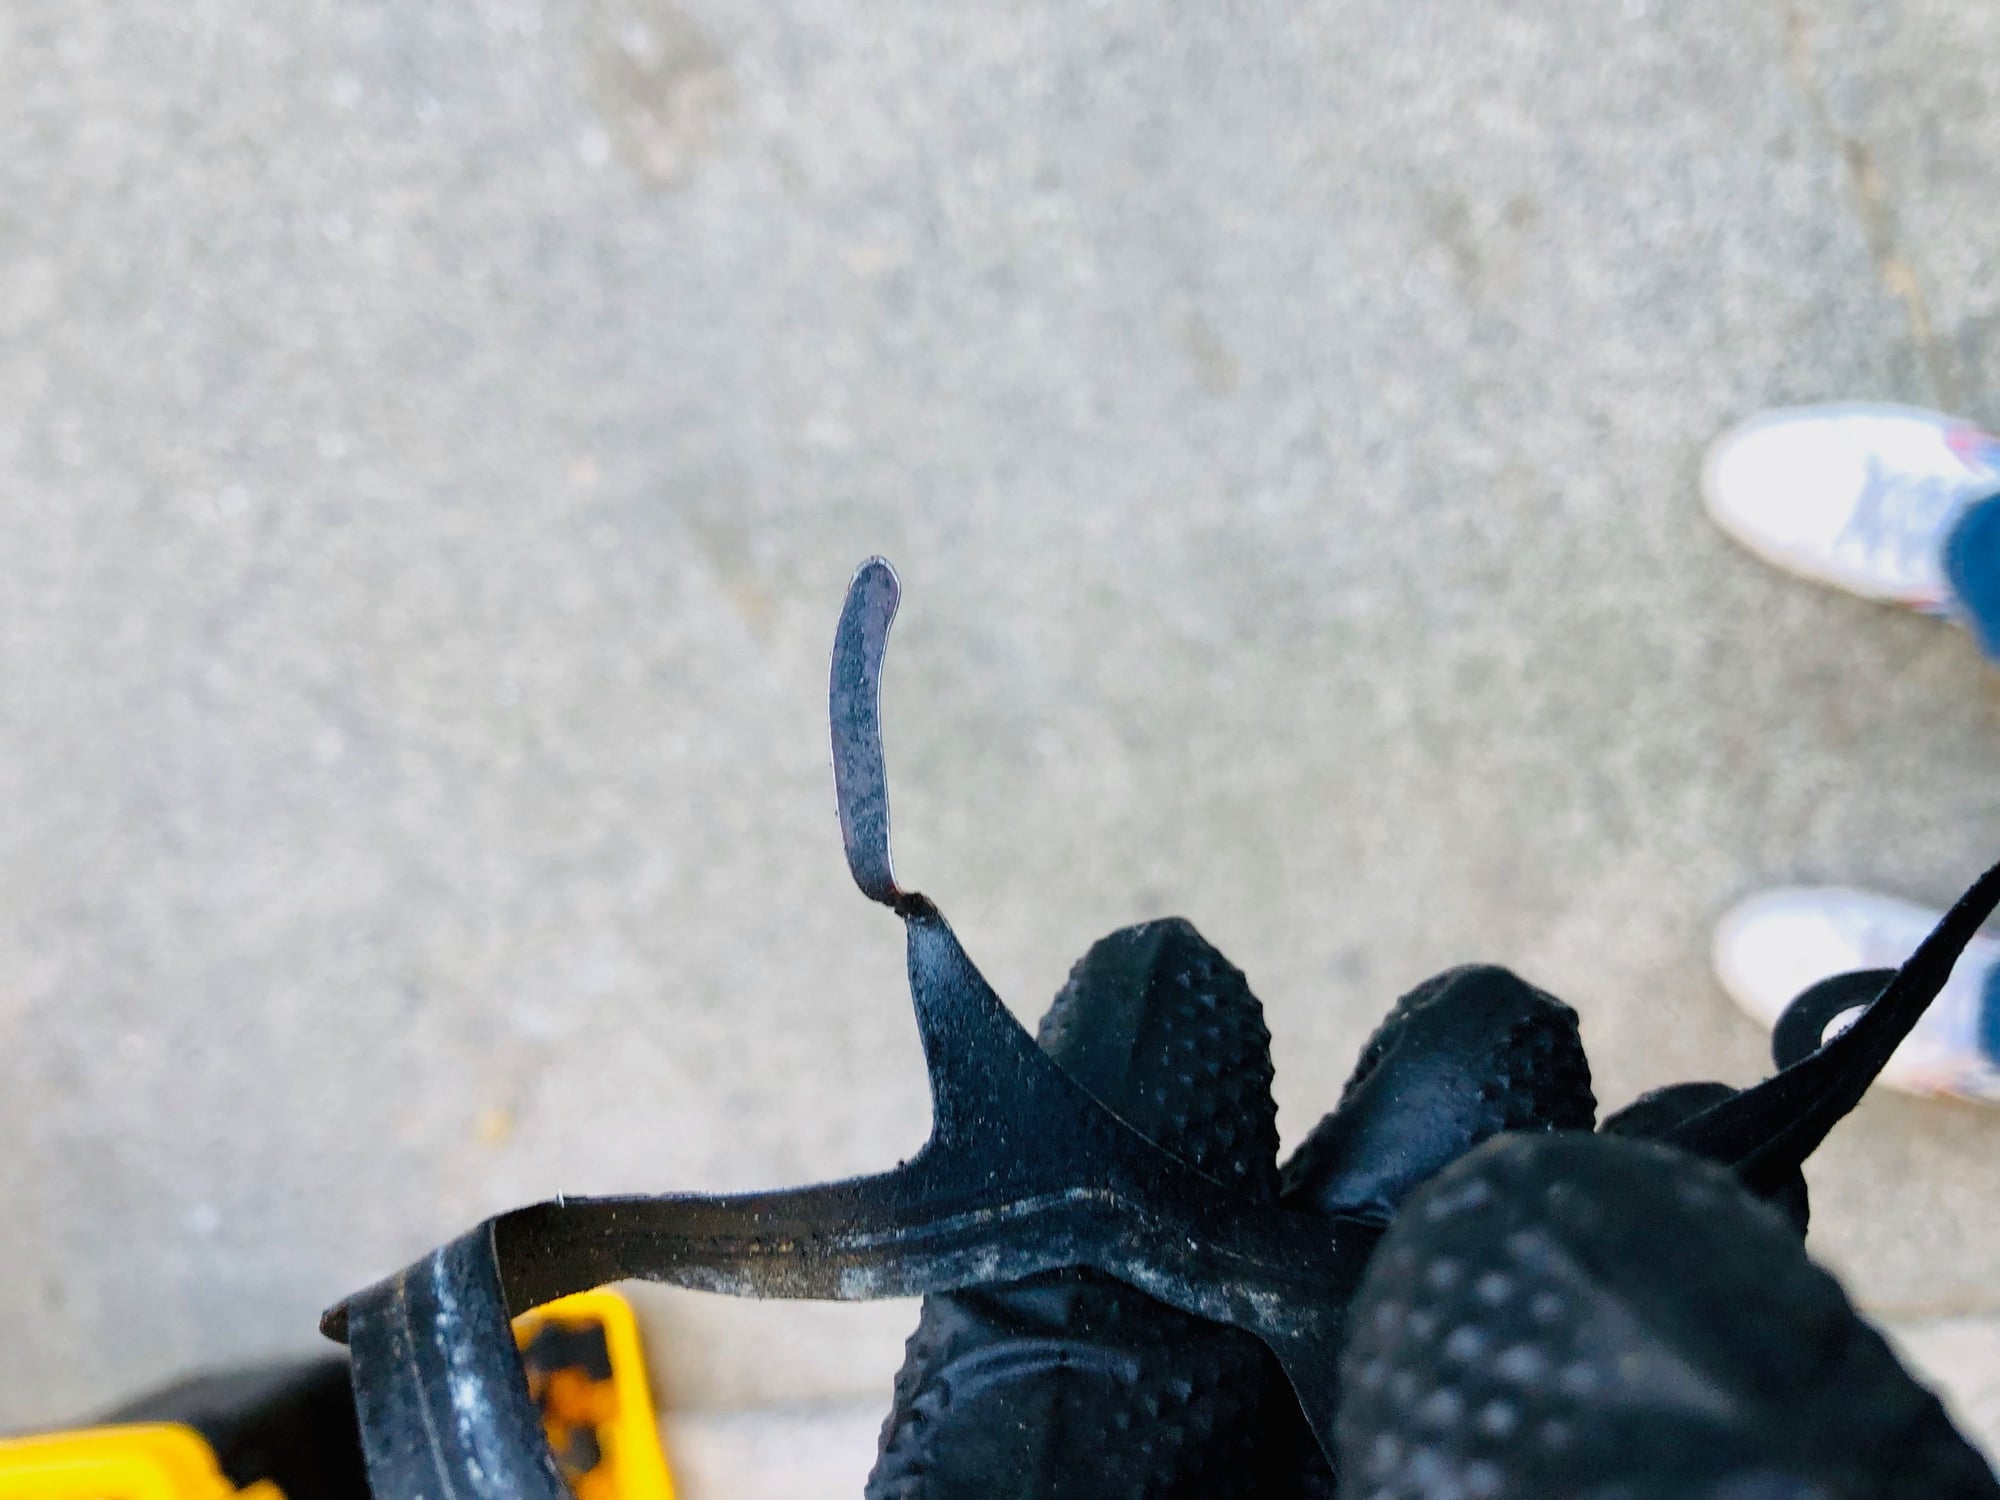
I did notice the little finger of the old gasket was kinked pretty bad. I may have done it during removal but it could have also been installed incorrectly - so be careful with that part.
16. Reinstall pump - I was worried about bending the gasket during install so I got the pump back in place first, then gently slid the gasket down into place from above. Its a little tricky because there are 2 dowels on the pump that the gasket slides onto. Pay special attention to the little sliver of gasket in the middle which can easily get bent or broken if you aren't careful. Check from above and below to make sure the gasket is seated properly and then slide the top #1 bolt in and bottom #4 bolt in.
17. Torque 6 bolts down - make sure you have cleaned these bolts and then are going back in the same holes you took them out off. The #3 bolt is longer than the others so if you try to jam it in the wrong hole you are going to strip the block. As noted, you dont have clearance to get a torque wrench on these so you need to hand tighten to 7.5lbs. The dealer service technician said he just tightens to the point where he feels tension and that's it. He stressed you don't want to over tighten or you will strip it. 7.5lbs is nothing.
Tighten in a star pattern. The #3 bolt will be the hardest to reinstall because its back in the corner. I found getting to it from underneath was easiest.
Congrats. The hard part is over.
18. Reattach the hoses and 3 hard line brackets - and if you moved any of the hoses make sure they are all back in their brackets above the pump.
19. Reattach the belt - do before you tighten the carrier to give yourself some more room. Check all your pulleys while you are at it.
20. Reattach the cat bracket holder - make sure you slide this on and hold in place with the E10 before you put the 2 15mm bolts on!
21. Reattach the 4 15mm carrier nuts - these are spec'd at 34lbs but you need to hand tighten as you can't get a torque wrench on it.
31. Reattach the cat bracket - put the this on the cat bracket holder with the 2 E15s. Now slide the cat clamps back over the bracket and tighten them down and reattach the cat clamping sleeves if you removed.
Double check all your work below the car before you lower it and fill with coolant.
32. Lower the car and reinstall airbox
33. Fill coolant - use the hand pump to fill 1 gallon of coolant then 1 gallon of distilled water. Then do about a half gallon of coolant and half gallon of distilled water. That should get you near full.
The steps below arent required if you have one of the bleeder systems. If not, my indy and the dealer technician both said this method below will work fine (and its the way they use to do it).
34. Coolant bleed #1 - with the cap off start the car and idle if for a minute looking for any leaks. Then increase rpms to 2k and hold it for a minute or 2. Go back to the engine and you will see the coolant has dropped about halfway. Refill 50/50 as required.
35. Coolant bleed #2 - reattach cap and open the bleeder valve and drive it for a couple miles to get up to temp. It will drop again. Refill as required.
36. Final check - check the next morning when cold and refill as required. The dealer technician said if you have any bubbles in the system the heater wont work (?). If working properly you will feel both coolant pipes in the driver side wheel well are hot.
37. Coolant disposal - this cant be disposed with motor oil (or down the drain) so you need to put in separate container and find a shop that will dispose of it for you.
38. Hat disposal.
In closing, this was my least favorite project to date but I still learned a lot. I'm sure if I did it again I could do in half the time and it would be less painful.
Great write up! As these cars start to age, folks are starting to do more DIY, and contributing to the knowledge base for those of us who also DIY. Thanks Bruce!
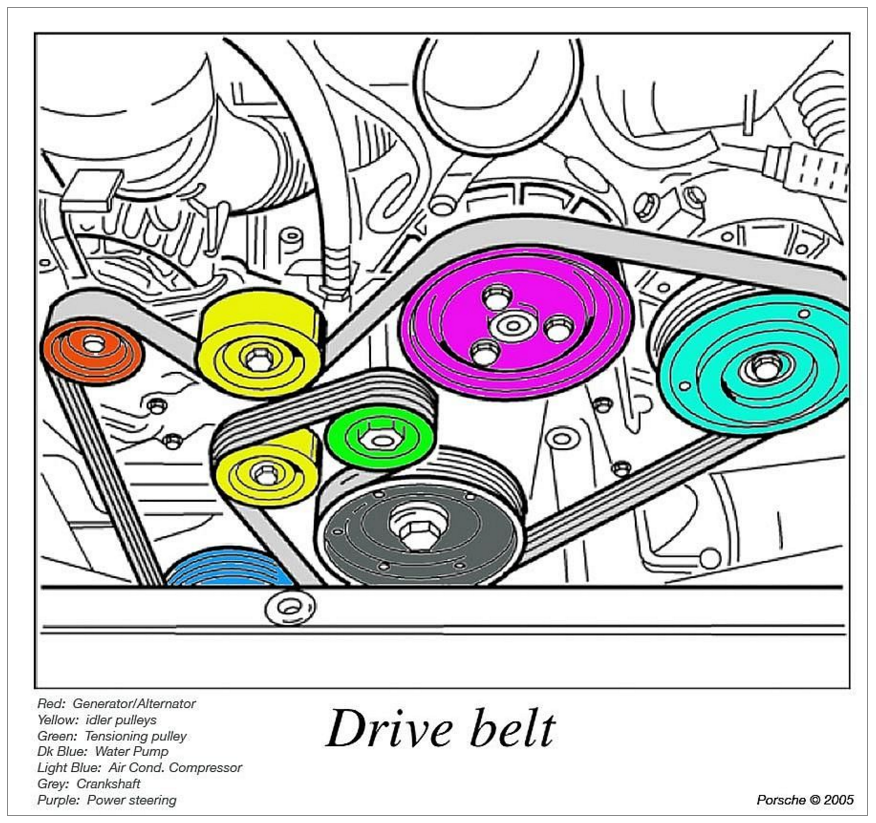
Nice work Bruce. Here's a serpentine belt routing diagram so others have all the info in one place.
You think it was fun on your car....try and do it with a supercharger and supporting cage, belt, and tensioner for the supercharger belt in the way - took me an entire weekend to do mine and about 3-4 hours do the one on my wife's car. At least it's hers that's due again, and not mine.
nice writeup, I just did this and also replaced the thermostat. Although some had had early failures with the water pump mine was in excellent shape with no bearing play, no noise or wear at 75k on my 07 4S. The only thing I would add is that this is the perfect time to replace the motor mounts given you have to undo the carrier.
@David - if getting my hat dirty gets me free Patagonia swag, ive got a fleece and jacket I can roll around in the mud with too :-)
@jeebus31 - as for next projects,
- I changed the transmission fluid to PTX while I had it on the lift. A bit smoother in 1st and 2nd. The oil was nasty.
- Wayne says he's doing a full suspension refresh. That should be fun.
- I want to try the Helmholz resonator hack one of these days. I've been searching where I can get a bung.
- I need to replace my front fender liners. Both are cracked. Originally I had it as a low priority but Im wondering if it could effect cooling as the radiator fans sit right in front of these.
- I need to replace the idler pulleys. I spun them last week and one looks like its nearing end of life.
- Oh, and if I don't upgrade to a C4S or C2S, I want to put a supercharger on it and make the sleeper C2.
- And....no, despite how much Pete wants me to put clear sidemarkers on, i'm not doing it :-)
@Petza914 thanks for that diagram. I was lucky I took a photo. It took me a few tries to get it right. As for the supercharger...tell me more about this. I saw a used one for sale the other day and it gave me impure thoughts...
@aaks38 - crap, that adds another project to my list. I've been meaning to do mounts
- And....no, despite how much Pete wants me to put clear sidemarkers on, i'm not doing it :-)
@Petza914 thanks for that diagram. I was lucky I took a photo. It took me a few tries to get it right. As for the supercharger...tell me more about this. I saw a used one for sale the other day and it gave me impure thoughts...
If you want spare amber sidemarkers in case you were to scratch or damage one, I have a couple pairs available that I'm holding just for you.
As for the supercharger, taking a NA 997 motor and bolting on a supercharger is not as simple as that statement. The most important things that need to be done are:
lowering the compression to avoid detonation under boost
using a piggyback ECU or DME from a forced induction car to have access to the necessary tuning parameters when the motor is under boost
taking intake air temp measurements after the air is compressed, which adds heat
utilizing a MAF that supports the full RPM range and full boost range for fuel management. When sourcing some spare parts for my car, I discovered that it does not run a standard 99X MAF but a very odd one from either a European Fiat or Citroen or some other odd vehicle that I had to buy from overseas. Bought 2 for the parts cabinet.
Check out some of the info in these threads that I've posted into with a lot of supercharger info:
I love the performance out of my car with the RUF setup but not sure I'd have the confidence in one of the other setups to hold up over the long haul. The RUF kit is pretty rare and they only manufactured it for a short time due to cost vs value from what RUF told me when I was visiting them in Germany. It was about a $30,000 conversion back at the time.
I think there are only 2 RUF R-Kompressors in the US - mine (#003) and a black one in GA (doesn't have the RUF body mods). The black aero kit 4S car from Texas was sold into Canada, then resold into FL, and that guy has converted it to a Turbo car. The R-Kompressor setup from that car (#017) is the spare I have in my garage, just in case, and I sent the supercharger itself off to ASA in Germany for a rebuild when I acquired it a couple years ago as I'm in this car for the long-haul. The other GT Silver one with Cocoa interior was sold out of Texas then from a dealer in Miami and currently resides in Chile.
My point is that parts, support, and knowledge of this RUF setup is pretty hard to come by and in more than one instance, I've known more about it than the some of the service people who have called me with questions on one of these others they were working on.
Honestly, in most cases the money is better spent selling your current car and upgrading to a TT or GT3. If anything ever happens to my current motor, I'll have Jake build me an upgraded 4.0 and reinstall the RUF setup along with any other upgrades he recommends once an analysis of the setup is done. Can't imagine a setup much better than what that would be like combined with the other mods I have on my current chassis.
I can PM you my phone # if you want to talk further about non-factory forced induction for the 997.
Pete - yes, please send me your amber markers. Im going to corner the market on them and make a killing when this crazy trend subsides.
As for supercharger, I read some of those earlier posts. It looks like it was a trend years ago but you don't hear much about the cars that did the conversion since then. I was unsure if thats because they are all still happily on the road, or all in the junkyard. I have only seen one listed for sale. I think they wanted $52k for a low mile .1 C2S with supercharger.
I read the posts on the guy who did the aftermarket turbo kit and that sounded like it was a mess.
ps - why am I not surprised :-)
I've known more about it than the some of the service people who have called me with questions on one of these others they were working on.
I do find it interesting how the Porsche crowd fights against FI. I'm sure it has to do with the price point of a potential rebuild. And also the thrill the car gives in stock form. But I'll bet money that a few years from now, I'll be looking into it. It's in my nature to tinker and FI is just so much fun. Moreover, I don't find (yet) the Porsche electronics to be any more difficult to understand than any of the other vehicles I have worked on. Just making mistakes... much more expensive. Perhaps the 996 cars are seeing more engine mods? Since the entry price is pretty low? I looked at several modified turbo cars... none started life as NA tho.
We all know the water temp gauge lies. It could be you've got better circulation now allowing the entire system to run cooler. That would be nice IMHO.

 01-02-2019, 03:21 AM


")