HELP!! Bumper Reinstall
 07-16-2009, 04:42 PM
#1
Addict
Rennlist Member
Rennlist Member
Thread Starter
I need some help!!
Maybe I'm doing it wrong, which would not be surprising, but I'm having a terrible time reinstalling the bumper after installing the Cargraphic grills I bought from XLR8N-Fan. The bumper removal went easily. The installation of the grills seem to go OK, but I cannot get the bumper to go back on.
Do the grills go in the channel around the openings? Seem to fit quite nicely. But I can't get the center duct to fit over the installed grill, so the bumper will not reseat.
Help!
 07-16-2009, 06:15 PM
#3
Rennlist Member

I fitted (not fully tight) the centre top screws first then the two in the indicator repeater area - this gave a starting set up and alignment.
Then I fitted the screws below the bumper (not fully tight) - making sure that the tabs were on the correct side.
The top centre screws only get tightened when you are sure that the gap to the bumper/hood and bumper/headlight is even. Then tighten the side screws and recheck the alignment. When its aligned tighten the ones below the bumper.
Note also that I did not remove the wheel arch lining to get at the side screw that comes up behind it - I simply manoevered the lining out of the way by removing the visible fastenings - I even left the wheel on.
Quote:
Originally Posted by ltcjmramos
Please send pics to Much appreciated.
I'm able to get the top screws on each side in, but can't get that middle section to fit.
What did you do with the temp sensor, also?
Quote:
Originally Posted by StevoUK
Hi
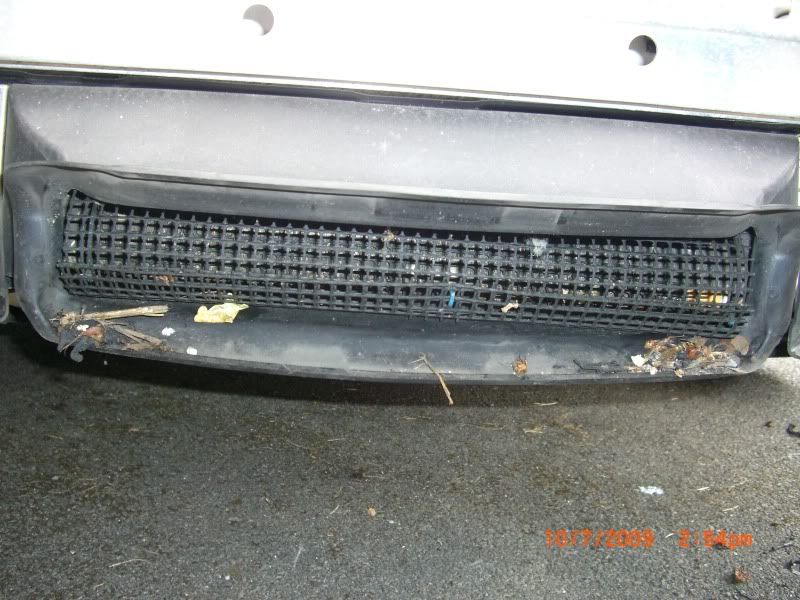
I pondered about the centre duct for a while and in the end did not fit the grill to it.
My reason was that the 3D shape of the opening was difficult to fit the aluminium mesh to. (it would have meant curves in the mesh that I wasn't happy being hassled with.) I will later fit plastic mesh when I find some since it will be easier to work with. Meanwhile I revert to my previous solution which is a cylinder of green garden mesh stuffed into the opening! Has the advantage that it can be removed for debris cleaning.
The mesh fitted to the sides was much easier because it could be installed as a flat mesh, I left room for the rubber vents to still fit in the groove as before and drilled small holes in the black plastic surround so I could use cable ties to hold the mesh on.
If you give me an email address I will send the full size pictures so you can zoom in and see clearly.
Note that it was easier to fit the bumper by supporting it with the towing eye until I could get the top screws in next to the hood release lever.
Glad to help.
John
Quote:
Originally Posted by ltcjmramos
I need some help!!
Maybe I'm doing it wrong, which would not be surprising, but I'm having a terrible time reinstalling the bumper after installing the Cargraphic grills I bought from XLR8N-Fan. The bumper removal went easily. The installation of the grills seem to go OK, but I cannot get the bumper to go back on.
Do the grills go in the channel around the openings? Seem to fit quite nicely, and from the pic you posted seems to be the way to go . But I can't get the center duct to fit over the installed grill, so the bumper will not reseat.
Help!
Then I fitted the screws below the bumper (not fully tight) - making sure that the tabs were on the correct side.
The top centre screws only get tightened when you are sure that the gap to the bumper/hood and bumper/headlight is even. Then tighten the side screws and recheck the alignment. When its aligned tighten the ones below the bumper.
Note also that I did not remove the wheel arch lining to get at the side screw that comes up behind it - I simply manoevered the lining out of the way by removing the visible fastenings - I even left the wheel on.
Quote:
Originally Posted by ltcjmramos
Please send pics to Much appreciated.
I'm able to get the top screws on each side in, but can't get that middle section to fit.
What did you do with the temp sensor, also?
Quote:
Originally Posted by StevoUK
Hi
I pondered about the centre duct for a while and in the end did not fit the grill to it.
My reason was that the 3D shape of the opening was difficult to fit the aluminium mesh to. (it would have meant curves in the mesh that I wasn't happy being hassled with.) I will later fit plastic mesh when I find some since it will be easier to work with. Meanwhile I revert to my previous solution which is a cylinder of green garden mesh stuffed into the opening! Has the advantage that it can be removed for debris cleaning.
The mesh fitted to the sides was much easier because it could be installed as a flat mesh, I left room for the rubber vents to still fit in the groove as before and drilled small holes in the black plastic surround so I could use cable ties to hold the mesh on.
If you give me an email address I will send the full size pictures so you can zoom in and see clearly.
Note that it was easier to fit the bumper by supporting it with the towing eye until I could get the top screws in next to the hood release lever.
Glad to help.
John
Quote:
Originally Posted by ltcjmramos
I need some help!!
Maybe I'm doing it wrong, which would not be surprising, but I'm having a terrible time reinstalling the bumper after installing the Cargraphic grills I bought from XLR8N-Fan. The bumper removal went easily. The installation of the grills seem to go OK, but I cannot get the bumper to go back on.
Do the grills go in the channel around the openings? Seem to fit quite nicely, and from the pic you posted seems to be the way to go . But I can't get the center duct to fit over the installed grill, so the bumper will not reseat.
Help!
 07-16-2009, 06:48 PM
#5
Addict
Rennlist Member
Rennlist Member
Thread Starter
Got it done!!! It was a case of lack of muscle. Steve's suggestion to attach at the side markers worked fine once I got a buddy to help me push it into position. Once attached, everything lined up much more cleanly than I thought it would.
Steve, thanks for all the help!!
Steve, thanks for all the help!!
 07-16-2009, 07:44 PM
#7
Addict
Rennlist Member
Rennlist Member
Thread Starter
For info, not counting the breaks I took to make my pleas for help and lunch and waiting for my buddy, the job should take about 3-3.5 hours. And you do not need to remove the frame inside the bumper, but do need to relocate the temp sensor. Also, I think it's easier to significantly loosen the wheel liner to get at the inside screw.
Trending Topics
07-16-2009, 09:56 PM
#10
Addict
Rennlist Member
Rennlist Member
Thread Starter
The car's in the garage, so not very good lighting, and the flash washes it out some. I'll take better on Saturday when I'm out.
07-17-2009, 03:13 PM
#12
Addict
Rennlist Member
Rennlist Member
Thread Starter
I fitted (not fully tight) the centre top screws first then the two in the indicator repeater area - this gave a starting set up and alignment.
Then I fitted the screws below the bumper (not fully tight) - making sure that the tabs were on the correct side.
The top centre screws only get tightened when you are sure that the gap to the bumper/hood and bumper/headlight is even. Then tighten the side screws and recheck the alignment. When its aligned tighten the ones below the bumper.