When you click on links to various merchants on this site and make a purchase, this can result in this site earning a commission. Affiliate programs and affiliations include, but are not limited to, the eBay Partner Network.
Over the past two years I've made several personalizing modifications to the exterior and interior that other 996 owners might be interested in. In this thread I show the exterior upgrades, where I made the purchase (unless I neglected to write it down), and the cost in money and installation time.
Getty Designs Ducktail Sport spoiler
Depo/Dectane 997.2-style LED taillights
Painted the perimeter of the taillights
LED center brake light
LED license plate lights
LED strip to illuminate license plate area
Custom license plate
Polished headlights
Headlight protection film
Porsche valve stem caps
Lowered with M030 suspension package
Repainted wheels
Custom wheel caps
Rennline grille
Last edited by DrMEMS; 04-08-2018 at 02:24 PM.
Reason: Made more mods on the car.
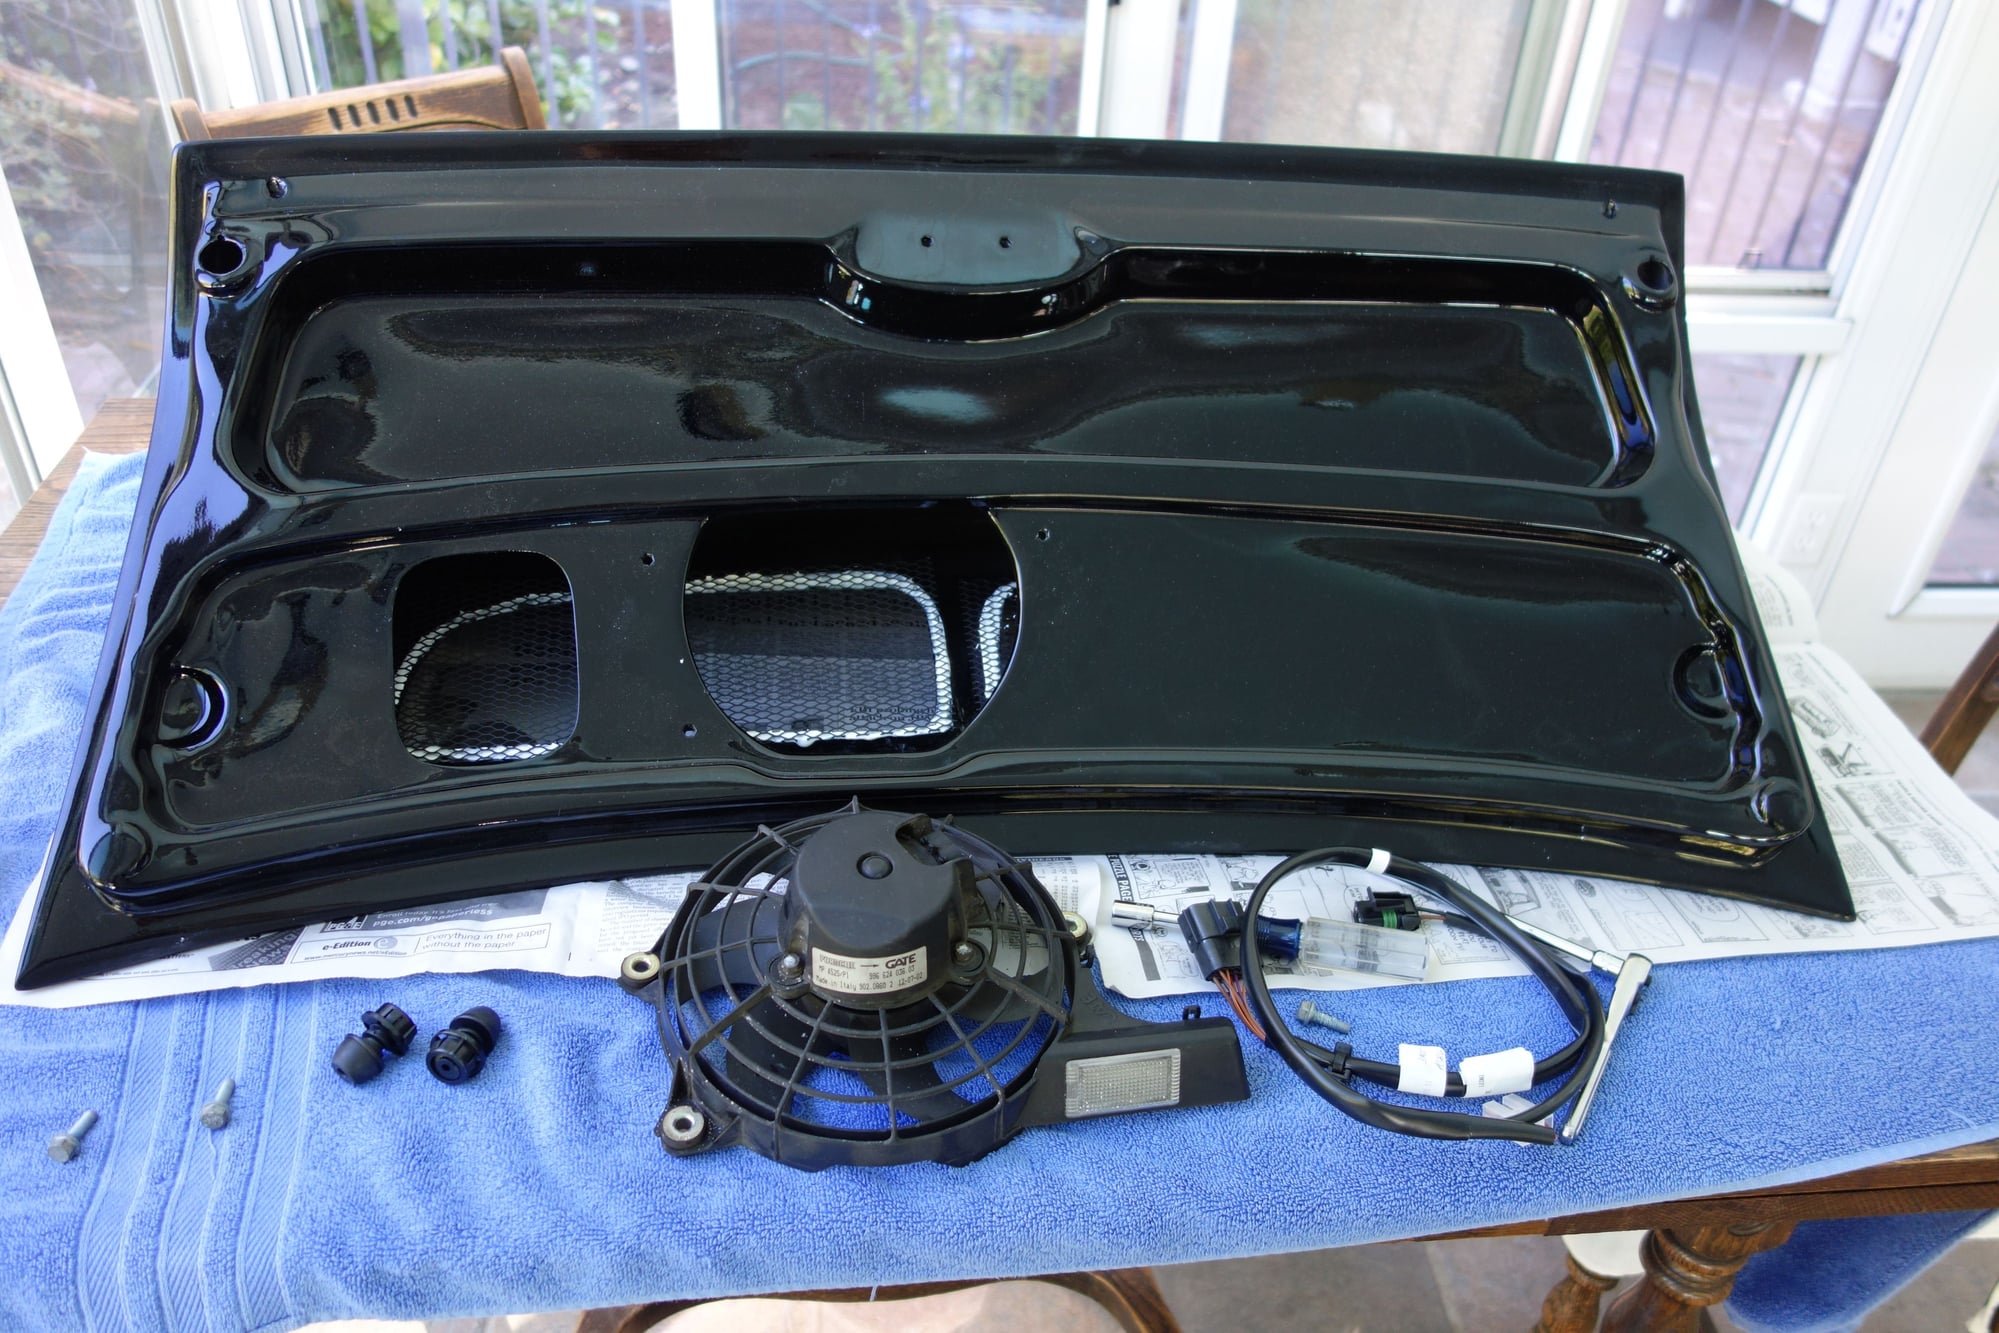
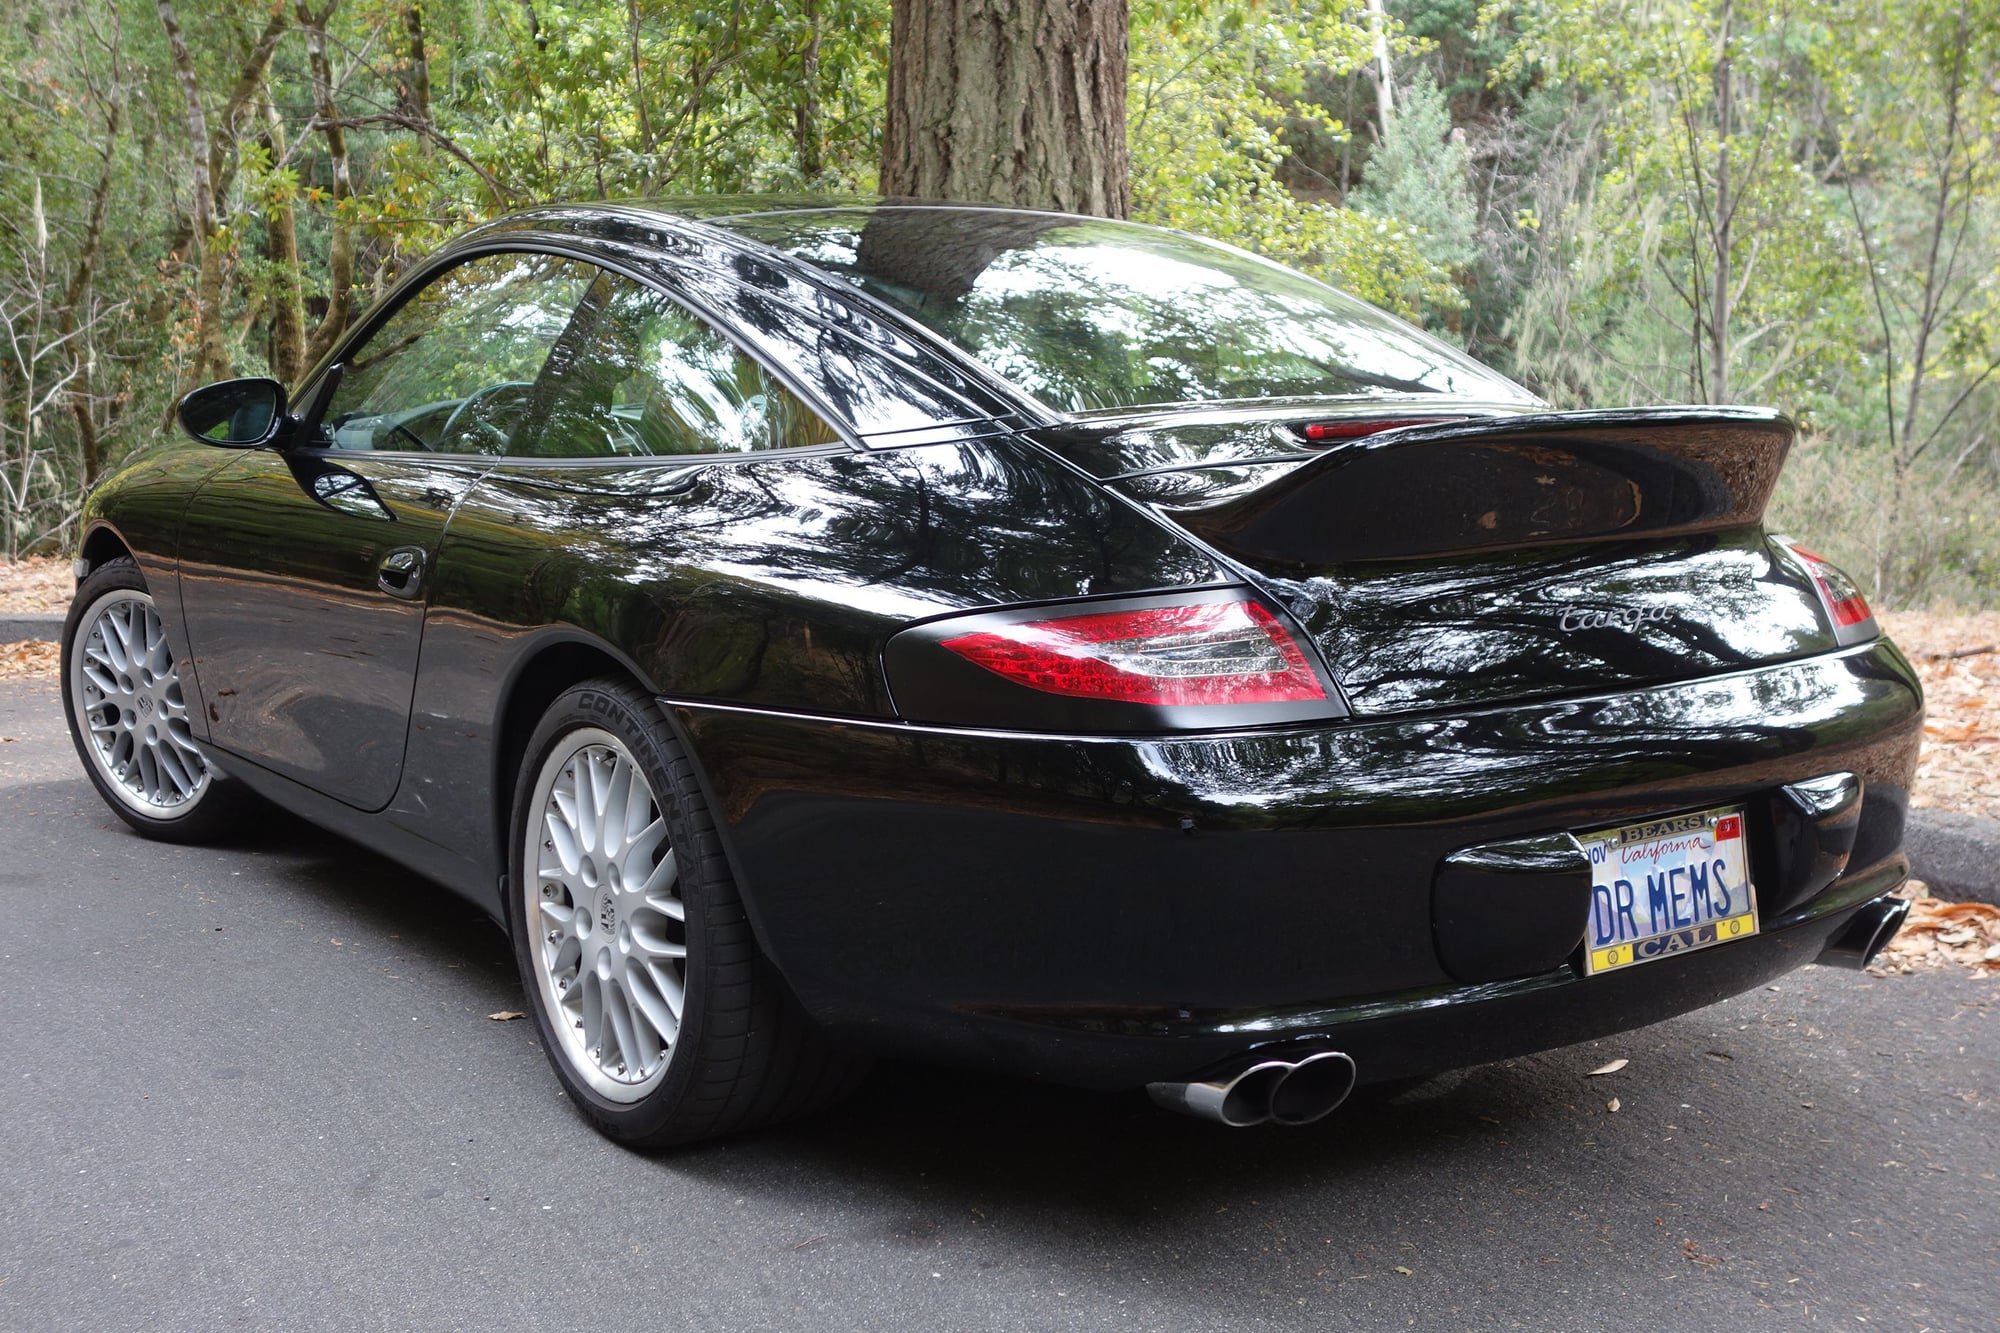
The biggest mod is replacing the stock engine cover with a Getty Design "Ducktail Sport" spoiler/engine cover. This is molded in fiberglass in Riverside, California. I found that MA Shaw seems to sell the same spoiler using about the same mold. I can't figure out the relationship between the two companies.
I had Getty prime, sand, then reprime the fiberglass, several times. After I received it, I had it further primed and sanded to fill all of the pinholes, then painted black to match my car at a body shop owned by Vic Costelli in San Carlos, CA (cost: $300 when he was doing other body work for me). Vic painted the screens separately, then I epoxied them onto the spoiler.
I also purchased the electrical cable from Getty. This powers the fan, interior light, and tells the control system that there is no moveable spoiler. Total cost for the spoiler, priming, cable, and shipping was $1352.
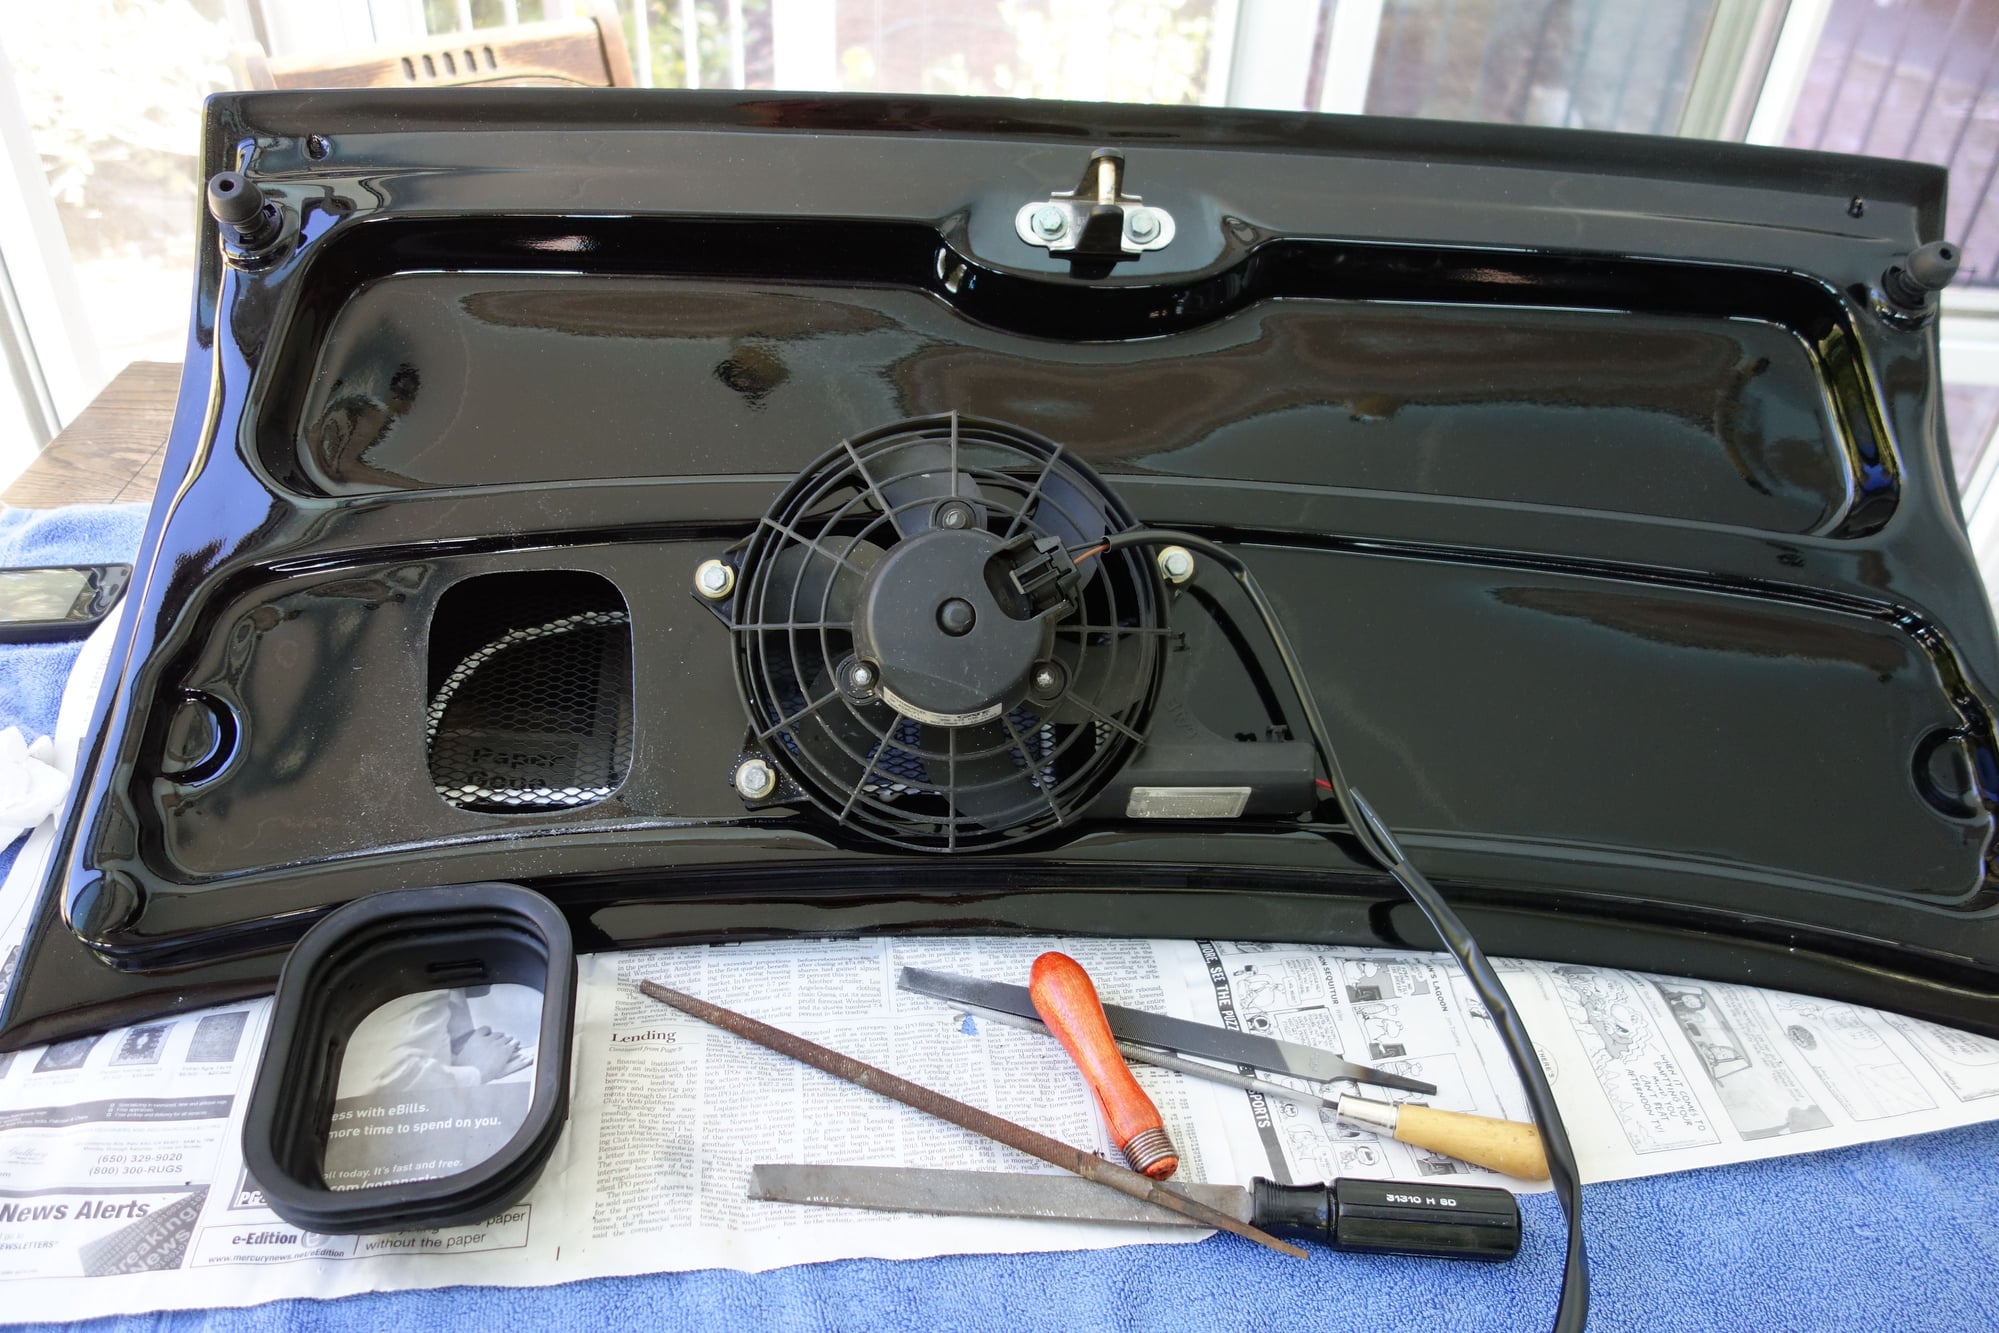
To get the deck lid to close all the way, I had to shave some plastic off of the taillights where they go under the deck lid.
Transferring the bolt-on parts to the new deck lid. The ring of white-colored epoxy is visible from the inside of the lid.
I filed the air-intake hole a little larger to fit the bellows. I could never get the bellows to stay in place, so I have removed it.
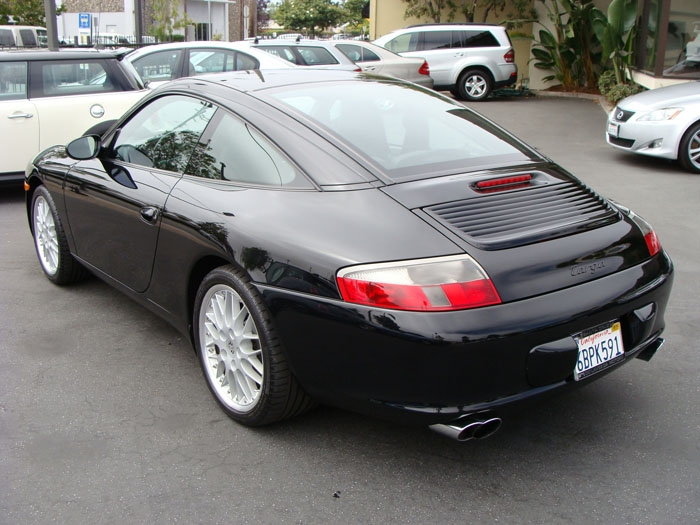
Here is the car with the stock deck lid and taillights, then with the new spoiler and LED taillights. These are Depo/Dectane 997.2-style taillights. I found the best price at Supertweaks in the UK, including shipping to California, for $565. These have load resistors in parallel with the LED lights. This draws more current, so that the monitor in the car's control system doesn't think that a light is out, which would produce an error code.
Stock deck lid and taillights.
New deck lid/spoiler and LED taillights.
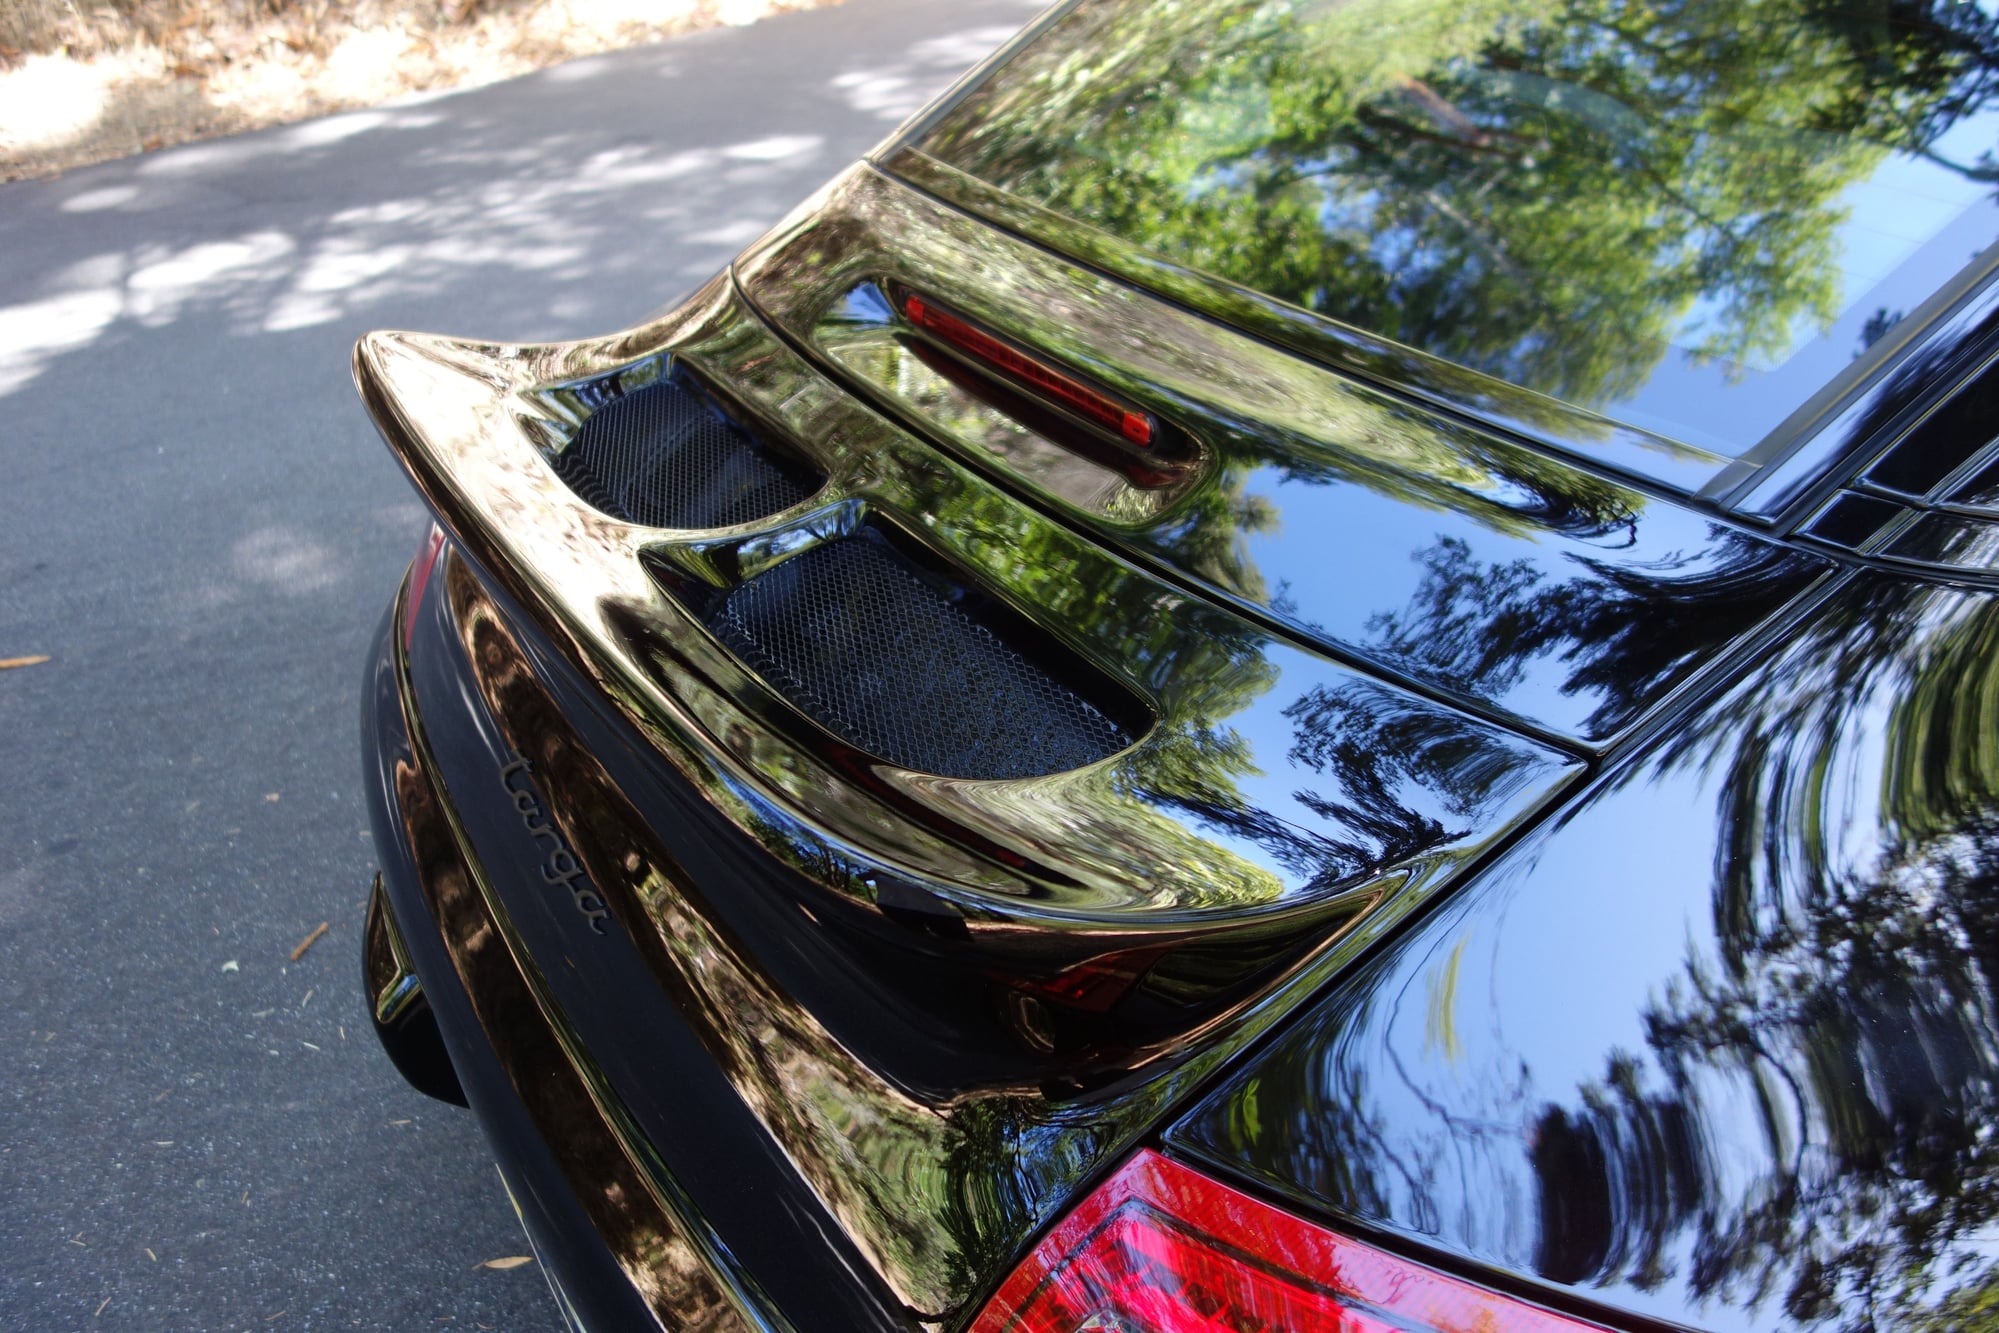
Close-up of the spoiler. You can see a little of the white epoxy. I have since painted over it in black.
I felt that these taillights look a bit bulbous. I really like the look of the narrower, LED taillights on the 997.2 models. In the dark with the taillights on, my taillights look narrower, which gave me the idea to paint the taillight perimeters. I have painted, stripped, and repainted these three times with glossy black paint and clear coat, but I still have not gotten them to come out as shiny as the rest of the body. After painting the taillight perimeters.
A lot of work and custom touches. For the lights get a Wrap shop to put wrap on the areas you want gloss black. It will be identical to the black paint and not look flat or painted on.
I'm a fan of led lights. on our 996 cars.
Post a pic of the led license plate light mods. Those I'm not a fan of license plate lights at all.
I went the opposite and darkened my license plate lights to be barely visible.
The LED brake light cost $85 on eBay and was also easy to install. It looked way to bright, and I hate it when I'm blinded by some of the newer cars' red LED lights. I soldered 40 ohms of resistance in series to bring the brightness down to a reasonable level. If I did it again, I would drop the resistance to 30 ohms to make it a little brighter.
I replaced the two stock incandescent license-plate lights with LED lights from eBay. They were better, but still did not uniformly illuminate the license plate and thought it looked dorky. The new lights also did not stay in place--they'd fall out every day, only to be saved by the license-plate frame.
Here's a shot as dusk with the taillights and LED strip over the license plate turned on. LED taillights and bluish white LED strip over the license plate.
I got the LED strip from Super Bright LEDs for $15. These are waterproof outdoor LED strips with a sticky backing from 3M that connect directly to 12 volts. I trimmed it to fit the area over the license plate. I drilled a small hole upward on the right side and connected the wires to the wiring to the stock license-plate lights.
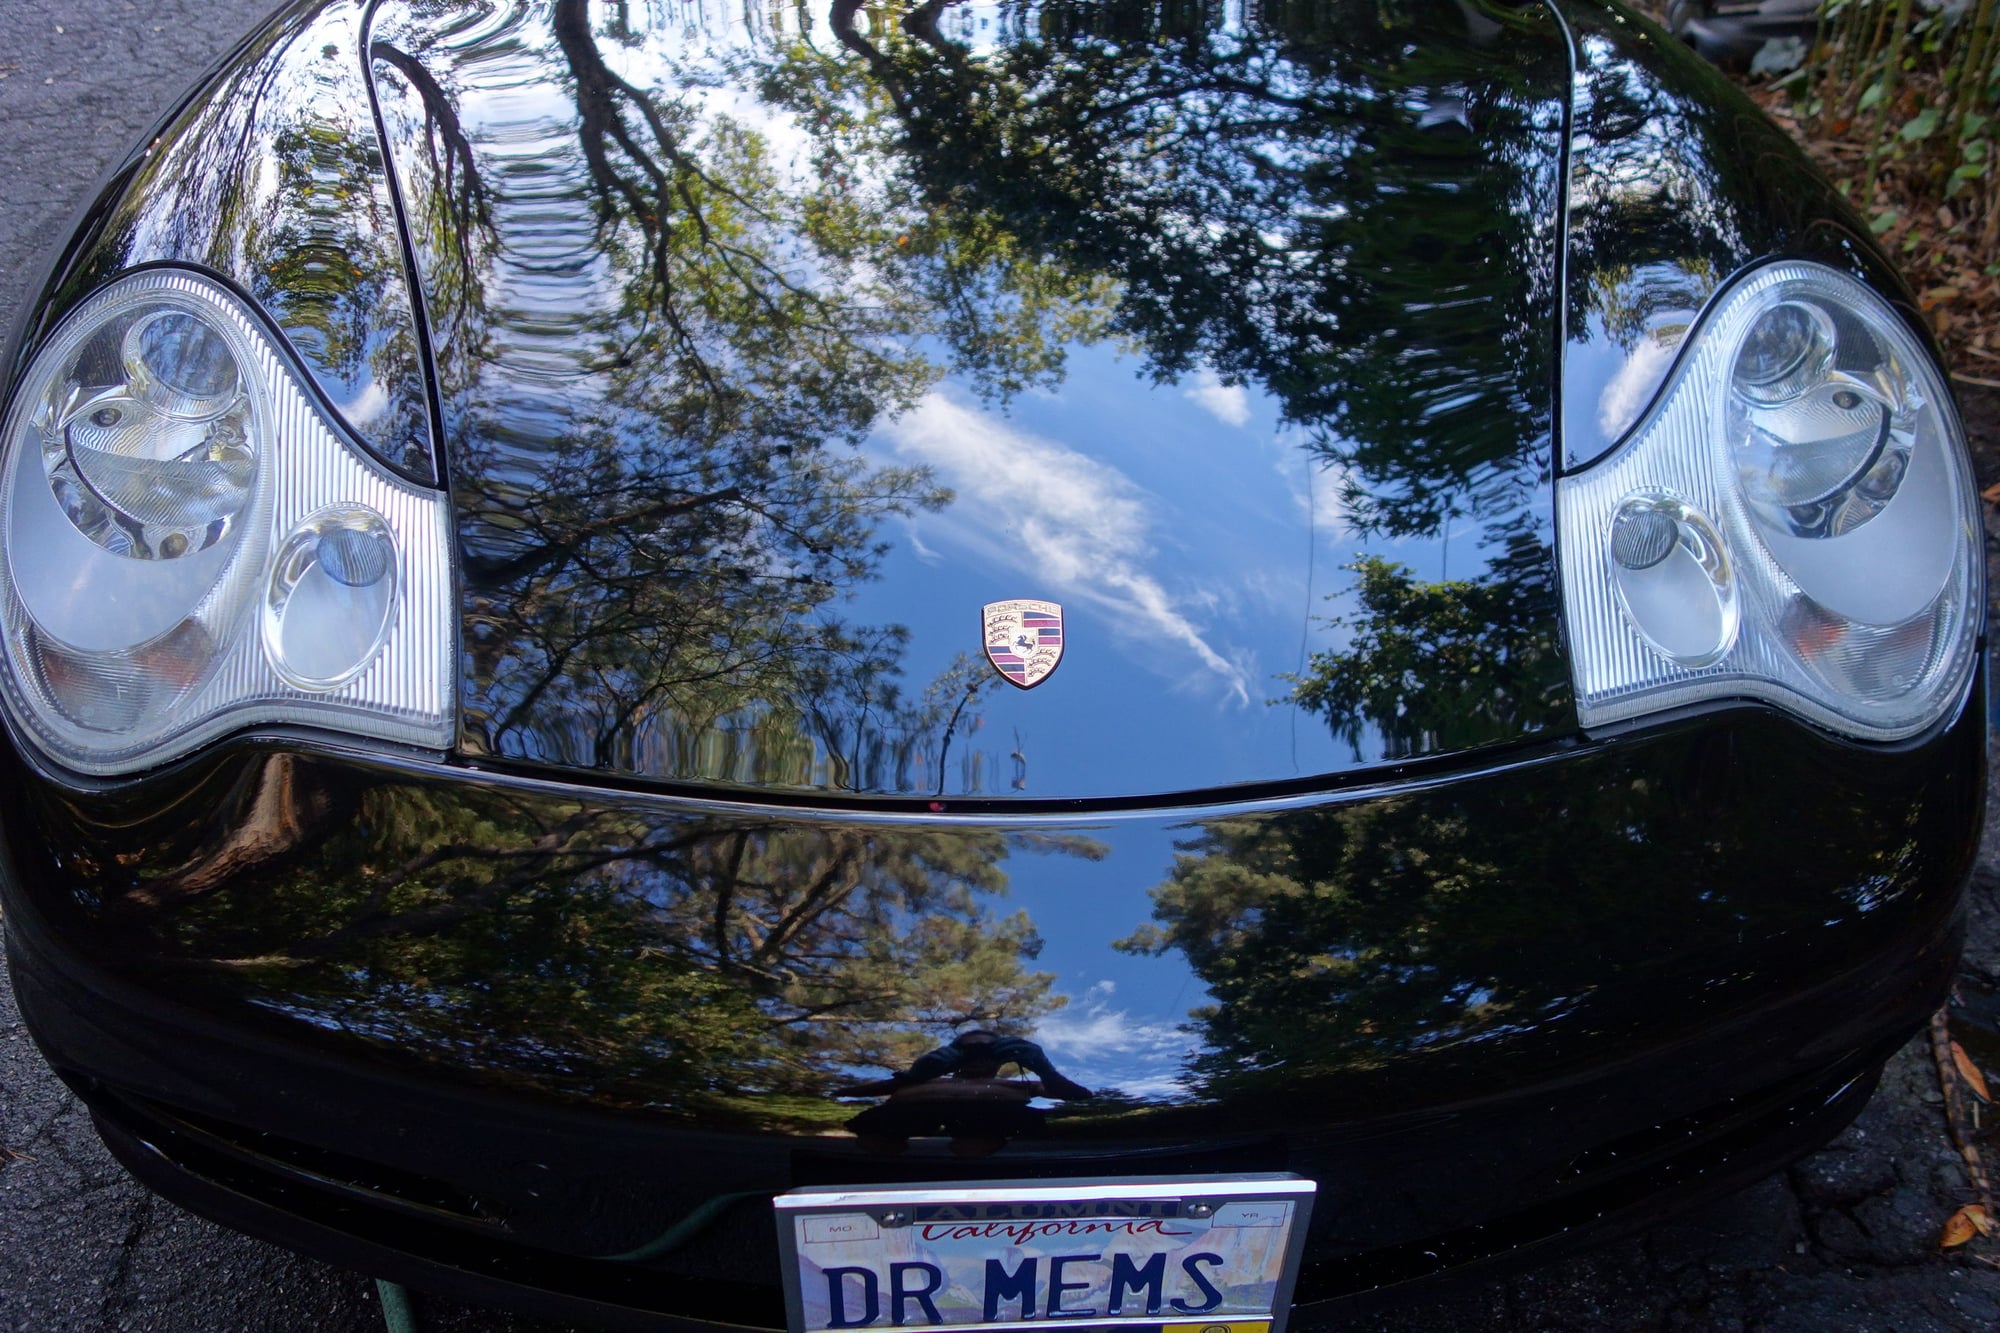
This car is a 2003. When I purchased it in 2010, the headlights were cloudy from their time in the sun. Fortunately, this was just the surface of the plastic. I got the Meguiar's Heavy Duty Headlight Restoration Kit from my local auto parts store. It comes with 1000- and 3000-grit sandpaper that velcros onto a handle, a polishing pad that attaches to a drill, polish, and a paint-on UV protective layer.
When working on the headlights, I removed them from the car to avoid damaging the paint.
After much polishing, the headlights looked the same. After using the 1000-grit sandpaper, they didn't look much better. Finally, I went to 600-grit sandpaper (not in the kit but really should have been), which uniformly ground the surface layer off of the plastic, making it look uniformly cloudy. A short time with the 1000-, then the 3000-grit sandpaper, then a half hour of polishing with a drill made them look like new. Total time, after I figured out to start with 600-grit sandpaper, was about 1.5 hours per headlight. I applied the Meguiar's UV coating, which went on cleanly.
Next, I put a 30-mil-thick protective film, available from Pelican Parts for $68 per pair, over the headlights. This trapped water vapor/condensation under it for several months before it dried out and looked clean.
Here's a photo a year after application. The headlights look water-clear.
The headlights look water-clear and the hood reflects the northern California sky after washing.
The stock front side markers are made of orange plastic and have a single incandescent lamp inside. I replaced them with Depo brand LED lights for $92 for the pair. The Depos are clear, with five LEDs inside produce orange light, making them look much nicer at night.
Here are before and after photos.
Does the ducktail have any effect on how the car feels at high speed?
I have not felt any difference, but it's rare that I get over 90 mph.
The guy at Getty Design said that if I tracked the car, I should install a bigger spoiler/wing. I installed the ducktail mainly because I like the look of the old 1973 911 RSs with ducktails.
I like what you did the with the LED tail lights. The aftermarket "997 style" tail lights look out of place on the 996 to me because the lines of the tail lights don't follow the lines of the LEDs. Your solution takes care of that nicely!

 10-18-2015 | 05:57 PM