When you click on links to various merchants on this site and make a purchase, this can result in this site earning a commission. Affiliate programs and affiliations include, but are not limited to, the eBay Partner Network.
Could not get tank in position with bracket installed. So with bracket off slipped tank in, and in this exact position was able to get the two bolts started on the bracket (small piece of duct tape holding bolt to a socket which made a handle). After bracket tightened down not easy to get tank on bracket but eventually it slid in place.
Thanks for the great tip! I struggled to the point of total frustration so I had to walk away for a day. Then I saw your tip on removing the bracket and it worked! A bit fiddly reinstalling it, but done and the new tank is in! Woo Hoo! Thanks!
Just out of curiosity, why has nobody put reflective heatshield tape on the bottom to prolong the tank from degrading from heat? It's pretty thin, can be shaped pretty wwell, and does a good job against radiant heat.... What am I missing?
But why wouldn�t people do it when replacing with a new tank?
maybe because the temp if the engine conpartment is less then tne coolant temp. All that stuff will do is insulate the the interior and increase the cooking of the plastic.
Rotating ratchet tool
I just completed this task myself and man it is a MAJOR PIA, if I had my time over again, I would probably pay Porsche to do it. It took me around 3 hours to get the old tank out (had to lower the engine as suggested in here and other YouTube videos) but it took me about 13 hours to get the new tank in, it really was frustrating but such exhilaration when it finally snaps into place. Here are some things that worked for me and might help others silly enough to take on this task. I am not going to repeat everything that has already been advised here and elsewhere, just some other things to try. You can’t get the tank in with the bracket in place, at least I couldn’t on my 2001 996 Cab. Remove the bracket and the tank goes in quite easily, (you do need to remove both fuel line brass nuts, it makes the job much easier (don’t worry fuel does not rush out). With the tank in place, there is very little room to get the bracket in, but it can be done, push the tank back and down as far as you can get it. Before putting the bracket in, put the bolts into their holes, poking up through the top of the bracket and then stretch some electrician tape over the tops of the bolts (make sure the points of the bolts push through the tape and secure the tape to the sides of the bracket, this helps hold the bolts in place when it comes to tightening them (if you don’t do this be prepared for the bolts to fall out and get lodged in the engine bay somewhere and you will spend half an hour or more looking for them (and swearing frequently) and then have to have a long magnetic retrieval tool to fish them out). Once you have got the bracket in place use a 10mm socket on a short extension bar and start tightening the bolts by hand, it is tight and difficult but can be done, once you have the bracket loosely in place, you need a small ratchet rotator ( a ratchet that turns by turning the handle) as there is not enough room to move a normal ratchet back and forth. See photo attached. Once you have the tank in the engine bay and the bracket attached, you are nearly home, just keep playing with moving the tank around, I rotated it down towards the engine) until you finally get it in place. You will certainly feel a sense of achievement once you do, but for me in future I think this is a job I would pay someone else to do. Hope this helps
Haven't done the job. But would it be worth just cutting the bracket for removal ?
I was also reminded of working on a 1967 chrysler 300 where you could stand in the engine compartment...
Yes that is what I would do if I had my time over again, the bracket is only about $45, so it should save you about 2 hours of work trying to get it out past the bracket, just use a Dremel on it and cut off all the lower bits and the tank should come out easy. Make sure you have ordered the new one first.
I did this on a 997 once for a friend's car and after that, I promised myself when the next time comes, the engine would be out. My wife's 997 reached 120,000 miles last week and the engine came out for about $4,000 worth of parts to be replaced. One such part was the coolant tank even though the old one has not broken ... yet.
The engine came out in about 5 hours.
The engine went back in about 5 hours.
The coolant tank replacement took exactly 5 minutes.
Between the engine out and engine in, there were water pump, thermostat, spark plugs, ignition coils, AOS, starter, alternator, belt and all pulleys, all were replaced. And the cylinders were all scoped out from the top.
So taking the engine out just to replace the coolant tank may be over the top but if you combine it with a bunch of other things to be done, it actually pays for itself.
Yelcab I should have considered this, as I recently had to replace the alternator and decided to replace the starter at the same time and needed to replace teh coolant tank and now have decided to replace the water pump and thermostat as well, even though there is nothing wrong with them, but in reading posts on the forums, it will eventually fail and I am spending over AUD$300 on Porsche coolant, so may as well do it now. ( I have never taken an engine out of a car though)
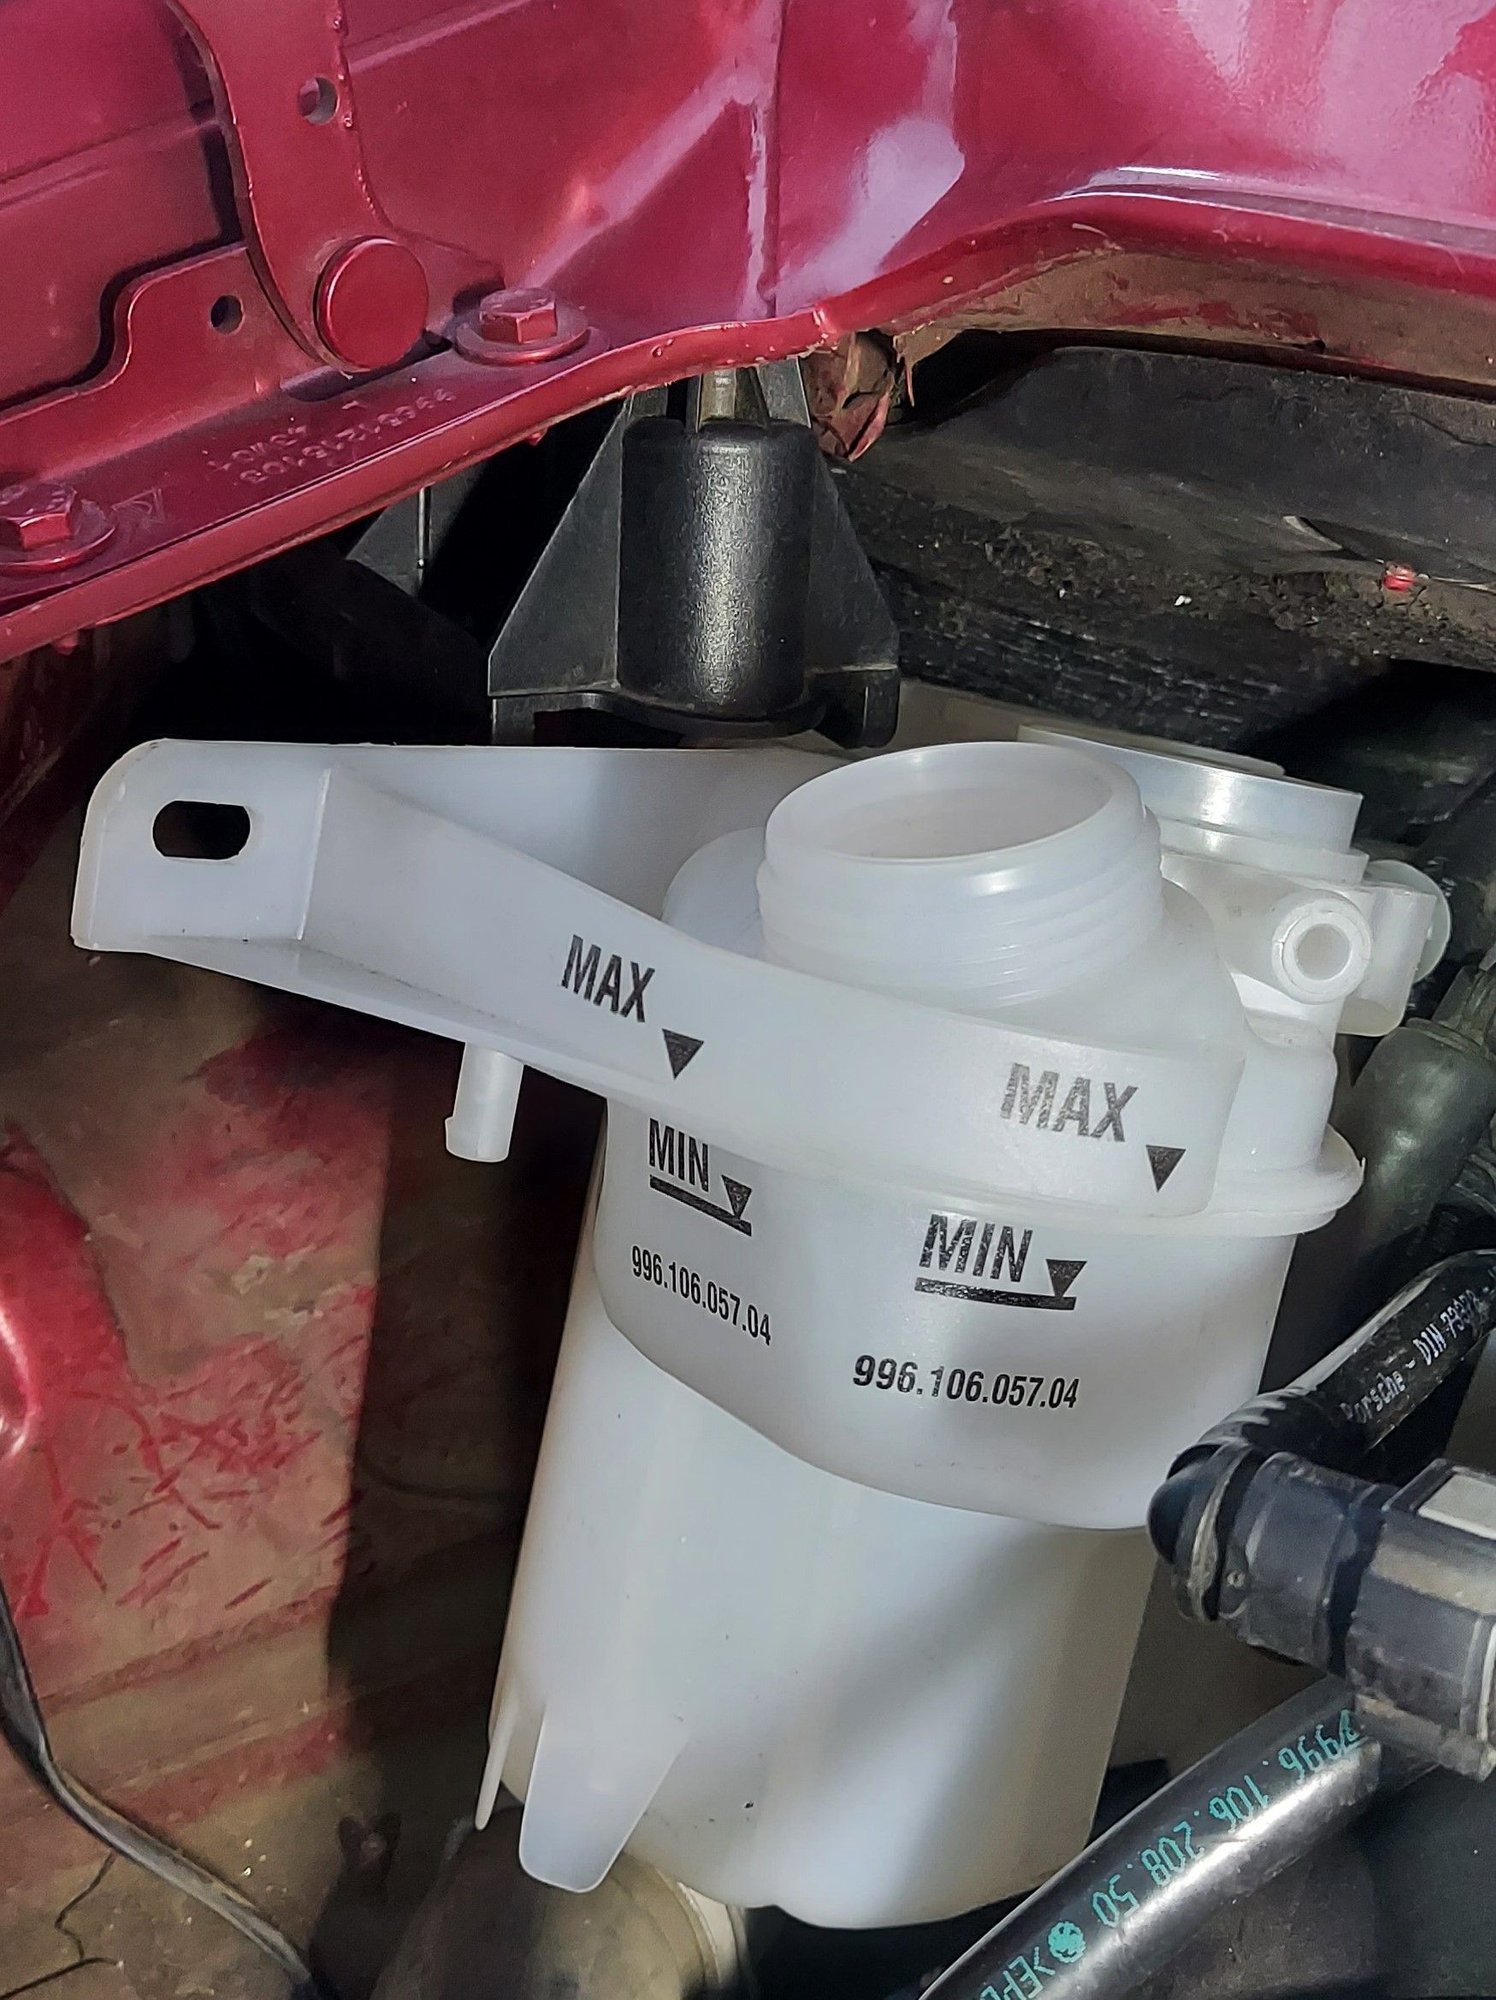
TLDR: Take your time and be gentle removing the tank so you don't break the support bracket. It is very thin in parts and mine became brittle over the years... Don't be like me.
just have to vent. stupidly engineered POS plastic dumb *** bracket design. My brittle plastic bracket snapped when I was pulling the tank out. This extremely useful and fragile POS part is on back order so i get to sit and wait around a few weeks for a ****ty engineered piece of plastic to finish this stupid job that should have took an hour. The screws could literally go on so many different ways but no they have to go straight up so you cannot remove or replace the bracket with the tank in place. The engineer who designed this is just a flat out idiot. I hope someone takes a big **** in his fruit salad. this is the first time working on my 996 that I have been steaming mad. worst design ever. thanks for reading.
TLDR: Take your time and be gentle removing the tank so you don't break the support bracket. It is very thin in parts and mine became brittle over the years... Don't be like me.
just have to vent. stupidly engineered POS plastic dumb *** bracket design. My brittle plastic bracket snapped when I was pulling the tank out. This extremely useful and fragile POS part is on back order so i get to sit and wait around a few weeks for a ****ty engineered piece of plastic to finish this stupid job that should have took an hour. A blind toddler would design a better bracket than this. The screws could literally go on so many different ways but no they have to go straight up so you cannot remove or replace the bracket with the tank in place. The engineer who designed this is just a flat out idiot. I hope someone takes a big **** in his fruit salad. this is the first time working on my 996 that I have been steaming mad. worst design ever. thanks for reading.
Yeah I'm feeling much better haha. I just hate the feeling a leaving a job half done. But I got a lot accomplished today in hind sight. And it was a good day working in the garage. Can't complain in the end.
 01-29-2022, 03:03 PM