


CV Boot Clamps Question

Thread Starter
Rennlist Member
Joined: Aug 2005
Posts: 661
Likes: 0
From: Bettendorf, IA
Sorry for the X-post from the Boxster forum, but its a shared 996 part and theres 10 times more visitor traffic here in 996 land.
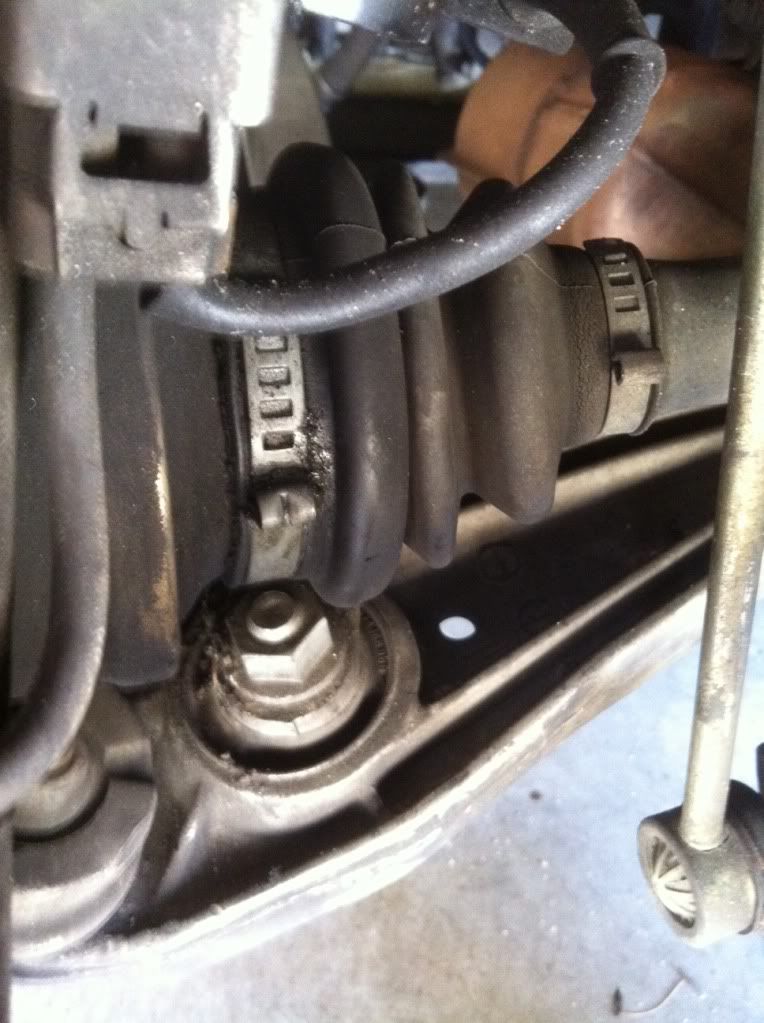
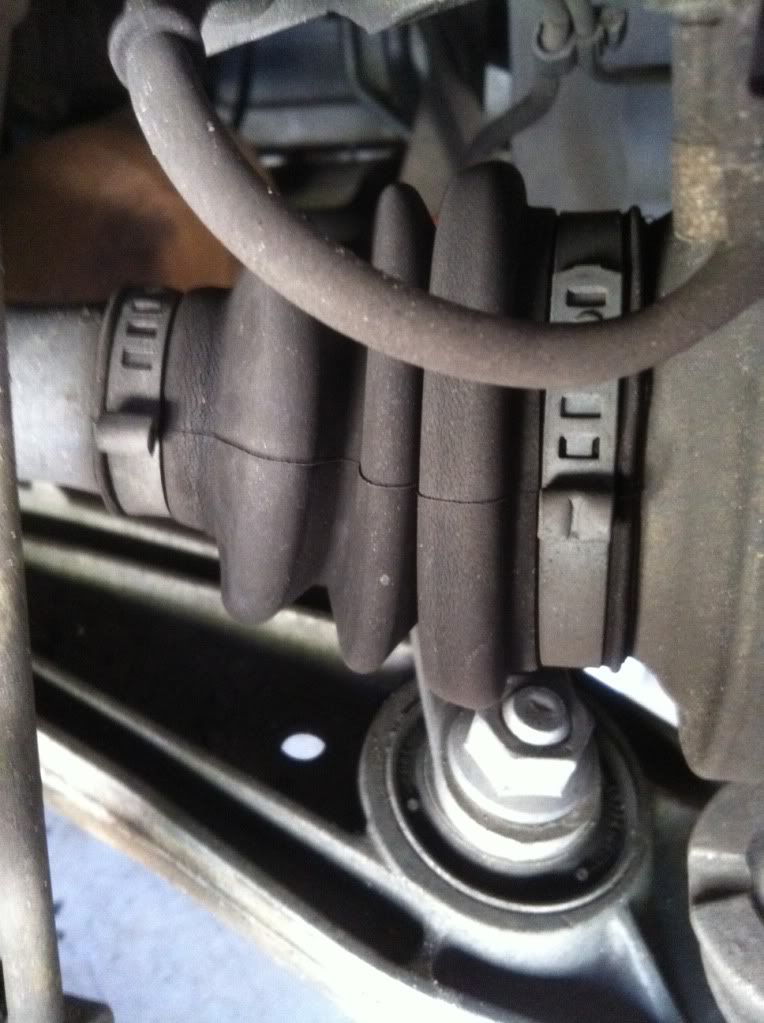
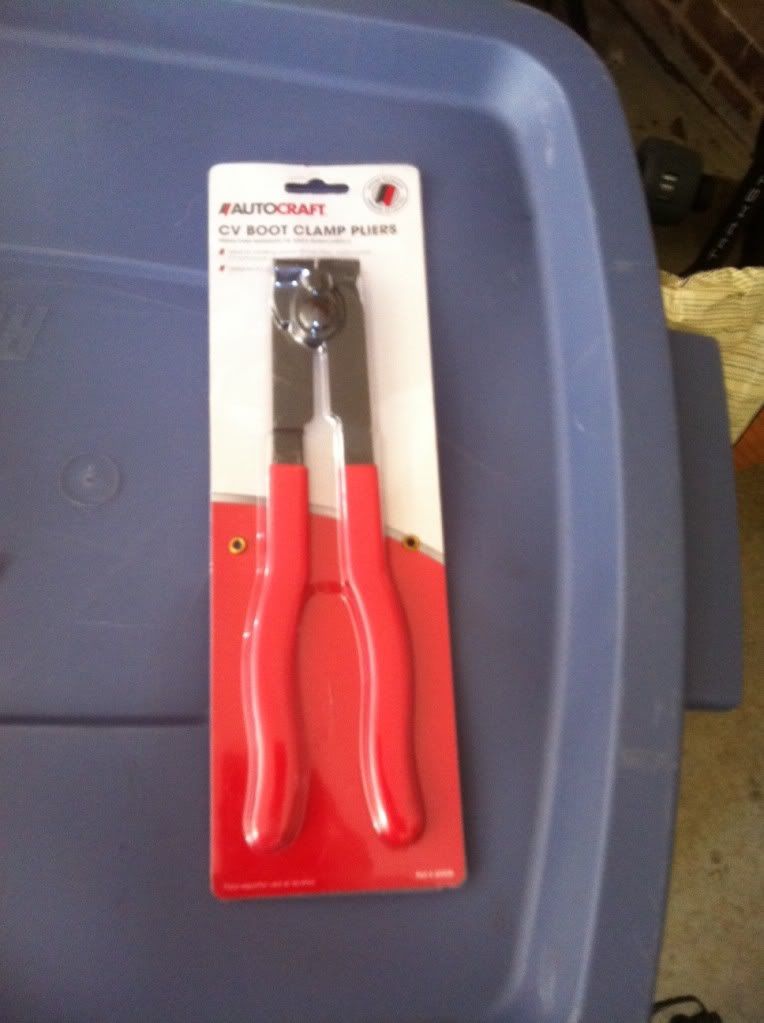
While changing brake pads and disks this weekend, I found one of my hub-end CV boots leaking at the outside clamp and slinging grease under the car. I've got the correct CV clamp pliers and grease but have never removed or installed this style clamp before.
Is this clamp re-useable, they appear to be one-time use due to crimp. ie: remove clamp, add grease to CV joint, re-install clamp? I've inspected all 4 boots and they're all still in one piece. The picture below shows that the grease appears to be coming from the clamp connection point. Could the rubber have gotten pinched and split?
Also, what's the best method to remove the clamp without damaging the rubber boot?
I plan to order a new clamp today, but would like to fix now if at all possible since the car is still up in the air with brake disk off.
Thanks!
Rennlist Member

Joined: May 2005
Posts: 2,333
Likes: 248
I'd be surprised if your boot isn't split under the clamp. Hopefully it isn't since replacing the clamp is pretty easy while replacing the boot requires quite a bit more work.
I've never tried to remove the clamp without damaging the boot, but to remove them in the past I slid a flathead screwdriver into the raised portion (currently crimped) and rotated it to spread the crimp back open. Once you have the tension off of it should be able to pull the tab out of engagement pretty easily.
-Shawn
Racer

Joined: Jan 2009
Posts: 300
Likes: 18
From: Summerland, BC
I'd be surprised if replacing the band solves the problem. I think you should go the whole route and change the boots. They look like the rubber is starting to deteriorate. In the past I've used a pair of diagonal cutters (wire cutters) to cut off the crimp. Then you can just pull off the band.
Rennlist Member
Joined: May 2005
Posts: 2,333
Likes: 248
Anything in particular? In general it's not a terribly difficult job. It does require borrowing a few tools from autozone/Advance but no big deal. The most difficult part in my opinion is A) removing the inner joint from the shaft and B) reassembly the ball joint. A is no big deal if you have access to a press. B is no big deal if you've done it before, but since it was my first time it took more than a few tries to get it back together properly. I actually have a write up I made for myself when I did the first one. When the second one went bad I had my local indy take care of it because I was short on time before a DE.
Let me know if you need more information.
-S.
Let me know if you need more information.
-S.
Nordschleife Master
Joined: Nov 2008
Posts: 5,815
Likes: 59
From: Mooresville, IN (Life Long Cheesehead)
My main question is........does the caliper, rotor, wheel carrier and more need to come off? Sounds like no. Please forward a link of your write up. I think I'm tackling it soon.
Trending Topics
Rennlist Member
Joined: May 2005
Posts: 2,333
Likes: 248
http://www.pelicanparts.com/techarti...nt_-_Boots.htm
S.
Rennlist Stories
The Best Porsche Posts for Porsche Enthusiasts

Porsche Reveals Coupe Variant of the Electric Cayenne With a Fresh Look
Verdad Gallardo
10 Porsche Colors That Have More Personality Than Most People
Verdad Gallardo
Guntherwerks' Final Speedster Creation Is the Ultimate Porsche Restomod
Verdad Gallardo
10 Reasons I Hate Going to the Porsche Dealership (& the 1 Reason I Stay)
Joe Kucinski
Porsche Shakes Up The N�rburgring Lap Record Table Once Again
Verdad Gallardo
6 Ways the Porsche 911 GT3 S/C Redefines Performance
Joe Kucinski
10 Wildest Homologation Specials Porsche Ever Sold
Verdad Gallardo
Super Rare RUF BTR III Comes Out of Hibernation, Looking For a New Home
Verdad Gallardo
10 Porsche Opinions That Can Start a Fight
Joe Kucinski
Thread Starter
Rennlist Member
Joined: Aug 2005
Posts: 661
Likes: 0
From: Bettendorf, IA
Thanks for the feedback guys!
I've figured new boots are in my future but will replace the band and pack some new grease to keep from contaminating the joint in the interim.
I've figured new boots are in my future but will replace the band and pack some new grease to keep from contaminating the joint in the interim.
Rennlist Member
Joined: May 2005
Posts: 2,333
Likes: 248
Here's the write up I mentioned:
Tools:
10 mm socket and flat screw driver for under panel
16 mm socket for cross member 48 ft-lbs
13 mm for tank strap 17 ft-lbs
6 mm allen for screws to diff 30 ft-lbs
32 mm axle nut socket OEM27051
CV boot pliers OEM27055
CV clamp tool OEM27057
Slide hammer flange OEM27032
Flange Axle FWD puller OEM27037
2/3 Jaw Gear Puller 10� 5-ton OEM27078
�� socket for puller
Snap ring pliers
Hammer
Wood
Parts:
Wheel hub nuts 2 999-084-634-09 M22x1.5 (340 ft-lbs)
Mobil Fully Synthetic Grease
Boots: 99634929300 Inner
99634929100 Outer
Clamps Inner Small 99634925703
Inner Big 99734995700
Outer Small 99634925701
Outer Big 99634925700
Rennlist Member
Joined: May 2005
Posts: 2,333
Likes: 248
1. Remove center caps from wheels using bent clothes hanger through the hole in the cap.
2. Soak the hub nut with PB Blaster if necessary to loosen rust/crud
3. Put the transmission in neutral, set the emergency brake, and chock the front wheels.
4. Break the hub nut free using a two foot breaker bar and the 32 mm axle nut. A standard socket is too short to clear the axle. Remove the nut fully.
5. Loosen the lug bolts.
6. Jack the front of the car up and place jackstands under the front jacking points.
7. Remove the lug bolts and the wheel.
8. Remove the central front underbody panel by removing the two nuts (10 mm socket) and the metal clips (flat screwdriver).
9. Remove the diagonal brace that is in the way of your half shaft using the 16 mm socket.
10. Remove the tank strap that is in the way of your half shaft using the 13 mm socket and an extension.
11. Apply PB blaster to the six cap head screws holding the half shaft to the differential.
12. Loosen and remove the six cap head screws holding the half shaft to the differential using the 6mm allen wrench. Hold the opposite wheel to prevent the rotation of the differential.
13. Move the freed end of the shaft from the differential and move it as far out of the way as possible.
14. Place a floor jack under the control arm with a block of wood as a spacer. Jack the hub up until the body of the car is well free of the jack stand and the half shaft has room to be angled out of the car.
15. Place the slide hammer flange (27032) on the hub with the lug bolts and thread the bolt from the axle puller (27037). Using a 3/4� socket drive the axle out of the hub.
16. Guide the freed half shaft out of the car.
17. Lower the hub and replace the car onto the jack stands.
18. Mount the half shaft in a vise.
19. Remove the clamps and boots.
20. Using the block of wood and a hammer gently tap the brass end cap off the inner joint.
21. Remove the c-clip on the inner joint using snap-ring pliers.
22. Clean as much grease from the joint as possible.
23. If possible remove the inner joint by hand or with a hammer (direct the hammer blows to the inner race using a soft material like copper or wood).
24. If you can�t remove the inner joint use the wood to gently remove the inner joints other brass cap.
25. Use the puller to remove the inner joint. In a worst case have a machine shop press the joint off the axle. Mark the three components of the joint so that you can align them in the same orientation (Chamfered side of the cage faces the smooth side of the inner race and the inside of the shaft/differential)
26. Clean the inner joint components thoroughly (solvent, soapy water, dry thoroughly).
27. Reassemble the joint: http://www.benplace.com/cv_joint_maintenance.htm
28. Have the joint facing you just like the picture. Have the inner race resting on the table. Hold the cage just above the inner race and the outer race just a little higher so that the ***** fit into the cage and the out race. The ***** are now in the cage and out race but above the surface of the inner race resting in the grooves. Now guide the out race and cage down onto the table and the ***** will fall into place.
29. Clean the outer joint thoroughly and repack it with grease. Push the grease into the joint until no more will fit.
30. If you removed the inner brass cap use a vise to gently press it back onto the inner joint. Work your way around the circumference and use bolts in the holes to ensure alignment.
31. Slide a new outer boot onto the shaft. (make sure it�s facing the right way!)
32. Slide a new inner boot onto the shaft. (make sure it�s facing the right way!)
33. Put the inner joint with the brass cap back on the shaft. Use a socket and a hammer to get the joint all the way back on the shaft.
34. Put a new c-clip on the shaft
35. Pack the inner joint with grease until you see the grease squirt through to the other side of the joint.
36. Replace the brass cap using the vise to press it back onto the joint. Make sure it�s even and gentle.
37. Slide the boots onto the joints and secure them with the appropriate clamps using the correct pliers. Make sure the bent ears are in between the bolt holds on the joints so they don�t block the holes.
38. Place a floor jack under the control arm with a block of wood as a spacer. Jack the hub up until the body of the car is well free of the jack stand and the half shaft has room to be angled into the car.
39. Reinstall the half shaft into the car with the axle guided into the hub.
40. Use a new axle nut to draw the axle into the hub (hold the rotor to prevent rotation). Tighten as much as possible by hand until secure but do not attempt to torque it down.
41. Clean the six cap head bolts and apply blue loctite to the threads prior to reinstalling them.
42. Torque the cap head bolts down to 30 ft-lbs. Extensions (~18�) required for the upper bolts.
43. Lower the hub and the car so that it�s back on the jackstand.
44. Reinstall the tank strap with the 13 mm socket to 17 ft-lbs
45. Reinstall the diagonal brace with the 16 mm socket to 48 ft-lbs
46. Replace the under body shield with the metal clips and the two 10mm nuts.
47. Replace the wheel on the hub and install the lug bolts without torquing them fully.
48. Lower the car off the jackstands.
49. Torque the lug bolts to 96 fl-lbs
50. Torque the axle nut to 340 ft-lbs.
51. Replace the center cap
52. Done!
Rennlist Member
Joined: May 2005
Posts: 2,333
Likes: 248
Sorry I don't have more pictures to go with the text. I borrowed a few from other websites for my own purposes but since I don't have their permission I'm not going to post them up. While trying to track down references I found a webpage that did a good job of breaking the process down by "Pedro". When I just searched for him I turned up this site which has what seems to be a very nice write up with pictures. I'm sure that between these posts and this site you shouldn't have any problem. Let me know if you have any questions:
http://memories.ppbb.com/scgi-bin/bo...s;read=1365884
-Shawn
http://memories.ppbb.com/scgi-bin/bo...s;read=1365884
-Shawn
Thread Starter
Rennlist Member
Joined: Aug 2005
Posts: 661
Likes: 0
From: Bettendorf, IA
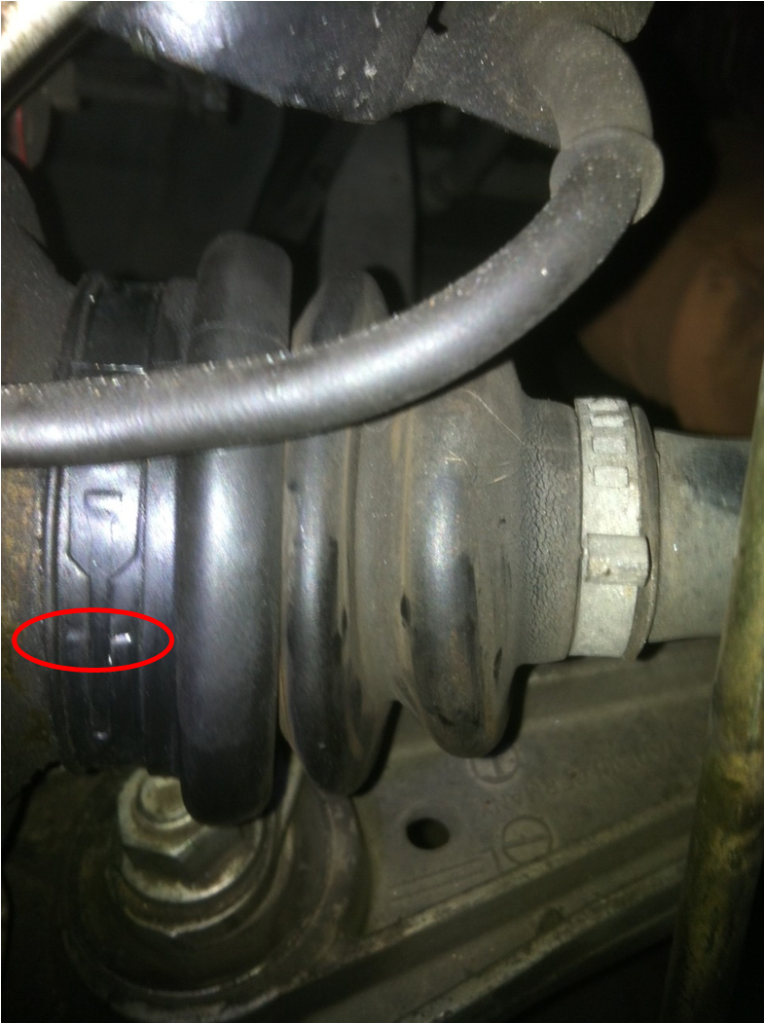
So I picked up a new clamp for $3 tonight and removed the leaky one to check for a split. Turns out the boot was cut under the crimp (see photo) from the last shop to replace the boots under my car's previous owner.
Oh well. Installed the new clamp to keep me on the road for a few days and ordering 2 new boot kits w/ clamps. Isn't it funny how one DIY only seems to lead you to finding your next project? Time to start reading up on axle removal!
Thanks again guys.
Oh well. Installed the new clamp to keep me on the road for a few days and ordering 2 new boot kits w/ clamps. Isn't it funny how one DIY only seems to lead you to finding your next project? Time to start reading up on axle removal!
Thanks again guys.