Addicted... to customizing, show your stuff!

 03-07-2010, 12:13 AM
#17
Pro
Thread Starter
Join Date: Oct 2009
Location: Montreal, LA, Amsterdam.
Posts: 552
Likes: 0
Received 1 Like
on
1 Post
WOWWWW!!! that looks ehhhr well amazing!
It's hypnotic... shinyyyy.
Is this done with cloth and clear coated the hell out of or is it actual carbon fiber with resin?
Did you do it yourself or have it done or did you buy it as a package and install after if so where can one get this and how much?
Come on don't be a tease, spill the beans!
I think you're missing the point... 
It's like has been stated before, customizing is purely for personal pleasure and to personal tastes.
You're not trying to make it look like anything else that's out there, rather the opposite, best of many different types of models as an expression of your own personal style.
Many custom shops will make one-offs for high end rides making them even more high end.
Think of all the fabricators out there like Techart, Gemballa etc, etc. I dear say a brand new 911 with a full Techart GT street body kit is a sight to behold and is not just a 911 trying to look like something else rather enhanced to such a point it's at the pinnacle of it's potential of personal expression.
It may not be to everyones tastes but everyone who looks at a customized Porsche knows that someone spend a great deal of time, passion and money in the ultimate expression in their love for that car.
That said, it is something you purely do for yourself because every penny spend you'll never see back...but what a ride!
Cheers,
Sid.
It's hypnotic... shinyyyy.
Is this done with cloth and clear coated the hell out of or is it actual carbon fiber with resin?
Did you do it yourself or have it done or did you buy it as a package and install after if so where can one get this and how much?
Come on don't be a tease, spill the beans!
It's like has been stated before, customizing is purely for personal pleasure and to personal tastes.
You're not trying to make it look like anything else that's out there, rather the opposite, best of many different types of models as an expression of your own personal style.
Many custom shops will make one-offs for high end rides making them even more high end.
Think of all the fabricators out there like Techart, Gemballa etc, etc. I dear say a brand new 911 with a full Techart GT street body kit is a sight to behold and is not just a 911 trying to look like something else rather enhanced to such a point it's at the pinnacle of it's potential of personal expression.
It may not be to everyones tastes but everyone who looks at a customized Porsche knows that someone spend a great deal of time, passion and money in the ultimate expression in their love for that car.
That said, it is something you purely do for yourself because every penny spend you'll never see back...but what a ride!
Cheers,
Sid.
 03-07-2010, 01:43 AM
#19
Pro
Thread Starter
Join Date: Oct 2009
Location: Montreal, LA, Amsterdam.
Posts: 552
Likes: 0
Received 1 Like
on
1 Post
OK since the thread is now officially on it's way I would like it to be all things customizing (not just interiors) hence this post on customizing taillight.
I started another thread on this and got a lot of PM's on how it's done but realized really it should part of this thread so here it goes.
I was looking for led taillight for my C4S and have not been able to find any so I decided to black them out but with a clear cutout similar to the clear lens you see on the 2010 997 turbo LED's.
It took me a few tries to get it right.
First off make sure you use pinstripe automotive painters tape because the regular thin tape I bought from the hardware store left adhesion on the lens (right at the paint line) and I could not get it of without inevitably damaging the paint!
However if you do screw up you can just wet sand everything and start over.
1. wet sand the entire lens with 1500 grid.
2. tape off the area you want to remain clear (in my case it's about 60% of the upper lens).
3. spay on 2 fine coats of VHT nite shade.
4. when dry (about 1 hour) wet sand any imperfections or in my case dust!
5. apply 2 thick coats of night shade.
6. hold the taillight unit in your hands and turn it every minute or so (to prevent drips) until it's congealed enough so it stays put (about 2 to 3 min.).
7. after about 2 to 3 hours remove the tape carefully but do not touch the painted surface, it's still very soft!
8. let it dry for 24 hours, then wet sand it LIGHTLY and spay 2 light coats of Dupont acrylic clear-coat.
9. spay 2 thick coats of clear coat (same as step 6) this dries relatively fast (60 to 90 sec.).
10 wait 2 days and finish it of with a glazing compound and or wax.
Now that I've had a few beers
 lets address the reduced light output.
there are 4 compartments/sockets in the bottom (red part) of the housing (see picture) please note that the picture does not give an accurate reflection of the actual brightness, in real life they are at least as bright as stock (with the fog lights that is)!.
1. tail light/brake light 21/5 W.
2. tail light 5 W.
3. fog light 21 W.
4. side marker light 5 W.
Normally # 1. 2. and 3. are the nighttime lights.
Needless to say the brightness of these lights have been greatly reduced.
To correct this I used the dormant fog light.
The fog light (which encompass almost the entire corner of the tail light housing) is only functional on the drivers side, the passenger side has a dummy bulb that doesn't actually light up... I replaced this with a functional bulb.
Now that both fog light were functional I had them wired up to the #2 socket.
This means that instead of having the normal combined out put of 15 Watt it is now a more than double 36 Watts.
Also, since the fog light compartment is about 40% of the total surface (of the red lens area) not just has the wattage output been doubled but also the surface which is actually lit!
And since the wiring and fuses are not drawing any more power than they were designed for there are no electrical or fault light issues.
Now time will tell if the cops look at it the same way... so far so good.
OK I hope that answered all the questions I got in your PM's 'cause that was waaaay more typing than this dude's used to.
For anyone trying it, let us know how it worked out!
Who's next?
Cheers guys!
Sid.
I started another thread on this and got a lot of PM's on how it's done but realized really it should part of this thread so here it goes.
I was looking for led taillight for my C4S and have not been able to find any so I decided to black them out but with a clear cutout similar to the clear lens you see on the 2010 997 turbo LED's.
It took me a few tries to get it right.
First off make sure you use pinstripe automotive painters tape because the regular thin tape I bought from the hardware store left adhesion on the lens (right at the paint line) and I could not get it of without inevitably damaging the paint!
However if you do screw up you can just wet sand everything and start over.
1. wet sand the entire lens with 1500 grid.
2. tape off the area you want to remain clear (in my case it's about 60% of the upper lens).
3. spay on 2 fine coats of VHT nite shade.
4. when dry (about 1 hour) wet sand any imperfections or in my case dust!
5. apply 2 thick coats of night shade.
6. hold the taillight unit in your hands and turn it every minute or so (to prevent drips) until it's congealed enough so it stays put (about 2 to 3 min.).
7. after about 2 to 3 hours remove the tape carefully but do not touch the painted surface, it's still very soft!
8. let it dry for 24 hours, then wet sand it LIGHTLY and spay 2 light coats of Dupont acrylic clear-coat.
9. spay 2 thick coats of clear coat (same as step 6) this dries relatively fast (60 to 90 sec.).
10 wait 2 days and finish it of with a glazing compound and or wax.
Now that I've had a few beers
lets address the reduced light output.there are 4 compartments/sockets in the bottom (red part) of the housing (see picture) please note that the picture does not give an accurate reflection of the actual brightness, in real life they are at least as bright as stock (with the fog lights that is)!.
1. tail light/brake light 21/5 W.
2. tail light 5 W.
3. fog light 21 W.
4. side marker light 5 W.
Normally # 1. 2. and 3. are the nighttime lights.
Needless to say the brightness of these lights have been greatly reduced.
To correct this I used the dormant fog light.
The fog light (which encompass almost the entire corner of the tail light housing) is only functional on the drivers side, the passenger side has a dummy bulb that doesn't actually light up... I replaced this with a functional bulb.
Now that both fog light were functional I had them wired up to the #2 socket.
This means that instead of having the normal combined out put of 15 Watt it is now a more than double 36 Watts.
Also, since the fog light compartment is about 40% of the total surface (of the red lens area) not just has the wattage output been doubled but also the surface which is actually lit!
And since the wiring and fuses are not drawing any more power than they were designed for there are no electrical or fault light issues.
Now time will tell if the cops look at it the same way... so far so good.
OK I hope that answered all the questions I got in your PM's 'cause that was waaaay more typing than this dude's used to.
For anyone trying it, let us know how it worked out!
Who's next?
Cheers guys!
Sid.
Last edited by Psycho Sid; 03-07-2010 at 02:50 AM.
03-07-2010, 10:16 AM
#20

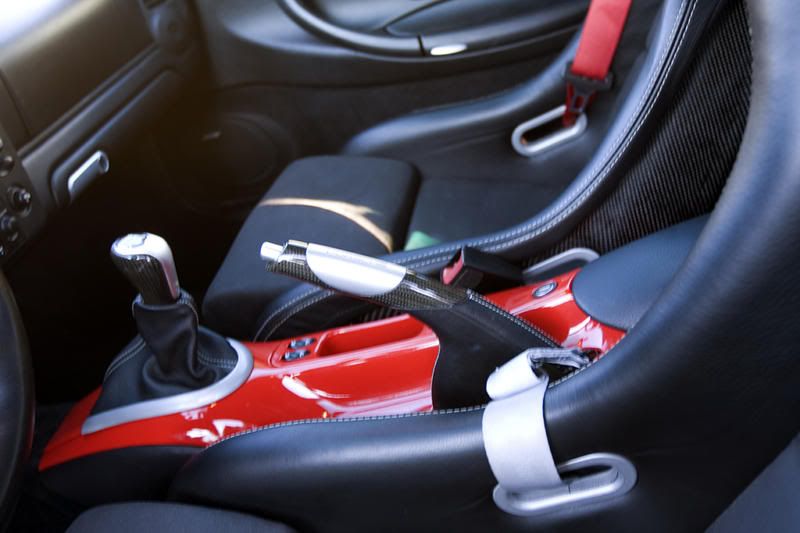
All mine is carbon fiber. I bought all of the factory pieces available. Plus I had all the other pieces custom made. The origional part is stripped down and covered w/CF then vacuumed down. Then clear coated. Its how the factory pieces are done.
 03-07-2010, 10:12 PM
#24
Pro
Thread Starter
Join Date: Oct 2009
Location: Montreal, LA, Amsterdam.
Posts: 552
Likes: 0
Received 1 Like
on
1 Post
NICCCCCE !!!
I have to be honest I really wasn't into the black rim thing but I've got to tell ya I'm changing my mind in a big way 'cause those look really really good!
I want, I want, I want...
I have a feeling starting this tread is going to get expensive...
Cheers!
Sid.
I have to be honest I really wasn't into the black rim thing but I've got to tell ya I'm changing my mind in a big way 'cause those look really really good!
I want, I want, I want...
I have a feeling starting this tread is going to get expensive...
Cheers!
Sid.
03-08-2010, 02:29 PM
#25
Pro
Thread Starter
Join Date: Oct 2009
Location: Montreal, LA, Amsterdam.
Posts: 552
Likes: 0
Received 1 Like
on
1 Post
Hey ArneeA,
I've gotten a few others that have asked me about it.
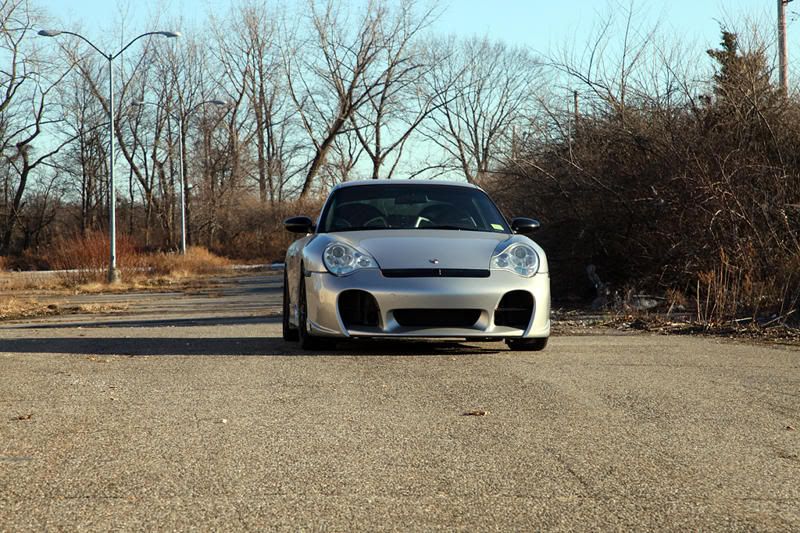
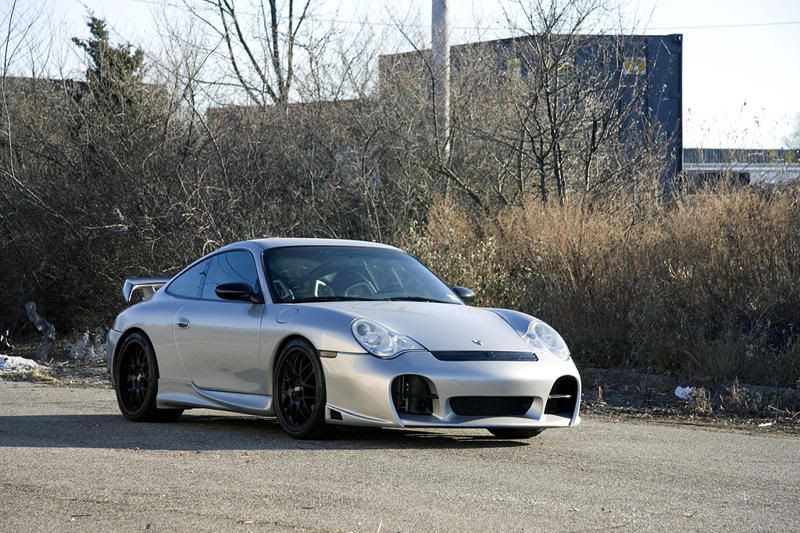
For those of you who are thinking of getting this '08 997 GT2 modified bumper there's a version for the 996 MK1 and MK11 you can get it at wicked motor works http://www.wickedmotorworks.com/contact/
My bumper (just the bumper) cost $3000,- but it's now been reduced to less than $ 2k... go figure!!
So that alone is already a plus!
However there's a few things I want to give you guys a heads up on.
There's a considerable amount of detail body/fiber/putty work to be done to the tow hook plug section, the part where the LED lights hook up to the bumper and the corner where the headlight, fender and bumper meet (the gap there was quite big).
Also keep in mind that on top of the cost of the bumper you still have to pay for the grills, intakes, LED's and the lip...thats about another $1600,- to $2200,-(depending where you get it).
Of course the electrical work screwing around with body work, fitment/installation and paint is another $2000,- extra.
I would highly suggest you stay away from jobber fiberglass lips!!!!!
they are less expensive than the stock GT2 urethane ones but because the bumper sits low you'll tear the sh#t out of it in no time.
Talking about fiberglass, since this is what the bumper is made out of, I would say it's absolutely imperative you have the bumper covered with M3 clear film however since there's no pattern for this Frankenstein bumper available this has to be custom cut on the car... another $850,-
All said though I'm super happy with the look this bumper gives my P. ride.
But I just wanted to give you guys a heads up 'cause there's a lot of hidden costs you wouldn't find out about till you're in it neck deep.
Cheers!
Sid.
I've gotten a few others that have asked me about it.
For those of you who are thinking of getting this '08 997 GT2 modified bumper there's a version for the 996 MK1 and MK11 you can get it at wicked motor works http://www.wickedmotorworks.com/contact/
My bumper (just the bumper) cost $3000,- but it's now been reduced to less than $ 2k... go figure!!
So that alone is already a plus!
However there's a few things I want to give you guys a heads up on.
There's a considerable amount of detail body/fiber/putty work to be done to the tow hook plug section, the part where the LED lights hook up to the bumper and the corner where the headlight, fender and bumper meet (the gap there was quite big).
Also keep in mind that on top of the cost of the bumper you still have to pay for the grills, intakes, LED's and the lip...thats about another $1600,- to $2200,-(depending where you get it).
Of course the electrical work screwing around with body work, fitment/installation and paint is another $2000,- extra.
I would highly suggest you stay away from jobber fiberglass lips!!!!!
they are less expensive than the stock GT2 urethane ones but because the bumper sits low you'll tear the sh#t out of it in no time.
Talking about fiberglass, since this is what the bumper is made out of, I would say it's absolutely imperative you have the bumper covered with M3 clear film however since there's no pattern for this Frankenstein bumper available this has to be custom cut on the car... another $850,-
All said though I'm super happy with the look this bumper gives my P. ride.
But I just wanted to give you guys a heads up 'cause there's a lot of hidden costs you wouldn't find out about till you're in it neck deep.
Cheers!
Sid.
03-08-2010, 05:55 PM
#26
Rennlist Member
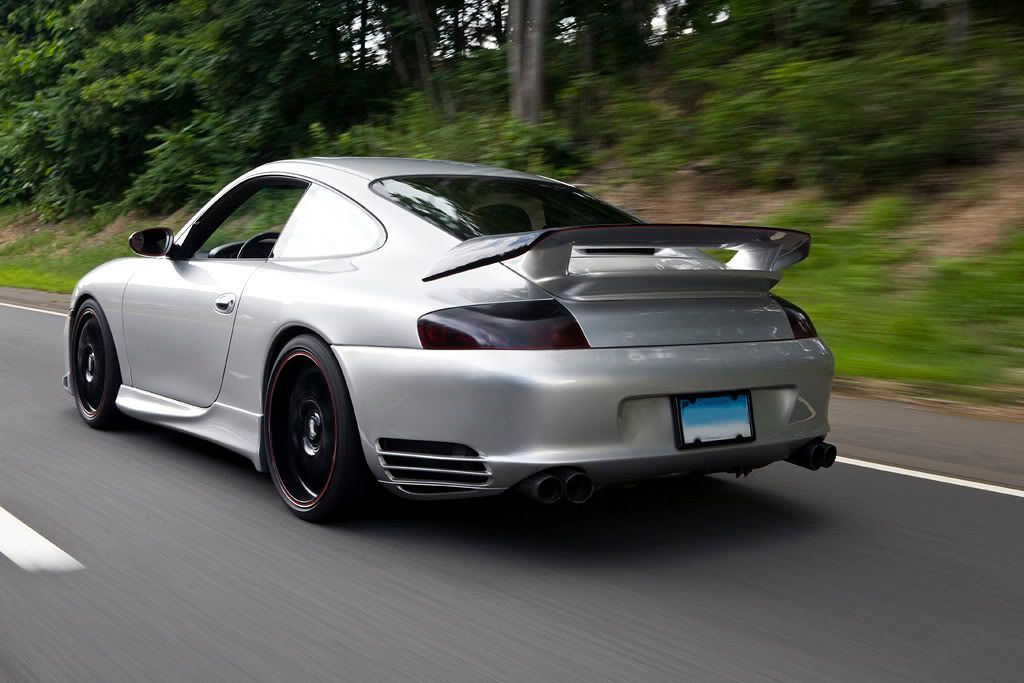
Your car looks pretty tough Sid. Was the headlight mod a DIY deal? I really like the look of the front end. I havent done anything to my cab yet other than lose the pumpkins . Looking foward to FisterD exhaust soon. Can't wait to get mine out of the shop and drive the soup out of it.
") 03-08-2010, 08:37 PM
03-08-2010, 08:37 PM
#28
Rennlist Member
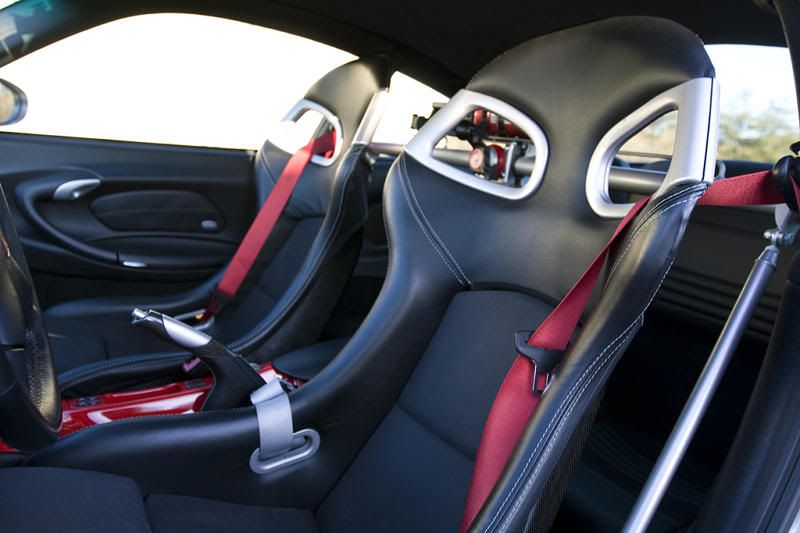
You guys are animals. In the 2.5 years I've had my car, I've ....... put in the non-smoker's kit.
It does help that my PO did the console delete and GT3 seat.
It does help that my PO did the console delete and GT3 seat.
03-08-2010, 08:57 PM
#29
Rennlist Member
My car did not come from the factory with an Aero kit, so Techart got the call to fix that.
Also, my car came with full leather everywhere and red stitching everywhere... except for the steering wheel and shifter boot. So, I corrected that with a bid on Ebay.
I know the steering wheel and shifter look gray in the photos but I assure they are dark black like everything else... sunrise at Roebling Road caused the effect.
Techart also supplied the lowering springs and the 14MM wheel spacers all around, as well as the unseen sport muffler. The exhaust tips are original as part of the Aluminum/Stainless package.
Last edited by Thundertub; 03-08-2010 at 09:27 PM.