1st mod!
 02-24-2009, 03:02 PM
#16
Rennlist Member

I'm pretty sure that my car was built without the premium Bose package, so I'm dealing with the base level audio (no Bose grills, no amp up front, no subs). Isn't there a dealer tool that you can plug your VIN into and see what options the car came from the factory with?
 02-24-2009, 03:31 PM
#17
Racer
Thread Starter
Join Date: Dec 2008
Location: Austin, TX
Posts: 268
Likes: 0
Received 0 Likes
on
0 Posts
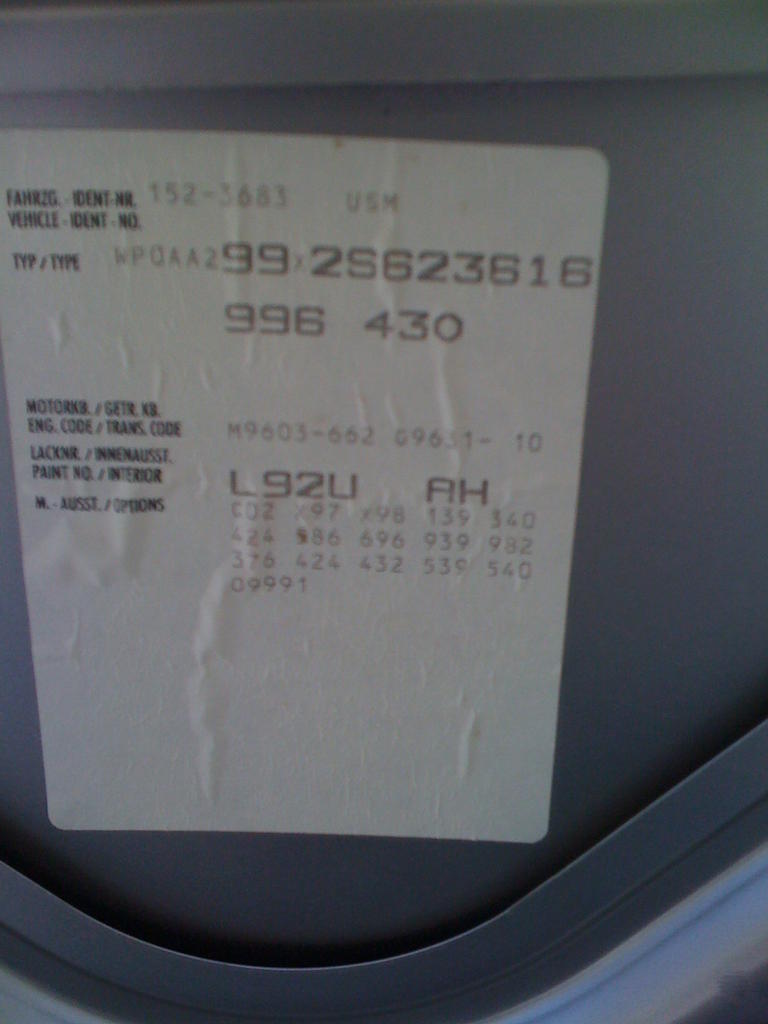
Here is what the Porsche Option Decoder had to say:
Code Option Description
139 Seat Heating - Left
340 Seat heating - Right
424 Automatic heating control
432 Sports steering wheel, leather 363mm (4 spokes)
432 Lateral stripes, Martini [1978-1982]
586 Lumbar support (driver's seat)
939 Soft leather rear
982 Supple Leather Seats/Trim
C02 Equipped with catalytic converter
X97 Aluminium/leather shift ****
X98 Aluminium/leather parking break handle
No BOSE. The car also as a three spoke wheel instead of a four spoke, so that must have gotten swapped at some point.
Here is the rest of the sticker:
Last edited by zroadhouse; 02-25-2009 at 01:16 AM.
02-24-2009, 04:12 PM
#20
Racer
Thread Starter
Join Date: Dec 2008
Location: Austin, TX
Posts: 268
Likes: 0
Received 0 Likes
on
0 Posts
I'd have to check my buyer's guide and essential companion on that. Perhaps its a mistake in the option lookup?
Just under the VIN, it says 996 430. Is that the indicator for 4S?
Just under the VIN, it says 996 430. Is that the indicator for 4S?
02-24-2009, 09:53 PM
#22
Racer
Thread Starter
Join Date: Dec 2008
Location: Austin, TX
Posts: 268
Likes: 0
Received 0 Likes
on
0 Posts
I did a little searching here and on renntech but couldn't find a thread detailing how to remove the center console. Anyone with links?
I think I may try the cubby installation first and move to the rear console box later.
I think I may try the cubby installation first and move to the rear console box later.
 02-24-2009, 11:07 PM
#26
Racer
Thread Starter
Join Date: Dec 2008
Location: Austin, TX
Posts: 268
Likes: 0
Received 0 Likes
on
0 Posts

 02-28-2009, 12:16 AM
#27
Racer
Thread Starter
Join Date: Dec 2008
Location: Austin, TX
Posts: 268
Likes: 0
Received 0 Likes
on
0 Posts
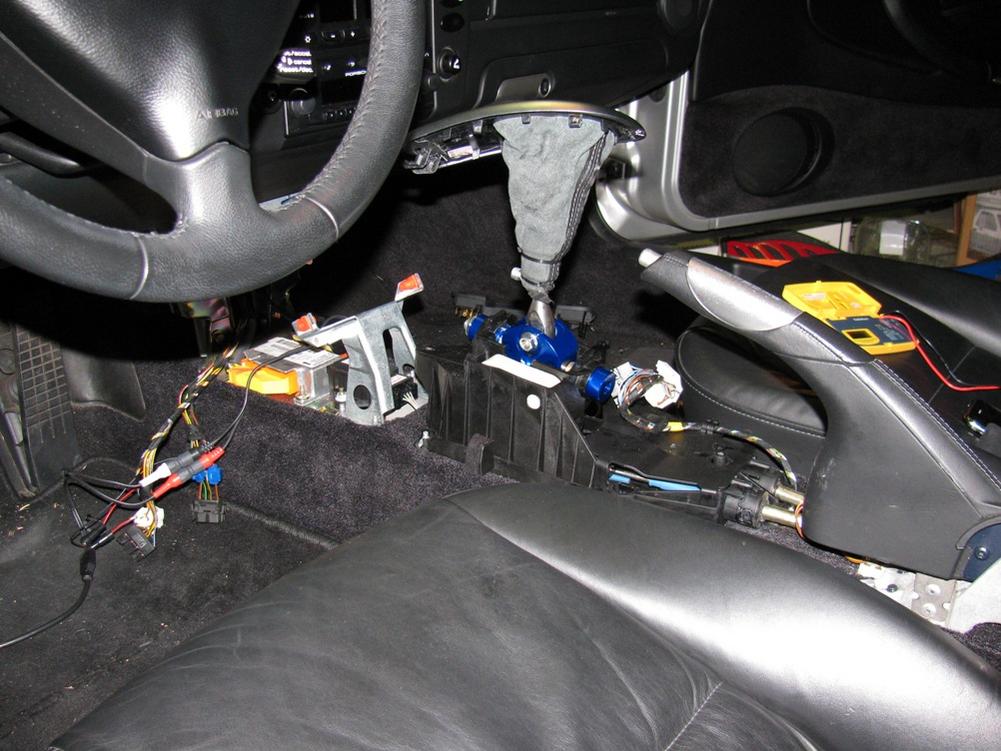
Center console is off. iPorsche adapter installed but not fully working yet (not charging my iPod like it should).
Question on wire routing -- what would be the best way to get the wire routed to the rear console box? It looks like the "stock" wires are routed under the shifter assembly. Is it possible to route the wire above without interfering with the shifter cables, etc.?
Question on wire routing -- what would be the best way to get the wire routed to the rear console box? It looks like the "stock" wires are routed under the shifter assembly. Is it possible to route the wire above without interfering with the shifter cables, etc.?
02-28-2009, 01:47 AM
#28
Newbies Hospitality Director
Lifetime Rennlist
Member
Lifetime Rennlist
Member
Join Date: Apr 2005
Location: Winston-Salem, NC
Posts: 18,084
Likes: 0
Received 33 Likes
on
33 Posts
Just loosen the 4 bolts that hold down the shift tower (black plastic housing) and completely remove two of them on the same side and lift the shift tower up 1/4" and tuck the wires under the tower. Re-tighten the bolts and you are good to go.
02-28-2009, 03:49 PM
#29
Racer
Thread Starter
Join Date: Dec 2008
Location: Austin, TX
Posts: 268
Likes: 0
Received 0 Likes
on
0 Posts
I'm completed the install and am very happy with the results.
I followed the iPorsche instructions for the actual install of the connections for the iPod (LINK) but decided to locate the ipod in the box in the rear console instead of in the cubby.
1) Here is the car with the center and rear consoles removed:
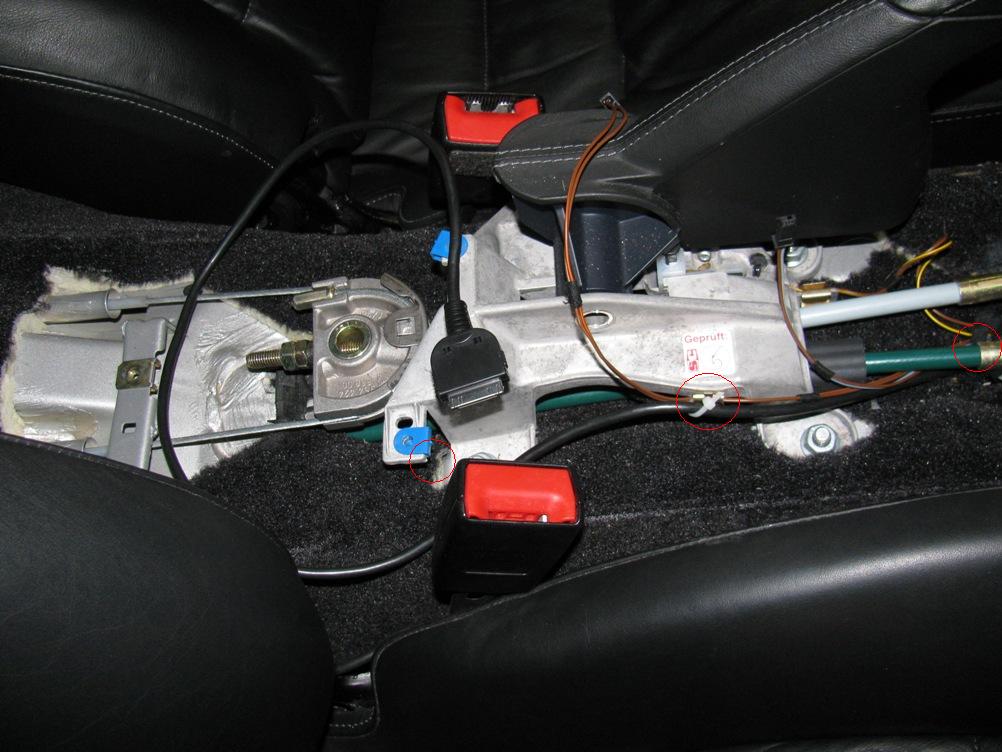
2) I routed the iPod cable under the shifter assembly (which I temporarily moved to help accomplish this) as shown in this picture (far right). I used mini zip ties to secure the cable as shown here (center and left -- soon after the pic was taken):
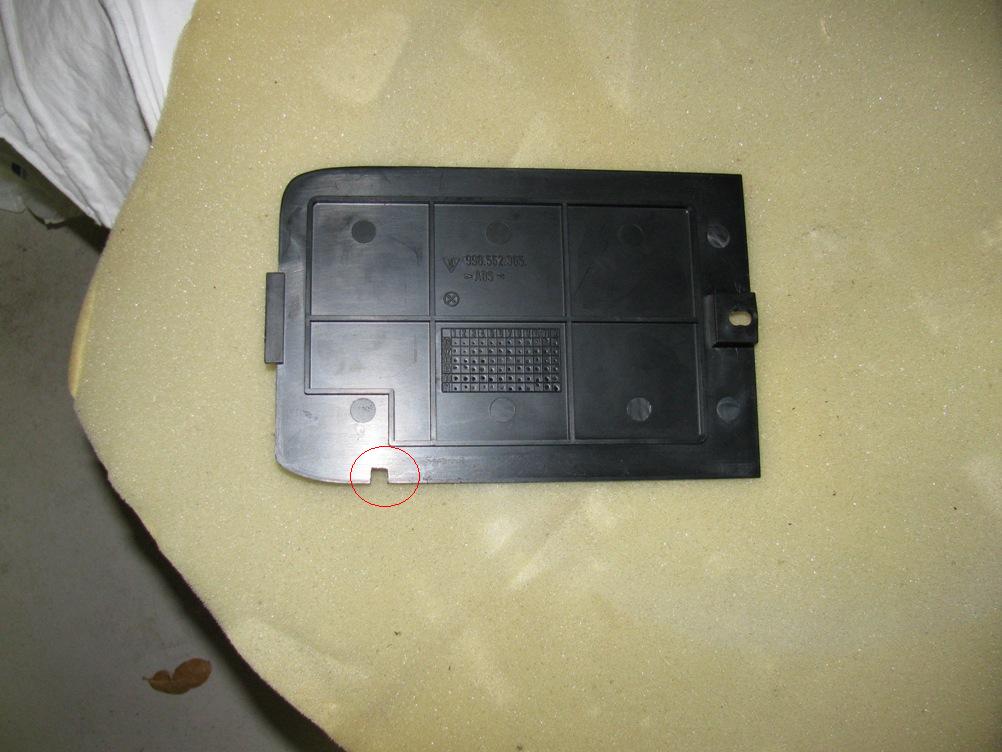
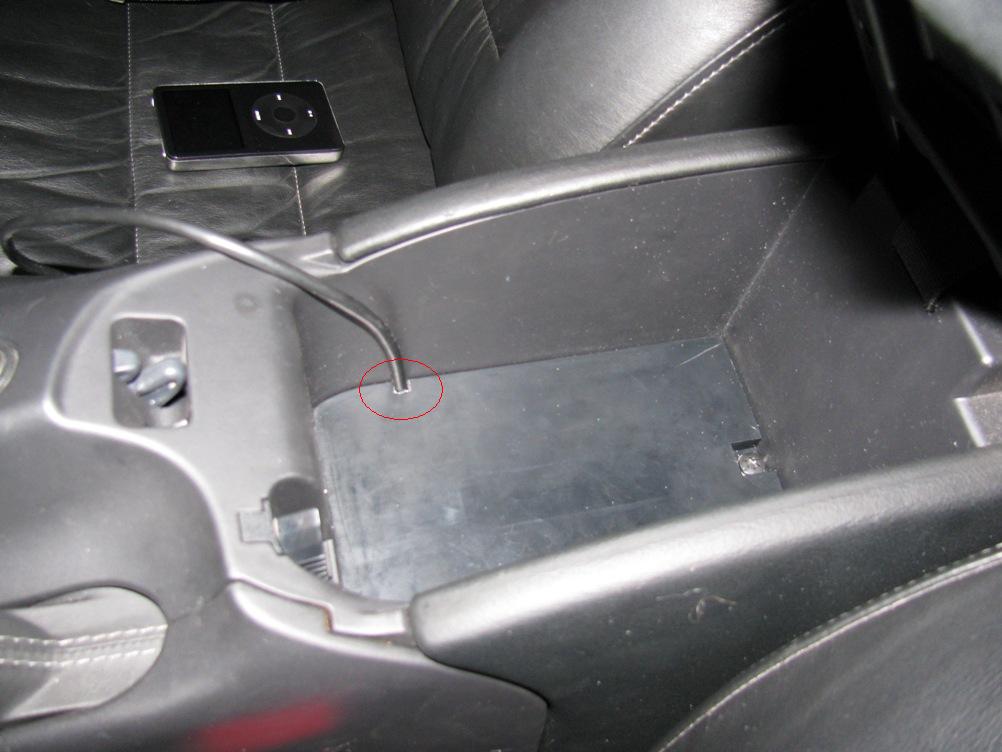
3) Using a hack saw and a file, I cut into the bottom of the rear console box sides and floor for the wire:

4) This picture shows the console reinstalled prior to adding in the rubber mat
5) iPod installed!
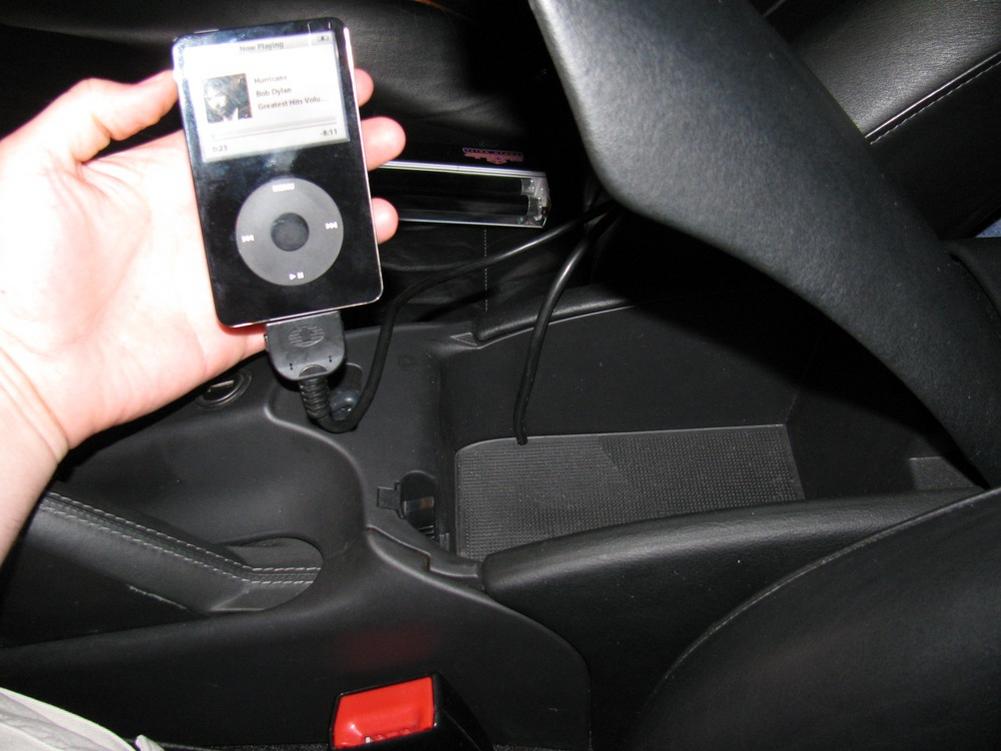
Hope others will find this useful.
I followed the iPorsche instructions for the actual install of the connections for the iPod (LINK) but decided to locate the ipod in the box in the rear console instead of in the cubby.
1) Here is the car with the center and rear consoles removed:
2) I routed the iPod cable under the shifter assembly (which I temporarily moved to help accomplish this) as shown in this picture (far right). I used mini zip ties to secure the cable as shown here (center and left -- soon after the pic was taken):
3) Using a hack saw and a file, I cut into the bottom of the rear console box sides and floor for the wire:
4) This picture shows the console reinstalled prior to adding in the rubber mat
5) iPod installed!
Hope others will find this useful.