When you click on links to various merchants on this site and make a purchase, this can result in this site earning a commission. Affiliate programs and affiliations include, but are not limited to, the eBay Partner Network.
Usually the invoice states what was done. If the guides are the same and the springs are all the same then all this work could have been easily done by you at home. Just need a spring compressor and a vacumme hose with a drill, nothing more. I did this myself on my engine.
I didn't have the tools to verify everything on the heads and do a valve job at home. Having an expert go through the heads and replace what needed to be replaced was worth paying for. Plus he went and verified all my clearances for my crankshaft and rods.
For a reasonable fee, I could have had him build my short block, but I decided I want to do that.
The build begins!!! Up until this point it has been teardown and cleaning, Now I am finally putting something together for good.
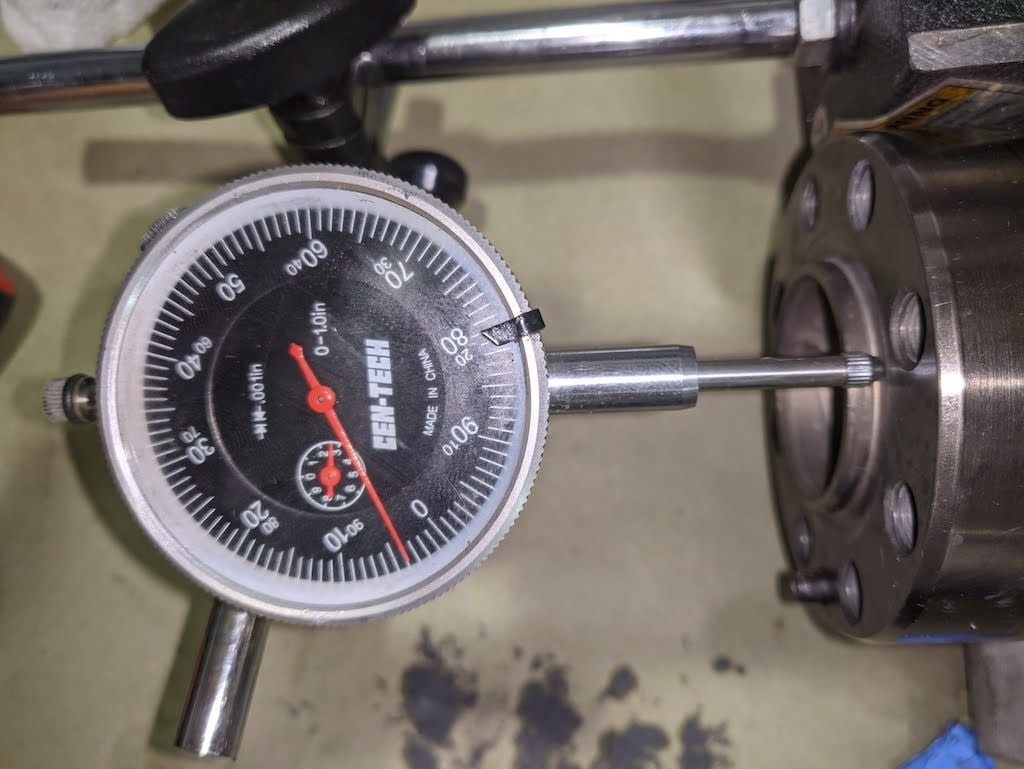
After work tonight I put in the Raby DVD and rewatched the 1st part and put the crankshaft carrier together. I took my time and everything went as planned. Once it was all put together, the endplay checked out and the crank spins like it should.
Now I put the case in a trash bag to keep it safe and clean and wait for LN Engineering to return my block and the rest of the parts, It should be any day now.
Lower half with Piston Squirters and Bearings in place lubed up and ready to go.
Crankshaft with assembly lube.
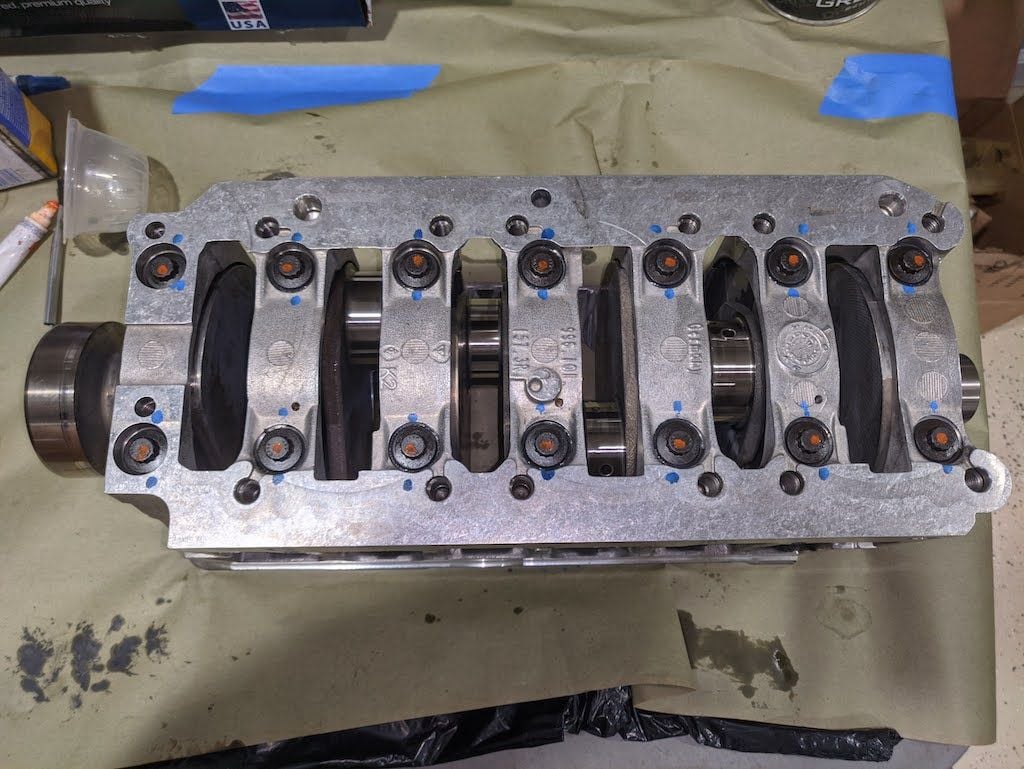
Crankshaft in the lower case. Upper case has the squirters and bearings in place and assembly lube on the bearings.
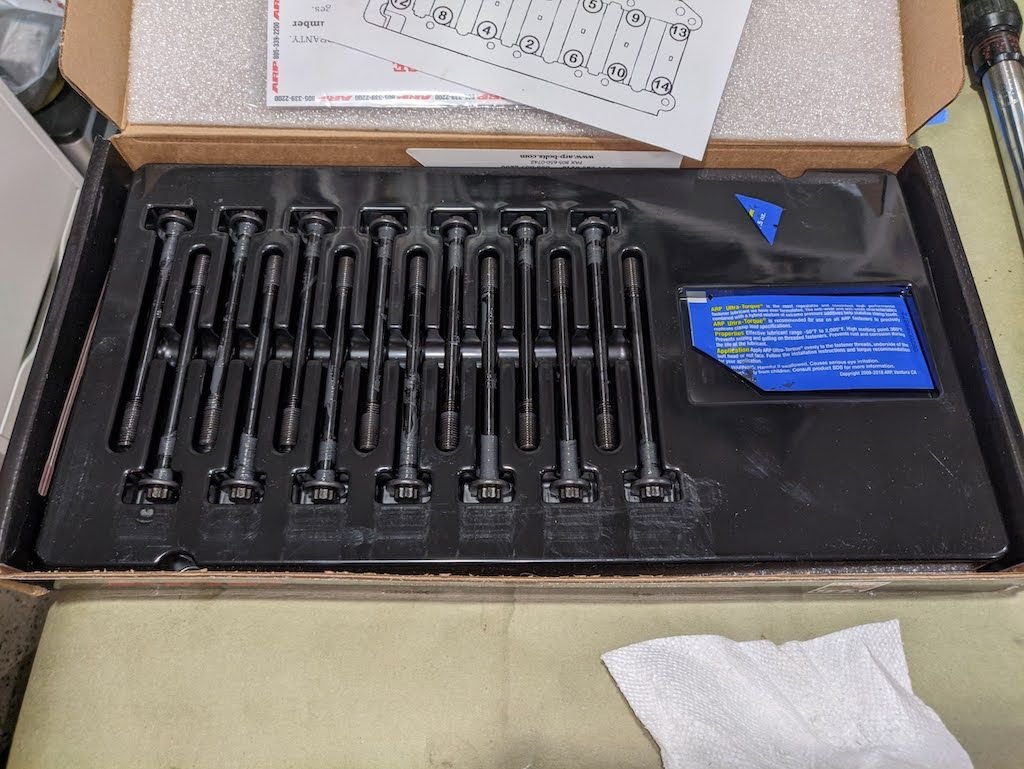
Here are the ARP bolts.
Case assembled and waiting for the bolts.
Checked endplay after torquing everything down. Right at spec at .004
No real progress as I am waiting on the block and other parts from LN Engineering. The good news is I saved over $200 on products I ordered with my block with their Cyber Monday sale this week.
They did let me know that the block is done and waiting for the QC steps before they ship it out.
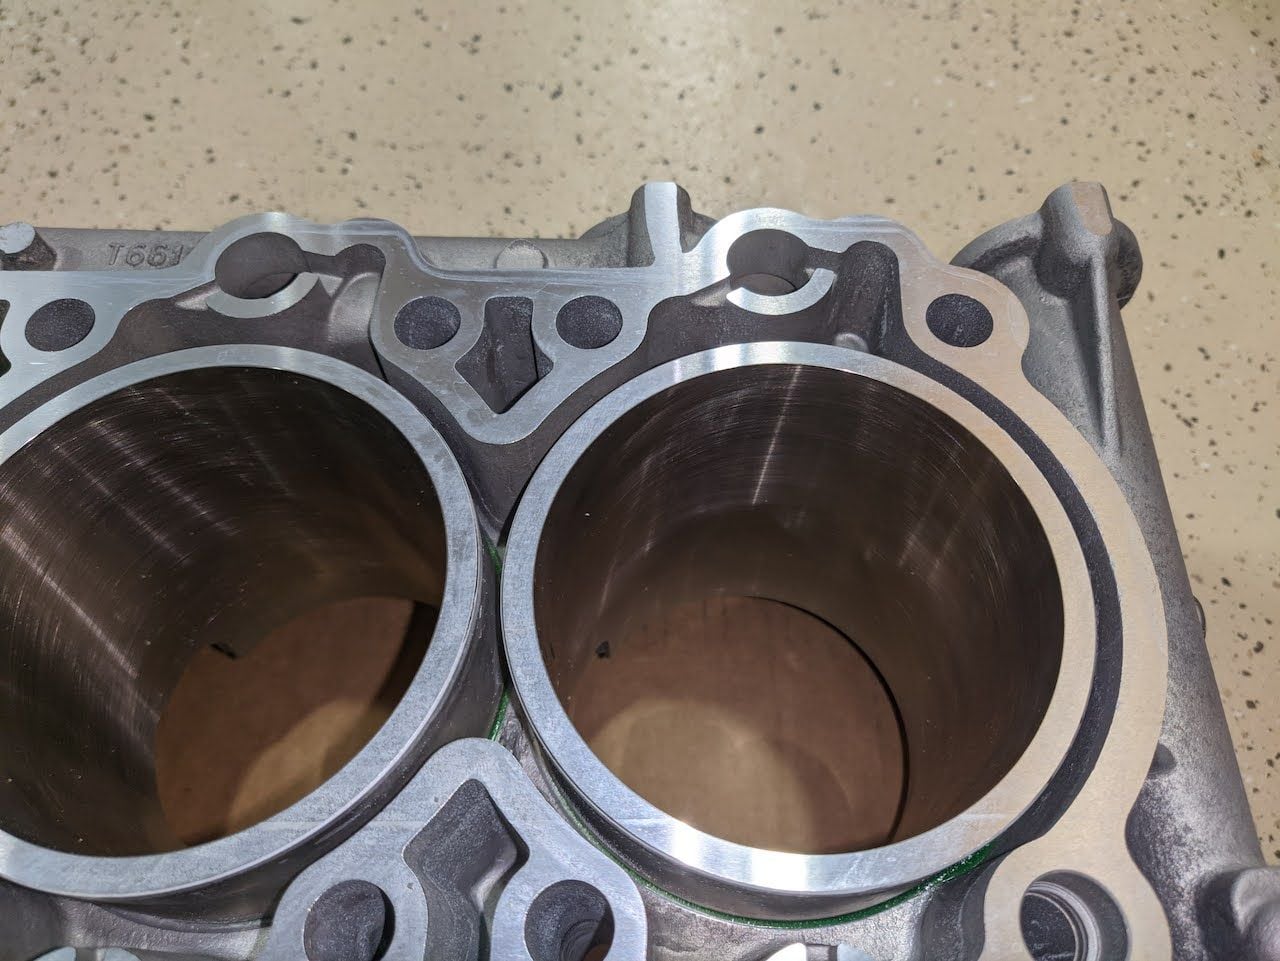
Cleaned and scrubbed the bores and block with soap and hot water
Wiped down the bores and mating surfaces using Kimwipes and acetone/brake parts cleaner.
Here are the results from the weighing portion.
All but one rod was 546 grams with 1 rod being 545 grams.
4 pistons were 431 grams with 2 pistons being 432 grams
All 6 pins were 98 grams
All 6 ring packs were 32 grams
I matched 1 of the heavier pistons with the 1 lightest rod and then matched the rest up. That leaves me with 5 of the piston/rod/pin/rings at 1107 grams and one of the sets at 1108 grams. I can live with a 1 gram difference for one set. I could grind a bit off of the one piston, but I think my chances of screwing up the piston is greater than the effect of 1 gram of imbalance. I am trying to figure out if I should put this set on one of the inner bores or one of the outer bores. By comparison, the factory piston/rod/pin/rings come in between 1130 and 1133 grams. So they have a 3 gram difference between them and overall they are at least 22 grams more than the new set. I know measuring the whole rod isn't technically the way to verify the weight, and you should weigh the large end and small end separately, but with their weights being so close, I don't see how there could be a significant difference between each rod.
The next step will be for me to check the end gap of all the piston rings. I am doing this now, while the engine block and associated parts are in the warmth of my basement. At some point, I will need to bring the partially assembled engine into the garage and it is not consistently heated out there. I have a space heater I will run, but it will not be as warm as in my basement.
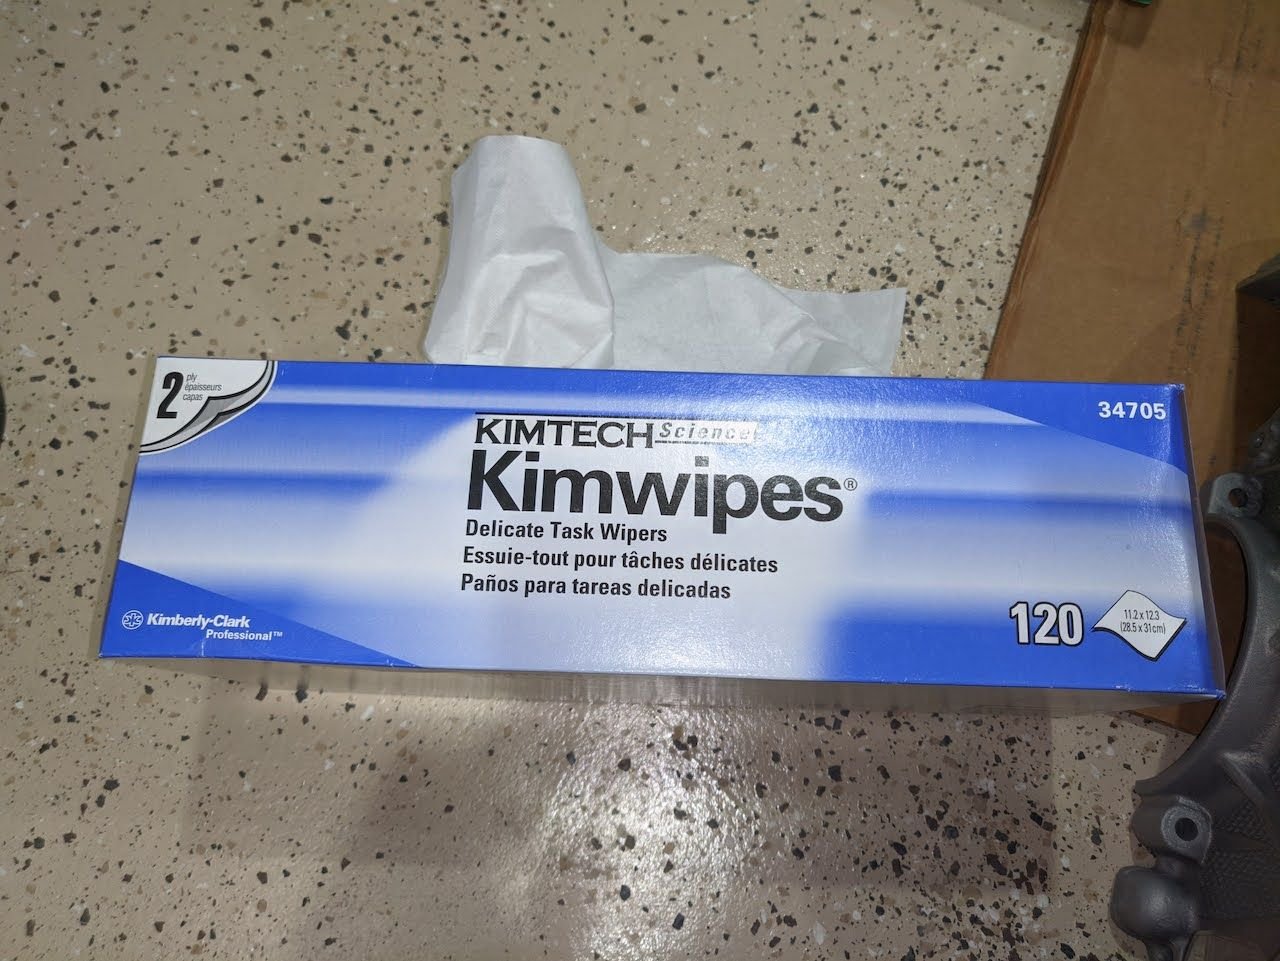
Lastly, if you are going to do this, get the Kimwipes in the blue box. They are thicker and bigger.
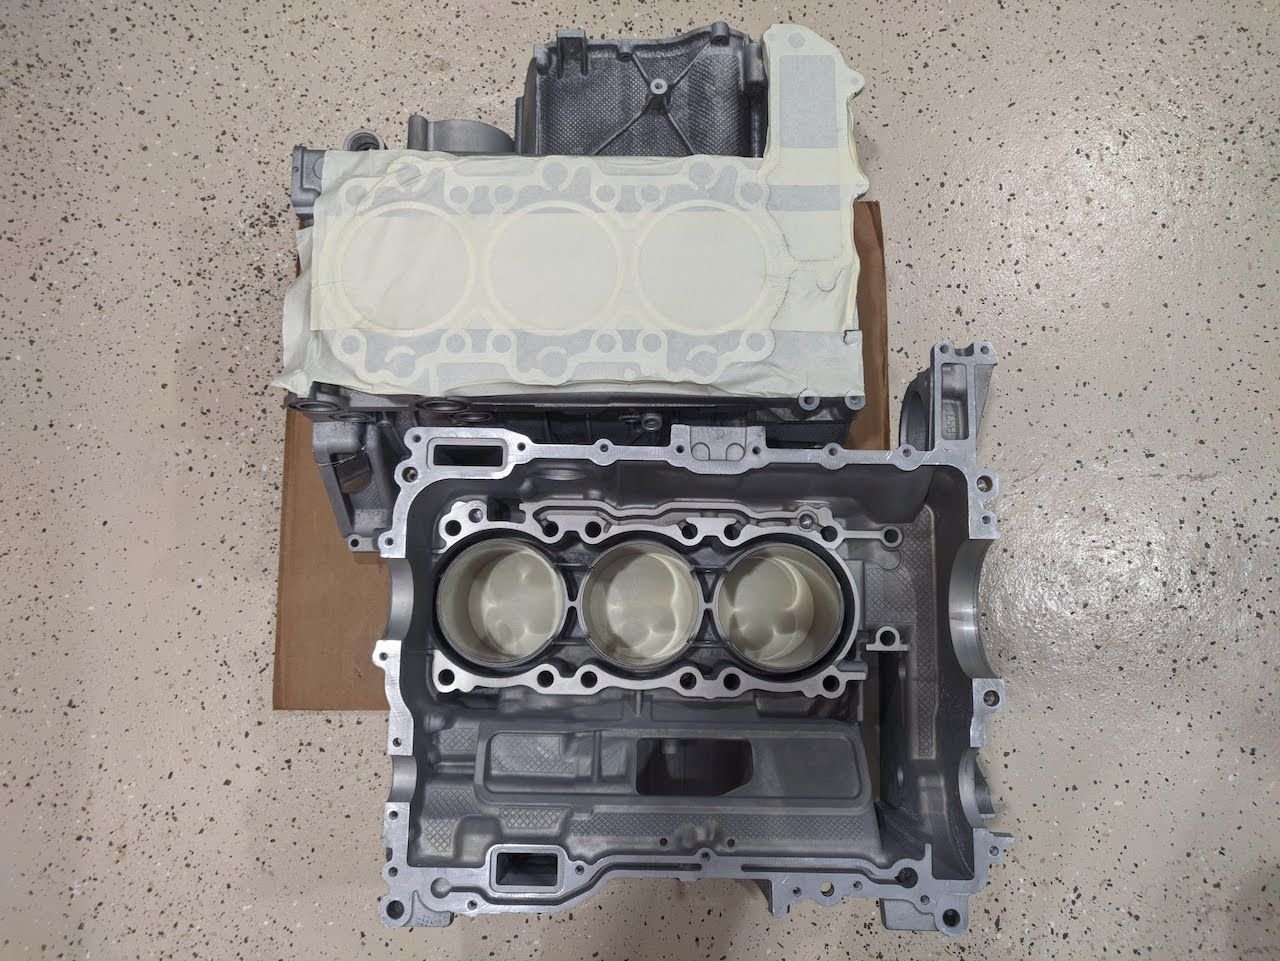
Here is what the block looks like out of the shipping box. After cleaning with soap and hot water. Close up after the soapy bath. Bores wiped down with brake cleaner and Kimwipes. The Kimwipes came out spotless. Here are the Kimwipes you want.
I didn�t catch this, but have you considered having the rotating assembly balanced?
I know that having equal weights of pistons and rods can help, but unless the crank has the counterweight correction in place (either drilling or filling), the rotating balance could still be off.
I didn�t catch this, but have you considered having the rotating assembly balanced?
I know that having equal weights of pistons and rods can help, but unless the crank has the counterweight correction in place (either drilling or filling), the rotating balance could still be off.
When I researching this, the general consensus was balancing was not necessary unless you were looking to race the car. I'm just making sure that the assemblies are as close in weight as possible.
Quick update for today. I started checking the ring end gaps and they are all too tight so far. They are coming in at around 0.014 for the top ring and 0.011 for the second ring. Ideally, they should be at 0.018 for the top ring and 0.019/0.020 for the middle ring. To fix this, I ordered a ring filer from Amazon today.
I am hoping to get to work on step 2 of the crankshaft carrier case assembly tomorrow.
Yesterday my ring filer arrived so I filed all my rings and set the gaps. I now have the top ring at .018 and the middle ring at .019. That should be perfect. I also put on my big boy engine building pants and pulled out the dial bore gauge and the outside micrometer to verify the rod clearances. They all came in at either 0.0021 or <!--td {border: 1px solid #ccc;}br {mso-data-placement:same-cell;}-->0.0020 which is good.

 11-18-2021, 12:00 PM