What’s the right way ?
 04-08-2020, 11:31 AM
#1

Hello everyone !!
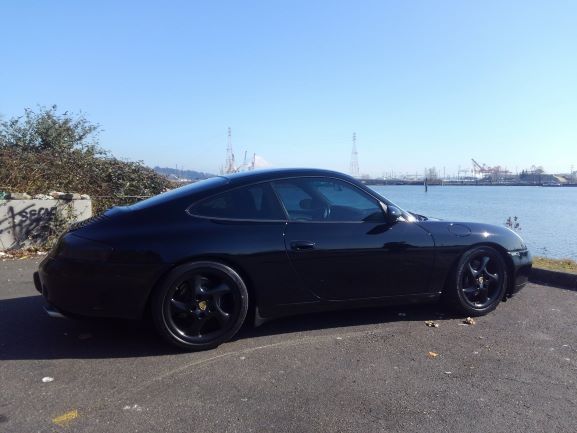
vehicle 1999 c2 3.4 95k miles
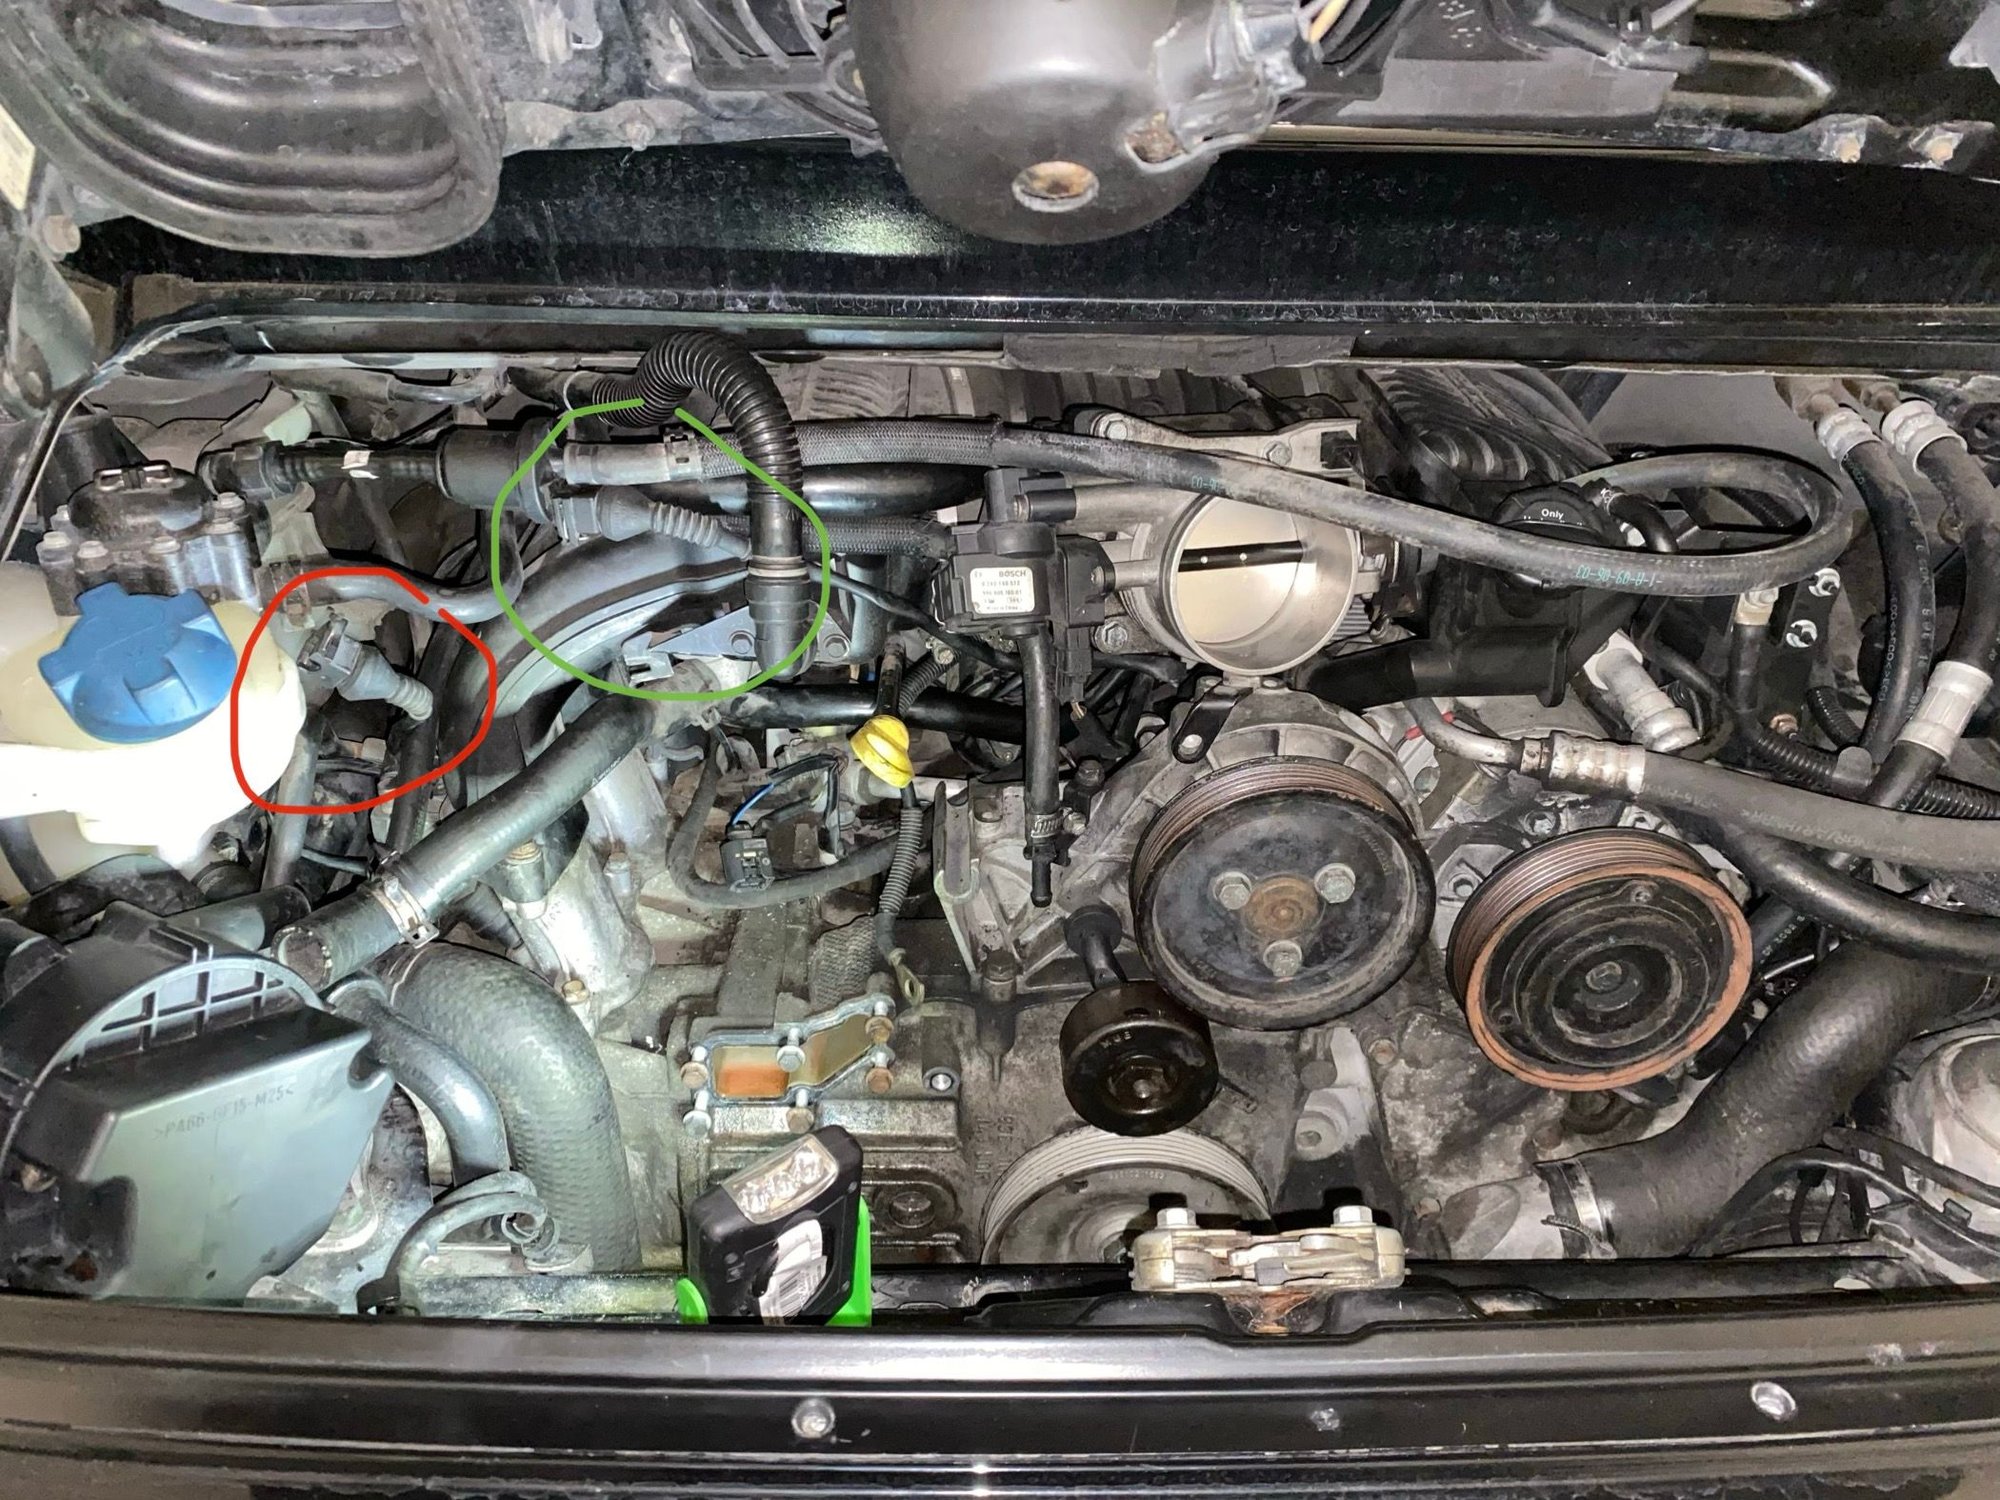
my alternator bracket lid failed so while working on it noticed :
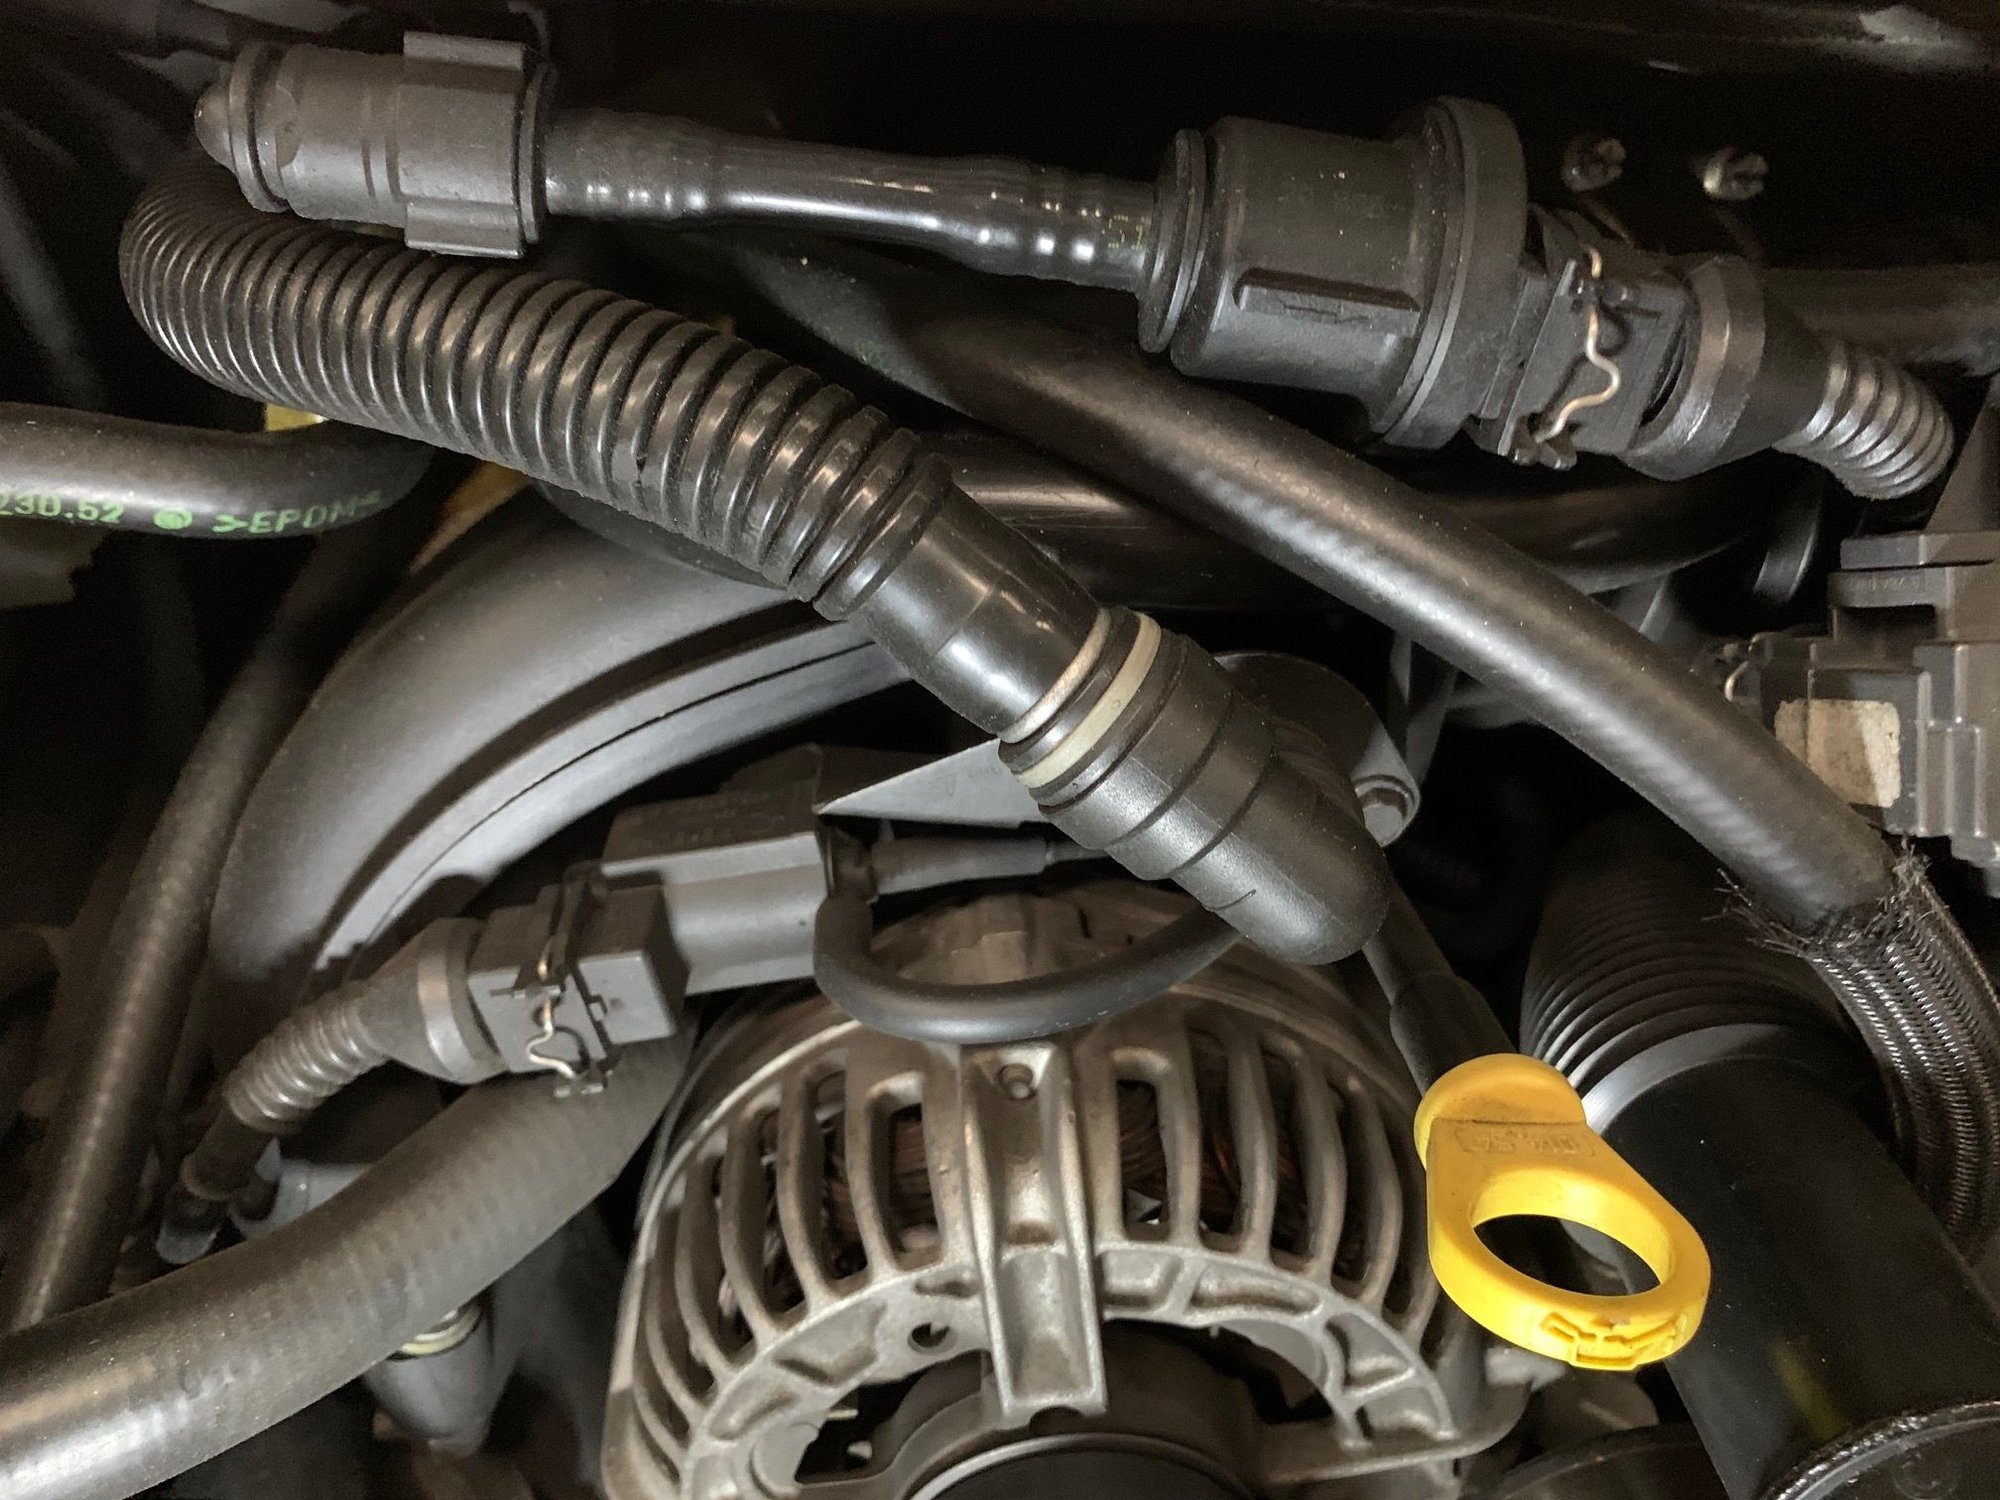
-the conector (circled in green) was disconnected and tucked away behind the alternator
-the connector circle in red was connected to the vapor purge valve
I had code for it (P0444 ) so I’m thinking it was connected in the wrong spot .
now my question is where should the connector (circled in RED)should be plugged in ??
vehicle 1999 c2 3.4 95k miles

my alternator bracket lid failed so while working on it noticed :
-the conector (circled in green) was disconnected and tucked away behind the alternator
-the connector circle in red was connected to the vapor purge valve
I had code for it (P0444 ) so I’m thinking it was connected in the wrong spot .
now my question is where should the connector (circled in RED)should be plugged in ??
 04-08-2020, 12:15 PM
#2
Rennlist Member
Join Date: Apr 2010
Location: Ormond Beach, FL
Posts: 5,907
Likes: 0
Received 1,166 Likes
on
746 Posts
My guess is the one circled in green goes to the TB Idle Control Valve and the one circled in red goes to the Evap Purge Valve. See the ICV on the side of the TB? There is nothing attached to it and there should be.
04-08-2020, 02:47 PM
#3
Rennlist Member

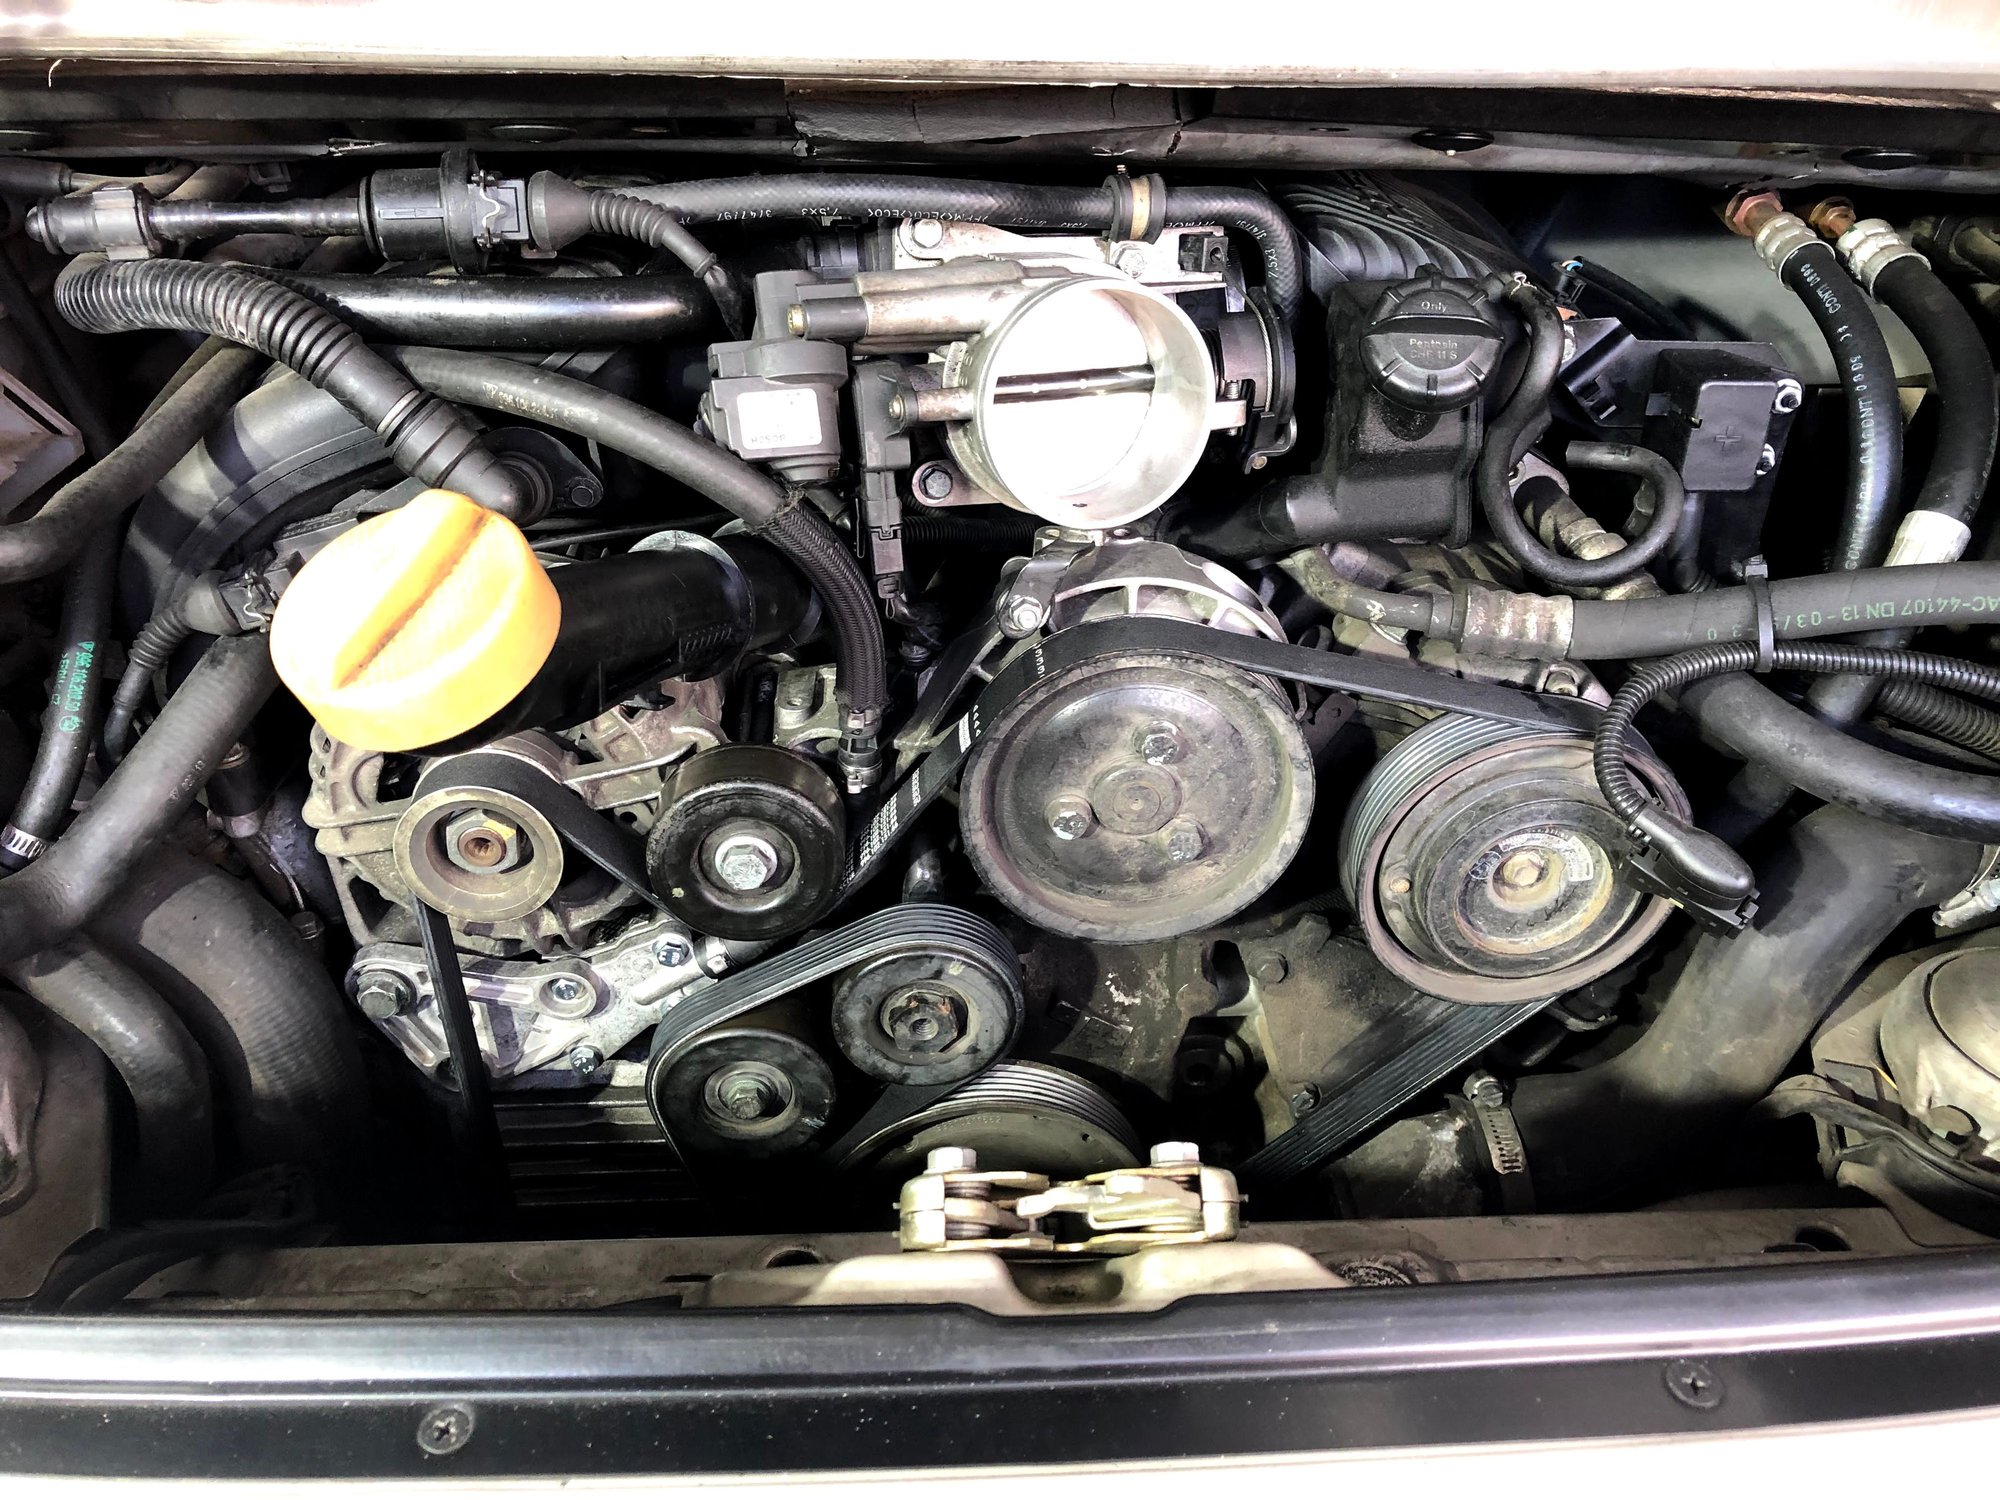
You can see the connections in this picture.
One at the top
The other right behind the oil filler cap.
M
ps. pic taken after fixing the same problem! had to change the oil filler tube also as the roller had shifted enough to eat through it.
One at the top
The other right behind the oil filler cap.
M
ps. pic taken after fixing the same problem! had to change the oil filler tube also as the roller had shifted enough to eat through it.
 04-08-2020, 03:34 PM
#4
04-08-2020, 05:07 PM
#5
Rennlist Member
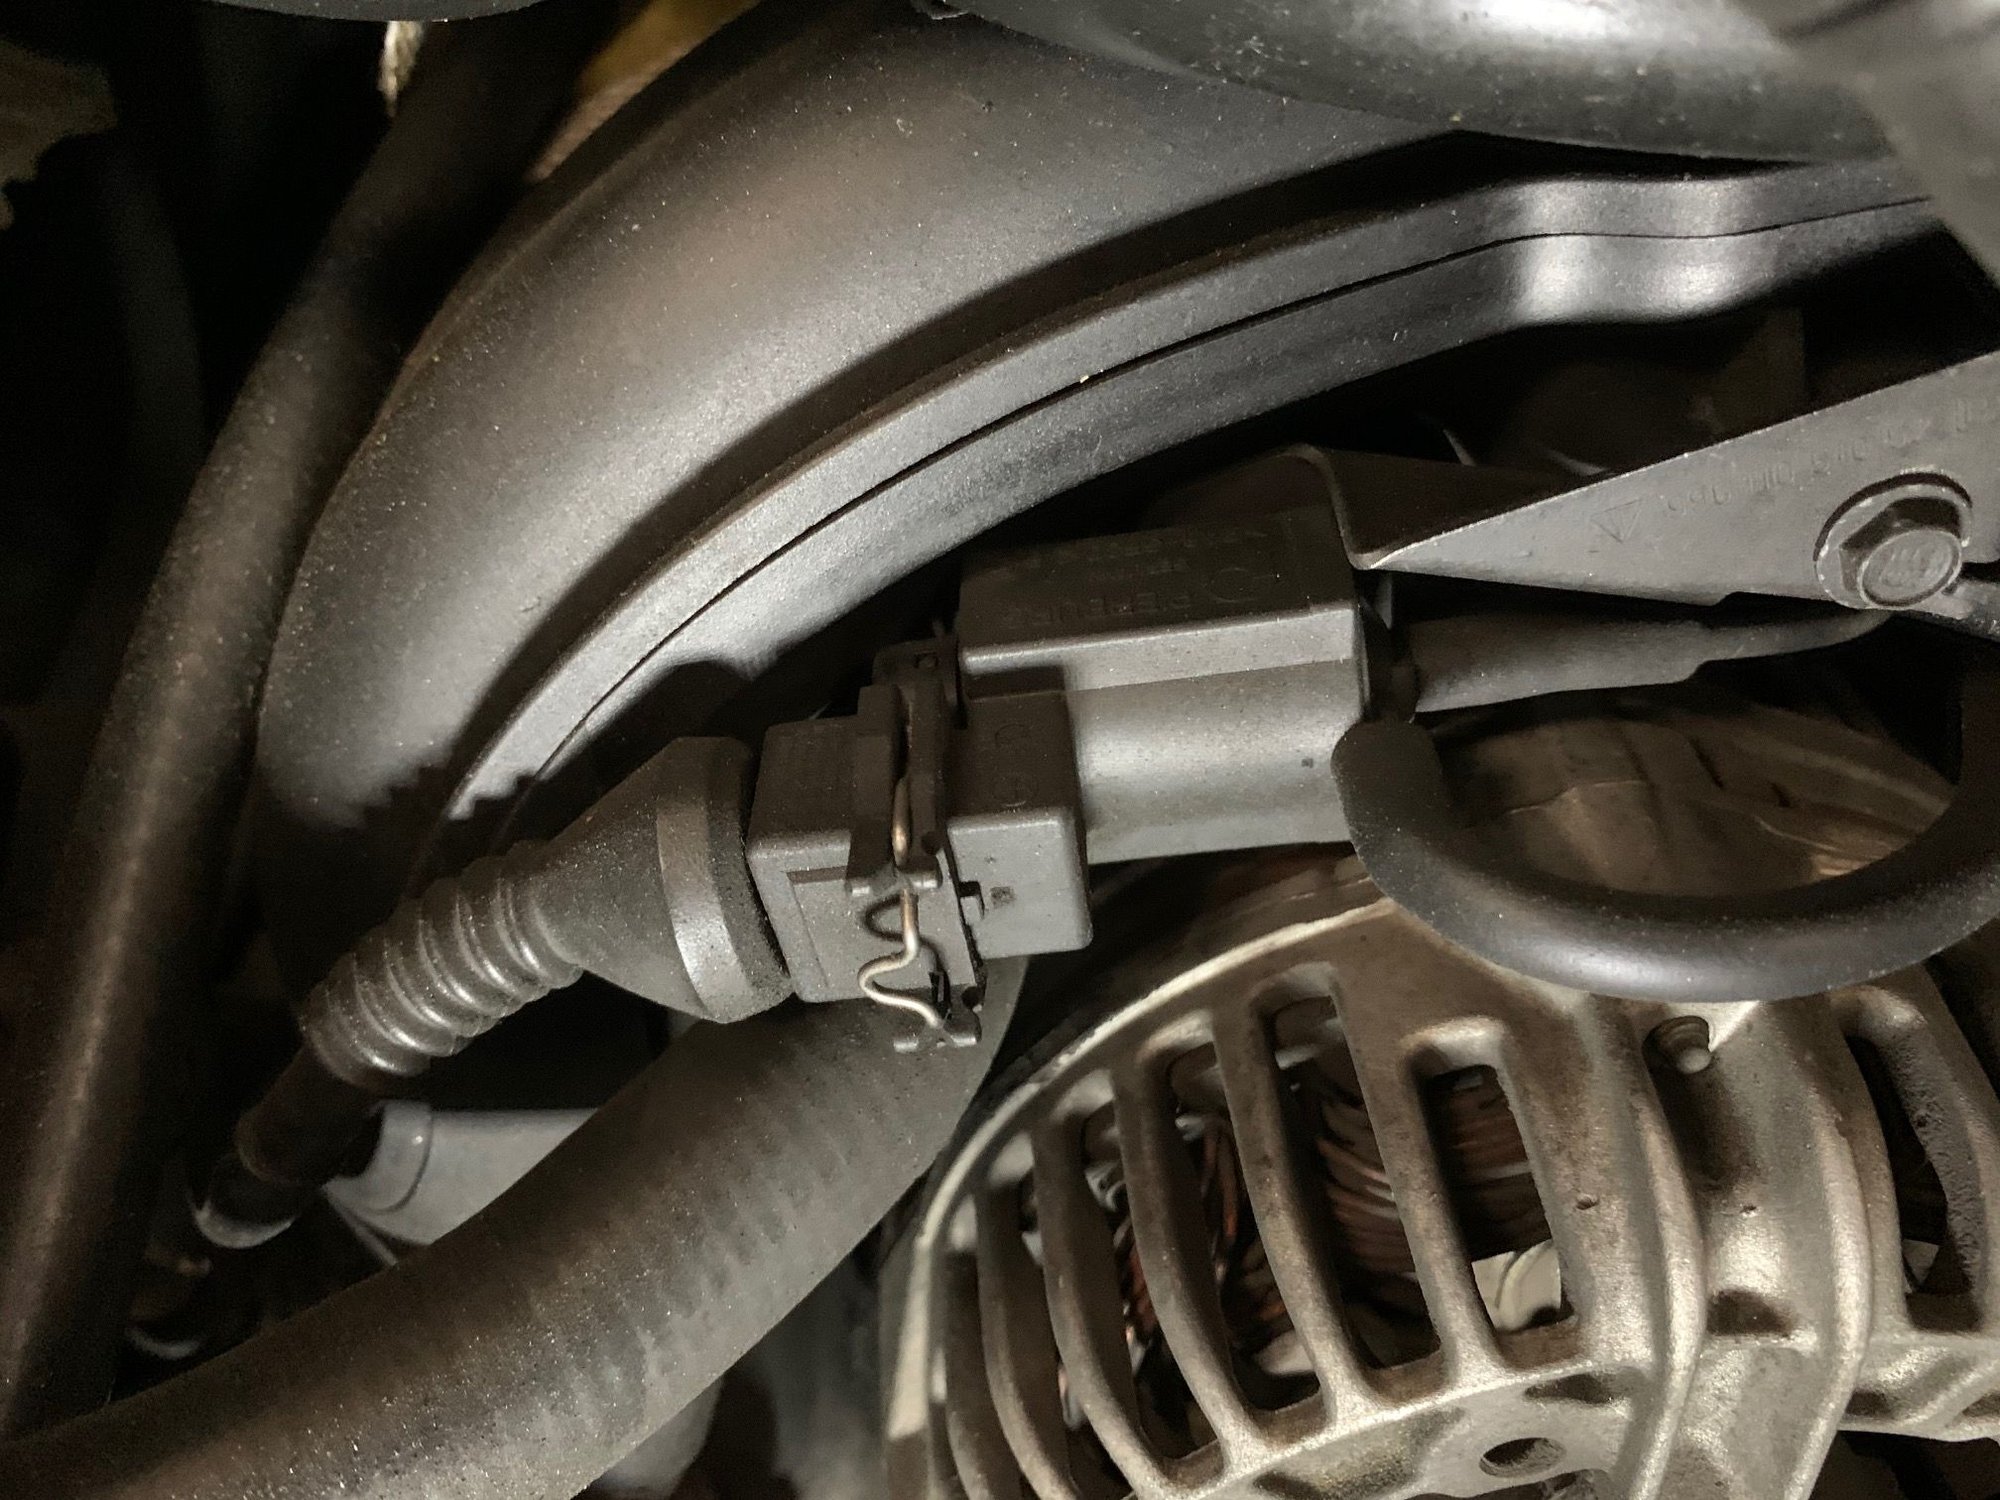
Here's a closer look. (before cleanup!)
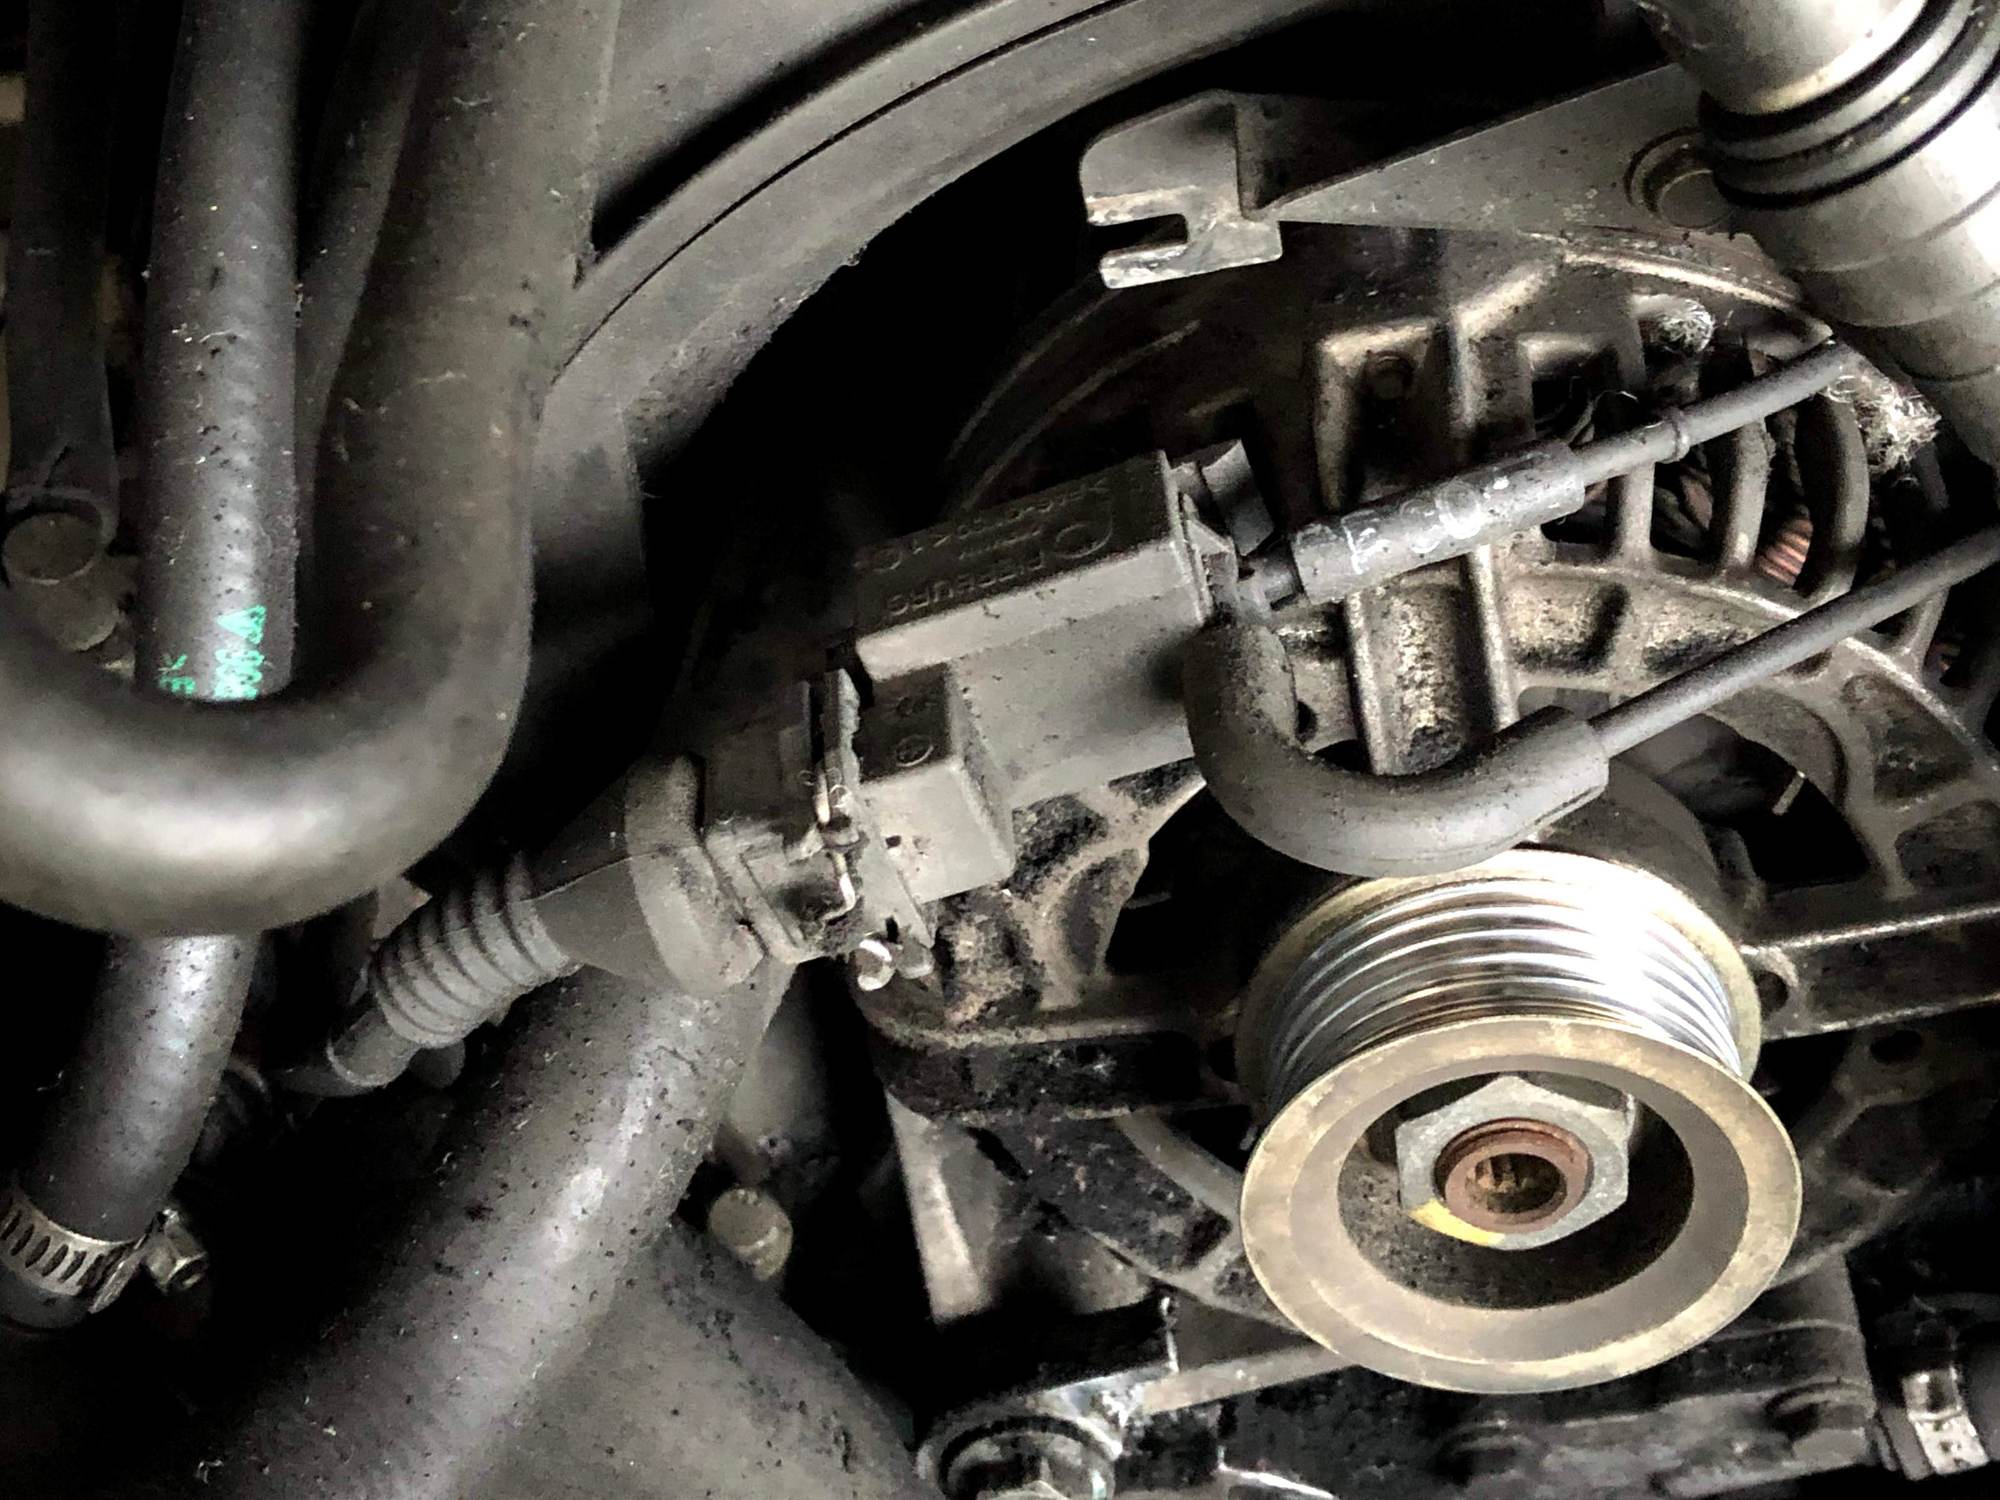
from the parts diagram - looks to be
996 605 123 01
Change over valve
#18 in this picture (air injection):

and same # here (intake distributor):
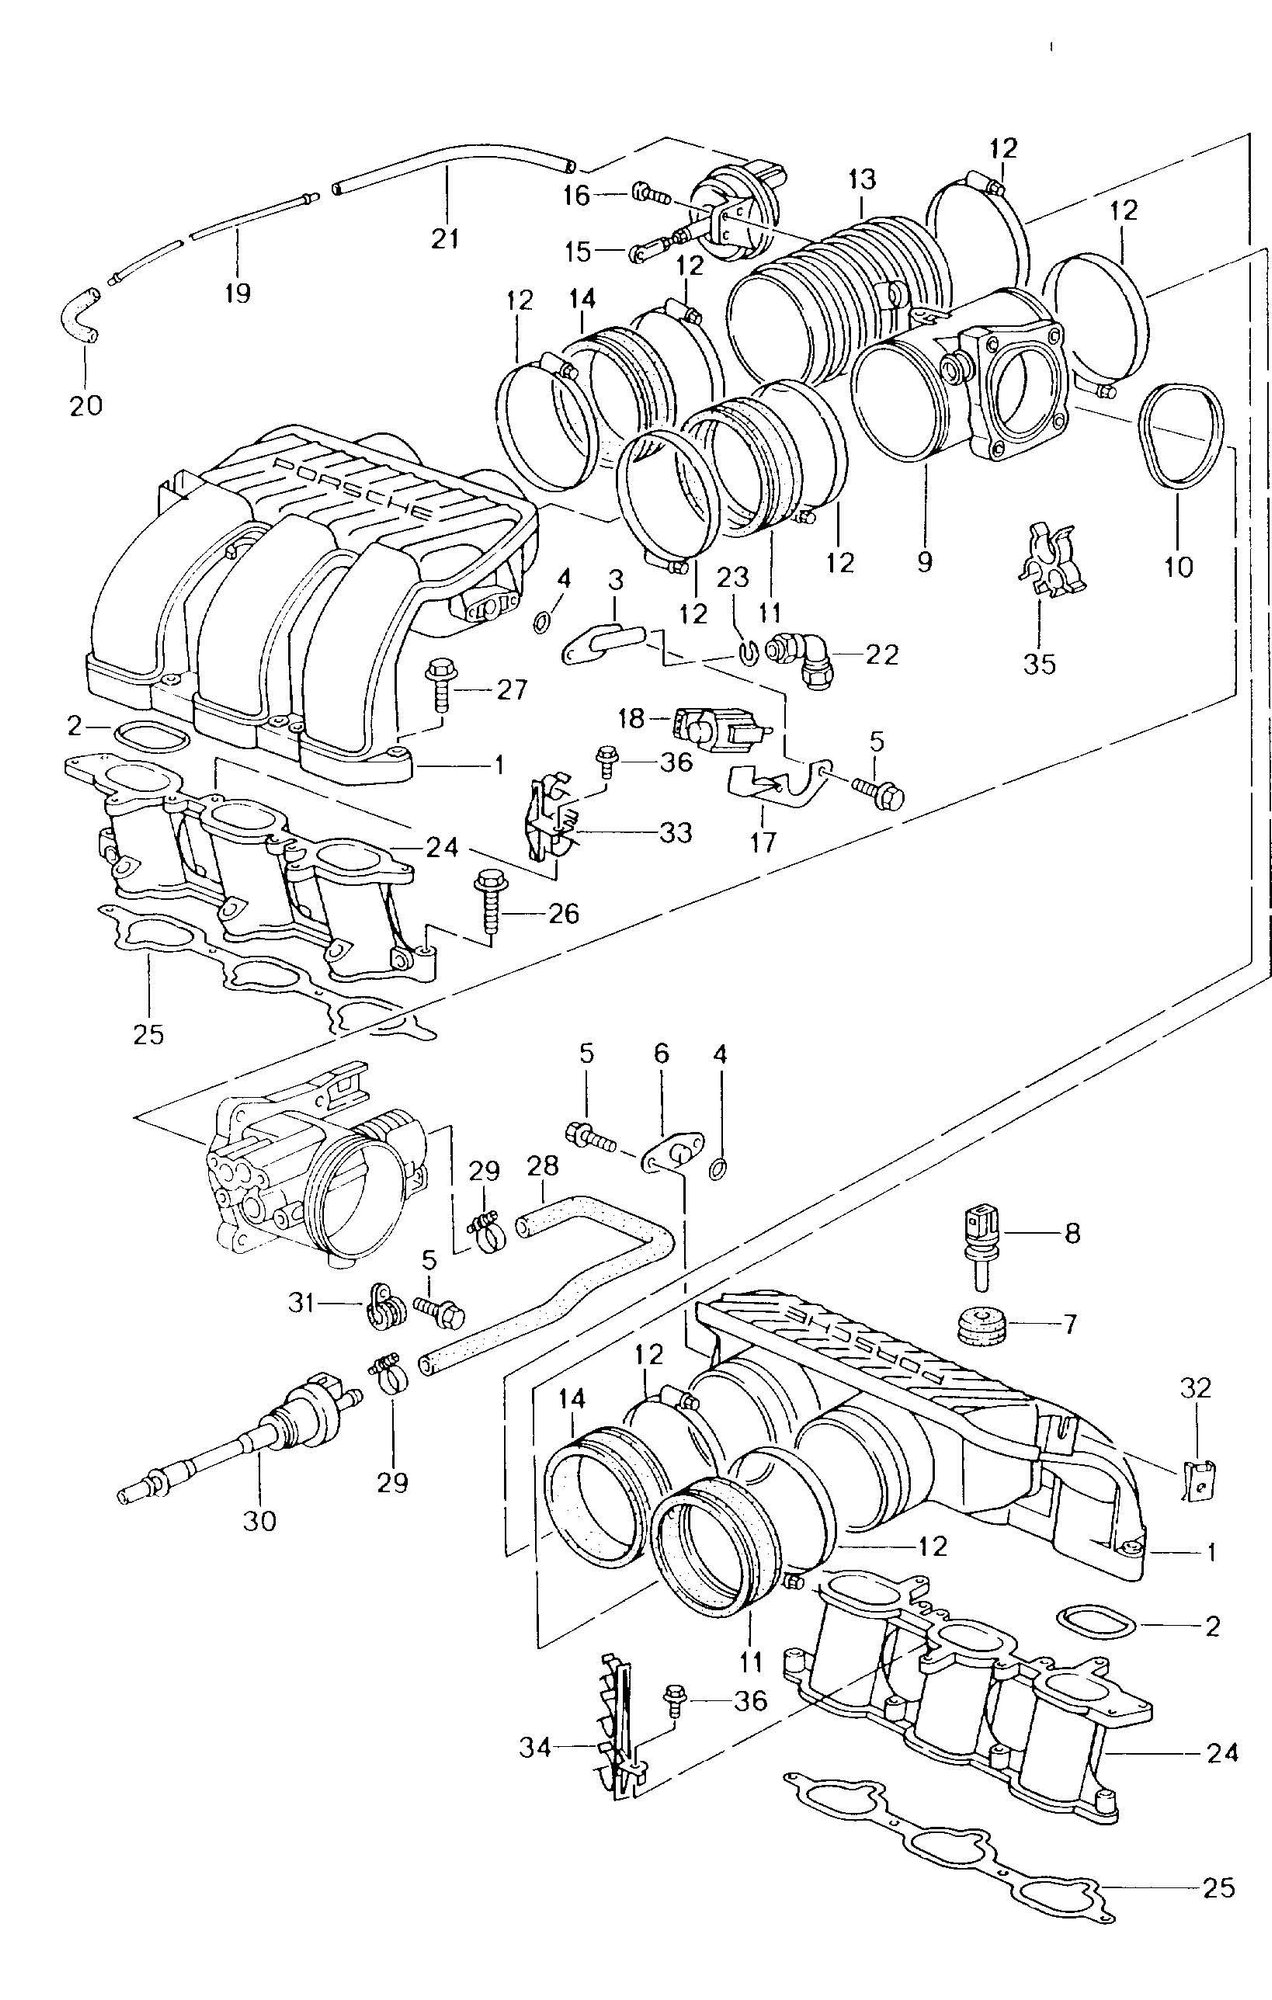

from the parts diagram - looks to be
996 605 123 01
Change over valve
#18 in this picture (air injection):

and same # here (intake distributor):
 04-08-2020, 05:08 PM
#6
Rennlist Member
Join Date: Apr 2010
Location: Ormond Beach, FL
Posts: 5,907
Likes: 0
Received 1,166 Likes
on
746 Posts
I believe you are correct. I just went and took some pictures in the engine bay. Appears after further looking at your picture you are missing the change over valve.


The following 2 users liked this post by DBJoe996:
Brian_C (04-08-2020),
Porschetech3 (04-08-2020)
Trending Topics
04-08-2020, 05:46 PM
#8
Rennlist Member
I don't think anyone would intentionally remove the change-over valve, my guess it was unplugged and pushed back out of the way then forgot about.
You are correct that the change-over valve in question controls the resonance flap in the secondary plenum.
You are correct that the change-over valve in question controls the resonance flap in the secondary plenum.
04-08-2020, 06:40 PM
#9
Nordschleife Master
Very timely post as i am currenty replacing all my vacuum rubber and tube. Autoatlanta has all the parts and the change over valve is about half of what my dealer wanted. Although the diagram isnt exactly correct on the vacuum lines for the 3.4l.
04-08-2020, 09:50 PM
#10
Rennlist Member
Thanks for the post. My A and B hoses came loose after my recent DIY AOS install. I was second guessing myself and thinking I installed incorrectly since they came off. Just didn’t seat them well enough I guess. This weekend project. Should take care of the p1411 and p0410 codes, hopefully.
edit: B & C hoses came loose.
edit: B & C hoses came loose.
04-08-2020, 09:53 PM
#11
Rennlist Member
04-08-2020, 10:48 PM
#12
Thank you everyone that responded !
This car doesn’t stop surprising me ! I bought it for $7,900 in a very bad part of Miami Florida ..and I got to say I’ve never seen a vehicle miss so many parts ! Lol surprisedly runs good ..
The vacuum reservoir is not even there Im getting some parts and re routing everything .
it’s coming along so far I’ve invested on a Rear main seal ; IMS retro , clutch , short shifter , OIL air separator, spark plug, new alternator, some suspension items etc . I’ve learn a lot more than what I did with my 2003 C4S as I’m more comfortable with messing up while working on it
Total investment so far 14k

The following users liked this post:
TexSquirrel (04-09-2020)
04-09-2020, 01:43 AM
#13
Rennlist Member
Right on!!!! Enjoy it, she's a beauty. Then again, I'm partial to black.