When you click on links to various merchants on this site and make a purchase, this can result in this site earning a commission. Affiliate programs and affiliations include, but are not limited to, the eBay Partner Network.
Basically lift car, support tranny, remove bolt through center, remove tranny crossmember, undo the three nuts holding the mount to the tranny. Install is reverse
I'm going to add a couple steps:
1) Lift car
2) Remove the plastic transmission pan
3) support transmission
4) Remove the thin rectangular cross-section brace which supports the heater ducts.
5) LOOSEN transmission crossmember, it does not need to be fully removed, but you want to be able to adjust it left/right.
6) Remove the OEM transmission mount by removing the three nuts and the long bolt.
7) Either double nut the studs OR use a stud remover (NOT a stud puller) to remove the studs. They are not long enough for the billet brace. Stow them with the rest of your spare parts, because I know none of us throw things away
8) Install the new transmission mount using the supplied hardware, torque to about 18 ft-lbs (25 N-m)
9) The transmission may need to be adjusted (raised) a little due to sag in the OEM mount.
9) Re-install everything you removed.
Just ordered this. I feel like I renewed the trans mount with an OEM piece a few thousand miles ago, but anything FDM conjures up is a big plus in my book and well worth doing, especially at this entirely reasonable price!
I'm a little late to the party here since that picture of the installed mount is on my car I was the test mule for some of this process and was happy to see the prototype come to market. It's a great idea and a great design. It is a perfect compliment to upgraded motor mounts. I made some notes of my thoughts/impressions to pass along to Darin so I'll post here as well to help anyone looking for more info on the product. Happy to answer any questions about it.
1. The manufacturing quality and finish of the product are of very high quality.
2. Install was straight forward and can be accomplished by any average DYIer at home. Chaoscreater's process in his post is spot on.
3. My stock mount was split significantly and in need of replacement regardless at 90k miles.
4. There were no negative aspects to post-install driving or shifting characteristics. Shifting alignment/feel was unchanged. The part accomplishes exactly what one would expect installing a harder compound material between the transmission and chassis. Specifically, I noticed small increase in gear noise/whine/lash, more when at low RPMs. This is only mechanical noise, and no added vibration was noted which is key to a product like this. I have been in many more race inspired 911s with solid transmission mounts and there is a lot of NVH with buzzing and vibrating felt through the chassis. This tells me the hardness of the bushing is just right. For people looking to add a little more rawness to their 993, this is a perfect addition. It is a similar incremental step to adding wevo or RS motor mounts. I was not able to test any difference of the lateral load of the transmission as I have not been in a safe enough setting to corner fast enough. However, it is clear given the difference in materials that things will not be shifting as much under load.
5. For reference, I have a 1997 C4S with 90k miles on it. It has a 2WD conversion and PSS10 coilovers. I have wevo black motor mounts, Rennline rear subframe mounts, welded engine carrier support, LWF, 2 inch bypass exhaust pipe and Goldenrod.
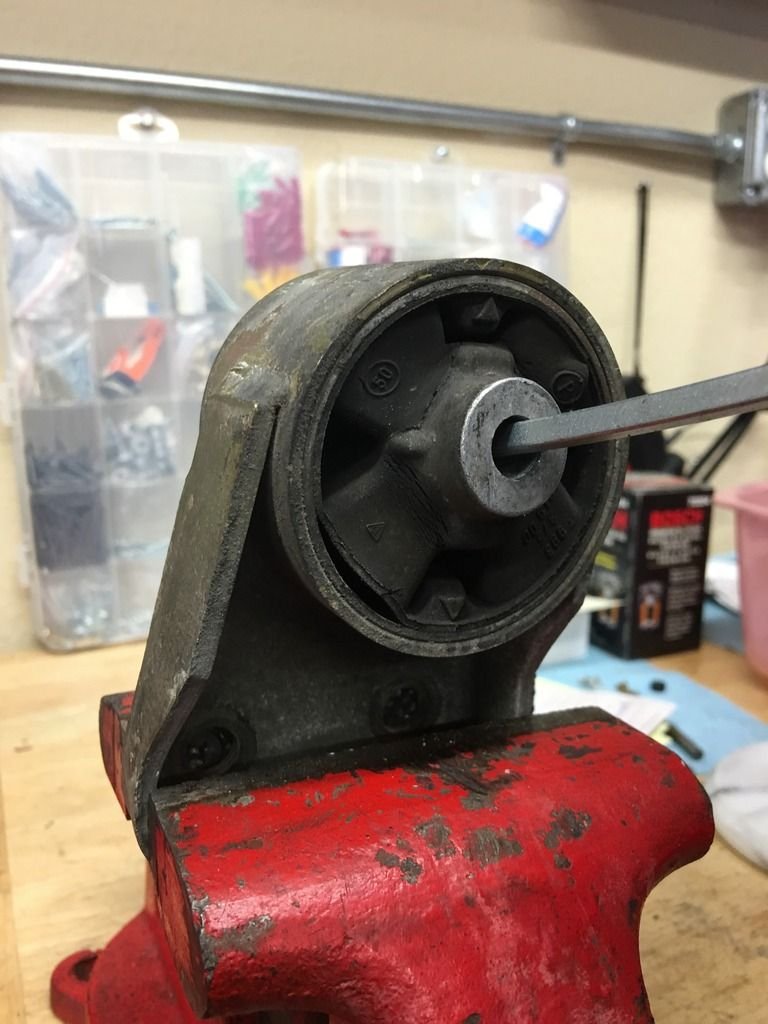
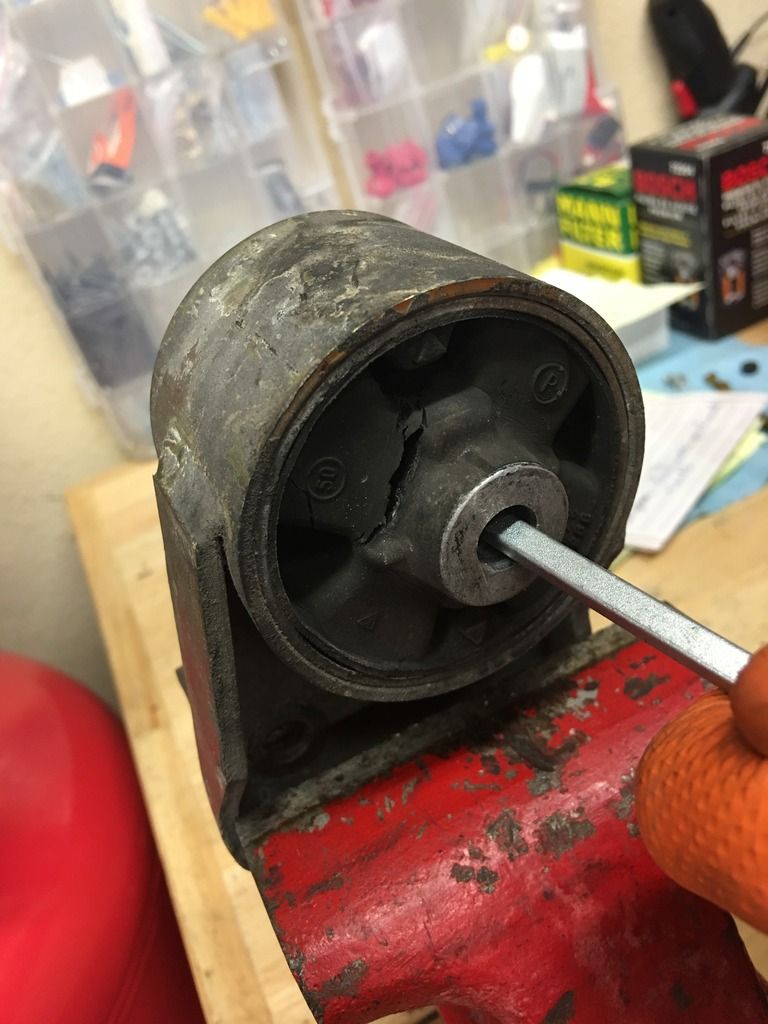
I wanted to add some pictures from installing Adam's transmission mount a couple weeks ago.
The original mount was torn in a couple of spots, this is OEM with about 90k miles on it. The rubber was very easily moved around with a screwdriver.
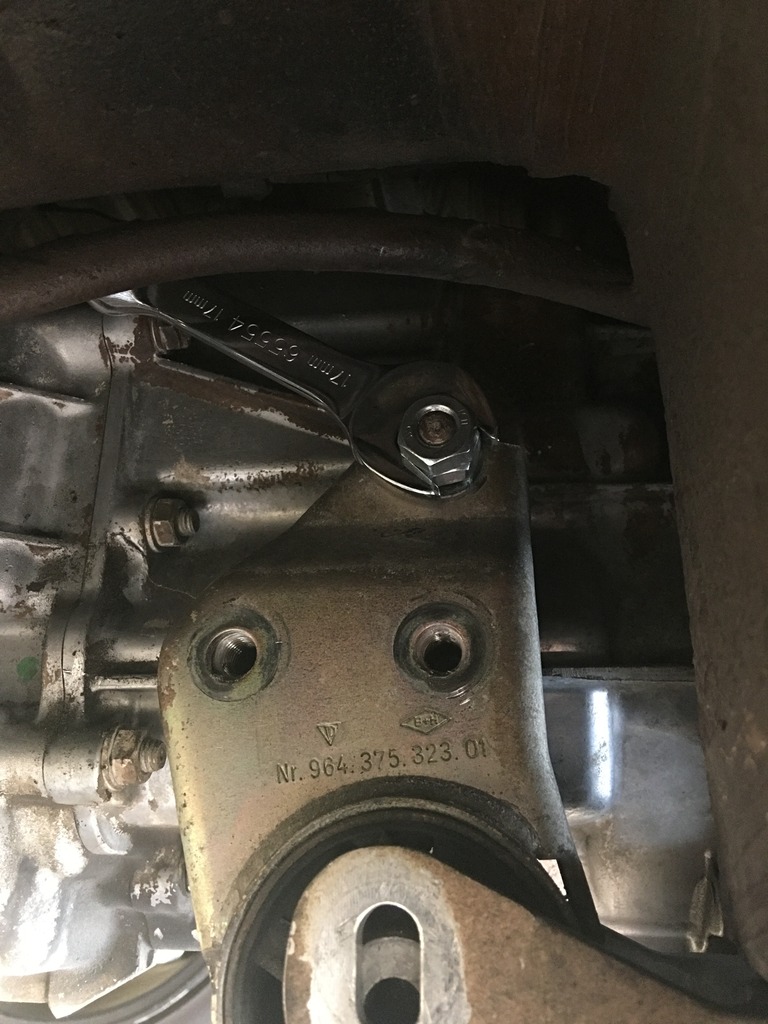
The OEM mount was worn enough that we actually had to jack the transmission mount up about 1/4" to get the new mount to line up.
The last picture is the "double nut" technique for replacing the OEM studs with the supplied new hardware. Install one nut on top of the other. Tighten them against each other, then use the lower nut to remove the stud from the transmission case.
1) Lift car
2) Remove the plastic transmission pan
3) support transmission
4) Remove the thin rectangular cross-section brace which supports the heater ducts.
5) LOOSEN transmission crossmember, it does not need to be fully removed, but you want to be able to adjust it left/right.
6) Remove the OEM transmission mount by removing the three nuts and the long bolt.
7) Either double nut the studs OR use a stud remover (NOT a stud puller) to remove the studs. They are not long enough for the billet brace. Stow them with the rest of your spare parts, because I know none of us throw things away
8) Install the new transmission mount using the supplied hardware, torque to about 18 ft-lbs (25 N-m)
9) The transmission may need to be adjusted (raised) a little due to sag in the OEM mount.
9) Re-install everything you removed.
Of course I do it with a slight variation - I do not remove or even loosen the thin cross section brace, but drop the main support.
A few questions arise though.
1 - What direction are the two washers? - I assume the flat side of the washers go to towards the rubber sleeve.
2 - Torque spec for inserting the studs in the transmission case are not specified in the manuals, but the nuts appear to be 46NM - 34 ft-lbs, so I assumed the three bolts are the same torque. I also locktited them in. That differs from the 18ft-lbs above, where was that number sourced?
Just installed mine last night. I also have C4S with Fister III, PSS10, FD SSK, Golden Rod with OEM clutch. Not sure I feel more vibration, but definitely more noise especially now I can hear I think it's the clutch spinning under the center tunnel. I also do feel the improvement in the shifting but I will give it few weeks and see if the whirring noise is something I can get used to...
Just installed mine last night. I also have C4S with Fister III, PSS10, FD SSK, Golden Rod with OEM clutch. Not sure I feel more vibration, but definitely more noise especially now I can hear I think it's the clutch spinning under the center tunnel. I also do feel the improvement in the shifting but I will give it few weeks and see if the whirring noise is something I can get used to...
Andy
Also you may want to add the RS Motor mounts they make a big difference as well! Yes the FD Mount transmits a lot of NVH into the cabin! Very visceral! Love it!

 07-01-2016, 01:23 PM